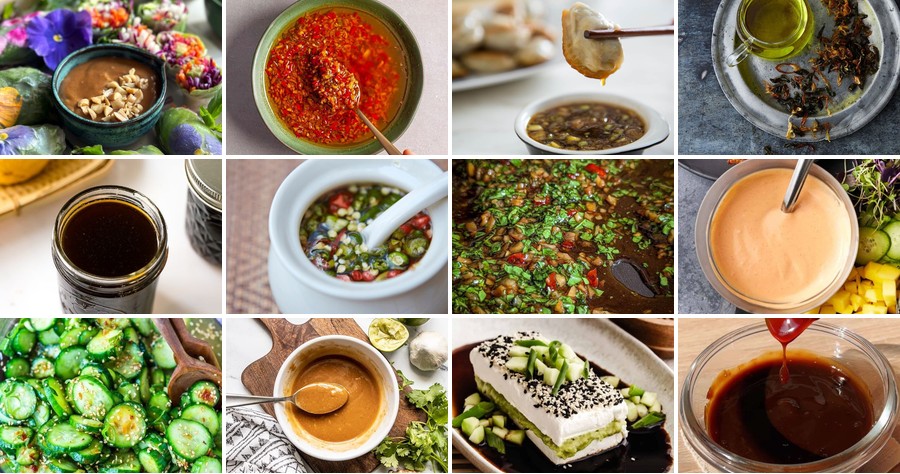
Picture this: you’re just one zesty dipping sauce away from transforming ordinary meals into extraordinary Asian-inspired feasts. Whether you’re hosting a casual weeknight dinner or a weekend gathering with friends, these 18 spicy sauces promise to add that perfect kick of flavor. Ready to elevate your cooking game? Let’s dive into these irresistible recipes that are sure to become your new go-tos!
Sweet Chili Soy Dipping Sauce
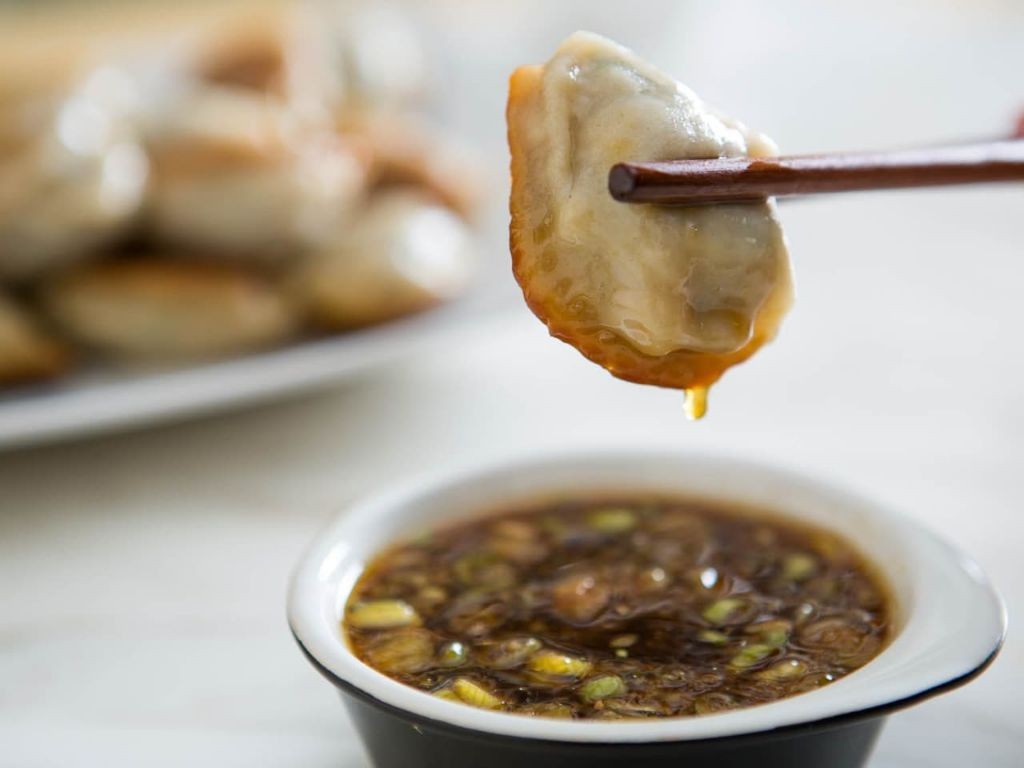
Holiday gatherings always leave me scrambling for a last-minute dip that can impress a crowd, and this Sweet Chili Soy Dipping Sauce has become my secret weapon—it’s the perfect balance of sweet, savory, and spicy that pairs with everything from spring rolls to grilled chicken. I first whipped it up during a chaotic Christmas Eve potluck last year when I realized I’d forgotten to bring an appetizer, and now my friends request it for every get-together.
Serving: 6 | Pre Time: 5 minutes | Cooking Time: 5 minutes
Ingredients
– 1/2 cup sweet chili sauce (I always grab Mae Ploy brand for its consistent tanginess)
– 1/4 cup soy sauce (low-sodium is my preference to control saltiness)
– 2 tbsp rice vinegar (unseasoned works best to let the other flavors shine)
– 1 tbsp honey (local raw honey adds a lovely floral note)
– 1 tsp sesame oil (toasted sesame oil is my go-to for that nutty aroma)
– 1 garlic clove, minced (freshly minced makes all the difference—I avoid pre-minced jars)
– 1 tsp grated ginger (I keep a knob in the freezer for easy grating)
– 1/4 tsp red pepper flakes (adjust based on your heat tolerance; I like a mild kick)
Instructions
1. In a small saucepan, combine 1/2 cup sweet chili sauce, 1/4 cup soy sauce, 2 tbsp rice vinegar, 1 tbsp honey, 1 tsp sesame oil, 1 minced garlic clove, 1 tsp grated ginger, and 1/4 tsp red pepper flakes.
2. Place the saucepan over medium heat and whisk the ingredients together until fully blended, about 1 minute. Tip: Whisking continuously prevents the honey from sticking to the bottom.
3. Bring the mixture to a gentle simmer, then reduce the heat to low. Let it cook for 3–4 minutes, stirring occasionally, until it thickens slightly and the garlic softens. Tip: Look for small bubbles around the edges and a glossy sheen to know it’s ready.
4. Remove the saucepan from the heat and let the sauce cool to room temperature, about 10 minutes, to allow the flavors to meld. Tip: Cooling it fully enhances the depth—I sometimes pop it in the fridge for a quicker chill.
5. Transfer the sauce to a serving bowl or airtight container. For the best texture, give it a final stir before serving.
Fresh from the stove, this sauce has a glossy, slightly syrupy consistency that clings beautifully to dumplings or drizzles over grilled shrimp. Its flavor is a vibrant dance of sweet chili upfront, mellowed by savory soy and a hint of ginger warmth—perfect for dipping, marinating, or even as a salad dressing twist. I love doubling the batch to keep in the fridge; it only gets better after a day or two as the garlic and ginger infuse deeper.
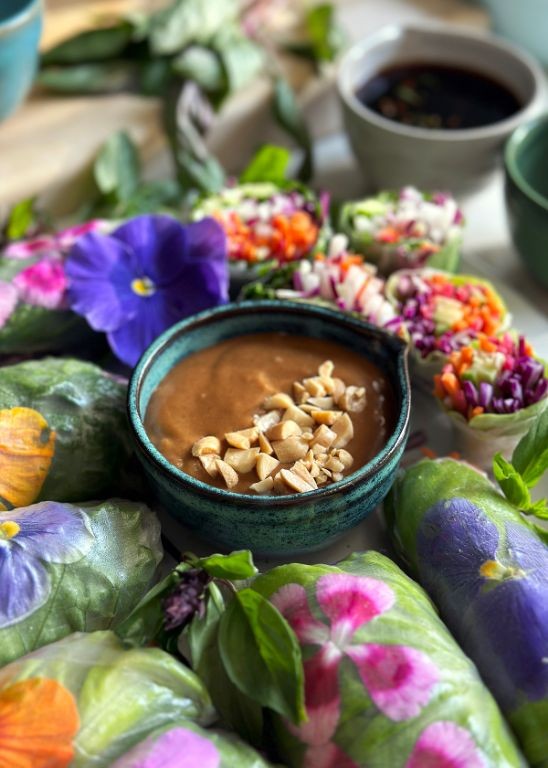
Spicy Peanut Satay Sauce

Craving something that packs a punch and brings everyone to the table? This Spicy Peanut Satay Sauce is my go-to for turning a simple weeknight into a flavor-packed feast. I first fell in love with a version at a street food market, and after countless tweaks in my own kitchen, this is the creamy, spicy, nutty blend I always come back to.
Serving: 4 | Pre Time: 10 minutes | Cooking Time: 10 minutes
Ingredients
– 1 cup creamy peanut butter (I always use the natural, stir-first kind for the best texture)
– 1/3 cup coconut milk (full-fat from the can gives it that luxurious richness)
– 2 tbsp soy sauce (this is my secret umami booster)
– 1 tbsp honey (for a touch of sweetness to balance the heat)
– 1 tbsp fresh lime juice (bottled just isn’t the same, trust me)
– 2 cloves garlic, minced (the more, the merrier in my book)
– 1 tsp grated fresh ginger
– 1/2 tsp red pepper flakes (adjust this if you’re sensitive to heat!)
– 2 tbsp water, as needed
Instructions
1. In a medium saucepan, combine the peanut butter, coconut milk, soy sauce, honey, lime juice, minced garlic, grated ginger, and red pepper flakes.
2. Place the saucepan over low heat. Tip: Low heat is crucial here to prevent the peanut butter from seizing or burning.
3. Whisk the mixture constantly for about 5-7 minutes until everything is fully combined, smooth, and gently warmed through.
4. If the sauce seems too thick for your liking, whisk in the water, one tablespoon at a time, until it reaches your desired consistency. Tip: The sauce will thicken slightly as it cools, so I often aim for a pourable but coatable texture.
5. Remove the saucepan from the heat and let the sauce cool for a couple of minutes. Tip: Letting it rest allows the flavors to meld together beautifully.
6. Give the sauce a final whisk before serving.
Just like that, you have a versatile sauce with a perfect balance of creamy peanut, tangy lime, and a gentle kick of heat. Its velvety texture clings wonderfully to grilled chicken skewers or makes a fantastic dip for fresh spring rolls. Try drizzling it over a bowl of noodles for an instant upgrade—it’s the kind of sauce you’ll want to put on everything.
Garlic Ginger Ponzu Sauce
Last week, as I was staring at a sad-looking salmon fillet in my fridge, I realized I needed a sauce that could transform any protein from bland to brilliant in minutes. This Garlic Ginger Ponzu Sauce has become my secret weapon for busy weeknights—it’s bright, savory, and comes together faster than you can preheat the oven. I love how it makes even simple grilled chicken or steamed veggies feel like a restaurant-worthy meal.
Serving: 4 | Pre Time: 10 minutes | Cooking Time: 0 minutes
Ingredients
– 1/2 cup ponzu sauce (I always keep a bottle in the pantry—it’s a citrusy soy sauce blend that’s perfect for quick marinades)
– 3 cloves garlic, minced (fresh is key here for that pungent kick; I press mine with a garlic press to save time)
– 1 tablespoon fresh ginger, grated (I keep a knob in the freezer and grate it frozen—no peeling needed and it stays fresh for weeks)
– 2 tablespoons rice vinegar (this adds a subtle tang; I prefer the unseasoned variety to control the sweetness)
– 1 tablespoon honey (local honey is my go-to for a natural sweetness that balances the acidity)
– 1 tablespoon sesame oil (toasted sesame oil gives it that nutty depth—don’t skip it!)
– 2 green onions, thinly sliced (I use both the white and green parts for a fresh finish)
Instructions
1. In a medium bowl, combine 1/2 cup ponzu sauce, 3 cloves of minced garlic, and 1 tablespoon of grated fresh ginger.
2. Add 2 tablespoons of rice vinegar and 1 tablespoon of honey to the bowl, then whisk vigorously for about 30 seconds until the honey is fully dissolved and the mixture is smooth.
3. Drizzle in 1 tablespoon of sesame oil while continuing to whisk; this helps emulsify the sauce for a cohesive texture.
4. Stir in 2 thinly sliced green onions until evenly distributed throughout the sauce.
5. Let the sauce sit at room temperature for at least 10 minutes to allow the flavors to meld—this resting time is crucial for the garlic and ginger to infuse properly.
6. Taste the sauce and adjust if needed (though with these measurements, it should be perfectly balanced).
7. Use immediately or transfer to an airtight container and refrigerate for up to 5 days; the flavors will deepen over time.
Perfectly tangy and aromatic, this sauce has a smooth, slightly thick consistency that clings beautifully to grilled meats or drizzles over rice. I love it as a dipping sauce for dumplings or tossed with cold soba noodles for a refreshing lunch—it’s versatile enough to become your new kitchen staple.
Tangy Hoisin Lime Dip
Yesterday, while prepping for a holiday gathering, I realized I needed a quick, crowd-pleasing dip that could elevate everything from spring rolls to grilled chicken. This Tangy Hoisin Lime Dip was born from that frantic fridge forage, and it’s become my go-to for adding a sweet, zesty kick to any snack spread—trust me, it disappears fast!
Serving: 6 | Pre Time: 10 minutes | Cooking Time: 0 minutes
Ingredients
– 1/2 cup hoisin sauce (I always grab the store-bought kind for convenience, but homemade works too if you’re ambitious!)
– 1/4 cup fresh lime juice, squeezed from about 2 limes (I roll them on the counter first to get more juice—a little trick from my grandma)
– 2 tbsp soy sauce (I use low-sodium to control the saltiness, but regular is fine)
– 1 tbsp honey (local honey adds a nice floral note, but any will do)
– 1 tsp toasted sesame oil (this is key for that nutty aroma—don’t skip it!)
– 1 clove garlic, minced (I press mine for a smoother texture, but chopping works)
– 1/2 tsp grated fresh ginger (I keep a knob in the freezer and grate it frozen—so much easier!)
– 2 tbsp chopped fresh cilantro (optional, but I love the bright green flecks)
Instructions
1. In a medium mixing bowl, combine 1/2 cup hoisin sauce, 1/4 cup fresh lime juice, and 2 tbsp soy sauce, whisking until smooth. Tip: Use a fork or small whisk to break up any clumps in the hoisin for a silky consistency.
2. Add 1 tbsp honey, 1 tsp toasted sesame oil, 1 clove minced garlic, and 1/2 tsp grated fresh ginger to the bowl, stirring thoroughly to incorporate all ingredients. Tip: Taste as you go here—if you prefer it sweeter, add a bit more honey, but avoid over-sweetening.
3. Stir in 2 tbsp chopped fresh cilantro, if using, until evenly distributed throughout the dip. Tip: For a smoother dip, you can blend everything in a food processor for 10-15 seconds, but I like the rustic texture of hand-mixing.
4. Transfer the dip to a serving bowl, cover it with plastic wrap, and refrigerate for at least 30 minutes to allow the flavors to meld. Tip: Chilling is crucial—it thickens the dip slightly and intensifies the tangy-sweet balance.
5. Serve the dip chilled with your favorite dippers, such as vegetable crudités, spring rolls, or grilled meats.
Finally, this dip boasts a glossy, pourable texture with a perfect harmony of sweet hoisin and zesty lime that tingles on the tongue. For a creative twist, I’ve used it as a marinade for shrimp skewers or drizzled over rice bowls—it’s versatile enough to become your new kitchen staple!
Fiery Sriracha Mayo
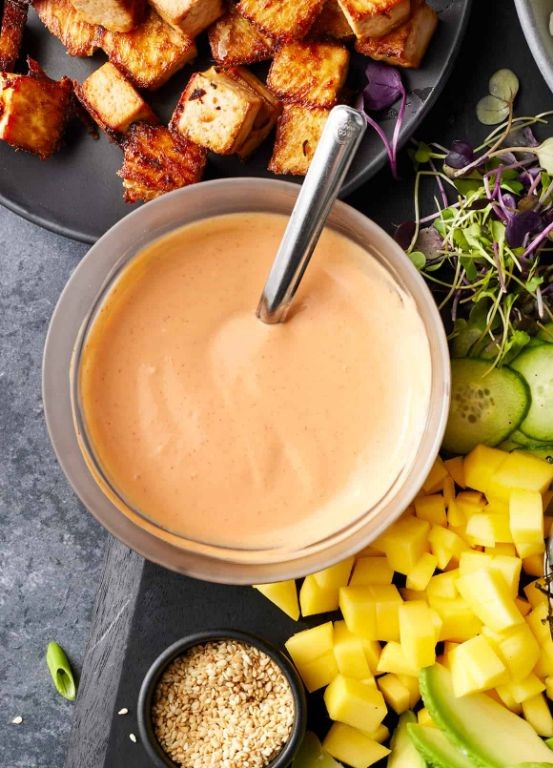
Gosh, I can’t believe it’s almost Christmas Eve—2025 is flying by! As I’m prepping for tomorrow’s feast, I always whip up a batch of my Fiery Sriracha Mayo to have on hand; it’s the perfect zesty condiment that livens up everything from leftover turkey sandwiches to festive appetizers, and honestly, it’s become a non-negotiable staple in my kitchen year-round.
Serving: 8 | Pre Time: 5 minutes | Cooking Time: 0 minutes
Ingredients
– 1 cup mayonnaise (I swear by full-fat mayo for that creamy richness, but light works too if you prefer)
– ¼ cup Sriracha sauce (adjust based on your heat tolerance—I usually go heavy because I love that kick!)
– 1 tablespoon fresh lime juice (freshly squeezed makes all the difference; I always keep a lime or two in my fruit bowl)
– 1 teaspoon honey (a little sweetness balances the heat perfectly; I use local raw honey from my farmer’s market)
– ½ teaspoon garlic powder (I’m lazy with mincing fresh garlic here, but powder blends in smoothly)
– ¼ teaspoon salt (just a pinch to enhance all those flavors)
Instructions
1. Gather all your ingredients and a medium-sized mixing bowl—I like to set everything out on my counter to avoid mid-recipe dashes to the fridge.
2. Add 1 cup of mayonnaise to the bowl, scraping the cup clean with a spatula to get every last bit.
3. Pour in ¼ cup of Sriracha sauce; if you’re unsure about the spice level, start with 2 tablespoons and taste as you go—you can always add more later.
4. Squeeze 1 tablespoon of fresh lime juice directly into the bowl, being careful to avoid any seeds that might sneak in.
5. Drizzle in 1 teaspoon of honey; if your honey is thick, warm it slightly by placing the spoon in hot water for a few seconds to make it easier to mix.
6. Sprinkle ½ teaspoon of garlic powder and ¼ teaspoon of salt over the mixture.
7. Use a whisk or fork to vigorously stir everything together for about 1–2 minutes, until the sauce is completely smooth and uniformly orange-red with no streaks.
8. Taste the mayo with a clean spoon—if it needs more heat, add Sriracha in small increments, stirring well after each addition.
9. Transfer the Fiery Sriracha Mayo to an airtight container, like a glass jar or plastic tub, and refrigerate it immediately.
10. Let it chill in the refrigerator for at least 30 minutes before serving; this allows the flavors to meld and the sauce to thicken slightly for a better texture.
This mayo comes out gloriously creamy with a bold, tangy heat that tingles on your tongue—it’s not just spicy, but layered with sweet and savory notes. Try it as a dip for crispy fries, slathered on grilled burgers, or even drizzled over roasted veggies for an unexpected twist that’ll have everyone asking for the recipe.
Creamy Wasabi Soy Dip
You won’t believe how this Creamy Wasabi Soy Dip came to be—it was a happy accident during a frantic pre-holiday fridge clean-out when I realized I had nothing to serve with the veggie platter. Years later, it’s my most-requested party staple, balancing cool creaminess with a gentle, sinus-clearing kick that keeps everyone coming back for more.
Serving: 6 | Pre Time: 10 minutes | Cooking Time: 0 minutes
Ingredients
– 1 cup sour cream (full-fat gives the best texture, I swear by it)
– 1/2 cup mayonnaise (I always use Duke’s for its tangy richness)
– 2 tablespoons soy sauce (low-sodium works great if you’re watching salt)
– 1 tablespoon wasabi paste (adjust this to your heat tolerance—my husband adds extra!)
– 1 teaspoon rice vinegar (this little splash brightens everything up)
– 1/4 teaspoon garlic powder (fresh minced garlic can be too harsh here)
– Freshly cracked black pepper (I grind it right over the bowl for maximum flavor)
Instructions
1. Place 1 cup of sour cream and 1/2 cup of mayonnaise in a medium mixing bowl.
2. Add 2 tablespoons of soy sauce to the bowl.
3. Spoon 1 tablespoon of wasabi paste into the mixture—tip: if you’re new to wasabi, start with half and taste as you go.
4. Pour in 1 teaspoon of rice vinegar.
5. Sprinkle 1/4 teaspoon of garlic powder evenly over the ingredients.
6. Generously season with freshly cracked black pepper from your grinder.
7. Use a whisk or fork to vigorously combine all ingredients for about 1 minute, until completely smooth and uniform in color—tip: no streaks of white should remain.
8. Cover the bowl tightly with plastic wrap and refrigerate for at least 30 minutes to allow the flavors to meld—tip: this resting time is crucial for the wasabi’s heat to mellow and integrate.
9. After chilling, give the dip a final stir before serving.
From the first scoop, you’ll notice its luxuriously smooth, almost velvety texture that clings perfectly to crudités or chips. The flavor is a masterful dance: the initial cool creaminess gives way to a subtle umami depth from the soy, finishing with that clean, tingling wasabi warmth that never overpowers. For a fun twist, I love serving it alongside crispy sweet potato fries or even as a bold sandwich spread—it transforms the ordinary into something unforgettable.
Umami Miso Sesame Sauce
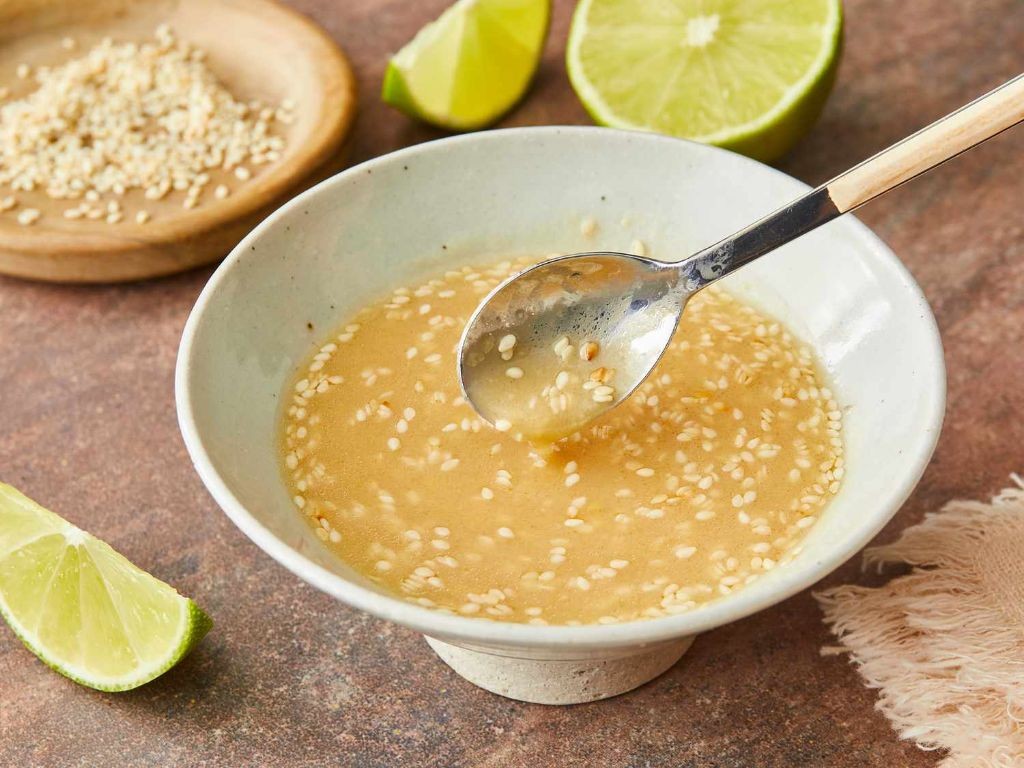
Yesterday, as I was cleaning out my pantry, I rediscovered a forgotten tub of white miso paste and decided to create something special for holiday gatherings. This Umami Miso Sesame Sauce has become my go-to for adding depth to everything from roasted vegetables to grilled proteins—it’s savory, nutty, and incredibly versatile. I love how it comes together in just minutes, making it perfect for last-minute entertaining or busy weeknights.
Serving: 4 | Pre Time: 5 minutes | Cooking Time: 0 minutes
Ingredients
– 1/4 cup white miso paste (I use a mild, organic variety for a smoother flavor)
– 2 tablespoons toasted sesame oil (this is essential for that rich, nutty aroma—don’t skip it!)
– 1 tablespoon rice vinegar (I prefer unseasoned to control the sweetness)
– 1 teaspoon honey (local raw honey adds a subtle warmth)
– 1/4 cup water (room temperature helps everything blend smoothly)
– 1 tablespoon sesame seeds (toasted for extra crunch—I always keep a jar handy)
– 1 small garlic clove, minced (freshly minced releases the best flavor)
Instructions
1. In a medium bowl, combine 1/4 cup white miso paste, 2 tablespoons toasted sesame oil, 1 tablespoon rice vinegar, and 1 teaspoon honey.
2. Whisk the mixture vigorously for about 30 seconds until it’s fully incorporated and smooth. Tip: If the miso is lumpy, press it against the bowl with the whisk to break it up.
3. Slowly add 1/4 cup water while whisking continuously to create a pourable consistency. Tip: Add the water in a steady stream to avoid clumping.
4. Stir in 1 tablespoon sesame seeds and 1 small minced garlic clove until evenly distributed. Tip: Toast the sesame seeds in a dry pan over medium heat for 2-3 minutes until golden for enhanced flavor.
5. Let the sauce sit at room temperature for 5 minutes to allow the flavors to meld.
6. Transfer the sauce to a serving jar or bowl, and it’s ready to use immediately.
Here’s why I adore this sauce: its creamy texture clings beautifully to noodles or salads, while the umami punch from the miso balances the sesame’s earthiness. Try drizzling it over roasted Brussels sprouts or as a marinade for tofu—it transforms simple dishes into something memorable.
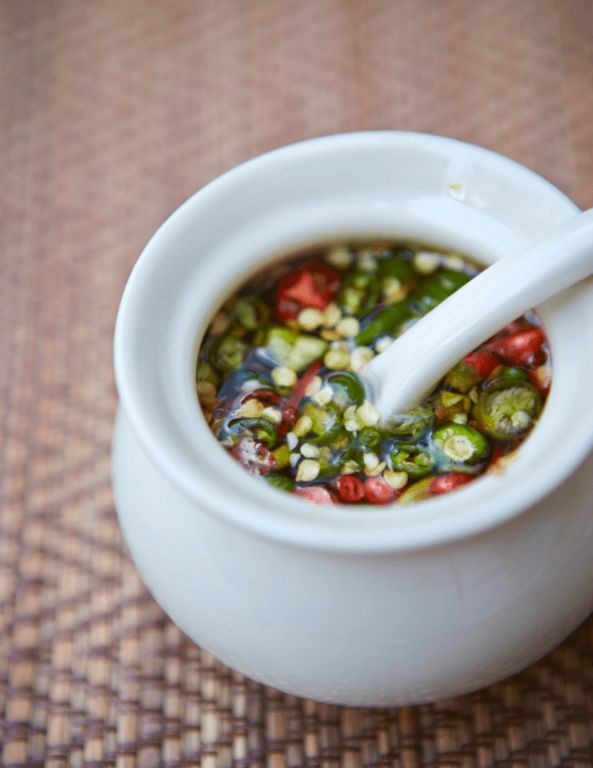
Zesty Lemongrass Fish Sauce
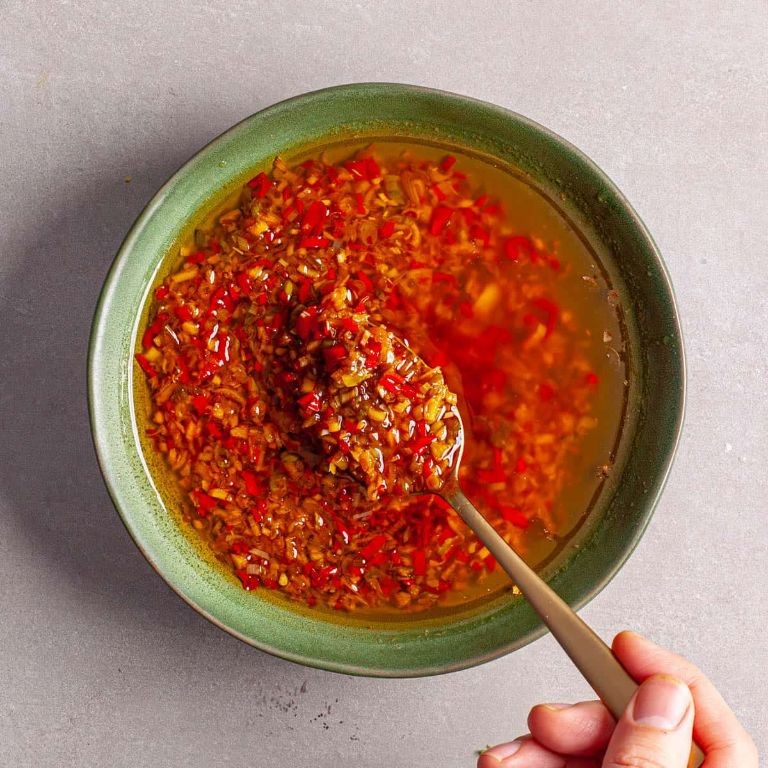
Picture this: you’re hosting a summer barbecue, and while everyone’s raving about the grilled meats, it’s the bright, tangy dipping sauce that steals the show. That’s exactly what happened at my last cookout with this zesty lemongrass fish sauce—it transformed simple grilled chicken into something unforgettable. I’ve been tweaking this recipe for years, and this version is my absolute favorite for its perfect balance of savory, sweet, and citrusy notes.
Serving: 4 | Pre Time: 10 minutes | Cooking Time: 5 minutes
Ingredients
- 1/4 cup fish sauce (I use Red Boat—it’s pricier but has a cleaner, less fishy flavor that makes all the difference)
- 1/4 cup granulated sugar (don’t skip this—it mellows the fish sauce’s saltiness beautifully)
- 1/4 cup water
- 2 tablespoons fresh lime juice (about 1 large lime, squeezed right before using for maximum zing)
- 1 tablespoon minced garlic (I always keep a jar of pre-minced garlic in the fridge for quick recipes like this)
- 1 stalk lemongrass, tender white part only, finely minced (look for firm, fragrant stalks at your Asian market)
- 1-2 Thai chilies, thinly sliced (adjust based on your heat tolerance—I use 2 for a good kick)
Instructions
- In a small saucepan over medium heat, combine 1/4 cup fish sauce, 1/4 cup granulated sugar, and 1/4 cup water.
- Stir continuously with a wooden spoon until the sugar completely dissolves, about 2-3 minutes—you’ll see the mixture turn clear and slightly syrupy. Tip: Avoid boiling it hard, as that can make the fish sauce taste overly sharp.
- Remove the saucepan from heat and let the mixture cool to room temperature, approximately 5 minutes.
- Transfer the cooled mixture to a medium bowl and add 2 tablespoons fresh lime juice, 1 tablespoon minced garlic, 1 stalk minced lemongrass, and 1-2 sliced Thai chilies.
- Whisk all ingredients together vigorously for 30 seconds until well combined. Tip: Taste it now—if it’s too salty, whisk in an extra teaspoon of sugar; if too sweet, add a splash more lime juice.
- Cover the bowl with plastic wrap and refrigerate for at least 30 minutes to allow the flavors to meld. Tip: For best results, make this sauce a day ahead—the lemongrass and chilies infuse beautifully overnight.
- Stir the sauce once more before serving to redistribute any settled ingredients.
This sauce has a thin, glossy consistency that clings perfectly to grilled meats or drizzles over rice. The flavor is an addictive punch of umami from the fish sauce, brightened by the lemongrass and lime, with a slow-building heat from the chilies. Try it as a dipping sauce for spring rolls, a marinade for shrimp, or even tossed with cold noodles for a quick lunch—it’s endlessly versatile and always disappears fast!
Sweet and Spicy Gochujang Dip

Every time I host a holiday gathering, I find myself scrambling for a crowd-pleasing appetizer that’s both easy to make and packed with flavor. That’s why I’ve fallen in love with this Sweet and Spicy Gochujang Dip—it’s the perfect balance of savory, sweet, and heat that always disappears first from the snack table. I first tried a version at a friend’s potluck and have been tweaking it ever since to get that ideal glossy, dippable consistency.
Serving: 6 | Pre Time: 5 minutes | Cooking Time: 10 minutes
Ingredients
- 1/2 cup gochujang paste (I use the one in the red tub for its deep, fermented flavor)
- 1/4 cup honey (local raw honey adds a lovely floral note)
- 2 tablespoons soy sauce (low-sodium is my go-to to control saltiness)
- 2 tablespoons rice vinegar
- 1 tablespoon sesame oil (toasted sesame oil is essential for that nutty aroma)
- 2 cloves garlic, minced (freshly minced makes all the difference)
- 1 teaspoon grated fresh ginger
- 1/4 cup water (room temperature helps everything blend smoothly)
Instructions
- In a medium saucepan, combine 1/2 cup gochujang paste, 1/4 cup honey, 2 tablespoons soy sauce, 2 tablespoons rice vinegar, 1 tablespoon sesame oil, 2 cloves minced garlic, and 1 teaspoon grated fresh ginger. Tip: Use a whisk to break up the gochujang paste thoroughly for a lump-free base.
- Place the saucepan over medium heat and pour in 1/4 cup water, stirring continuously with a wooden spoon to incorporate all ingredients evenly.
- Bring the mixture to a gentle simmer, then reduce the heat to low. Cook for 8–10 minutes, stirring frequently to prevent sticking, until the dip thickens slightly and becomes glossy. Tip: Watch for small bubbles around the edges—that’s your cue it’s simmering properly without boiling.
- Remove the saucepan from the heat and let the dip cool for 5 minutes in the pan to allow flavors to meld. Tip: Cooling it briefly helps achieve the ideal dipping consistency, as it thickens a bit more off the heat.
- Transfer the dip to a serving bowl. Serve warm or at room temperature.
Here’s the best part: this dip has a luscious, velvety texture that clings perfectly to veggies or chips, with a complex flavor that starts sweet and finishes with a gentle, warming spice. I love pairing it with crispy sweet potato fries or drizzling it over grilled chicken for an extra kick—it’s versatile enough to elevate any snack or meal.
Savory Teriyaki Glaze
Naturally, as the holiday hustle begins, I find myself craving something that feels festive yet fuss-free—enter this savory teriyaki glaze, my go-to for adding instant umami magic to everything from weeknight chicken to holiday ham. I first whipped it up years ago when a last-minute potluck invite left me scrambling, and it’s been a staple in my fridge ever since, thanks to its sweet-savory balance and glossy finish that makes even simple dishes look chef-worthy.
Serving: About 1 cup | Pre Time: 5 minutes | Cooking Time: 15 minutes
Ingredients
– 1/2 cup soy sauce (I use low-sodium to control saltiness, but regular works great too)
– 1/4 cup honey (local raw honey adds a lovely floral note, but any honey will do)
– 2 tbsp rice vinegar (this gives it that tangy kick—don’t skip it!)
– 2 tbsp brown sugar (packed lightly; I prefer dark brown for deeper molasses flavor)
– 1 tbsp minced garlic (about 3 cloves; fresh is best, but jarred works in a pinch)
– 1 tsp grated ginger (I keep a knob in the freezer for easy grating anytime)
– 1 tbsp cornstarch (mixed with 2 tbsp cold water—this is key for that glossy thickness)
– 1/4 tsp black pepper (freshly ground adds a subtle warmth)
Instructions
1. In a small saucepan over medium heat, combine 1/2 cup soy sauce, 1/4 cup honey, 2 tbsp rice vinegar, 2 tbsp brown sugar, 1 tbsp minced garlic, 1 tsp grated ginger, and 1/4 tsp black pepper.
2. Whisk the mixture continuously for 2–3 minutes until the sugar fully dissolves and it starts to simmer gently—you’ll see small bubbles forming around the edges.
3. Reduce the heat to low and let it simmer uncovered for 8–10 minutes, stirring occasionally with a wooden spoon to prevent sticking; the sauce will reduce slightly and become fragrant.
4. In a separate small bowl, whisk together 1 tbsp cornstarch and 2 tbsp cold water until smooth with no lumps—this slurry prevents clumping when added to the hot sauce.
5. Slowly pour the cornstarch slurry into the saucepan while whisking constantly to incorporate it evenly without forming lumps.
6. Increase the heat to medium and cook for 2–3 more minutes, whisking continuously, until the glaze thickens to a coating consistency that coats the back of a spoon.
7. Remove the saucepan from the heat immediately to avoid overcooking, which can make the glaze too thick or gummy.
8. Let the glaze cool for 5 minutes in the pan before transferring to a jar or bowl; it will continue to thicken as it cools.
Just like that, you’ve got a versatile glaze with a glossy, sticky texture and a rich flavor that’s perfectly balanced between sweet honey and savory soy. I love brushing it on grilled salmon during summer BBQs or drizzling it over roasted veggies for a quick upgrade—it stores beautifully in the fridge for up to two weeks, so make a double batch!
Peanut Lime Dipping Sauce
Yesterday, while prepping for our holiday party, I realized I needed a versatile dipping sauce that could pull double duty with spring rolls and grilled chicken. This Peanut Lime Dipping Sauce is my go-to—it’s creamy, tangy, and comes together in just minutes, making it perfect for last-minute entertaining or a quick weeknight dinner.
Serving: 6 | Pre Time: 10 minutes | Cooking Time: 0 minutes
Ingredients
– 1/2 cup creamy peanut butter (I always use the natural kind—it blends smoother and has a richer flavor)
– 1/4 cup fresh lime juice (about 2 limes squeezed, and I zest one first for extra brightness)
– 2 tbsp soy sauce (low-sodium is my preference to control the saltiness)
– 2 tbsp honey (local honey adds a lovely floral note, but any works)
– 1 tbsp rice vinegar (this gives it that subtle tang without overpowering)
– 1 clove garlic, minced (fresh is key here—I avoid the jarred stuff for this recipe)
– 1 tsp grated ginger (I keep a knob in the freezer and grate it frozen for no mess)
– 1/4 cup water (room temp helps everything emulsify better)
– 1/4 tsp red pepper flakes (adjust to your heat level—I like a mild kick)
Instructions
1. In a medium mixing bowl, combine 1/2 cup creamy peanut butter, 1/4 cup fresh lime juice, 2 tbsp soy sauce, 2 tbsp honey, 1 tbsp rice vinegar, 1 minced garlic clove, and 1 tsp grated ginger.
2. Whisk the ingredients together vigorously for about 1 minute until they start to thicken and become cohesive.
3. Gradually add 1/4 cup water while continuing to whisk; this thins the sauce to a pourable consistency and prevents clumping.
4. Stir in 1/4 tsp red pepper flakes until evenly distributed throughout the sauce.
5. Taste the sauce and adjust if needed—if it’s too thick, add more water 1 tbsp at a time until desired consistency is reached.
6. Transfer the sauce to a serving bowl and let it sit at room temperature for 5 minutes to allow the flavors to meld.
Drizzle this sauce over grilled veggies or use it as a dip for fresh rolls—its creamy texture with a zesty lime punch makes it irresistibly versatile. I love how the peanut butter base balances the tanginess, creating a sauce that’s both rich and refreshing.
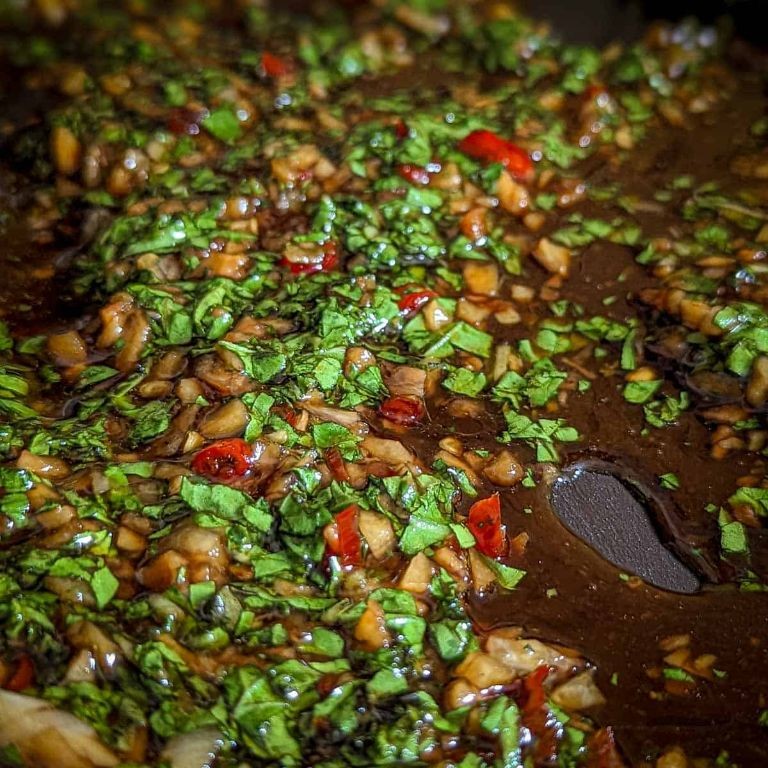
Spicy Garlic Black Bean Sauce
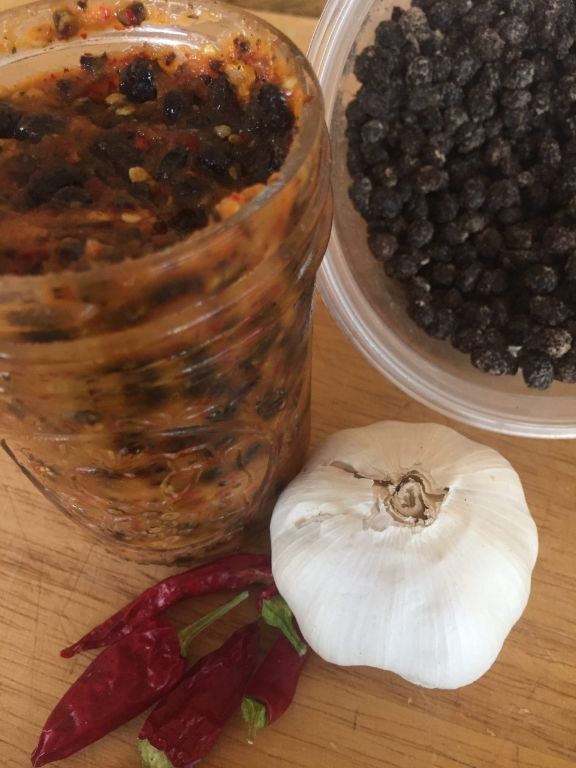
Perfect for those nights when you crave something bold and comforting, this Spicy Garlic Black Bean Sauce has become my go-to for quick weeknight dinners. I first stumbled upon a version at a tiny Szechuan restaurant in Chicago and have been tweaking it ever since to suit my pantry—it’s the kind of sauce that makes even simple veggies or tofu feel like a feast.
Serving: 4 | Pre Time: 10 minutes | Cooking Time: 15 minutes
Ingredients
- 2 tablespoons vegetable oil (I always keep a neutral oil like this on hand for high-heat cooking)
- 4 cloves garlic, minced (fresh is key here—I avoid the pre-minced jars for maximum flavor)
- 1 tablespoon fresh ginger, grated (I keep a knob in the freezer and grate it frozen for ease)
- 1/2 cup fermented black beans, rinsed and lightly mashed (these salty gems are the star; I find them in Asian markets)
- 2 tablespoons soy sauce (I use low-sodium to control the saltiness)
- 1 tablespoon rice vinegar (a splash brightens everything up)
- 1 teaspoon sugar (just a pinch to balance the heat)
- 1/2 teaspoon red pepper flakes (adjust to your spice tolerance—I like it fiery!)
- 1/2 cup water (for thinning the sauce to the right consistency)
- 1 tablespoon cornstarch mixed with 2 tablespoons water (my secret for a glossy, thick sauce)
- 2 green onions, thinly sliced (for a fresh finish straight from my garden)
Instructions
- Heat 2 tablespoons vegetable oil in a large skillet or wok over medium-high heat until it shimmers, about 1 minute. Tip: A hot pan prevents sticking and gives the sauce a nice sear.
- Add 4 cloves minced garlic and 1 tablespoon grated ginger to the skillet, stirring constantly for 30 seconds until fragrant but not browned. Tip: Keep the garlic moving to avoid bitter burnt bits.
- Stir in 1/2 cup rinsed and mashed fermented black beans, cooking for 1 minute to release their deep, salty aroma.
- Pour in 2 tablespoons soy sauce, 1 tablespoon rice vinegar, 1 teaspoon sugar, and 1/2 teaspoon red pepper flakes, mixing well to combine all flavors.
- Add 1/2 cup water to the skillet, bringing the mixture to a gentle simmer over medium heat for 2 minutes to let the sauce meld.
- Whisk 1 tablespoon cornstarch with 2 tablespoons water in a small bowl until smooth, then slowly drizzle it into the simmering sauce while stirring continuously. Tip: This slurry thickens the sauce evenly without clumps—stir for 1-2 minutes until it coats the back of a spoon.
- Remove the skillet from heat and fold in 2 thinly sliced green onions just before serving to keep them crisp and vibrant.
Glossy and rich, this sauce clings beautifully to noodles or stir-fried vegetables, with a punchy garlic heat that mellows into umami depth from the black beans. I love tossing it with crispy tofu or drizzling it over steamed rice for an easy, restaurant-worthy meal that always impresses guests.
Refreshing Cucumber Sesame Dip
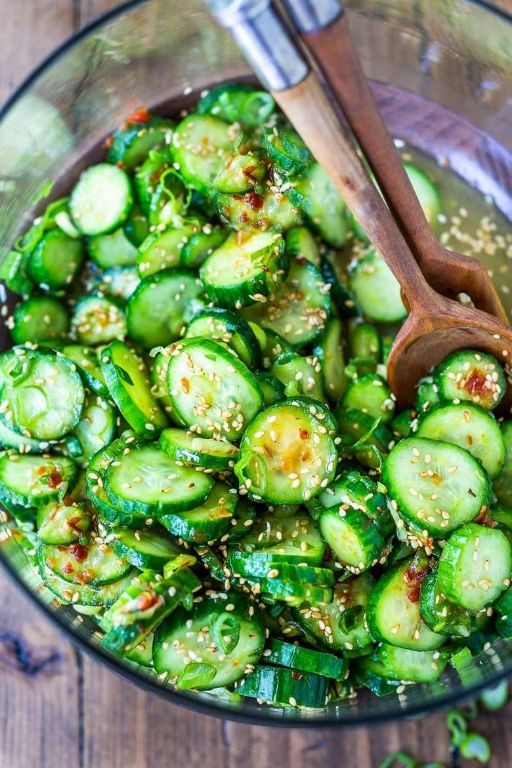
Remember those sweltering summer barbecues where you’re craving something cool and crunchy to balance out the smoky grilled meats? This Refreshing Cucumber Sesame Dip was born from exactly that—a desperate fridge forage that turned into a staple. I now whip it up weekly because it’s that versatile and satisfying.
Serving: 6 | Pre Time: 15 minutes | Cooking Time: 0 minutes
Ingredients
– 2 large English cucumbers, peeled and seeded (I find they have fewer bitter seeds than regular ones)
– 1 cup plain Greek yogurt (full-fat gives the creamiest texture, but any works)
– 3 tablespoons tahini (stir the jar well first—the oil separates)
– 2 tablespoons fresh lemon juice (about 1 juicy lemon)
– 2 cloves garlic, minced (I press mine for a smoother blend)
– 1 tablespoon toasted sesame oil (this is key for that nutty aroma)
– 1 teaspoon kosher salt (I use Diamond Crystal; if using table salt, start with ½ teaspoon)
– ½ teaspoon freshly ground black pepper
– 2 tablespoons chopped fresh dill (dried just doesn’t compare here)
– 1 tablespoon toasted sesame seeds, for garnish
Instructions
1. Grate the peeled and seeded cucumbers using the large holes of a box grater into a medium bowl.
2. Tip: Squeeze the grated cucumber firmly with your hands over the sink to remove excess liquid—this prevents a watery dip.
3. In a separate mixing bowl, combine the Greek yogurt, tahini, lemon juice, minced garlic, toasted sesame oil, salt, and pepper.
4. Whisk the mixture vigorously for about 1 minute until completely smooth and creamy.
5. Tip: If the tahini makes it too thick, add a splash of water, 1 teaspoon at a time, until it reaches a dip-like consistency.
6. Fold in the squeezed grated cucumber and chopped fresh dill with a spatula until evenly distributed.
7. Cover the bowl with plastic wrap and refrigerate for at least 30 minutes to let the flavors meld.
8. Tip: Chilling also firms it up slightly, making it perfect for scooping.
9. Before serving, sprinkle the toasted sesame seeds over the top as a garnish.
So creamy yet light, this dip has a cool crunch from the cucumber and a rich, nutty depth from the sesame. I love it with pita chips or as a vibrant sauce drizzled over grilled salmon—it brightens up any plate instantly.
Rich Oyster Sauce Blend
Kind of like that cozy sweater you reach for on chilly evenings, this Rich Oyster Sauce Blend is my ultimate comfort food hack—a savory, glossy sauce that transforms simple weeknight proteins and veggies into something special. I first started making this years ago when I needed a quick, flavorful boost for a last-minute stir-fry, and it’s been a staple in my fridge ever since.
Serving: 4 | Pre Time: 5 minutes | Cooking Time: 10 minutes
Ingredients
– 1/2 cup oyster sauce (I always use Lee Kum Kee for its deep, balanced flavor—it’s my pantry hero)
– 1/4 cup low-sodium soy sauce (this helps control saltiness, so I can adjust later if needed)
– 2 tbsp rice vinegar (a splash of brightness is key)
– 1 tbsp toasted sesame oil (the nutty aroma makes all the difference)
– 2 tbsp light brown sugar, packed (for a touch of caramel-like sweetness)
– 3 cloves garlic, minced (freshly minced, please—it beats the jarred stuff every time)
– 1 tsp grated fresh ginger (I keep a knob in the freezer for easy grating)
– 1/4 cup water (to thin it out just right)
– 1 tbsp cornstarch (my secret for that luscious, clingy texture)
Instructions
1. In a small bowl, whisk together 1/4 cup water and 1 tbsp cornstarch until completely smooth to create a slurry, which prevents lumps later—this is my go-to tip for perfect sauce consistency.
2. Combine 1/2 cup oyster sauce, 1/4 cup low-sodium soy sauce, 2 tbsp rice vinegar, 1 tbsp toasted sesame oil, 2 tbsp light brown sugar, 3 cloves minced garlic, and 1 tsp grated fresh ginger in a medium saucepan over medium heat.
3. Whisk the mixture constantly for 2 minutes until the sugar fully dissolves and the garlic becomes fragrant, being careful not to let it boil yet.
4. Slowly pour in the cornstarch slurry while whisking continuously to incorporate it evenly without clumping.
5. Bring the sauce to a gentle simmer over medium heat, then reduce the heat to low.
6. Cook for 5 minutes, whisking occasionally, until the sauce thickens enough to coat the back of a spoon—another pro tip: if it drips slowly, it’s ready.
7. Remove the saucepan from the heat and let the sauce cool for 2 minutes before using; for storage, transfer it to an airtight container once completely cool to maintain freshness.
Really, this blend is all about that velvety, umami-rich glaze that clings to every bite—think of it as a flavor bomb for grilled chicken, roasted broccoli, or even drizzled over rice. I love doubling the batch to keep on hand; it’ll jazz up leftovers in seconds.
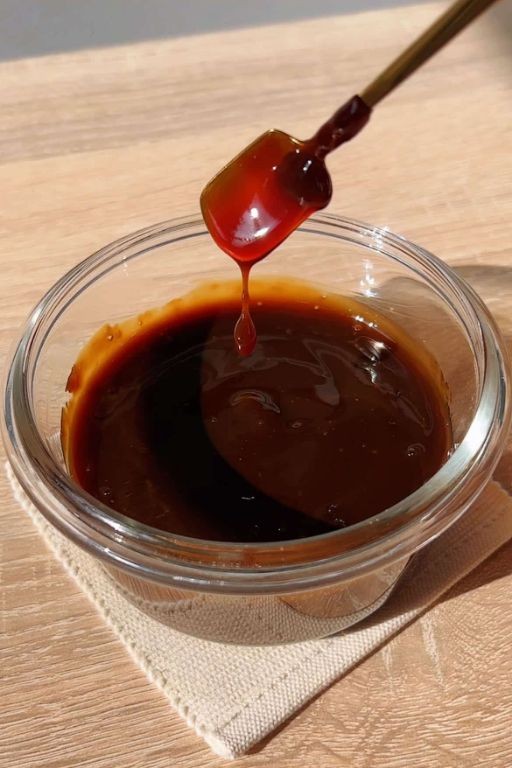
Sweet Tamarind Chili Sauce
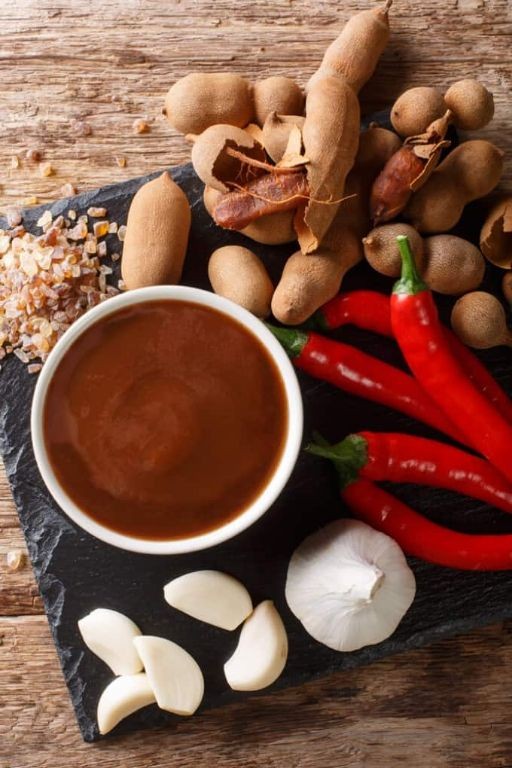
Diving into my pantry this holiday season, I found a forgotten jar of tamarind paste that inspired this sweet-spicy creation—it’s become my go-to condiment for everything from grilled chicken to roasted veggies. Honestly, I love how it balances tangy, sweet, and heat in one jar, and it’s so simple to whip up while prepping Christmas Eve dinner.
Serving: 1.5 cups | Pre Time: 5 minutes | Cooking Time: 15 minutes
Ingredients
– 1/2 cup tamarind paste (I use the seedless kind for less fuss—trust me, it saves time)
– 1/4 cup honey (local raw honey adds a lovely floral note, but any works)
– 2 tbsp rice vinegar (this mild vinegar keeps the acidity smooth)
– 1 tbsp soy sauce (I always grab low-sodium to control the saltiness)
– 1 tsp chili flakes (adjust to your spice level; I like a medium kick)
– 1/2 tsp garlic powder (fresh minced garlic works too, but powder blends seamlessly)
– 1/4 cup water (room temp helps everything dissolve evenly)
Instructions
1. In a small saucepan over medium heat, combine 1/2 cup tamarind paste, 1/4 cup honey, 2 tbsp rice vinegar, 1 tbsp soy sauce, 1 tsp chili flakes, 1/2 tsp garlic powder, and 1/4 cup water.
2. Whisk the mixture continuously for 2 minutes until the ingredients are fully incorporated and no lumps remain—this prevents scorching.
3. Reduce the heat to low and let the sauce simmer gently for 10 minutes, stirring every 2 minutes to avoid sticking to the pan bottom.
4. After 10 minutes, check the consistency: it should coat the back of a spoon thickly; if too thin, simmer for an additional 2-3 minutes.
5. Remove the saucepan from the heat and let the sauce cool completely at room temperature for about 20 minutes—this allows the flavors to meld.
6. Once cooled, transfer the sauce to a clean glass jar or airtight container; it can be stored in the refrigerator for up to 2 weeks.
Heavenly with its glossy sheen and sticky texture, this sauce clings beautifully to grilled meats or drizzled over crispy spring rolls. I often mix a spoonful into mayo for a quick dipping sauce—it’s that versatile tangy-sweet punch my holiday table craves.
Herbal Thai Basil Dipping Sauce
Gathering around the table with friends last summer, I realized the magic of a great dipping sauce—it can transform simple grilled chicken or fresh spring rolls into something unforgettable. That’s why I’ve been perfecting this Herbal Thai Basil Dipping Sauce, which has become my go-to for everything from weeknight dinners to casual gatherings. It’s bright, aromatic, and comes together in minutes, making it the perfect last-minute flavor boost.
Serving: 4 | Pre Time: 10 minutes | Cooking Time: 0 minutes
Ingredients
– 1/2 cup fresh Thai basil leaves, packed (I like to pick the leaves right before using for maximum aroma)
– 1/4 cup fresh cilantro, roughly chopped (stems included for extra flavor)
– 2 cloves garlic, minced (fresh is key here—it adds a sharp kick)
– 1 Thai chili, finely chopped (adjust to your heat preference; I use one for medium spice)
– 3 tbsp fish sauce (I prefer Red Boat brand for its clean, savory depth)
– 2 tbsp lime juice, freshly squeezed (about 1 lime—bottled just doesn’t compare)
– 1 tbsp granulated sugar (this balances the tang and salt perfectly)
– 1/4 cup water (room temp to help dissolve the sugar easily)
Instructions
1. Wash and dry the Thai basil leaves and cilantro thoroughly to remove any grit.
2. In a small bowl, combine the minced garlic and finely chopped Thai chili.
3. Add the fish sauce, lime juice, and granulated sugar to the bowl with the garlic and chili.
4. Pour in the water and stir vigorously with a spoon for about 1 minute until the sugar is fully dissolved—no granules should remain.
5. Roughly chop the Thai basil leaves and cilantro, then add them to the bowl.
6. Stir everything together gently for 30 seconds to let the herbs infuse without bruising them too much.
7. Taste the sauce and adjust if needed, but avoid over-stirring to keep it fresh.
8. Transfer the sauce to a serving bowl and let it sit at room temperature for 5 minutes before serving to allow the flavors to meld.
Bright and herbaceous, this sauce has a vibrant green hue and a texture that’s thin enough to coat but packed with minced bits for a satisfying crunch. I love drizzling it over grilled shrimp or using it as a dip for crispy tofu—it brings a burst of Southeast Asian flair to any meal without overpowering the main dish.
Smoky Charred Scallion Oil
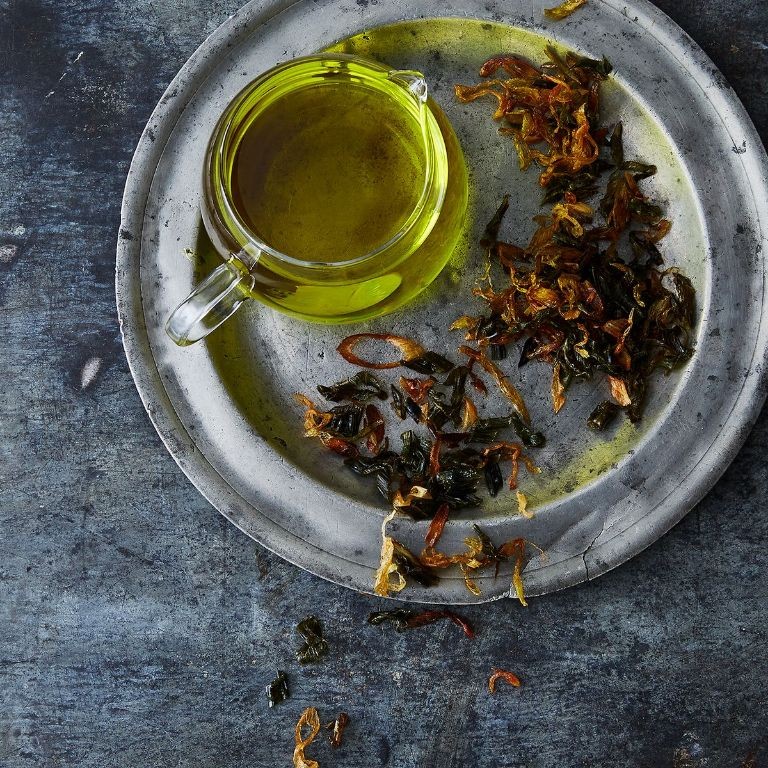
Whenever I’m craving something that feels both rustic and refined, I reach for this smoky charred scallion oil—it’s the kind of condiment that transforms a simple bowl of noodles or rice into something magical, and I love how the deep, savory aroma fills my kitchen, reminding me of cozy dinners with friends. Serving: 1 cup | Pre Time: 10 minutes | Cooking Time: 15 minutes
Ingredients
– 1 cup of neutral oil like grapeseed (I always keep a bottle handy for high-heat cooking)
– 8 large scallions, trimmed and cut into 2-inch pieces (look for vibrant green ones at the farmer’s market—they pack more flavor)
– 2 tablespoons of soy sauce (I prefer low-sodium to control the saltiness)
– 1 teaspoon of toasted sesame oil (a dash adds a nutty depth that I can’t resist)
– 1/2 teaspoon of crushed red pepper flakes (adjust based on your heat tolerance, but I like a subtle kick)
Instructions
1. Heat the neutral oil in a medium saucepan over medium-high heat until it reaches 350°F, using a candy thermometer to check—this ensures the scallions fry perfectly without burning.
2. Carefully add the scallion pieces to the hot oil and fry for 3-4 minutes, stirring occasionally, until they turn deeply charred and crispy, with edges that are almost blackened.
3. Remove the saucepan from the heat and let it cool for 5 minutes to prevent splattering when adding liquids.
4. Stir in the soy sauce, toasted sesame oil, and crushed red pepper flakes until fully combined, which will create a sizzling sound as the ingredients meld together.
5. Transfer the mixture to a heatproof jar or container and let it cool completely at room temperature for about 1 hour before sealing.
6. Strain the oil through a fine-mesh sieve into a clean jar, pressing down on the scallions to extract all the flavorful oils, then discard the solids.
7. Store the smoky charred scallion oil in the refrigerator for up to 2 weeks, shaking it gently before each use to redistribute the flavors.
Even after straining, this oil retains a rich, velvety texture with flecks of spice, and its bold, umami-packed flavor shines when drizzled over grilled meats or stirred into soups for an instant upgrade—I often gift small jars to foodie friends, and it never fails to impress.
Citrusy Yuzu Ponzu Dip
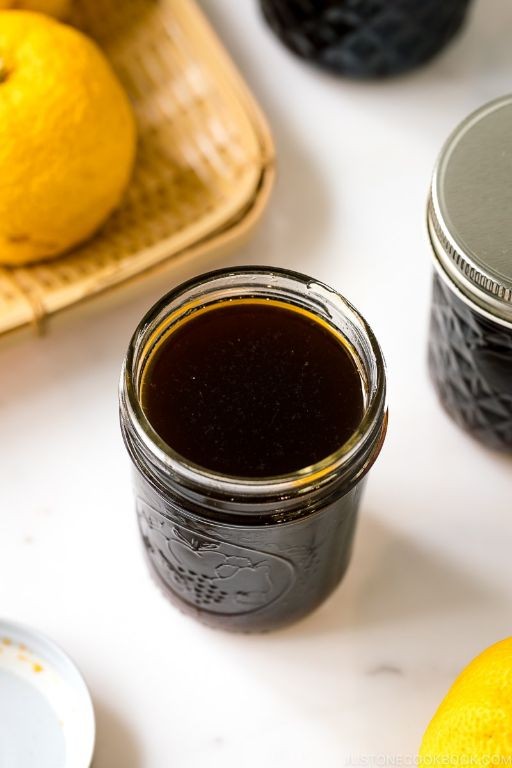
Sometimes the simplest recipes are the ones that become instant classics in your kitchen, and this vibrant Citrusy Yuzu Ponzu Dip is exactly that for me. I first fell for its bright, tangy flavor at a sushi bar years ago and have been making my own version ever since—it’s the perfect way to add a zesty kick to everything from fresh veggies to grilled chicken. Trust me, once you try it, you’ll want to keep a jar in your fridge at all times!
Serving: 6 | Pre Time: 10 minutes | Cooking Time: 0 minutes
Ingredients
– 1/2 cup low-sodium soy sauce (I always use Kikkoman for its balanced flavor)
– 1/4 cup fresh yuzu juice (if you can’t find fresh, bottled works, but the brightness of fresh is unbeatable)
– 2 tbsp rice vinegar (my go-to for its mild acidity)
– 1 tbsp mirin (this sweet rice wine adds a lovely depth)
– 1 tsp freshly grated ginger (I keep a knob in the freezer for easy grating)
– 1 small garlic clove, minced (fresh is key here—skip the jarred stuff)
– 1 tsp toasted sesame oil (just a dash for that nutty aroma)
– 1 green onion, thinly sliced (I use the green parts for a pop of color)
– 1 tsp sesame seeds, for garnish (toasted ones add extra crunch)
Instructions
1. In a medium mixing bowl, combine 1/2 cup low-sodium soy sauce, 1/4 cup fresh yuzu juice, 2 tbsp rice vinegar, and 1 tbsp mirin.
2. Whisk the mixture vigorously for about 30 seconds until all the liquids are fully incorporated and the color is uniform.
3. Add 1 tsp freshly grated ginger and 1 small minced garlic clove to the bowl. Tip: Grate the ginger directly over the bowl to catch all the juices.
4. Whisk again for another 20 seconds to evenly distribute the ginger and garlic throughout the dip.
5. Drizzle in 1 tsp toasted sesame oil while whisking continuously to emulsify it into the mixture. Tip: Add the oil slowly to prevent separation.
6. Stir in 1 thinly sliced green onion until it’s well mixed into the dip.
7. Transfer the dip to a serving bowl or airtight container. Tip: Let it sit for at least 5 minutes to allow the flavors to meld—this step makes a big difference.
8. Just before serving, sprinkle 1 tsp sesame seeds over the top as a garnish.
Finally, this dip has a wonderfully balanced texture—thin enough to drizzle but packed with umami from the soy sauce and a citrusy punch from the yuzu. I love how it brightens up simple dishes; try it as a dipping sauce for tempura or drizzled over a bowl of steamed rice for an instant flavor boost. It’s so versatile that you’ll find yourself reaching for it all week long!
Summary
Unleash a world of flavor with these 18 spicy Asian dipping sauces! From quick weeknight dinners to festive gatherings, there’s a perfect match for every meal. We’d love to hear which recipe becomes your new favorite—drop a comment below and don’t forget to share the spicy love by pinning this article to your Pinterest boards. Happy cooking!


