Indulge in the rich flavors of Italy with these 20 creamy and delectable shrimp pasta dishes. From classic garlic butter to spicy arrabbiata, our collection of recipes offers a variety of options to satisfy your cravings. Whether you’re a fan of tangy lemon or bold pesto, we’ve got you covered.
Garlic Butter Shrimp Linguine sets the stage with its rich and velvety sauce, while Creamy Tuscan Shrimp Pasta takes you on a journey through the rolling hills of Tuscany. Lemon Garlic Shrimp Spaghetti adds a burst of citrus freshness, and Spicy Arrabbiata Shrimp Penne brings the heat.
But that’s not all – our collection also includes Shrimp Scampi with Angel Hair, Sun-Dried Tomato Shrimp Fettuccine, Pesto Shrimp Farfalle, White Wine Shrimp Linguine, and many more. Which one will you try first?
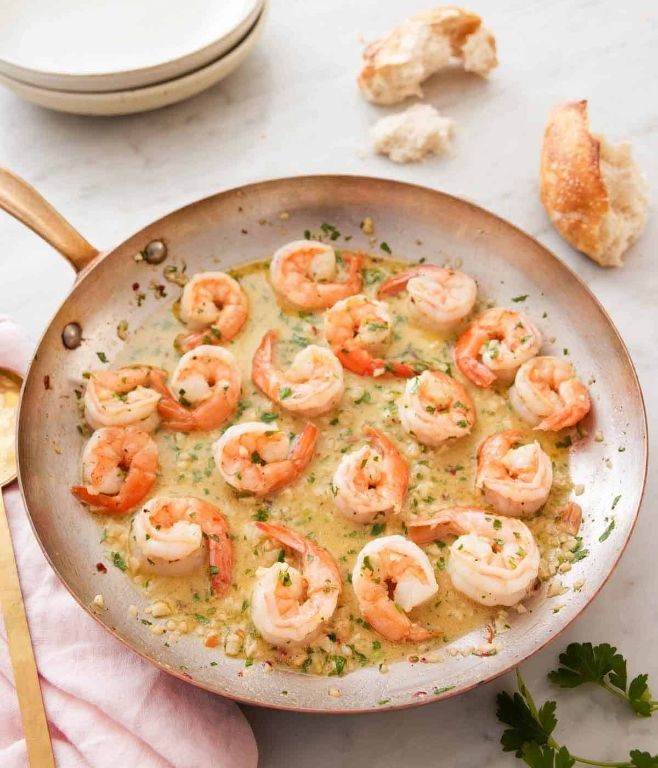
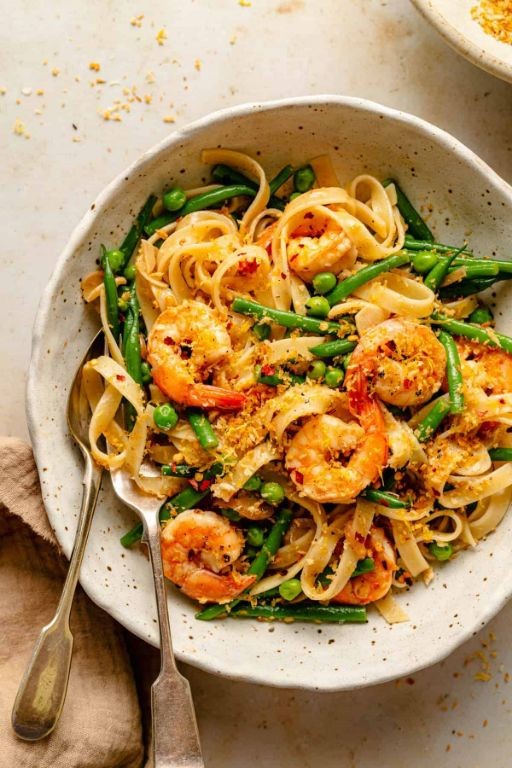
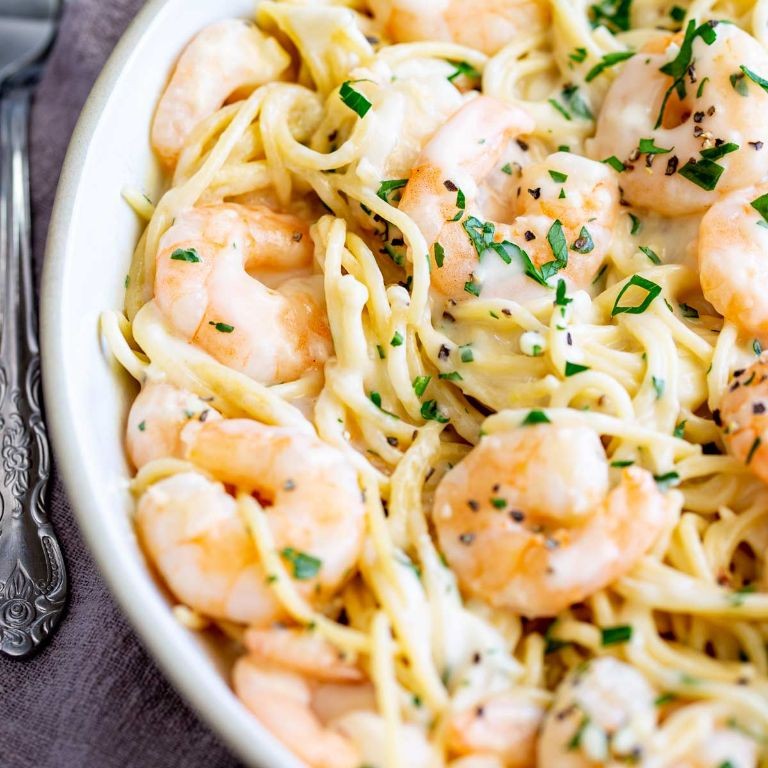
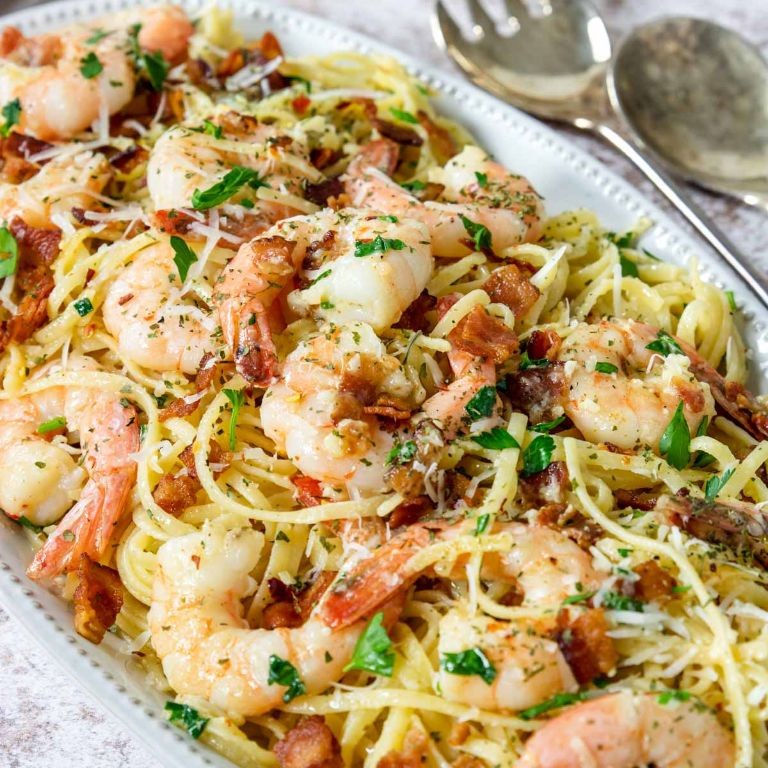
Garlic Butter Shrimp Linguine
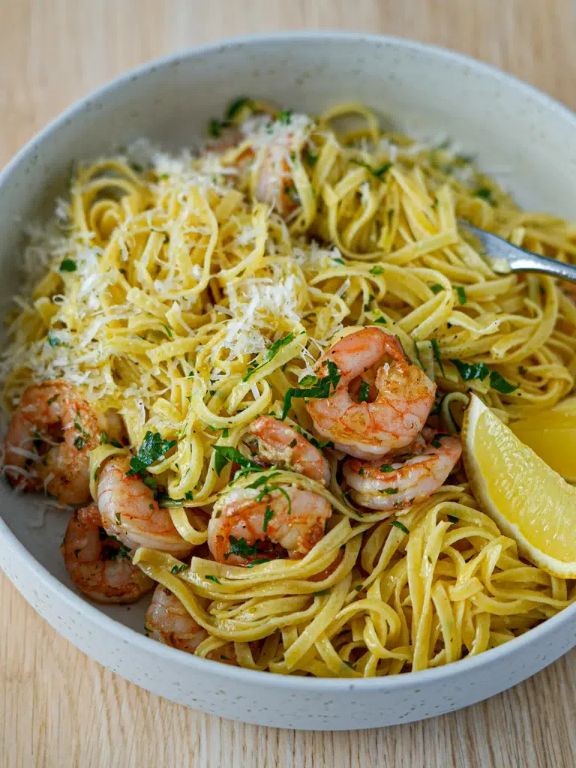
Savor the flavors of Italy with this simple yet satisfying dish, featuring succulent shrimp cooked in a rich garlic butter sauce and served over linguine pasta.
Ingredients:
– 12 large shrimp, peeled and deveined
– 8 oz linguine pasta
– 4 tbsp (1/2 stick) unsalted butter, softened
– 3 cloves garlic, minced
– 1/2 cup white wine (optional)
– 1/4 cup chicken broth
– Salt and pepper to taste
– Fresh parsley, chopped (optional)
Instructions:
1. Bring a large pot of salted water to a boil. Cook linguine according to package instructions until al dente. Reserve 1 cup pasta water before draining.
2. In a large skillet, melt butter over medium heat. Add garlic and cook for 1 minute, or until fragrant.
3. Add shrimp to the skillet and cook for 2-3 minutes per side, or until pink and cooked through.
4. If using wine and broth, add to the skillet and simmer for an additional 2-3 minutes.
5. Combine cooked linguine, shrimp mixture, and reserved pasta water in a large serving dish. Season with salt and pepper to taste.
6. Garnish with chopped parsley, if desired. Serve immediately.
Cooking Time: 15-20 minutes
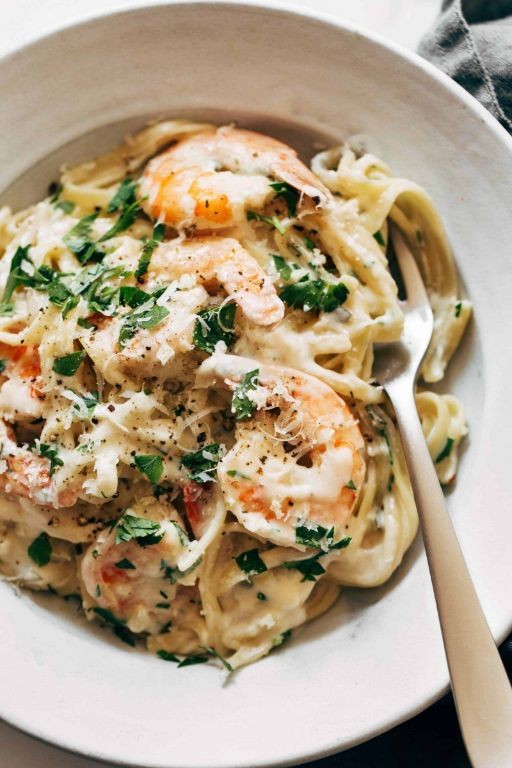
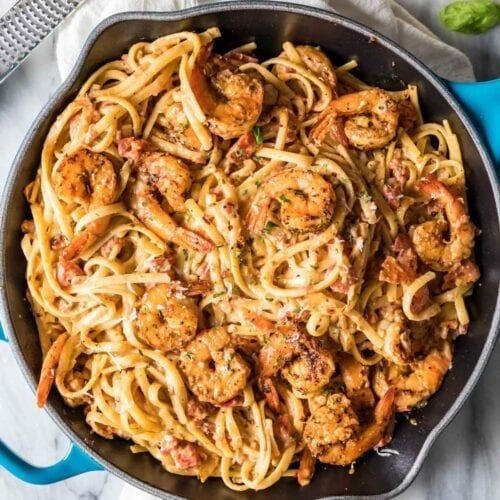
Creamy Tuscan Shrimp Pasta
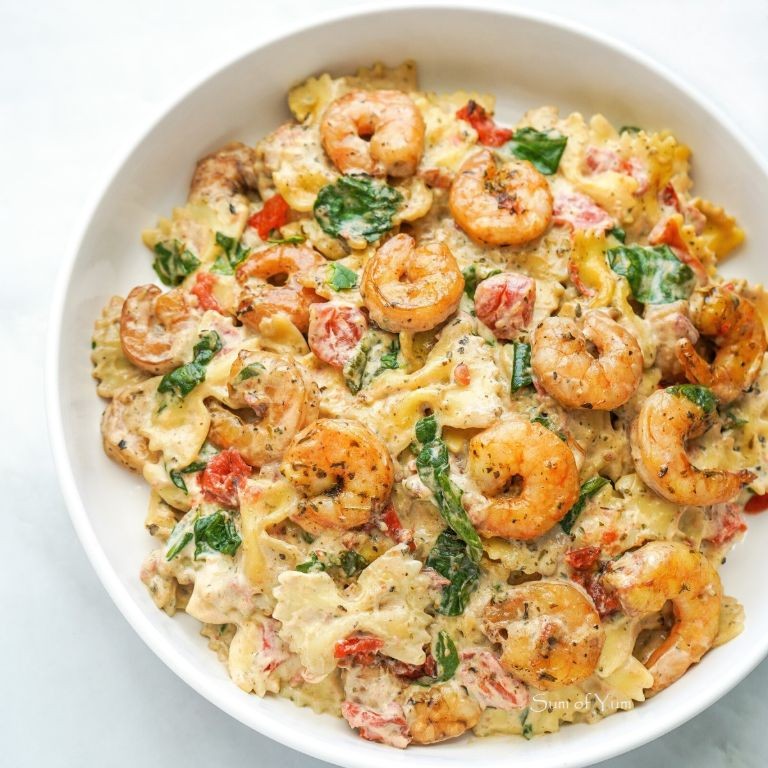
This recipe combines succulent shrimp with a rich and creamy sauce, all wrapped up in tender pasta. Perfect for a quick and satisfying weeknight dinner.
Ingredients:
– 12 oz (340g) pasta of your choice
– 1 lb (450g) large shrimp, peeled and deveined
– 2 tablespoons olive oil
– 2 cloves garlic, minced
– 1 cup (250ml) heavy cream
– 1/4 cup (60ml) white wine (optional)
– 1 tablespoon fresh parsley, chopped
– Salt and pepper to taste
– Grated Parmesan cheese (optional)
Instructions:
1. Cook pasta according to package instructions. Drain and set aside.
2. In a large skillet, heat olive oil over medium-high. Add garlic and sauté for 1 minute.
3. Add shrimp and cook until pink and fully cooked, about 2-3 minutes per side.
4. Remove shrimp from skillet and set aside.
5. Reduce heat to low and add heavy cream, white wine (if using), salt, and pepper. Stir until smooth.
6. Combine cooked pasta, shrimp, and sauce. Toss until coated.
7. Sprinkle with chopped parsley and Parmesan cheese (if using). Serve hot.
Cooking Time: 15-20 minutes
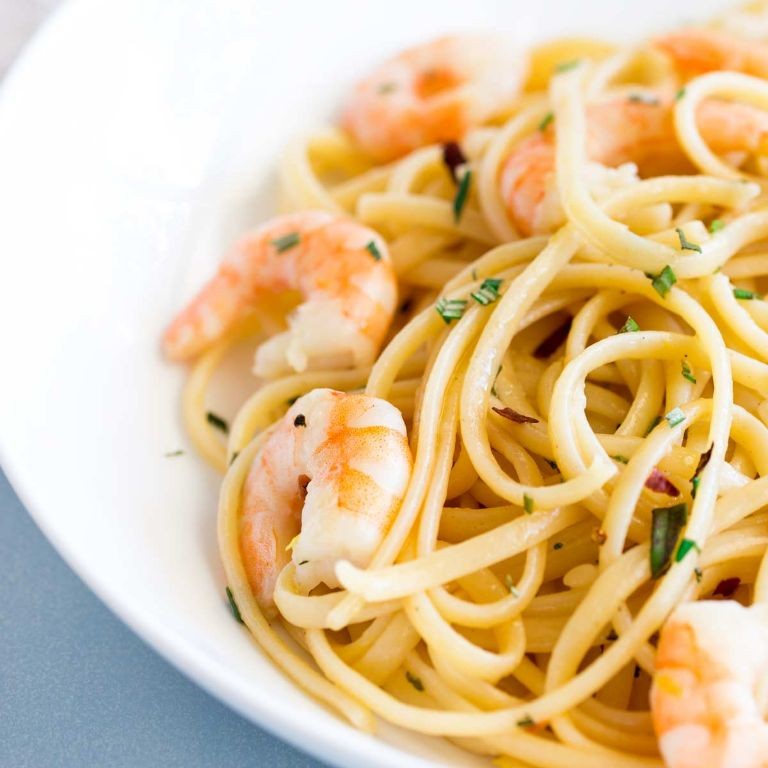
Lemon Garlic Shrimp Spaghetti
Brighten up your dinner plate with this zesty and flavorful dish, perfect for a quick weeknight meal. Succulent shrimp, infused with the brightness of lemon and the pungency of garlic, are tossed with al dente spaghetti and a hint of parsley.
Ingredients:
– 12 large shrimp, peeled and deveined
– 8 oz spaghetti
– 2 cloves garlic, minced
– 2 lemons, juiced (about 1/4 cup)
– 1 tablespoon olive oil
– Salt and pepper to taste
– Fresh parsley, chopped (optional)
Instructions:
1. Bring a large pot of salted water to a boil. Cook spaghetti according to package instructions until al dente. Reserve 1 cup of pasta water before draining.
2. In a large skillet, heat olive oil over medium-high. Add garlic and sauté for 1 minute until fragrant.
3. Add shrimp and cook for 2-3 minutes per side, until pink and cooked through.
4. Remove from heat. Stir in lemon juice, reserved pasta water, salt, and pepper.
5. Combine cooked spaghetti with the shrimp mixture. Garnish with chopped parsley, if desired.
Cooking Time: 15-20 minutes
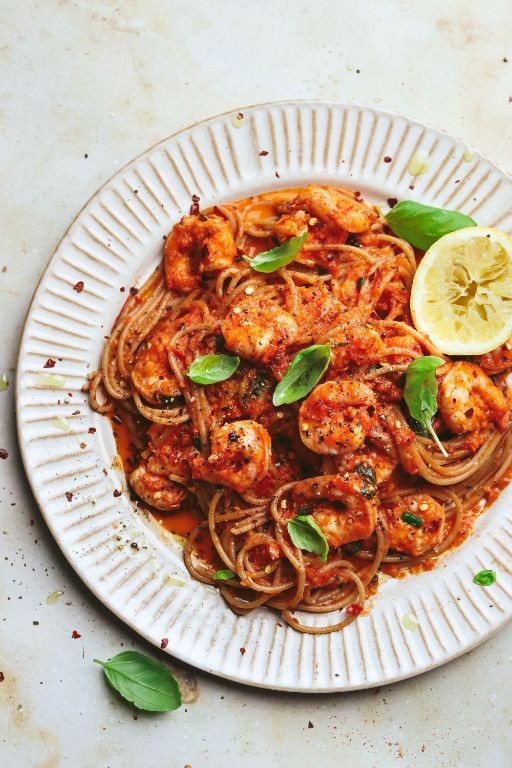
Spicy Arrabbiata Shrimp Penne
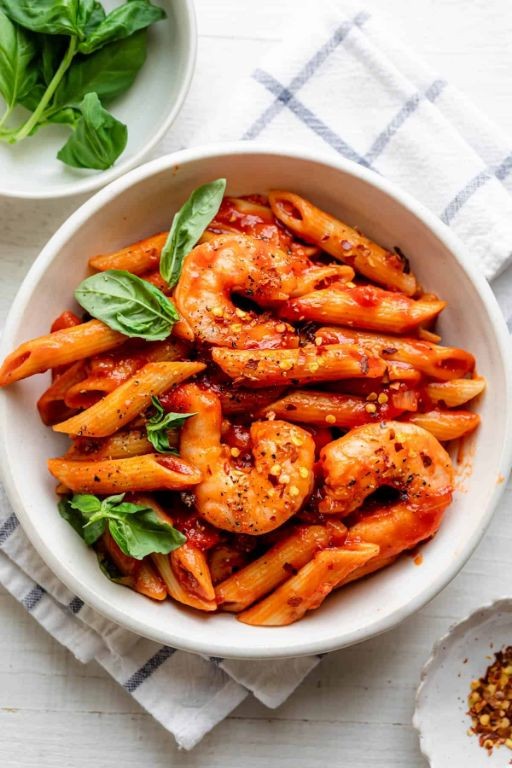
This recipe combines the bold flavors of Italy with a spicy kick, perfect for those who like a little heat. Succulent shrimp and penne pasta are tossed in a rich arrabbiata sauce made with crushed red peppers, garlic, and olive oil.
Ingredients:
– 12 oz (340g) penne pasta
– 1 lb (450g) large shrimp, peeled and deveined
– 2 cloves of garlic, minced
– 1/4 cup (60ml) arrabbiata sauce (homemade or store-bought)
– 1/4 cup (30g) crushed red peppers
– 1 tablespoon olive oil
– Salt and pepper to taste
– Fresh parsley, chopped (optional)
Instructions:
1. Bring a large pot of salted water to a boil. Cook penne pasta according to package instructions until al dente.
2. In a large skillet, heat the olive oil over medium-high heat. Add garlic and cook for 1 minute.
3. Add shrimp to the skillet and cook until pink and fully cooked, about 2-3 minutes per side.
4. Stir in arrabbiata sauce and crushed red peppers. Cook for an additional 2-3 minutes.
5. Combine cooked pasta and shrimp mixture. Season with salt and pepper to taste.
6. Garnish with chopped parsley if desired.
Cooking Time: 15-20 minutes
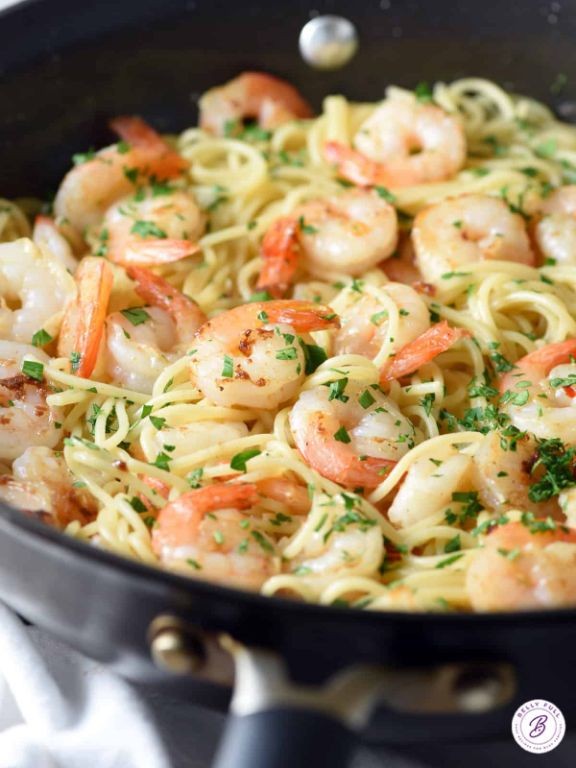
Shrimp Scampi with Angel Hair
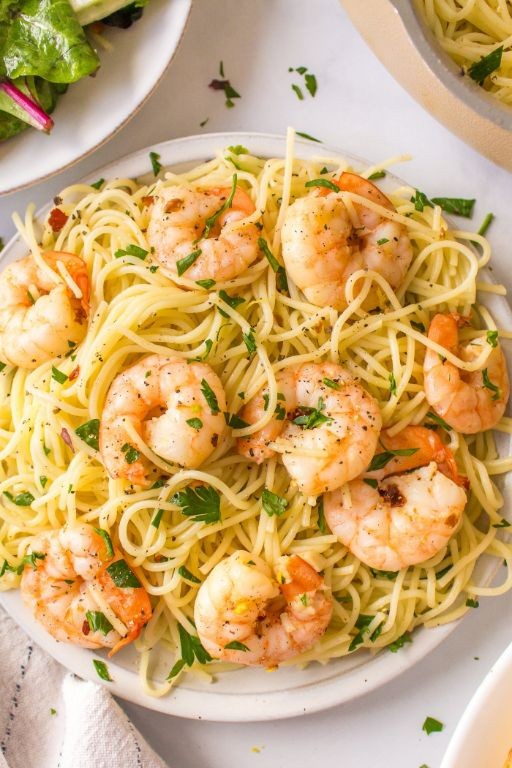
This classic recipe combines succulent shrimp, garlic, lemon, and parsley with the delicate texture of angel hair pasta. Perfect for a weeknight dinner or special occasion.
Ingredients:
– 1 pound large shrimp, peeled and deveined
– 8 oz angel hair pasta
– 2 cloves garlic, minced
– 2 tablespoons unsalted butter
– 2 tablespoons freshly squeezed lemon juice
– 1/4 cup white wine (optional)
– Salt and pepper to taste
– Fresh parsley, chopped (for garnish)
Instructions:
1. Cook the angel hair pasta according to package instructions until al dente. Drain and set aside.
2. In a large skillet, melt butter over medium-high heat. Add garlic and sauté for 1 minute.
3. Add shrimp to the skillet and cook for 2-3 minutes per side, or until pink and cooked through.
4. Remove shrimp from skillet and add lemon juice and white wine (if using). Simmer for 2 minutes.
5. Combine cooked pasta and shrimp in the skillet. Toss with salt, pepper, and parsley to taste.
6. Serve immediately, garnished with additional parsley if desired.
Cooking Time: 15-20 minutes
Sun-Dried Tomato Shrimp Fettuccine
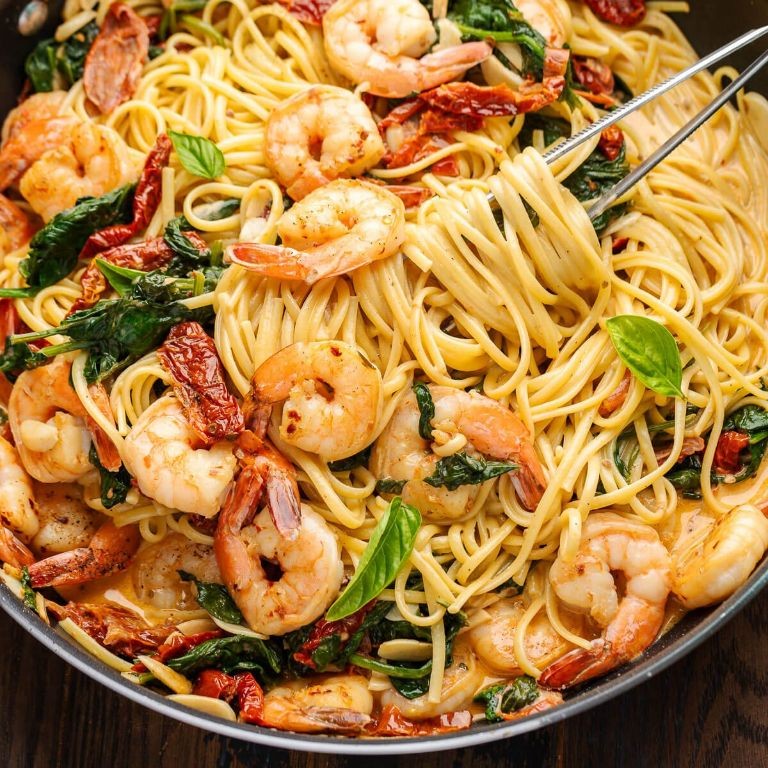
A flavorful and elegant pasta dish that combines succulent shrimp with the rich flavors of sun-dried tomatoes, garlic, and herbs. This recipe is perfect for a quick yet impressive dinner.
Ingredients:
– 1 pound large shrimp, peeled and deveined
– 8 oz fettuccine
– 2 tablespoons olive oil
– 3 cloves garlic, minced
– 1/4 cup sun-dried tomatoes, chopped
– 1/4 cup white wine (optional)
– 1 tablespoon freshly squeezed lemon juice
– Salt and pepper to taste
– Fresh parsley, chopped (for garnish)
Instructions:
1. Bring a large pot of salted water to a boil. Cook fettuccine according to package instructions until al dente. Reserve 1 cup pasta water before draining.
2. In a large skillet, heat olive oil over medium-high. Add garlic and cook for 1 minute.
3. Add shrimp and cook until pink and cooked through, about 2-3 minutes per side.
4. Stir in sun-dried tomatoes, white wine (if using), and lemon juice. Season with salt and pepper to taste.
5. Toss cooked fettuccine with the shrimp mixture, adding some reserved pasta water if needed to achieve desired creaminess.
6. Serve immediately, garnished with chopped parsley.
Cooking Time: 15-20 minutes
Pesto Shrimp Farfalle
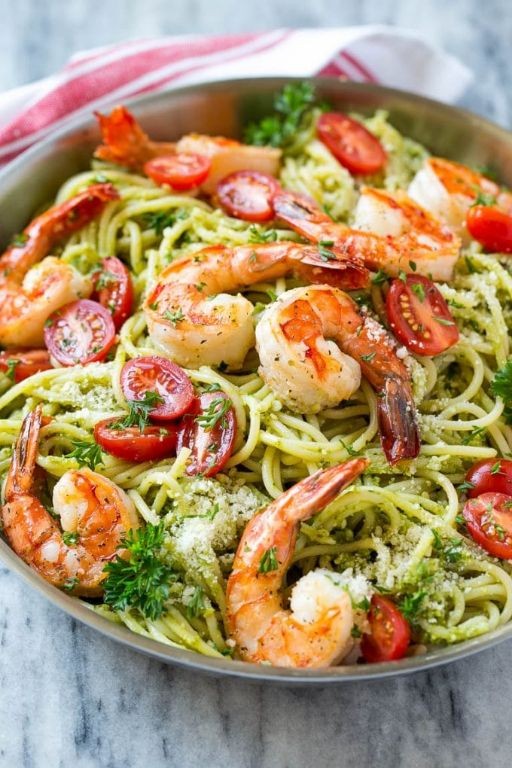
This recipe combines the flavors of pesto sauce, succulent shrimp, and tender farfalle pasta for a quick and delicious meal. Perfect for a weeknight dinner or special occasion.
Ingredients:
– 8 oz farfalle pasta
– 1 lb large shrimp, peeled and deveined
– 1/4 cup pesto sauce
– 2 tbsp olive oil
– 1 clove garlic, minced
– Salt and pepper to taste
– Grated Parmesan cheese (optional)
Instructions:
1. Bring a large pot of salted water to a boil. Cook farfalle pasta according to package instructions until al dente. Reserve 1 cup of pasta water before draining.
2. In a large skillet, heat olive oil over medium-high heat. Add garlic and cook for 1 minute.
3. Add shrimp to the skillet and cook until pink and cooked through, about 2-3 minutes per side.
4. Stir in pesto sauce and reserved pasta water. Combine cooked farfalle pasta with the shrimp and pesto mixture.
5. Season with salt and pepper to taste. Serve hot, topped with grated Parmesan cheese if desired.
Cooking Time: 15-20 minutes
White Wine Shrimp Linguine
Savor the flavors of Italy with this light and refreshing pasta dish, featuring succulent shrimp cooked in a zesty white wine sauce and served over linguine noodles.
Ingredients:
– 12 large shrimp, peeled and deveined
– 1/4 cup white wine (dry)
– 2 tablespoons olive oil
– 1 small onion, finely chopped
– 2 cloves garlic, minced
– 1/4 cup chicken broth
– 1 tablespoon lemon juice
– Salt and pepper to taste
– 12 oz linguine noodles
– Fresh parsley, chopped (optional)
Instructions:
1. Bring a large pot of salted water to a boil. Cook linguine noodles according to package instructions until al dente. Reserve.
2. In a large skillet, heat olive oil over medium-high. Add onion and garlic; cook 1-2 minutes or until softened.
3. Add shrimp to the skillet; cook 2-3 minutes per side or until pink and cooked through.
4. Pour in white wine, chicken broth, and lemon juice. Bring mixture to a simmer and cook for an additional 2-3 minutes or until sauce has reduced slightly.
5. Serve cooked linguine noodles with shrimp and sauce. Garnish with chopped parsley, if desired.
Cooking Time: 15-20 minutes
Shrimp and Mushroom Alfredo
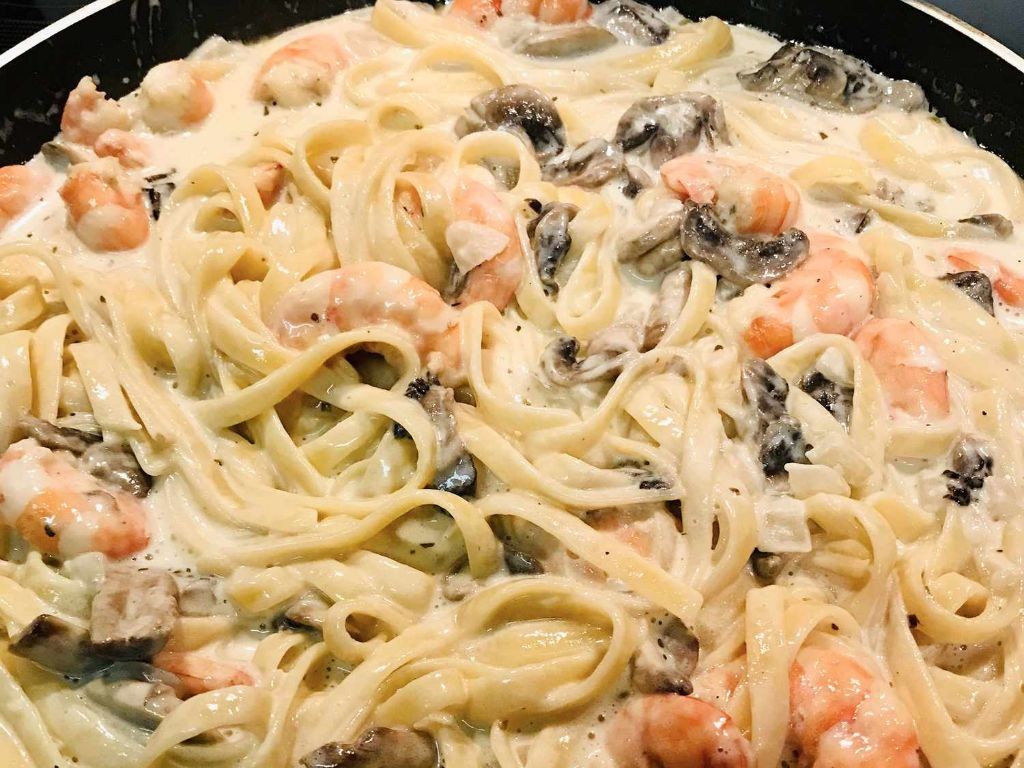
This rich and creamy pasta dish combines succulent shrimp with earthy mushrooms, all wrapped up in a decadent Alfredo sauce. Perfect for a special occasion or a cozy night in.
Ingredients:
– 1 pound large shrimp, peeled and deveined
– 2 cups mixed mushrooms (button, cremini, shiitake), sliced
– 8 ounces fettuccine pasta
– 2 tablespoons butter
– 3 cloves garlic, minced
– 1 cup heavy cream
– 1/2 cup grated Parmesan cheese
– Salt and pepper to taste
– Fresh parsley, chopped (optional)
Instructions:
1. Cook pasta according to package directions; drain and set aside.
2. In a large skillet, melt butter over medium-high heat. Add garlic and sauté for 1 minute.
3. Add mushrooms and cook until tender, about 3-4 minutes.
4. Add shrimp and cook until pink and cooked through, about 2-3 minutes per side.
5. Stir in heavy cream and Parmesan cheese; season with salt and pepper to taste.
6. Combine cooked pasta and Alfredo sauce mixture. Serve hot, garnished with chopped parsley if desired.
Cooking Time: 20-25 minutes
Tomato Basil Shrimp Orzo
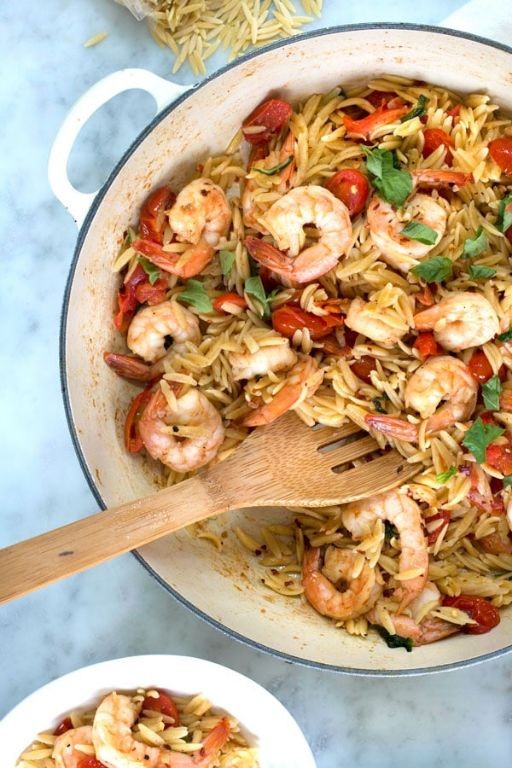
This Mediterranean-inspired dish combines succulent shrimp, flavorful tomato and basil sauce, and nutty orzo pasta for a quick and satisfying meal. Perfect for a weeknight dinner or special occasion.
Ingredients:
– 1 pound large shrimp, peeled and deveined
– 8 oz orzo pasta
– 2 cups cherry tomatoes, halved
– 1/4 cup fresh basil leaves, chopped
– 2 cloves garlic, minced
– 1/4 cup olive oil
– Salt and pepper to taste
– Grated Parmesan cheese (optional)
Instructions:
1. Cook orzo pasta according to package instructions. Drain and set aside.
2. In a large skillet, heat olive oil over medium-high heat. Add garlic and cook for 1 minute.
3. Add cherry tomatoes and cook until they release their juices and start to soften, about 3-4 minutes.
4. Add shrimp and cook until pink and fully cooked, about 2-3 minutes per side.
5. Stir in chopped basil leaves and season with salt and pepper to taste.
6. Combine cooked orzo pasta with tomato-basil mixture. Serve hot, topped with grated Parmesan cheese if desired.
Cooking Time: Approximately 15-20 minutes
Cajun Shrimp Pasta
A spicy twist on a classic pasta dish, this Cajun Shrimp Pasta combines succulent shrimp with a bold and flavorful sauce.
Ingredients:
– 1 pound large shrimp, peeled and deveined
– 8 ounces linguine pasta
– 2 tablespoons olive oil
– 1 tablespoon butter
– 1 small onion, diced
– 2 cloves garlic, minced
– 1 teaspoon Cajun seasoning
– 1/4 cup chicken broth
– 1/4 cup heavy cream
– Salt and pepper to taste
– Fresh parsley, chopped (optional)
Instructions:
1. Cook linguine pasta according to package instructions until al dente. Drain and set aside.
2. In a large skillet, heat olive oil over medium-high heat. Add butter and let melt.
3. Add diced onion and cook for 2-3 minutes or until translucent.
4. Add garlic and Cajun seasoning; cook for an additional minute.
5. Add shrimp to the skillet; cook for 2-3 minutes or until pink and fully cooked.
6. Stir in chicken broth and heavy cream; bring sauce to a simmer.
7. Combine cooked pasta with the shrimp mixture; season with salt and pepper to taste.
8. Garnish with chopped parsley, if desired.
Cooking Time: 15-20 minutes
Shrimp Fra Diavolo with Spaghetti
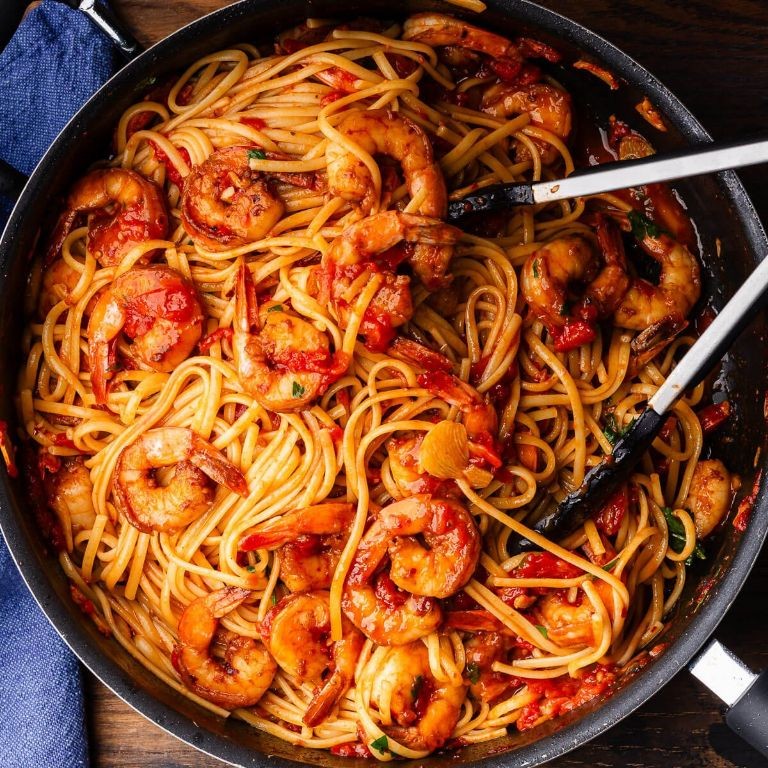
This classic Italian-American dish combines succulent shrimp with a spicy tomato sauce and served over al dente spaghetti, making it a perfect comfort food for any occasion.
Ingredients:
– 1 pound large shrimp, peeled and deveined
– 2 tablespoons olive oil
– 1 onion, finely chopped
– 3 garlic cloves, minced
– 1 can (28 oz) crushed tomatoes
– 1/4 cup dry white wine
– 1/4 cup chicken broth
– 1 teaspoon dried oregano
– Salt and pepper to taste
– 12 ounces spaghetti
– Fresh parsley, chopped (optional)
Instructions:
1. Cook spaghetti according to package instructions; set aside.
2. In a large skillet, heat olive oil over medium-high. Add onion and garlic; cook until softened, 3-4 minutes.
3. Add shrimp; cook until pink, about 2-3 minutes per side.
4. Add crushed tomatoes, wine, broth, oregano, salt, and pepper. Simmer for 5 minutes or until sauce thickens slightly.
5. Toss cooked spaghetti with the spicy tomato sauce. Serve hot, garnished with chopped parsley if desired.
Cooking Time: 15-20 minutes
Garlic Parmesan Shrimp Pasta
A flavorful and aromatic pasta dish that combines succulent shrimp with the richness of parmesan cheese and the pungency of garlic, all wrapped up in a quick-cooking penne pasta.
Ingredients:
– 1 pound large shrimp, peeled and deveined
– 12 oz penne pasta
– 2 cloves garlic, minced
– 1/4 cup unsalted butter
– 1 cup grated parmesan cheese
– 1/2 cup white wine (optional)
– Salt and pepper to taste
– Fresh parsley, chopped (optional)
Instructions:
1. Cook penne pasta according to package instructions until al dente. Drain and set aside.
2. In a large skillet, melt butter over medium-high heat. Add garlic and sauté for 1 minute.
3. Add shrimp to the skillet and cook for 2-3 minutes per side, or until pink and cooked through.
4. Remove shrimp from skillet and set aside.
5. If using white wine, add it to the skillet and simmer for 1 minute to deglaze.
6. Stir in parmesan cheese until melted and combined with pan juices.
7. Add cooked pasta to the skillet and toss with parmesan sauce.
8. Return shrimp to the skillet and toss to combine.
9. Season with salt and pepper to taste.
10. Serve hot, garnished with chopped parsley if desired.
Cooking Time: 15-20 minutes
Shrimp Carbonara
A creamy, indulgent take on the classic Italian dish, this shrimp carbonara recipe combines succulent shrimp with rich eggs and parmesan cheese. Perfect for a quick weeknight dinner or special occasion.
Ingredients:
– 12 large shrimp, peeled and deveined
– 4 oz spaghetti
– 2 large eggs
– 1/4 cup grated parmesan cheese
– 2 tbsp butter
– Salt and black pepper to taste
– Fresh parsley for garnish (optional)
Instructions:
1. Cook spaghetti according to package instructions until al dente. Drain and set aside.
2. In a medium bowl, whisk together eggs and parmesan cheese. Season with salt and black pepper to taste.
3. In a large skillet, melt butter over medium heat. Add shrimp and cook for 2-3 minutes per side, or until pink and cooked through. Remove from heat.
4. Add cooked spaghetti to the bowl with egg mixture. Toss to combine.
5. Add cooked shrimp to the bowl and toss to combine.
6. Cook for an additional minute, until eggs are just set.
7. Serve immediately, garnished with fresh parsley if desired.
Cooking Time: 15-20 minutes
Rosemary Shrimp Pappardelle
Experience the rich flavors of Italy with this simple yet elegant dish, where succulent shrimp and fragrant rosemary come together to create a harmonious union on a bed of pappardelle pasta.
Ingredients:
– 12 large shrimp, peeled and deveined
– 1/4 cup olive oil
– 2 cloves garlic, minced
– 2 sprigs fresh rosemary, chopped
– 1 teaspoon lemon zest
– Salt and pepper to taste
– 8 oz pappardelle pasta
– Grated Parmesan cheese (optional)
Instructions:
1. Bring a large pot of salted water to a boil and cook the pappardelle according to package instructions until al dente. Reserve 1 cup of pasta water before draining.
2. In a large skillet, heat the olive oil over medium-high heat. Add garlic and sauté for 1 minute until fragrant.
3. Add shrimp and cook for 2-3 minutes per side, or until pink and cooked through.
4. Stir in chopped rosemary and lemon zest. Season with salt and pepper to taste.
5. Combine the cooked pappardelle pasta with the shrimp mixture, adding some reserved pasta water if needed to achieve a creamy consistency.
6. Serve hot, topped with grated Parmesan cheese if desired.
Cooking Time: 15-20 minutes
Shrimp and Spinach Tortellini
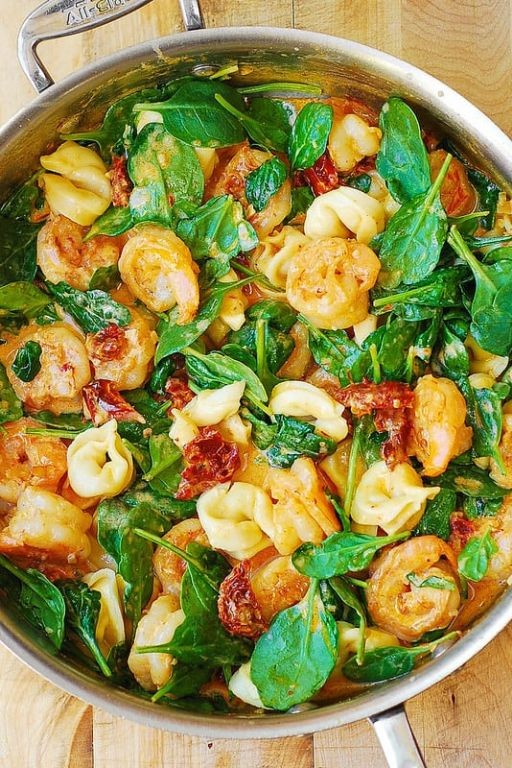
This creamy pasta dish combines succulent shrimp with the richness of spinach and Parmesan cheese, all wrapped up in tender tortellini. Perfect for a quick weeknight dinner or a special occasion.
Ingredients:
– 1 package cheese-filled tortellini
– 1 pound large shrimp, peeled and deveined
– 2 cups fresh spinach leaves
– 2 cloves garlic, minced
– 1/4 cup grated Parmesan cheese
– 1 tablespoon olive oil
– Salt and pepper to taste
– 1/4 cup heavy cream
Instructions:
1. Cook tortellini according to package instructions. Drain and set aside.
2. In a large skillet, heat olive oil over medium-high. Add garlic and cook for 1 minute.
3. Add shrimp and cook until pink and fully cooked, about 2-3 minutes per side.
4. Add spinach leaves and cook until wilted, about 1 minute.
5. Stir in Parmesan cheese and heavy cream. Combine with cooked tortellini.
6. Season with salt and pepper to taste.
7. Serve hot and enjoy!
Cooking Time: 15-20 minutes
Roasted Red Pepper Shrimp Rigatoni
Roasted Red Pepper Shrimp Rigatoni: A flavorful and vibrant pasta dish that combines succulent shrimp with sweet roasted red peppers.
Ingredients:
– 12 oz rigatoni pasta
– 1 lb large shrimp, peeled and deveined
– 2 large red bell peppers, seeded and chopped
– 2 tbsp olive oil
– 2 cloves garlic, minced
– 1 tsp dried oregano
– Salt and pepper to taste
– Grated Parmesan cheese (optional)
Instructions:
1. Preheat oven to 425°F (220°C).
2. Toss the red bell peppers with 1 tbsp olive oil, salt, and pepper on a baking sheet. Roast for 30-40 minutes or until charred.
3. Cook rigatoni according to package instructions. Reserve 1 cup of pasta water before draining.
4. In a large skillet, heat the remaining 1 tbsp olive oil over medium-high heat. Add garlic and cook for 1 minute.
5. Add the shrimp and cook until pink and fully cooked (about 2-3 minutes per side).
6. Combine roasted red peppers, cooked rigatoni, and reserved pasta water in a large serving bowl. Toss with cooked shrimp and oregano. Top with Parmesan cheese if desired.
Cooking Time: approximately 45-50 minutes
Shrimp Piccata with Capellini
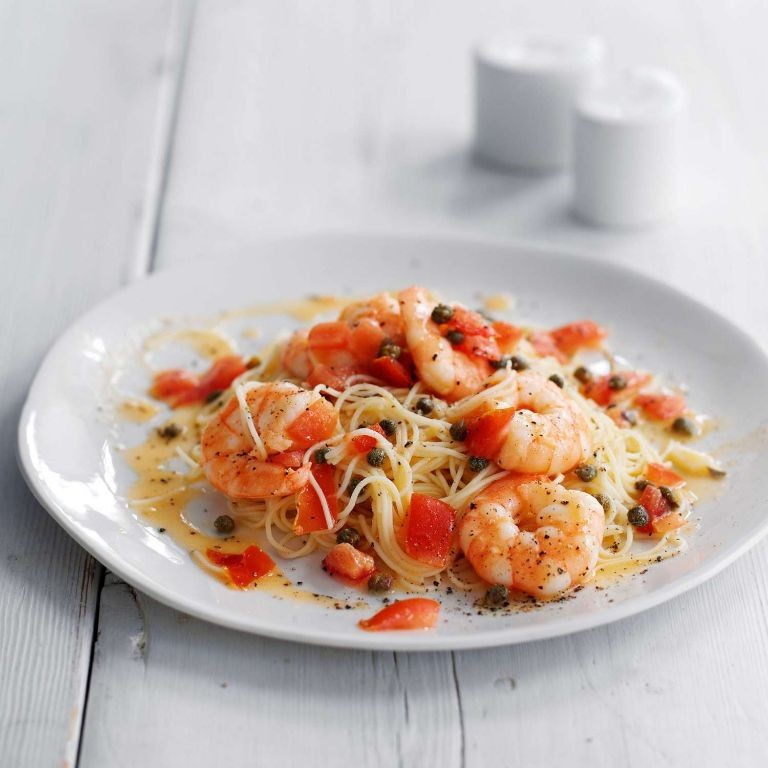
This recipe combines succulent shrimp, crispy prosciutto, and tangy lemon butter sauce with delicate capellini pasta for a dish that’s sure to impress. In just 20 minutes, you’ll have a flavorful and satisfying meal that’s perfect for any occasion.
Ingredients:
– 12 large shrimp, peeled and deveined
– 6 slices of prosciutto, thinly sliced
– 1/4 cup white wine
– 2 tablespoons butter
– 2 cloves garlic, minced
– 2 lemons, juiced
– Salt and pepper to taste
– 8 oz capellini pasta
– Fresh parsley, chopped (optional)
Instructions:
1. Bring a large pot of salted water to a boil. Cook the capellini according to package instructions until al dente. Reserve.
2. In a large skillet, melt 1 tablespoon butter over medium-high heat. Add prosciutto and cook until crispy, about 3-4 minutes. Remove from pan and set aside.
3. In the same pan, add remaining butter. Add garlic and cook for 1 minute.
4. Add shrimp to the pan and cook for 2-3 minutes per side, or until pink and cooked through.
5. Add white wine and lemon juice to the pan. Simmer for 2 minutes.
6. Serve shrimp over capellini pasta, topped with crispy prosciutto and a sprinkle of parsley if desired.
Cooking Time: 20 minutes
Balsamic Glazed Shrimp Penne
Elevate your pasta game with this simple yet impressive recipe, featuring succulent shrimp coated in a rich balsamic glaze. Perfect for a quick weeknight dinner or special occasion.
Ingredients:
– 12 oz penne pasta
– 1 lb large shrimp, peeled and deveined
– 2 tbsp olive oil
– 2 cloves garlic, minced
– 1/4 cup balsamic vinegar
– 2 tbsp honey
– Salt and pepper to taste
– Fresh parsley, chopped (optional)
Instructions:
1. Preheat oven to 400°F (200°C).
2. Cook penne pasta according to package instructions until al dente.
3. In a large skillet, heat olive oil over medium-high. Add garlic and sauté for 1 minute.
4. Add shrimp and cook until pink and just cooked through, about 2-3 minutes per side.
5. While shrimp cooks, whisk together balsamic vinegar and honey in a small bowl.
6. Toss cooked penne with balsamic glaze and top with sautéed shrimp. Season with salt and pepper to taste.
7. Garnish with chopped parsley, if desired.
Cooking Time: 15-20 minutes
Shrimp and Artichoke Linguine
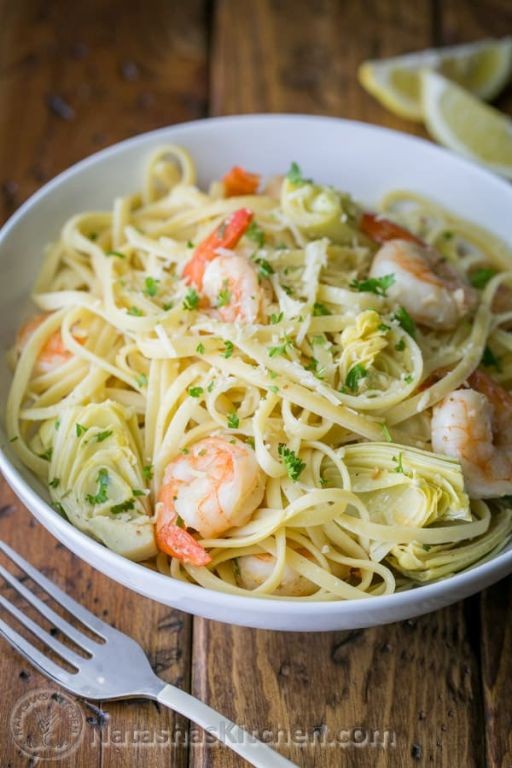
This recipe combines succulent shrimp, tender artichokes, and linguine pasta in a rich and flavorful sauce, perfect for a quick weeknight dinner or special occasion.
Ingredients:
– 12 oz linguine pasta
– 1 lb large shrimp, peeled and deveined
– 1 (14.5 oz) can artichoke hearts, drained and chopped
– 2 cloves garlic, minced
– 1/4 cup white wine
– 1/4 cup chicken broth
– 1 tbsp olive oil
– 1 tsp dried oregano
– Salt and pepper to taste
– Grated Parmesan cheese (optional)
Instructions:
1. Bring a large pot of salted water to a boil and cook linguine according to package instructions until al dente. Reserve 1 cup pasta water before draining.
2. In a large skillet, heat olive oil over medium-high heat. Add garlic and sauté for 1 minute.
3. Add shrimp and cook until pink and fully cooked, about 2-3 minutes per side. Remove from heat and set aside.
4. In the same skillet, add artichoke hearts, white wine, chicken broth, and oregano. Simmer for 5 minutes, stirring occasionally.
5. Add cooked linguine to the skillet and toss with sauce, adding reserved pasta water as needed. Season with salt and pepper to taste.
6. Serve immediately, topped with grilled shrimp and grated Parmesan cheese if desired.
Cooking Time: 15-20 minutes
Summary
Indulge in the rich flavors of Italy with these 20 creamy shrimp pasta recipes. From classic garlic butter linguine to spicy arrabbiata penne, and from sun-dried tomato fettuccine to shrimp scampi with angel hair, there’s a dish for every taste bud. Whether you prefer bold and spicy or light and zesty, these Italian-inspired recipes will transport your plate to the Tuscan countryside.