Let’s make mealtime magic for your little one! This collection of 20 nutritious baby food recipes is designed to delight tiny taste buds and nourish growing bodies. From simple purées to flavorful finger foods, you’ll find wholesome, easy-to-make ideas that turn everyday ingredients into delicious first bites. Get ready to explore a world of healthy, homemade goodness your baby will love—let’s dive in!
Sweet Potato Puree with Cinnamon

Holiday meals often call for comforting sides, and this sweet potato puree with cinnamon delivers just that—a velvety, subtly spiced dish that feels both festive and familiar. Let’s walk through each step together to create this simple yet satisfying recipe.
Serving: 4 | Pre Time: 10 minutes | Cooking Time: 45 minutes
Ingredients
– 2 large sweet potatoes (about 2 pounds total), peeled and cubed—I find the orange-fleshed variety yields the sweetest, creamiest texture.
– 1/4 cup unsalted butter, cut into tablespoons; using unsalted lets you control the seasoning perfectly.
– 1/4 cup whole milk, warmed slightly to prevent curdling when mixed in.
– 1 teaspoon ground cinnamon, my favorite spice for adding warmth without overpowering.
– 1/2 teaspoon salt, to enhance all the flavors naturally.
Instructions
1. Preheat your oven to 400°F and line a baking sheet with parchment paper for easy cleanup.
2. Place the peeled and cubed sweet potatoes in a single layer on the prepared baking sheet.
3. Roast the sweet potatoes in the preheated oven for 35–40 minutes, until they are fork-tender and lightly caramelized at the edges.
4. Transfer the roasted sweet potatoes to a large mixing bowl and let them cool for 5 minutes—this prevents the butter from melting too quickly.
5. Add the unsalted butter, warmed whole milk, ground cinnamon, and salt to the bowl with the sweet potatoes.
6. Use a potato masher or immersion blender to puree the mixture until smooth and creamy, about 2–3 minutes of mashing.
7. Taste the puree and adjust the seasoning if needed, but avoid overmixing to keep it light.
8. Serve the puree immediately while warm, or cover and reheat gently on the stovetop if preparing ahead.
Keep this puree in mind for its silky texture and cozy cinnamon aroma, which pairs beautifully with roasted meats or as a base for savory bowls. For a creative twist, swirl in a dollop of maple syrup or top with toasted pecans just before serving.
Avocado Banana Mash
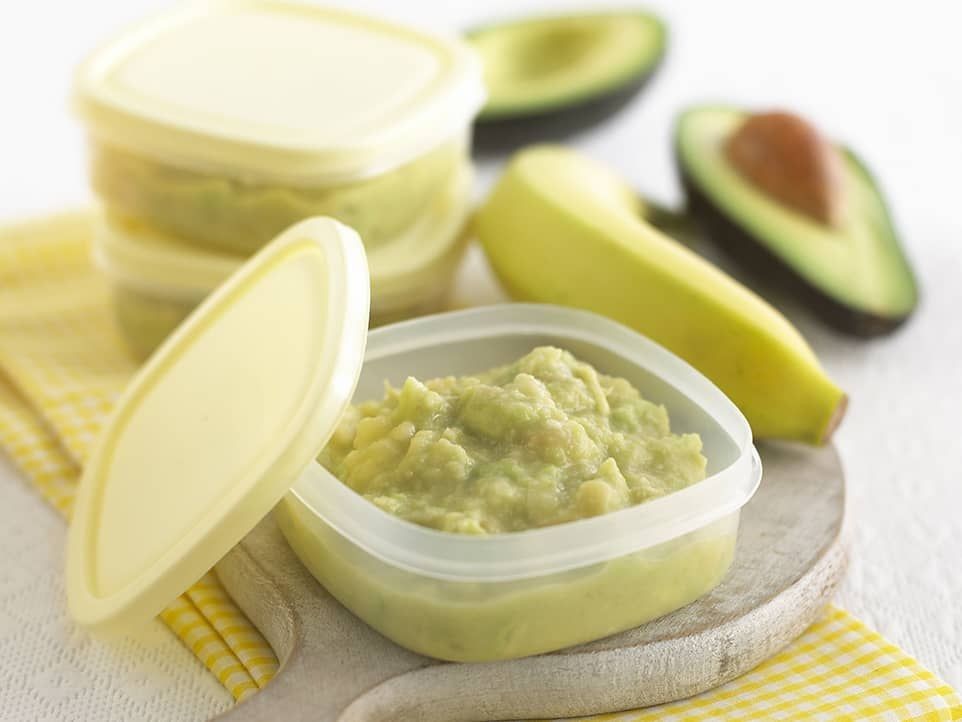
Just when you think you’ve seen every avocado recipe, this simple mash proves there’s always room for one more delightful combination. Today, we’re blending creamy avocado with sweet banana for a surprisingly versatile spread or dip that comes together in minutes—perfect for busy mornings or last-minute snacks. Let’s walk through each step methodically so you can master this no-cook recipe with confidence.
Serving: 2 | Pre Time: 5 minutes | Cooking Time: 0 minutes
Ingredients
– 1 large ripe avocado, halved and pitted (look for one that yields slightly to gentle pressure)
– 1 medium ripe banana, peeled (I prefer bananas with a few brown spots for natural sweetness)
– 1 tablespoon fresh lime juice (bottled works in a pinch, but fresh adds a brighter zing)
– 1 teaspoon pure maple syrup (my go-to for a subtle, earthy sweetness)
– ¼ teaspoon ground cinnamon (a warm spice that pairs beautifully with the banana)
– Pinch of fine sea salt (to balance the flavors)
Instructions
1. Scoop the flesh from the avocado halves directly into a medium mixing bowl, discarding the skin and pit.
2. Add the peeled banana to the bowl with the avocado.
3. Using a fork, mash the avocado and banana together vigorously for about 1–2 minutes until no large chunks remain and the mixture is mostly smooth. (Tip: A few small lumps are fine for texture.)
4. Pour in the fresh lime juice and stir it into the mash until fully incorporated to prevent browning.
5. Add the pure maple syrup, ground cinnamon, and pinch of fine sea salt to the bowl.
6. Stir all ingredients together thoroughly for another 30–45 seconds until evenly combined and the mash has a uniform color. (Tip: Taste a small spoonful here—if you prefer it sweeter, you can add an extra ½ teaspoon of maple syrup.)
7. Transfer the mash to a serving bowl or airtight container immediately. (Tip: Press plastic wrap directly onto the surface if storing to minimize air exposure and keep it fresh.)
The result is a velvety, lightly sweet mash with a hint of tang from the lime and warmth from the cinnamon. Enjoy it as a spread on whole-grain toast, a dip for apple slices, or even stirred into oatmeal for a creamy breakfast boost—its versatility makes it a staple you’ll return to again and again.
Peach and Oatmeal Blend
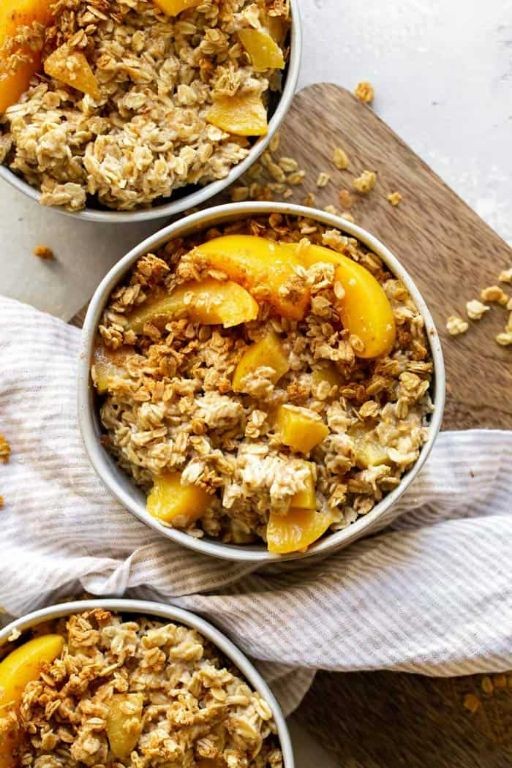
Whether you’re craving a cozy breakfast or a wholesome snack, this Peach and Oatmeal Blend is the perfect solution. With ripe peaches and hearty oats, it’s a simple yet satisfying dish that comes together in minutes, making it ideal for busy mornings or a quick energy boost. Let’s walk through each step together to create this comforting blend.
Serving: 2 | Pre Time: 5 minutes | Cooking Time: 10 minutes
Ingredients
– 1 cup old-fashioned rolled oats (I love the chewy texture they provide)
– 1 large ripe peach, peeled and diced (about 1 cup—choose one that’s fragrant and slightly soft for the best flavor)
– 2 cups water (using filtered water can make a subtle difference in taste)
– 1 tbsp honey (local honey adds a lovely floral note, but any type works)
– 1/4 tsp ground cinnamon (a pinch more if you’re a cinnamon enthusiast like me)
– A pinch of salt (I always add this to balance the sweetness)
Instructions
1. In a medium saucepan, combine 1 cup old-fashioned rolled oats and 2 cups water over medium heat.
2. Bring the mixture to a gentle boil, which should take about 3-4 minutes, stirring occasionally to prevent sticking.
3. Reduce the heat to low and let it simmer uncovered for 5 minutes, until the oats have absorbed most of the water and thickened slightly.
4. While the oats cook, peel and dice 1 large ripe peach into small, even pieces—this ensures they soften quickly and distribute evenly.
5. Add the diced peach, 1 tbsp honey, 1/4 tsp ground cinnamon, and a pinch of salt to the saucepan.
6. Stir everything together thoroughly and continue cooking on low heat for another 2 minutes, until the peaches are tender but not mushy.
7. Remove the saucepan from the heat and let it sit for 1 minute to allow the flavors to meld.
8. Divide the blend evenly between two bowls, serving it warm for the best experience.
Very creamy with a hint of natural sweetness from the peaches, this blend offers a delightful contrast between the soft oats and juicy fruit chunks. For a creative twist, top it with a dollop of Greek yogurt or a sprinkle of toasted nuts to add extra protein and crunch, making it a versatile dish that’s as nourishing as it is delicious.
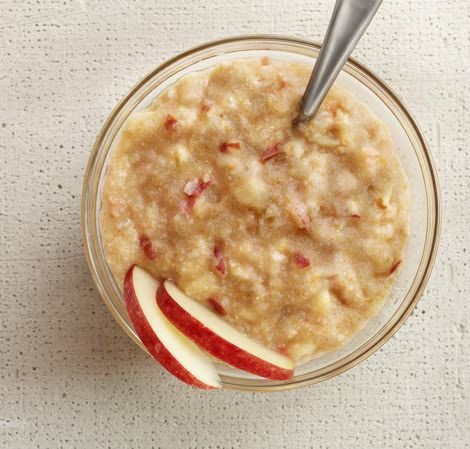
Butternut Squash Apple Puree

Kick off your holiday meal prep with this comforting Butternut Squash Apple Puree, a sweet and savory side that’s as simple to make as it is delicious. Let’s walk through each step together to ensure a perfectly smooth result every time.
Serving: 6 | Pre Time: 15 minutes | Cooking Time: 30 minutes
Ingredients
– 1 medium butternut squash (about 2 lbs), peeled, seeded, and cubed—I find pre-cut squash saves time, but a sharp peeler works too
– 2 large apples, such as Honeycrisp or Granny Smith, peeled, cored, and chopped; I love the tartness of Granny Smith here
– 2 tablespoons unsalted butter, my go-to for rich flavor
– 1/4 cup heavy cream, for a luxuriously smooth texture
– 1/2 teaspoon ground cinnamon, a warm spice that ties it all together
– 1/4 teaspoon salt, to balance the sweetness
– 1/4 cup water, to help steam the ingredients
Instructions
1. Place the cubed butternut squash and chopped apples in a large saucepan. Tip: Use a heavy-bottomed pan to prevent burning during cooking.
2. Add the water to the saucepan, cover with a lid, and cook over medium heat for 20 minutes, or until the squash and apples are fork-tender. Tip: Check halfway through to ensure there’s enough moisture; add a splash more water if needed.
3. Remove the saucepan from the heat and drain any excess liquid, then transfer the cooked squash and apples to a blender or food processor.
4. Add the unsalted butter, heavy cream, ground cinnamon, and salt to the blender.
5. Blend on high speed for 1-2 minutes until completely smooth and creamy, scraping down the sides as necessary. Tip: For an extra-silky texture, blend in batches if your appliance is small.
6. Taste and adjust seasoning if desired, then transfer the puree to a serving bowl.
7. Serve warm immediately, or cover and keep in the refrigerator for up to 3 days, reheating gently before serving.
Yield a velvety puree with a delightful balance of earthy squash and bright apple notes, perfect for spooning over roasted meats or as a cozy standalone side. Try swirling in a dollop of Greek yogurt for a tangy twist or topping with toasted pecans for added crunch.
Spinach and Pear Puree
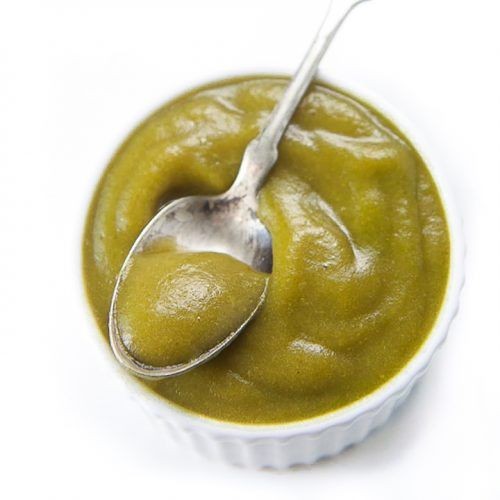
Making a smooth, nutritious puree doesn’t have to be complicated, and this Spinach and Pear Puree is the perfect example. Let’s walk through each simple step together to create a vibrant, sweet, and savory blend that’s as versatile as it is delicious.
Serving: 4 | Pre Time: 10 minutes | Cooking Time: 15 minutes
Ingredients
– 1 large ripe pear, peeled, cored, and chopped (I like Bartlett pears for their sweet, juicy flesh)
– 5 ounces fresh baby spinach leaves (about 5 packed cups—rinsed well to remove any grit)
– 1 cup water or low-sodium vegetable broth (broth adds a subtle savory depth)
– 1 tablespoon unsalted butter (I prefer unsalted to control the seasoning)
– 1/4 teaspoon fine sea salt (adjust based on your broth choice)
– A pinch of freshly grated nutmeg (just a whisper enhances the flavors beautifully)
Instructions
1. Place a medium saucepan over medium heat and add 1 tablespoon of unsalted butter.
2. Once the butter has melted and started to foam slightly, add the chopped pear to the saucepan.
3. Cook the pear, stirring occasionally, for about 5 minutes until it begins to soften and become fragrant.
4. Add 5 ounces of fresh baby spinach leaves to the saucepan with the pear.
5. Pour in 1 cup of water or low-sodium vegetable broth to the saucepan.
6. Season the mixture with 1/4 teaspoon of fine sea salt and a pinch of freshly grated nutmeg.
7. Bring the mixture to a gentle simmer over medium heat, then reduce the heat to low.
8. Cover the saucepan with a lid and let it cook for 8-10 minutes, until the spinach is fully wilted and the pear is very tender.
9. Remove the saucepan from the heat and let it cool slightly for about 5 minutes to handle safely.
10. Carefully transfer the entire mixture to a blender or use an immersion blender directly in the pot.
11. Blend on high speed for 1-2 minutes until completely smooth and creamy, scraping down the sides as needed.
12. Taste the puree and adjust the seasoning with more salt if desired, but avoid over-blending to prevent it from becoming watery.
13. Serve the puree immediately while warm, or let it cool completely before storing.
14. For storage, transfer the puree to an airtight container and refrigerate for up to 3 days or freeze for longer.
15. Gently reheat the puree on the stovetop over low heat, stirring frequently, if serving it warm later.
Gently spoon this puree into bowls to enjoy its velvety texture and balanced sweet-savory flavor. It pairs wonderfully as a side dish with roasted chicken, stirred into warm oatmeal for a nutrient boost, or even spread on toast for a quick, elegant snack. The vibrant green color makes it a visually appealing addition to any meal, and its simplicity ensures it becomes a staple in your kitchen repertoire.
Carrot and Lentil Mash
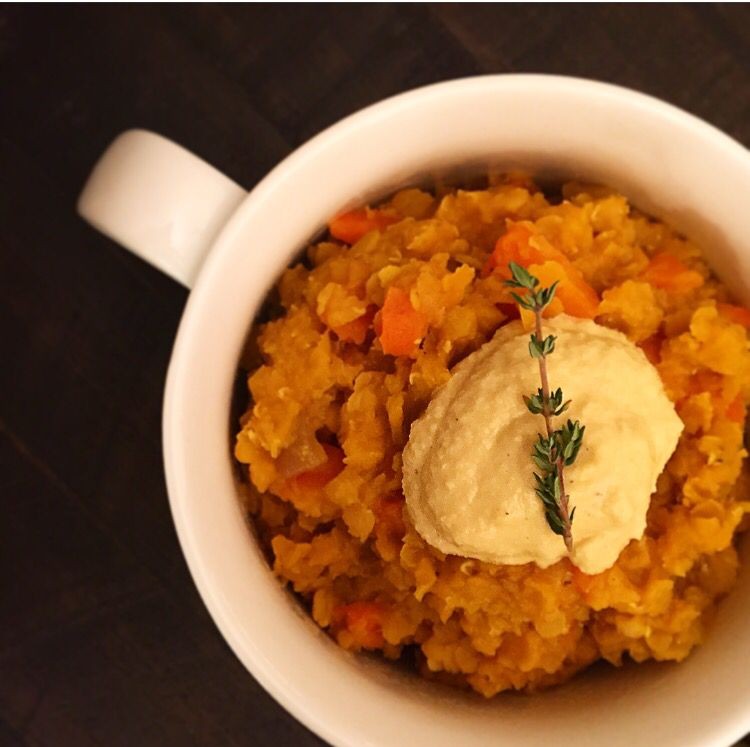
Perfect for a cozy winter evening, this Carrot and Lentil Mash transforms humble ingredients into a comforting, nutritious dish that’s both simple to prepare and deeply satisfying. Let’s walk through each step together, starting with gathering our ingredients and moving methodically through the cooking process.
Serving: 4 | Pre Time: 10 minutes | Cooking Time: 30 minutes
Ingredients
– 1 cup dried brown lentils, rinsed well (I find these hold their shape better than red lentils for this mash)
– 4 medium carrots, peeled and chopped into ½-inch pieces (about 2 cups)
– 1 small yellow onion, finely diced
– 2 cloves garlic, minced
– 4 cups vegetable broth (low-sodium is my preference to control saltiness)
– 2 tablespoons extra virgin olive oil (my go-to for its fruity flavor)
– ½ teaspoon ground cumin
– ¼ teaspoon smoked paprika
– Salt and freshly ground black pepper, to be added during cooking
– Fresh parsley, chopped, for garnish (optional but adds a bright finish)
Instructions
1. Heat the 2 tablespoons of extra virgin olive oil in a large pot or Dutch oven over medium heat for 1 minute until shimmering.
2. Add the finely diced yellow onion and cook for 5 minutes, stirring occasionally, until softened and translucent.
3. Stir in the minced garlic and cook for 1 minute more until fragrant, being careful not to let it burn.
4. Add the chopped carrots and rinsed brown lentils to the pot, stirring to coat them in the oil and aromatics.
5. Pour in the 4 cups of vegetable broth, ensuring it covers the ingredients by about an inch; if needed, add a splash of water.
6. Bring the mixture to a boil over high heat, then reduce the heat to low and cover the pot with a lid.
7. Simmer for 25 minutes, checking halfway to stir and ensure the liquid hasn’t evaporated too quickly—the lentils should be tender but not mushy.
8. After 25 minutes, test a carrot piece with a fork; it should pierce easily. If not, simmer for 5 more minutes.
9. Remove the pot from the heat and drain any excess liquid, reserving about ½ cup in case you need to adjust the mash consistency later.
10. Using a potato masher or immersion blender, mash the mixture until it reaches your desired texture—I like it slightly chunky for more bite.
11. Stir in the ½ teaspoon ground cumin and ¼ teaspoon smoked paprika, seasoning with salt and black pepper to taste; start with ½ teaspoon salt and adjust as needed.
12. If the mash seems too thick, gradually mix in some of the reserved cooking liquid until it’s creamy but still holds its shape.
13. Serve warm, garnished with chopped fresh parsley if using.
A velvety, hearty mash with subtle sweetness from the carrots and earthy depth from the lentils, this dish pairs beautifully with crusty bread or as a side to roasted chicken. For a creative twist, top it with a fried egg or a dollop of Greek yogurt for added richness.
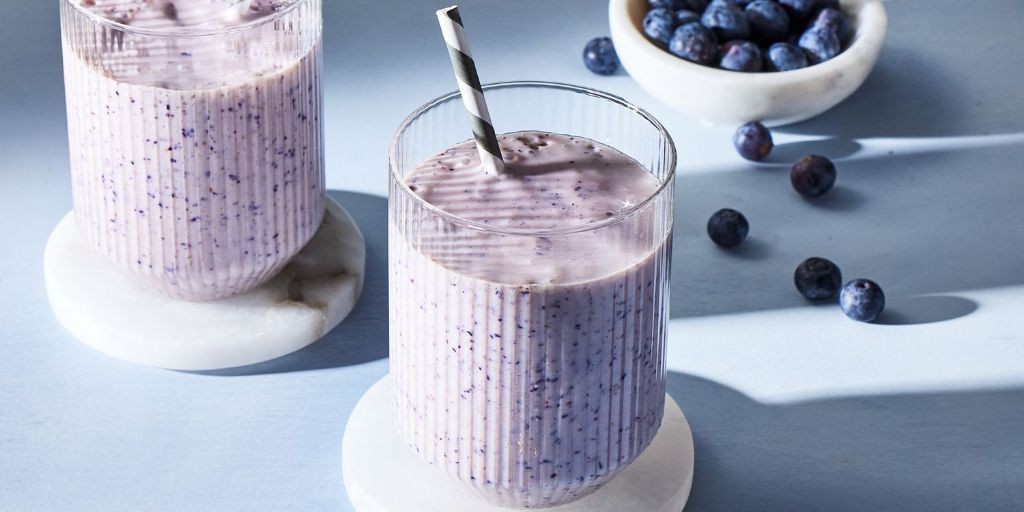
Blueberry Yogurt Smoothie
Venturing into the world of homemade smoothies can transform your morning routine, and this Blueberry Yogurt Smoothie is the perfect place to start. Let’s walk through each simple step together to create a refreshing, nutritious drink that feels like a treat.
Serving: 2 | Pre Time: 5 minutes | Cooking Time: 0 minutes
Ingredients
– 2 cups frozen blueberries (I find frozen berries yield a thicker, frostier texture than fresh)
– 1 cup plain Greek yogurt (full-fat gives the creamiest result, but any variety works)
– 1 cup whole milk (for richness; almond milk is a great dairy-free swap)
– 2 tablespoons honey (local honey adds a lovely floral note, but maple syrup works too)
– 1 teaspoon pure vanilla extract (my secret for depth of flavor)
– A pinch of fine sea salt (just a dash to balance the sweetness)
Instructions
1. Place your blender pitcher on a stable, clean countertop.
2. Add 2 cups of frozen blueberries directly to the blender pitcher.
3. Measure and pour 1 cup of plain Greek yogurt into the pitcher.
4. Pour 1 cup of whole milk over the yogurt and blueberries.
5. Drizzle 2 tablespoons of honey into the mixture.
6. Add 1 teaspoon of pure vanilla extract to the pitcher.
7. Sprinkle a pinch of fine sea salt over all the ingredients.
8. Securely fasten the blender lid until it clicks into place.
9. Start the blender on its lowest speed setting for 10 seconds to begin combining the ingredients.
10. Increase the blender speed to high and blend for 45-60 seconds, or until the mixture is completely smooth with no visible berry chunks. (Tip: If the blender struggles, pause, stir with a spoon, and resume.)
11. Stop the blender and remove the lid carefully.
12. Pour the smoothie evenly into two 16-ounce glasses, filling each about three-quarters full. (Tip: For a frothier top, pour from a slight height.)
13. Serve immediately with a straw or spoon.
Blending these ingredients creates a luxuriously thick, velvety smoothie with a vibrant purple hue. The tangy yogurt perfectly complements the sweet burst of blueberries, while the vanilla adds a warm, aromatic finish. For a fun twist, try layering it with granola in a parfait glass or freezing it into popsicle molds for a cool summer snack.
Quinoa and Apple Porridge

Many chilly winter mornings call for a breakfast that’s both nourishing and comforting, and this quinoa and apple porridge fits the bill perfectly. It’s a simple, wholesome dish that combines the nutty chew of quinoa with sweet, tender apples—ideal for beginners looking to start their day with a warm, satisfying meal.
Serving: 2 | Pre Time: 5 minutes | Cooking Time: 20 minutes
Ingredients
– 1 cup quinoa, rinsed well under cold water to remove any bitterness—I find this step makes all the difference in flavor.
– 2 cups water
– 1 medium apple, peeled and diced into ½-inch pieces; I prefer Honeycrisp for its sweet-tart balance, but any firm variety works.
– ½ cup milk (whole milk adds creaminess, but almond milk is a great dairy-free swap).
– 2 tablespoons maple syrup, plus extra for drizzling—real maple syrup is my go-to for its rich depth.
– ½ teaspoon ground cinnamon, a warm spice that pairs beautifully with the apples.
– Pinch of salt to enhance all the flavors.
Instructions
1. Rinse 1 cup of quinoa under cold running water in a fine-mesh strainer for 1 minute to wash away saponins, which can taste bitter.
2. In a medium saucepan, combine the rinsed quinoa and 2 cups of water, then bring to a boil over high heat.
3. Once boiling, reduce the heat to low, cover the saucepan with a lid, and simmer for 15 minutes, or until the quinoa has absorbed most of the water and appears fluffy.
4. Add 1 diced apple, ½ cup milk, 2 tablespoons maple syrup, ½ teaspoon cinnamon, and a pinch of salt to the saucepan, stirring gently to combine.
5. Cook uncovered over medium-low heat for 5 minutes, stirring occasionally, until the apples soften slightly and the mixture thickens to a porridge-like consistency.
6. Remove the saucepan from the heat and let it sit for 2 minutes to allow the flavors to meld.
7. Divide the porridge evenly between two bowls.
8. Drizzle with additional maple syrup if desired, and serve immediately.
Soft and creamy with a pleasant chew from the quinoa, this porridge offers a cozy blend of sweet apples and warm cinnamon. For a creative twist, top it with toasted nuts or a dollop of Greek yogurt to add crunch and tang.
Zucchini and Pea Puree

Kickstart your meal prep with this vibrant Zucchini and Pea Puree, a versatile side that transforms simple vegetables into a silky, flavorful dish perfect for busy weeknights or elegant dinners. Let’s walk through each step together to ensure success, even if you’re new to purees.
Serving: 4 | Pre Time: 10 minutes | Cooking Time: 15 minutes
Ingredients
– 2 medium zucchinis, chopped into 1-inch pieces (I find this size cooks evenly without turning mushy)
– 1 cup frozen peas (no need to thaw—they’ll cook quickly in the pan)
– 2 tablespoons extra virgin olive oil, my go-to for its fruity aroma
– 1 small yellow onion, finely diced (this adds a sweet base that balances the veggies)
– 2 cloves garlic, minced (freshly minced garlic gives the best punch)
– 1/2 cup vegetable broth (low-sodium lets you control the saltiness)
– 1/4 cup heavy cream (for a rich, velvety texture—you can substitute with coconut milk for a dairy-free version)
– Salt and freshly ground black pepper, to taste (I always grind pepper fresh for maximum flavor)
Instructions
1. Heat 1 tablespoon of extra virgin olive oil in a large skillet over medium heat until it shimmers, about 1 minute.
2. Add the finely diced yellow onion to the skillet and sauté, stirring occasionally, until translucent and soft, about 5 minutes.
3. Stir in the minced garlic and cook for 30 seconds until fragrant, being careful not to let it burn.
4. Add the chopped zucchini pieces to the skillet and cook, stirring every 2 minutes, until they start to soften and turn lightly golden, about 6-8 minutes.
5. Pour in the frozen peas and vegetable broth, then bring the mixture to a gentle simmer over medium-low heat.
6. Cover the skillet with a lid and let it cook for 5 minutes, or until the zucchini is tender when pierced with a fork and the peas are bright green.
7. Remove the skillet from the heat and carefully transfer the vegetable mixture to a blender or food processor.
8. Add the remaining 1 tablespoon of extra virgin olive oil and heavy cream to the blender.
9. Blend on high speed for 1-2 minutes until completely smooth and creamy, scraping down the sides once if needed.
10. Season the puree with salt and freshly ground black pepper, then blend for another 10 seconds to incorporate.
This puree boasts a luxuriously smooth texture with a subtle sweetness from the peas and a hint of earthiness from the zucchini. Serve it warm as a side to grilled chicken or fish, or get creative by using it as a spread on crostini topped with fresh herbs for an easy appetizer.
Chicken and Sweet Corn Puree

Ever find yourself craving something both comforting and elegant? This chicken and sweet corn purée transforms simple ingredients into a velvety, satisfying dish that feels special enough for a holiday meal yet easy enough for a weeknight. Let’s walk through each step together, ensuring you end up with a perfectly smooth, flavorful result.
Serving: 4 | Pre Time: 15 minutes | Cooking Time: 25 minutes
Ingredients
– 1.5 lbs boneless, skinless chicken breasts, cut into 1-inch cubes (I like to pat them dry first for better browning)
– 2 cups fresh or frozen sweet corn kernels (fresh corn in summer is unbeatable, but frozen works great year-round)
– 1 medium yellow onion, finely diced (a sharp knife here makes all the difference)
– 2 cloves garlic, minced (freshly minced garlic gives the best aroma)
– 4 cups low-sodium chicken broth (homemade broth is ideal, but store-bought is fine)
– 1 cup heavy cream (full-fat cream creates the richest texture)
– 2 tbsp unsalted butter (I always use unsalted to control the seasoning)
– 2 tbsp extra virgin olive oil (my go-to for sautéing)
– 1 tsp kosher salt, plus more as needed
– ½ tsp freshly ground black pepper
– Fresh parsley, chopped, for garnish (a handful adds a bright, fresh finish)
Instructions
1. Heat the extra virgin olive oil in a large pot or Dutch oven over medium-high heat until it shimmers, about 2 minutes.
2. Add the diced onion and cook, stirring occasionally, until translucent and soft, about 5 minutes.
3. Stir in the minced garlic and cook until fragrant, about 30 seconds, being careful not to let it burn.
4. Add the chicken cubes in a single layer and season with 1 tsp kosher salt and ½ tsp black pepper; cook until browned on all sides, about 6-8 minutes total.
5. Pour in the chicken broth and bring to a boil, then reduce the heat to low and simmer for 10 minutes, until the chicken is cooked through and tender.
6. Stir in the sweet corn kernels and simmer for an additional 5 minutes, until the corn is heated through and slightly softened.
7. Carefully transfer the mixture to a blender, add the heavy cream and unsalted butter, and blend on high speed until completely smooth and creamy, about 2-3 minutes (tip: hold the lid firmly with a towel to prevent spills from the heat).
8. Return the purée to the pot and warm over low heat for 2-3 minutes, stirring occasionally, until heated through; taste and adjust seasoning with more salt if needed.
9. Ladle into bowls and garnish with chopped fresh parsley.
Rich and velvety, this purée boasts a sweet corn flavor that pairs beautifully with the savory chicken, creating a silky texture that’s almost soup-like. Serve it warm in shallow bowls with a side of crusty bread for dipping, or get creative by using it as a luxurious sauce over grilled chicken or roasted vegetables for an elevated twist.
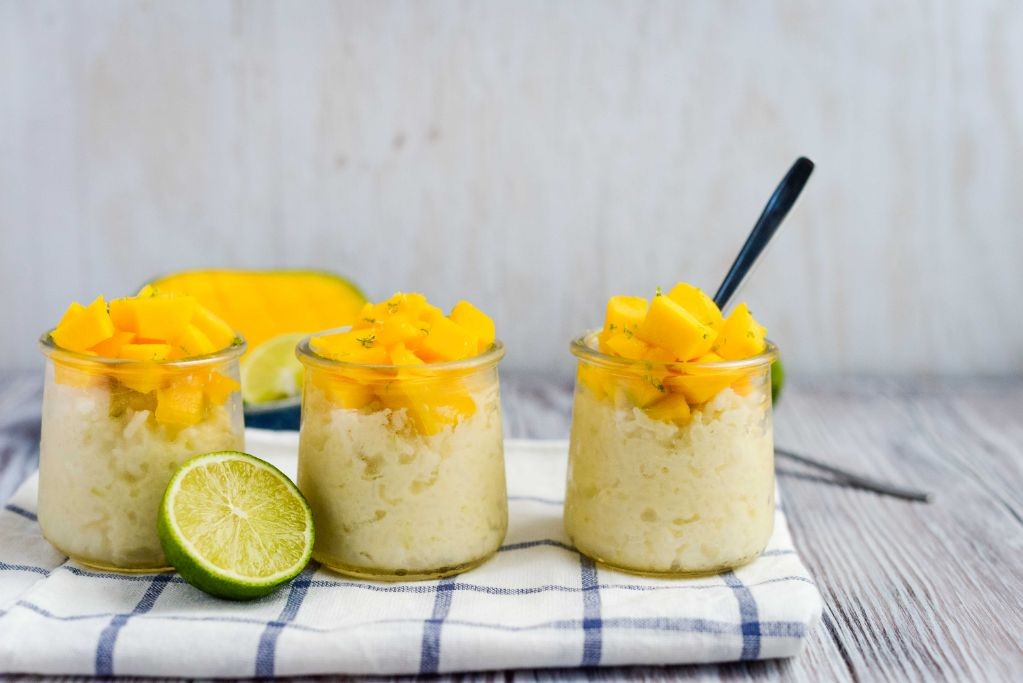
Mango Coconut Rice Pudding
Mango coconut rice pudding is a tropical twist on a classic comfort dessert that’s surprisingly simple to make at home. Many home cooks think rice pudding requires hours of simmering, but this version comes together in under an hour with just a handful of pantry staples. Let’s walk through each step methodically so you end up with a creamy, dreamy treat perfect for any occasion.
Serving: 6 | Pre Time: 10 minutes | Cooking Time: 40 minutes
Ingredients
– 1 cup Arborio rice (I find its starchiness gives the pudding a wonderfully creamy texture)
– 1 (13.5 oz) can full-fat coconut milk (don’t skimp—this is key for richness)
– 2 cups whole milk (room temperature helps it blend smoothly)
– 1/3 cup granulated sugar (adjust slightly if your mango is very sweet)
– 1 teaspoon pure vanilla extract (my go-to for a warm, aromatic note)
– 1/4 teaspoon fine sea salt (just a pinch to balance the sweetness)
– 1 large ripe mango, peeled and diced (about 1.5 cups—look for one that yields slightly to pressure)
– 2 tablespoons unsweetened shredded coconut, for garnish (toasting it first adds a lovely crunch)
Instructions
1. Rinse the Arborio rice under cold water in a fine-mesh strainer until the water runs clear, which removes excess starch and prevents clumping.
2. In a medium saucepan, combine the rinsed rice, coconut milk, whole milk, sugar, and salt.
3. Place the saucepan over medium heat and bring the mixture to a gentle simmer, stirring occasionally with a wooden spoon to prevent sticking.
4. Once simmering, reduce the heat to low and cover the saucepan partially, leaving a small gap for steam to escape.
5. Cook for 30–35 minutes, stirring every 5–7 minutes, until the rice is tender and the liquid has thickened to a creamy consistency. Tip: If it thickens too quickly, add a splash of milk.
6. Remove the saucepan from the heat and stir in the vanilla extract and diced mango, reserving a few mango pieces for garnish.
7. Let the pudding sit, uncovered, for 5 minutes to allow the flavors to meld and the mango to soften slightly.
8. Divide the pudding evenly among 6 serving bowls or glasses.
9. Garnish each serving with the reserved mango pieces and a sprinkle of shredded coconut. Tip: For extra flavor, toast the coconut in a dry skillet over medium heat for 2–3 minutes until golden before garnishing.
10. Serve warm or chilled. Tip: If serving chilled, cover and refrigerate for at least 2 hours, stirring once halfway through to prevent a skin from forming.
Keep in mind that this pudding thickens as it cools, so don’t worry if it seems a bit loose right off the stove. The result is a lusciously creamy texture with pops of sweet mango and a subtle coconut aroma that’s irresistible. For a creative twist, layer it in parfait glasses with crushed graham crackers or drizzle with a bit of honey just before serving.
Beetroot and Apple Mash
Kickstart your holiday cooking with this vibrant, earthy-sweet side dish that’s as simple as it is stunning. Perfect for a festive table or a cozy winter meal, this mash combines the natural sweetness of roasted beets and apples into a comforting, colorful puree. Let’s walk through each step together to ensure your mash turns out perfectly smooth and flavorful.
Serving: 4 | Pre Time: 15 minutes | Cooking Time: 45 minutes
Ingredients
– 2 medium beetroots, peeled and cubed (about 2 cups—I like using golden beets for a milder flavor, but red ones work beautifully too)
– 2 large apples, peeled, cored, and cubed (about 2 cups—I prefer Granny Smith for a tart contrast, but any firm apple will do)
– 2 tablespoons extra virgin olive oil (my go-to for roasting—it adds a lovely richness)
– 1/4 cup vegetable broth or water (for blending—I keep broth on hand for extra depth)
– 1 tablespoon unsalted butter (room temperature is best for easy mixing)
– 1/2 teaspoon salt (I use fine sea salt for even distribution)
– 1/4 teaspoon black pepper (freshly ground gives the best aroma)
Instructions
1. Preheat your oven to 400°F (200°C) and line a baking sheet with parchment paper for easy cleanup.
2. In a large bowl, toss the cubed beetroots and apples with the extra virgin olive oil, ensuring all pieces are evenly coated.
3. Spread the beetroot and apple cubes in a single layer on the prepared baking sheet to promote even roasting.
4. Roast in the preheated oven for 35-40 minutes, or until the beetroots are tender when pierced with a fork and the apples are soft.
5. Remove the baking sheet from the oven and let the roasted beetroots and apples cool for 5 minutes to handle safely.
6. Transfer the roasted beetroots and apples to a food processor or blender.
7. Add the vegetable broth or water to the food processor to help with blending and achieve a smoother consistency.
8. Blend the mixture on high speed for 1-2 minutes, scraping down the sides as needed, until it forms a smooth puree.
9. Add the unsalted butter, salt, and black pepper to the puree in the food processor.
10. Blend again on low speed for 30 seconds, or until the butter is fully incorporated and the seasoning is evenly distributed.
11. Taste the mash and adjust seasoning if necessary, but avoid over-blending to maintain a velvety texture.
12. Transfer the beetroot and apple mash to a serving bowl and serve warm.
Lovingly crafted, this mash boasts a velvety texture with a beautiful pink hue from the beets, balanced by the subtle tartness of apples. For a creative twist, try serving it as a dip with crispy pita chips or as a vibrant base for grilled chicken—it’s versatile enough to shine in any meal setting.
Broccoli and Cauliflower Puree
Zesty yet comforting, this broccoli and cauliflower puree transforms humble vegetables into a silky side dish perfect for holiday meals or cozy weeknights. Let’s walk through each simple step together—you’ll be amazed how a few ingredients create such elegant results.
Serving: 4 | Pre Time: 10 minutes | Cooking Time: 25 minutes
Ingredients
– 1 large head of broccoli, cut into florets (about 4 cups—I always save the stems for stir-fries later)
– 1 medium head of cauliflower, cut into florets (about 4 cups)
– 3 tablespoons unsalted butter, softened (room temp blends smoother)
– ½ cup heavy cream, warmed slightly (cold cream can seize the puree)
– 1 teaspoon kosher salt (I prefer Diamond Crystal for its lighter texture)
– ¼ teaspoon freshly ground black pepper
– ¼ teaspoon garlic powder (optional, but it adds a subtle savory note)
Instructions
1. Fill a large pot with 8 cups of water and bring it to a rolling boil over high heat.
2. Add the broccoli and cauliflower florets to the boiling water and cook for 8–10 minutes, until they are fork-tender but not mushy.
3. Drain the vegetables thoroughly in a colander, then transfer them to a high-speed blender or food processor.
4. Add the softened butter, warmed heavy cream, kosher salt, black pepper, and garlic powder (if using) to the blender.
5. Blend on medium speed for 30 seconds, then increase to high speed for 1–2 minutes, scraping down the sides once, until completely smooth and creamy.
6. Taste and adjust seasoning if needed, but avoid over-blending to prevent a gummy texture.
7. Serve immediately while warm, or transfer to a serving bowl and cover to keep hot.
Perfectly velvety with a subtle sweetness from the cauliflower and a vibrant green hue from the broccoli, this puree pairs beautifully with roasted meats or as a base for grilled fish. Try swirling in a tablespoon of pesto or topping with crispy fried shallots for an extra layer of flavor that will impress any dinner guest.
Pumpkin and Pear Blend

Mixing seasonal produce creates some of the most comforting dishes, and this Pumpkin and Pear Blend is a perfect example—it’s a warm, spiced puree that feels like autumn in a bowl, ideal for a cozy holiday side or a simple, elegant dessert. Let’s walk through each step together to create this smooth, flavorful blend.
Serving: 6 | Pre Time: 15 minutes | Cooking Time: 30 minutes
Ingredients
– 2 cups pumpkin puree (I always use canned for convenience, but homemade works too)
– 2 ripe pears, peeled and diced (Bartlett pears are my favorite for their sweet, juicy texture)
– 1/4 cup maple syrup (pure grade A adds a rich depth—I avoid artificial syrups)
– 1/2 cup heavy cream (room temperature blends more smoothly)
– 1 tsp ground cinnamon (a fragrant touch that enhances the warmth)
– 1/4 tsp ground nutmeg (freshly grated nutmeg is my go-to for the best flavor)
– 2 tbsp unsalted butter (I prefer unsalted to control the saltiness)
– 1/4 tsp salt (a pinch balances the sweetness perfectly)
Instructions
1. In a medium saucepan over medium heat, melt 2 tbsp unsalted butter until it’s just foamy, about 1 minute.
2. Add 2 ripe pears, peeled and diced, to the saucepan and sauté them for 5-7 minutes, stirring occasionally, until they soften and turn slightly golden—this caramelizes their natural sugars for extra flavor.
3. Stir in 2 cups pumpkin puree, 1/4 cup maple syrup, 1 tsp ground cinnamon, 1/4 tsp ground nutmeg, and 1/4 tsp salt, mixing everything thoroughly to combine.
4. Reduce the heat to low and let the mixture simmer gently for 15 minutes, stirring every few minutes to prevent sticking—this allows the flavors to meld beautifully.
5. Remove the saucepan from the heat and let it cool slightly for 5 minutes; this prevents the cream from curdling when added.
6. Gradually pour in 1/2 cup heavy cream while stirring continuously until fully incorporated and the blend is smooth and creamy.
7. For a silky texture, transfer the mixture to a blender and puree on high speed for 1-2 minutes until completely smooth, or use an immersion blender directly in the pan.
8. Return the puree to the saucepan and warm it over low heat for 2-3 minutes, stirring constantly, until heated through—avoid boiling to keep it velvety.
Vibrant and aromatic, this blend boasts a lusciously smooth texture with sweet pear notes balancing the earthy pumpkin. Serve it warm as a side dish with roasted meats, drizzle it over vanilla ice cream for a decadent dessert, or enjoy it straight from a mug on a chilly evening—it’s versatile enough to shine in any setting.
Lentil and Vegetable Stew
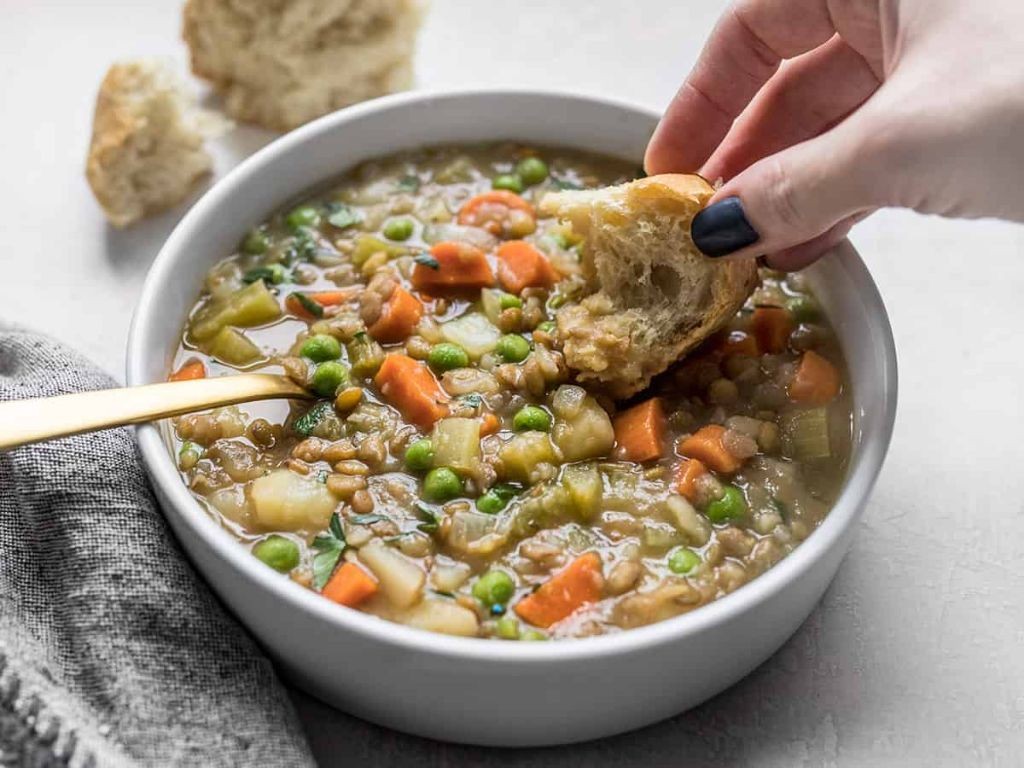
Just imagine coming home to a pot of this hearty Lentil and Vegetable Stew simmering on the stove—it’s the ultimate comforting, one-pot meal that’s both nourishing and incredibly satisfying, perfect for a cozy winter evening like today.
Serving: 6 | Pre Time: 15 minutes | Cooking Time: 45 minutes
Ingredients
– 2 tablespoons extra virgin olive oil (my go-to for its rich flavor)
– 1 large yellow onion, diced (I like a fine dice for even cooking)
– 3 cloves garlic, minced (freshly minced makes all the difference)
– 2 large carrots, peeled and sliced into ¼-inch rounds
– 2 celery stalks, chopped (use the inner stalks for tenderness)
– 1 teaspoon dried thyme (rubbed between your palms to release the oils)
– 1 cup brown lentils, rinsed and picked over (no soaking needed!)
– 4 cups vegetable broth (low-sodium lets you control the salt)
– 1 (14.5-ounce) can diced tomatoes, undrained
– 2 cups chopped kale, stems removed (I prefer curly kale for texture)
– Salt and black pepper (to season as you go)
Instructions
1. Heat the extra virgin olive oil in a large Dutch oven or heavy-bottomed pot over medium heat until shimmering, about 2 minutes.
2. Add the diced yellow onion and cook, stirring occasionally, until softened and translucent, about 5 minutes.
3. Stir in the minced garlic and cook for 1 minute until fragrant, being careful not to let it burn.
4. Add the sliced carrots and chopped celery, cooking for another 5 minutes to soften slightly.
5. Sprinkle in the dried thyme and cook for 30 seconds to toast the herbs, which enhances their flavor.
6. Pour in the rinsed brown lentils, vegetable broth, and undrained diced tomatoes, stirring to combine.
7. Bring the mixture to a boil over high heat, then reduce the heat to low, cover the pot, and simmer for 25 minutes.
8. After 25 minutes, check that the lentils are tender but not mushy by tasting one; if needed, simmer for up to 5 more minutes.
9. Stir in the chopped kale and cook uncovered for 5 minutes until wilted and bright green.
10. Season with salt and black pepper to your preference, starting with ½ teaspoon of salt and a few grinds of pepper, then adjust as needed.
You’ll love the stew’s thick, brothy texture with tender lentils and vegetables that hold their shape. The flavors deepen as it sits, making it even better the next day—try serving it over a scoop of creamy mashed potatoes or with a slice of crusty bread for dipping.
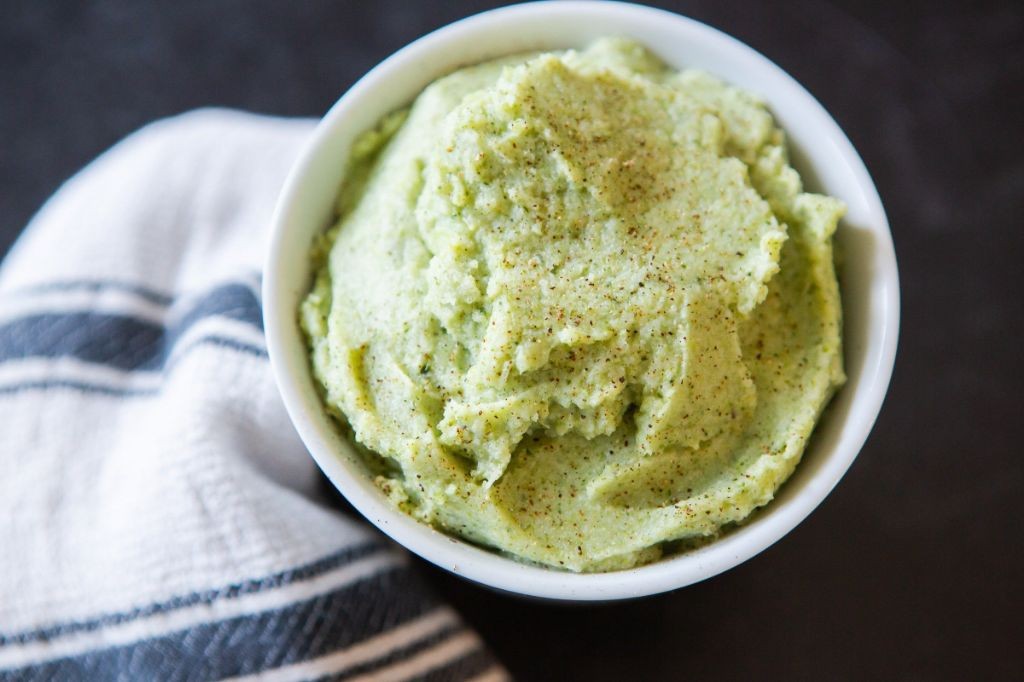
Pear and Kale Puree
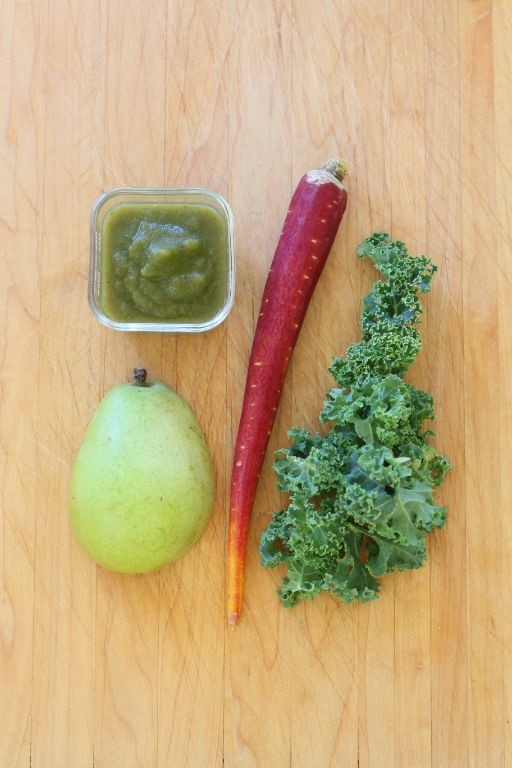
Begin by exploring a surprisingly delightful puree that transforms humble ingredients into a vibrant, nutrient-packed dish perfect for holiday meals or everyday nourishment. This pear and kale puree combines sweet and earthy flavors with a velvety texture that even picky eaters will enjoy, and it’s simpler to make than you might think—let’s walk through it step by step.
Serving: 4 | Pre Time: 15 minutes | Cooking Time: 20 minutes
Ingredients
– 2 ripe pears, peeled and cored (I like Bartlett pears for their sweet, juicy flesh)
– 4 cups fresh kale, stems removed and roughly chopped (curly kale adds a nice texture, but any variety works)
– 1 tablespoon extra virgin olive oil (my go-to for a light, fruity flavor)
– 1/2 cup vegetable broth (homemade or low-sodium store-bought for better control)
– 1/4 teaspoon salt (I prefer fine sea salt to blend evenly)
– 1/8 teaspoon black pepper (freshly ground for a subtle kick)
Instructions
1. Heat the extra virgin olive oil in a large skillet over medium heat until it shimmers, about 1 minute.
2. Add the chopped kale to the skillet and sauté for 5 minutes, stirring occasionally, until the leaves wilt and turn bright green.
3. Pour in the vegetable broth and bring the mixture to a gentle simmer, then reduce the heat to low and cook for 10 minutes to soften the kale fully.
4. While the kale cooks, peel and core the pears, then chop them into 1-inch chunks for even blending later.
5. Transfer the cooked kale and any remaining broth to a high-speed blender or food processor.
6. Add the chopped pears, salt, and black pepper to the blender with the kale.
7. Blend the mixture on high speed for 2-3 minutes, scraping down the sides once, until it becomes completely smooth and creamy.
8. Taste the puree and adjust seasoning if needed, but avoid over-blending to prevent it from becoming too thin.
9. Serve the puree immediately while warm, or let it cool to room temperature for a thicker consistency.
Just imagine the silky-smooth texture that glides across your palate, with the natural sweetness of pears balancing the earthy kale notes. This puree shines as a side dish for roasted meats or a creative spread on whole-grain toast, offering a burst of color and flavor that elevates any meal without overwhelming it.
Turkey and Sweet Potato Mash
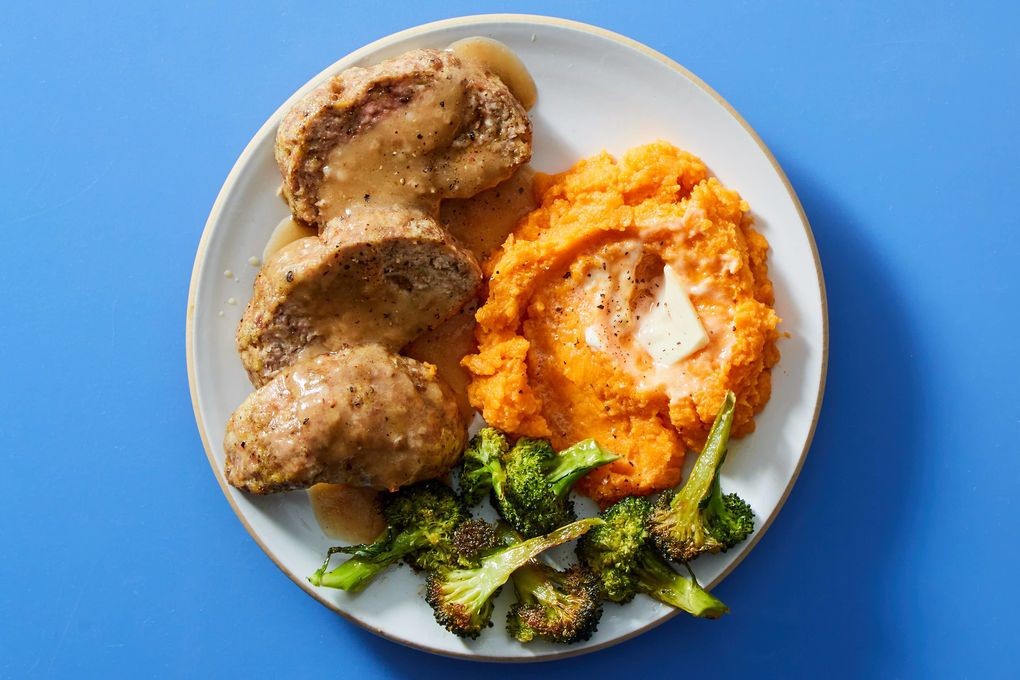
Savor the cozy flavors of this comforting turkey and sweet potato mash, perfect for chilly evenings or holiday gatherings. This straightforward recipe transforms simple ingredients into a hearty, satisfying dish that even beginners can master with confidence. Let’s walk through each step together to create a meal that’s both nourishing and delicious.
Serving: 4 | Pre Time: 15 minutes | Cooking Time: 30 minutes
Ingredients
– 1 lb ground turkey (I like 93% lean for a good balance of flavor and healthiness)
– 2 large sweet potatoes, peeled and cubed (about 4 cups—look for firm, smooth skins)
– 1/2 cup chicken broth (low-sodium is my preference to control saltiness)
– 2 tbsp unsalted butter (room temperature for easier mixing)
– 1/4 cup milk (whole milk gives the mash a creamier texture)
– 1 tsp dried thyme (fresh thyme works too, but dried is convenient)
– 1/2 tsp garlic powder (a pantry staple that adds depth)
– 1/4 tsp black pepper (freshly ground if you have it)
– 1 tbsp olive oil (extra virgin olive oil is my go-to for sautéing)
Instructions
1. Place the peeled and cubed sweet potatoes in a large pot and cover them with cold water by about 1 inch.
2. Bring the water to a boil over high heat, then reduce to a simmer and cook for 15–20 minutes until the sweet potatoes are fork-tender—test by piercing with a fork; they should slide off easily.
3. While the sweet potatoes cook, heat 1 tbsp olive oil in a skillet over medium heat until it shimmers, about 1 minute.
4. Add the ground turkey to the skillet, breaking it into small pieces with a spatula as it cooks for 8–10 minutes until no pink remains and it’s lightly browned.
5. Stir in 1/2 cup chicken broth, 1 tsp dried thyme, 1/2 tsp garlic powder, and 1/4 tsp black pepper into the turkey, then simmer for 5 minutes until the liquid reduces slightly—this helps the flavors meld.
6. Drain the cooked sweet potatoes thoroughly in a colander to remove excess water, which prevents a watery mash.
7. Return the drained sweet potatoes to the pot and add 2 tbsp unsalted butter and 1/4 cup milk, then mash with a potato masher or fork until smooth and creamy, avoiding overmixing to keep it fluffy.
8. Gently fold the turkey mixture into the mashed sweet potatoes until just combined, being careful not to overmix to maintain texture.
9. Serve the turkey and sweet potato mash immediately while warm. Marvel at how this dish combines the savory richness of turkey with the natural sweetness of potatoes, creating a velvety, comforting texture. For a creative twist, top it with a sprinkle of crispy fried onions or serve alongside a simple green salad to balance the heartiness.
Apricot and Brown Rice Cereal
This wholesome apricot and brown rice cereal transforms simple pantry staples into a comforting breakfast that feels both nourishing and indulgent. The combination of chewy dried fruit and nutty whole grains creates a satisfying texture, while a touch of cinnamon and vanilla warms it up perfectly for a cozy morning. Let’s walk through the process together, step by step, to ensure your cereal turns out perfectly every time.
Serving: 4 | Pre Time: 5 minutes | Cooking Time: 25 minutes
Ingredients
– 1 cup brown rice, rinsed well to remove excess starch (I find this makes for a less sticky final texture)
– 3 cups water
– 1/2 cup dried apricots, chopped into small, bite-sized pieces (I prefer unsulfured apricots for their deeper flavor)
– 1/4 cup pure maple syrup, the real stuff makes all the difference here
– 1 teaspoon ground cinnamon
– 1/2 teaspoon pure vanilla extract
– 1/4 teaspoon fine sea salt
– 1 cup whole milk or your preferred milk alternative, for serving
Instructions
1. Rinse 1 cup of brown rice under cool running water in a fine-mesh strainer until the water runs mostly clear.
2. Combine the rinsed rice and 3 cups of water in a medium saucepan.
3. Place the saucepan over high heat and bring the mixture to a rolling boil.
4. Once boiling, immediately reduce the heat to low and cover the saucepan with a tight-fitting lid.
5. Simmer the rice gently for 25 minutes; do not lift the lid during this time to ensure even cooking. (Tip: Setting a timer is crucial here to prevent overcooking.)
6. After 25 minutes, remove the saucepan from the heat and let it stand, covered, for 10 full minutes to allow the rice to finish steaming.
7. While the rice rests, chop 1/2 cup of dried apricots into small, uniform pieces.
8. Carefully uncover the saucepan and fluff the cooked rice with a fork.
9. Add the chopped apricots, 1/4 cup maple syrup, 1 teaspoon cinnamon, 1/2 teaspoon vanilla extract, and 1/4 teaspoon salt to the hot rice.
10. Gently fold all the ingredients together until they are evenly distributed and the apricots begin to soften slightly from the residual heat. (Tip: Folding, rather than stirring vigorously, helps keep the rice grains intact.)
11. Divide the warm cereal evenly among four serving bowls.
12. Pour 1/4 cup of cold milk over each serving just before eating. (Tip: Adding the milk at the table keeps the cereal from becoming soggy if there are leftovers.)
Just spooned into a bowl, this cereal offers a delightful contrast of soft, creamy rice and plump, sweet-tart apricots. The warmth of the cinnamon and the richness of the vanilla make it feel like a special treat, yet it’s wonderfully simple. For a creative twist, try topping it with a sprinkle of toasted nuts or a dollop of Greek yogurt for added protein.
Green Bean and Potato Puree
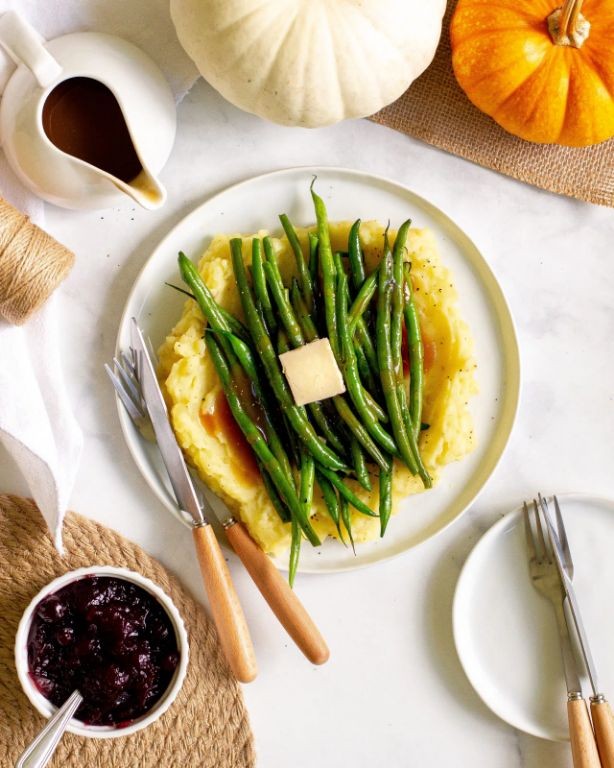
Holiday meals often need a comforting side dish that feels special yet simple enough for beginners to master. Green bean and potato puree is that perfect blend—creamy, vibrant, and a guaranteed crowd-pleaser that comes together with just a handful of ingredients. Let’s walk through it step-by-step so you can serve it with confidence.
Serving: 4 | Pre Time: 10 minutes | Cooking Time: 25 minutes
Ingredients
– 1 pound Yukon Gold potatoes, peeled and quartered (their buttery texture is key for smoothness)
– 8 ounces fresh green beans, trimmed and cut into 1-inch pieces (I always snap off the ends by hand for that rustic feel)
– 1/2 cup heavy cream, warmed (room temp helps it blend seamlessly)
– 3 tablespoons unsalted butter, cubed (extra for a richer finish)
– 1 teaspoon kosher salt, plus more for seasoning
– 1/4 teaspoon freshly ground black pepper
– 1/4 cup grated Parmesan cheese (I prefer freshly grated—it melts better)
Instructions
1. Place the quartered potatoes in a medium pot and cover with cold water by 1 inch; add 1 teaspoon of kosher salt.
2. Bring the pot to a boil over high heat, then reduce to a simmer and cook for 15 minutes, or until the potatoes are fork-tender.
3. While the potatoes cook, steam the green beans in a separate pot with 1/2 inch of water for 5–7 minutes, until bright green and tender-crisp—this preserves their color and nutrients.
4. Drain the potatoes thoroughly and return them to the pot over low heat for 1 minute to evaporate excess moisture, which prevents a watery puree.
5. Transfer the potatoes and steamed green beans to a food processor or blender.
6. Add the warmed heavy cream, cubed butter, black pepper, and Parmesan cheese to the processor.
7. Pulse the mixture on low speed for 30 seconds, then increase to high and blend for 1–2 minutes until completely smooth, scraping down the sides as needed.
8. Taste and adjust seasoning with additional salt if desired, blending briefly to incorporate.
9. Serve immediately while warm. Velvety and rich, this puree boasts a subtle earthiness from the green beans balanced by the creamy potatoes. For a festive twist, top it with crispy fried shallots or a drizzle of truffle oil to elevate any holiday table.
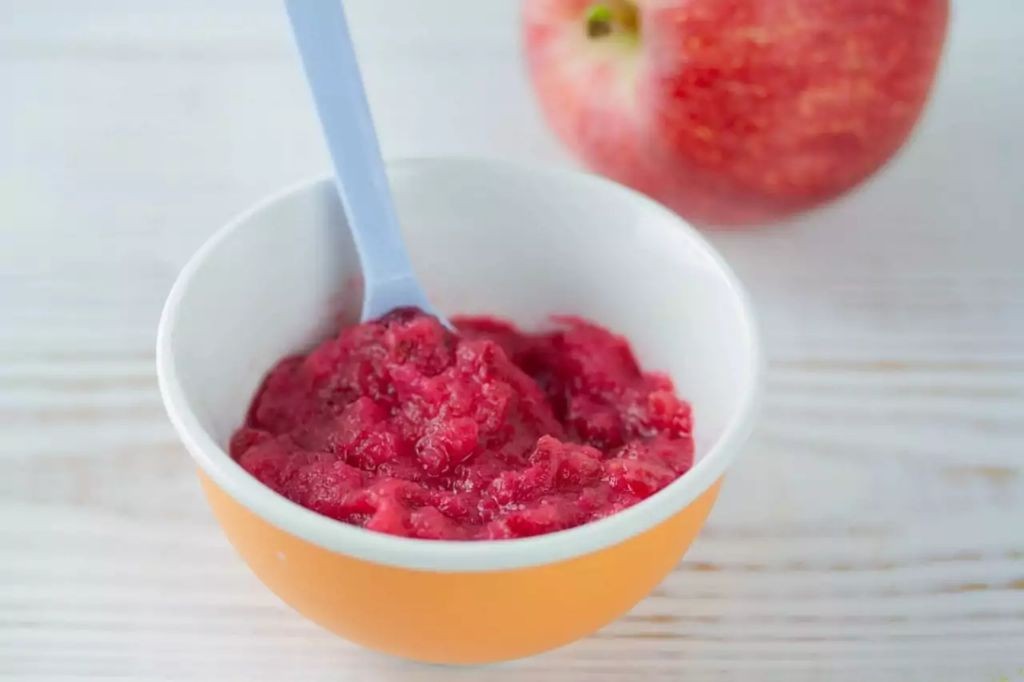
Peach and Raspberry Compote

Unwrap the vibrant flavors of summer with this simple peach and raspberry compote that transforms basic fruit into a versatile topping. Using just a few ingredients, you’ll create a sweet-tart sauce perfect for elevating breakfasts or desserts in under 30 minutes. Let’s walk through each step together to ensure your compote turns out perfectly balanced every time.
Serving: 4 | Pre Time: 10 minutes | Cooking Time: 15 minutes
Ingredients
– 3 cups fresh peaches, peeled and diced (I prefer slightly firm peaches for better texture)
– 1 cup fresh raspberries (frozen work too, but fresh give brighter flavor)
– 1/2 cup granulated sugar (adjust slightly if your peaches are very sweet)
– 1 tablespoon fresh lemon juice (bottled works, but fresh adds zing)
– 1/4 teaspoon vanilla extract (pure vanilla is my go-to for depth)
– 1/4 cup water
Instructions
1. Combine the diced peaches, raspberries, sugar, lemon juice, vanilla extract, and water in a medium saucepan.
2. Place the saucepan over medium heat and stir gently until the sugar dissolves completely, about 2-3 minutes.
3. Bring the mixture to a gentle boil, then immediately reduce the heat to low to maintain a simmer.
4. Simmer uncovered for 10-12 minutes, stirring occasionally with a wooden spoon to prevent sticking.
5. Use a potato masher or fork to gently crush about half of the fruit pieces against the side of the pan for a chunkier texture.
6. Continue simmering for another 3-5 minutes until the compote thickens slightly and coats the back of a spoon.
7. Remove the saucepan from the heat and let the compote cool in the pan for 5 minutes.
8. Transfer the compote to a clean glass jar or bowl using a spatula to scrape all the sauce.
9. Cover and refrigerate for at least 1 hour before serving to allow flavors to meld.
Keep in mind that this compote will thicken further as it cools, resulting in a luscious, spoonable consistency with bursts of sweet peach and tart raspberry. Try it warm over vanilla ice cream for an instant dessert, or chilled on morning yogurt—the possibilities are as endless as summer itself.
Summary
Brimming with wholesome goodness, these 20 recipes are your toolkit for nourishing your little one’s growth and taste buds. We hope you find some new family favorites! Please give a few recipes a try, leave a comment telling us which ones your baby loved, and if you found this helpful, we’d be so grateful if you shared it on Pinterest to help other parents. Happy cooking!


