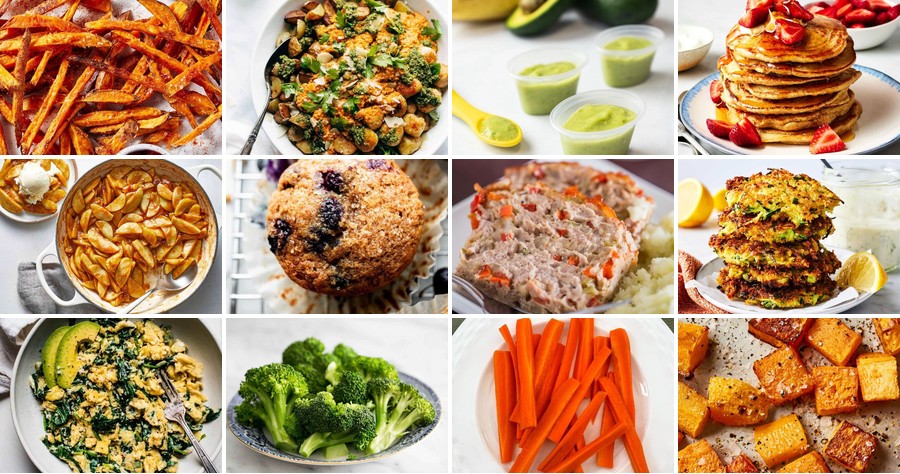
Hey there, busy parents! Have you been curious about baby-led weaning but feel overwhelmed by where to start? You’re in the right place. This roundup is your friendly guide to nutritious, beginner-friendly recipes that make mealtime fun and stress-free for both you and your little one. Let’s dive into these delicious ideas that will have your baby exploring new flavors with gusto!
Avocado and Banana Mash

Unbelievably, we’ve stumbled upon the ultimate kitchen hack that’s about to make your breakfast (or snack-time) a creamy, dreamy delight. Forget complicated recipes—this Avocado and Banana Mash is so simple, it practically makes itself while you sip your coffee. Let’s dive into this green-and-yellow wonder that’s as fun to whip up as it is to devour!
Serving: 2 | Pre Time: 5 minutes | Cooking Time: 0 minutes
Ingredients
– For the mash:
– 1 ripe avocado, peeled and pitted
– 1 ripe banana, peeled
– 1 tbsp honey
– 1 tsp fresh lime juice
– Pinch of salt
– For serving (optional):
– 2 tbsp granola
– Fresh berries (e.g., ¼ cup strawberries)
Instructions
1. Place the avocado and banana in a medium mixing bowl.
2. Use a fork to mash them together until smooth, with just a few small chunks for texture—this should take about 2 minutes. Tip: If your avocado is firm, let it sit at room temperature for 10 minutes first to soften up.
3. Add the honey, lime juice, and salt to the bowl.
4. Stir everything with a spoon until fully combined, about 1 minute. Tip: Taste it now and adjust with an extra squeeze of lime if you like it tangier.
5. Divide the mash evenly between two serving bowls.
6. Top each bowl with 1 tbsp of granola and a handful of fresh berries, if using. Tip: For a crunchier twist, toast the granola in a dry skillet over medium heat for 3–4 minutes until golden before adding.
Delightfully creamy and subtly sweet, this mash boasts a velvety texture that pairs perfectly with the crunch of granola. Serve it chilled for a refreshing treat, or spread it on toast for a quick upgrade—it’s so versatile, you’ll want to make it every morning!
Sweet Potato Fries

Crispy, golden, and downright addictive, sweet potato fries are the veggie side dish that secretly dreams of being the main event. Forget boring spuds—these orange beauties bring a natural sweetness and vibrant color that’ll make your taste buds do a happy dance. Let’s turn those humble tubers into crispy, oven-baked perfection that even the pickiest eaters will devour.
Serving: 4 | Pre Time: 15 minutes | Cooking Time: 25 minutes
Ingredients
For the fries:
– 2 large sweet potatoes (about 1.5 lbs), peeled and cut into ¼-inch thick matchsticks
– 2 tbsp olive oil
– 1 tsp paprika
– ½ tsp garlic powder
– ½ tsp salt
– ¼ tsp black pepper
For the dipping sauce (optional but highly recommended):
– ½ cup mayonnaise
– 1 tbsp ketchup
– 1 tsp smoked paprika
– 1 tsp lemon juice
Instructions
1. Preheat your oven to 425°F and line a large baking sheet with parchment paper.
2. In a large bowl, toss the sweet potato matchsticks with olive oil until evenly coated.
3. Sprinkle paprika, garlic powder, salt, and black pepper over the potatoes, then toss again to distribute the spices evenly.
4. Spread the fries in a single layer on the prepared baking sheet, ensuring they aren’t touching—this helps them crisp up instead of steaming.
5. Bake for 15 minutes, then flip each fry carefully using tongs.
6. Return to the oven and bake for another 10–15 minutes, until the edges are crispy and lightly browned.
7. While the fries bake, whisk together mayonnaise, ketchup, smoked paprika, and lemon juice in a small bowl for the dipping sauce.
8. Remove fries from the oven and let them cool on the sheet for 5 minutes—they’ll crisp up further as they rest.
These fries emerge with a satisfying crunch on the outside and a tender, creamy interior that’s subtly sweet. Try serving them piled high in a paper cone for a fun, food-truck vibe, or alongside a juicy burger to steal the spotlight.
Steamed Broccoli Florets
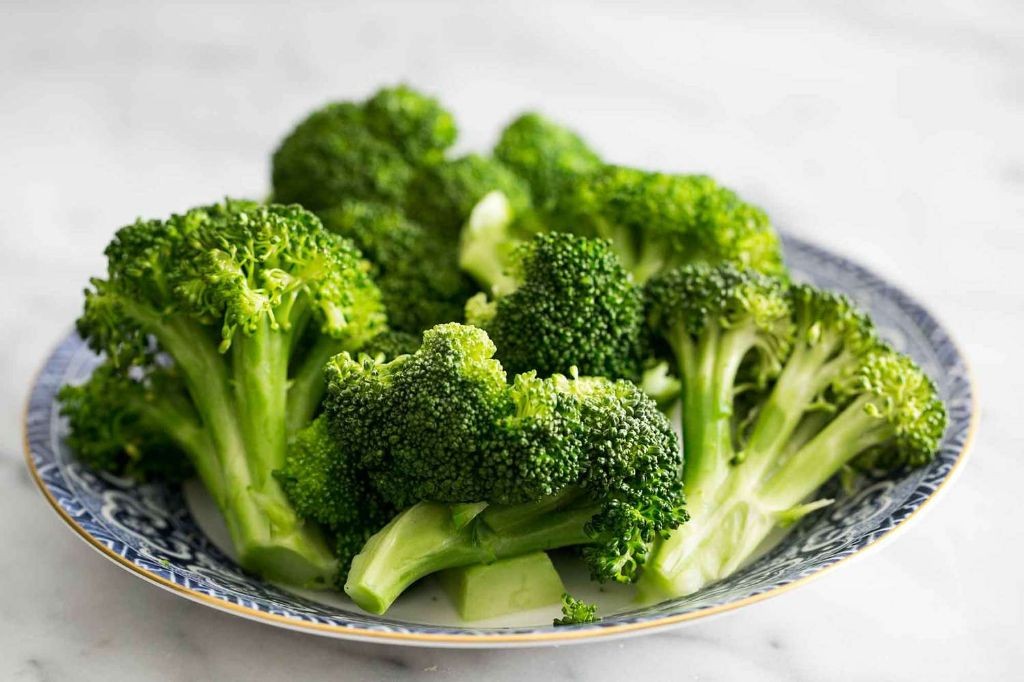
Now, let’s be real—steamed broccoli florets are the unsung heroes of the veggie world, often relegated to sad, soggy sidekick status. But with a few clever tricks, we can transform these humble green gems into a vibrant, crisp-tender delight that might just steal the show from your main dish! It’s time to give broccoli the playful, flavorful upgrade it deserves, turning ‘meh’ into ‘more, please!’ in minutes.
Serving: 4 | Pre Time: 5 minutes | Cooking Time: 5 minutes
Ingredients
For the broccoli:
– 1 pound fresh broccoli florets
– 1 cup water
For finishing (optional but recommended):
– 2 tablespoons unsalted butter
– 1 tablespoon fresh lemon juice
– 1/4 teaspoon salt
– 1/8 teaspoon black pepper
Instructions
1. Rinse 1 pound of fresh broccoli florets under cold running water in a colander to remove any dirt, then pat them completely dry with paper towels—this helps them steam evenly without getting waterlogged.
2. Pour 1 cup of water into a medium saucepan and place a steamer basket inside, ensuring the water level sits just below the basket to prevent the broccoli from boiling instead of steaming.
3. Arrange the dried broccoli florets in a single layer in the steamer basket, avoiding overcrowding so steam can circulate freely for uniform cooking.
4. Cover the saucepan with a tight-fitting lid and set it over high heat, bringing the water to a rolling boil—you’ll hear a steady hissing sound when it’s ready.
5. Once boiling, reduce the heat to medium-high to maintain a vigorous steam, and cook the broccoli for 4–5 minutes, checking at 4 minutes by piercing a floret with a fork; it should be tender but still bright green and slightly crisp, not mushy.
6. Immediately remove the saucepan from the heat and transfer the steamed broccoli to a serving bowl using tongs to stop the cooking process and preserve that vibrant color.
7. If using the finishing ingredients, melt 2 tablespoons of unsalted butter in a small microwave-safe bowl for 20–30 seconds until liquid, then whisk in 1 tablespoon of fresh lemon juice, 1/4 teaspoon of salt, and 1/8 teaspoon of black pepper.
8. Drizzle the butter-lemon mixture over the hot broccoli and toss gently to coat evenly, letting the residual heat meld the flavors for a glossy, aromatic finish.
Kick back and savor those perfectly steamed florets—they’ll be tender with a satisfying crunch, infused with a zesty, buttery brightness that makes them irresistible straight from the bowl. Try piling them over creamy mashed potatoes for a cozy twist, or chill them and toss into a salad for a refreshing crunch that’ll have everyone asking for your secret!
Soft Carrot Sticks

Veggie lovers, rejoice! We’re about to transform the humble carrot from a crunchy salad cruncher into a melt-in-your-mouth, sweet, and savory side dish that will have you questioning why you ever ate them raw. Forget the boring crudité platter; these soft carrot sticks are the cozy, comforting upgrade your dinner plate has been dreaming of.
Serving: 4 | Pre Time: 10 minutes | Cooking Time: 25 minutes
Ingredients
For the Carrots:
– 1 pound of carrots, peeled and cut into 3-inch long sticks
– 2 tablespoons of unsalted butter
– 1/4 cup of water
– 1 tablespoon of honey
– 1/2 teaspoon of salt
For Finishing:
– 1 tablespoon of fresh chopped parsley
Instructions
1. Peel 1 pound of carrots and cut them into uniform 3-inch long sticks, about 1/2-inch thick, to ensure even cooking.
2. In a large skillet or saucepan, melt 2 tablespoons of unsalted butter over medium heat.
3. Add the carrot sticks to the skillet and toss to coat them evenly in the melted butter. Cook for 2 minutes, stirring occasionally, to lightly sauté them.
4. Pour in 1/4 cup of water and 1 tablespoon of honey directly over the carrots. Tip: The water creates steam to soften the carrots while the honey caramelizes for flavor.
5. Sprinkle 1/2 teaspoon of salt evenly over the carrots and stir to combine all ingredients.
6. Bring the liquid to a gentle simmer, then reduce the heat to low and cover the skillet with a tight-fitting lid.
7. Let the carrots simmer gently for 15-20 minutes. Tip: Check at 15 minutes by piercing a carrot with a fork; it should be tender but not mushy. If needed, cook for an additional 5 minutes.
8. Remove the lid and increase the heat to medium. Cook, stirring frequently, for 3-5 minutes until the remaining liquid reduces to a glossy glaze that coats the carrots. Tip: Don’t walk away here—keep stirring to prevent burning and to achieve that perfect sticky coating.
9. Turn off the heat and stir in 1 tablespoon of fresh chopped parsley until evenly distributed.
10. Transfer the glazed carrot sticks to a serving dish immediately. They’re wonderfully tender with a subtle sweetness from the honey and a rich, buttery finish. Serve them warm alongside roasted chicken or flaky fish, or get creative by mashing them lightly with a fork for a rustic carrot side puree.
Scrambled Eggs with Spinach

Let’s be real—some mornings, you need a breakfast that’s faster than your coffee brewing and more satisfying than scrolling through social media. This scrambled eggs with spinach is your kitchen superhero, ready to rescue you from bland breakfasts with a pop of green and a whole lot of flavor. It’s the perfect way to sneak in veggies before you’ve even had your first sip of caffeine!
Serving: 2 | Pre Time: 5 minutes | Cooking Time: 10 minutes
Ingredients
For the eggs:
– 4 large eggs
– 2 tablespoons whole milk
– 1/4 teaspoon salt
– 1/8 teaspoon black pepper
– 1 tablespoon unsalted butter
For the spinach:
– 2 cups fresh spinach, roughly chopped
– 1/4 cup shredded cheddar cheese
Instructions
1. Crack 4 large eggs into a medium bowl. Add 2 tablespoons whole milk, 1/4 teaspoon salt, and 1/8 teaspoon black pepper. Whisk vigorously for 30 seconds until the mixture is fully combined and slightly frothy—this adds air for fluffier eggs!
2. Heat a non-stick skillet over medium-low heat. Add 1 tablespoon unsalted butter and let it melt completely, swirling to coat the pan evenly.
3. Pour the egg mixture into the skillet. Let it sit undisturbed for 20 seconds until the edges start to set.
4. Gently push the eggs from the edges toward the center with a spatula, creating soft curds. Repeat this process every 15 seconds for about 3-4 minutes until the eggs are mostly set but still slightly wet.
5. Add 2 cups roughly chopped fresh spinach to the skillet. Stir gently for 1-2 minutes until the spinach wilts and turns bright green—don’t overcook it, or it’ll get soggy!
6. Sprinkle 1/4 cup shredded cheddar cheese over the eggs. Remove the skillet from heat and let it rest for 1 minute, allowing the residual heat to melt the cheese perfectly.
7. Serve immediately on warm plates. For extra flair, top with a sprinkle of extra cheese or a dash of hot sauce.
Craving something creamy and vibrant? These eggs turn out luxuriously soft with little pockets of melted cheddar, while the spinach adds a fresh, earthy bite that balances the richness. Try piling them onto toasted whole-grain bread or wrapping them in a warm tortilla for a breakfast burrito that’ll make your morning routine feel like a celebration!
Mini Chicken Meatballs

Hold onto your aprons, folks, because we’re about to make the most adorable, bite-sized flavor bombs your kitchen has ever seen! These mini chicken meatballs are the perfect party starter, weeknight hero, or ‘I-deserve-a-treat’ snack that comes together with a wink and a sizzle. They’re so good, you might just forget to share.
Serving: 4 | Pre Time: 15 minutes | Cooking Time: 12 minutes
Ingredients
For the Meatballs:
– 1 lb ground chicken
– 1/2 cup panko breadcrumbs
– 1/4 cup grated Parmesan cheese
– 1 large egg
– 2 cloves garlic, minced
– 1 tbsp fresh parsley, finely chopped
– 1 tsp dried oregano
– 1/2 tsp salt
– 1/4 tsp black pepper
For Cooking:
– 2 tbsp olive oil
Instructions
1. In a large mixing bowl, combine the ground chicken, panko breadcrumbs, grated Parmesan cheese, egg, minced garlic, chopped parsley, dried oregano, salt, and black pepper.
2. Use your hands to gently mix all ingredients until just combined; avoid overmixing to keep the meatballs tender.
3. Scoop about 1 tablespoon of the mixture and roll it between your palms to form a 1-inch meatball. Repeat until all mixture is used, placing meatballs on a parchment-lined tray.
4. Heat the olive oil in a large skillet over medium-high heat until it shimmers, about 2 minutes.
5. Carefully add the meatballs to the skillet in a single layer, leaving space between them to ensure even browning.
6. Cook the meatballs for 5-6 minutes, turning occasionally with tongs, until they are golden brown on all sides and reach an internal temperature of 165°F on a meat thermometer.
7. Transfer the cooked meatballs to a paper towel-lined plate to drain any excess oil. A pro tip: let them rest for 2 minutes before serving to lock in those juicy flavors.
Absolutely irresistible, these little gems boast a crispy, golden exterior that gives way to a tender, herb-infused center bursting with savory garlic and Parmesan notes. Toss them in your favorite marinara for a quick appetizer, skewer them with veggies for fun party bites, or pile them high on a sub roll with melted provolone for the ultimate comfort-food sandwich.
Oatmeal Pancakes

Let’s be honest—most of us have stared into our oatmeal bowl and thought, ‘What if you were a pancake?’ Well, dream no more, because these oatmeal pancakes are about to make your breakfast (or let’s be real, breakfast-for-dinner) dreams a fluffy, wholesome reality. They’re the cozy, fiber-packed hug your morning needs, with a texture that’ll make you forget all about the boring old flapjack.
Serving: 4 | Pre Time: 10 minutes | Cooking Time: 15 minutes
Ingredients
For the Dry Mix:
– 1 cup old-fashioned rolled oats
– 1 cup all-purpose flour
– 2 tbsp granulated sugar
– 1 tsp baking powder
– 1/2 tsp baking soda
– 1/2 tsp salt
For the Wet Mix:
– 1 cup buttermilk
– 1/2 cup whole milk
– 1 large egg
– 2 tbsp unsalted butter, melted and cooled slightly
– 1 tsp vanilla extract
For Cooking:
– 1 tbsp unsalted butter or neutral oil (like vegetable oil), for the skillet
Instructions
1. In a large bowl, whisk together the old-fashioned rolled oats, all-purpose flour, granulated sugar, baking powder, baking soda, and salt until fully combined.
2. In a separate medium bowl, whisk the buttermilk, whole milk, large egg, melted unsalted butter, and vanilla extract until smooth.
3. Pour the wet mixture into the dry mixture and stir gently with a spatula until just combined—a few lumps are fine to avoid tough pancakes.
4. Let the batter rest for 5 minutes at room temperature to allow the oats to soften slightly.
5. Heat a large non-stick skillet or griddle over medium heat (about 350°F) and add 1/2 tablespoon of the unsalted butter or neutral oil, swirling to coat the surface.
6. For each pancake, scoop 1/4 cup of batter onto the hot skillet, leaving space between them.
7. Cook for 2–3 minutes, or until bubbles form on the surface and the edges look set.
8. Flip each pancake carefully with a spatula and cook for another 1–2 minutes, or until golden brown and cooked through.
9. Transfer the cooked pancakes to a plate and repeat with the remaining batter, adding more butter or oil to the skillet as needed to prevent sticking.
10. Serve the pancakes immediately while warm.
So, what’s the verdict? These pancakes boast a delightfully hearty yet tender texture from the oats, with a subtle sweetness that pairs perfectly with maple syrup or fresh berries. Stack ’em high for a brunch centerpiece, or enjoy them solo as a quick, satisfying bite—either way, they’re a guaranteed upgrade from your average breakfast fare.
Roasted Butternut Squash Cubes

Yep, you’ve officially found the easiest, most delicious way to turn that gorgeous butternut squash into a side dish that steals the show. Forget the wrestling match with a stubborn peel—we’re roasting these babies into sweet, caramelized perfection with minimal fuss and maximum flavor. It’s the kind of simple magic that makes you look like a kitchen wizard without breaking a sweat.
Serving: 4 | Pre Time: 15 minutes | Cooking Time: 30 minutes
Ingredients
For the Squash:
– 1 medium butternut squash (about 2–2½ lbs)
– 2 tablespoons olive oil
– 1 teaspoon kosher salt
– ½ teaspoon freshly ground black pepper
For the Seasoning:
– 1 tablespoon pure maple syrup
– ½ teaspoon ground cinnamon
– ¼ teaspoon ground nutmeg
Instructions
1. Preheat your oven to 425°F and line a large, rimmed baking sheet with parchment paper.
2. Carefully slice the butternut squash in half lengthwise using a sharp chef’s knife and a stable cutting board.
3. Scoop out the seeds and stringy pulp from each half with a sturdy spoon and discard them.
4. Peel the squash halves completely with a vegetable peeler, working from top to bottom.
5. Cut the peeled squash into 1-inch cubes, aiming for uniform pieces so they roast evenly.
6. Place the cubed squash in a large mixing bowl and drizzle with 2 tablespoons of olive oil.
7. Sprinkle 1 teaspoon of kosher salt and ½ teaspoon of black pepper over the squash.
8. Toss the squash vigorously with your hands or a spoon until every cube is lightly coated in oil and seasoning.
9. Spread the squash cubes in a single layer on the prepared baking sheet, ensuring they aren’t crowded.
10. Roast the squash in the preheated oven at 425°F for 15 minutes, then remove the pan using oven mitts.
11. In a small bowl, whisk together 1 tablespoon of maple syrup, ½ teaspoon of cinnamon, and ¼ teaspoon of nutmeg.
12. Drizzle the maple-spice mixture evenly over the partially roasted squash cubes and toss gently on the pan.
13. Return the pan to the oven and continue roasting for another 12–15 minutes, until the edges are deeply caramelized and a fork pierces the cubes easily.
14. Let the roasted squash cool on the pan for 5 minutes before serving to allow the flavors to settle.
Glory in those tender, caramel-kissed cubes that boast a perfect balance of savory and sweet. The cinnamon and nutmeg add a cozy warmth that makes this dish ideal for tossing into salads, mashing into soups, or simply devouring straight from the pan—no judgment here!
Quinoa and Veggie Bites

Munching on something healthy doesn’t have to feel like a chore—enter these quinoa and veggie bites, your new favorite snack that’s secretly packed with goodness and ready to party. They’re crispy on the outside, tender inside, and so delicious you’ll forget they’re actually good for you. Let’s get these little flavor bombs rolling!
Serving: 24 bites | Pre Time: 20 minutes | Cooking Time: 25 minutes
Ingredients
For the Base:
– 1 cup quinoa, rinsed and drained
– 2 cups water
– 1 tbsp olive oil
– 1 small onion, finely diced
– 2 cloves garlic, minced
– 1 cup grated carrot
– 1 cup finely chopped broccoli florets
For Binding & Flavor:
– 2 large eggs, beaten
– 1/2 cup grated Parmesan cheese
– 1/4 cup breadcrumbs
– 1 tsp salt
– 1/2 tsp black pepper
– 1/2 tsp paprika
For Baking:
– Cooking spray or extra olive oil
Instructions
1. In a medium saucepan, combine 1 cup quinoa and 2 cups water. Bring to a boil over high heat, then reduce heat to low, cover, and simmer for 15 minutes until water is absorbed and quinoa is fluffy. Remove from heat and let cool slightly. Tip: Fluff the quinoa with a fork after cooking to prevent clumping.
2. Preheat your oven to 375°F and line a baking sheet with parchment paper. Lightly coat it with cooking spray or brush with olive oil.
3. Heat 1 tbsp olive oil in a skillet over medium heat. Add 1 small diced onion and cook for 3-4 minutes until translucent. Stir in 2 minced garlic cloves and cook for 1 more minute until fragrant.
4. Add 1 cup grated carrot and 1 cup chopped broccoli to the skillet. Cook for 5-6 minutes, stirring occasionally, until vegetables are tender but not mushy. Remove from heat and let cool for a few minutes. Tip: Don’t overcrowd the skillet to ensure even cooking and a nice texture.
5. In a large bowl, combine the cooked quinoa, sautéed vegetable mixture, 2 beaten eggs, 1/2 cup Parmesan cheese, 1/4 cup breadcrumbs, 1 tsp salt, 1/2 tsp black pepper, and 1/2 tsp paprika. Mix thoroughly until everything is well incorporated.
6. Scoop about 1 tablespoon of the mixture and shape it into a small ball or patty, about 1-inch in diameter. Place each bite on the prepared baking sheet, spacing them about 1 inch apart. Tip: Wet your hands slightly to prevent the mixture from sticking while shaping.
7. Bake in the preheated oven for 20-25 minutes, flipping halfway through, until the bites are golden brown and firm to the touch.
8. Remove from the oven and let cool on the baking sheet for 5 minutes before serving.
Oh, the joy of biting into these—they’re delightfully crispy with a soft, savory center that bursts with veggie goodness. Serve them warm with a zesty yogurt dip or pack them cold for a lunchbox surprise that’ll make everyone ask for the recipe!
Peach and Pear Puree
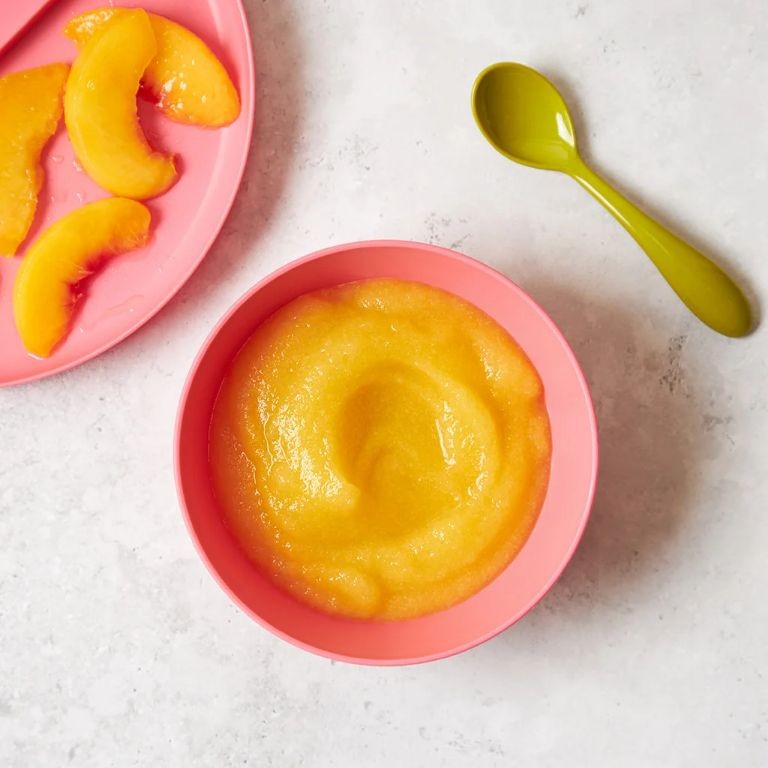
Crank up the cozy vibes, because we’re about to turn your kitchen into a fruit-filled wonderland with a silky-smooth puree that’s basically a hug in a bowl. This peach and pear puree is the ultimate lazy-day hero—no fancy skills required, just a blender and a dream. Let’s get blending!
Serving: 4 | Pre Time: 10 minutes | Cooking Time: 15 minutes
Ingredients
For the fruit base:
– 2 large ripe peaches, peeled, pitted, and chopped (about 2 cups)
– 2 ripe pears, peeled, cored, and chopped (about 2 cups)
– 1/4 cup water
For flavor and texture:
– 1 tbsp fresh lemon juice
– 1 tbsp honey
– 1/2 tsp ground cinnamon
– Pinch of salt
Instructions
1. Combine the chopped peaches, chopped pears, and 1/4 cup water in a medium saucepan over medium heat.
2. Bring the mixture to a gentle simmer, then reduce the heat to low and cover the saucepan with a lid.
3. Cook the fruit for 10–12 minutes, stirring occasionally, until the peaches and pears are completely soft and easily mashed with a fork. Tip: If the fruit starts to stick, add 1–2 more tablespoons of water to prevent burning.
4. Remove the saucepan from the heat and let the fruit cool slightly for 5 minutes.
5. Transfer the cooked fruit and any remaining liquid to a blender or food processor.
6. Add 1 tbsp fresh lemon juice, 1 tbsp honey, 1/2 tsp ground cinnamon, and a pinch of salt to the blender.
7. Blend the mixture on high speed for 1–2 minutes until it’s perfectly smooth and no chunks remain. Tip: For an extra-silky texture, strain the puree through a fine-mesh sieve to remove any fibrous bits.
8. Taste the puree and adjust the sweetness by adding more honey if desired, blending for another 10 seconds to incorporate. Tip: Serve it warm for a comforting treat, or chill it in the refrigerator for 1 hour for a refreshing twist.
This puree boasts a velvety, spoonable texture that’s neither too thick nor too runny—just right for drizzling over pancakes or yogurt. Its flavor is a sweet-tart dance of juicy peaches and mellow pears, with a warm cinnamon kiss that’ll make you swoon. Get creative by swirling it into oatmeal or freezing it into popsicles for a fun summer snack!
Soft Lentil Patties

Zesty, zippy, and downright delightful—these soft lentil patties are the plant-based heroes your weeknight dinners have been dreaming of, offering a cozy hug in patty form that’s as easy to whip up as it is to devour. Forget the bland veggie burgers of yore; these little guys pack a punch of flavor and a tender texture that’ll make even the staunchest carnivore do a double-take. Let’s get cooking and turn those lentils into something legendary!
Serving: 4 | Pre Time: 15 minutes | Cooking Time: 20 minutes
Ingredients
For the patties:
– 1 cup dried brown lentils, rinsed
– 2 cups water
– 1/2 cup breadcrumbs
– 1/4 cup finely chopped onion
– 1 large egg, beaten
– 1 tbsp olive oil
– 1 tsp garlic powder
– 1/2 tsp salt
– 1/4 tsp black pepper
For cooking:
– 2 tbsp olive oil
Instructions
1. In a medium saucepan, combine 1 cup dried brown lentils and 2 cups water, then bring to a boil over high heat.
2. Reduce heat to low, cover, and simmer for 15 minutes until lentils are tender but not mushy, then drain any excess water and let cool for 5 minutes. Tip: Don’t overcook the lentils—aim for a soft bite to keep the patties from falling apart later.
3. In a large bowl, mash the cooled lentils with a fork until mostly smooth but with some texture remaining.
4. Add 1/2 cup breadcrumbs, 1/4 cup finely chopped onion, 1 large beaten egg, 1 tbsp olive oil, 1 tsp garlic powder, 1/2 tsp salt, and 1/4 tsp black pepper to the bowl, then mix until well combined.
5. Shape the mixture into 4 equal patties, about 1/2-inch thick, pressing firmly with your hands. Tip: Wet your hands slightly to prevent sticking and ensure even patties.
6. Heat 2 tbsp olive oil in a large skillet over medium heat until shimmering, about 2 minutes.
7. Carefully place the patties in the skillet and cook for 4-5 minutes per side until golden brown and crispy on the edges. Tip: Resist the urge to flip too early—let them develop a nice crust for the best texture.
8. Transfer the patties to a plate lined with paper towels to drain any excess oil.
Ridiculously tender with a subtle earthy flavor, these patties boast a melt-in-your-mouth softness that pairs perfectly with a tangy sauce or crisp lettuce. Serve them tucked into buns for a burger twist or atop a salad for a light meal—either way, they’re sure to become a repeat star in your kitchen lineup!
Baked Apple Slices
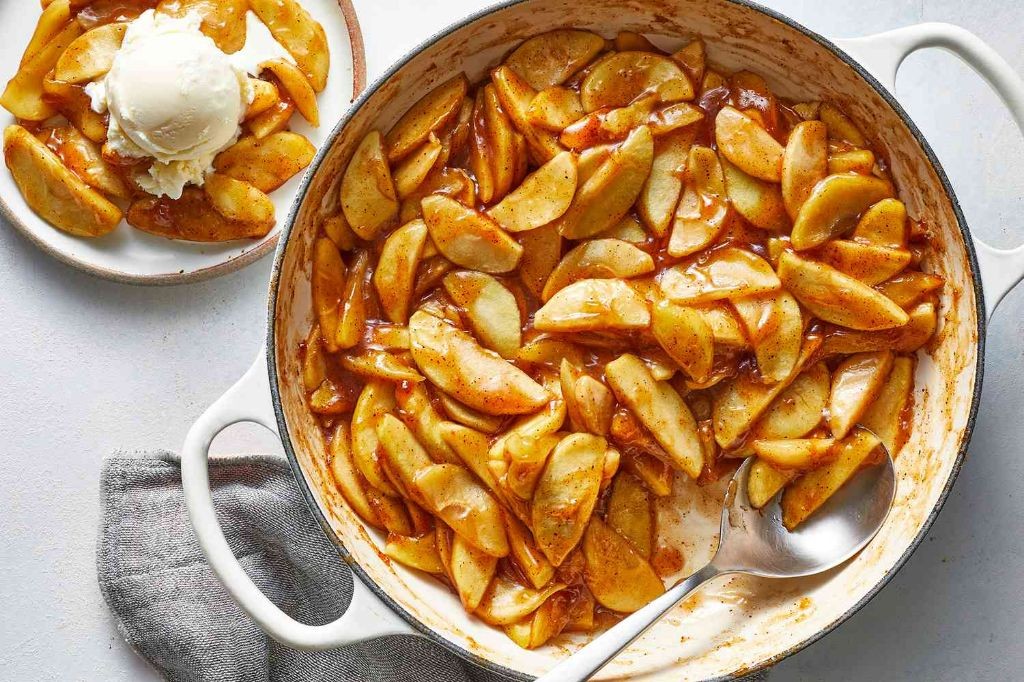
Zesty and cozy, these baked apple slices are the ultimate holiday hack—they taste like apple pie filling without the crust commitment, perfect for when you want dessert vibes but your patience is thinner than a pie crust. Imagine tender, cinnamon-kissed apples that caramelize into a warm, gooey treat, ready to rescue you from last-minute cookie fatigue or just a serious sweet tooth emergency.
Serving: 4 | Pre Time: 10 minutes | Cooking Time: 25 minutes
Ingredients
For the apple mixture:
– 4 medium apples (such as Granny Smith or Honeycrisp), peeled, cored, and sliced into 1/4-inch thick pieces
– 1/4 cup granulated sugar
– 1 teaspoon ground cinnamon
– 1/4 teaspoon ground nutmeg
For the topping:
– 2 tablespoons unsalted butter, melted
– 1 tablespoon lemon juice
Instructions
1. Preheat your oven to 375°F and line a baking sheet with parchment paper.
2. In a large mixing bowl, combine the sliced apples, granulated sugar, ground cinnamon, and ground nutmeg, tossing until the apples are evenly coated—this ensures every bite is spiced just right.
3. Drizzle the melted butter and lemon juice over the apple mixture, stirring gently to coat; the lemon juice adds a bright zing that balances the sweetness.
4. Spread the apples in a single layer on the prepared baking sheet, avoiding overcrowding so they caramelize instead of steam.
5. Bake at 375°F for 20-25 minutes, checking halfway to stir the apples for even cooking, until they are tender and the edges start to turn golden brown.
6. Remove from the oven and let cool for 5 minutes on the baking sheet—this allows the juices to thicken slightly for a saucier texture.
Warm and fragrant, these baked apple slices boast a soft, melt-in-your-mouth texture with a hint of caramelized crispness on the edges. Serve them over vanilla ice cream for a decadent sundae, swirl into oatmeal for a breakfast upgrade, or simply enjoy straight from the pan—they’re so versatile, you might just skip the pie altogether!
Whole Wheat Pasta with Tomato Sauce

Hold onto your forks, folks, because we’re about to transform that humble box of whole wheat pasta into a saucy, soul-satisfying masterpiece that’s way more exciting than its name suggests. It’s the cozy, no-fuss hero your weeknight dinner lineup has been desperately craving.
Serving: 4 | Pre Time: 10 minutes | Cooking Time: 25 minutes
Ingredients
For the Pasta:
- 12 ounces whole wheat spaghetti
- 1 tablespoon kosher salt
For the Sauce:
- 2 tablespoons olive oil
- 1 medium yellow onion, finely diced
- 4 cloves garlic, minced
- 1 (28-ounce) can crushed tomatoes
- 1 teaspoon dried oregano
- 1/2 teaspoon red pepper flakes
- 1/2 teaspoon kosher salt
- 1/4 teaspoon freshly ground black pepper
- 1/4 cup fresh basil leaves, thinly sliced
For Finishing:
- 1/4 cup grated Parmesan cheese
Instructions
- Fill a large pot with 4 quarts of water and place it over high heat.
- Add 1 tablespoon of kosher salt to the water once small bubbles form.
- Bring the salted water to a full, rolling boil.
- Add 12 ounces of whole wheat spaghetti to the boiling water, stirring immediately to prevent sticking.
- Cook the pasta for 9-11 minutes, stirring occasionally, until it is al dente (tender but with a slight bite). Tip: Start tasting a strand at 9 minutes to avoid mushy pasta.
- While the pasta cooks, heat 2 tablespoons of olive oil in a large skillet over medium heat.
- Add 1 finely diced yellow onion to the skillet and cook for 5-7 minutes, stirring often, until the onion is soft and translucent.
- Add 4 minced garlic cloves to the skillet and cook for 1 minute, stirring constantly, until fragrant.
- Pour 1 can of crushed tomatoes into the skillet with the onions and garlic.
- Stir in 1 teaspoon of dried oregano, 1/2 teaspoon of red pepper flakes, 1/2 teaspoon of kosher salt, and 1/4 teaspoon of black pepper.
- Bring the sauce to a gentle simmer, then reduce the heat to low.
- Let the sauce simmer uncovered for 15 minutes, stirring occasionally, until it thickens slightly. Tip: A slow simmer helps the flavors meld beautifully.
- Reserve 1 cup of the starchy pasta cooking water, then drain the cooked spaghetti in a colander.
- Add the drained spaghetti directly to the skillet with the finished tomato sauce.
- Toss the pasta and sauce together over low heat for 1-2 minutes, adding splashes of the reserved pasta water if needed to loosen the sauce. Tip: The starchy water helps the sauce cling to every noodle.
- Remove the skillet from the heat and stir in 1/4 cup of thinly sliced fresh basil leaves.
- Divide the pasta among four bowls and top each serving with 1 tablespoon of grated Parmesan cheese.
Zesty with a gentle kick from the pepper flakes, this dish delivers a wonderfully hearty texture from the whole wheat pasta that stands up to the rich, garlicky sauce. For a fun twist, try serving it in shallow bowls with extra basil and a drizzle of good olive oil for a restaurant-worthy finish that’s still totally doable on a busy night.
Banana and Blueberry Muffins

Ditch the boring breakfast routine and dive into these banana and blueberry muffins—they’re the cheerful, crumb-topped heroes your mornings have been begging for, packed with fruity sweetness and a hint of cozy spice. Perfect for lazy weekends or sneaky snacks, they’ll have you grinning from the first bite to the last crumb.
Serving: 12 | Pre Time: 15 minutes | Cooking Time: 25 minutes
Ingredients
For the dry mix:
– 2 cups all-purpose flour
– 1 tsp baking soda
– 1/2 tsp salt
– 1 tsp ground cinnamon
For the wet mix:
– 3 ripe bananas, mashed (about 1 1/2 cups)
– 3/4 cup granulated sugar
– 1/3 cup melted unsalted butter, cooled slightly
– 1 large egg
– 1 tsp vanilla extract
For folding in:
– 1 cup fresh blueberries
Instructions
1. Preheat your oven to 375°F and line a 12-cup muffin tin with paper liners or grease it lightly.
2. In a medium bowl, whisk together the all-purpose flour, baking soda, salt, and ground cinnamon until well combined.
3. In a large bowl, mash the ripe bananas with a fork until mostly smooth, leaving a few small lumps for texture.
4. Add the granulated sugar, melted unsalted butter, large egg, and vanilla extract to the mashed bananas, and stir vigorously until the mixture is creamy and uniform.
5. Tip: Fold the dry ingredients into the wet mix gently with a spatula—overmixing can lead to tough muffins, so stop as soon as no flour streaks remain.
6. Gently fold in the fresh blueberries, being careful not to crush them to avoid purple streaks in the batter.
7. Divide the batter evenly among the prepared muffin cups, filling each about 3/4 full.
8. Tip: For extra crunch, sprinkle a pinch of sugar on top of each muffin before baking.
9. Bake in the preheated oven at 375°F for 20–25 minutes, or until a toothpick inserted into the center of a muffin comes out clean.
10. Tip: Let the muffins cool in the tin for 5 minutes before transferring to a wire rack—this prevents them from getting soggy.
11. Allow the muffins to cool completely on the rack before serving.
Enjoy these muffins warm for a tender, moist crumb that’s studded with juicy blueberries and a subtle banana sweetness. They’re fantastic with a dollop of whipped cream or crumbled over yogurt for a playful twist—either way, they’ll disappear faster than you can say “second breakfast!”
Steamed Green Beans
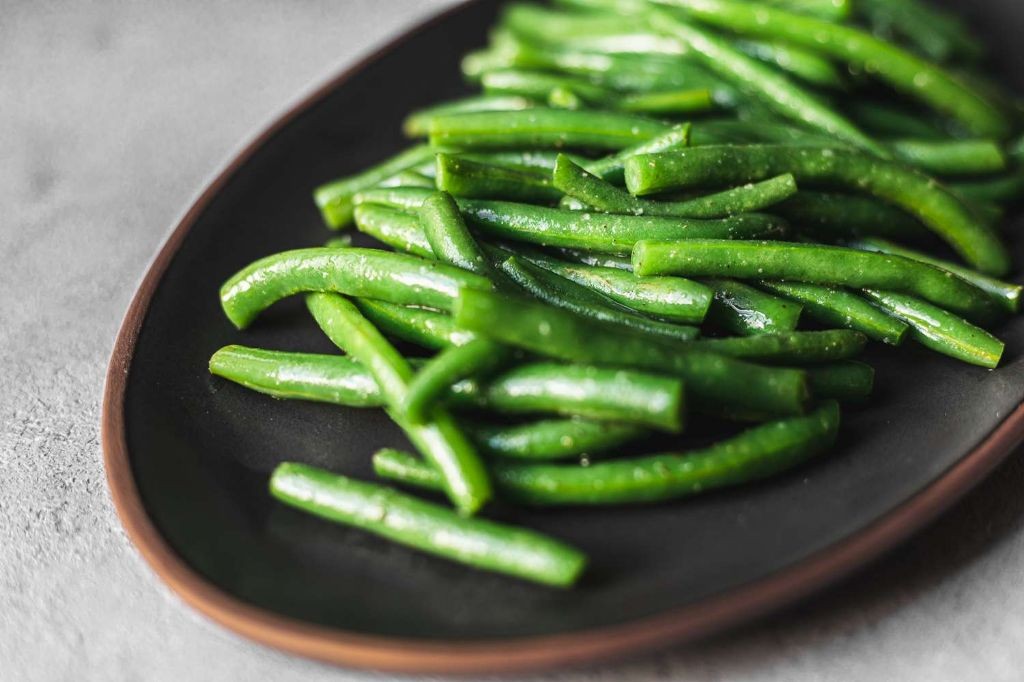
Miraculously, we’ve found a way to make green beans exciting—no, really! Forget those sad, soggy versions of yore; this steamed method keeps them crisp, vibrant, and ready to dazzle your taste buds with minimal effort. It’s the veggie side dish that actually wants to be eaten, and we’re here for it.
Serving: 4 | Pre Time: 5 minutes | Cooking Time: 10 minutes
Ingredients
For the beans:
– 1 pound fresh green beans, trimmed
– 1 cup water
For the finishing touch:
– 2 tablespoons unsalted butter
– 1 tablespoon fresh lemon juice
– 1/2 teaspoon garlic powder
– 1/4 teaspoon salt
Instructions
1. Rinse 1 pound of fresh green beans under cold running water in a colander to remove any dirt.
2. Trim the stem ends off the green beans using a sharp knife or by snapping them by hand.
3. Pour 1 cup of water into a medium saucepan and place a steamer basket inside, ensuring the water level is below the basket.
4. Add the trimmed green beans to the steamer basket in a single layer for even cooking.
5. Cover the saucepan with a tight-fitting lid and set it over high heat until the water boils, which should take about 3–4 minutes.
6. Once boiling, reduce the heat to medium and steam the green beans for 5–7 minutes, checking at 5 minutes for doneness—they should be bright green and tender-crisp when pierced with a fork.
7. Tip: Avoid overcooking by testing early; soggy beans are a culinary crime!
8. Carefully remove the steamer basket from the saucepan and transfer the green beans to a serving bowl, discarding the hot water.
9. In a small microwave-safe bowl, melt 2 tablespoons of unsalted butter in the microwave on high for 20–30 seconds until liquid.
10. Tip: For extra flavor, you can brown the butter in a skillet over medium heat for 2–3 minutes until nutty and golden.
11. Stir 1 tablespoon of fresh lemon juice, 1/2 teaspoon of garlic powder, and 1/4 teaspoon of salt into the melted butter until well combined.
12. Drizzle the butter mixture over the steamed green beans in the serving bowl and toss gently to coat evenly.
13. Tip: Toss while the beans are still warm to help them absorb the flavors better.
14. Serve immediately for the best texture and taste.
Who knew something so simple could be so satisfying? These steamed green beans boast a delightful crunch with a buttery, zesty kick that makes them irresistible straight from the bowl. Try piling them atop grilled chicken or mixing into a grain salad for a vibrant, healthy twist that’ll have everyone asking for seconds.
Soft Turkey and Veggie Meatloaf
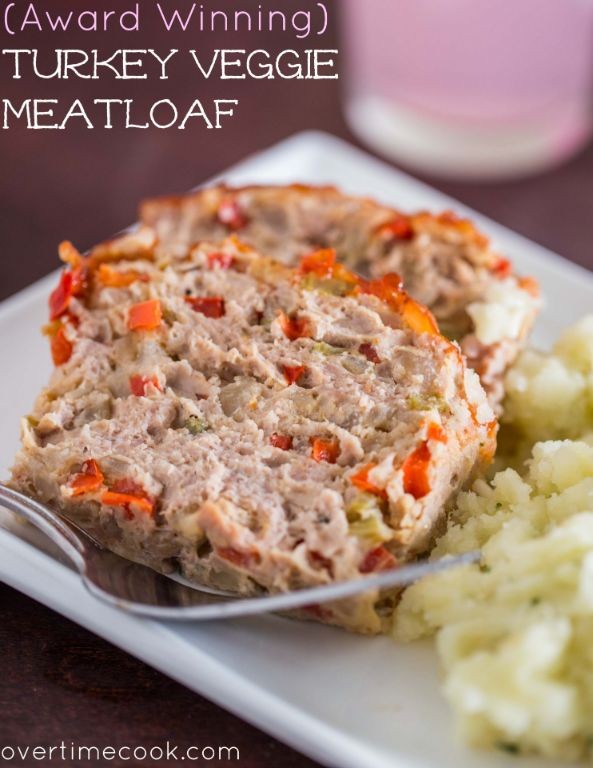
Nestled between holiday feasts and weeknight scrambles, this soft turkey and veggie meatloaf is the cozy, comforting hero your dinner table deserves—think of it as a hug in loaf form, packed with sneaky veggies and juicy turkey that’ll have even picky eaters asking for seconds. It’s the ultimate ‘set it and forget it’ dish that bakes up tender, moist, and utterly irresistible, proving that meatloaf can be anything but boring.
Serving: 6 | Pre Time: 15 minutes | Cooking Time: 60 minutes
Ingredients
For the Meatloaf Mixture:
– 1.5 lbs ground turkey
– 1 cup finely grated zucchini, squeezed dry with a towel to remove excess moisture
– 1/2 cup finely grated carrot
– 1/2 cup finely chopped onion
– 2 cloves garlic, minced
– 1 large egg, lightly beaten
– 1/2 cup breadcrumbs
– 1/4 cup milk
– 1 tsp salt
– 1/2 tsp black pepper
– 1 tsp dried thyme
For the Glaze:
– 1/2 cup ketchup
– 2 tbsp brown sugar
– 1 tbsp apple cider vinegar
Instructions
1. Preheat your oven to 375°F (190°C) and lightly grease a 9×5-inch loaf pan with non-stick spray or oil.
2. In a large mixing bowl, combine the ground turkey, grated zucchini, grated carrot, chopped onion, minced garlic, beaten egg, breadcrumbs, milk, salt, black pepper, and dried thyme.
3. Use your hands to gently mix everything together until just combined—overmixing can make the meatloaf tough, so stop as soon as it’s uniform.
4. Transfer the mixture to the prepared loaf pan and press it down evenly to form a smooth top.
5. In a small bowl, whisk together the ketchup, brown sugar, and apple cider vinegar until smooth to create the glaze.
6. Spread the glaze evenly over the top of the meatloaf mixture in the pan, covering it completely.
7. Place the loaf pan in the preheated oven and bake for 55 to 60 minutes, or until the internal temperature reaches 165°F (74°C) when checked with a meat thermometer inserted into the center.
8. Remove the meatloaf from the oven and let it rest in the pan for 10 minutes before slicing—this allows the juices to redistribute, keeping it moist and tender.
9. Carefully slice the meatloaf into 1-inch thick pieces using a sharp knife, and serve warm.
Perfectly tender and packed with flavor, this meatloaf boasts a juicy, soft texture from the turkey and hidden veggies, balanced by a sweet-tangy glaze that caramelizes beautifully. Serve it sliced thick with a side of creamy mashed potatoes for a classic comfort meal, or crumble leftovers into a breakfast hash the next morning—it’s versatile enough to shine any time of day.
Summary
Yum! These 18 nutritious recipes make baby-led weaning a breeze for beginners. They’re packed with wholesome goodness to help your little one explore flavors and textures. We hope you and your baby enjoy making—and eating!—these meals together. Give them a try, then pop back to tell us your favorites in the comments. If you found this helpful, please share the love on Pinterest!


