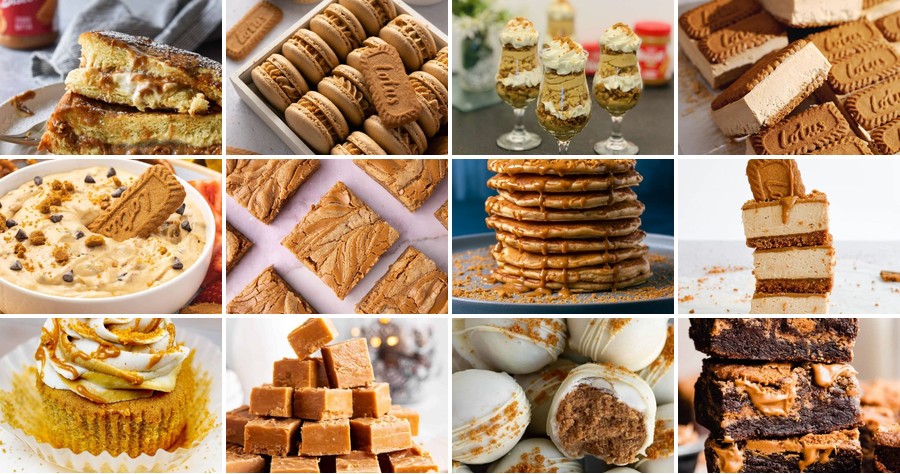
Satisfy your sweet tooth with these irresistible Biscoff cookie recipes! Whether you’re craving classic treats or creative twists, this roundup has something for every home baker. From chewy delights to crunchy bites, get ready to transform that beloved cookie butter into mouthwatering desserts. Let’s dive in and discover your new favorite cookie creation!
Classic Biscoff Cookie Butter Cookies
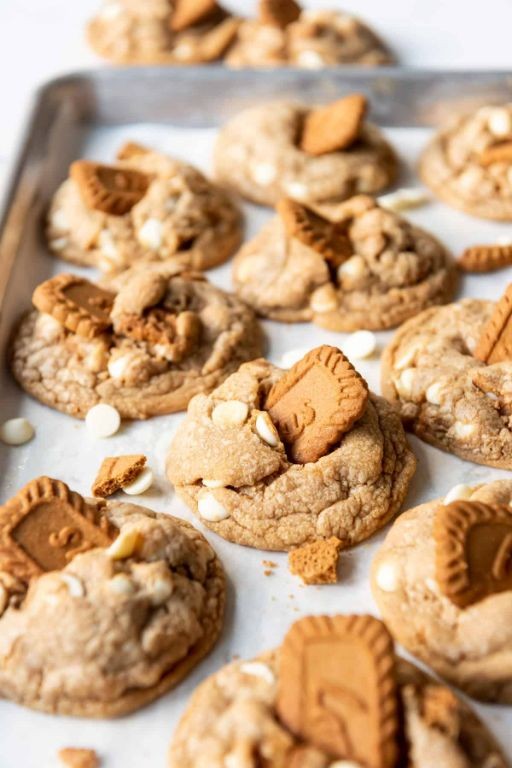
Just when you thought cookie butter couldn’t get any better, we’re baking it right into soft, chewy cookies. Join me as we transform that irresistible spread into a batch of warm, comforting treats perfect for holiday gifting or a cozy afternoon snack.
Serving: 24 | Pre Time: 15 minutes | Cooking Time: 10 minutes
Ingredients
– Unsalted butter – ½ cup
– Granulated sugar – ¾ cup
– Biscoff cookie butter – ½ cup
– Egg – 1 large
– Vanilla extract – 1 tsp
– All-purpose flour – 1 ½ cups
– Baking soda – ½ tsp
– Salt – ¼ tsp
Instructions
1. Preheat your oven to 350°F and line two baking sheets with parchment paper.
2. In a large bowl, beat the softened unsalted butter and granulated sugar together with an electric mixer on medium speed for 2 minutes, until light and fluffy.
3. Add the Biscoff cookie butter to the bowl and beat for 1 more minute until fully incorporated.
4. Crack the egg into the bowl, add the vanilla extract, and beat on low speed just until combined, about 30 seconds.
5. In a separate medium bowl, whisk together the all-purpose flour, baking soda, and salt until evenly distributed.
6. Gradually add the dry ingredients to the wet ingredients, mixing on low speed until a soft dough forms and no dry streaks remain, about 1 minute.
7. Using a 1-tablespoon cookie scoop, portion the dough into 24 balls and place them 2 inches apart on the prepared baking sheets.
8. Bake one sheet at a time in the preheated oven for 9–11 minutes, until the edges are lightly golden and the centers look just set.
9. Let the cookies cool on the baking sheet for 5 minutes before transferring them to a wire rack to cool completely.
As they cool, these cookies develop a wonderfully crisp edge that gives way to a soft, melt-in-your-mouth center packed with warm spice flavor. Try sandwiching two with a dollop of whipped cream or crumbling them over vanilla ice cream for an instant dessert upgrade.
Biscoff Cookie Cheesecake Bars
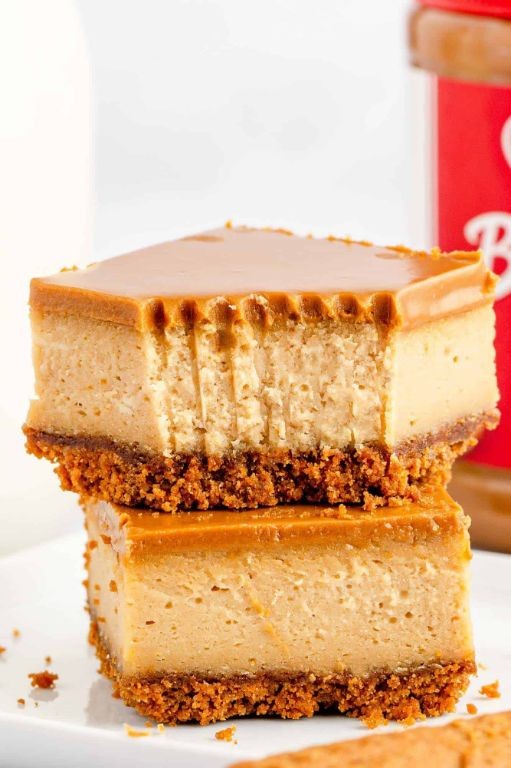
Picture this: a creamy cheesecake filling nestled on a crunchy Biscoff cookie crust, all baked into convenient bars that are perfect for holiday gatherings or a sweet treat. These Biscoff Cookie Cheesecake Bars combine the beloved spiced cookie flavor with classic cheesecake for an irresistible dessert that’s surprisingly simple to make, even for beginners.
Serving: 16 | Pre Time: 20 minutes | Cooking Time: 35 minutes
Ingredients
- Biscoff cookies – 2 cups crushed
- Unsalted butter – ½ cup melted
- Cream cheese – 16 oz softened
- Granulated sugar – ¾ cup
- Eggs – 2 large
- Vanilla extract – 1 tsp
- Sour cream – ½ cup
Instructions
- Preheat your oven to 350°F and line an 8×8-inch baking pan with parchment paper, leaving overhang on two sides for easy removal.
- In a medium bowl, combine the crushed Biscoff cookies and melted butter until the mixture resembles wet sand. Tip: Use a food processor for quick, even crushing of the cookies.
- Press the cookie mixture firmly into the bottom of the prepared pan to form an even crust layer.
- Bake the crust for 10 minutes at 350°F until it’s lightly set, then remove it from the oven and let it cool slightly on a wire rack.
- In a large mixing bowl, beat the softened cream cheese and granulated sugar on medium speed for 2-3 minutes until smooth and creamy. Tip: Ensure the cream cheese is at room temperature to avoid lumps in the batter.
- Add the eggs one at a time, beating well after each addition until fully incorporated.
- Mix in the vanilla extract and sour cream until the filling is uniform and no streaks remain.
- Pour the cheesecake filling over the cooled crust and spread it evenly with a spatula.
- Bake at 350°F for 25-30 minutes, or until the edges are set and the center jiggles slightly when gently shaken. Tip: Avoid overbaking to prevent cracks; the bars will firm up as they cool.
- Turn off the oven, crack the door open, and let the bars cool inside for 1 hour to prevent sudden temperature changes.
- Transfer the pan to the refrigerator and chill the bars for at least 4 hours, or overnight, until completely firm.
- Use the parchment overhang to lift the bars from the pan, then cut into 16 squares with a sharp knife wiped clean between cuts for neat edges.
After chilling, these bars boast a velvety smooth texture with a rich, spiced flavor from the Biscoff crust that complements the tangy cream cheese filling. For a creative twist, drizzle them with melted Biscoff spread or serve alongside a scoop of vanilla ice cream to balance the sweetness.
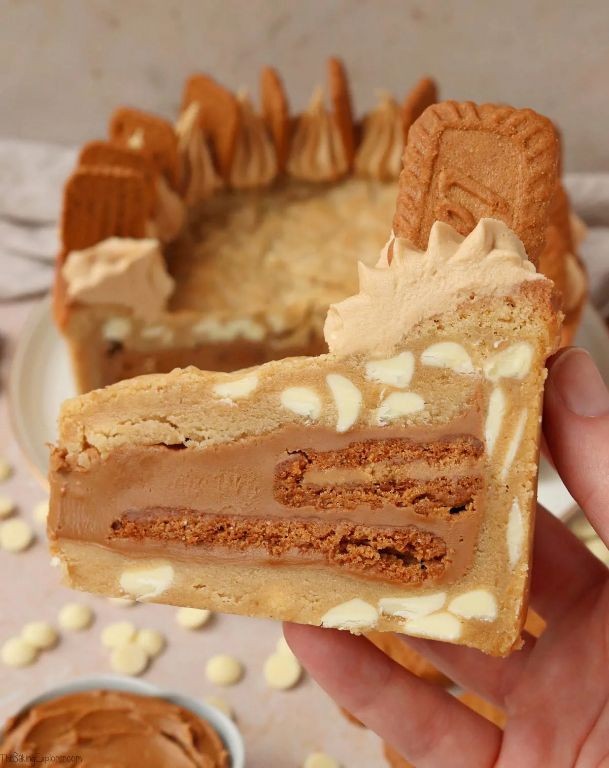
Biscoff Cookie Stuffed Brownies
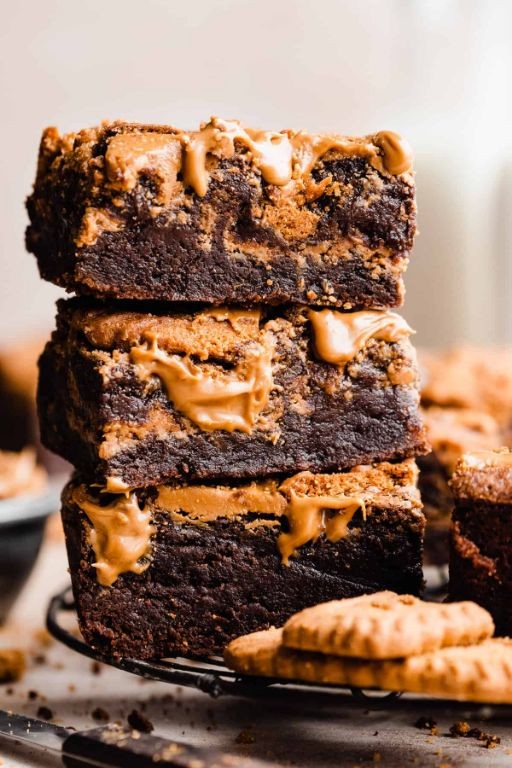
Perfect for holiday gatherings or cozy winter nights, these Biscoff Cookie Stuffed Brownies combine fudge-like chocolate with the warm, spiced caramel flavor of Biscoff cookies. Prepare to bake a decadent dessert that’s surprisingly simple to make, even for beginners.
Serving: 16 | Pre Time: 15 minutes | Cooking Time: 30 minutes
Ingredients
– Unsalted butter – ½ cup
– Semi-sweet chocolate chips – 1 cup
– Granulated sugar – 1 cup
– Eggs – 2 large
– Vanilla extract – 1 tsp
– All-purpose flour – ⅔ cup
– Cocoa powder – ¼ cup
– Salt – ¼ tsp
– Biscoff cookies – 16
Instructions
1. Preheat your oven to 350°F and line an 8×8-inch baking pan with parchment paper, leaving an overhang on two sides for easy removal.
2. Melt the unsalted butter and semi-sweet chocolate chips together in a microwave-safe bowl in 30-second intervals, stirring after each until smooth.
3. Tip: Let the chocolate mixture cool slightly before adding eggs to prevent them from scrambling.
4. Whisk the granulated sugar into the melted chocolate mixture until fully combined.
5. Add the eggs one at a time, whisking vigorously after each addition until the mixture is glossy.
6. Stir in the vanilla extract.
7. Sift the all-purpose flour, cocoa powder, and salt directly into the wet ingredients to avoid lumps.
8. Tip: Fold the dry ingredients gently with a spatula until just combined; overmixing can make the brownies tough.
9. Spread half of the brownie batter evenly into the prepared pan.
10. Arrange the Biscoff cookies in a single layer over the batter, leaving a small gap between each.
11. Carefully spread the remaining brownie batter over the cookies, covering them completely.
12. Tip: Use an offset spatula to smooth the top layer without disturbing the cookies underneath.
13. Bake at 350°F for 28–30 minutes, until the edges are set and a toothpick inserted into the center comes out with a few moist crumbs.
14. Let the brownies cool completely in the pan on a wire rack for at least 2 hours before slicing.
Baking these brownies results in a rich, fudgy texture with gooey pockets of melted Biscoff cookies that add a delightful crunch. Serve them warm with a scoop of vanilla ice cream for an indulgent treat, or cut them into small squares for a festive holiday platter.
Biscoff Cookie Truffles
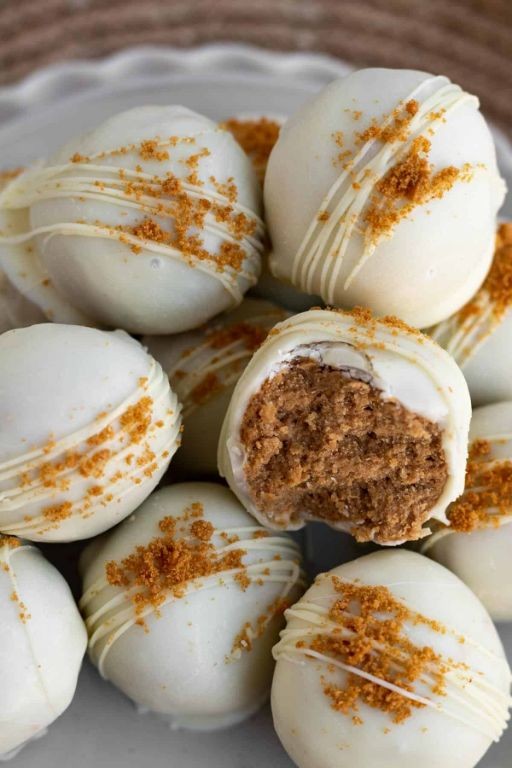
Baking these irresistible treats is simpler than you might think, requiring just a few pantry staples and no oven time. By following these clear steps, you’ll create decadent truffles with a crunchy cookie center and smooth chocolate coating, perfect for holiday gifting or a sweet homemade indulgence. Let’s walk through the process together, one straightforward action at a time.
Serving: 24 | Pre Time: 20 minutes | Cooking Time: 0 minutes
Ingredients
– Biscoff cookies – 2 cups (crushed)
– Cream cheese – 8 oz (softened)
– White chocolate chips – 2 cups
– Vegetable oil – 1 tsp
Instructions
1. Place 2 cups of Biscoff cookies in a food processor and pulse until they form fine crumbs, about 30 seconds.
2. Transfer the cookie crumbs to a medium mixing bowl and add 8 oz of softened cream cheese.
3. Use a spatula or your hands to mix the crumbs and cream cheese until fully combined and a uniform dough forms, about 2 minutes. Tip: If the mixture feels too sticky, chill it in the refrigerator for 10 minutes to make rolling easier.
4. Scoop out 1 tablespoon of the dough and roll it between your palms to form a smooth, round ball about 1 inch in diameter.
5. Place the rolled truffle on a baking sheet lined with parchment paper and repeat with the remaining dough to make 24 truffles total.
6. Freeze the truffles on the baking sheet for 15 minutes to firm them up before coating. Tip: This step prevents the truffles from falling apart when dipped in warm chocolate.
7. In a microwave-safe bowl, combine 2 cups of white chocolate chips and 1 tsp of vegetable oil.
8. Microwave the mixture on high for 30 seconds, then stir thoroughly with a spoon.
9. Continue microwaving in 15-second intervals, stirring after each, until the chocolate is completely melted and smooth, about 1 minute total. Tip: Avoid overheating the chocolate, as it can seize and become grainy; stop microwaving when just a few lumps remain and let the residual heat melt them as you stir.
10. Remove the truffles from the freezer and use a fork to dip each one into the melted chocolate, tapping off any excess.
11. Return the coated truffles to the parchment-lined baking sheet and let them set at room temperature for 30 minutes until the chocolate hardens.
12. Store the truffles in an airtight container in the refrigerator for up to 1 week.
Here, the finished truffles offer a delightful contrast between the creamy, spiced cookie center and the crisp white chocolate shell. For a festive touch, sprinkle crushed Biscoff cookies on top before the chocolate sets, or package them in small boxes as thoughtful homemade gifts.
Biscoff Cookie Ice Cream Sandwiches
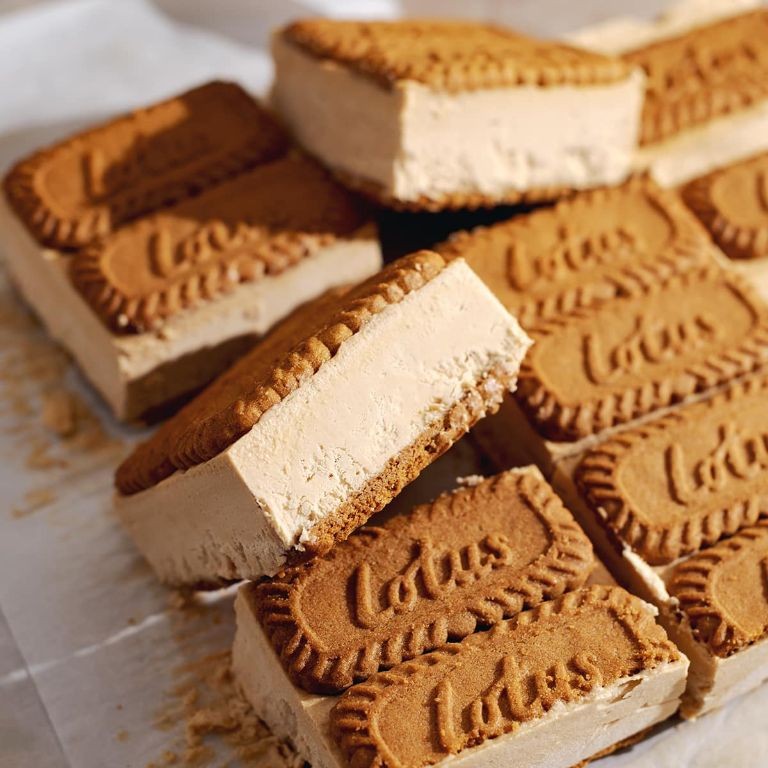
Mixing crunchy Biscoff cookies with creamy ice cream creates a dessert that’s both nostalgic and effortlessly impressive. This recipe walks you through assembling these frozen treats with precision, ensuring each sandwich holds together beautifully. Follow each step carefully for a foolproof result that’s perfect for any gathering.
Serving: 8 | Pre Time: 15 minutes | Cooking Time: 0 minutes
Ingredients
– Biscoff cookies – 16 cookies
– Vanilla ice cream – 1 pint
Instructions
1. Line a baking sheet with parchment paper and arrange 8 Biscoff cookies flat-side up on it, spacing them evenly.
2. Remove the vanilla ice cream from the freezer and let it soften at room temperature for 10 minutes until it’s scoopable but not melted.
3. Use an ice cream scoop to portion 1 scoop of vanilla ice cream onto the center of each cookie on the baking sheet.
4. Place a second Biscoff cookie flat-side down on top of each ice cream scoop, gently pressing to spread the ice cream to the edges without breaking the cookies.
5. Immediately transfer the baking sheet to the freezer and freeze the sandwiches for at least 4 hours until the ice cream is completely firm.
6. Remove the sandwiches from the freezer and serve directly, or wrap each individually in plastic wrap for storage.
These sandwiches offer a delightful contrast between the crisp, spiced cookies and the smooth, cold ice cream. Try rolling the edges in crushed Biscoff crumbs for extra texture, or serve them slightly softened for a more indulgent bite.
Biscoff Cookie Crunch Cupcakes

Delve into the world of irresistible desserts with these cupcakes that combine the beloved flavor of Biscoff cookies with a satisfying crunch. Today, we’ll walk through every step to create a batch perfect for any gathering, ensuring even beginners can achieve bakery-quality results.
Serving: 12 | Pre Time: 20 minutes | Cooking Time: 18 minutes
Ingredients
– All-purpose flour – 1 ½ cups
– Granulated sugar – 1 cup
– Baking powder – 1 ½ tsp
– Salt – ½ tsp
– Unsalted butter – ½ cup
– Whole milk – ¾ cup
– Large eggs – 2
– Vanilla extract – 1 tsp
– Biscoff cookie spread – ½ cup
– Crushed Biscoff cookies – 1 cup
Instructions
1. Preheat your oven to 350°F and line a 12-cup muffin tin with paper liners.
2. In a medium bowl, whisk together the all-purpose flour, granulated sugar, baking powder, and salt until fully combined.
3. In a large bowl, use an electric mixer on medium speed to beat the unsalted butter until creamy, about 2 minutes.
4. Add the whole milk, large eggs, and vanilla extract to the butter, and mix on low speed until just incorporated, scraping down the sides of the bowl with a spatula to ensure even mixing.
5. Gradually add the dry ingredients to the wet mixture, mixing on low speed until a smooth batter forms, being careful not to overmix to avoid dense cupcakes.
6. Fold in the Biscoff cookie spread and crushed Biscoff cookies with a spatula until evenly distributed throughout the batter.
7. Divide the batter evenly among the prepared muffin cups, filling each about two-thirds full to allow room for rising.
8. Bake in the preheated oven for 18 minutes, or until a toothpick inserted into the center of a cupcake comes out clean with no wet batter.
9. Remove the cupcakes from the oven and let them cool in the tin for 5 minutes before transferring to a wire rack to cool completely, which helps prevent sticking and ensures they set properly.
10. Serve the cupcakes as is or top with additional Biscoff cookie spread for extra flavor.
Bursting with a moist, tender crumb and the signature spiced sweetness of Biscoff, these cupcakes offer a delightful crunch from the cookie pieces. For a creative twist, try drizzling them with melted white chocolate or serving alongside a scoop of vanilla ice cream to balance the rich flavors.
Biscoff Cookie Dough Dip
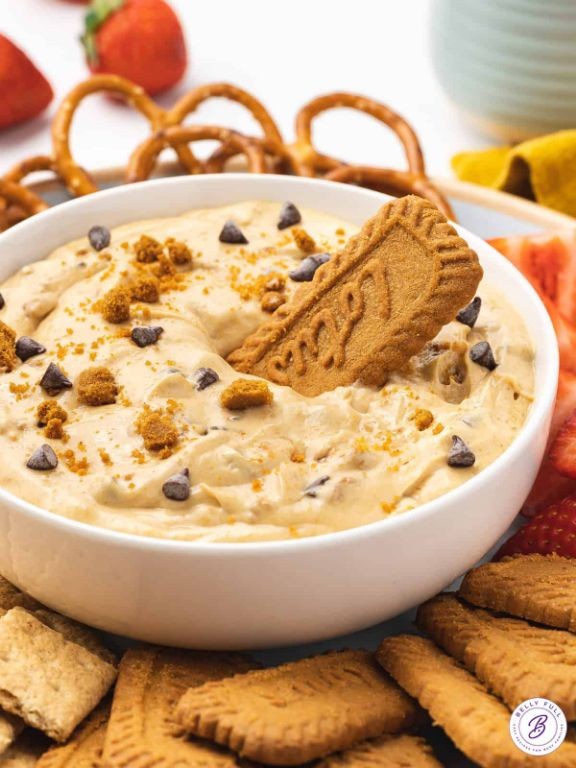
Zesty and indulgent, this Biscoff Cookie Dough Dip is a no-bake dessert that comes together in minutes. It captures the beloved flavor of cookie dough in a creamy, dippable form, perfect for sharing at holiday gatherings or cozy nights in. Follow these simple steps to create a treat that’s sure to impress.
Serving: 6 | Pre Time: 10 minutes | Cooking Time: 0 minutes
Ingredients
– Cream cheese – 8 oz
– Unsalted butter – ½ cup
– Powdered sugar – 1 cup
– Biscoff cookie spread – ¾ cup
– Vanilla extract – 1 tsp
– Mini chocolate chips – ½ cup
Instructions
1. Place the cream cheese and unsalted butter on the counter to soften at room temperature for 30 minutes.
2. In a large mixing bowl, combine the softened cream cheese and unsalted butter.
3. Use an electric mixer on medium speed to beat the mixture for 2 minutes, until smooth and creamy.
4. Add the powdered sugar to the bowl.
5. Beat on low speed for 1 minute to incorporate, then increase to medium for another minute until fully combined.
6. Tip: Scrape down the sides of the bowl with a spatula halfway through to ensure even mixing.
7. Add the Biscoff cookie spread and vanilla extract to the bowl.
8. Beat on medium speed for 2 minutes, until the mixture is uniform and fluffy.
9. Tip: If the dip seems too thick, add 1 tablespoon of milk and beat for 30 seconds to reach a smoother consistency.
10. Gently fold in the mini chocolate chips with a spatula until evenly distributed.
11. Transfer the dip to a serving bowl.
12. Cover the bowl with plastic wrap and refrigerate for at least 1 hour to allow the flavors to meld and the texture to firm up.
13. Tip: For best results, serve the dip chilled within 3 days, as it can soften at room temperature.
A rich, velvety dip with the unmistakable caramelized spice of Biscoff, studded with bursts of chocolate. Its thick, scoopable texture pairs wonderfully with graham crackers, apple slices, or even spooned over ice cream for an extra-decadent twist.
Biscoff Cookie Butter Thumbprint Cookies
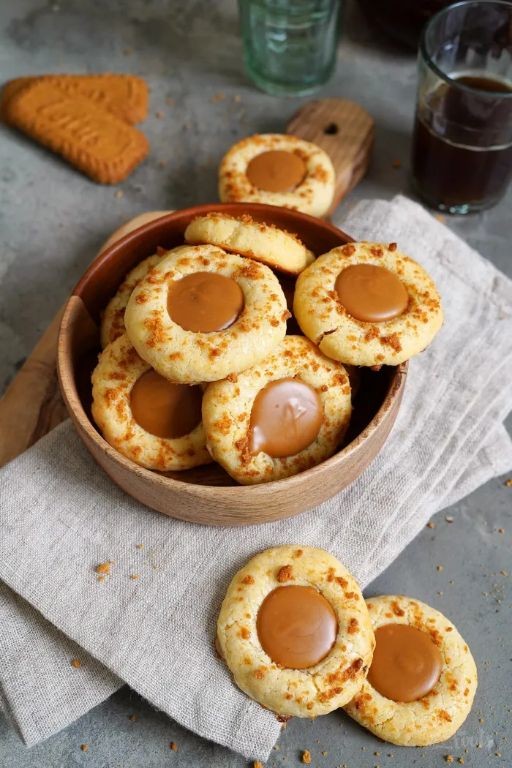
You’ve probably seen that irresistible jar of Biscoff cookie butter sitting on the grocery store shelf, and today we’re turning it into the ultimate holiday cookie. These thumbprint cookies are soft, buttery, and filled with that signature spiced caramel flavor, making them a festive treat that’s surprisingly simple to bake.
Serving: 24 | Pre Time: 15 minutes | Cooking Time: 12 minutes
Ingredients
– Unsalted butter – 1 cup
– Granulated sugar – ¾ cup
– Egg – 1 large
– Vanilla extract – 1 tsp
– All-purpose flour – 2 ¼ cups
– Salt – ½ tsp
– Biscoff cookie butter – ½ cup
Instructions
1. Preheat your oven to 350°F and line two baking sheets with parchment paper.
2. In a large bowl, use an electric mixer to cream the unsalted butter and granulated sugar together on medium speed for 2–3 minutes until light and fluffy.
3. Add the egg and vanilla extract to the butter mixture, mixing on low speed just until combined to avoid overbeating.
4. In a separate bowl, whisk together the all-purpose flour and salt to ensure even distribution.
5. Gradually add the flour mixture to the wet ingredients, mixing on low speed until a soft dough forms and no dry streaks remain.
6. Scoop the dough into 1-tablespoon portions, rolling each into a smooth ball between your palms.
7. Place the dough balls 2 inches apart on the prepared baking sheets.
8. Use your thumb or the back of a small spoon to press a deep indentation into the center of each dough ball.
9. Fill each indentation with about 1 teaspoon of Biscoff cookie butter, being careful not to overfill to prevent spillage during baking.
10. Bake the cookies in the preheated oven for 10–12 minutes, or until the edges are lightly golden and the centers are set.
11. Let the cookies cool on the baking sheets for 5 minutes before transferring them to a wire rack to cool completely.
Vibrantly spiced and delightfully tender, these cookies offer a melt-in-your-mouth texture with a rich, caramelized filling. For a festive twist, drizzle them with melted white chocolate or sprinkle with crushed Biscoff cookies before serving.
Biscoff Cookie Crust Pie
Every holiday season calls for a showstopping dessert that’s both impressive and surprisingly simple to make. Enter this Biscoff Cookie Crust Pie—a creamy, spiced delight that comes together with minimal fuss and maximum flavor. Let’s walk through it step-by-step so you can confidently create this crowd-pleaser.
Serving: 8 | Pre Time: 20 minutes | Cooking Time: 10 minutes
Ingredients
– Biscoff cookies – 2 cups (crushed)
– Unsalted butter – 6 tbsp, melted
– Cream cheese – 8 oz, softened
– Powdered sugar – ½ cup
– Heavy cream – 1 cup
– Vanilla extract – 1 tsp
Instructions
1. Preheat your oven to 350°F.
2. Place Biscoff cookies in a zip-top bag and crush them finely with a rolling pin until you have 2 cups of crumbs.
3. In a medium bowl, combine the cookie crumbs with 6 tbsp of melted unsalted butter until the mixture resembles wet sand.
4. Tip: Press the crust firmly into a 9-inch pie dish using the bottom of a measuring cup to create an even, compact layer.
5. Bake the crust at 350°F for 10 minutes, then let it cool completely on a wire rack—this prevents the filling from melting.
6. In a large bowl, beat 8 oz of softened cream cheese with ½ cup of powdered sugar using an electric mixer on medium speed until smooth, about 2 minutes.
7. Add 1 tsp of vanilla extract and beat until just combined.
8. In a separate chilled bowl, whip 1 cup of heavy cream with the mixer on high speed until stiff peaks form, about 3-4 minutes.
9. Tip: Fold the whipped cream gently into the cream cheese mixture with a spatula to keep the filling light and airy.
10. Pour the filling into the cooled crust and smooth the top with an offset spatula.
11. Refrigerate the pie for at least 4 hours, or until set.
12. Tip: For clean slices, dip your knife in hot water and wipe it dry before cutting each piece.
You’ll love the contrast between the crunchy, spiced cookie crust and the velvety, tangy cream cheese filling. This pie shines when served chilled with a dollop of whipped cream or a drizzle of caramel, making it a festive centerpiece for any gathering.
Biscoff Cookie Layered Parfait
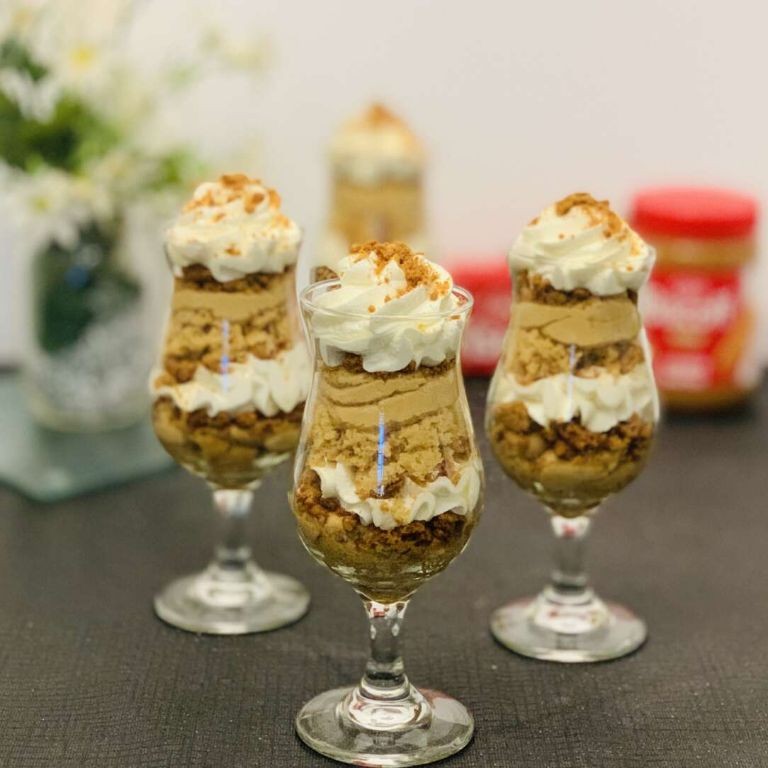
Gathering a few simple ingredients can create a stunning dessert that’s perfect for holiday entertaining or a cozy night in. This Biscoff Cookie Layered Parfait comes together quickly with no baking required, making it an ideal last-minute treat that looks impressively layered in clear glasses. Follow each step carefully to build those distinct, creamy and crunchy textures.
Serving: 4 | Pre Time: 15 minutes | Cooking Time: 0 minutes
Ingredients
– Heavy cream – 1 cup
– Powdered sugar – ¼ cup
– Cream cheese – 8 oz
– Biscoff cookie spread – ½ cup
– Biscoff cookies – 12 cookies
Instructions
1. Place a large mixing bowl and the beaters of a hand mixer in the freezer for 10 minutes to chill, which helps the cream whip faster and hold its shape better.
2. Pour 1 cup of heavy cream into the chilled bowl.
3. Add ¼ cup of powdered sugar to the bowl.
4. Use the hand mixer on medium-high speed to whip the cream and sugar until stiff peaks form, about 3–4 minutes; stiff peaks mean the cream stands up straight when you lift the beaters.
5. In a separate medium bowl, combine 8 oz of cream cheese and ½ cup of Biscoff cookie spread.
6. Beat the cream cheese and Biscoff spread with the mixer on medium speed until completely smooth and well blended, about 2 minutes.
7. Gently fold the whipped cream into the cream cheese mixture using a rubber spatula until no white streaks remain, being careful not to deflate the cream.
8. Crush 12 Biscoff cookies into coarse crumbs by placing them in a zip-top bag and rolling with a rolling pin, or pulse briefly in a food processor.
9. Spoon a layer of the cream mixture into the bottom of four serving glasses, using about 2 tablespoons per glass.
10. Sprinkle a layer of cookie crumbs over the cream mixture in each glass, using about 1 tablespoon per glass.
11. Repeat the layers—cream mixture then cookie crumbs—once more in each glass.
12. Top each parfait with a final dollop of the cream mixture.
13. Garnish each parfait with a whole Biscoff cookie inserted into the top.
14. Refrigerate the parfaits for at least 1 hour before serving to allow the flavors to meld and the layers to set firmly.
The parfait offers a delightful contrast between the smooth, spiced cream and the crunchy cookie layers, with the Biscoff spread lending a warm caramelized flavor. For a festive twist, drizzle each serving with melted chocolate or add a sprinkle of cinnamon just before serving to enhance the cozy spice notes.
Biscoff Cookie Butter Blondies
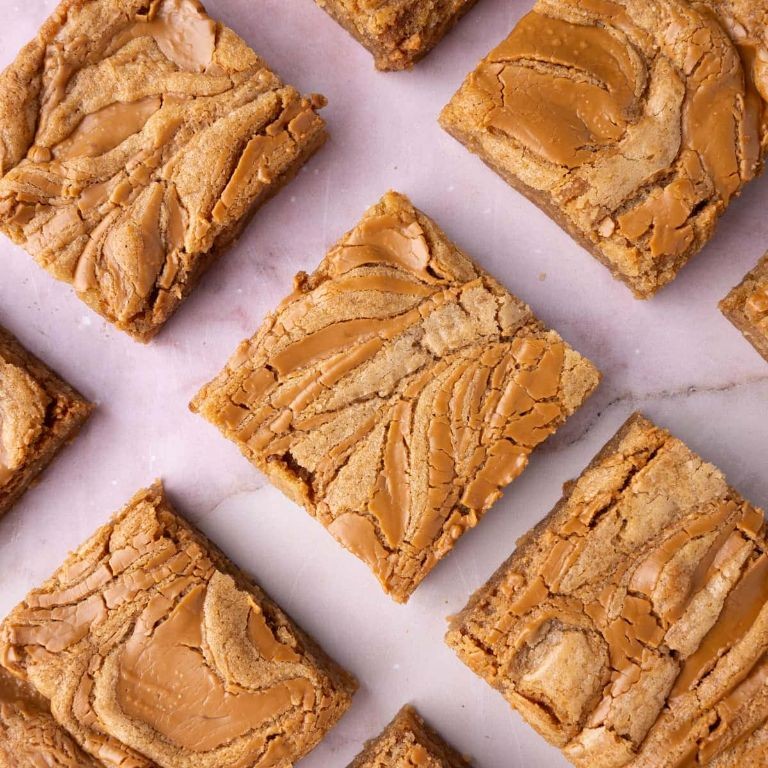
Fancy a treat that combines the cozy warmth of blondies with the irresistible caramelized spice of cookie butter? These Biscoff Cookie Butter Blondies are your answer—a simple, one-bowl wonder that delivers rich, chewy squares with a delightful swirl of Lotus Biscoff spread. Perfect for holiday gifting or a quick dessert fix, they come together in minutes with minimal fuss.
Serving: 16 | Pre Time: 10 minutes | Cooking Time: 25 minutes
Ingredients
– Unsalted butter – ½ cup
– Brown sugar – ¾ cup
– Egg – 1
– Vanilla extract – 1 tsp
– All-purpose flour – 1 cup
– Baking powder – ½ tsp
– Salt – ¼ tsp
– Lotus Biscoff cookie butter – ⅓ cup
Instructions
1. Preheat your oven to 350°F and line an 8×8-inch baking pan with parchment paper, leaving overhang on two sides for easy removal later.
2. Melt the unsalted butter in a microwave-safe bowl for 45 seconds until fully liquid, then let it cool for 2 minutes to avoid cooking the egg.
3. Add the brown sugar to the melted butter and whisk vigorously for 1 minute until smooth and slightly thickened—this helps create a chewy texture.
4. Crack the egg into the bowl and pour in the vanilla extract, then whisk for another 30 seconds until fully combined.
5. Sift the all-purpose flour, baking powder, and salt directly into the wet ingredients to prevent lumps, and fold gently with a spatula just until no dry streaks remain; overmixing can lead to tough blondies.
6. Pour half of the batter into the prepared pan and spread it evenly with the spatula.
7. Warm the Lotus Biscoff cookie butter in the microwave for 15 seconds to make it pourable, then drizzle it over the batter in the pan.
8. Top with the remaining batter and use a knife to swirl the layers together in a figure-eight pattern for a marbled effect, being careful not to overmix.
9. Bake at 350°F for 22-25 minutes, until the edges are golden brown and a toothpick inserted into the center comes out with a few moist crumbs—avoid overbaking for fudgy results.
10. Let the blondies cool completely in the pan on a wire rack for at least 1 hour before slicing into 16 squares with a sharp knife.
Perfectly fudgy with a crisp edge, these blondies boast deep caramel notes from the brown sugar and a warm spice kick from the Biscoff swirl. Serve them slightly warmed with a scoop of vanilla ice cream for an indulgent twist, or pack them into festive tins as homemade holiday gifts that’ll disappear fast.
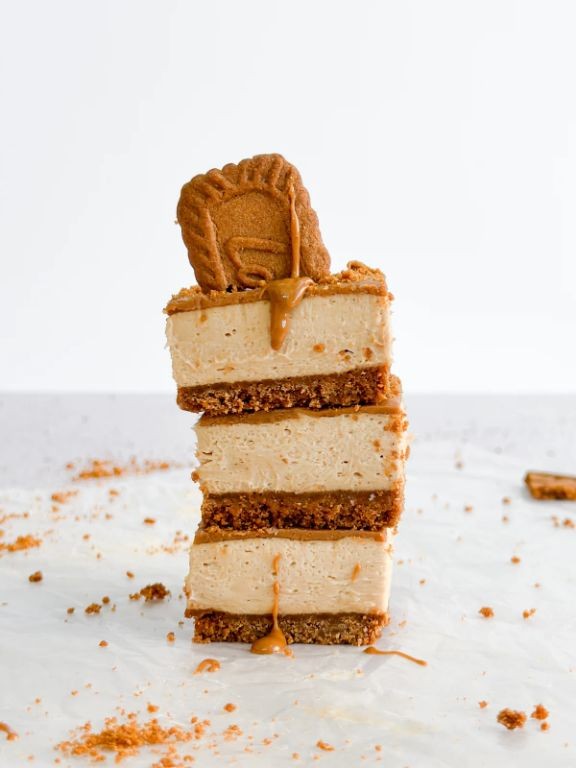
Biscoff Cookie Swirl Cheesecake
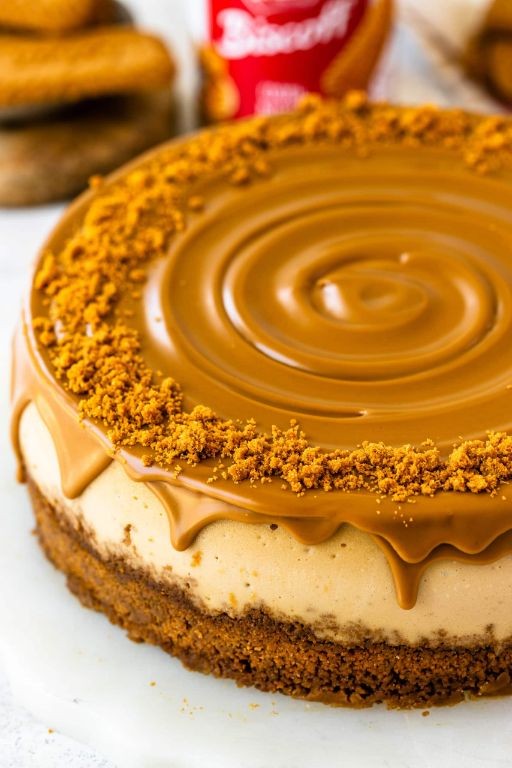
Meticulously crafted for holiday gatherings, this Biscoff Cookie Swirl Cheesecake combines creamy cheesecake with the warm spice of speculoos cookies. Follow these precise steps to create a stunning dessert that requires patience but rewards with incredible flavor. Let’s begin by preparing our ingredients and equipment.
Serving: 12 | Pre Time: 30 minutes | Cooking Time: 60 minutes
Ingredients
– Biscoff cookies – 2 cups (crushed)
– Butter – ½ cup (melted)
– Cream cheese – 24 oz (room temperature)
– Granulated sugar – 1 cup
– Eggs – 3 large
– Vanilla extract – 1 tsp
– Sour cream – ½ cup
– Biscoff cookie butter – ½ cup
Instructions
1. Preheat your oven to 325°F (163°C) and position a rack in the center.
2. Place 2 cups of Biscoff cookies in a food processor and pulse until fine crumbs form.
3. Combine the cookie crumbs with ½ cup melted butter in a medium bowl, mixing until evenly moistened.
4. Press the crumb mixture firmly into the bottom of a 9-inch springform pan using the bottom of a measuring cup.
5. Bake the crust for 10 minutes at 325°F, then remove and cool completely on a wire rack.
6. In a large mixing bowl, beat 24 oz room temperature cream cheese with 1 cup granulated sugar on medium speed for 3 minutes until smooth and creamy.
7. Add 3 large eggs one at a time, beating for 30 seconds after each addition until fully incorporated.
8. Mix in 1 tsp vanilla extract and ½ cup sour cream on low speed until just combined, being careful not to overmix.
9. Pour two-thirds of the cheesecake batter over the cooled crust, spreading evenly with a spatula.
10. Warm ½ cup Biscoff cookie butter in the microwave for 15 seconds to make it pourable.
11. Drizzle the warmed cookie butter over the cheesecake batter in a spiral pattern.
12. Pour the remaining cheesecake batter over the cookie butter swirls.
13. Use a knife to gently swirl through the batter in a figure-eight pattern to create marbled effects.
14. Place the springform pan in a larger baking dish and create a water bath by pouring hot water into the outer dish until it reaches halfway up the sides of the springform pan.
15. Bake at 325°F for 55-60 minutes until the edges are set but the center still jiggles slightly when gently shaken.
16. Turn off the oven, prop the door open with a wooden spoon, and let the cheesecake cool in the oven for 1 hour.
17. Remove from the oven and run a knife around the edges to loosen from the pan.
18. Refrigerate the cheesecake for at least 6 hours, preferably overnight, before serving.
Baking this cheesecake low and slow in a water bath ensures a silky, crack-free texture that contrasts beautifully with the crunchy cookie crust. The swirls of spiced cookie butter create pockets of caramelized flavor throughout each creamy slice. For an elegant presentation, garnish each serving with crushed Biscoff cookies and a dollop of whipped cream.
Biscoff Cookie Crumble Muffins

Gently combine the warmth of holiday baking with the irresistible crunch of Biscoff cookies in these easy-to-make muffins. Perfect for beginners, this recipe walks you through each step methodically, ensuring delicious results every time. You’ll create a tender crumb with pockets of caramelized cookie goodness that will make your kitchen smell like a festive bakery.
Serving: 12 | Pre Time: 15 minutes | Cooking Time: 20 minutes
Ingredients
– All-purpose flour – 2 cups
– Granulated sugar – ¾ cup
– Baking powder – 2 tsp
– Salt – ½ tsp
– Milk – 1 cup
– Vegetable oil – ⅓ cup
– Egg – 1 large
– Vanilla extract – 1 tsp
– Biscoff cookies – 1 cup crushed
– Unsalted butter – ¼ cup melted
Instructions
1. Preheat your oven to 375°F and line a 12-cup muffin tin with paper liners.
2. In a large bowl, whisk together the flour, sugar, baking powder, and salt until fully combined.
3. In a separate medium bowl, whisk the milk, vegetable oil, egg, and vanilla extract until smooth.
4. Pour the wet ingredients into the dry ingredients and stir gently with a spatula until just combined—do not overmix to keep the muffins tender.
5. Fold in ¾ cup of the crushed Biscoff cookies, reserving the remaining ¼ cup for the topping.
6. Divide the batter evenly among the 12 muffin cups, filling each about ⅔ full.
7. In a small bowl, mix the remaining ¼ cup crushed cookies with the melted butter to create a crumble topping.
8. Sprinkle the crumble topping evenly over each muffin batter portion.
9. Bake at 375°F for 18–22 minutes, or until a toothpick inserted into the center of a muffin comes out clean.
10. Let the muffins cool in the tin for 5 minutes, then transfer them to a wire rack to cool completely—this prevents soggy bottoms.
Lightly crisp on top with a soft, moist interior, these muffins offer a delightful contrast of textures. The Biscoff crumble adds a caramelized, spiced crunch that pairs wonderfully with the vanilla-scented base. For a festive twist, serve them warm with a drizzle of melted white chocolate or alongside a cup of spiced chai tea.
Biscoff Cookie Butter Fudge
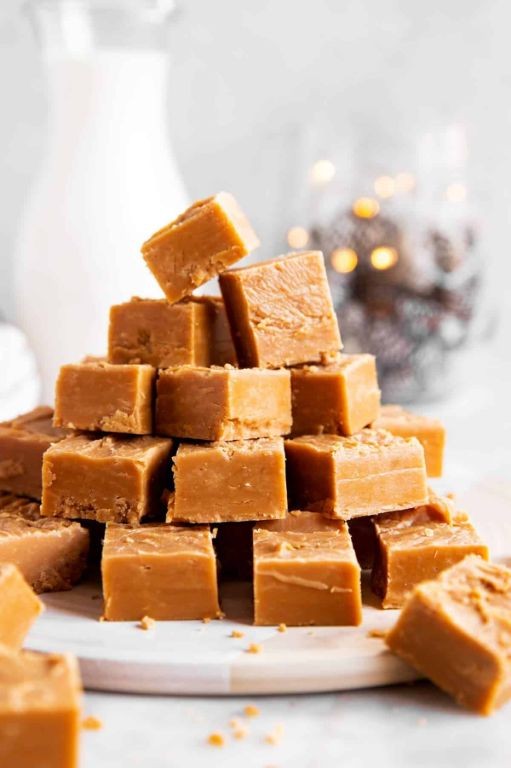
Biscoff cookie butter fudge is a decadent treat that combines the warm, spiced flavor of speculoos cookies with rich, creamy chocolate. By following these straightforward steps, you’ll create a dessert that’s perfect for holiday gifting or a cozy night in. This recipe requires minimal ingredients and yields impressive results every time.
Serving: 16 pieces | Pre Time: 10 minutes | Cooking Time: 5 minutes
Ingredients
– White chocolate chips – 2 cups
– Biscoff cookie butter – 1 cup
– Sweetened condensed milk – 1 (14 oz) can
– Vanilla extract – 1 tsp
Instructions
1. Line an 8×8-inch baking pan with parchment paper, leaving overhang on two sides for easy removal.
2. Combine the white chocolate chips, Biscoff cookie butter, and sweetened condensed milk in a medium saucepan.
3. Place the saucepan over low heat and stir constantly with a rubber spatula for 4–5 minutes until the mixture is completely smooth and no lumps remain.
4. Remove the saucepan from the heat and stir in the vanilla extract until fully incorporated.
5. Pour the fudge mixture into the prepared pan and spread it evenly with the spatula.
6. Tap the pan gently on the counter 2–3 times to release any air bubbles.
7. Let the fudge cool at room temperature for 30 minutes, then cover it with plastic wrap.
8. Refrigerate the fudge for at least 4 hours, or until it is completely firm to the touch.
9. Use the parchment paper overhang to lift the fudge slab from the pan and place it on a cutting board.
10. Cut the fudge into 16 even squares with a sharp knife, wiping the blade clean between cuts for neat edges.
After chilling, this fudge sets into a firm yet melt-in-your-mouth texture with a pronounced caramelized spice flavor from the cookie butter. A sprinkle of crushed Biscoff cookies on top before chilling adds delightful crunch, or you can drizzle the squares with melted dark chocolate for an elegant finish.
Biscoff Cookie No-Bake Bars
Picture this: a decadent, no-bake treat that comes together in minutes, perfect for last-minute holiday gatherings or a cozy winter indulgence. These Biscoff Cookie No-Bake Bars combine the warm, spiced flavor of Biscoff cookies with a rich, creamy filling, requiring zero oven time—ideal for beginners or anyone short on time.
Serving: 16 | Pre Time: 15 minutes | Cooking Time: 0 minutes
Ingredients
- Biscoff cookies – 2 cups (crushed)
- Unsalted butter – ½ cup
- Cream cheese – 8 oz
- Powdered sugar – 1 cup
- Vanilla extract – 1 tsp
- White chocolate chips – 1 cup
Instructions
- Line an 8×8-inch baking pan with parchment paper, leaving overhang on two sides for easy removal later.
- Place Biscoff cookies in a zip-top bag and crush them into fine crumbs using a rolling pin until you have 2 cups total.
- Melt ½ cup unsalted butter in a microwave-safe bowl in 30-second intervals, stirring between each, until fully liquid and smooth.
- Combine the crushed Biscoff cookies with the melted butter in a medium bowl, mixing until the crumbs are evenly coated and hold together when pressed.
- Press the Biscoff mixture firmly into the bottom of the prepared pan using the back of a spoon or your hands to create an even, compact layer.
- In a separate large bowl, beat 8 oz cream cheese with an electric mixer on medium speed for 1-2 minutes until smooth and creamy.
- Gradually add 1 cup powdered sugar to the cream cheese, beating on low speed to incorporate without creating a cloud of sugar, then increase to medium until fully combined.
- Mix in 1 tsp vanilla extract with the cream cheese mixture until just blended, being careful not to overmix which can make it grainy.
- Spread the cream cheese filling evenly over the Biscoff crust using a spatula, smoothing the top to ensure it reaches all corners of the pan.
- Melt 1 cup white chocolate chips in a microwave-safe bowl in 20-second intervals, stirring after each, until completely smooth and fluid, about 1-2 minutes total.
- Pour the melted white chocolate over the cream cheese layer, tilting the pan gently to spread it into a thin, even coating.
- Refrigerate the pan for at least 4 hours, or until the bars are fully set and firm to the touch, which prevents crumbling when cutting.
- Lift the bars from the pan using the parchment overhang and place on a cutting board, then slice into 16 squares with a sharp knife wiped clean between cuts for neat edges.
Finally, these bars offer a delightful contrast: the crunchy Biscoff base pairs with the creamy, tangy filling and a sweet white chocolate top, creating a melt-in-your-mouth texture. For a festive twist, sprinkle crushed Biscoff cookies on top before the chocolate sets, or serve chilled with a drizzle of caramel for extra indulgence.
Biscoff Cookie Butter Pancakes
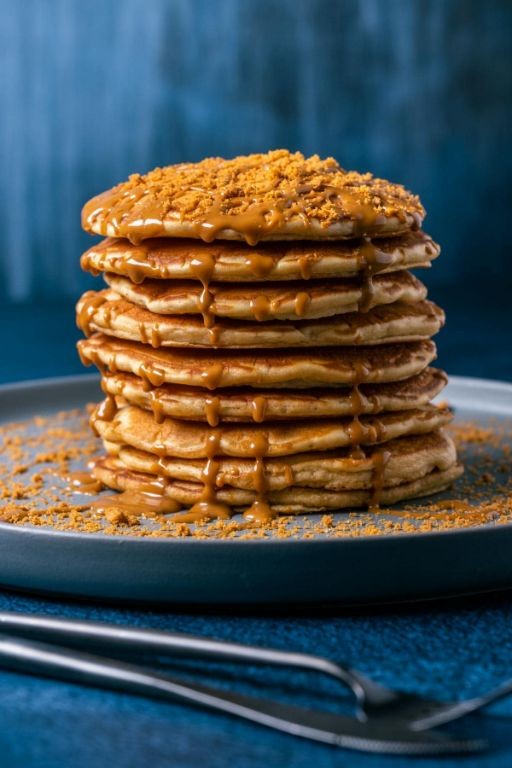
Savor the holiday morning with these decadent Biscoff Cookie Butter Pancakes, a festive twist on a classic breakfast that combines the warm, spiced flavor of cookie butter with fluffy, golden pancakes. This recipe is perfect for beginners, as I’ll guide you through each simple step to ensure perfect results every time. Let’s create a memorable Christmas Eve breakfast together.
Serving: 4 | Pre Time: 10 minutes | Cooking Time: 15 minutes
Ingredients
– All-purpose flour – 1 cup
– Granulated sugar – 2 tbsp
– Baking powder – 2 tsp
– Salt – ¼ tsp
– Milk – 1 cup
– Large egg – 1
– Vegetable oil – 2 tbsp
– Biscoff cookie butter – ½ cup
– Unsalted butter – 2 tbsp
Instructions
1. In a large mixing bowl, whisk together 1 cup all-purpose flour, 2 tbsp granulated sugar, 2 tsp baking powder, and ¼ tsp salt until fully combined.
2. In a separate medium bowl, whisk 1 cup milk, 1 large egg, and 2 tbsp vegetable oil until smooth.
3. Pour the wet ingredients into the dry ingredients and gently stir with a spatula until just combined; do not overmix, as a few lumps are fine for tender pancakes.
4. Heat a non-stick skillet or griddle over medium heat and add 1 tbsp unsalted butter, swirling to coat the surface evenly.
5. For each pancake, ladle ¼ cup of batter onto the hot skillet, cooking until bubbles form on the surface and the edges look set, about 2-3 minutes.
6. Flip the pancakes carefully with a spatula and cook until golden brown on the other side, about 1-2 minutes more; adjust heat if needed to prevent burning.
7. Transfer cooked pancakes to a plate and cover loosely with foil to keep warm; repeat with remaining batter, adding more butter to the skillet as necessary.
8. In a small microwave-safe bowl, microwave ½ cup Biscoff cookie butter for 15-20 seconds until slightly melted and drizzleable, stirring halfway through.
9. Drizzle the warmed Biscoff cookie butter over the stack of pancakes just before serving.
Zesty and indulgent, these pancakes boast a soft, fluffy interior with crispy edges, infused with the rich, caramelized spice of cookie butter. For a festive touch, top with extra cookie butter swirls or a sprinkle of crushed Biscoff cookies, making them a showstopper for holiday brunches or cozy weekend mornings.
Biscoff Cookie Stuffed French Toast
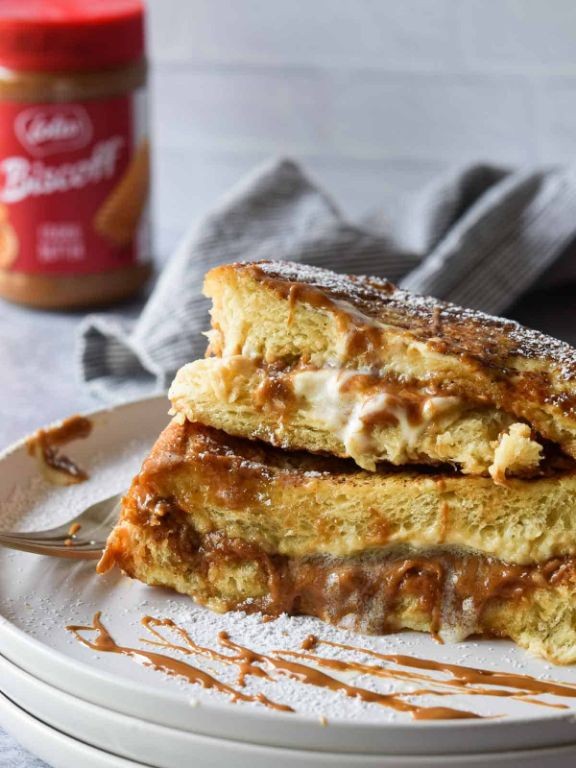
Diving into a decadent breakfast treat, this recipe transforms classic French toast into a cookie-stuffed delight that’s surprisingly simple to master. Let’s walk through each step methodically to ensure your first attempt is a success.
Serving: 2 | Pre Time: 10 minutes | Cooking Time: 10 minutes
Ingredients
– Bread – 4 slices
– Eggs – 2 large
– Milk – ¼ cup
– Ground cinnamon – ½ tsp
– Vanilla extract – 1 tsp
– Biscoff cookies – 8 cookies
– Butter – 2 tbsp
– Maple syrup – for serving
Instructions
1. Place 4 slices of bread on a clean work surface.
2. Arrange 2 Biscoff cookies between each pair of bread slices to create 2 stuffed sandwiches, pressing gently to seal.
3. Crack 2 large eggs into a shallow bowl.
4. Add ¼ cup of milk, ½ tsp of ground cinnamon, and 1 tsp of vanilla extract to the bowl with the eggs.
5. Whisk the egg mixture vigorously until fully combined and slightly frothy, about 30 seconds.
6. Heat a large non-stick skillet or griddle over medium heat.
7. Add 1 tbsp of butter to the skillet, swirling to coat the surface as it melts completely.
8. Dip one stuffed sandwich into the egg mixture, submerging it for 5 seconds per side to soak thoroughly without becoming soggy.
9. Immediately transfer the dipped sandwich to the preheated skillet.
10. Cook the sandwich for 3–4 minutes on the first side, until the bottom is golden brown and crisp.
11. Carefully flip the sandwich using a spatula.
12. Cook for another 3–4 minutes on the second side, until golden brown and the internal temperature reaches 160°F if checked with a thermometer.
13. Remove the cooked sandwich from the skillet and place it on a plate.
14. Repeat steps 8–13 with the remaining sandwich, adding the second 1 tbsp of butter to the skillet first.
15. Serve the French toast immediately, drizzled with maple syrup.
Creating this dish yields a crisp exterior that gives way to a soft, custardy center with melted Biscoff cookies adding a warm, spiced sweetness. Consider topping it with a dollop of whipped cream or fresh berries for a festive brunch presentation that highlights the cookie’s caramelized notes.
Biscoff Cookie Butter Macarons
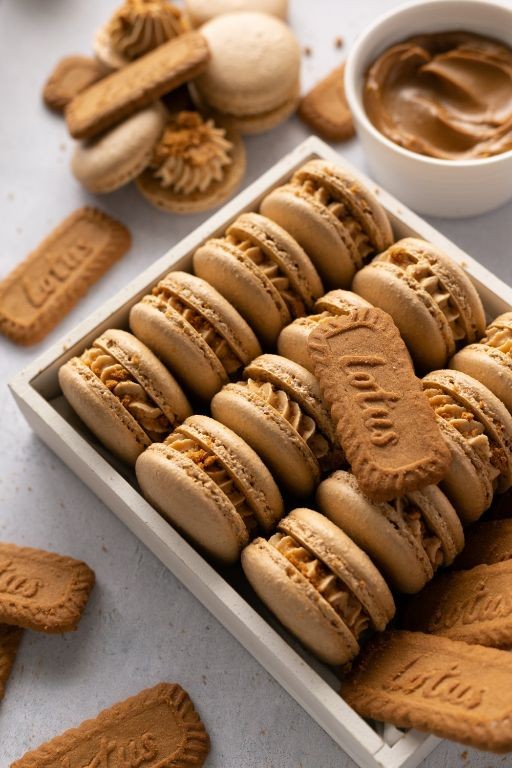
Getting the perfect macaron can feel intimidating, but with careful attention to detail, you can create these elegant Biscoff Cookie Butter Macarons at home. This recipe breaks down the process into clear, manageable steps, ensuring success even for first-timers. We’ll focus on achieving smooth, shiny shells and a rich, spiced filling that’s sure to impress.
Serving: 24 | Pre Time: 45 minutes | Cooking Time: 15 minutes
Ingredients
– Almond flour – 1 cup
– Powdered sugar – 1¾ cups
– Egg whites – 3 large
– Granulated sugar – ¼ cup
– Cream of tartar – ¼ tsp
– Biscoff cookie butter – ½ cup
– Unsalted butter – ¼ cup
Instructions
1. Sift the almond flour and powdered sugar together into a large bowl twice to remove any lumps, which is key for smooth macaron shells.
2. In a separate clean, dry bowl, combine the egg whites, granulated sugar, and cream of tartar.
3. Using a hand mixer or stand mixer, beat the egg white mixture on medium-high speed for 8-10 minutes until stiff, glossy peaks form.
4. Gently fold the sifted dry ingredients into the meringue in three additions using a spatula, mixing just until the batter flows like lava and a ribbon holds for 10 seconds when lifted.
5. Transfer the batter to a piping bag fitted with a ½-inch round tip.
6. Pipe 1½-inch circles onto parchment paper-lined baking sheets, spacing them 1 inch apart.
7. Firmly tap the baking sheets on the counter 3-4 times to release air bubbles, then let the piped shells sit at room temperature for 30 minutes until a skin forms that doesn’t stick to your finger.
8. Preheat your oven to 300°F.
9. Bake the shells on the middle rack for 14-16 minutes until they lift cleanly off the parchment when gently nudged.
10. Let the shells cool completely on the baking sheets for 15 minutes before removing.
11. While the shells cool, beat the Biscoff cookie butter and unsalted butter together in a bowl with a mixer on medium speed for 2-3 minutes until light and fluffy.
12. Transfer the filling to a piping bag fitted with a ¼-inch round tip.
13. Pipe a dollop of filling onto the flat side of half the cooled shells.
14. Sandwich with the remaining shells, pressing gently to spread the filling to the edges.
15. Refrigerate the assembled macarons in an airtight container for 24 hours to allow the flavors to meld and the texture to soften.
Fresh from the fridge, these macarons offer a crisp shell that gives way to a chewy interior and a creamy, spiced Biscoff center. For a festive touch, serve them alongside coffee or crumble extra cookies over the top as garnish.
Biscoff Cookie Milkshake
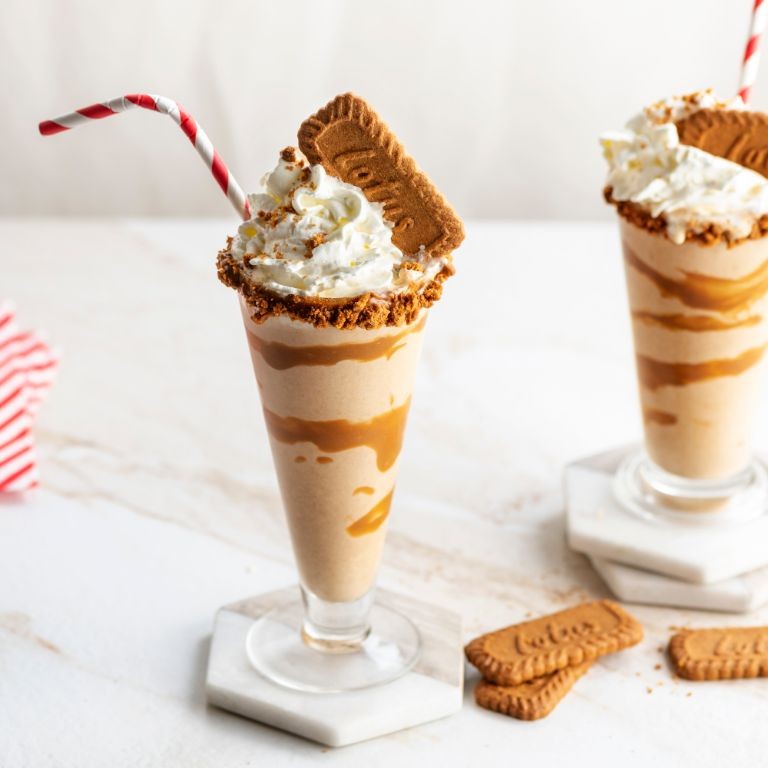
Ready to blend up a creamy, cookie-packed treat that tastes like a liquid version of your favorite spiced biscuits? This Biscoff Cookie Milkshake comes together in minutes with just a handful of ingredients, perfect for a quick dessert or indulgent snack. Let’s walk through each simple step to ensure your shake is perfectly smooth and flavorful every time.
Serving: 2 | Pre Time: 5 minutes | Cooking Time: 0 minutes
Ingredients
– Vanilla ice cream – 2 cups
– Whole milk – ½ cup
– Biscoff cookie spread – ¼ cup
– Biscoff cookies – 4 cookies
– Whipped cream – for topping
Instructions
1. Place 2 cups of vanilla ice cream into a blender. Tip: For a thicker shake, use ice cream straight from the freezer without letting it soften.
2. Add ½ cup of whole milk to the blender. Tip: Whole milk creates a richer texture compared to low-fat alternatives.
3. Spoon ¼ cup of Biscoff cookie spread into the blender.
4. Crush 2 Biscoff cookies into coarse crumbs by placing them in a sealed plastic bag and gently tapping with a rolling pin for about 30 seconds.
5. Add the crushed cookie crumbs to the blender.
6. Secure the blender lid tightly.
7. Blend the mixture on high speed for 45–60 seconds, until completely smooth with no lumps.
8. Pour the milkshake evenly into two tall glasses.
9. Top each glass with a generous dollop of whipped cream. Tip: For extra flair, use a piping bag to swirl the whipped cream neatly.
10. Crush the remaining 2 Biscoff cookies into fine crumbs using the same bag-and-rolling-pin method for about 15 seconds.
11. Sprinkle the fine cookie crumbs over the whipped cream on each glass.
12. Insert a straw into each glass and serve immediately.
Here, the shake boasts a velvety, thick consistency that clings to the straw, with the spiced caramel flavor of Biscoff shining through in every sip. For a fun twist, try drizzling extra cookie spread on the glass rims before pouring, or blend in a pinch of cinnamon to enhance the warm notes.
Biscoff Cookie Butter Pretzel Bites

Baking these irresistible treats combines the cozy warmth of cookie butter with the satisfying crunch of pretzels. Begin by gathering your ingredients and preheating your oven to 350°F for even, gentle cooking.
Serving: 24 | Pre Time: 15 minutes | Cooking Time: 10 minutes
Ingredients
– Mini pretzel twists – 24
– Biscoff cookie butter – ½ cup
– White chocolate chips – 1 cup
– Sprinkles – 2 tbsp
Instructions
1. Arrange 24 mini pretzel twists in a single layer on a parchment-lined baking sheet.
2. Spoon ½ cup of Biscoff cookie butter into a microwave-safe bowl.
3. Microwave the cookie butter on high for 15 seconds to soften it slightly for easier spreading.
4. Place 1 teaspoon of the softened cookie butter onto the center of each pretzel twist using a small spoon.
5. Transfer the baking sheet to the preheated 350°F oven and bake for 5 minutes, just until the cookie butter is warm and spreadable.
6. Remove the baking sheet from the oven and let the pretzels cool for 2 minutes to set the cookie butter base.
7. Pour 1 cup of white chocolate chips into a separate microwave-safe bowl.
8. Microwave the white chocolate chips in 20-second intervals, stirring between each, until fully melted and smooth to prevent scorching.
9. Drizzle the melted white chocolate over each pretzel bite using a fork or piping bag for controlled decoration.
10. Immediately sprinkle 2 tablespoons of colorful sprinkles over the white chocolate before it sets to ensure they adhere.
11. Allow the bites to cool completely at room temperature for 30 minutes until the chocolate hardens.
12. Gently lift the bites from the parchment paper and transfer them to a serving plate.
Layers of creamy, spiced cookie butter and crisp pretzel create a delightful contrast in every bite. The sweet white chocolate drizzle adds a festive touch, making these perfect for holiday gatherings or as a quick snack straight from the freezer.
Summary
Joyful baking awaits with these 20 irresistible Biscoff cookie recipes! Whether you’re a seasoned baker or just starting out, this collection offers something for everyone to create and enjoy. We’d love to hear which recipe becomes your new favorite—please leave a comment below and share this roundup on Pinterest to spread the Biscoff love. Happy baking!


