
Kick your cheese obsession into high gear! Blue cheese lovers, rejoice—we’ve gathered 20 irresistibly creamy recipes that turn tangy, bold blue into the star of every meal. From cozy comfort dishes to elegant appetizers, get ready to savor every bite. Dive in and discover your next favorite creation!
Blue Cheese Stuffed Burgers
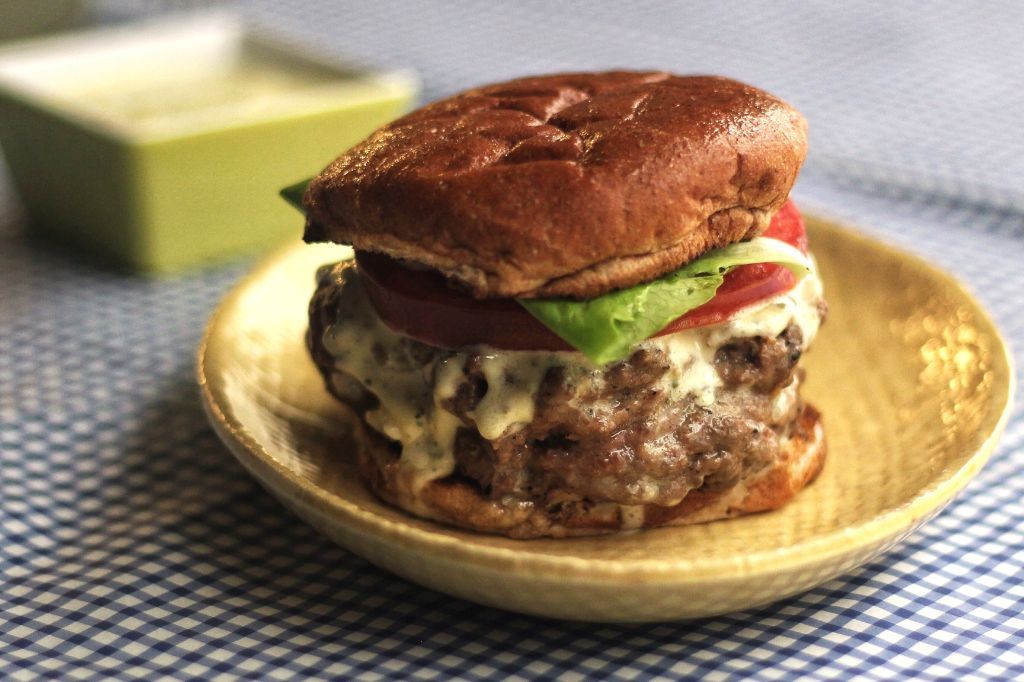
Often, as the year winds down and the air turns crisp, I find myself craving the kind of meal that feels like a warm, savory embrace—a simple yet deeply satisfying project for the hands and the heart. Today, that craving led me to the kitchen for a quiet afternoon of shaping and stuffing, a slow ritual to create something truly special for the table.
Serving: 4 | Pre Time: 20 minutes | Cooking Time: 12 minutes
Ingredients
– 1 ½ pounds of 80/20 ground chuck, chilled
– 4 ounces of creamy, tangy blue cheese crumbles
– 1 large, farm-fresh egg
– ½ cup of fine, dry breadcrumbs
– 1 teaspoon of finely ground black pepper
– ½ teaspoon of coarse kosher salt
– 1 tablespoon of rich extra virgin olive oil
– 4 soft, toasted brioche burger buns
– 4 crisp leaves of butter lettuce
– 1 ripe, juicy beefsteak tomato, sliced
– ¼ cup of smooth, high-quality mayonnaise
Instructions
1. In a large, cool mixing bowl, gently combine the chilled ground chuck, the farm-fresh egg, fine breadcrumbs, finely ground black pepper, and coarse kosher salt with your hands until just incorporated; avoid overmixing to keep the burgers tender.
2. Divide the meat mixture into eight equal, thin patties, each about ¼-inch thick, and place them on a parchment-lined tray.
3. Spoon 1 ounce of the creamy blue cheese crumbles onto the center of four of the patties, leaving a ½-inch border around the edges.
4. Top each cheese-covered patty with one of the remaining patties, carefully pinching and sealing the edges firmly to fully encase the cheese, forming four stuffed burgers.
5. Preheat a cast-iron skillet or grill pan over medium-high heat until a drop of water sizzles and evaporates upon contact, about 5 minutes.
6. Brush the skillet with the rich extra virgin olive oil and place the stuffed burgers in the pan; cook for 5-6 minutes without moving them to develop a deep, caramelized crust.
7. Using a thin, flexible spatula, flip the burgers carefully to avoid breaking the seal, and cook for another 5-6 minutes until the internal temperature reaches 160°F on an instant-read thermometer for food safety.
8. Remove the burgers from the heat and let them rest on a clean plate for 5 minutes to allow the juices to redistribute.
9. While the burgers rest, spread 1 tablespoon of smooth mayonnaise on the cut sides of each soft, toasted brioche bun.
10. Assemble each burger by placing a crisp butter lettuce leaf and a slice of the ripe, juicy tomato on the bottom bun, topping it with a rested burger, and finishing with the top bun.
Perhaps the true magic happens in that first bite, where the juicy, seasoned beef gives way to a molten, tangy blue cheese core, all cradled by the soft, buttery brioche. The cool crunch of lettuce and the bright acidity of tomato cut through the richness beautifully. For a delightful twist, try serving these alongside a simple arugula salad dressed with lemon vinaigrette, letting the peppery greens complement the bold flavors of the burger.
Creamy Blue Cheese Pasta
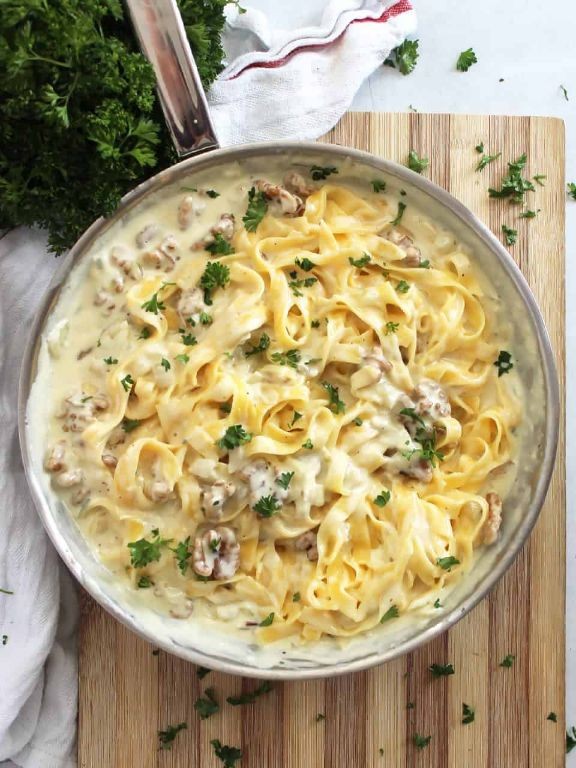
Musing quietly in my kitchen this morning, with the gentle hum of the refrigerator and the soft light filtering through the window, I found myself drawn to the idea of something deeply comforting. This creamy blue cheese pasta feels like a warm, savory embrace, a dish that unfolds slowly and rewards patience with its rich, complex layers of flavor.
Serving: 4 | Pre Time: 15 minutes | Cooking Time: 25 minutes
Ingredients
– 12 ounces of dried rigatoni pasta
– 2 tablespoons of rich extra virgin olive oil
– 3 cloves of fresh garlic, minced
– 1 cup of heavy cream, cold from the refrigerator
– 6 ounces of crumbled, pungent blue cheese
– 1/4 cup of freshly grated Parmigiano-Reggiano cheese
– 1/4 teaspoon of finely ground black pepper
– 1 tablespoon of chopped fresh parsley, for garnish
Instructions
1. Fill a large pot with 4 quarts of water, add 1 tablespoon of salt, and bring it to a rolling boil over high heat.
2. Add 12 ounces of dried rigatoni pasta to the boiling water and cook for 10-12 minutes, stirring occasionally, until it is al dente (tender but still firm to the bite).
3. While the pasta cooks, heat 2 tablespoons of rich extra virgin olive oil in a large skillet over medium-low heat.
4. Add 3 cloves of minced fresh garlic to the skillet and sauté for 1-2 minutes, stirring constantly, until it becomes fragrant and just starts to turn golden—be careful not to burn it, as this can make the dish bitter.
5. Pour 1 cup of cold heavy cream into the skillet, increase the heat to medium, and bring it to a gentle simmer, which should take about 3-4 minutes; stir occasionally to prevent scorching.
6. Reduce the heat to low and gradually stir in 6 ounces of crumbled blue cheese until it melts completely into the cream, creating a smooth sauce, which will take about 2-3 minutes.
7. Stir in 1/4 cup of freshly grated Parmigiano-Reggiano cheese and 1/4 teaspoon of finely ground black pepper until well combined, then remove the skillet from the heat.
8. Drain the cooked pasta, reserving 1/2 cup of the starchy pasta water, and add the pasta directly to the skillet with the sauce.
9. Toss the pasta gently in the sauce, adding a splash of the reserved pasta water if needed to loosen the sauce and help it cling to the pasta—this tip ensures a silky, cohesive texture.
10. Garnish with 1 tablespoon of chopped fresh parsley just before serving to add a fresh, herbal note that balances the richness.
Finally, this pasta offers a luxurious, velvety texture that coats each rigatoni tube, with the bold, tangy punch of blue cheese mellowed by the creamy base. For a creative twist, try serving it alongside a crisp green salad or topping it with toasted walnuts for added crunch, making it a comforting yet elegant meal for quiet evenings.
Blue Cheese and Pear Salad
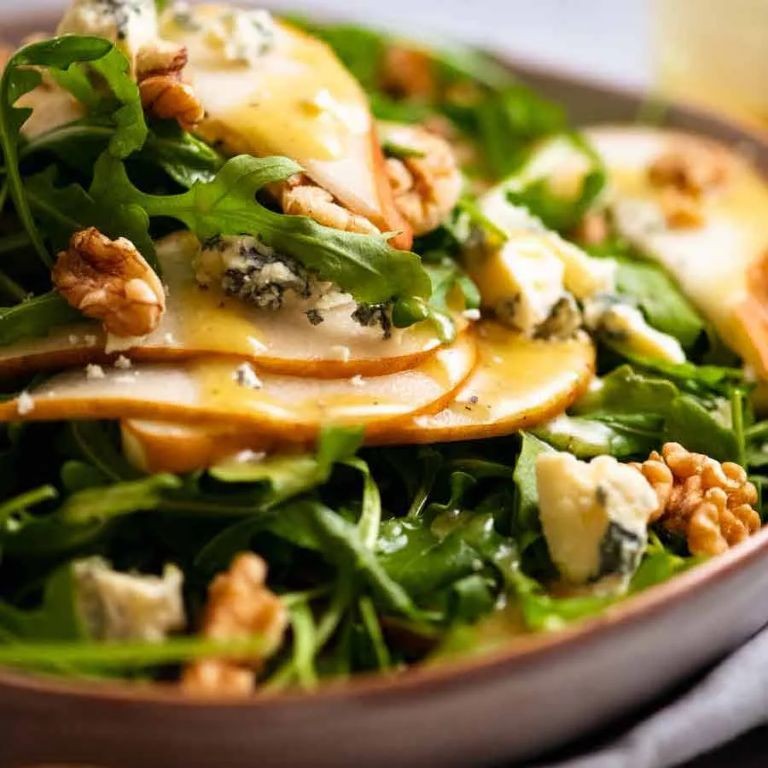
Yearning for a quiet moment of simple elegance, I find myself drawn to the kitchen on this crisp December afternoon. The gentle rhythm of chopping and assembling feels like a meditation, a way to honor the season’s quiet beauty with something both humble and refined. This salad, with its harmonious contrasts, is a gentle reminder that the most satisfying meals often emerge from just a few thoughtful ingredients.
Serving: 4 | Pre Time: 15 minutes | Cooking Time: 0 minutes
Ingredients
– 6 cups of crisp, fresh romaine lettuce, torn into bite-sized pieces
– 2 ripe but firm Anjou pears, cored and thinly sliced
– 4 ounces of crumbly, pungent blue cheese
– 1/2 cup of crunchy, toasted walnut halves
– 1/4 cup of rich extra virgin olive oil
– 2 tablespoons of smooth, aged balsamic vinegar
– 1 tablespoon of raw, golden honey
– 1/2 teaspoon of finely ground black pepper
– 1/4 teaspoon of flaky sea salt
Instructions
1. Place the torn crisp romaine lettuce into a large, wide salad bowl.
2. Arrange the thinly sliced ripe Anjou pears evenly over the bed of lettuce.
3. Crumble the pungent blue cheese by hand directly over the pears and lettuce.
4. Scatter the crunchy toasted walnut halves across the top of the salad.
5. In a small glass jar with a tight-fitting lid, combine the rich extra virgin olive oil, smooth aged balsamic vinegar, and raw golden honey.
6. Secure the lid on the jar and shake vigorously for 30 seconds, or until the mixture is fully emulsified and slightly thickened. (Tip: Using a jar is the easiest way to create a perfectly blended vinaigrette without whisking.)
7. Drizzle the emulsified dressing evenly over the entire assembled salad.
8. Season the salad by sprinkling the finely ground black pepper and flaky sea salt directly over the dressed ingredients. (Tip: Seasoning after dressing helps the salt and pepper adhere to the ingredients for more even flavor distribution.)
9. Using a pair of large salad tongs, gently toss the salad 8-10 times, lifting from the bottom to coat everything lightly without crushing the delicate pears. (Tip: Toss just before serving to keep the lettuce crisp and prevent the pears from browning.)
Vividly creamy pockets of cheese melt slightly against the cool, juicy pears, while the walnuts provide a satisfying crunch in every bite. For a beautiful presentation, consider serving it on individual chilled plates, perhaps with a slice of crusty bread to soak up the last traces of the sweet and tangy dressing.
Blue Cheese and Walnut Stuffed Mushrooms
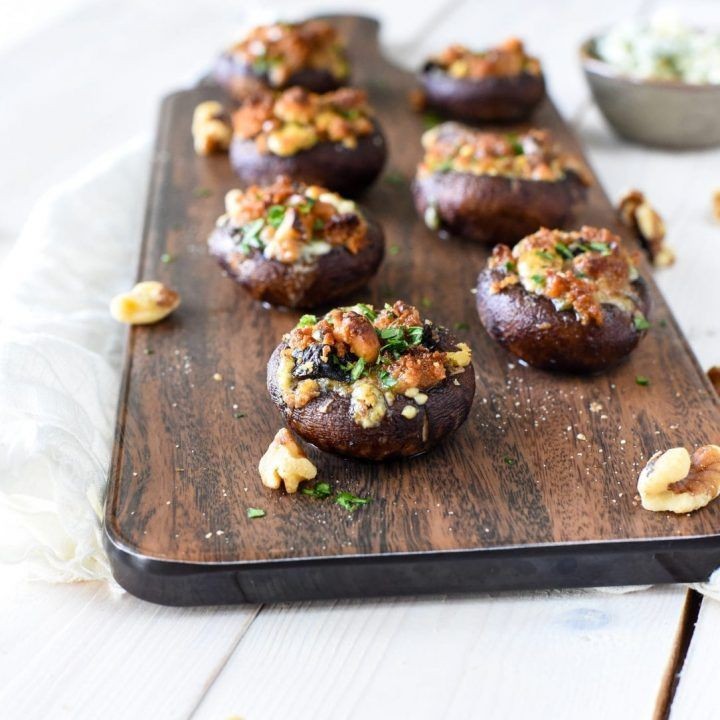
Beneath the quiet hum of the oven, a simple transformation begins. These mushrooms, humble and earthy, become vessels for something rich and complex, a small indulgence that feels both rustic and elegant. It’s the kind of quiet kitchen alchemy that makes a winter afternoon feel complete.
Serving: 4 | Pre Time: 15 minutes | Cooking Time: 20 minutes
Ingredients
– 16 large, firm cremini mushrooms
– 2 tablespoons of rich, melted unsalted butter
– 1/4 cup of finely chopped yellow onion
– 1/2 cup of finely chopped, toasted walnuts
– 4 ounces of crumbly, pungent blue cheese
– 1/4 cup of smooth, full-fat sour cream
– 1/4 teaspoon of finely ground black pepper
– 1/4 teaspoon of kosher salt
– 1 tablespoon of fresh, finely chopped parsley
Instructions
1. Preheat your oven to 400°F (200°C) and line a large baking sheet with parchment paper.
2. Gently twist the stems from all 16 cremini mushrooms, setting the caps aside on the prepared sheet.
3. Finely chop the removed mushroom stems.
4. In a medium skillet over medium heat, melt the 2 tablespoons of unsalted butter.
5. Add the 1/4 cup of finely chopped yellow onion and the chopped mushroom stems to the skillet, sautéing for 5-7 minutes until the onions are translucent and any liquid from the mushrooms has evaporated. Tip: Cooking out this moisture now prevents a soggy filling later.
6. Transfer the onion and mushroom mixture to a medium mixing bowl and let it cool for 5 minutes.
7. To the bowl, add the 1/2 cup of toasted walnuts, 4 ounces of crumbled blue cheese, 1/4 cup of sour cream, 1/4 teaspoon of black pepper, and 1/4 teaspoon of kosher salt.
8. Stir the mixture gently until just combined. Tip: Avoid overmixing to keep the blue cheese crumbles distinct for pockets of bold flavor.
9. Using a small spoon, generously fill each mushroom cap with the cheese and walnut mixture, mounding it slightly.
10. Bake the stuffed mushrooms on the middle rack for 18-20 minutes, until the tops are golden in spots and the mushroom caps are tender. Tip: For extra color, broil for the final 1-2 minutes, watching closely to prevent burning.
11. Remove the baking sheet from the oven and immediately sprinkle the mushrooms with the 1 tablespoon of fresh parsley.
Momentarily, the intense, salty tang of the blue cheese mellows against the earthy, toasted crunch of the walnuts, all cradled by the soft, savory mushroom. Serve them warm, perhaps alongside a crisp, bitter green salad to cut through the richness, or simply let them stand alone as a deeply satisfying bite.
Blue Cheese and Bacon Dip
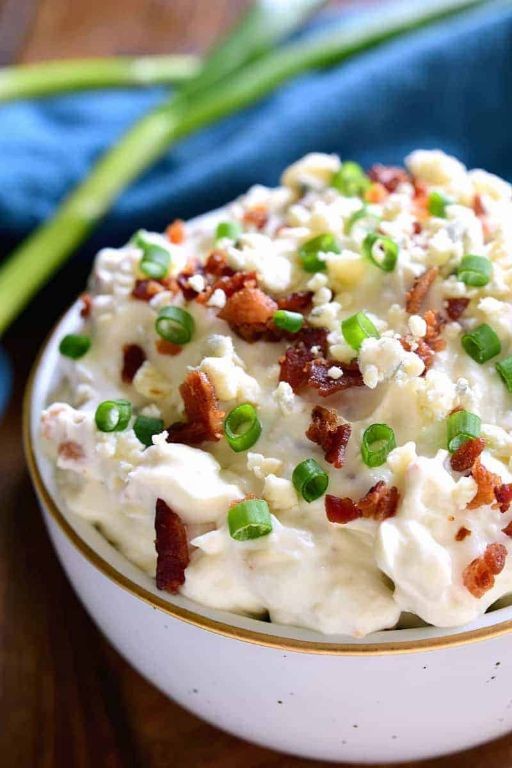
Zigzagging through holiday preparations, I found myself craving something unapologetically rich and comforting, a dip that whispers of cozy gatherings rather than shouts for attention. It’s the kind of dish that emerges slowly from the oven, its aroma promising warmth and nostalgia, perfect for a quiet moment or shared laughter. This blue cheese and bacon dip is that quiet anchor, a humble yet deeply satisfying creation for today’s gentle pace.
Serving: 8 | Pre Time: 15 minutes | Cooking Time: 25 minutes
Ingredients
– 8 ounces of thick-cut, smoky bacon, chopped into small pieces
– 1 cup of full-fat sour cream, luxuriously smooth and tangy
– 8 ounces of creamy, crumbly blue cheese, at room temperature for easy blending
– 1/2 cup of finely grated sharp cheddar cheese, for a subtle melt
– 1/4 cup of finely chopped fresh chives, adding a bright, herbal note
– 1 teaspoon of finely ground black pepper, for a gentle kick
– 1/4 teaspoon of garlic powder, to deepen the savory undertones
– Assorted crackers or sliced baguette, for serving
Instructions
1. Preheat your oven to 350°F (175°C) to ensure even baking from the start.
2. In a large skillet over medium heat, cook the chopped thick-cut, smoky bacon until it turns crispy and golden brown, about 8-10 minutes, stirring occasionally to prevent burning.
3. Using a slotted spoon, transfer the crispy bacon to a paper towel-lined plate to drain excess grease, reserving 1 tablespoon of the bacon fat in the skillet for added flavor.
4. In a medium mixing bowl, combine the full-fat sour cream, creamy crumbly blue cheese, finely grated sharp cheddar cheese, finely chopped fresh chives, finely ground black pepper, and garlic powder, stirring gently until just incorporated to avoid overmixing.
5. Fold in the crispy bacon pieces and the reserved tablespoon of bacon fat, ensuring they are evenly distributed throughout the mixture for a balanced taste.
6. Transfer the mixture to a small, oven-safe baking dish, spreading it into an even layer with a spatula for consistent cooking.
7. Bake in the preheated oven at 350°F (175°C) for 20-25 minutes, or until the edges are bubbly and the top develops a light golden crust, checking at the 20-minute mark to avoid overcooking.
8. Remove the dip from the oven and let it rest for 5 minutes to allow the flavors to meld and the texture to set slightly before serving.
9. Serve warm with assorted crackers or sliced baguette for dipping, encouraging guests to scoop generously.
Soft and velvety with pockets of melted blue cheese, this dip offers a creamy texture that contrasts beautifully with the crispy bacon bits. Its bold, tangy flavor mellows into a comforting richness, perfect for pairing with crunchy vegetables or spreading on toasted crostini for an elegant twist.
Blue Cheese Crusted Steak
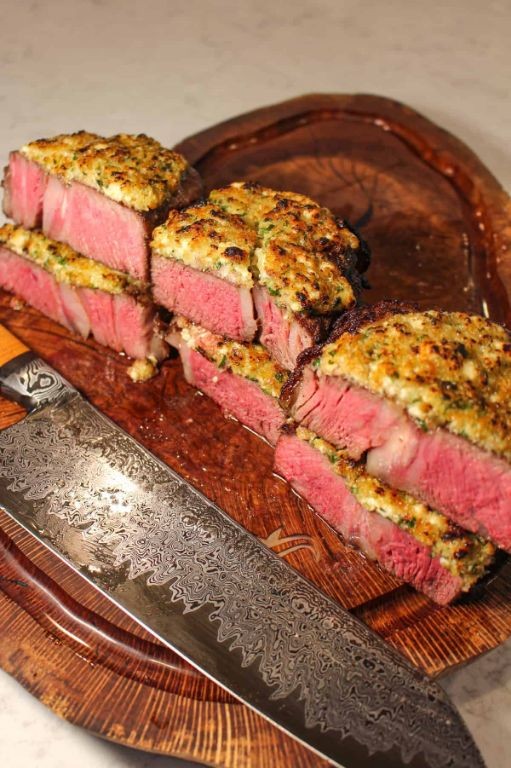
As the winter light fades on this Christmas Eve, I find myself craving something deeply comforting, a dish that feels like a quiet celebration of the season. This blue cheese crusted steak is exactly that—a rich, savory indulgence that transforms a simple cut into something truly special, perfect for a solitary evening or an intimate gathering.
Serving: 2 | Pre Time: 15 minutes | Cooking Time: 15 minutes
Ingredients
– 2 thick-cut, well-marbled ribeye steaks (about 1-inch thick)
– 2 tablespoons of rich extra virgin olive oil
– 1 teaspoon of finely ground sea salt
– 1 teaspoon of coarsely cracked black pepper
– 4 ounces of creamy, pungent blue cheese crumbles (like Roquefort or Gorgonzola)
– 1/4 cup of fresh, soft breadcrumbs from a rustic loaf
– 2 tablespoons of unsalted butter, cut into small cubes
– 1 tablespoon of fresh thyme leaves, stripped from their stems
Instructions
1. Preheat your oven to 400°F and place a cast-iron skillet inside to heat for 10 minutes.
2. Pat the ribeye steaks completely dry with paper towels to ensure a proper sear.
3. Rub the steaks all over with the extra virgin olive oil, then season both sides generously with the sea salt and cracked black pepper.
4. Carefully remove the hot skillet from the oven using an oven mitt and place it over high heat on the stovetop.
5. Sear the steaks in the hot skillet for 3 minutes per side to develop a deep, caramelized crust.
6. While the steaks sear, combine the blue cheese crumbles, fresh breadcrumbs, butter cubes, and thyme leaves in a small bowl, mixing gently with your fingers.
7. Tip: The residual heat from your hands will help the butter soften and bind the crust mixture.
8. After searing, remove the skillet from the heat and evenly press the blue cheese mixture onto the top of each steak, forming a thick, rustic layer.
9. Transfer the skillet back to the preheated oven and roast for 6-8 minutes, or until the internal temperature of the steak reaches 135°F for medium-rare and the cheese crust is golden and bubbling.
10. Tip: For an accurate reading, insert a meat thermometer into the side of the steak, avoiding the bone if present.
11. Remove the skillet from the oven and let the steaks rest, undisturbed, for 5 full minutes on a cutting board to allow the juices to redistribute.
12. Tip: This resting period is crucial for a tender, juicy result—don’t skip it.
13. Slice the steaks against the grain and serve immediately.
Here, the sharp, funky tang of the melted blue cheese melds beautifully with the savory, juicy steak beneath, creating a luxurious contrast in every bite. Consider serving it alongside a simple arugula salad dressed with lemon to cut through the richness, or with roasted fingerling potatoes for a truly comforting winter meal.
Blue Cheese and Honey Crostini

Kindly, as the afternoon light slants through my kitchen window, I find myself reaching for simple ingredients that transform into something quietly elegant. This blue cheese and honey crostini feels like a whispered conversation between bold and sweet, a moment of calm in the bustling season. It’s a reminder that the most satisfying gatherings often start with the humblest of bites.
Serving: 8 | Pre Time: 10 minutes | Cooking Time: 8 minutes
Ingredients
– 1 rustic French baguette, sliced into 16 half-inch pieces
– 2 tablespoons rich extra virgin olive oil
– 4 ounces creamy, crumbly blue cheese
– 3 tablespoons raw, wildflower honey
– 1 tablespoon fresh thyme leaves, finely chopped
– A generous pinch of flaky sea salt
Instructions
1. Preheat your oven to 375°F (190°C) and line a baking sheet with parchment paper.
2. Arrange the sliced rustic French baguette pieces in a single layer on the prepared sheet.
3. Using a pastry brush, lightly coat one side of each baguette slice with the rich extra virgin olive oil. Tip: Brushing ensures even coverage without making the bread soggy.
4. Bake the slices for 6-8 minutes, or until the edges turn a light golden brown and the centers are crisp to the touch.
5. Remove the baking sheet from the oven and let the crostini cool on the sheet for 2 minutes to firm up.
6. While still warm, evenly crumble the creamy, crumbly blue cheese over each toasted slice.
7. Drizzle the raw, wildflower honey in thin streams over the blue cheese. Tip: Warming the honey slightly makes it easier to drizzle without clumping.
8. Sprinkle the fresh thyme leaves and a generous pinch of flaky sea salt evenly across all the crostini. Tip: Adding salt last helps balance the sweetness and enhances the cheese’s tang.
9. Serve immediately on a wooden board or platter.
Gently, the first bite reveals a symphony of textures: the crisp bread gives way to the creamy, pungent cheese, mellowed by the floral honey. The thyme adds an earthy whisper, while the salt crystals provide a satisfying crunch. For a creative twist, try pairing these with sliced pears or a glass of late-harvest Riesling to elevate your casual gathering into a memorable moment.
Blue Cheese Mashed Potatoes
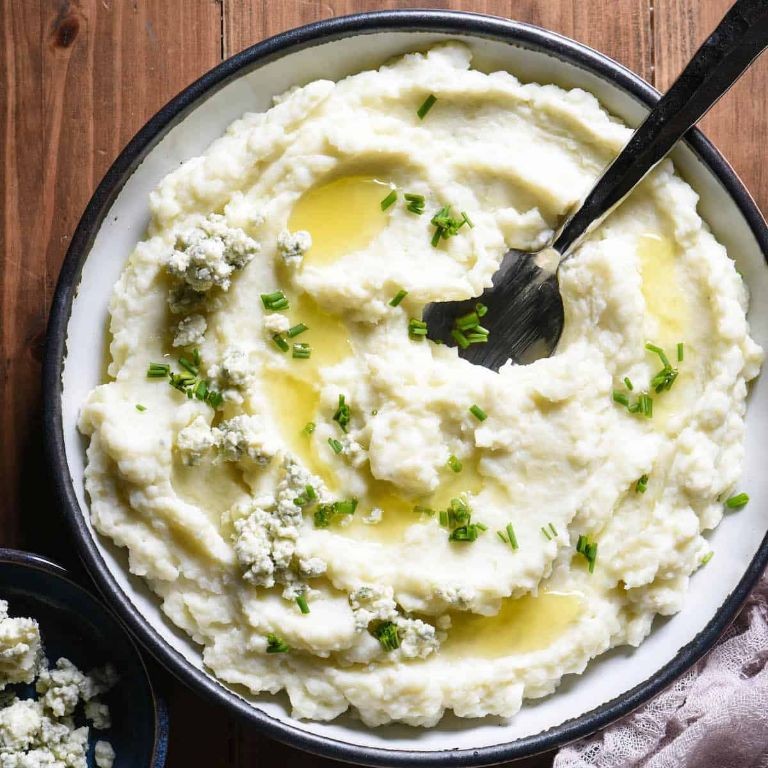
Dusk settles softly outside the window, and in the quiet kitchen, a simple bowl of mashed potatoes transforms into something quietly extraordinary with the bold, creamy whisper of blue cheese. This recipe is a gentle embrace of comfort and sophistication, perfect for a reflective evening or a cozy gathering where flavors speak softly but leave a lasting impression.
Serving: 4 | Pre Time: 15 minutes | Cooking Time: 25 minutes
Ingredients
– 2 pounds of russet potatoes, peeled and cut into 1-inch chunks
– 4 tablespoons of unsalted butter, softened to room temperature
– 1/2 cup of heavy cream, gently warmed
– 4 ounces of crumbled blue cheese, with its tangy, earthy aroma
– 1 teaspoon of kosher salt, for balanced seasoning
– 1/2 teaspoon of freshly ground black pepper, finely milled
– 2 tablespoons of fresh chives, finely chopped for a bright, herbal finish
Instructions
1. Place the peeled russet potato chunks into a large pot and cover them with cold water by 1 inch. Tip: Starting with cold water helps the potatoes cook evenly without becoming mushy on the outside.
2. Bring the water to a boil over high heat, then reduce to a simmer and cook the potatoes for 15–20 minutes, or until they are fork-tender and easily pierced.
3. Drain the potatoes thoroughly in a colander, then return them to the warm pot to let excess moisture evaporate for 2 minutes, which prevents watery mashed potatoes.
4. Add the softened unsalted butter to the potatoes and mash them with a potato masher or ricer until smooth and free of lumps.
5. Pour in the gently warmed heavy cream gradually while stirring continuously to create a creamy, velvety texture. Tip: Warming the cream prevents the potatoes from cooling too quickly and ensures a smoother blend.
6. Fold in the crumbled blue cheese, kosher salt, and freshly ground black pepper, mixing until the cheese is partially melted and evenly distributed, leaving some visible crumbles for texture.
7. Stir in the finely chopped fresh chives just before serving to preserve their vibrant color and fresh flavor. Tip: Adding herbs at the end keeps them from wilting and maintains their aromatic quality.
8. Serve the mashed potatoes immediately while warm, optionally garnishing with extra chives or a drizzle of melted butter.
Upon serving, these blue cheese mashed potatoes offer a luxurious contrast: creamy and smooth with pockets of tangy, crumbly cheese that melt on the tongue. The subtle sharpness of the blue cheese balances the rich, buttery base, making it an elegant side for roasted meats or a standalone comfort dish. For a creative twist, try topping them with crispy fried onions or serving alongside a crisp green salad to cut through the richness.
Blue Cheese and Caramelized Onion Pizza
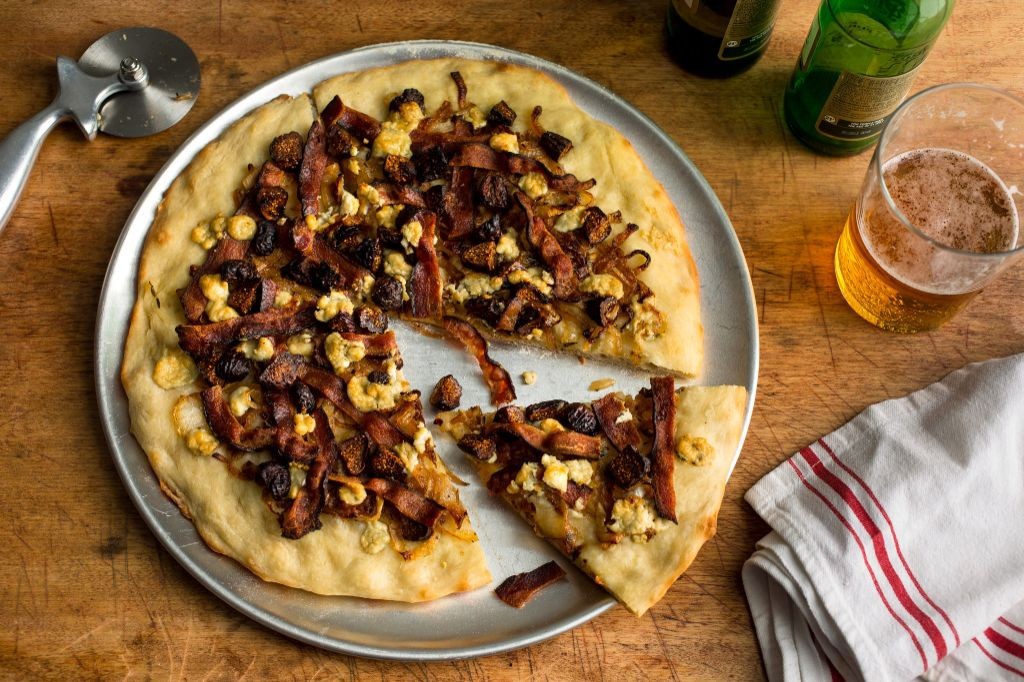
Nostalgia sometimes arrives in the most unexpected forms, like the quiet comfort of a familiar kitchen scent mingling with something new. This evening, as the light fades, I find myself drawn to the slow, deliberate process of making a pizza that feels both indulgent and deeply comforting. It’s a dance of sharp, tangy cheese and sweet, softened onions—a simple pleasure worth savoring.
Serving: 4 | Pre Time: 25 minutes | Cooking Time: 15 minutes
Ingredients
– 1 pound of store-bought pizza dough, brought to room temperature
– 2 tablespoons of rich extra virgin olive oil, divided
– 1 large yellow onion, thinly sliced into half-moons
– 1 teaspoon of granulated sugar
– 1/4 teaspoon of kosher salt
– 1/2 cup of crumbled blue cheese, with its distinctive pungent aroma
– 1/2 cup of shredded whole-milk mozzarella cheese, for creamy melt
– 1 tablespoon of fresh thyme leaves, finely chopped
– A pinch of freshly cracked black pepper
Instructions
1. Place the pizza dough on a lightly floured surface and let it rest, covered with a damp kitchen towel, for 15 minutes to relax the gluten.
2. Heat 1 tablespoon of extra virgin olive oil in a large skillet over medium-low heat.
3. Add the thinly sliced yellow onion to the skillet and cook, stirring occasionally, for 5 minutes until slightly softened.
4. Sprinkle the granulated sugar and kosher salt over the onions, which will help draw out moisture and promote caramelization.
5. Continue cooking the onions over medium-low heat, stirring every few minutes, for 15-20 minutes until they turn a deep golden brown and become jammy in texture. Tip: Resist the urge to increase the heat, as slow cooking develops the sweetest flavor without burning.
6. While the onions caramelize, preheat your oven to 475°F with a pizza stone or baking sheet inside to ensure a crisp crust.
7. Gently stretch the rested dough into a 12-inch circle on a piece of parchment paper.
8. Brush the dough with the remaining 1 tablespoon of extra virgin olive oil, coating the surface evenly to prevent sogginess.
9. Spread the caramelized onions in an even layer over the dough, leaving a 1/2-inch border around the edges.
10. Evenly distribute the crumbled blue cheese and shredded mozzarella cheese over the onions. Tip: For balanced flavor, avoid clumping the blue cheese—scatter it lightly so each bite has a hint of tang.
11. Sprinkle the fresh thyme leaves and a pinch of freshly cracked black pepper over the top.
12. Carefully transfer the pizza on the parchment paper to the preheated pizza stone or baking sheet.
13. Bake for 12-15 minutes, until the crust is golden brown and the cheese is bubbly with slight browning at the edges. Tip: Rotate the pizza halfway through baking for even cooking, especially if your oven has hot spots.
14. Remove the pizza from the oven and let it cool on a wire rack for 3 minutes before slicing.
Yielding a perfect balance of textures, the crust emerges crisp yet chewy, while the onions melt into a sweet jam against the bold blue cheese. Serve it warm, perhaps with a drizzle of honey or a side of bitter greens to cut through the richness, making each slice a quiet celebration of contrasts.
Blue Cheese and Buffalo Chicken Wings

Crisp winter evenings always seem to call for something bold and comforting, a dish that feels like a warm embrace after a long day. Today, I find myself drawn to the classic, fiery tang of buffalo sauce paired with the cool, creamy complexity of blue cheese—a combination that feels both nostalgic and deeply satisfying. It’s a simple pleasure, really, but one that never fails to bring a smile.
Serving: 4 | Pre Time: 15 minutes | Cooking Time: 45 minutes
Ingredients
– 2 pounds of fresh, plump chicken wings, patted dry with paper towels
– 1/4 cup of rich, melted unsalted butter
– 1/2 cup of vibrant, tangy Frank’s RedHot sauce
– 1/2 cup of creamy, full-fat sour cream
– 1/2 cup of crumbly, pungent blue cheese
– 1/4 cup of smooth, whole milk
– 1 tablespoon of freshly squeezed lemon juice
– 1 teaspoon of finely ground garlic powder
– 1/2 teaspoon of coarse, flaky sea salt
– 1/2 teaspoon of freshly cracked black pepper
– 2 tablespoons of neutral, high-heat vegetable oil
Instructions
1. Preheat your oven to 400°F and line a large, rimmed baking sheet with aluminum foil for easy cleanup.
2. In a large mixing bowl, toss the dried chicken wings with vegetable oil, sea salt, and black pepper until evenly coated.
3. Arrange the wings in a single layer on the prepared baking sheet, ensuring they are not touching to allow for proper browning.
4. Bake the wings in the preheated oven for 45 minutes, flipping them halfway through with tongs until the skin is golden brown and crispy.
5. While the wings bake, combine melted butter and Frank’s RedHot sauce in a small saucepan over low heat, stirring gently for 2 minutes until fully blended—this prevents the sauce from separating.
6. In a separate bowl, whisk together sour cream, blue cheese, whole milk, lemon juice, and garlic powder until smooth and creamy, letting it sit at room temperature to soften the cheese flavors.
7. Once the wings are done, immediately toss them in the warm buffalo sauce using the mixing bowl until each wing is generously coated.
8. Serve the wings hot alongside the blue cheese dip, garnishing with extra blue cheese crumbles if desired.
9. For extra crispiness, place the sauced wings under a broiler for 2-3 minutes, watching closely to avoid burning.
Rustic and utterly satisfying, these wings offer a perfect contrast: the crispy, fiery exterior gives way to tender, juicy meat, while the cool, tangy dip provides a creamy respite. Try serving them with crisp celery sticks and carrot batons for a refreshing crunch, or pile them high on a platter for a casual gathering where fingers are meant to get messy.
Blue Cheese and Spinach Stuffed Chicken
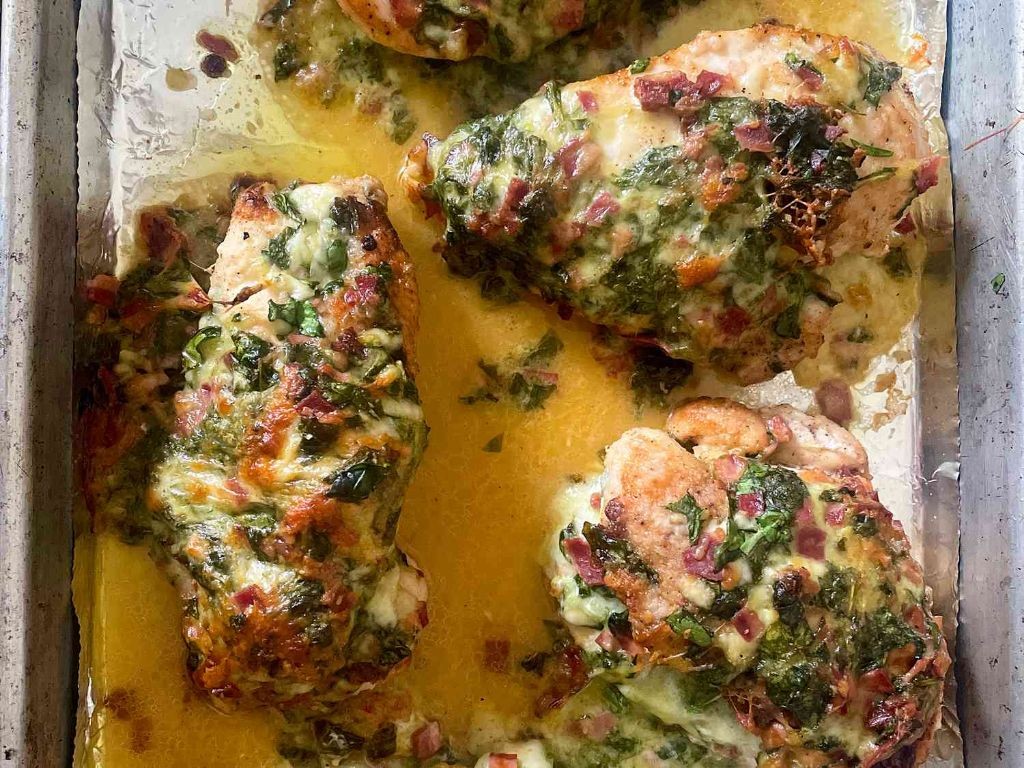
Under the soft glow of the kitchen light, I find myself returning to this recipe, a quiet ritual that transforms simple ingredients into something deeply comforting. It’s a dish that feels like a warm embrace on a cold evening, its rich flavors unfolding slowly and deliberately.
Serving: 4 | Pre Time: 20 minutes | Cooking Time: 30 minutes
Ingredients
– 4 boneless, skinless chicken breasts
– 4 ounces of crumbly, tangy blue cheese
– 2 cups of fresh, vibrant baby spinach leaves
– 1/2 cup of rich, full-fat cream cheese, softened
– 1/4 cup of finely grated, nutty Parmesan cheese
– 2 cloves of aromatic garlic, minced
– 1 tablespoon of fragrant, extra virgin olive oil
– 1/2 teaspoon of finely ground black pepper
– 1/4 teaspoon of flaky sea salt
Instructions
1. Preheat your oven to 375°F (190°C) and lightly grease a baking dish with a drizzle of olive oil.
2. Using a sharp knife, carefully cut a horizontal pocket into the thickest side of each chicken breast, being careful not to cut all the way through.
3. In a medium mixing bowl, combine the crumbled blue cheese, softened cream cheese, grated Parmesan, minced garlic, black pepper, and sea salt until well blended.
4. Gently fold the fresh baby spinach leaves into the cheese mixture until evenly distributed.
5. Spoon an equal portion of the spinach and cheese filling into the pocket of each chicken breast, packing it lightly without overstuffing.
6. Secure the opening of each chicken breast with 2-3 toothpicks to prevent the filling from leaking during baking.
7. Brush the outside of each stuffed chicken breast lightly with the remaining olive oil.
8. Place the chicken breasts in the prepared baking dish, ensuring they are not touching.
9. Bake in the preheated oven for 25-30 minutes, or until the chicken is cooked through and registers an internal temperature of 165°F (74°C) on an instant-read thermometer.
10. Remove the baking dish from the oven and let the chicken rest for 5 minutes before carefully removing the toothpicks.
What emerges from the oven is a beautiful contrast of textures—the chicken remains wonderfully juicy, while the filling becomes luxuriously creamy with pockets of melted blue cheese. The spinach adds a subtle earthiness that balances the richness perfectly. For a lovely presentation, serve each breast sliced on a bias to reveal the vibrant green filling, perhaps alongside roasted fingerling potatoes or a simple arugula salad dressed with lemon.
Blue Cheese and Apple Grilled Cheese
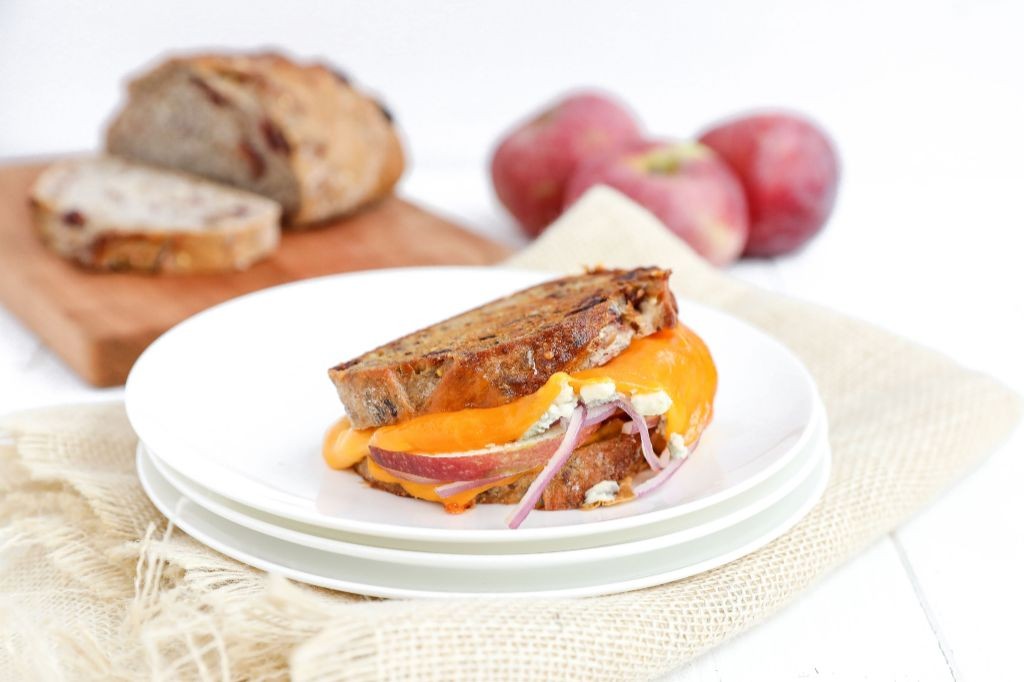
Here in the quiet kitchen, as winter light slants through the window, I find myself drawn to a simple yet profound comfort. This grilled cheese is a meditation on contrasts—the sharp, funky tang of blue cheese softened by the sweet crunch of apple, all held together by the gentle embrace of melted butter and toasted bread.
Serving: 2 | Pre Time: 10 minutes | Cooking Time: 10 minutes
Ingredients
– 4 slices of thick-cut, rustic sourdough bread
– 4 tablespoons of creamy, unsalted European-style butter, softened
– 4 ounces of crumbly, pungent blue cheese, such as Gorgonzola
– 1 medium, crisp and sweet Honeycrisp apple, thinly sliced
– 2 tablespoons of rich, golden honey
Instructions
1. Spread 1 tablespoon of softened, unsalted European-style butter evenly onto one side of each of the 4 slices of thick-cut, rustic sourdough bread.
2. Place 2 slices of bread, buttered-side down, onto a cold, large skillet or griddle.
3. Evenly distribute 2 ounces of crumbly, pungent blue cheese onto each of the bread slices in the skillet.
4. Arrange thin slices from one half of a crisp, sweet Honeycrisp apple in a single layer over the blue cheese on each bread slice.
5. Drizzle 1 tablespoon of rich, golden honey over the apple slices on each sandwich.
6. Carefully place the remaining 2 slices of bread on top, buttered-side facing up.
7. Turn the stove burner to medium-low heat and cook the sandwiches for 4-5 minutes, until the bottom bread is deeply golden brown and crisp. (Tip: Starting in a cold pan allows the butter to melt slowly and the cheese to warm through without burning the bread.)
8. Using a wide spatula, gently flip each sandwich.
9. Continue cooking for another 3-4 minutes on the second side, pressing down lightly with the spatula, until the bread is equally golden and the blue cheese is fully melted. (Tip: Pressing helps fuse the layers together and creates an even, crispy crust.)
10. Remove the sandwiches from the skillet and let them rest on a cutting board for 1 full minute before slicing. (Tip: This brief rest allows the molten cheese to set slightly, preventing a messy spill when you cut.)
11. Slice each sandwich in half diagonally and serve immediately.
During that first bite, the initial crunch gives way to a warm, oozing center where the sharp cheese and sweet apple meld into something greater than the sum of its parts. The honey caramelizes subtly against the hot bread, adding a floral note that brightens the rich funk of the blue cheese. For a delightful twist, serve it alongside a small bowl of lightly dressed arugula or a cup of spiced apple cider to sip between bites.
Blue Cheese and Fig Jam Flatbread
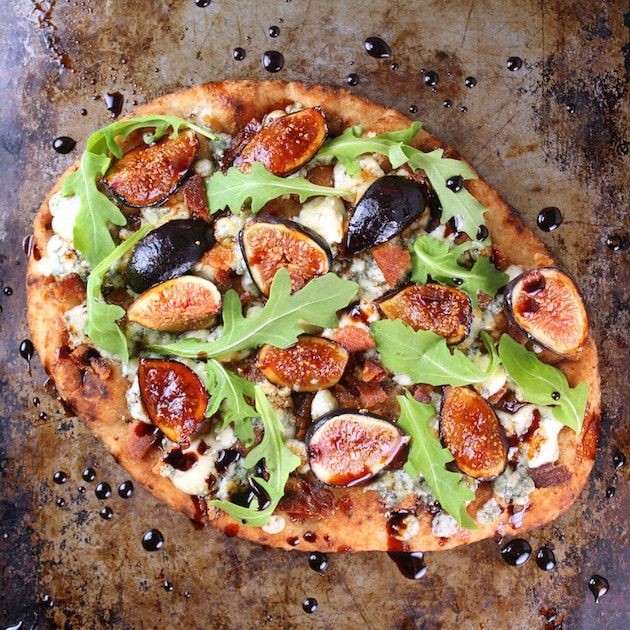
Evenings like this, when the world outside quiets and the kitchen becomes a sanctuary, I find myself drawn to simple yet deeply satisfying creations. This flatbread, with its balance of sweet and savory, feels like a quiet celebration of winter’s bounty—a moment to pause and savor the small joys that cooking can bring.
Serving: 4 | Pre Time: 15 minutes | Cooking Time: 12 minutes
Ingredients
– 1 store-bought flatbread or naan
– 1/2 cup creamy blue cheese, crumbled into small pieces
– 1/4 cup fig jam, with visible fruit pieces
– 1/4 cup thinly sliced red onion, in delicate half-moons
– 2 tablespoons rich extra virgin olive oil
– 1 tablespoon fresh thyme leaves, stripped from woody stems
– 1/4 teaspoon flaky sea salt, for finishing
– 1/4 teaspoon freshly cracked black pepper
Instructions
1. Preheat your oven to 400°F and place a baking sheet inside to heat.
2. Brush the flatbread evenly with the rich extra virgin olive oil, coating the entire surface.
3. Spread the fig jam in a thin, even layer over the oiled flatbread, leaving a 1/2-inch border around the edges.
4. Sprinkle the creamy blue cheese crumbles evenly over the jam.
5. Scatter the thinly sliced red onion in delicate half-moons across the cheese.
6. Remove the hot baking sheet from the oven and carefully transfer the flatbread onto it.
7. Bake for 10–12 minutes, until the cheese is melted and bubbling and the edges are golden brown.
8. Remove from the oven and immediately sprinkle with fresh thyme leaves, flaky sea salt, and freshly cracked black pepper.
9. Let the flatbread rest for 2 minutes on a cutting board before slicing.
10. Slice into 8 wedges using a sharp pizza cutter or chef’s knife.
Tip: Heating the baking sheet first ensures a crispier crust. Tip: Letting the flatbread rest briefly makes it easier to slice cleanly. Tip: For extra flavor, toast the thyme leaves in a dry pan for 30 seconds before sprinkling.
Oozing with melted blue cheese and sticky fig jam, this flatbread offers a delightful contrast of creamy and crisp textures. The sweet fruitiness of the jam mellows the sharp cheese, while the thyme adds an earthy freshness—perfect for serving warm alongside a simple arugula salad or as an elegant appetizer for holiday gatherings.
Blue Cheese and Roasted Garlic Soup
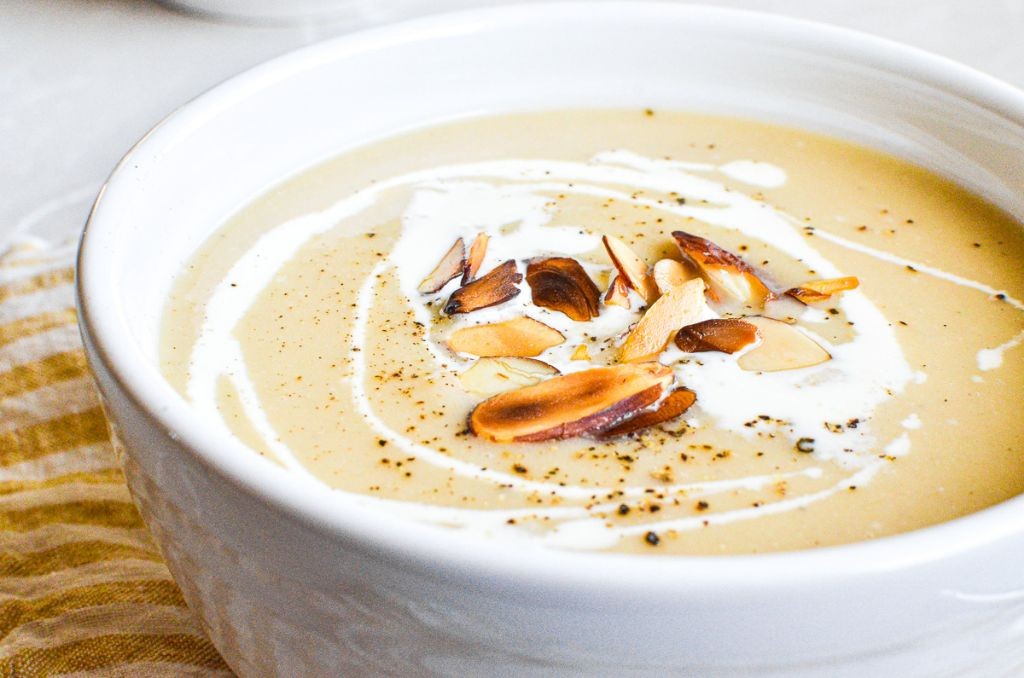
Just now, as the winter light slants through my kitchen window on this quiet Christmas Eve morning, I find myself craving something deeply comforting—a soup that feels like a warm embrace. This blue cheese and roasted garlic soup is that dish, a velvety blend of sharp, tangy cheese and sweet, mellow garlic that transforms simple ingredients into something magical. It’s the kind of recipe that invites you to slow down, to savor each step as the flavors deepen and meld into a rich, creamy bowl of solace.
Serving: 4 | Pre Time: 15 minutes | Cooking Time: 45 minutes
Ingredients
– 1 large head of garlic, with its papery skin intact
– 2 tablespoons of rich extra virgin olive oil
– 1 medium yellow onion, finely chopped
– 2 tablespoons of unsalted butter
– ¼ cup of all-purpose flour
– 4 cups of low-sodium chicken broth, warmed slightly
– 1 cup of heavy cream
– 4 ounces of crumbled blue cheese, with its bold, tangy aroma
– ½ teaspoon of finely ground black pepper
– ¼ teaspoon of sea salt
– Fresh chives, finely chopped, for garnish
Instructions
1. Preheat your oven to 400°F.
2. Slice the top off the head of garlic to expose the cloves, drizzle it with 1 tablespoon of olive oil, wrap it tightly in aluminum foil, and roast it in the preheated oven for 30 minutes, until the cloves are soft and golden—this slow roasting mellows the garlic’s sharpness into a sweet, caramelized flavor.
3. While the garlic roasts, heat the remaining 1 tablespoon of olive oil and the unsalted butter in a large pot over medium heat until the butter melts and foams slightly.
4. Add the finely chopped yellow onion to the pot and sauté it for 5–7 minutes, stirring occasionally, until it becomes translucent and fragrant, which builds a savory base for the soup.
5. Sprinkle the all-purpose flour over the onions and cook for 1 minute, stirring constantly to form a roux that will thicken the soup without lumps.
6. Gradually whisk in the warmed low-sodium chicken broth, ensuring no clumps remain, and bring the mixture to a gentle simmer.
7. Squeeze the roasted garlic cloves from their skins into the pot, mashing them lightly with a spoon to release their creamy texture.
8. Reduce the heat to low, stir in the heavy cream, and let the soup simmer for 10 minutes, allowing the flavors to meld—avoid boiling to prevent the cream from curdling.
9. Add the crumbled blue cheese, finely ground black pepper, and sea salt, stirring until the cheese fully melts and the soup is smooth and velvety.
10. Taste and adjust seasoning if needed, then ladle the soup into bowls and garnish with freshly chopped chives for a bright, herbal contrast.
When you take that first spoonful, the soup envelops your senses with its creamy, luxurious texture, where the sharp tang of blue cheese dances gracefully with the sweet, earthy notes of roasted garlic. Serve it alongside crusty bread for dipping, or drizzle with a touch of olive oil and extra pepper to highlight its rustic elegance—it’s a dish that feels both indulgent and utterly comforting, perfect for a quiet moment or sharing with loved ones.
Blue Cheese and Prosciutto Wrapped Asparagus
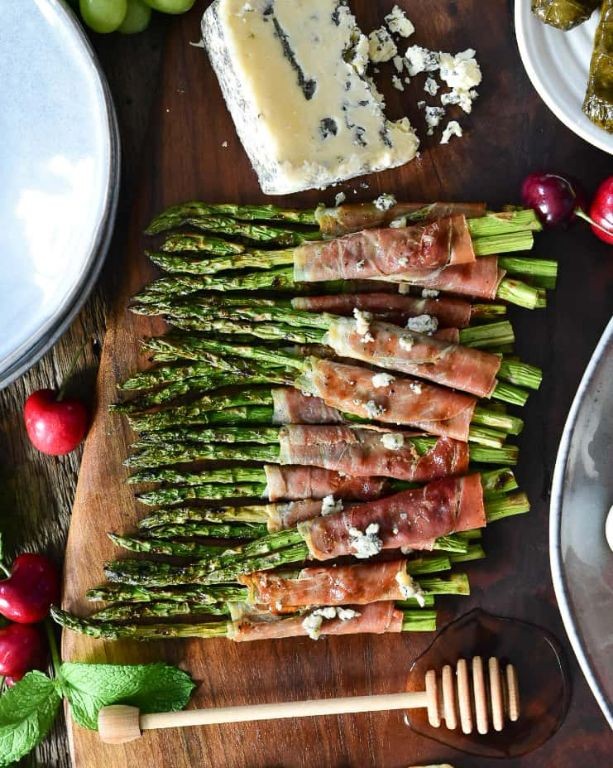
Evenings like this, when the kitchen is quiet and the world outside feels distant, I find myself drawn to simple pleasures—like wrapping tender asparagus in salty prosciutto and creamy blue cheese. It’s a dish that feels both elegant and comforting, a little ritual of preparation that slows the hands of the clock.
Serving: 4 | Pre Time: 15 minutes | Cooking Time: 15 minutes
Ingredients
– 1 pound of fresh, crisp asparagus spears, trimmed
– 4 ounces of thinly sliced, salty prosciutto
– 4 ounces of crumbly, tangy blue cheese
– 2 tablespoons of rich extra virgin olive oil
– 1 teaspoon of finely ground black pepper
– 1 teaspoon of coarse sea salt
Instructions
1. Preheat your oven to 400°F and line a baking sheet with parchment paper for easy cleanup.
2. Drizzle the fresh, crisp asparagus spears with 1 tablespoon of rich extra virgin olive oil, then sprinkle evenly with 1 teaspoon of coarse sea salt and 1 teaspoon of finely ground black pepper, tossing gently to coat each spear.
3. Take a slice of thinly sliced, salty prosciutto and lay it flat, then place a small handful of crumbly, tangy blue cheese along one edge.
4. Wrap a single asparagus spear tightly in the prosciutto, ensuring the blue cheese is nestled against the vegetable, and place it seam-side down on the prepared baking sheet; repeat for all spears, spacing them evenly apart.
5. Drizzle the wrapped asparagus with the remaining 1 tablespoon of rich extra virgin olive oil to help them crisp in the oven.
6. Bake at 400°F for 12-15 minutes, or until the prosciutto is golden and slightly crispy and the asparagus is tender when pierced with a fork.
7. Remove from the oven and let cool on the baking sheet for 2-3 minutes to allow the flavors to meld and the cheese to set slightly.
Just out of the oven, the asparagus retains a gentle crunch beneath the savory, crisped prosciutto, while the blue cheese melts into a creamy, pungent contrast. Serve these warm bundles alongside a crisp salad or as a starter to a cozy dinner, their rustic elegance inviting slow, appreciative bites.
Blue Cheese and Cranberry Tartlets

Musing on the quiet moments before the holiday rush, I find myself drawn to these little tartlets—their buttery shells cradling a tangy-sweet filling that feels both festive and comforting. They’re the kind of treat that slows time, inviting you to savor each bite with a cup of tea or a glass of crisp white wine.
Serving: 12 tartlets | Pre Time: 20 minutes | Cooking Time: 15 minutes
Ingredients
– 1 package (2 sheets) frozen puff pastry, thawed but still cold
– 4 ounces creamy blue cheese, crumbled into small pieces
– 1/2 cup dried cranberries, plump and slightly sweet
– 1/4 cup heavy cream, rich and velvety
– 1 large egg, farm-fresh and lightly beaten
– 1 tablespoon honey, golden and floral
– 1/4 teaspoon finely ground black pepper, aromatic and sharp
– Fresh thyme sprigs, for garnish (optional)
Instructions
1. Preheat your oven to 400°F (200°C) and line a baking sheet with parchment paper.
2. Unfold the thawed puff pastry sheets on a lightly floured surface, rolling them out slightly to smooth any seams.
3. Using a 3-inch round cutter, cut 12 circles from the pastry, re-rolling scraps as needed.
4. Gently press each pastry circle into the wells of a mini muffin tin, forming small cups.
5. In a medium bowl, combine the crumbled blue cheese, dried cranberries, heavy cream, beaten egg, honey, and black pepper, stirring until just mixed—avoid overworking to keep the filling light.
6. Spoon about 1 tablespoon of the filling into each pastry cup, distributing it evenly.
7. Bake in the preheated oven for 12–15 minutes, or until the pastry is golden brown and puffed, and the filling is set with slight jiggle in the center.
8. Remove from the oven and let cool in the tin for 5 minutes to firm up, then transfer to a wire rack.
9. Garnish with fresh thyme sprigs if desired, serving warm or at room temperature.
Here, the contrast of textures shines: the flaky, buttery crust gives way to a creamy, slightly tangy filling studded with bursts of sweet cranberry. For a creative twist, drizzle with a touch more honey before serving, or pair with a simple arugula salad to balance the richness.
Blue Cheese and Avocado Toast
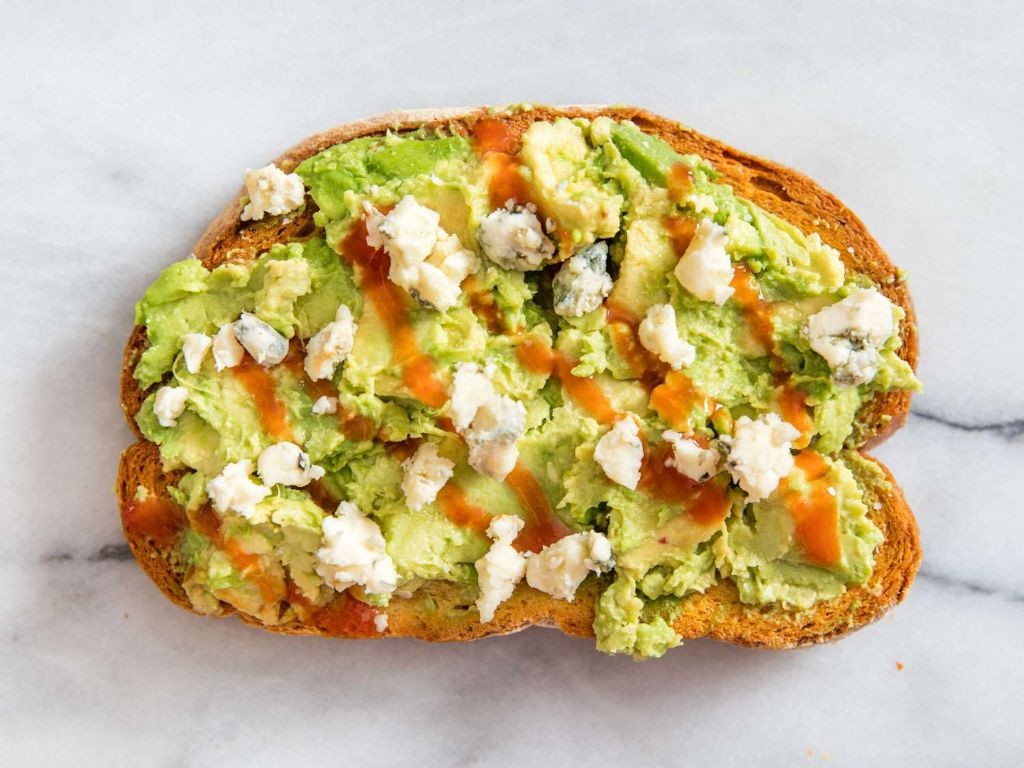
Venturing into the kitchen on a quiet morning, I find myself drawn to simple comforts that feel both indulgent and grounding. This blue cheese and avocado toast is one of those quiet luxuries—a humble canvas that transforms with just a few thoughtful touches into something quietly spectacular.
Serving: 2 | Pre Time: 10 minutes | Cooking Time: 5 minutes
Ingredients
– 4 slices of artisanal sourdough bread, about 1/2-inch thick
– 1 large, perfectly ripe Hass avocado
– 2 ounces of crumbly, pungent blue cheese
– 2 tablespoons of rich extra virgin olive oil
– 1 tablespoon of freshly squeezed lemon juice
– 1/4 teaspoon of flaky sea salt
– 1/4 teaspoon of finely ground black pepper
– 1 tablespoon of raw honey for drizzling
Instructions
1. Preheat your oven’s broiler to 500°F and position a rack 6 inches below the heating element.
2. Arrange the 4 slices of artisanal sourdough bread on a baking sheet in a single layer.
3. Lightly brush the top of each bread slice with 1 tablespoon of rich extra virgin olive oil using a pastry brush.
4. Place the baking sheet under the broiler and toast the bread for 2–3 minutes until the edges turn golden brown and crisp. Tip: Watch closely to prevent burning, as broilers vary in intensity.
5. While the bread toasts, cut the large, perfectly ripe Hass avocado in half, remove the pit, and scoop the flesh into a small mixing bowl.
6. Add 1 tablespoon of freshly squeezed lemon juice to the avocado to prevent browning and enhance brightness.
7. Mash the avocado with a fork until mostly smooth but with some small chunks remaining for texture.
8. Stir in 1/4 teaspoon of flaky sea salt and 1/4 teaspoon of finely ground black pepper until evenly distributed.
9. Remove the toasted bread from the oven and let it cool on the baking sheet for 1 minute to set the crust.
10. Divide the mashed avocado mixture evenly among the 4 toast slices, spreading it to the edges with a butter knife.
11. Crumble 2 ounces of crumbly, pungent blue cheese evenly over the avocado on each toast. Tip: Use your fingers to crumble for better control over chunk size.
12. Return the topped toasts to the baking sheet and broil for 1–2 minutes until the blue cheese just begins to melt and bubble slightly. Tip: Avoid over-melting to preserve the cheese’s distinct flavor.
13. Remove from the oven and immediately drizzle each toast with about 1/4 tablespoon of raw honey from a height for delicate strands.
14. Serve warm on a plate, optionally garnished with extra pepper if desired.
Momentarily, the first bite reveals a beautiful contrast: the warm, crisp sourdough gives way to the cool, creamy avocado, punctuated by the sharp, salty tang of blue cheese. The honey’s subtle sweetness weaves through it all, balancing the richness without overpowering. For a playful twist, try topping with a sprinkle of crushed walnuts or serving alongside a simple arugula salad dressed in lemon vinaigrette.
Blue Cheese and Bacon Deviled Eggs

Deviled eggs have always been a nostalgic comfort, but today, I found myself craving something with a bit more depth—a whisper of smokiness and a tangy, creamy bite that feels both familiar and new. As I stood in my quiet kitchen, the morning light filtering through the window, I decided to transform the classic into something quietly luxurious, perfect for a slow holiday morning or a simple, thoughtful gathering.
Serving: 12 | Pre Time: 15 minutes | Cooking Time: 15 minutes
Ingredients
– 6 large farm-fresh eggs
– 4 slices thick-cut applewood-smoked bacon
– 3 tablespoons full-fat mayonnaise
– 2 tablespoons crumbled creamy blue cheese
– 1 teaspoon Dijon mustard with whole grains
– 1 teaspoon fresh lemon juice
– 1/4 teaspoon finely ground black pepper
– 1 tablespoon finely chopped fresh chives
– A pinch of flaky sea salt for finishing
Instructions
1. Place 6 large farm-fresh eggs in a single layer in a medium saucepan and cover them with cold water by 1 inch.
2. Bring the water to a rolling boil over high heat, then immediately remove the pan from heat, cover it, and let the eggs sit for 12 minutes for perfectly set yolks.
3. While the eggs cook, arrange 4 slices of thick-cut applewood-smoked bacon on a baking sheet lined with parchment paper.
4. Bake the bacon in a preheated 400°F oven for 12-15 minutes until crisp and golden, then transfer it to a paper towel-lined plate to cool completely.
5. After the eggs have rested, transfer them to a bowl of ice water and let them chill for 5 minutes to stop the cooking process and make peeling easier.
6. Gently tap each egg on the counter and peel under cool running water to remove the shells smoothly.
7. Slice the peeled eggs in half lengthwise and carefully scoop the yolks into a medium mixing bowl, placing the whites on a serving platter.
8. Crumble the cooled bacon into small pieces, reserving 1 tablespoon for garnish and adding the rest to the bowl with the yolks.
9. To the yolk mixture, add 3 tablespoons of full-fat mayonnaise, 2 tablespoons of crumbled creamy blue cheese, 1 teaspoon of Dijon mustard, 1 teaspoon of fresh lemon juice, and 1/4 teaspoon of finely ground black pepper.
10. Mash and stir the ingredients together with a fork until smooth and well combined, adjusting with a splash of water if needed for a creamy, pipeable consistency.
11. Spoon or pipe the filling evenly into the egg white halves, mounding it slightly for an inviting appearance.
12. Garnish each deviled egg with the reserved bacon crumbles, a sprinkle of finely chopped fresh chives, and a delicate pinch of flaky sea salt.
These deviled eggs emerge with a velvety, rich filling that melts on the tongue, balanced by the salty crunch of bacon and the bold, tangy notes of blue cheese. Try serving them on a rustic wooden board alongside crisp radishes and a glass of chilled sparkling wine for a simple yet elegant appetizer that feels both comforting and special.
Blue Cheese and Pear Risotto
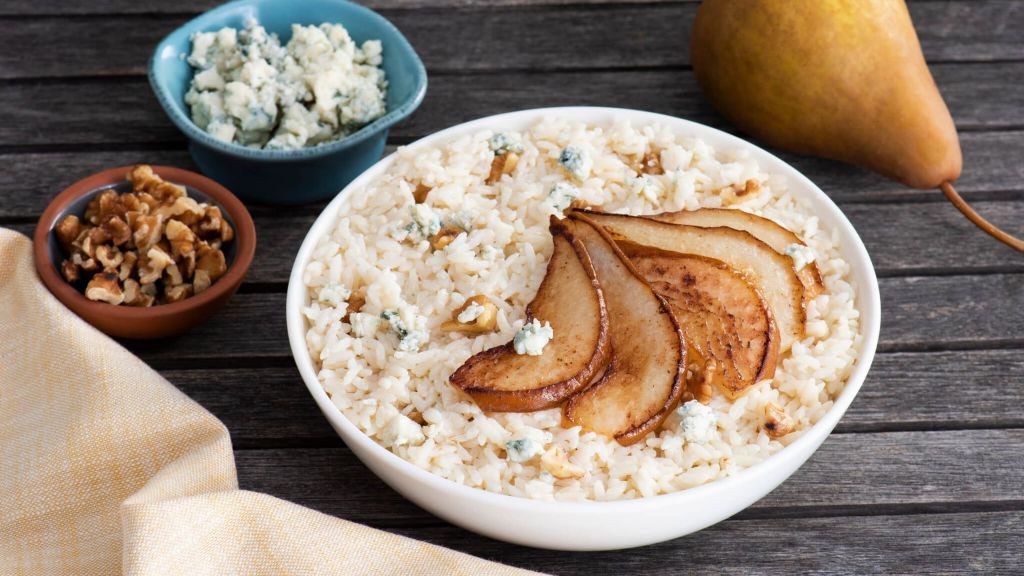
Beneath the quiet hum of the kitchen on a winter afternoon, there’s a comfort in the slow, deliberate stir of a risotto, a dish that feels like a warm embrace. This version, with its unexpected pairing, transforms simple ingredients into something quietly luxurious, a creamy canvas for the bold and the sweet. It’s a recipe for a moment of calm, where the process is as nourishing as the result.
Serving: 4 | Pre Time: 15 minutes | Cooking Time: 35 minutes
Ingredients
– 5 cups of rich, homemade chicken or vegetable stock, kept warm
– 2 tablespoons of unsalted European-style butter
– 1 tablespoon of fragrant extra virgin olive oil
– 1 medium yellow onion, finely diced
– 2 cloves of fresh garlic, minced
– 1 ½ cups of premium Arborio rice
– ½ cup of dry white wine, like a crisp Sauvignon Blanc
– 2 ripe but firm Bartlett pears, peeled, cored, and cut into ½-inch cubes
– 4 ounces of crumbled, pungent blue cheese (such as Gorgonzola Dolce)
– ½ cup of freshly grated Parmigiano-Reggiano cheese
– Kosher salt and freshly cracked black pepper
Instructions
1. In a medium saucepan, bring the 5 cups of stock to a gentle simmer over medium-low heat, then reduce the heat to low to keep it warm throughout cooking.
2. In a large, heavy-bottomed pot or Dutch oven, melt the 2 tablespoons of butter with the 1 tablespoon of olive oil over medium heat until the butter foams.
3. Add the finely diced onion and cook, stirring occasionally, for 6 to 8 minutes until the onion is soft and translucent but not browned.
4. Stir in the minced garlic and cook for 1 minute until fragrant.
5. Add the 1 ½ cups of Arborio rice all at once. Toast the rice, stirring constantly, for 2 to 3 minutes until the grains become slightly translucent at the edges and smell nutty. Tip: Toasting the rice helps each grain maintain a firm core, essential for the perfect risotto texture.
6. Pour in the ½ cup of white wine. Cook, stirring continuously, until the wine is completely absorbed by the rice, about 2 minutes.
7. Begin adding the warm stock. Add ½ cup of stock and stir constantly until the liquid is nearly fully absorbed, about 3 to 4 minutes.
8. Continue adding the stock in ½-cup increments, stirring constantly and allowing each addition to be mostly absorbed before adding the next. This process should take about 18 to 22 minutes total.
9. After about 15 minutes of adding stock, stir in the cubed pears. Tip: Adding the pears partway through allows them to soften and release their sweetness without turning to mush.
10. Continue adding the remaining stock and stirring. The risotto is done when the rice is tender but still has a slight bite (al dente) and the mixture is creamy and loose, not stiff. It should take about 3 more minutes after adding the pears.
11. Remove the pot from the heat. Stir in the 4 ounces of crumbled blue cheese and the ½ cup of grated Parmigiano-Reggiano until the cheeses are melted and fully incorporated.
12. Season the risotto with kosher salt and freshly cracked black pepper. Tip: Season carefully at the end, as the cheeses are already salty; always taste first.
13. Let the risotto rest, covered, off the heat for 2 minutes before serving.
Creates a luxurious, velvety texture where each grain of rice is distinct yet bound in a creamy sauce. The flavor is a beautiful balance—the sharp, salty tang of the blue cheese is mellowed by the sweet, soft pears and the rich, savory depth of the stock. For a lovely presentation, serve it in shallow bowls garnished with a few extra pear slices and a light drizzle of honey to accentuate the sweet notes.
Blue Cheese and Herb Butter
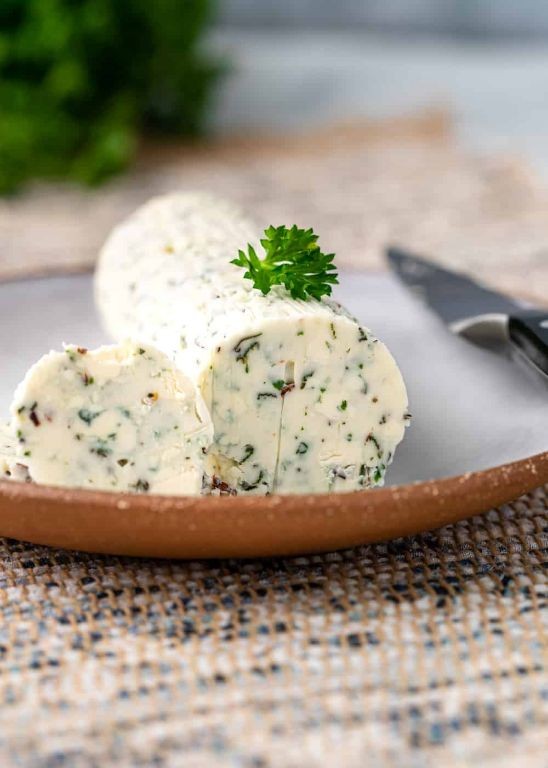
Wandering through the kitchen on a quiet afternoon, I found myself craving something simple yet deeply flavorful—a soft, spreadable butter infused with the earthy tang of blue cheese and the gentle whisper of fresh herbs. It’s the kind of recipe that feels like a quiet gift to yourself, a small indulgence to savor slowly. Let’s make it together, step by gentle step.
Serving: 8 | Pre Time: 15 minutes | Cooking Time: 0 minutes
Ingredients
– 1 cup unsalted butter, softened to room temperature
– 4 ounces crumbly blue cheese, such as Roquefort or Gorgonzola
– 2 tablespoons fresh parsley, finely chopped
– 1 tablespoon fresh chives, thinly sliced
– 1 teaspoon fresh thyme leaves, stripped from stems
– ½ teaspoon finely ground black pepper
– ¼ teaspoon kosher salt
Instructions
1. Place 1 cup of softened unsalted butter in a medium mixing bowl. Tip: Ensure the butter is soft but not melted for a smooth, spreadable texture.
2. Crumble 4 ounces of blue cheese into the bowl with the butter.
3. Add 2 tablespoons of finely chopped fresh parsley, 1 tablespoon of thinly sliced fresh chives, and 1 teaspoon of fresh thyme leaves to the bowl.
4. Sprinkle in ½ teaspoon of finely ground black pepper and ¼ teaspoon of kosher salt.
5. Use a fork or spatula to gently mash and mix all ingredients together until well combined and creamy. Tip: Avoid overmixing to keep the blue cheese crumbles distinct for bursts of flavor.
6. Transfer the mixture onto a sheet of parchment paper or plastic wrap.
7. Shape the butter into a log about 6 inches long, rolling it tightly in the parchment or wrap. Tip: Chill the log in the refrigerator for at least 30 minutes to firm up, making it easier to slice later.
8. Once chilled, unwrap and slice into ½-inch rounds for serving.
Keeping this butter in the fridge transforms it into a firm, sliceable delight with a creamy mouthfeel that melts luxuriously on warm bread. Its bold, tangy notes from the blue cheese are beautifully balanced by the herbal freshness, perfect for smearing on crusty baguettes or melting over grilled steaks for an effortless upgrade.
Summary
From decadent dips to cozy casseroles, these 20 creamy blue cheese recipes are a treasure trove for any cheese enthusiast. We hope you’re inspired to whip up something delicious in your kitchen! Don’t forget to leave a comment telling us which recipe you loved most and share your favorites on Pinterest so other home cooks can discover these cheesy delights. Happy cooking!


