Kindred spirits, gather ’round the kitchen table. There’s something downright magical about transforming humble leftovers into a hearty morning feast, a tradition whispered through generations in farmhouses and cozy homes alike. This breakfast fried rice with eggs isn’t just a meal; it’s a warm embrace to start your day, a testament to making the most of what you have with love and a hot skillet.
Why This Recipe Works
- Day-old rice fries up perfectly, giving each grain a delightful, separate texture that soaks up all the savory flavors.
- Cooking the eggs right in the rice creates creamy, golden ribbons that bind everything together in a comforting, rustic way.
- A simple trio of aromatics—onion, garlic, and green onion—builds a deeply flavorful foundation without any fuss.
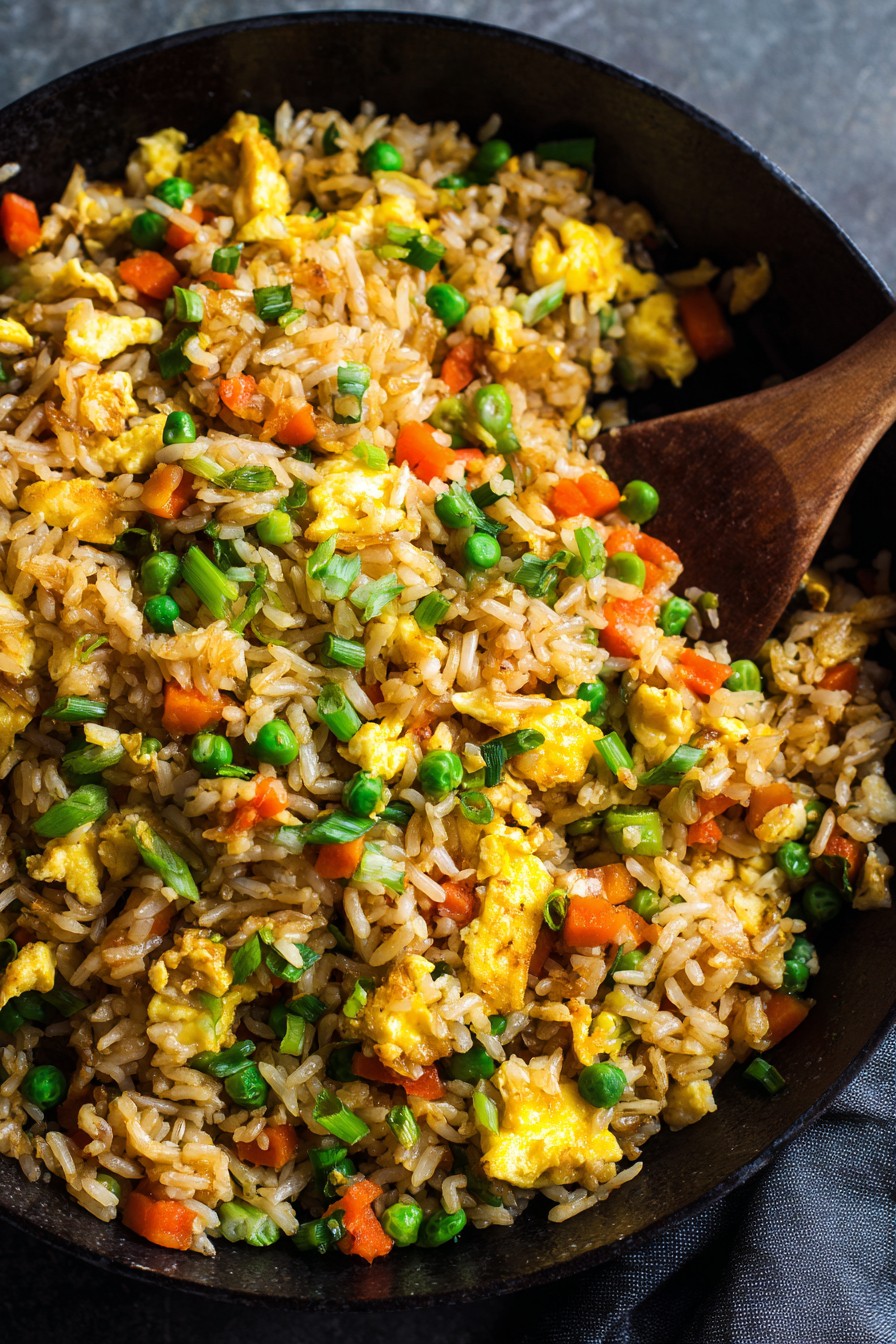
- Using a well-seasoned cast iron or heavy skillet ensures that beautiful, crispy crust we all crave.
- It’s endlessly adaptable, welcoming whatever bits of vegetables or protein you have on hand from yesterday’s supper.
Ingredients
- 3 cups of day-old cooked long-grain white rice, chilled
- 4 large eggs
- 1/2 cup of diced yellow onion (about 1 small onion)
- 3 cloves of garlic, minced
- 1/2 cup of frozen peas and carrots, thawed
- 3 green onions, thinly sliced (white and green parts separated)
- 3 tablespoons of vegetable oil, divided
- 3 tablespoons of soy sauce
- 1 tablespoon of toasted sesame oil
- 1/2 teaspoon of freshly ground black pepper
- Salt, to taste
Equipment Needed
- A large (12-inch) cast iron skillet or heavy-bottomed non-stick pan
- A sturdy wooden spoon or spatula
- Cutting board and chef’s knife
- Measuring cups and spoons
- A small bowl for whisking eggs
Instructions
Step 1: Prepare Your Aromatics and Eggs
Before the skillet even whispers with heat, let’s get everything ready. Dice your yellow onion into small, even pieces—you’re aiming for about a half-cup. Mince three cloves of garlic until they’re fine; this ensures their flavor melds seamlessly into every bite. Slice your green onions, but keep the white parts and green parts in separate little piles, as they’ll join the party at different times. Now, crack those four large eggs into a small bowl, give them a good whisk with a fork until the yolks and whites are fully combined and slightly frothy. Having all these components prepped and within arm’s reach is the secret to a smooth, unhurried cooking process, just like Grandma taught. It turns cooking from a chore into a gentle, mindful ritual.
Step 2: Sauté the Onion and Garlic to Golden Perfection
Place your large cast iron skillet over medium-high heat and let it get properly hot for about two minutes. You should feel a steady wave of heat when you hold your hand a few inches above the surface. Add two tablespoons of the vegetable oil and swirl it to coat the pan. Now, in goes the diced yellow onion. Sauté it, stirring occasionally, for about 4 to 5 minutes. You’re waiting for the pieces to turn soft and translucent, with just the faintest hint of golden edges. Then, add the minced garlic and the white parts of your sliced green onions. Stir constantly for just 45 seconds to 1 minute—garlic burns in the blink of an eye, and you want it fragrant, not bitter. The kitchen should smell absolutely heavenly by now.
Step 3: Scramble the Eggs Directly in the Pan
Push the sautéed onion and garlic mixture to one side of the skillet. Pour in the remaining one tablespoon of vegetable oil into the empty space. Let it heat for 15 seconds, then pour in your whisked eggs. Let them set for about 20 seconds without touching them, then gently scramble them with your spatula, pulling the cooked curds from the edges toward the center. Cook for about 1 to 2 minutes total, until they are softly set but still slightly moist. Tip: Don’t overcook the eggs here! They’ll continue to cook when mixed with the hot rice, and keeping them a touch soft ensures a creamy texture throughout the final dish.
Step 4: Incorporate the Rice and Vegetables
Now, add your three cups of chilled, day-old rice to the skillet, breaking up any large clumps with your fingers or the back of your spoon. Add the half-cup of thawed peas and carrots as well. Increase the heat to high. This is where the magic happens. Stir-fry everything together vigorously for 3 to 4 minutes. You’re looking for the rice to heat through completely and for some of the grains to start getting a little crispy and toasted in the hot pan—listen for a faint sizzle. Tip: Resist the urge to stir constantly. Let the rice sit for 30-second intervals to develop those delicious, crispy bits on the bottom of the pan, then give it a good stir.
Step 5: Season and Finish with Green Onions
Once the rice is hot and has some nice texture, it’s time to season. Drizzle the three tablespoons of soy sauce and the one tablespoon of toasted sesame oil evenly over the rice. Add the half-teaspoon of black pepper. Stir-fry for another 1 to 2 minutes, ensuring the seasoning is distributed evenly. Taste and add a pinch of salt only if needed—the soy sauce is quite salty. Finally, remove the skillet from the heat. Stir in most of the reserved green parts of your green onions, saving a small handful for a fresh garnish. Give everything one final, gentle fold. The sesame oil will add a wonderful nutty aroma, and the green onions will provide a bright, fresh finish.
Tips and Tricks
For the absolute best texture, spread your cooked rice on a baking sheet after dinner and let it cool completely at room temperature before refrigerating it uncovered overnight. This dries it out perfectly. If you’re in a pinch, you can use freshly cooked rice; just spread it thin and pop it in the freezer for 20-30 minutes to chill quickly. Don’t shy away from using bacon fat or butter instead of some of the vegetable oil for an even richer, more decadent flavor. A splash of rice vinegar or a squeeze of lime juice added right at the end can cut through the richness beautifully. And remember, your skillet is your friend—let the rice get acquainted with the hot surface to develop that coveted crispy crust.
Recipe Variations
- Meat Lover’s Twist: Add 1/2 cup of diced ham, crumbled cooked breakfast sausage, or chopped cooked bacon in with the onions for a hearty protein boost.
- Garden Fresh: Swap the frozen peas and carrots for 1/2 cup of diced bell peppers (any color) or a handful of chopped fresh spinach added in the last minute of cooking.
- Spicy Kick: Stir in 1-2 teaspoons of chili-garlic sauce or sriracha along with the soy sauce, and top with sliced fresh jalapeño.
- Cheesy Comfort: After removing from heat, stir in 1/2 cup of shredded sharp cheddar or pepper jack cheese until it melts into the hot rice.
- Umami Bomb: Add 1/4 cup of chopped mushrooms when sautéing the onions, and use a tablespoon of oyster sauce mixed with the soy sauce for deeper flavor.
Frequently Asked Questions
Q: Can I use freshly cooked rice instead of day-old?
A: You can, but the texture will be softer. Day-old rice has dried out, so the grains stay separate and get crispier when fried. For fresh rice, spread it on a tray to cool and dry for at least an hour before using.
Q: What’s the best type of rice to use?
A: Long-grain varieties like jasmine or basmati work beautifully as they are less sticky. Medium-grain rice can work but may clump more. Avoid using short-grain or sushi rice for this particular recipe.
Q: How do I store and reheat leftovers?
A: Store cooled leftovers in an airtight container in the fridge for up to 3 days. Reheat in a skillet over medium heat with a tiny splash of water to refresh it, or microwave in 30-second intervals, stirring in between.
Q: Can I make this vegetarian or vegan?
A: Absolutely! For vegetarian, just ensure your ingredients align. For vegan, omit the eggs and use a tofu scramble instead, and substitute the soy sauce with a vegan alternative or coconut aminos.
Q: My rice is sticking to the pan. What did I do wrong?
A: This usually means the pan wasn’t hot enough before adding the oil and ingredients, or you’re using a pan with poor heat distribution. Ensure your skillet is properly preheated and don’t be shy with that initial amount of oil.
Summary
This rustic breakfast fried rice transforms simple ingredients into a soul-warming morning feast, celebrating resourcefulness and flavor in every savory, satisfying bite.
Breakfast Fried Rice with Eggs
4
servings10
minutes15
minutesIngredients
Instructions
- 1 Prepare all ingredients: dice onion, mince garlic, slice green onions (separating white and green parts), and whisk eggs in a small bowl.
- 2 Heat a large skillet over medium-high heat. Add 2 tbsp vegetable oil. Sauté diced onion for 4-5 minutes until soft. Add minced garlic and white parts of green onions; stir for 45-60 seconds until fragrant.
- 3 Push aromatics to one side. Add remaining 1 tbsp oil to empty space. Pour in whisked eggs. Let set for 20 seconds, then scramble for 1-2 minutes until softly set.
- 4 Add chilled rice and thawed peas & carrots. Increase heat to high. Stir-fry for 3-4 minutes, letting rice sit briefly to crisp, until hot and slightly toasted.
- 5 Drizzle with soy sauce, toasted sesame oil, and black pepper. Stir-fry for 1-2 more minutes. Remove from heat. Stir in most of the green onion tops. Taste and add salt if needed. Garnish with remaining green onions and serve immediately.