Have you ever wondered how to transform humble burdock root into something truly spectacular? Whether you’re craving quick weeknight dinners, cozy comfort food, or seasonal delights, this versatile vegetable is your new secret weapon. We’ve gathered 18 savory recipes that make burdock shine for every occasion—get ready to be inspired and discover your next favorite dish!
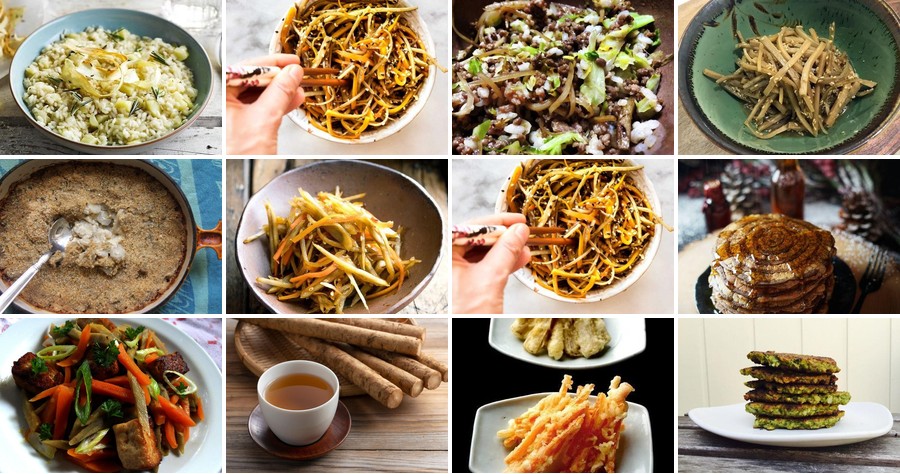
Braised Burdock Root with Soy Sauce
You know that feeling when you want something cozy and savory but also a little different? Braised burdock root with soy sauce is exactly that—a humble veggie dish that transforms into something deeply satisfying with minimal effort.
Serving: 4 | Pre Time: 10 minutes | Cooking Time: 25 minutes
Ingredients
– 2 medium burdock roots, scrubbed and cut into 2-inch matchsticks
– 1 tablespoon vegetable oil
– 2 cloves garlic, minced
– 1-inch piece of fresh ginger, grated
– ¼ cup soy sauce
– 1 tablespoon honey
– 1 cup water
– A splash of rice vinegar
– A couple of green onions, thinly sliced for garnish
Instructions
1. Heat the vegetable oil in a large skillet or Dutch oven over medium-high heat until it shimmers, about 2 minutes.
2. Add the burdock root matchsticks and sauté for 5 minutes, stirring occasionally, until they start to soften and brown slightly at the edges.
3. Stir in the minced garlic and grated ginger, cooking for 1 minute until fragrant—be careful not to burn them.
4. Pour in the soy sauce, honey, and water, then bring the mixture to a gentle boil.
5. Reduce the heat to low, cover the skillet, and let it simmer for 15 minutes, checking halfway to ensure the liquid hasn’t evaporated too quickly.
6. Uncover and cook for an additional 5 minutes to allow the sauce to thicken slightly, stirring once or twice.
7. Remove from heat and stir in the splash of rice vinegar for a bright finish.
8. Transfer to a serving dish and garnish with the sliced green onions.
But here’s the best part: the burdock turns tender yet retains a pleasant chew, soaking up all that savory-sweet soy sauce goodness. Serve it over steamed rice for a simple meal, or pair it with grilled chicken to let its earthy flavors shine—either way, it’s a dish that feels both comforting and a bit adventurous.
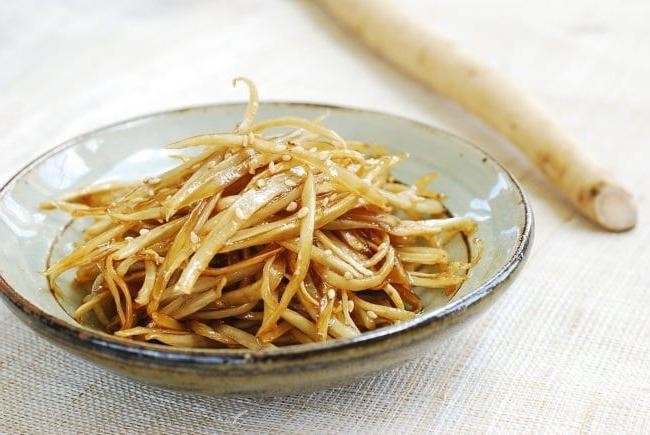
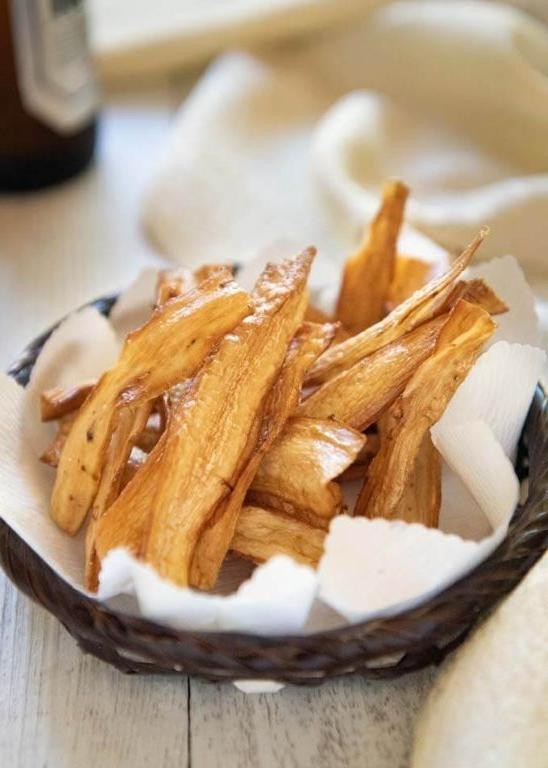
Crispy Burdock Tempura
Venture beyond the usual tempura suspects with this crispy burdock version that’ll make your taste buds do a happy dance. It’s earthy, crunchy, and surprisingly easy to pull off for a cozy night in or a festive appetizer. You’ll love how the simple batter lets the root veggie’s subtle sweetness shine through.
Serving: 4 | Pre Time: 15 minutes | Cooking Time: 10 minutes
Ingredients
– About 1 large burdock root (or 2 medium ones), peeled and sliced into thin matchsticks
– 1 cup of ice-cold water (seriously, keep it chilly)
– ¾ cup of all-purpose flour, plus a couple of extra tablespoons for dusting
– 1 large egg, lightly beaten
– A generous pinch of salt
– Enough vegetable oil to fill your pot or deep fryer about 2 inches deep
– A splash of soy sauce or your favorite dipping sauce for serving
Instructions
1. Peel the burdock root thoroughly with a vegetable peeler to remove the tough outer skin.
2. Slice the peeled root into thin matchsticks, roughly 2–3 inches long and ¼-inch thick, for even cooking.
3. Toss the burdock matchsticks in a couple of tablespoons of flour to coat them lightly—this helps the batter stick better.
4. In a medium bowl, whisk together the ice-cold water, ¾ cup of flour, the beaten egg, and a generous pinch of salt until just combined; a few lumps are fine to keep the batter light.
5. Heat the vegetable oil in a heavy-bottomed pot or deep fryer to 350°F, using a thermometer to check the temperature for perfect crispiness.
6. Dip a few burdock matchsticks into the batter, letting any excess drip off to avoid clumping in the oil.
7. Carefully lower the battered burdock into the hot oil, frying in small batches to maintain the oil temperature and prevent overcrowding.
8. Fry for about 2–3 minutes, flipping halfway through, until the tempura turns golden brown and crispy.
9. Remove the fried burdock with a slotted spoon and drain on a paper towel-lined plate to soak up extra oil.
10. Repeat with the remaining burdock, letting the oil return to 350°F between batches for consistent results.
11. Serve immediately while hot and crispy, with a splash of soy sauce or your favorite dipping sauce on the side.
Kick back and enjoy that satisfying crunch with every bite—the burdock stays tender inside while the tempura coating shatters beautifully. Its earthy flavor pairs wonderfully with a tangy dipping sauce, or try serving it over a bed of greens for a fun salad twist. This dish is a surefire way to impress guests or just treat yourself to something a little different!
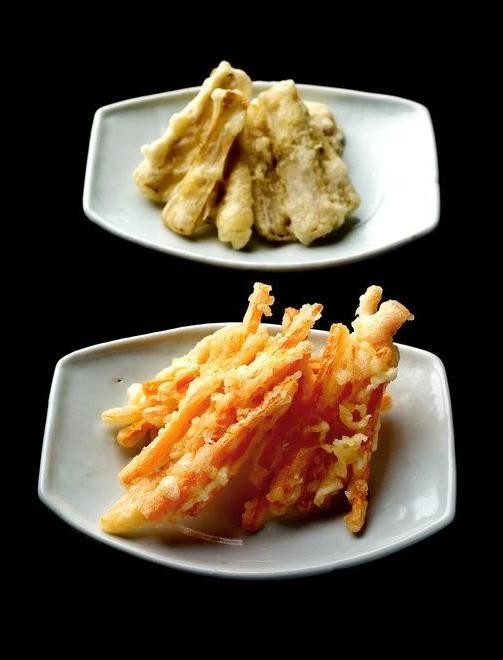
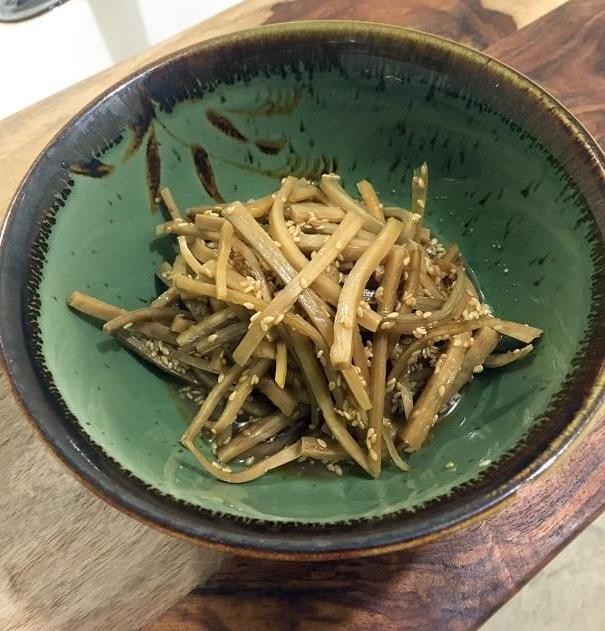
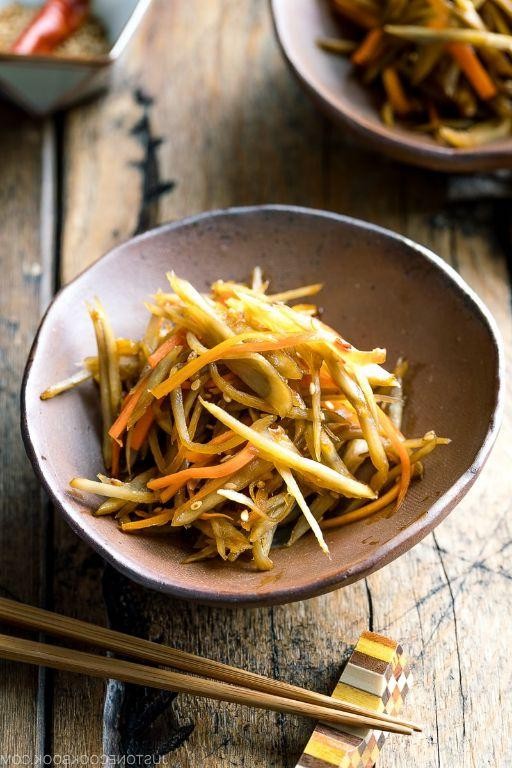
Burdock and Carrot Kinpira
Just when you need a cozy side dish that feels both nourishing and exciting, this burdock and carrot kinpira delivers. It’s a Japanese classic that transforms humble roots into something savory-sweet with a satisfying crunch. You’ll love how simple it is to pull together on a busy weeknight.
Serving: 4 | Pre Time: 15 minutes | Cooking Time: 15 minutes
Ingredients
– A couple of burdock roots (about 8 ounces total), scrubbed clean
– Two medium carrots
– A tablespoon of toasted sesame oil
– A splash of water (about 2 tablespoons)
– Two tablespoons of soy sauce
– A tablespoon of mirin
– A teaspoon of granulated sugar
– A sprinkle of toasted sesame seeds for garnish
Instructions
1. Scrub the burdock roots under cold running water to remove any dirt, then peel them with a vegetable peeler.
2. Cut the burdock and carrots into thin matchsticks about 2 inches long—this helps them cook evenly and gives that great texture.
3. Heat the toasted sesame oil in a large skillet or wok over medium-high heat until it shimmers, about 1 minute.
4. Add the burdock and carrot matchsticks to the hot oil and stir-fry for 5 minutes, until they start to soften slightly.
5. Pour in the splash of water, then cover the skillet and let the vegetables steam for 3 minutes to tenderize them without losing crunch.
6. Uncover and add the soy sauce, mirin, and granulated sugar to the skillet, stirring to coat everything evenly.
7. Continue cooking uncovered for another 5 minutes, stirring occasionally, until the liquid reduces to a glossy glaze that coats the vegetables.
8. Tip: To prevent burning, keep the heat at medium and stir frequently once the sauce is added—this ensures a perfect caramelized finish.
9. Remove the skillet from the heat and transfer the kinpira to a serving dish.
10. Sprinkle the toasted sesame seeds over the top just before serving for a nutty aroma and extra crunch.
11. Tip: For best results, let the kinpira sit for a few minutes after cooking; this allows the flavors to meld together beautifully.
12. Tip: If you prefer a bit of heat, add a pinch of red pepper flakes with the soy sauce for a subtle kick.
The kinpira comes out with a delightful chew from the burdock and a sweet crispness from the carrots, all wrapped in that umami-rich glaze. Try it over a bowl of steamed rice or tucked into a lunchbox—it’s just as good cold, making leftovers something to look forward to.
Burdock Root Chips
Did you know burdock root makes amazing chips? They’re crispy, earthy, and way healthier than store-bought. You’ll love how simple these are to whip up.
Serving: 4 | Pre Time: 15 minutes | Cooking Time: 20 minutes
Ingredients
– 2 medium burdock roots, peeled
– 2 tablespoons olive oil
– 1 teaspoon sea salt
– A couple of pinches of smoked paprika
– A splash of apple cider vinegar
Instructions
1. Preheat your oven to 375°F and line a baking sheet with parchment paper.
2. Peel the burdock roots thoroughly to remove the tough outer skin.
3. Use a mandoline or sharp knife to slice the roots into thin, uniform rounds about 1/8-inch thick. Tip: Consistent thickness ensures even cooking.
4. In a large bowl, toss the slices with olive oil until they’re lightly coated.
5. Sprinkle in the sea salt and smoked paprika, then add the apple cider vinegar.
6. Toss everything together until the slices are evenly seasoned.
7. Arrange the slices in a single layer on the prepared baking sheet, making sure they don’t overlap.
8. Bake for 15-20 minutes, flipping halfway through, until golden brown and crispy. Tip: Keep an eye on them after 15 minutes to prevent burning.
9. Remove from the oven and let cool on the sheet for 5 minutes to crisp up further. Tip: They’ll firm up as they cool, so don’t skip this step.
10. Transfer to a serving bowl.
Enjoy these chips right away—they’re delightfully crunchy with a nutty, slightly sweet flavor. Try dipping them in hummus or sprinkling with extra paprika for a smoky kick.
Burdock and Beef Stir-Fry
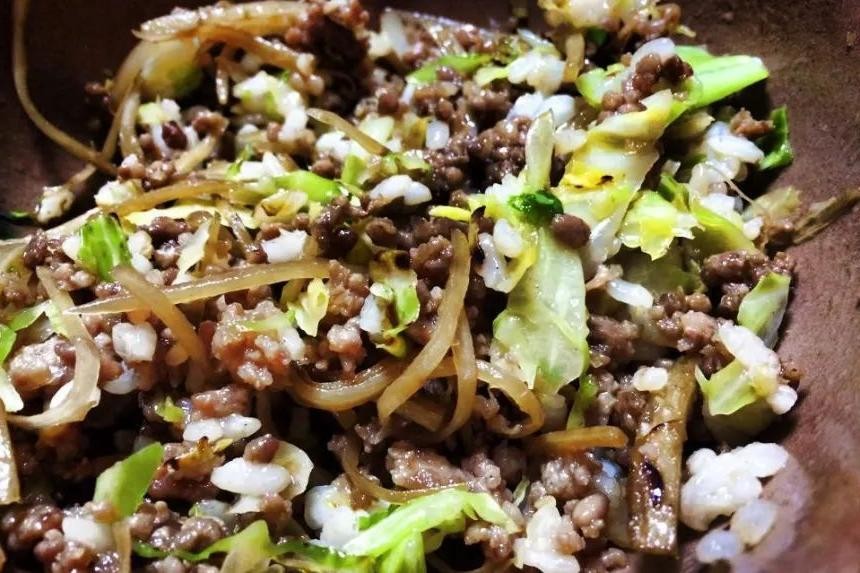
Pulling together a satisfying weeknight dinner doesn’t have to be complicated. This burdock and beef stir-fry is a fantastic way to get a hearty, flavorful meal on the table fast, and you’ll love the unique, earthy crunch the root vegetable adds.
Serving: 4 | Pre Time: 15 minutes | Cooking Time: 10 minutes
Ingredients
– 1 pound of flank steak, sliced thin against the grain
– 2 medium burdock roots (about 1 cup once peeled and julienned)
– 1 large yellow onion, sliced
– 2 cloves of garlic, minced
– A 1-inch piece of fresh ginger, grated
– 3 tablespoons of soy sauce
– 1 tablespoon of toasted sesame oil
– 2 tablespoons of vegetable oil
– A splash of rice vinegar
– A couple of green onions, chopped for garnish
Instructions
1. Slice the flank steak thinly against the grain and place it in a bowl.
2. Peel the burdock roots with a vegetable peeler, then immediately julienne them into matchsticks to prevent browning.
3. In the bowl with the beef, add 1 tablespoon of the soy sauce and the grated ginger, then toss to coat and let it marinate while you prep the other ingredients.
4. Heat 1 tablespoon of the vegetable oil in a large wok or skillet over high heat until it shimmers, about 1 minute.
5. Add the beef in a single layer and cook without moving for 1 minute to get a good sear.
6. Stir the beef and cook for another 1-2 minutes until it’s just browned but still slightly pink inside, then transfer it to a clean plate.
7. Add the remaining 1 tablespoon of vegetable oil to the same wok.
8. Add the sliced onion and cook for 2 minutes, stirring occasionally, until it starts to soften.
9. Add the julienned burdock and minced garlic, and stir-fry for 3-4 minutes until the burdock is tender-crisp.
10. Return the cooked beef and any accumulated juices to the wok.
11. Pour in the remaining 2 tablespoons of soy sauce and the splash of rice vinegar, then toss everything together for 1 minute until heated through and well-coated.
12. Remove the wok from the heat and drizzle the toasted sesame oil over the stir-fry.
13. Garnish with the chopped green onions.
Let this dish be your new go-to for a quick, satisfying meal. The beef stays wonderfully tender, and the burdock offers a delightful, slightly nutty crunch that pairs perfectly with the savory sauce. Try serving it over a bed of steamed jasmine rice or even stuffing it into warm tortillas for a fun fusion twist.
Burdock Miso Soup

Craving something cozy and nourishing? This burdock miso soup is just the thing for chilly evenings—it’s earthy, savory, and comes together with minimal fuss. You’ll love how the burdock adds a subtle crunch and the miso brings that comforting umami depth.
Serving: 4 | Pre Time: 10 minutes | Cooking Time: 20 minutes
Ingredients
– 1 medium burdock root, peeled and sliced into thin matchsticks
– 4 cups water
– 2 tablespoons white miso paste
– 1 tablespoon soy sauce
– 1 teaspoon sesame oil
– A couple of green onions, thinly sliced
– A splash of rice vinegar
Instructions
1. In a medium pot, combine the sliced burdock root and 4 cups of water. Bring it to a boil over high heat.
2. Once boiling, reduce the heat to medium-low and let it simmer for 15 minutes, or until the burdock is tender but still has a slight bite—test it with a fork to avoid overcooking.
3. While the soup simmers, in a small bowl, whisk together 2 tablespoons of white miso paste with a ladleful of the hot broth until smooth to prevent clumping.
4. Turn off the heat and stir the miso mixture back into the pot along with 1 tablespoon of soy sauce and 1 teaspoon of sesame oil.
5. Add a splash of rice vinegar and the sliced green onions, giving everything a gentle stir to combine.
6. Ladle the soup into bowls and serve immediately while hot.
Dig into this soup and you’ll notice the burdock’s satisfying crunch against the silky broth, with a savory kick from the miso and soy. Try topping it with a sprinkle of toasted sesame seeds or pairing it with steamed rice for a heartier meal—it’s versatile enough to shine on its own or as a side.
Burdock Root Tea
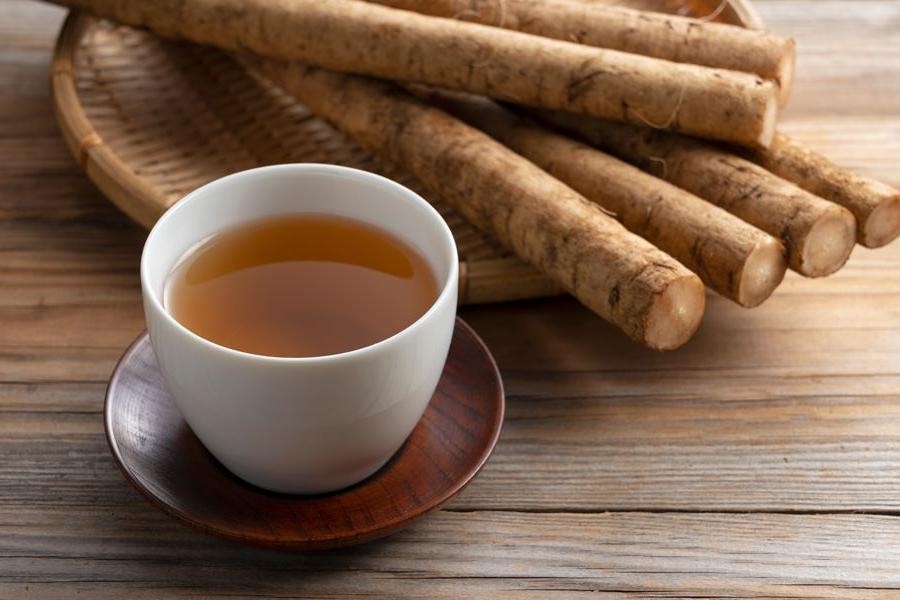
Perfect for a cozy winter evening, this earthy burdock root tea is like a warm hug in a mug. You’ll love its subtle sweetness and how it makes your kitchen smell amazing while it simmers.
Serving: 2 | Pre Time: 5 minutes | Cooking Time: 20 minutes
Ingredients
- 1 cup of fresh burdock root, scrubbed clean and thinly sliced
- 4 cups of cold water
- A splash of maple syrup (about 1 tbsp)
- A couple of thin slices of fresh ginger
- A pinch of sea salt
Instructions
- Place the sliced burdock root and ginger slices into a medium saucepan.
- Pour the 4 cups of cold water over the roots in the pan.
- Bring the mixture to a boil over high heat, which should take about 5 minutes.
- Once boiling, immediately reduce the heat to low for a gentle simmer.
- Let the tea simmer uncovered for 15 minutes, which allows the flavors to fully infuse—you’ll know it’s ready when the liquid turns a deep amber color.
- Carefully strain the tea through a fine-mesh sieve into a heatproof pitcher or directly into mugs, pressing lightly on the solids to extract all the liquid.
- Stir in the splash of maple syrup and the pinch of sea salt until fully dissolved. Tip: The salt isn’t for saltiness; it actually helps balance and enhance the other flavors subtly.
Enjoy this tea hot for its soothing, slightly sweet and woody flavor with a gentle ginger kick. It has a clean, light body that’s perfect sipped slowly, or try it chilled over ice with a lemon wedge for a refreshing twist.
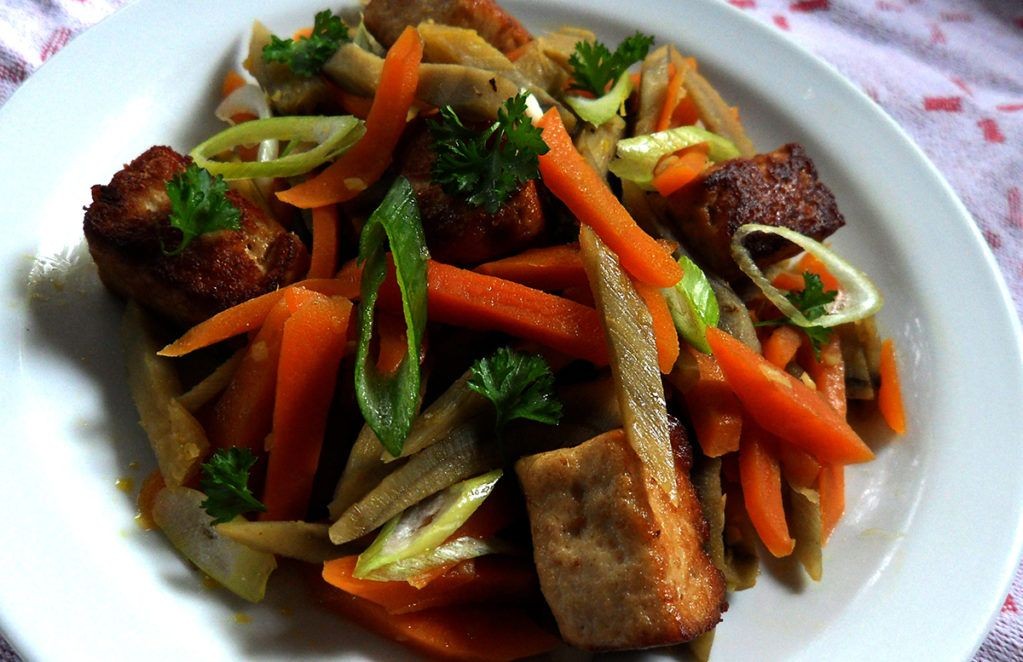
Burdock and Tofu Salad

Oof, sometimes you just need a salad that feels substantial but won’t weigh you down. This burdock and tofu combo is exactly that—a crunchy, savory, and totally satisfying dish that comes together without any fuss. It’s perfect for a light lunch or a fresh side that brings something different to the table.
Serving: 4 | Pre Time: 15 minutes | Cooking Time: 10 minutes
Ingredients
– A couple of medium burdock roots (about 2 cups when peeled and shredded)
– One 14-ounce block of extra-firm tofu
– A quarter cup of soy sauce
– Two tablespoons of sesame oil
– A tablespoon of rice vinegar
– A teaspoon of grated fresh ginger
– A splash of water (about 2 tablespoons)
– A couple of green onions, thinly sliced
Instructions
1. First, drain your block of tofu and press it between paper towels for 10 minutes to remove excess water—this helps it crisp up later.
2. While the tofu presses, peel the burdock roots with a vegetable peeler and shred them into thin matchsticks using a box grater or mandoline.
3. Cut the pressed tofu into half-inch cubes.
4. Heat a large skillet over medium-high heat and add the sesame oil.
5. Add the tofu cubes to the hot skillet in a single layer and cook for 5 minutes, flipping halfway, until golden brown on all sides.
6. Remove the tofu from the skillet and set it aside on a plate.
7. In the same skillet, add the shredded burdock and cook for 3 minutes, stirring often, until it softens slightly but still has a bite.
8. Tip: Don’t overcook the burdock—it should stay crunchy for the best texture.
9. In a small bowl, whisk together the soy sauce, rice vinegar, grated ginger, and splash of water.
10. Return the tofu to the skillet with the burdock.
11. Pour the sauce mixture over everything and stir to coat, cooking for 1 more minute until heated through.
12. Tip: If the sauce seems too thick, add another splash of water to loosen it up.
13. Remove the skillet from the heat and stir in the sliced green onions.
14. Tip: Let the salad sit for 5 minutes before serving to let the flavors meld together beautifully.
15. Serve the salad warm or at room temperature.
Kick back and enjoy this hearty mix—the burdock brings an earthy crunch that pairs perfectly with the savory, pan-fried tofu. It’s fantastic on its own, or try scooping it over a bed of greens for an extra fresh twist. Leftovers hold up great in the fridge, making it a smart make-ahead option for busy days.
Burdock Root Pickles
Venture beyond your usual pickle jar with these earthy, crunchy burdock root pickles—they’re a fantastic way to add a unique, slightly sweet crunch to your sandwiches, salads, or cheese boards. You’ll love how simple they are to make at home, and they keep for weeks in the fridge, getting better with time.
Serving: 2 pints | Pre Time: 15 minutes | Cooking Time: 5 minutes
Ingredients
– About 1 pound of fresh burdock root, scrubbed clean (no need to peel it all—just give it a good scrub)
– 1½ cups of white vinegar
– 1½ cups of water
– 2 tablespoons of granulated sugar
– 1 tablespoon of kosher salt
– 1 teaspoon of whole black peppercorns
– A couple of garlic cloves, smashed
– A splash of soy sauce (optional, for a savory twist)
Instructions
1. Trim the burdock root and slice it into thin matchsticks, about ¼-inch thick and 2 inches long.
2. In a medium saucepan, combine the white vinegar, water, sugar, salt, peppercorns, and smashed garlic cloves.
3. Heat the mixture over medium-high heat until it just begins to simmer, stirring occasionally to dissolve the sugar and salt—this should take about 3–5 minutes.
4. Tip: Don’t let it boil vigorously, as that can make the vinegar taste harsh.
5. Remove the saucepan from the heat and stir in the optional splash of soy sauce, if using.
6. Pack the sliced burdock root tightly into two clean pint-sized jars, leaving about ½ inch of space at the top.
7. Carefully pour the hot brine over the burdock root in the jars, ensuring it completely covers the slices.
8. Tip: Use a chopstick to gently press down the burdock and release any air bubbles trapped inside.
9. Let the jars cool to room temperature on the counter, which usually takes about 1 hour.
10. Once cooled, screw on the lids and refrigerate the pickles for at least 24 hours before eating to let the flavors develop.
11. Tip: They’ll keep well in the fridge for up to a month, tasting even better after a week as the flavors meld.
Ooh, these pickles turn out wonderfully crisp with a subtle earthy sweetness that pairs perfectly with sharp cheeses or grilled meats. Try them chopped into a grain bowl for extra texture, or simply snack on them straight from the jar—they’re that addictive!
Burdock and Chicken Stew

You know those cozy winter nights when you crave something hearty and nourishing? This burdock and chicken stew is exactly what you need—it’s earthy, comforting, and packed with flavor. Let’s get cooking!
Serving: 4 | Pre Time: 15 minutes | Cooking Time: 45 minutes
Ingredients
– 1.5 pounds of chicken thighs, bone-in and skin-on
– 2 medium burdock roots, peeled and sliced into half-inch pieces
– 1 large onion, chopped
– 2 carrots, chopped
– 3 cloves of garlic, minced
– 4 cups of chicken broth
– A splash of olive oil
– A couple of bay leaves
– 1 teaspoon of dried thyme
– Salt and pepper to season
Instructions
1. Heat a splash of olive oil in a large pot over medium-high heat until it shimmers.
2. Season the chicken thighs with salt and pepper on both sides.
3. Place the chicken thighs skin-side down in the pot and cook for 5–7 minutes until the skin is golden brown and crispy.
4. Flip the chicken and cook for another 3 minutes, then remove it from the pot and set it aside on a plate.
5. In the same pot, add the chopped onion and carrots, and sauté for 5 minutes until they start to soften.
6. Add the minced garlic and cook for 1 minute until fragrant.
7. Stir in the sliced burdock roots and cook for 2 minutes to lightly toast them.
8. Pour in the 4 cups of chicken broth, scraping the bottom of the pot to release any browned bits.
9. Add the bay leaves and dried thyme to the pot.
10. Return the chicken thighs to the pot, nestling them into the broth and vegetables.
11. Bring the stew to a boil, then reduce the heat to low, cover the pot, and simmer for 30 minutes until the chicken is cooked through and tender.
12. Remove the chicken from the pot and shred the meat off the bones, discarding the bones and skin if desired.
13. Return the shredded chicken to the pot and simmer uncovered for 5 minutes to thicken the stew slightly.
14. Taste the stew and adjust the seasoning with salt and pepper as needed.
15. Remove the bay leaves before serving.
Unbelievably tender chicken and earthy burdock meld into a rich, savory broth that’s perfect for soaking up with crusty bread. Serve it over a bed of mashed potatoes for extra comfort, or garnish with fresh parsley for a pop of color—it’s a bowl of warmth that’ll have everyone asking for seconds!
Burdock Root Pancakes
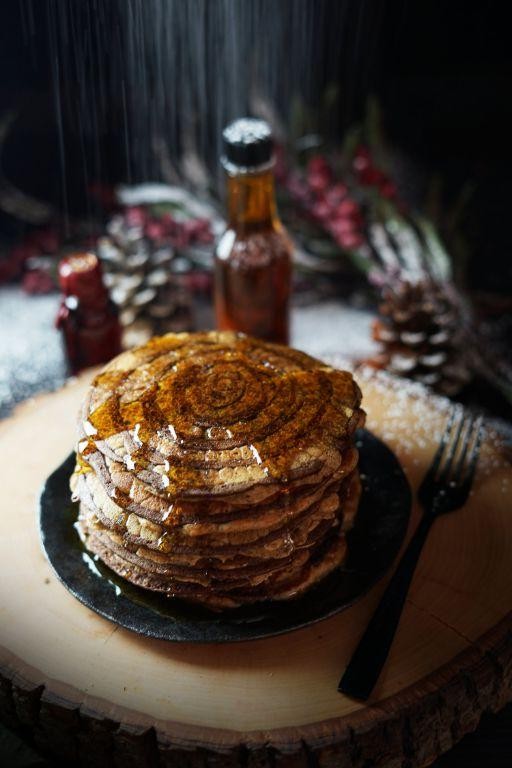
Aren’t you tired of the same old breakfast routine? Let’s shake things up with something earthy and satisfying. These burdock root pancakes are a deliciously different way to start your day, packed with a unique, slightly sweet flavor and a wonderful, hearty texture.
Serving: 4 | Pre Time: 15 minutes | Cooking Time: 20 minutes
Ingredients
– About 2 cups of grated burdock root (from one large root)
– 1 cup of all-purpose flour
– 2 large eggs
– 3/4 cup of milk
– A couple of tablespoons of vegetable oil, plus more for the pan
– A good pinch of salt
– A splash of maple syrup for serving (optional)
Instructions
1. Peel your burdock root and grate it using the coarse side of a box grater into a large mixing bowl. (Tip: Wear gloves if your skin is sensitive, as the root can sometimes cause a slight reaction.)
2. Add the 1 cup of all-purpose flour and the good pinch of salt to the bowl with the grated burdock.
3. Crack the 2 large eggs into a separate small bowl and whisk them lightly with a fork.
4. Pour the whisked eggs and the 3/4 cup of milk into the large bowl with the burdock and flour.
5. Stir everything together with a spatula until you have a thick, lumpy batter. Let it rest for 5 minutes.
6. While the batter rests, heat a large non-stick skillet or griddle over medium heat (about 350°F) and add a couple of tablespoons of vegetable oil to coat the bottom.
7. Once the oil shimmers, scoop about 1/4 cup of batter for each pancake onto the hot skillet. (Tip: Don’t overcrowd the pan—leave space for flipping.)
8. Cook the pancakes for 3-4 minutes, until the edges look set and you see small bubbles forming on the surface.
9. Carefully flip each pancake with a spatula and cook for another 3-4 minutes on the second side, until golden brown and cooked through. (Tip: Press down gently with the spatula—if it springs back, they’re done.)
10. Transfer the cooked pancakes to a plate and repeat with the remaining batter, adding a little more of the vegetable oil to the pan as needed.
Zesty and wholesome, these pancakes have a fantastic, slightly crunchy texture from the burdock and a lovely, nutty-sweet flavor. They’re amazing with that optional splash of maple syrup, or try them savory-style with a fried egg on top for a real treat.
Burdock and Mushroom Risotto
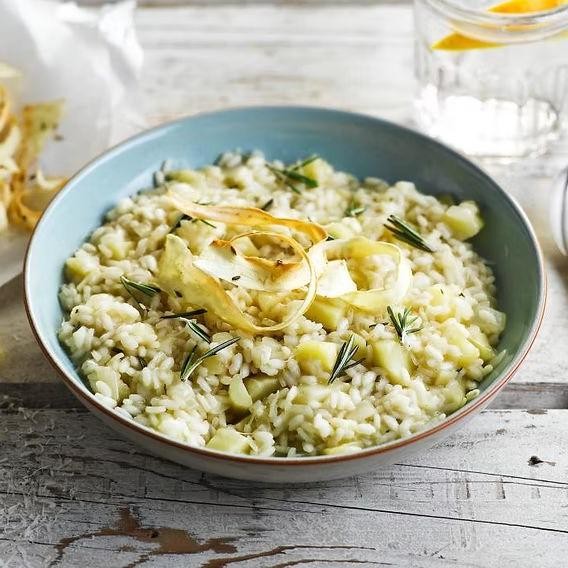
Mmm, nothing beats a cozy risotto on a chilly December evening, and this earthy burdock and mushroom version is about to become your new favorite. You’ll love how the nutty burdock pairs with savory mushrooms—it’s a comforting, restaurant-worthy dish you can whip up at home. Let’s get cooking!
Serving: 4 | Pre Time: 15 minutes | Cooking Time: 35 minutes
Ingredients
– 1 cup arborio rice
– 4 cups vegetable broth, kept warm on the stove
– 1 medium burdock root, peeled and sliced into thin matchsticks
– 8 ounces cremini mushrooms, sliced
– 1 small yellow onion, finely chopped
– 2 cloves garlic, minced
– 1/2 cup dry white wine
– 2 tablespoons olive oil
– 2 tablespoons unsalted butter
– 1/2 cup grated Parmesan cheese
– A splash of heavy cream
– Salt and freshly ground black pepper
Instructions
1. Heat 1 tablespoon of olive oil in a large, heavy-bottomed pot over medium heat.
2. Add the chopped onion and cook for 5 minutes, stirring occasionally, until softened and translucent.
3. Stir in the minced garlic and cook for 1 minute, just until fragrant—be careful not to let it burn.
4. Add the sliced burdock root and cook for 8 minutes, stirring now and then, until it starts to soften and brown slightly.
5. Toss in the sliced mushrooms and cook for 6 minutes, until they release their liquid and turn golden brown.
6. Pour in the arborio rice and stir to coat it with the oil and veggies, toasting it for 2 minutes to bring out a nutty flavor.
7. Add the white wine and let it simmer for 2 minutes, stirring constantly, until the liquid is mostly absorbed.
8. Ladle in 1 cup of warm vegetable broth and simmer, stirring frequently, until the broth is nearly absorbed—this should take about 5 minutes.
9. Repeat adding broth 1 cup at a time, stirring often and waiting for each addition to be absorbed before adding the next, until the rice is creamy and al dente, about 20 minutes total.
10. Remove the pot from the heat and stir in the butter, Parmesan cheese, and a splash of heavy cream until everything is melted and combined.
11. Season with salt and freshly ground black pepper to your liking.
What you’ll get is a risotto with a wonderfully creamy texture and deep, earthy flavors from the burdock and mushrooms. Serve it hot, maybe topped with an extra sprinkle of Parmesan and a side of crusty bread for dipping—it’s perfect for a festive dinner or a quiet night in.
Burdock Root Fritters
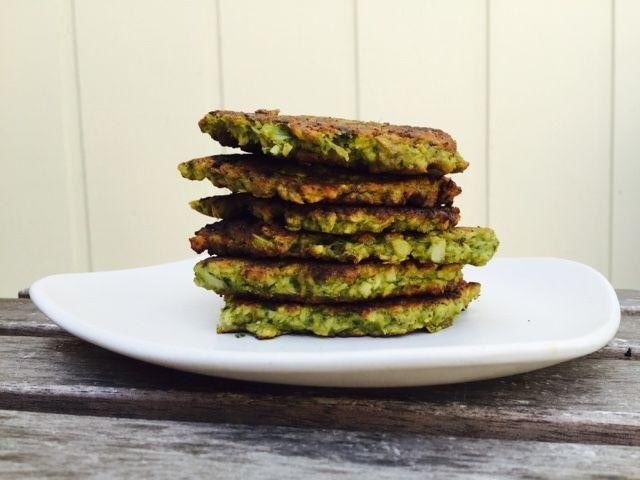
Might sound unusual, but these burdock root fritters are about to become your new favorite snack. You get crispy edges with a tender, earthy center that’s surprisingly addictive. Perfect for when you want something different but totally satisfying.
Serving: 4 | Pre Time: 15 minutes | Cooking Time: 20 minutes
Ingredients
– 2 medium burdock roots, peeled and grated (about 2 cups packed)
– 1 small onion, finely chopped
– 2 cloves garlic, minced
– 1 large egg
– ¼ cup all-purpose flour
– 2 tbsp cornstarch
– A couple of pinches of salt
– A good pinch of black pepper
– A splash of vegetable oil for frying (about ½ cup)
– ¼ cup sour cream for dipping
– A handful of fresh chives, chopped
Instructions
1. Place the grated burdock root in a clean kitchen towel and squeeze out as much liquid as possible—this helps the fritters get crispy instead of soggy.
2. In a large bowl, combine the squeezed burdock root, chopped onion, minced garlic, egg, flour, cornstarch, salt, and pepper.
3. Mix everything together until well combined; the mixture should hold together when pressed.
4. Heat about ¼ inch of vegetable oil in a large skillet over medium heat until it reaches 350°F (use a thermometer or test with a small piece—it should sizzle immediately).
5. Scoop about 2 tablespoons of the mixture per fritter and gently flatten into patties about ½-inch thick.
6. Carefully place the patties in the hot oil, leaving space between them so they don’t stick together.
7. Fry for 3–4 minutes per side, or until golden brown and crispy on both sides.
8. Transfer the cooked fritters to a paper towel-lined plate to drain excess oil.
9. Repeat with the remaining mixture, adding more oil to the skillet if needed and letting it reheat to 350°F between batches.
10. In a small bowl, stir together the sour cream and chopped chives for the dipping sauce.
Buttery and crisp on the outside with a savory, slightly sweet earthiness inside, these fritters are a delightful twist. Serve them hot with the chive sour cream for dipping, or try crumbling them over a fresh green salad for extra crunch.
Burdock and Pork Dumplings

Dumplings are one of those comforting foods that just hit the spot, especially when you’re craving something hearty and homemade. These burdock and pork dumplings bring a wonderful earthy twist to a classic, with the burdock adding a subtle, nutty flavor that pairs perfectly with the savory pork. You’re going to love how these come together for a cozy meal.
Serving: 4 | Pre Time: 40 minutes | Cooking Time: 15 minutes
Ingredients
– A package of round dumpling wrappers (about 30 count)
– Half a pound of ground pork
– One cup of finely chopped burdock root
– A couple of green onions, thinly sliced
– Two cloves of garlic, minced
– One tablespoon of soy sauce
– A teaspoon of sesame oil
– A splash of vegetable oil for cooking
– Half a cup of water for steaming
Instructions
1. In a medium bowl, combine the ground pork, chopped burdock root, sliced green onions, minced garlic, soy sauce, and sesame oil. Mix everything together with your hands until well combined.
2. Place a dumpling wrapper on a clean surface and spoon about one teaspoon of the filling into the center. Tip: Don’t overfill the wrappers to prevent them from bursting during cooking.
3. Dip your finger in water and moisten the edges of the wrapper.
4. Fold the wrapper in half over the filling and press the edges together firmly to seal, creating a half-moon shape. You can pleat the edges for a decorative touch if you like.
5. Repeat steps 2-4 until all the filling is used, placing the assembled dumplings on a lightly floured tray to prevent sticking.
6. Heat a large non-stick skillet over medium-high heat and add a splash of vegetable oil.
7. Arrange the dumplings in the skillet in a single layer, flat side down, and cook for 2-3 minutes until the bottoms are golden brown and crispy.
8. Carefully pour half a cup of water into the skillet, cover immediately with a lid, and reduce the heat to medium. Steam the dumplings for 8-10 minutes until the wrappers are translucent and the filling is cooked through. Tip: Listen for the sizzle to stop as a cue that the water has evaporated.
9. Remove the lid and let the dumplings cook for another minute to crisp up the bottoms again.
10. Use a spatula to transfer the dumplings to a serving plate. Tip: Serve them hot with a dipping sauce of soy sauce and vinegar for extra flavor.
What makes these dumplings special is their delightful texture—crispy on the bottom and tender on top, with a filling that’s juicy and packed with earthy notes from the burdock. They’re perfect for a casual dinner with friends, and you can even freeze any extras for a quick meal later. Enjoy them straight from the skillet for the best experience!
Burdock Root Curry
Okay, so you know how sometimes you want something cozy and different? On a chilly evening, this burdock root curry is just the thing—earthy, warming, and totally satisfying. It’s a simple one-pot wonder that’ll make your kitchen smell amazing.
Serving: 4 | Pre Time: 15 minutes | Cooking Time: 45 minutes
Ingredients
– A couple of tablespoons of olive oil
– One medium onion, chopped
– Three cloves of garlic, minced
– A tablespoon of fresh ginger, grated
– Two cups of burdock root, peeled and sliced into thin rounds (tip: soak them in water with a splash of lemon juice to prevent browning)
– One can (14 oz) of coconut milk
– Two cups of vegetable broth
– A tablespoon of curry powder
– A teaspoon of turmeric
– A pinch of salt
– A handful of fresh cilantro, chopped
Instructions
1. Heat the olive oil in a large pot over medium heat until it shimmers.
2. Add the chopped onion and cook for about 5 minutes, stirring occasionally, until it turns translucent and soft.
3. Stir in the minced garlic and grated ginger, cooking for 1 minute until fragrant—be careful not to burn it.
4. Add the sliced burdock root to the pot and sauté for 5 minutes to lightly brown the edges.
5. Pour in the coconut milk and vegetable broth, then sprinkle in the curry powder, turmeric, and a pinch of salt.
6. Bring the mixture to a gentle boil, then reduce the heat to low, cover the pot, and let it simmer for 30 minutes until the burdock root is tender when pierced with a fork.
7. Stir in the chopped cilantro just before serving to keep it fresh and vibrant.
Zesty and rich, this curry has a hearty texture with the burdock root adding a slight chewiness that soaks up all the flavors. Try it over a bed of fluffy rice or with some warm naan for dipping—it’s a comforting meal that’ll have you coming back for seconds.
Burdock and Seaweed Salad

A crunchy, earthy salad that’s surprisingly easy to pull together—perfect for when you want something fresh but different. You’ll love the mix of textures and that savory, umami kick. Let’s get chopping!
Serving: 4 | Pre Time: 20 minutes | Cooking Time: 5 minutes
Ingredients
– 2 medium burdock roots, peeled and julienned
– A couple of cups of dried wakame seaweed
– 3 tablespoons of soy sauce
– 2 tablespoons of rice vinegar
– A splash of sesame oil (about 1 tablespoon)
– 1 teaspoon of grated ginger
– A pinch of sugar
– 1 tablespoon of toasted sesame seeds
Instructions
1. Soak the dried wakame seaweed in a bowl of cold water for 10 minutes until it softens and expands.
2. While the seaweed soaks, peel the burdock roots with a vegetable peeler to remove the tough outer skin.
3. Julienne the peeled burdock roots into thin matchstick-sized pieces using a sharp knife or mandoline.
4. Bring a pot of water to a boil over high heat on the stove.
5. Blanch the julienned burdock in the boiling water for 3 minutes to soften it slightly and reduce bitterness.
6. Drain the burdock immediately and rinse it under cold water to stop the cooking process.
7. Drain the soaked wakame seaweed and squeeze out any excess water with your hands.
8. In a small bowl, whisk together the soy sauce, rice vinegar, sesame oil, grated ginger, and a pinch of sugar until well combined.
9. Tip: Taste the dressing now—if you prefer it tangier, add a bit more vinegar, but go easy since the soy sauce is already salty.
10. Combine the blanched burdock and drained wakame in a large mixing bowl.
11. Pour the dressing over the burdock and seaweed mixture, tossing gently with tongs to coat everything evenly.
12. Tip: Let the salad sit for 5 minutes before serving to allow the flavors to meld together for a tastier bite.
13. Sprinkle the toasted sesame seeds over the top of the salad as a garnish.
14. Tip: For extra crunch, you can add a handful of chopped nuts or crispy fried onions just before serving.
15. Serve the salad immediately or chill it in the refrigerator for up to 30 minutes if you prefer it cooler.
Grab a fork and dig into this vibrant mix—the burdock stays delightfully crisp, while the wakame adds a soft, chewy contrast. That savory dressing ties it all together with a hint of ginger warmth. Try piling it on top of grilled fish or alongside a bowl of steamed rice for a complete meal that’s as satisfying as it is healthy.
Burdock Root Gratin
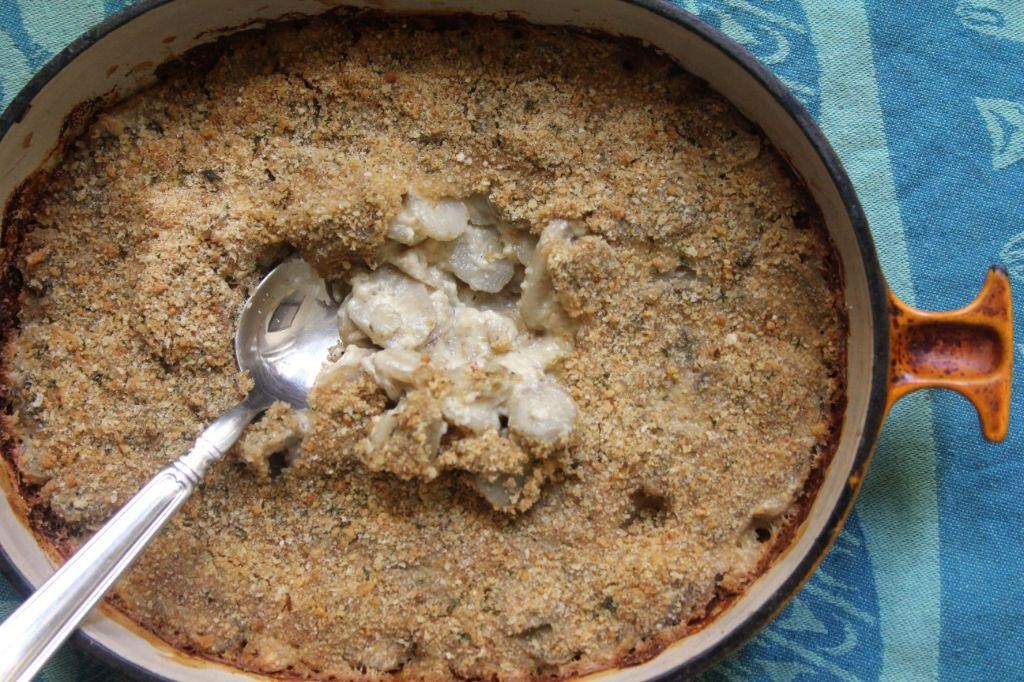
Picture this: a cozy winter evening, and you’re craving something creamy, comforting, and a little bit different. That’s where this burdock root gratin comes in—it’s earthy, cheesy, and totally satisfying, perfect for shaking up your usual side dish routine.
Serving: 4 | Pre Time: 15 minutes | Cooking Time: 45 minutes
Ingredients
- About 1 pound of burdock root, peeled and sliced into thin rounds
- 2 cups of heavy cream
- A couple of cloves of garlic, minced
- 1 cup of grated Gruyère cheese
- A splash of olive oil
- Salt and black pepper
- A pinch of nutmeg
Instructions
- Preheat your oven to 375°F.
- Peel the burdock root and slice it into thin rounds, about 1/8-inch thick—this helps it cook evenly and get tender.
- In a large skillet over medium heat, add a splash of olive oil and sauté the minced garlic for about 1 minute until fragrant.
- Add the burdock root slices to the skillet and cook for 5 minutes, stirring occasionally, until they start to soften slightly.
- Pour in the 2 cups of heavy cream, and season with salt, black pepper, and a pinch of nutmeg for a warm, aromatic touch.
- Bring the mixture to a gentle simmer, then reduce the heat to low and let it cook for 10 minutes, stirring now and then to prevent sticking.
- Transfer the burdock root and cream mixture to a baking dish, spreading it out evenly.
- Sprinkle the 1 cup of grated Gruyère cheese evenly over the top.
- Bake in the preheated oven at 375°F for 25-30 minutes, until the cheese is golden brown and bubbly.
- Remove from the oven and let it cool for 5 minutes before serving to let the flavors meld together.
After baking, you’ll love the creamy texture with a slight crunch from the burdock root, and the nutty Gruyère adds a rich depth. Try serving it alongside a simple roast chicken or as a hearty vegetarian main with a fresh salad—it’s versatile enough to shine in any meal!
Burdock and Ginger Stir-Fry
A burdock and ginger stir-fry might sound fancy, but it’s actually a super simple weeknight meal you can whip up in no time. You’ll love the earthy, slightly sweet flavor of the burdock root paired with the zing of fresh ginger—it’s a combo that feels both comforting and exciting.
Serving: 4 | Pre Time: 15 minutes | Cooking Time: 10 minutes
Ingredients
- 1 large burdock root (about 1 cup, peeled and julienned)
- A 2-inch piece of fresh ginger (minced)
- 2 cloves of garlic (minced)
- 1 medium carrot (julienned)
- 1 small onion (thinly sliced)
- 2 tablespoons of vegetable oil
- 2 tablespoons of soy sauce
- 1 tablespoon of rice vinegar
- A splash of water (about ¼ cup)
- A pinch of salt and black pepper
Instructions
- Peel the burdock root and carrot, then julienne them into thin matchsticks—this helps them cook evenly and quickly.
- Mince the ginger and garlic cloves finely so their flavors meld well in the stir-fry.
- Heat the vegetable oil in a large skillet or wok over medium-high heat until it shimmers, about 1-2 minutes.
- Add the sliced onion to the hot oil and stir-fry for 2-3 minutes until it turns translucent and soft.
- Tip: Keep the heat high to get a nice sear without steaming the veggies.
- Add the julienned burdock root and carrot to the skillet, stirring constantly for 4-5 minutes until they start to soften but still have a bit of crunch.
- Stir in the minced ginger and garlic, cooking for 1 minute until fragrant—be careful not to burn them.
- Pour in the soy sauce, rice vinegar, and a splash of water, then season with a pinch of salt and black pepper.
- Tip: The water helps create a light sauce and prevents sticking; adjust the amount if you prefer it saucier.
- Continue stir-frying for another 2-3 minutes until the vegetables are tender-crisp and coated in the sauce.
- Tip: Taste a piece of burdock to check for doneness—it should be firm but not raw.
- Remove from heat and serve immediately while hot.
Out of the pan, this dish has a wonderful mix of textures: the burdock is pleasantly chewy, the carrot adds sweetness, and the ginger gives it a warm kick. Try it over a bed of steamed rice or quinoa for a complete meal, or toss it with noodles for a fun twist—it’s versatile enough to make again and again!
Summary
Overall, this collection shows how versatile and delicious burdock root can be in your kitchen. I hope you find a new favorite dish to try! Please let me know which recipe you love most in the comments below, and if you enjoyed this roundup, feel free to share it on Pinterest to inspire other home cooks. Happy cooking!