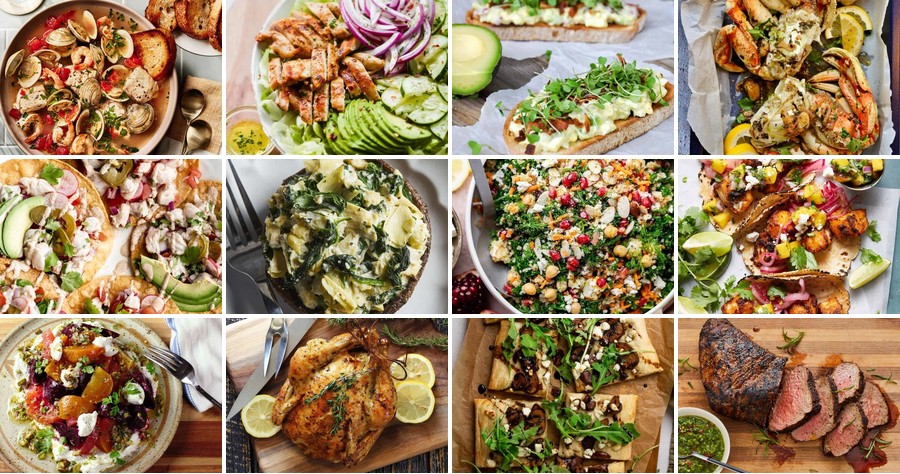
Picture yourself savoring vibrant, sun-kissed flavors that nourish both body and soul. Welcome to a collection of 18 Fresh Californian Cuisine Recipes for Healthy Living, where we celebrate the state’s bounty with dishes that are as delicious as they are wholesome. From zesty salads to light, protein-packed mains, these recipes make healthy eating an effortless joy. Let’s dive in and bring that West Coast vitality right to your kitchen!
Avocado and Grilled Chicken Salad
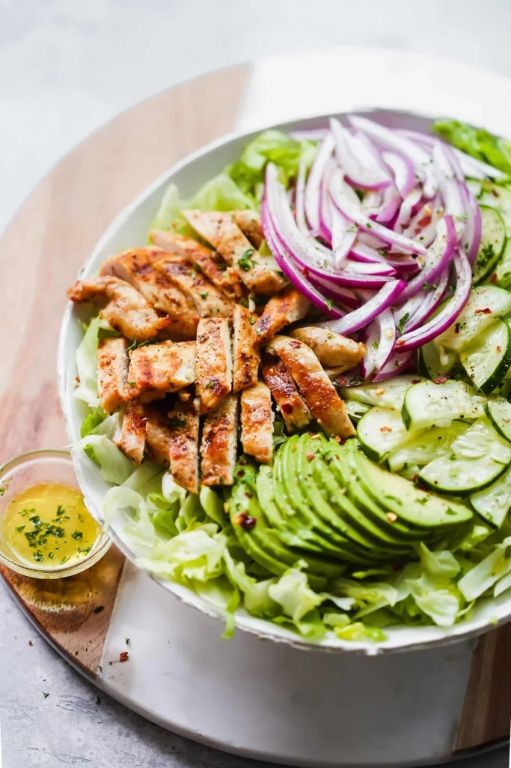
This vibrant avocado and grilled chicken salad transforms simple ingredients into a sophisticated meal that’s both nourishing and visually stunning. The combination of creamy avocado, smoky grilled chicken, and crisp vegetables creates a dish that feels indulgent yet refreshingly light, perfect for a quick lunch or elegant dinner. Tender chicken, marinated briefly for maximum flavor, pairs beautifully with the buttery texture of ripe avocado and the bright crunch of fresh vegetables.
Serving: 2 | Pre Time: 15 minutes | Cooking Time: 10 minutes
Ingredients
– Chicken breast – 1 lb
– Avocado – 1 large
– Lemon juice – 2 tbsp
– Olive oil – 3 tbsp
– Salt – ½ tsp
– Black pepper – ¼ tsp
– Mixed greens – 4 cups
– Cherry tomatoes – ½ cup
– Red onion – ¼ cup
Instructions
1. Preheat a grill or grill pan to medium-high heat (400°F).
2. Season the chicken breast evenly with ¼ tsp salt and ⅛ tsp black pepper.
3. Grill the chicken for 5–6 minutes per side, until the internal temperature reaches 165°F and the exterior has distinct grill marks.
4. Transfer the grilled chicken to a cutting board and let it rest for 5 minutes to retain its juices.
5. While the chicken rests, halve the avocado, remove the pit, and scoop the flesh into a medium bowl.
6. Mash the avocado with a fork until slightly chunky, then stir in 1 tbsp lemon juice to prevent browning.
7. Thinly slice the red onion and halve the cherry tomatoes.
8. Slice the rested chicken against the grain into ½-inch strips.
9. In a large salad bowl, combine the mixed greens, sliced red onion, and halved cherry tomatoes.
10. Drizzle the salad with 2 tbsp olive oil and the remaining 1 tbsp lemon juice, then toss gently to coat.
11. Divide the salad between two plates, top with the sliced chicken, and spoon the mashed avocado over each serving.
12. Season the finished dish with the remaining ¼ tsp salt and ⅛ tsp black pepper.
Velvety avocado melds with the smoky, tender chicken, while the crisp greens and juicy tomatoes provide a refreshing contrast. For a creative twist, serve this salad in lettuce cups or alongside crusty bread to soak up the vibrant dressing, making it a versatile centerpiece for any occasion.
Cioppino San Francisco Seafood Stew
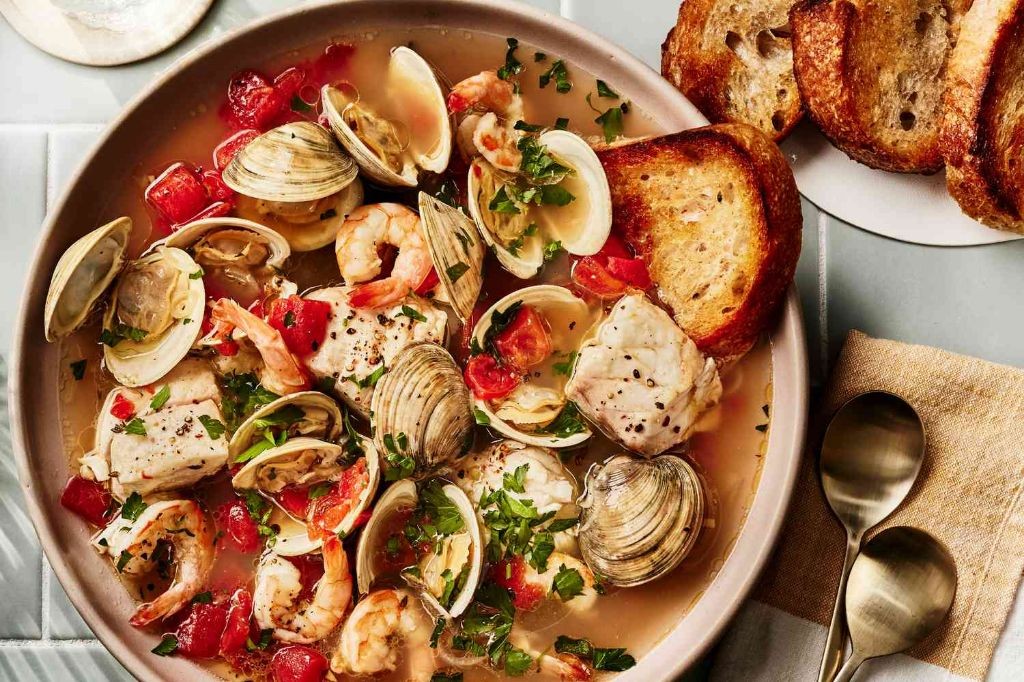
Zestful and brimming with the briny essence of the Pacific, Cioppino is San Francisco’s iconic seafood stew—a vibrant, tomato-based broth teeming with the day’s freshest catch, traditionally simmered to perfection and served with crusty sourdough to soak up every last drop. This one-pot wonder, born from the city’s Italian fishing communities, marries the simplicity of rustic cooking with the luxurious depth of a well-crafted broth, making it an ideal centerpiece for festive gatherings or a cozy winter evening. Its rich, aromatic base, infused with white wine and herbs, cradles an array of shellfish and firm-fleshed fish, creating a harmonious medley that is both elegant and profoundly satisfying.
Serving: 4 | Pre Time: 20 minutes | Cooking Time: 40 minutes
Ingredients
– Olive oil – 2 tbsp
– Onion – 1, diced
– Garlic – 4 cloves, minced
– Crushed tomatoes – 1 (28-oz) can
– Dry white wine – 1 cup
– Fish stock – 4 cups
– Bay leaf – 1
– Red pepper flakes – ¼ tsp
– Salt – 1 tsp
– Black pepper – ½ tsp
– Littleneck clams – 12, scrubbed
– Mussels – 12, debearded
– Shrimp – 1 lb, peeled and deveined
– Firm white fish (such as halibut) – 1 lb, cut into 1-inch chunks
– Fresh parsley – ¼ cup, chopped
Instructions
1. Heat olive oil in a large Dutch oven or heavy-bottomed pot over medium heat until shimmering, about 2 minutes.
2. Add diced onion and cook, stirring occasionally, until translucent and softened, 5–7 minutes.
3. Stir in minced garlic and cook until fragrant, 30–60 seconds, being careful not to let it brown.
4. Pour in dry white wine, scraping up any browned bits from the bottom of the pot with a wooden spoon, and simmer until reduced by half, 3–5 minutes.
5. Add crushed tomatoes, fish stock, bay leaf, red pepper flakes, salt, and black pepper, then bring to a boil.
6. Reduce heat to low, cover, and simmer for 20 minutes to allow the flavors to meld, stirring occasionally.
7. Increase heat to medium-high and add littleneck clams and mussels, arranging them in a single layer, then cover and cook until shells open, 5–8 minutes, discarding any that remain closed.
8. Gently stir in shrimp and firm white fish, submerging them in the broth, and simmer uncovered until shrimp turn pink and opaque and fish flakes easily with a fork, 3–5 minutes, avoiding overcooking to keep seafood tender.
9. Remove pot from heat, discard the bay leaf, and stir in chopped fresh parsley.
10. Ladle the stew into deep bowls, ensuring each serving has a mix of seafood and broth.
Generously ladled into bowls, this stew offers a luxurious texture where tender fish and plump shellfish meld with a velvety, tomato-infused broth that carries a subtle kick from red pepper flakes. The flavors are deeply layered, from the sweet brininess of the clams to the aromatic finish of parsley, making it a celebratory dish best enjoyed with a glass of the remaining white wine and plenty of sourdough for dipping.
California Roll Sushi Bowls
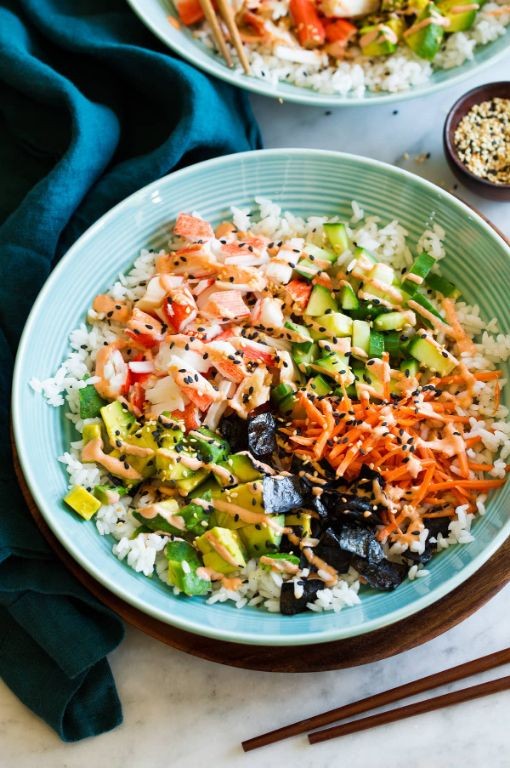
While traditional sushi requires meticulous rolling, these California Roll Sushi Bowls deconstruct the classic into an effortless, elegant meal. Imagine the familiar flavors of creamy avocado, sweet crab, and crisp cucumber, artfully arranged over seasoned rice for a presentation that’s both refined and utterly satisfying. This approachable dish brings the essence of sushi night to your table with minimal fuss and maximum style.
Serving: 2 | Pre Time: 15 minutes | Cooking Time: 15 minutes
Ingredients
– Sushi Rice – 1 cup
– Water – 1 ¼ cups
– Rice Vinegar – 2 tbsp
– Sugar – 1 tbsp
– Salt – ½ tsp
– Imitation Crab Meat – 8 oz, shredded
– Mayonnaise – 2 tbsp
– Avocado – 1, diced
– English Cucumber – ½, thinly sliced
– Nori Seaweed Sheets – 2, cut into thin strips
– Sesame Seeds – 1 tbsp
– Soy Sauce – for serving
Instructions
1. Rinse 1 cup of sushi rice under cold water in a fine-mesh strainer until the water runs clear, which removes excess starch for fluffier grains.
2. Combine the rinsed rice and 1 ¼ cups of water in a medium saucepan, bring to a boil over high heat, then reduce the heat to low, cover, and simmer for 15 minutes until all water is absorbed.
3. While the rice cooks, whisk together 2 tbsp rice vinegar, 1 tbsp sugar, and ½ tsp salt in a small bowl until dissolved to create the seasoning mixture.
4. Transfer the cooked rice to a large bowl, pour the vinegar mixture over it, and fold gently with a rice paddle to coat evenly, then let it cool to room temperature for about 10 minutes.
5. In a separate bowl, mix 8 oz shredded imitation crab meat with 2 tbsp mayonnaise until well combined for a creamy texture.
6. Dice 1 avocado and thinly slice ½ English cucumber, keeping them separate to maintain their distinct crispness.
7. Cut 2 nori seaweed sheets into thin strips using kitchen scissors for easy garnishing.
8. Divide the seasoned rice between two serving bowls, then top each with the crab mixture, diced avocado, and sliced cucumber in an artful arrangement.
9. Sprinkle 1 tbsp sesame seeds and the nori strips over the bowls just before serving to keep the seaweed crisp.
10. Serve immediately with soy sauce on the side for drizzling, allowing each diner to adjust the seasoning to their preference.
Meticulously layered, these bowls offer a delightful contrast of textures: the tender rice melds with the creamy crab, while the avocado adds buttery richness and the cucumber provides a refreshing crunch. For a creative twist, try adding a drizzle of spicy mayo or a sprinkle of tobiko for extra pop, making it a versatile centerpiece for casual dinners or elegant gatherings alike.
Farmers’ Market Veggie Tacos
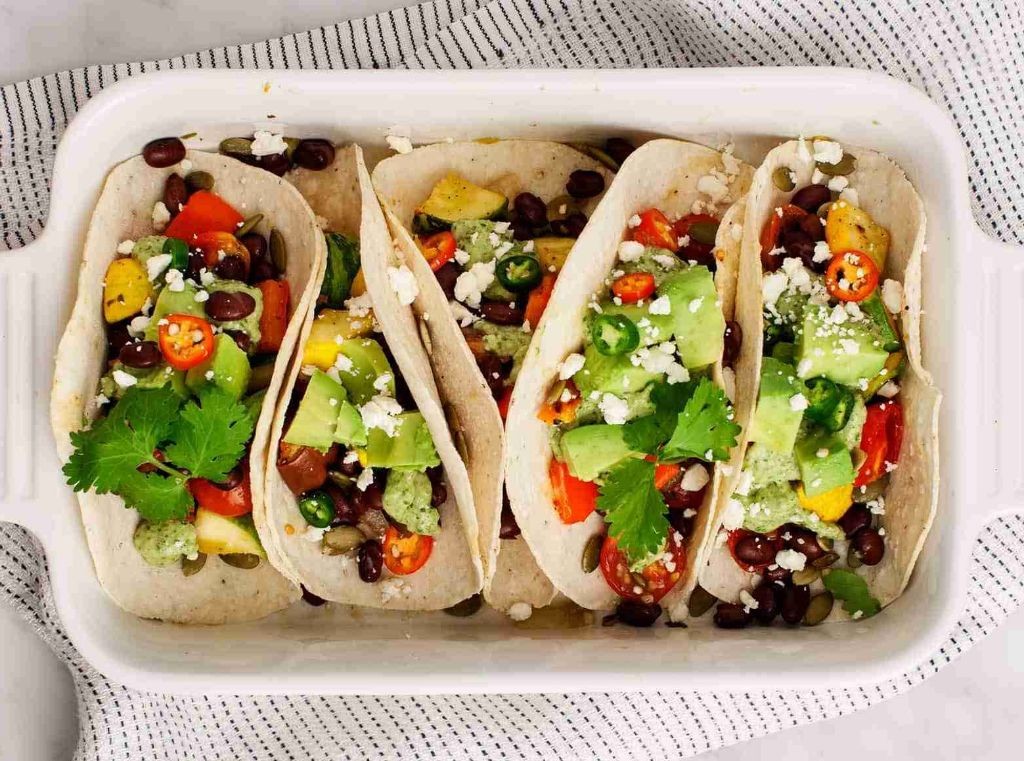
Radiant with the vibrant colors of a summer market, these Farmers’ Market Veggie Tacos transform humble vegetables into an elegant, plant-forward feast. Each bite bursts with the sweet char of roasted produce and the bright zing of fresh lime, all cradled in a warm, soft tortilla. This recipe celebrates simplicity, allowing the quality of seasonal ingredients to shine through.
Serving: 4 | Pre Time: 15 minutes | Cooking Time: 25 minutes
Ingredients
– Corn tortillas – 8
– Zucchini – 1 medium, sliced into ½-inch rounds
– Bell peppers – 2, sliced into ½-inch strips
– Red onion – 1 small, sliced into ½-inch wedges
– Olive oil – 2 tbsp
– Ground cumin – 1 tsp
– Chili powder – 1 tsp
– Salt – ¾ tsp
– Black pepper – ¼ tsp
– Lime – 1, cut into wedges
– Fresh cilantro – ¼ cup, chopped
– Avocado – 1, sliced
Instructions
1. Preheat your oven to 425°F and line a large baking sheet with parchment paper.
2. In a large bowl, combine the zucchini, bell peppers, and red onion.
3. Drizzle the vegetables with 2 tablespoons of olive oil and toss to coat evenly.
4. Sprinkle the ground cumin, chili powder, ¾ teaspoon of salt, and ¼ teaspoon of black pepper over the vegetables, then toss again until all pieces are seasoned.
5. Spread the vegetables in a single layer on the prepared baking sheet, ensuring they are not crowded to allow for proper roasting and caramelization.
6. Roast the vegetables in the preheated oven for 20-25 minutes, flipping them halfway through, until they are tender and have developed golden-brown edges.
7. While the vegetables roast, wrap the corn tortillas in a damp paper towel and warm them in the microwave for 30 seconds to make them pliable and prevent cracking.
8. Once the vegetables are done, remove them from the oven and let them cool slightly for 2-3 minutes.
9. To assemble each taco, place two warm tortillas on a plate and divide the roasted vegetables evenly among them.
10. Top each taco with slices of avocado and a sprinkle of fresh cilantro.
11. Serve immediately with lime wedges on the side for squeezing over the tacos just before eating to maximize the fresh, bright flavor.
Zesty lime juice cuts through the rich, smoky vegetables, while the creamy avocado adds a luxurious, cooling contrast. The soft, warm tortillas provide the perfect vessel for the hearty, caramelized filling, making these tacos ideal for a casual yet sophisticated al fresco dinner.
Santa Maria Style Tri-Tip BBQ
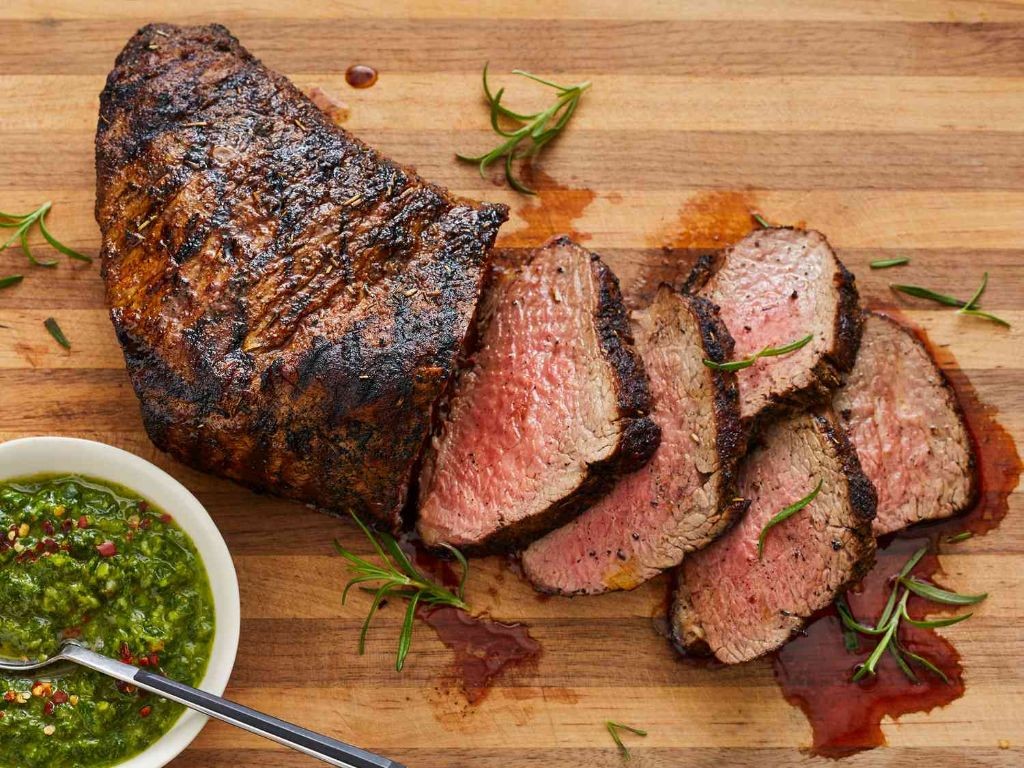
Glistening with a rustic, smoky allure, Santa Maria Style Tri-Tip BBQ is a Central Californian treasure that transforms a humble cut into a centerpiece of communal feasting. Its signature crust, kissed by oak smoke and a simple rub, yields to a juicy, medium-rare interior perfect for slicing against the grain. This method celebrates simplicity, where fire, time, and a few quality ingredients create a deeply satisfying experience.
Serving: 6-8 | Pre Time: 30 minutes | Cooking Time: 45 minutes
Ingredients
– Tri-tip roast – 1 (2.5-3 lb)
– Kosher salt – 2 tbsp
– Black pepper – 2 tbsp
– Garlic powder – 1 tbsp
– Oak wood chunks – 4-6
Instructions
1. Trim any large pieces of surface fat from the tri-tip roast, leaving a thin layer for flavor and moisture.
2. In a small bowl, combine the kosher salt, black pepper, and garlic powder to create the rub.
3. Pat the tri-tip roast completely dry with paper towels to ensure the rub adheres properly.
4. Rub the spice mixture evenly over the entire surface of the roast, coating all sides.
5. Let the seasoned roast rest at room temperature for 30 minutes to take the chill off, which promotes even cooking.
6. While the roast rests, prepare a charcoal grill for two-zone indirect cooking, piling lit coals on one side and leaving the other side empty.
7. Place the oak wood chunks directly onto the hot coals to generate clean smoke.
8. Once the grill temperature stabilizes at 225°F, place the tri-tip on the cool side of the grill, fat-side up, away from direct heat.
9. Close the grill lid and cook until the internal temperature reaches 120°F, about 40-50 minutes, using a digital meat thermometer inserted into the thickest part.
10. Carefully move the tri-tip directly over the hot coals to sear for 2-3 minutes per side, until a dark, crusty bark forms.
11. Transfer the seared roast to a clean cutting board and let it rest, tented loosely with foil, for 15 minutes; this allows the juices to redistribute throughout the meat.
12. Slice the tri-tip thinly against the grain, which is essential for tenderness, following the changing grain direction in the cut.
Delightfully tender with a bold, peppery crust, each slice offers a perfect contrast between the smoky exterior and rosy, juicy interior. The clean oak smoke imparts a subtle sweetness that complements the savory garlic and pepper notes. For a classic presentation, serve the sliced tri-tip atop grilled garlic bread with a side of pinquito beans and a simple salsa, allowing the meat’s robust flavors to truly shine.
Artichoke and Spinach Stuffed Portobello Mushrooms
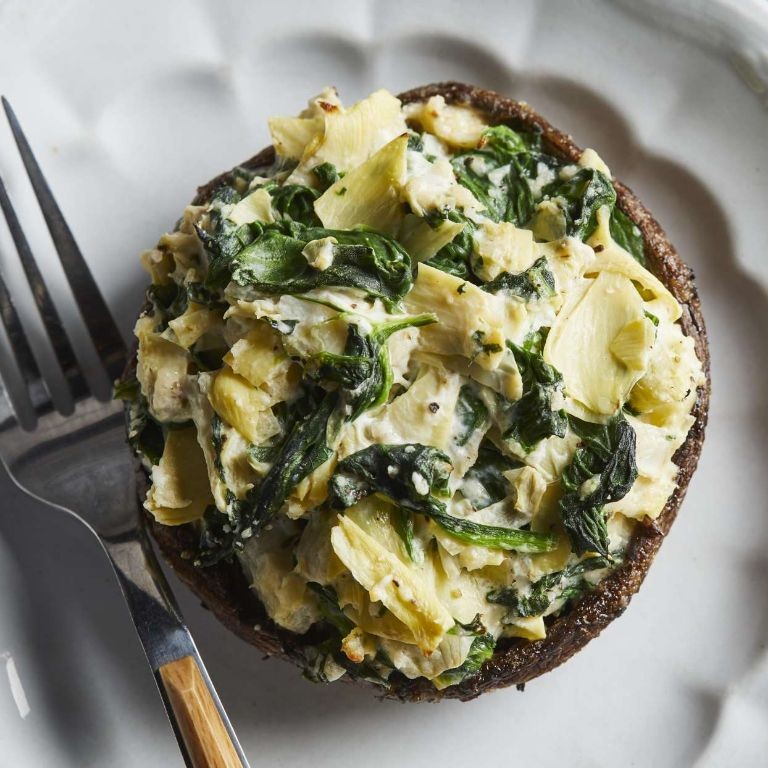
Heralding the holiday season with a vegetarian centerpiece that marries earthy richness with creamy sophistication, these Artichoke and Spinach Stuffed Portobello Mushrooms transform humble ingredients into an elegant feast. Perfect for festive gatherings or a special weeknight dinner, they offer a satisfying main course that delights both the palate and the eye with minimal effort.
Serving: 4 | Pre Time: 15 minutes | Cooking Time: 25 minutes
Ingredients
– Portobello mushroom caps – 4 large
– Olive oil – 2 tbsp
– Fresh spinach – 4 cups
– Canned artichoke hearts – 1 cup, drained and chopped
– Cream cheese – 4 oz
– Parmesan cheese – ½ cup, grated
– Garlic – 2 cloves, minced
– Salt – ½ tsp
– Black pepper – ¼ tsp
– Breadcrumbs – ¼ cup
Instructions
1. Preheat your oven to 400°F and line a baking sheet with parchment paper.
2. Remove the stems from the portobello mushroom caps and use a spoon to gently scrape out the gills to create more space for stuffing.
3. Brush both sides of the mushroom caps with 1 tablespoon of olive oil and place them gill-side up on the prepared baking sheet.
4. In a large skillet over medium heat, add the remaining 1 tablespoon of olive oil and sauté the minced garlic for 30 seconds until fragrant.
5. Add the fresh spinach to the skillet and cook for 2–3 minutes, stirring frequently, until wilted and any excess liquid has evaporated.
6. Transfer the wilted spinach to a mixing bowl and combine it with the chopped artichoke hearts, cream cheese, ¼ cup of Parmesan cheese, salt, and black pepper, mixing thoroughly until smooth.
7. Divide the spinach-artichoke mixture evenly among the mushroom caps, pressing it gently into the cavities.
8. In a small bowl, mix the breadcrumbs with the remaining ¼ cup of Parmesan cheese and sprinkle this topping evenly over each stuffed mushroom.
9. Bake in the preheated oven for 20–25 minutes, until the mushrooms are tender and the topping is golden brown and crispy.
10. Remove from the oven and let the mushrooms rest for 5 minutes before serving to allow the flavors to meld.
Warm from the oven, these stuffed mushrooms offer a delightful contrast of textures: the meaty, juicy portobello caps yield to a creamy, savory filling with a crisp, cheesy crust. For a festive presentation, garnish with fresh herbs like parsley or thyme and serve alongside a simple arugula salad drizzled with balsamic glaze to balance the richness.
Garlic Butter Dungeness Crab
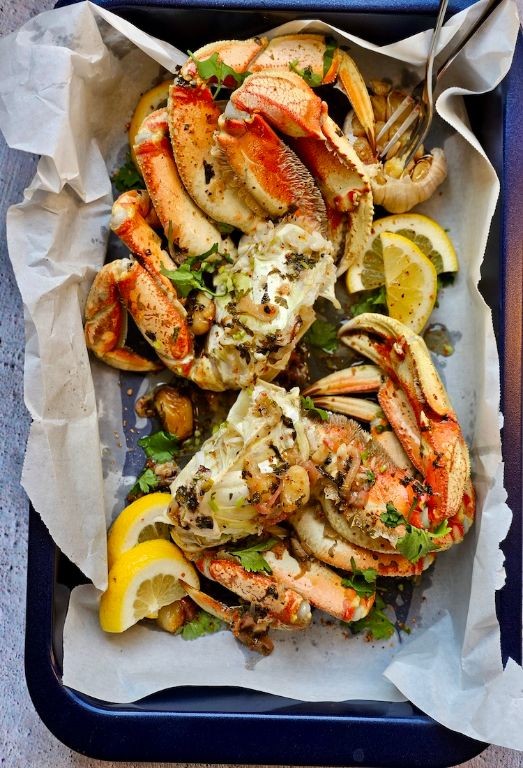
Revered for its sweet, succulent meat and impressive presentation, Dungeness crab transforms into an unforgettable centerpiece when bathed in a rich garlic butter sauce. This elegant yet approachable recipe highlights the crab’s natural sweetness with aromatic garlic, fresh herbs, and a generous amount of butter, creating a dish that feels both luxurious and comforting. Perfect for a special occasion or a decadent weeknight dinner, it promises to delight seafood lovers with its bold flavors and satisfying texture.
Serving: 2 | Pre Time: 15 minutes | Cooking Time: 10 minutes
Ingredients
– Dungeness crab (cooked) – 1 (about 2 lbs)
– Unsalted butter – ½ cup
– Garlic – 4 cloves
– Fresh parsley – 2 tbsp
– Lemon – 1
– Salt – ½ tsp
– Black pepper – ¼ tsp
Instructions
1. Place the cooked Dungeness crab on a cutting board and use a crab cracker or kitchen shears to crack the claws and legs, making them easier to eat later.
2. Mince the garlic cloves finely to ensure they distribute evenly in the sauce without burning.
3. Melt the unsalted butter in a large skillet over medium-low heat, swirling the pan occasionally until fully liquid and frothy, about 2 minutes.
4. Add the minced garlic to the skillet and cook, stirring constantly, until fragrant and just beginning to turn golden, about 1 minute; avoid browning it to prevent bitterness.
5. Increase the heat to medium and add the cracked crab to the skillet, tossing gently to coat all pieces thoroughly with the garlic butter.
6. Cook the crab, turning the pieces occasionally, until heated through and the shells are glossy, about 4–5 minutes.
7. While the crab cooks, chop the fresh parsley finely and cut the lemon in half.
8. Remove the skillet from the heat and stir in the chopped parsley, salt, and black pepper, tossing to combine evenly.
9. Squeeze the juice from one lemon half over the crab, using the other half for garnish if desired.
10. Transfer the crab to a serving platter, pouring any remaining garlic butter from the skillet over the top.
Vibrant and aromatic, this garlic butter crab boasts tender, juicy meat that absorbs the savory, buttery sauce, while the fresh lemon adds a bright, tangy finish. Serve it family-style on a large platter with crusty bread for dipping into the extra sauce, or pair it with a simple green salad to balance the richness. The combination of sweet crab, pungent garlic, and herbaceous parsley creates a harmonious flavor profile that feels both indulgent and refreshing, making it a standout dish for any gathering.
California Cobb Salad with Avocado Dressing

Nestled among the vibrant flavors of the West Coast, this salad transforms the classic Cobb into a modern, creamy delight with a luscious avocado-based dressing. It artfully layers crisp greens, rich proteins, and fresh vegetables for a satisfying meal that feels both indulgent and refreshing. Perfect for a light lunch or elegant starter, it captures the essence of California’s fresh, sun-drenched cuisine.
Serving: 4 | Pre Time: 20 minutes | Cooking Time: 15 minutes
Ingredients
– Romaine lettuce – 1 head
– Avocado – 2
– Lemon juice – 2 tbsp
– Olive oil – ¼ cup
– Garlic clove – 1
– Salt – ½ tsp
– Black pepper – ¼ tsp
– Chicken breast – 1 lb
– Bacon – 6 slices
– Hard-boiled eggs – 4
– Cherry tomatoes – 1 cup
– Blue cheese – ½ cup
Instructions
1. Preheat a skillet over medium-high heat (375°F) and cook the bacon for 8–10 minutes until crispy and browned, then transfer to a paper towel-lined plate to drain and cool.
2. Pat the chicken breast dry with paper towels, season both sides with ¼ tsp salt and ⅛ tsp black pepper, and cook in the same skillet over medium heat (350°F) for 6–7 minutes per side until the internal temperature reaches 165°F and the exterior is golden brown.
3. Remove the chicken from the skillet, let it rest on a cutting board for 5 minutes to retain juices, then slice it into thin strips.
4. Chop the cooled bacon into small pieces and set aside.
5. Wash and dry the romaine lettuce thoroughly, then tear it into bite-sized pieces and arrange them evenly on a large serving platter.
6. In a blender, combine 1 avocado (peeled and pitted), lemon juice, olive oil, garlic clove (minced), remaining ¼ tsp salt, and ⅛ tsp black pepper, and blend on high speed for 30–45 seconds until smooth and creamy.
7. Drizzle half of the avocado dressing over the lettuce on the platter.
8. Arrange the sliced chicken, chopped bacon, halved hard-boiled eggs, halved cherry tomatoes, crumbled blue cheese, and remaining avocado (diced) in neat rows or sections on top of the dressed lettuce.
9. Drizzle the remaining avocado dressing over the assembled salad just before serving.
10. Serve immediately, tossing gently at the table if desired.
Keeping the ingredients chilled until assembly ensures a crisp, refreshing bite, with the creamy avocado dressing balancing the salty bacon and tangy blue cheese. For a creative twist, serve it in individual mason jars for a portable picnic or layer it in a clear bowl to showcase the vibrant colors.
Wild Mushroom and Goat Cheese Flatbread

Tantalizingly rustic yet refined, this wild mushroom and goat cheese flatbread marries earthy forest flavors with creamy tang in a crisp, golden crust. Perfect for an elegant appetizer or light meal, it transforms simple ingredients into a sophisticated dish that feels both comforting and celebratory. The aromatic blend of mushrooms and herbs creates a savory canvas, while the goat cheese adds a luxurious finish that melts beautifully under heat.
Serving: 4 | Pre Time: 20 minutes | Cooking Time: 15 minutes
Ingredients
– Pizza dough – 1 lb
– Olive oil – 2 tbsp
– Wild mushrooms (such as cremini, shiitake, or oyster) – 8 oz, sliced
– Garlic – 2 cloves, minced
– Fresh thyme – 1 tbsp, chopped
– Goat cheese – 4 oz, crumbled
– Salt – ½ tsp
– Black pepper – ¼ tsp
Instructions
1. Preheat your oven to 475°F and place a pizza stone or baking sheet inside to heat for at least 30 minutes—this ensures a crisp crust.
2. On a lightly floured surface, stretch the pizza dough into a 12-inch round or rectangle about ¼-inch thick.
3. Heat 1 tablespoon of olive oil in a large skillet over medium-high heat until shimmering, about 2 minutes.
4. Add the sliced wild mushrooms to the skillet and cook, stirring occasionally, until they release their moisture and turn golden brown, 6–8 minutes.
5. Stir in the minced garlic and chopped thyme, cooking for 1 more minute until fragrant, then remove from heat and season with salt and black pepper.
6. Brush the stretched dough with the remaining 1 tablespoon of olive oil, spreading it evenly to the edges.
7. Evenly distribute the cooked mushroom mixture over the dough, leaving a ½-inch border around the edges.
8. Sprinkle the crumbled goat cheese over the mushrooms, covering the surface lightly.
9. Carefully transfer the flatbread to the preheated pizza stone or baking sheet and bake for 12–15 minutes, until the crust is puffed and golden brown and the cheese is slightly melted.
10. Remove from the oven and let cool for 2–3 minutes before slicing into wedges or squares.
Buttery and crisp at the edges, this flatbread offers a delightful contrast with the tender, umami-rich mushrooms and creamy pockets of goat cheese. Serve it warm, perhaps drizzled with a touch of honey or paired with a simple arugula salad for added freshness, making it an effortless centerpiece for gatherings or a cozy night in.
Pomegranate and Kale Superfood Salad

Kaleidoscopic in both color and nutrition, this Pomegranate and Kale Superfood Salad transforms humble ingredients into a vibrant masterpiece. With jewel-like pomegranate arils and hearty kale leaves, it’s a celebration of freshness that feels both indulgent and nourishing. Perfect for holiday gatherings or a bright weekday lunch, this salad delivers crisp textures and a harmonious balance of sweet and earthy flavors in every bite.
Serving: 4 | Pre Time: 15 minutes | Cooking Time: 0 minutes
Ingredients
– Kale – 1 large bunch
– Pomegranate arils – 1 cup
– Olive oil – ¼ cup
– Lemon juice – 2 tbsp
– Honey – 1 tbsp
– Salt – ½ tsp
– Black pepper – ¼ tsp
Instructions
1. Remove the kale leaves from the stems and tear them into bite-sized pieces, placing them in a large salad bowl.
2. Massage the kale with your hands for 2–3 minutes until the leaves soften and turn a darker green, which helps reduce bitterness and improves texture.
3. In a small bowl, whisk together the olive oil, lemon juice, honey, salt, and black pepper until fully emulsified.
4. Pour the dressing over the massaged kale and toss thoroughly to coat every leaf evenly, ensuring no dry spots remain.
5. Gently fold in the pomegranate arils, distributing them throughout the salad without crushing the seeds.
6. Let the salad sit at room temperature for 5 minutes to allow the flavors to meld, which enhances the overall taste.
7. Serve immediately on chilled plates to maintain the crisp freshness of the ingredients.
Radiant and refreshing, this salad offers a delightful crunch from the kale and a burst of juicy sweetness from the pomegranate. For a creative twist, top it with toasted nuts or crumbled feta to add richness, or pair it with grilled chicken for a complete meal. The bright, tangy dressing ties everything together, making each forkful a vibrant experience that’s as beautiful to look at as it is satisfying to eat.
Baja-Style Fish Ceviche
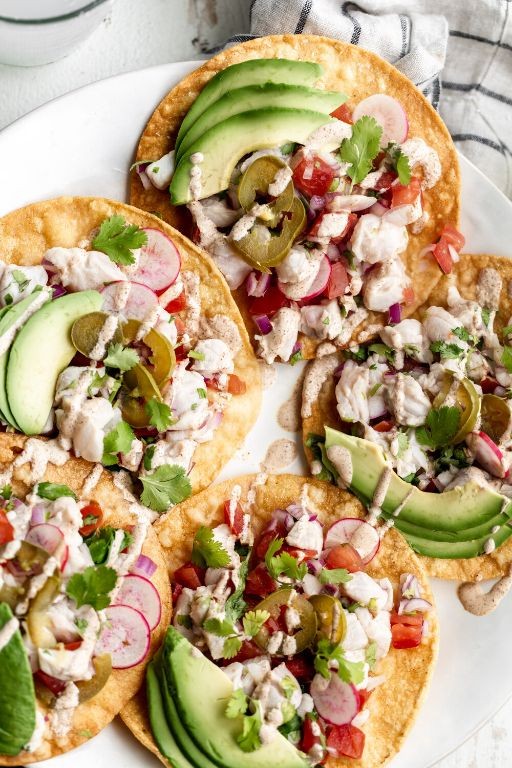
On a crisp winter day like today, nothing refreshes the palate quite like the vibrant, citrus-kissed flavors of Baja-Style Fish Ceviche. This coastal classic transforms fresh fish into a bright, zesty dish that feels both elegant and effortlessly simple. It’s a perfect centerpiece for holiday gatherings or a light, celebratory lunch.
Serving: 4 | Pre Time: 25 minutes | Cooking Time: 0 minutes
Ingredients
– Fresh white fish fillets (like cod or halibut) – 1 lb
– Lime juice – ¾ cup
– Orange juice – ¼ cup
– Red onion – ½ cup, thinly sliced
– Jalapeño – 1, seeded and minced
– Cilantro – ¼ cup, chopped
– Salt – 1 tsp
– Avocado – 1, diced
– Tortilla chips – for serving
Instructions
1. Rinse the fresh white fish fillets under cold water and pat them completely dry with paper towels.
2. Cut the fish into ½-inch cubes using a sharp knife and place them in a non-reactive glass or ceramic bowl.
3. Pour the lime juice and orange juice over the fish, ensuring all pieces are fully submerged.
4. Cover the bowl tightly with plastic wrap and refrigerate for exactly 15 minutes, which “cooks” the fish through acidulation without overcooking it.
5. While the fish marinates, thinly slice the red onion and mince the seeded jalapeño to control the heat level.
6. After 15 minutes, drain and discard about half of the citrus marinade from the bowl.
7. Gently fold in the sliced red onion, minced jalapeño, chopped cilantro, and salt until evenly combined.
8. Dice the avocado and gently stir it into the ceviche just before serving to prevent browning.
9. Serve the ceviche immediately in chilled bowls or glasses, accompanied by tortilla chips for scooping.
Light and lively, this ceviche offers a delightful contrast of textures—the firm, opaque fish against the creamy avocado and crisp onion. The bright citrus marinade, balanced with a hint of jalapeño, creates a refreshing, tangy flavor that’s perfect for a festive appetizer. For a creative twist, serve it in hollowed-out lime halves or over a bed of thinly sliced jicama to add an extra crunch.
California Avocado Toast with Microgreens

Meticulously crafted yet effortlessly simple, California Avocado Toast with Microgreens elevates the humble breakfast staple into a vibrant culinary experience. This artful arrangement celebrates the creamy richness of perfectly ripe avocados against the delicate crunch of fresh microgreens, all atop golden, rustic bread. It’s a dish that balances indulgence with freshness, offering a moment of quiet sophistication to start any day.
Serving: 2 | Pre Time: 5 minutes | Cooking Time: 5 minutes
Ingredients
– Sourdough bread – 2 slices
– Ripe avocado – 1 large
– Lemon juice – 1 tbsp
– Extra virgin olive oil – 1 tbsp
– Salt – ¼ tsp
– Black pepper – ⅛ tsp
– Microgreens – ½ cup
Instructions
1. Preheat a toaster or skillet to medium-high heat (375°F if using an oven toaster).
2. Toast the sourdough bread slices for 3–4 minutes until golden brown and crisp on the edges.
3. Halve the avocado, remove the pit, and scoop the flesh into a small bowl.
4. Mash the avocado with a fork until mostly smooth but with some small chunks for texture.
5. Stir in the lemon juice, salt, and black pepper until fully combined.
6. Drizzle the toasted bread slices evenly with the extra virgin olive oil.
7. Spread the avocado mixture thickly onto each slice of toast, covering from edge to edge.
8. Top each toast generously with the microgreens, arranging them evenly.
9. Serve immediately while the toast is still warm and crisp.
Offering a delightful contrast, the creamy avocado melds with the bright acidity of lemon, while the microgreens add a peppery, fresh bite that cuts through the richness. For a creative twist, drizzle with a touch of chili oil or sprinkle with toasted sesame seeds to enhance its visual appeal and depth of flavor.
Lemon Herb Roasted Free-Range Chicken

Savor the bright, aromatic essence of this Lemon Herb Roasted Free-Range Chicken, a centerpiece dish that transforms simple ingredients into an elegant feast. Its golden, crisp skin and juicy, herb-infused meat make it perfect for holiday gatherings or a sophisticated Sunday supper. The combination of fresh citrus and fragrant herbs creates a light yet deeply flavorful profile that delights the senses.
Serving: 4 | Pre Time: 15 minutes | Cooking Time: 90 minutes
Ingredients
– Whole free-range chicken – 4 lbs
– Lemon – 1
– Fresh rosemary – 2 tbsp, chopped
– Fresh thyme – 2 tbsp, chopped
– Garlic – 4 cloves, minced
– Olive oil – ¼ cup
– Salt – 1 tbsp
– Black pepper – 1 tsp
Instructions
1. Preheat the oven to 425°F and position a rack in the middle.
2. Pat the chicken completely dry with paper towels to ensure crisp skin.
3. Zest the lemon and set the zest aside, then cut the lemon into quarters.
4. In a small bowl, combine the lemon zest, rosemary, thyme, garlic, olive oil, salt, and pepper to form a paste.
5. Gently loosen the skin over the chicken breasts and thighs with your fingers.
6. Rub half of the herb paste evenly under the skin, spreading it over the meat.
7. Rub the remaining paste all over the outside of the chicken.
8. Place the lemon quarters inside the chicken cavity.
9. Tie the chicken legs together with kitchen twine for even cooking.
10. Place the chicken breast-side up on a rack in a roasting pan.
11. Roast at 425°F for 20 minutes to start browning.
12. Reduce the oven temperature to 375°F and continue roasting for 70 minutes, or until a meat thermometer inserted into the thickest part of the thigh reads 165°F.
13. Let the chicken rest on a cutting board for 15 minutes before carving to retain juices.
14. Carve and serve immediately.
Zesty and aromatic, this chicken emerges with a crackling, golden-brown skin that gives way to succulent, herb-perfumed meat. The lemon infuses a subtle brightness throughout, while the garlic and herbs meld into a savory depth. For a creative presentation, serve it atop a bed of roasted root vegetables or alongside a crisp arugula salad to complement its rich flavors.
Roasted Beet and Citrus Salad
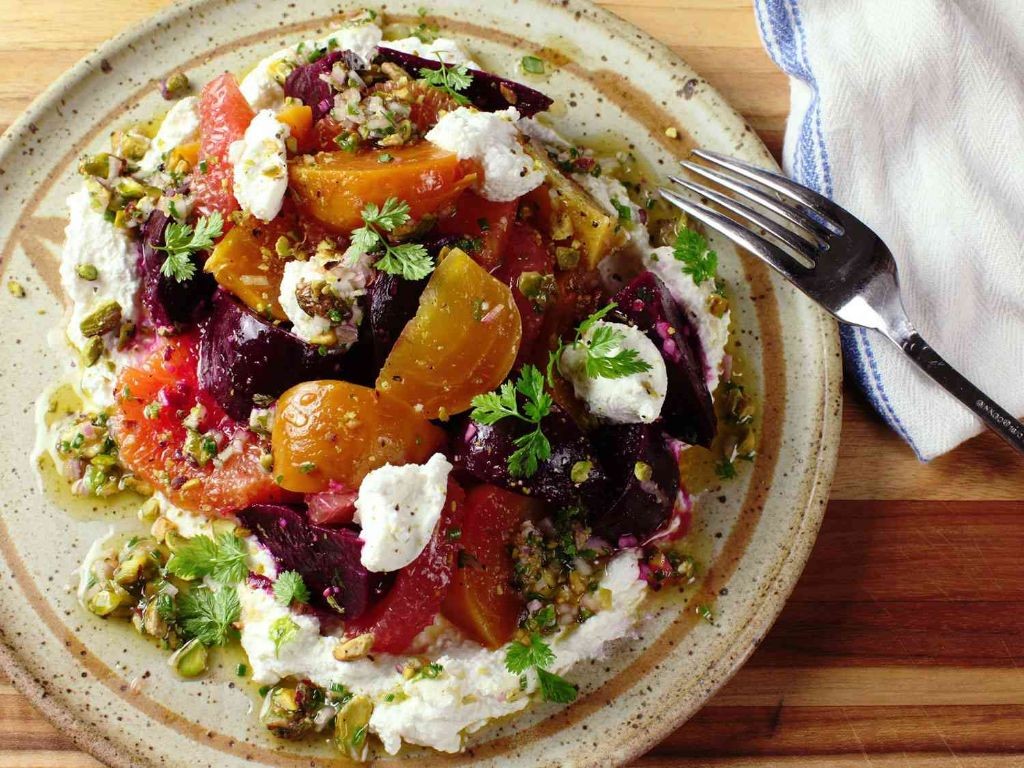
Zesty yet refined, this roasted beet and citrus salad transforms humble roots and bright fruits into an elegant winter dish. Earthy roasted beets mingle with vibrant citrus segments, creating a stunning contrast of deep crimson and sunny yellows on the plate. A simple vinaigrette and creamy cheese bring all the elements together in perfect harmony.
Serving: 4 | Pre Time: 15 minutes | Cooking Time: 60 minutes
Ingredients
– Beets – 4 medium
– Olive oil – 2 tbsp
– Salt – 1 tsp
– Orange – 2 large
– Grapefruit – 1 large
– Goat cheese – 4 oz
– Honey – 1 tbsp
– Apple cider vinegar – 2 tbsp
Instructions
1. Preheat your oven to 400°F.
2. Trim the tops from 4 medium beets, scrub them thoroughly under cold water, and pat them completely dry with paper towels.
3. Place the beets on a large sheet of aluminum foil, drizzle them with 1 tablespoon of olive oil, and sprinkle with ½ teaspoon of salt.
4. Wrap the beets tightly in the foil to create a sealed packet and place the packet directly on the oven rack.
5. Roast the beets at 400°F for 50-60 minutes, until a paring knife can be inserted into the center of the largest beet with little resistance.
6. Carefully open the foil packet to release steam and let the beets cool until they are safe to handle, about 15-20 minutes.
7. While the beets roast, use a sharp knife to cut the tops and bottoms from 2 large oranges and 1 large grapefruit.
8. Standing each fruit on one cut end, slice downward to remove all the peel and white pith, following the curve of the fruit.
9. Hold each peeled fruit over a medium bowl to catch juices, and cut along the membranes to release individual citrus segments into the bowl.
10. In a small bowl, whisk together the remaining 1 tablespoon of olive oil, 2 tablespoons of apple cider vinegar, 1 tablespoon of honey, and the remaining ½ teaspoon of salt until emulsified.
11. Once the beets are cool, use your fingers or a paper towel to rub away their skins; they should slip off easily.
12. Slice the peeled beets into ¼-inch thick rounds.
13. Arrange the beet slices on a serving platter and top them with the citrus segments and their collected juices.
14. Drizzle the honey vinaigrette evenly over the salad.
15. Crumble 4 ounces of goat cheese over the top of the salad.
Marvel at the final composition: the tender, earthy sweetness of the beets plays against the bright, acidic pop of the citrus, while the creamy, tangy goat cheese and rich vinaigrette tie every bite together. For a dramatic presentation, layer the components on individual plates or serve family-style on a large, rustic platter to highlight the vibrant colors.
California-Style Veggie Burgers
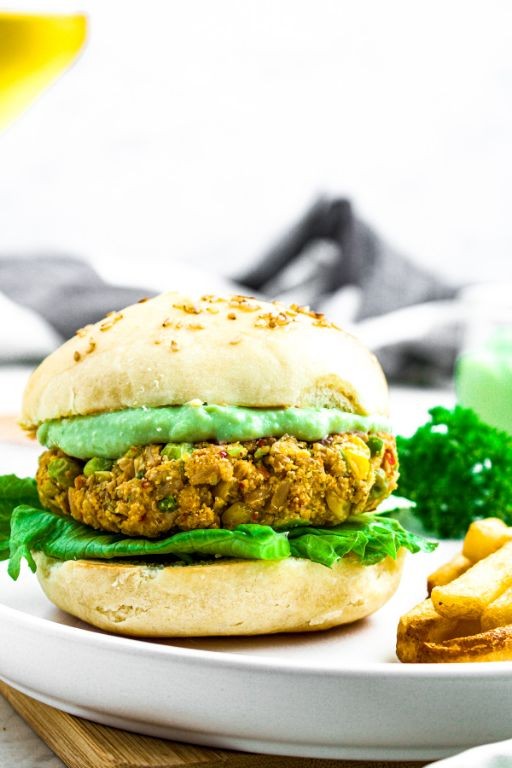
Tantalizing yet wholesome, California-style veggie burgers capture the essence of West Coast living with their vibrant, plant-based patties that are as nourishing as they are delicious. These burgers celebrate fresh, simple ingredients, transforming them into a satisfying meal that feels both indulgent and light, perfect for a sunny afternoon or a casual dinner gathering.
Serving: 4 | Pre Time: 15 minutes | Cooking Time: 10 minutes
Ingredients
– Canned black beans – 1 (15-ounce) can, drained and rinsed
– Cooked quinoa – 1 cup
– Panko breadcrumbs – ½ cup
– Large egg – 1
– Garlic powder – 1 tsp
– Ground cumin – 1 tsp
– Olive oil – 2 tbsp
– Salt – ½ tsp
– Hamburger buns – 4
Instructions
1. In a large mixing bowl, mash the drained black beans with a fork until mostly smooth, leaving a few chunks for texture.
2. Add the cooked quinoa, panko breadcrumbs, egg, garlic powder, ground cumin, and salt to the bowl.
3. Mix all ingredients thoroughly with your hands until well combined and the mixture holds together when pressed.
4. Divide the mixture into 4 equal portions and shape each into a patty about ¾-inch thick, pressing firmly to prevent crumbling during cooking.
5. Heat the olive oil in a large skillet over medium heat until it shimmers, about 2 minutes.
6. Carefully place the patties in the skillet and cook for 4-5 minutes per side, or until golden brown and crispy on the exterior.
7. Toast the hamburger buns in the same skillet for 1-2 minutes until lightly browned, using the residual oil for added flavor.
8. Assemble the burgers by placing each patty on a toasted bun, adding your favorite toppings like avocado or lettuce.
Ultimate in texture, these veggie burgers offer a delightful contrast with a crispy outer crust and a tender, hearty interior infused with earthy cumin and garlic notes. Serve them open-faced with a dollop of spicy aioli or alongside a crisp garden salad for a complete, refreshing meal that embodies California’s laid-back elegance.
Summary
Gathering these 18 fresh Californian recipes is a perfect way to embrace healthy living with vibrant flavors. We hope you find inspiration to try them in your own kitchen! Share which dish becomes your favorite in the comments below, and don’t forget to pin this roundup on Pinterest to spread the sunshine.


