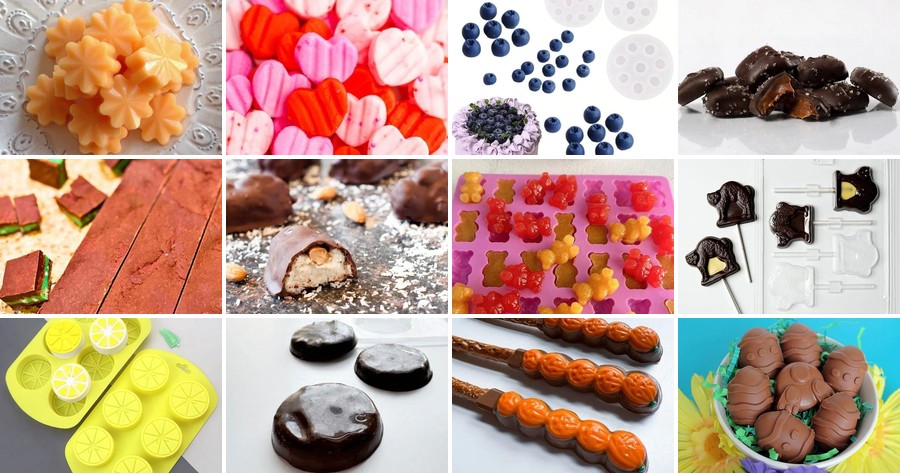
Zesty, whimsical, and wonderfully creative—candy molds transform simple ingredients into edible art for every celebration. Whether you’re crafting holiday treats, party favors, or just a sweet surprise, these 20 recipes offer endless inspiration. Dive in to discover how easy it is to make stunning candies that delight both kids and adults alike!
Chocolate Peanut Butter Candy Mold Treats
Zap your holiday dessert game with these no-bake chocolate peanut butter treats. Grab a candy mold and transform simple ingredients into festive delights—perfect for gifting or gobbling straight from the freezer. They’re creamy, crunchy, and ridiculously easy to make.
Serving: 24 pieces | Pre Time: 15 minutes | Cooking Time: 0 minutes
Ingredients
For the peanut butter filling:
– 1 cup creamy peanut butter
– 1/4 cup unsalted butter, softened
– 1 cup powdered sugar
– 1/2 cup crushed graham crackers
For the chocolate coating:
– 2 cups semi-sweet chocolate chips
– 1 tablespoon coconut oil
Instructions
1. Line a baking sheet with parchment paper and set aside.
2. In a medium bowl, combine 1 cup creamy peanut butter and 1/4 cup softened unsalted butter using a hand mixer on medium speed for 2 minutes until smooth.
3. Gradually add 1 cup powdered sugar to the peanut butter mixture, mixing on low speed until fully incorporated.
4. Fold in 1/2 cup crushed graham crackers with a spatula until evenly distributed.
5. Spoon the peanut butter mixture into a silicone candy mold, pressing firmly into each cavity with your fingers or a small spoon. Tip: Lightly grease the mold with cooking spray for easier removal later.
6. Freeze the filled mold for 30 minutes until the peanut butter centers are firm to the touch.
7. In a microwave-safe bowl, combine 2 cups semi-sweet chocolate chips and 1 tablespoon coconut oil.
8. Microwave the chocolate mixture in 30-second intervals, stirring after each interval, until completely melted and smooth, about 1-2 minutes total. Tip: Avoid overheating to prevent the chocolate from seizing.
9. Remove the peanut butter centers from the freezer and pop them out of the mold onto the prepared baking sheet.
10. Using a fork, dip each peanut butter center into the melted chocolate, coating it completely, then return it to the baking sheet.
11. Let the chocolate-coated treats set at room temperature for 1 hour until firm, or refrigerate for 20 minutes to speed up the process. Tip: For a glossy finish, tap the fork gently against the bowl to remove excess chocolate before setting.
Here’s the payoff: you get a crisp chocolate shell that gives way to a soft, nutty center with a subtle graham cracker crunch. Hide them in the fridge for a cool snack, or stack them in a clear jar tied with ribbon as a homemade holiday gift—they disappear fast, so make a double batch!
Homemade Gummy Bears in Silicone Molds
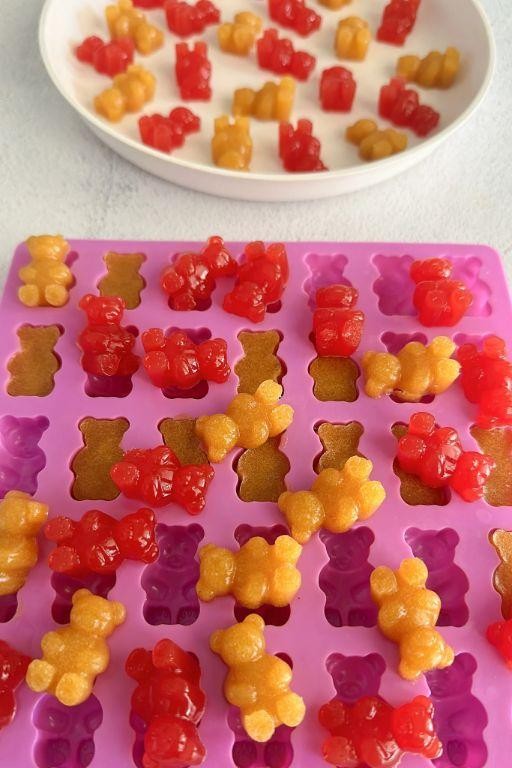
Kick boring snacks to the curb. These homemade gummy bears are a total game-changer—vibrant, chewy, and way better than store-bought. Grab your molds and let’s make magic.
Serving: 100 bears | Pre Time: 15 minutes | Cooking Time: 5 minutes
Ingredients
For the gummy base:
- 1/2 cup cold water
- 3 tbsp unflavored gelatin powder
- 1/2 cup granulated sugar
- 1/3 cup light corn syrup
For flavoring and coloring:
- 1/2 cup fruit juice (like apple or orange), at room temperature
- 1 tsp citric acid
- 1/4 tsp flavored extract (like strawberry or lemon)
- 2–3 drops gel food coloring
Instructions
- Place 1/2 cup cold water in a small saucepan.
- Sprinkle 3 tbsp unflavored gelatin powder evenly over the water. Tip: Let it bloom for 5 minutes until it looks like wet sand—this prevents clumps later.
- Add 1/2 cup granulated sugar and 1/3 cup light corn syrup to the saucepan.
- Heat the mixture over medium-low heat, stirring constantly with a silicone spatula.
- Cook until the sugar fully dissolves and the mixture reaches 160°F on a candy thermometer, about 3–4 minutes. Tip: Do not let it boil, or the gelatin can break down.
- Remove the saucepan from the heat.
- Stir in 1/2 cup room-temperature fruit juice, 1 tsp citric acid, 1/4 tsp flavored extract, and 2–3 drops gel food coloring until fully combined.
- Let the mixture cool for 2–3 minutes until slightly thickened but still pourable. Tip: If it sets too fast, gently reheat on low for 30 seconds.
- Place silicone gummy bear molds on a baking sheet for stability.
- Carefully pour or use a dropper to fill each mold cavity with the liquid mixture.
- Transfer the baking sheet with molds to the refrigerator.
- Chill for at least 2 hours, or until the gummies are firm and easily pop out.
- Remove the gummy bears from the molds by gently pushing from the bottom.
These gummies have a satisfying, bouncy chew with a bright, fruity tang from the citric acid. Toss them in a little extra sugar for a sour-sweet coating, or layer different flavors in a jar for a rainbow snack mix.
Easy Candy Mold Chocolate Truffles
Outshine holiday desserts with these effortless, elegant truffles. Grab candy molds and chocolate—this no-bake treat comes together in minutes. Perfect for gifting or last-minute parties.
Serving: 24 | Pre Time: 15 minutes | Cooking Time: 5 minutes
Ingredients
For the chocolate coating:
– 12 oz semisweet chocolate chips
– 1 tbsp coconut oil
For the truffle filling:
– 8 oz cream cheese, softened to room temperature
– 1 cup powdered sugar
– 1 tsp vanilla extract
– ½ cup crushed graham crackers
Instructions
1. Place 12 oz semisweet chocolate chips and 1 tbsp coconut oil in a microwave-safe bowl.
2. Microwave on high for 30 seconds, then stir thoroughly.
3. Repeat microwaving in 15-second intervals, stirring after each, until completely melted and smooth—about 60-90 seconds total.
4. Spoon 1 tsp melted chocolate into each cavity of a silicone candy mold, tilting to coat sides evenly.
5. Freeze mold for 10 minutes until chocolate sets firm.
6. Beat 8 oz softened cream cheese with an electric mixer on medium speed for 1 minute until fluffy.
7. Add 1 cup powdered sugar and 1 tsp vanilla extract; beat for 2 minutes until fully combined.
8. Fold in ½ cup crushed graham crackers with a spatula until evenly distributed.
9. Roll filling into 24 small balls, about 1 inch in diameter each.
10. Press one ball firmly into each chocolate-coated mold cavity.
11. Reheat remaining melted chocolate for 15 seconds if needed, then spoon over truffle balls to seal.
12. Tap mold gently on counter to remove air bubbles and smooth tops.
13. Freeze for 20 minutes until completely set.
14. Pop truffles out of mold by flexing silicone edges.
Zesty cream cheese filling meets crisp graham cracker crunch inside that glossy chocolate shell. Store in the refrigerator for up to 5 days—the texture stays perfectly firm yet creamy. Try rolling finished truffles in cocoa powder or crushed peppermint for festive variations.
Rainbow Jelly Candy Mold Delights
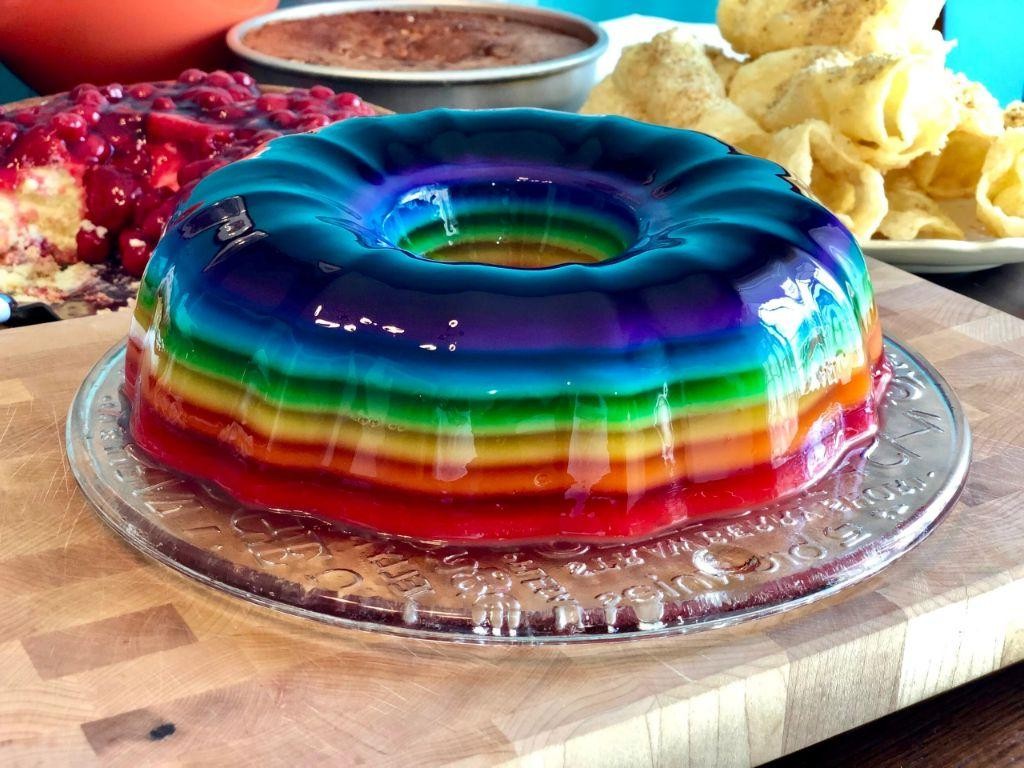
Viral-worthy and visually stunning, these Rainbow Jelly Candy Mold Delights are your next kitchen flex. Layer vibrant, fruity flavors into a dazzling treat that’s as fun to make as it is to eat. Get ready to impress with minimal effort and maximum wow factor.
Serving: 12 | Pre Time: 20 minutes | Cooking Time: 5 minutes
Ingredients
For the jelly layers:
– 3 cups water, divided
– 6 (0.25 oz each) packets unflavored gelatin
– 1 1/2 cups granulated sugar
– 1/2 cup light corn syrup
– 1 tsp citric acid
– 1/2 tsp kosher salt
– 2 tsp vanilla extract
– Red, orange, yellow, green, blue, and purple gel food coloring (a few drops each)
For assembly:
– Cooking spray
Instructions
1. Lightly coat a 9×13-inch baking dish or silicone mold with cooking spray.
2. Pour 1/2 cup of cold water into a small bowl and sprinkle all 6 packets of unflavored gelatin evenly over the surface. Let it bloom for 5 minutes until it looks like wet sand.
3. In a medium saucepan, combine the remaining 2 1/2 cups of water, 1 1/2 cups granulated sugar, 1/2 cup light corn syrup, 1 tsp citric acid, and 1/2 tsp kosher salt.
4. Heat the mixture over medium heat, stirring constantly, until the sugar fully dissolves and the liquid is clear, about 3-4 minutes. Do not let it boil.
5. Remove the saucepan from the heat and immediately whisk in the bloomed gelatin until it is completely melted and the mixture is smooth.
6. Stir in 2 tsp vanilla extract.
7. Divide the mixture evenly among six small bowls.
8. Add a few drops of red gel food coloring to the first bowl and stir until the color is uniform. Tip: Use gel food coloring for vibrant, non-watery hues.
9. Pour the red mixture into the prepared dish, tilting to coat the bottom evenly. Refrigerate for 15 minutes until set to the touch.
10. Repeat steps 8 and 9 with the remaining bowls, adding orange, yellow, green, blue, and purple food coloring in that order, refrigerating each layer for 15 minutes before adding the next. Tip: Work quickly between layers to prevent the remaining mixture from setting in the bowls.
11. Once all layers are set, cover the dish with plastic wrap and refrigerate for at least 4 hours, or overnight for best results. Tip: For clean cuts, run a sharp knife under hot water and wipe it dry before slicing.
12. Turn the set jelly out onto a cutting board and slice into 1-inch squares or use cookie cutters for fun shapes.
Delightfully chewy and bursting with bright, tangy-sweet flavor, each bite offers a satisfying gel-like texture. Serve these jewels on a platter for a party, pack them in lunchboxes, or layer them in clear glasses with whipped cream for a stunning parfait.
Peppermint Patties Using Candy Molds
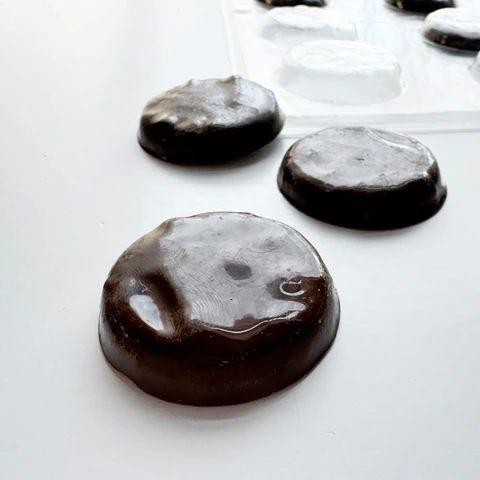
Viral holiday hack alert: These homemade peppermint patties are about to crush your store-bought cravings. Grab candy molds and let’s make magic—smooth, minty centers wrapped in rich chocolate, no fancy skills needed.
Serving: 24 patties | Pre Time: 20 minutes | Cooking Time: 10 minutes
Ingredients
For the peppermint filling:
– 3 cups powdered sugar
– 3 tablespoons light corn syrup
– 3 tablespoons water
– 1 1/2 teaspoons peppermint extract
– 1/4 teaspoon salt
For the chocolate coating:
– 12 ounces semi-sweet chocolate chips
– 1 tablespoon coconut oil
Instructions
1. Combine powdered sugar, corn syrup, water, peppermint extract, and salt in a large bowl.
2. Mix with a spatula until a thick, pliable dough forms—if it’s too dry, add water 1 teaspoon at a time.
3. Roll dough into 1-inch balls and place each into a candy mold cavity, pressing firmly to fill.
4. Freeze molds for 15 minutes until filling is firm to the touch.
5. Melt chocolate chips and coconut oil in a microwave-safe bowl in 30-second intervals, stirring between each, until smooth.
6. Remove molds from freezer and pop out each peppermint disk.
7. Dip each disk fully into melted chocolate using a fork, letting excess drip off.
8. Place coated patties on a parchment-lined baking sheet.
9. Let chocolate set at room temperature for 1 hour, or refrigerate for 20 minutes to speed it up.
10. Store in an airtight container at room temperature for up to 2 weeks.
Cool and creamy peppermint centers melt against that crisp chocolate shell—pure holiday bliss. Crumble them over ice cream or gift them in festive boxes for a homemade touch that screams cheer.
White Chocolate Raspberry Candy Mold Bites
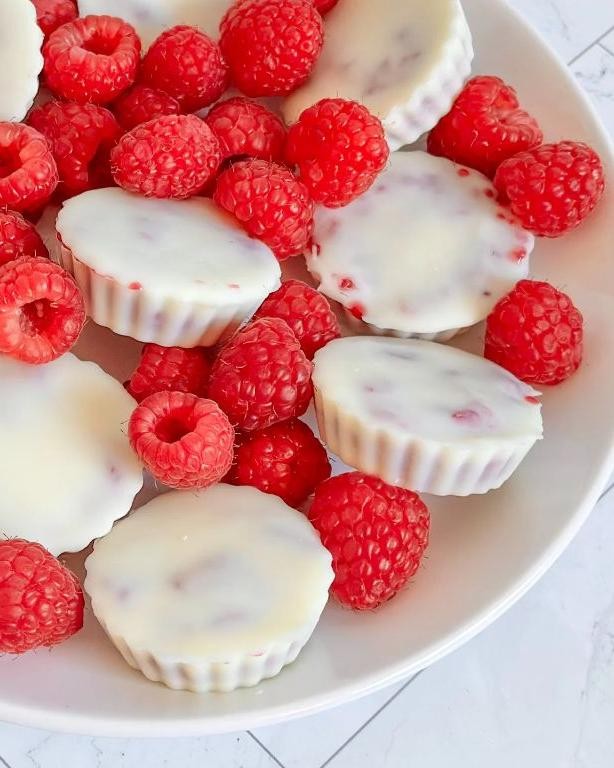
Fancy a holiday treat that’s as stunning as it is simple? These White Chocolate Raspberry Candy Mold Bites are your new go-to. They’re creamy, fruity, and perfect for gifting or snacking.
Serving: 24 bites | Pre Time: 15 minutes | Cooking Time: 5 minutes
Ingredients
For the white chocolate filling:
– 12 ounces high-quality white chocolate baking bars, finely chopped
– 1/2 cup heavy cream (at room temperature)
– 1 teaspoon pure vanilla extract
– 1/4 teaspoon fine sea salt
For the raspberry layer and garnish:
– 1/4 cup seedless raspberry jam
– 24 fresh raspberries (for topping)
– Non-stick cooking spray (for the molds)
Instructions
1. Lightly spray 24 silicone candy molds with non-stick cooking spray and set them on a baking sheet.
2. Place the finely chopped white chocolate in a heatproof bowl.
3. In a small saucepan, heat the 1/2 cup heavy cream over medium heat until it just begins to simmer around the edges (about 180°F).
4. Immediately pour the hot cream over the white chocolate. Let it sit undisturbed for 1 minute to melt the chocolate.
5. Add the 1 teaspoon vanilla extract and 1/4 teaspoon salt to the bowl.
6. Gently whisk the mixture from the center outward until completely smooth and glossy. (Tip: If any lumps remain, place the bowl over a pot of barely simmering water and stir until melted—avoid overheating.)
7. Spoon about 1 teaspoon of the white chocolate ganache into the bottom of each prepared mold cavity.
8. Tap the baking sheet firmly on the counter 2-3 times to release any air bubbles and level the chocolate.
9. Place the molds in the freezer for 10 minutes to set the base layer.
10. Remove the molds from the freezer. Spoon about 1/2 teaspoon of seedless raspberry jam into the center of each white chocolate base.
11. Gently press one fresh raspberry into the jam in each cavity. (Tip: Pat the raspberries dry with a paper towel first to prevent seeping moisture.)
12. Divide the remaining white chocolate ganache among the molds, covering the raspberry and jam completely.
13. Tap the baking sheet on the counter again to settle the top layer.
14. Return the molds to the freezer for 30 minutes, or until completely firm. (Tip: For clean removal, ensure the bites are fully set—they should feel solid when lightly pressed.)
15. Pop the bites out of the molds. Serve immediately or store in an airtight container in the refrigerator for up to 5 days.
Gorgeously creamy white chocolate melts into a tangy raspberry core for a perfect sweet-tart balance. The fresh berry on top adds a juicy pop. Serve them chilled on a festive platter or package them in clear bags as edible gifts.
Layered Candy Mold Fudge Squares
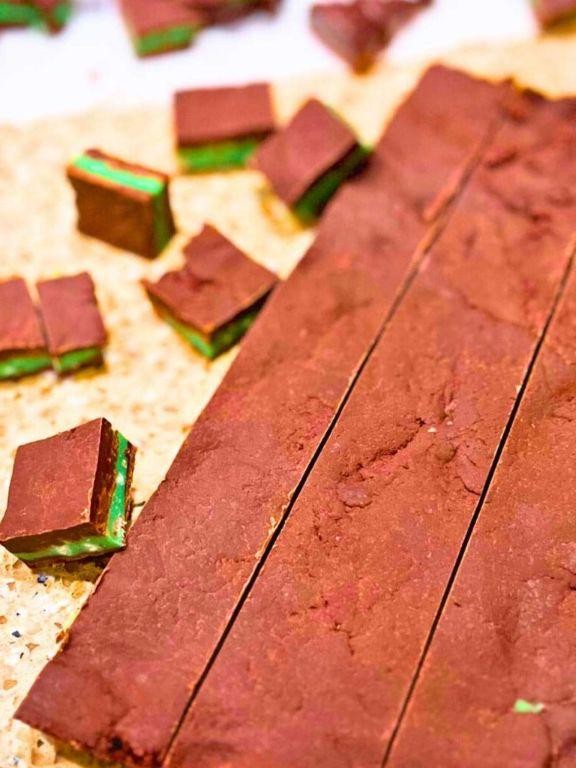
Melt your holiday stress away with these stunning Layered Candy Mold Fudge Squares. They’re the no-bake, make-ahead dessert that looks like a million bucks but requires zero chef skills. Seriously, if you can stir and pour, you’re already halfway there.
Serving: 16 squares | Pre Time: 25 minutes | Cooking Time: 0 minutes
Ingredients
For the Chocolate Base Layer:
– 2 cups (12 oz) semi-sweet chocolate chips
– 1 (14 oz) can sweetened condensed milk
– 1 teaspoon pure vanilla extract
– 1/8 teaspoon fine sea salt
For the Candy Mold Middle Layer:
– 1 (10 oz) bag of mini candy-coated chocolates (like mini M&M’s)
– 1/2 cup creamy peanut butter
For the White Chocolate Top Layer:
– 1 1/2 cups (9 oz) white chocolate chips
– 2 tablespoons unsalted butter
Instructions
1. Line an 8×8-inch square baking pan with parchment paper, letting the edges overhang for easy removal later.
2. Combine the 2 cups of semi-sweet chocolate chips and the entire can of sweetened condensed milk in a medium microwave-safe bowl.
3. Microwave the chocolate mixture on high for 1 minute, then stir vigorously. Tip: If not fully melted, microwave in 15-second intervals, stirring after each, to avoid scorching the chocolate.
4. Stir the 1 teaspoon of vanilla extract and 1/8 teaspoon of salt into the melted chocolate mixture until completely smooth.
5. Pour and spread this chocolate base layer evenly into the bottom of your prepared pan.
6. Sprinkle the entire 10 oz bag of mini candy-coated chocolates evenly over the chocolate base layer, pressing them in gently.
7. In a small bowl, microwave the 1/2 cup of peanut butter for 20-30 seconds until slightly runny, then drizzle it evenly over the candy layer.
8. For the top layer, combine the 1 1/2 cups of white chocolate chips and 2 tablespoons of butter in a clean microwave-safe bowl.
9. Microwave on high for 1 minute, then stir. Tip: White chocolate burns easily, so use 15-second intervals after the first minute if needed, stirring until completely smooth.
10. Carefully pour the melted white chocolate over the peanut butter and candy layers, using a spatula to spread it into a smooth, even top.
11. Refrigerate the pan for at least 4 hours, or until the fudge is completely firm and set. Tip: For clean cuts, use a sharp knife warmed under hot water and wiped dry between slices.
12. Use the parchment paper overhang to lift the entire block of fudge from the pan. Cut into 16 squares.
What you get is a fudge with a decadent, creamy chocolate base, a fun, crunchy middle from the candy shell, and a sweet, smooth white chocolate cap. The peanut butter drizzle adds a salty-sweet ribbon that ties all the textures together perfectly. Serve these squares stacked on a festive platter or package them in clear cellophane bags for irresistible homemade gifts.
Caramel-Filled Chocolate Candy Mold Confections
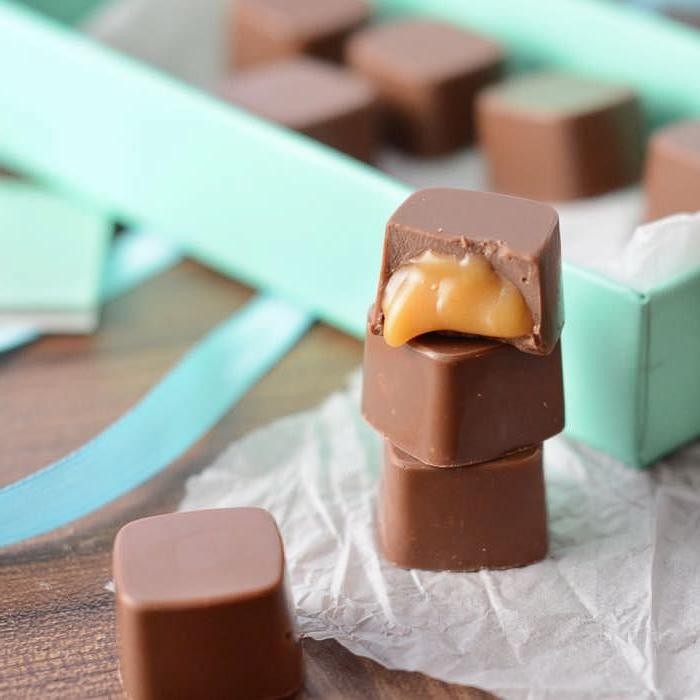
Ever crave that perfect sweet-salty combo? These caramel-filled chocolate molds are your new obsession. Grab your silicone molds and let’s make magic happen.
Serving: 24 candies | Pre Time: 20 minutes | Cooking Time: 10 minutes
Ingredients
For the caramel filling:
– 1 cup granulated sugar
– 6 tbsp unsalted butter, cubed
– 1/2 cup heavy cream
– 1 tsp sea salt
For the chocolate shells:
– 12 oz semi-sweet chocolate chips
– 1 tsp coconut oil
Instructions
1. Place silicone candy molds on a baking sheet for stability.
2. Melt chocolate chips and coconut oil in a microwave-safe bowl in 30-second intervals, stirring between each, until smooth (about 90 seconds total).
3. Spoon 1 tsp melted chocolate into each mold cavity, using the back of the spoon to coat the sides evenly up to the rim.
4. Chill molds in the freezer for 15 minutes until chocolate hardens completely.
5. Heat granulated sugar in a medium saucepan over medium heat, stirring constantly with a wooden spoon until it melts into an amber liquid (about 5 minutes).
6. Add cubed butter to the melted sugar and whisk vigorously until fully incorporated.
7. Slowly pour in heavy cream while whisking continuously—the mixture will bubble vigorously.
8. Remove from heat and stir in sea salt.
9. Let caramel cool for 10 minutes until slightly thickened but still pourable.
10. Spoon 1/2 tsp caramel into each chocolate-lined mold, leaving 1/8-inch space at the top.
11. Reheat remaining chocolate for 20 seconds if needed, then spoon over caramel to seal each candy.
12. Tap molds gently on the counter to remove air bubbles.
13. Freeze for 30 minutes until fully set.
14. Pop candies out of molds by flexing the silicone from the back.
Rich, gooey caramel bursts through crisp chocolate shells with every bite. The sea salt cuts through the sweetness perfectly. Try rolling them in crushed nuts or sprinkles before serving for extra texture.
Citrus Gummy Candy Mold Creations
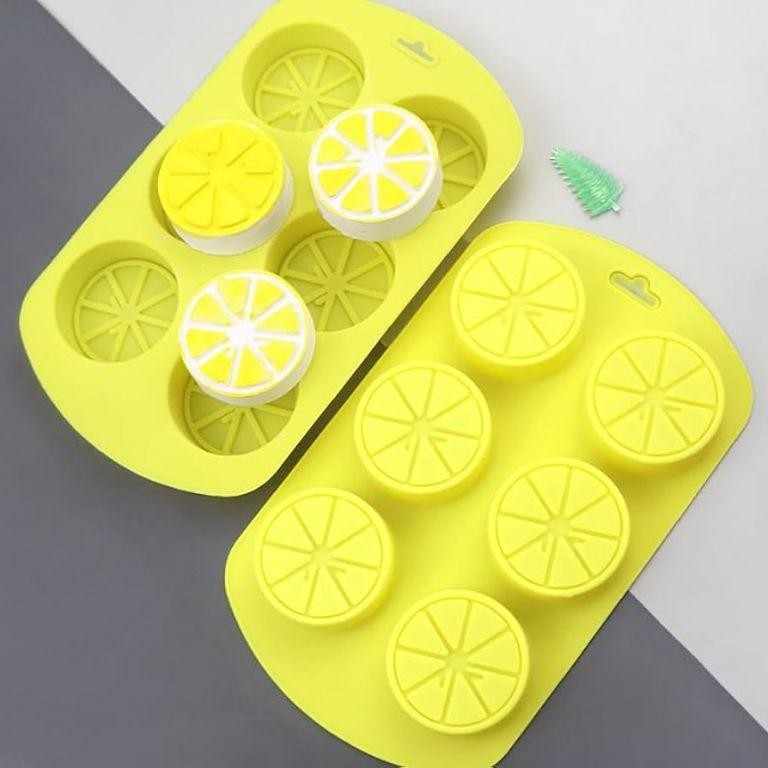
Brace for a flavor explosion with these vibrant, homemade citrus gummies. They’re the ultimate edible craft—fun to make, stunning to look at, and bursting with fresh, tangy taste. Let’s turn your kitchen into a candy lab.
Serving: 24 gummies | Pre Time: 15 minutes | Cooking Time: 10 minutes
Ingredients
For the Citrus Gelatin Base
– 1 cup fresh orange juice, strained
– 1/2 cup fresh lemon juice, strained
– 1/2 cup fresh lime juice, strained
– 3 (1/4 oz) packets unflavored gelatin powder
For the Sweet Syrup
– 1 cup granulated sugar
– 1/2 cup light corn syrup
For Molding & Finishing
– Cooking spray
– 1/4 cup granulated sugar (for coating)
Instructions
1. Lightly coat your silicone gummy candy molds with cooking spray using a pastry brush.
2. Pour the orange, lemon, and lime juices into a medium saucepan.
3. Sprinkle the 3 packets of unflavored gelatin evenly over the surface of the citrus juices. Let it bloom for 5 minutes until the powder looks wet and spongy.
4. Turn the stove to medium-low heat and add 1 cup of granulated sugar and 1/2 cup of light corn syrup to the saucepan.
5. Whisk the mixture constantly for 8–10 minutes until the sugar is fully dissolved and the liquid reaches 235°F on a candy thermometer. Tip: Do not let it boil—keep the heat gentle to prevent a rubbery texture.
6. Immediately remove the saucepan from the heat and let the mixture cool for 2 minutes.
7. Carefully pour or use a dropper to transfer the hot liquid into the prepared molds, filling each cavity completely.
8. Refrigerate the filled molds, uncovered, for at least 4 hours or until the gummies are completely firm and pull away from the sides easily. Tip: For clean shapes, avoid moving the molds during this setting time.
9. Gently pop the set gummies out of the molds onto a clean surface.
10. Place 1/4 cup of granulated sugar in a shallow bowl. Roll each gummy in the sugar to coat lightly. Tip: For a less sweet finish, you can skip this step and enjoy the pure citrus flavor.
Each piece has a delightfully soft, chewy bite that releases a bright, tangy punch of orange, lemon, and lime. The sugar coating adds a subtle crunch that perfectly balances the acidity. Try layering them in a clear jar as a colorful gift or using them to top a citrus cheesecake for a playful, gourmet twist.
Almond Joy Candy Mold Replicas
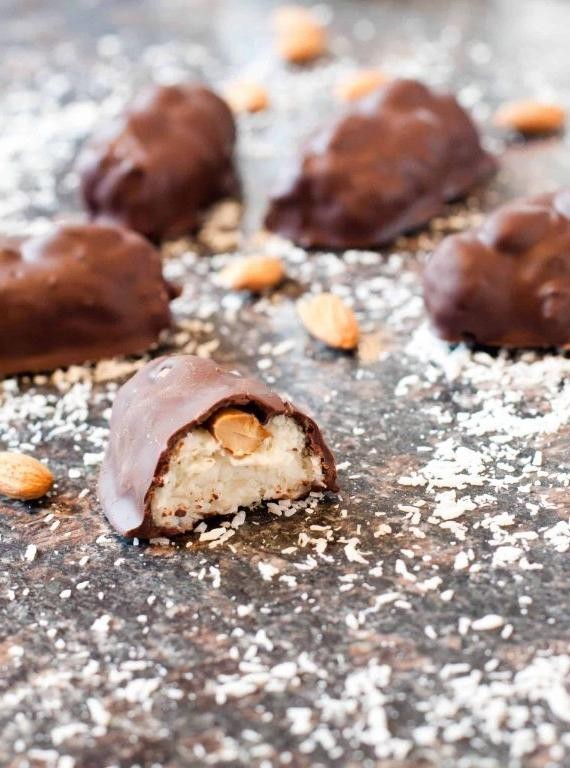
Tired of store-bought treats? Transform your kitchen into a candy factory with these homemade Almond Joy replicas. They’re the perfect holiday project—fun, festive, and foolproof.
Serving: 24 candies | Pre Time: 20 minutes | Cooking Time: 5 minutes
Ingredients
For the coconut filling:
– 14 oz sweetened shredded coconut
– 14 oz sweetened condensed milk
– 1 tsp pure vanilla extract
For the chocolate coating:
– 24 whole almonds
– 16 oz semi-sweet chocolate chips
– 2 tbsp coconut oil
Instructions
1. Line a baking sheet with parchment paper and set aside.
2. Combine 14 oz sweetened shredded coconut, 14 oz sweetened condensed milk, and 1 tsp pure vanilla extract in a large bowl.
3. Mix with a spatula until fully incorporated and sticky.
4. Scoop 1 tbsp of the coconut mixture and roll into a tight ball between your palms. Tip: Wet your hands slightly to prevent sticking.
5. Place each ball on the prepared baking sheet and flatten slightly into an oval shape.
6. Press 1 whole almond firmly into the center of each oval.
7. Freeze the coconut ovals for 15 minutes to firm up.
8. Melt 16 oz semi-sweet chocolate chips and 2 tbsp coconut oil in a microwave-safe bowl in 30-second intervals, stirring between each, until smooth. Tip: Coconut oil ensures a glossy, crack-free shell.
9. Use a fork to dip each frozen coconut oval into the melted chocolate, coating completely.
10. Tap the fork gently on the bowl’s edge to remove excess chocolate.
11. Return each coated candy to the parchment paper.
12. Let the chocolate set at room temperature for 1 hour, or refrigerate for 20 minutes to speed it up. Tip: Avoid stacking them until fully set to prevent smudging.
Vibrantly textured with chewy coconut, crunchy almonds, and a crisp chocolate shell, these replicas rival the original. Serve them piled high on a platter for parties or package them in cellophane bags as edible gifts—they’re guaranteed to disappear fast.
Strawberry Cream Cheese Candy Mold Sweets

Packed with creamy sweetness and berry freshness, these Strawberry Cream Cheese Candy Mold Sweets are your next viral dessert. They’re no-bake, easy to assemble, and perfect for holiday gifting or a quick treat. Grab your molds and let’s make candy magic happen.
Serving: 24 candies | Pre Time: 15 minutes | Cooking Time: 0 minutes
Ingredients
For the filling:
– 8 oz cream cheese, softened to room temperature
– 1/4 cup powdered sugar
– 1 tsp pure vanilla extract
– 1/2 cup fresh strawberries, finely chopped
For assembly:
– 12 oz white chocolate chips
– 1 tsp coconut oil
– 24 silicone candy molds (about 1-inch cavities)
Instructions
1. Place the softened cream cheese in a medium mixing bowl.
2. Add 1/4 cup powdered sugar and 1 tsp vanilla extract to the bowl.
3. Use an electric mixer on medium speed to beat the mixture until completely smooth and creamy, about 2 minutes. Tip: Ensure the cream cheese is truly soft for a lump-free filling.
4. Gently fold in 1/2 cup of finely chopped fresh strawberries with a spatula until just combined.
5. Cover the bowl with plastic wrap and refrigerate the filling for 30 minutes to firm up slightly.
6. While the filling chills, place 12 oz of white chocolate chips and 1 tsp of coconut oil in a microwave-safe bowl.
7. Microwave the mixture in 30-second intervals, stirring thoroughly after each, until completely melted and smooth. Tip: Do not overheat the chocolate to prevent seizing.
8. Using a small spoon or brush, coat the inside of each cavity of 24 silicone candy molds with a thin layer of the melted white chocolate.
9. Place the coated molds in the freezer for 10 minutes to set the chocolate shell completely.
10. Remove the chilled cream cheese filling from the refrigerator.
11. Spoon or pipe about 1 teaspoon of the filling into the center of each chocolate-lined mold cavity.
12. Re-melt the remaining white chocolate mixture if needed, then spoon it over the filling in each mold to seal the candies.
13. Gently tap the molds on the counter to remove any air bubbles and ensure an even top layer.
14. Return the filled molds to the freezer for a final 20 minutes, or until the candies are completely firm. Tip: Freezing ensures clean, easy release from the molds.
15. Pop the set candies out of the silicone molds.
They offer a delightful contrast: a crisp white chocolate shell gives way to a soft, tangy cream cheese center studded with juicy strawberry bits. Try serving them on a decorative platter for parties or packaging them in clear cellophane bags as homemade edible gifts.
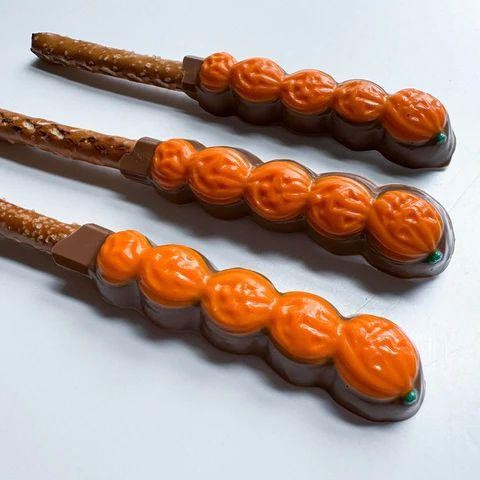
Spooky Halloween Candy Mold Lollipops
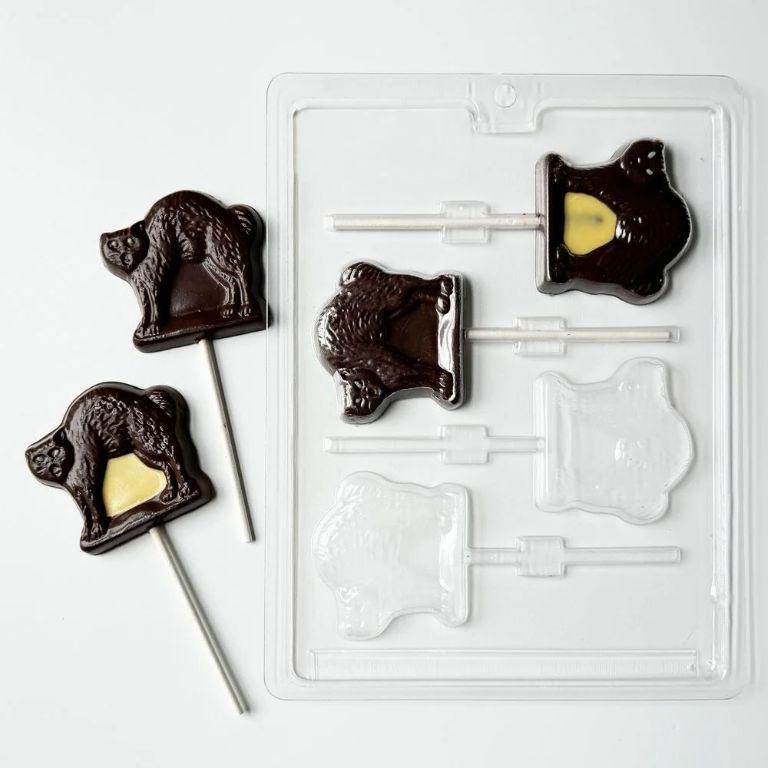
Brace for a sugar rush! These Spooky Halloween Candy Mold Lollipops are your ticket to a DIY treat station. Grab your molds and let’s make magic.
Serving: 12 lollipops | Pre Time: 15 minutes | Cooking Time: 10 minutes
Ingredients
For the lollipop base:
- 2 cups granulated sugar
- 2/3 cup light corn syrup
- 3/4 cup water
- 1/2 teaspoon cream of tartar
- 1 teaspoon orange gel food coloring
- 1 teaspoon black gel food coloring
- 12 lollipop sticks
For finishing:
- 1/2 cup orange candy melts
- 1/2 cup black candy melts
Instructions
- Lightly grease 12 Halloween-themed silicone candy molds with cooking spray.
- Insert one lollipop stick into each mold cavity, ensuring it’s centered.
- Combine 2 cups granulated sugar, 2/3 cup light corn syrup, 3/4 cup water, and 1/2 teaspoon cream of tartar in a medium saucepan.
- Place the saucepan over medium heat and stir until the sugar dissolves completely.
- Attach a candy thermometer to the side of the pan, ensuring it doesn’t touch the bottom.
- Bring the mixture to a boil without stirring, and cook until it reaches 300°F (hard crack stage).
- Remove the saucepan from the heat immediately and let the bubbles subside for 30 seconds.
- Divide the hot sugar syrup evenly between two heatproof bowls.
- Stir 1 teaspoon orange gel food coloring into one bowl and 1 teaspoon black gel food coloring into the other until fully blended.
- Carefully pour the colored syrups into the prepared molds, filling each cavity to the top.
- Allow the lollipops to cool and harden at room temperature for 30 minutes.
- Gently pop the lollipops out of the molds once fully set.
- Melt 1/2 cup orange candy melts and 1/2 cup black candy melts separately in microwave-safe bowls in 30-second intervals, stirring between each.
- Drizzle the melted candy melts over the lollipops in a zigzag pattern for a spooky effect.
- Let the drizzled candy melts set completely for 15 minutes before serving.
Vivid and glossy, these lollipops deliver a crisp, shatteringly sweet bite with a playful orange and black color scheme. The candy melt drizzle adds a fun textural contrast and extra Halloween flair. Stack them in a creepy cauldron or tie them with ribbon for eerie party favors that’ll vanish faster than a ghost.
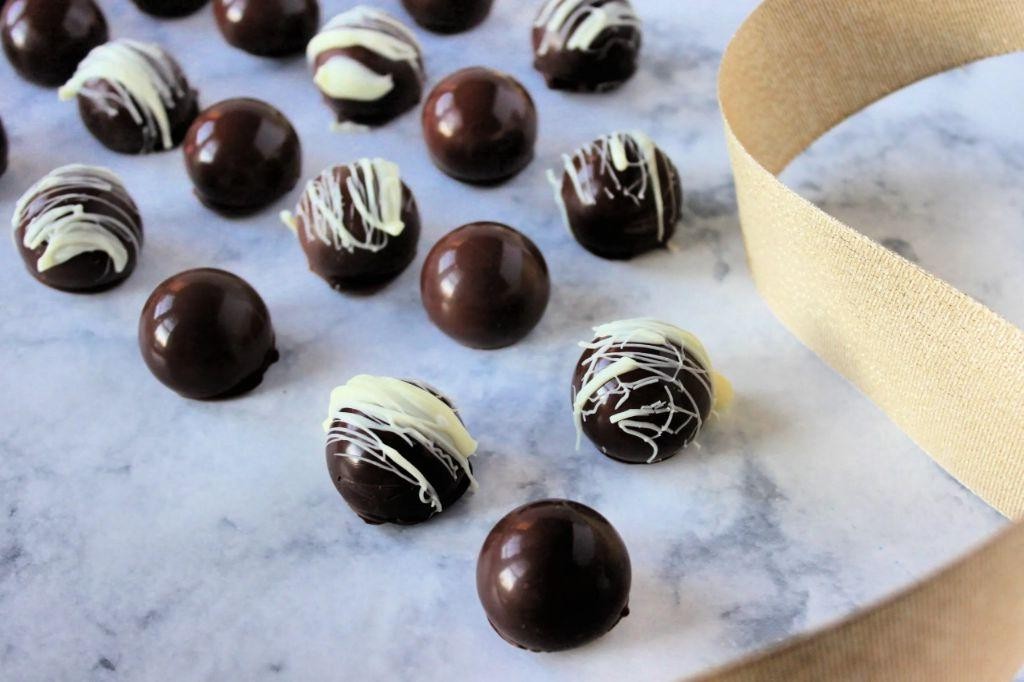
Vanilla Bean Candy Mold Bonbons
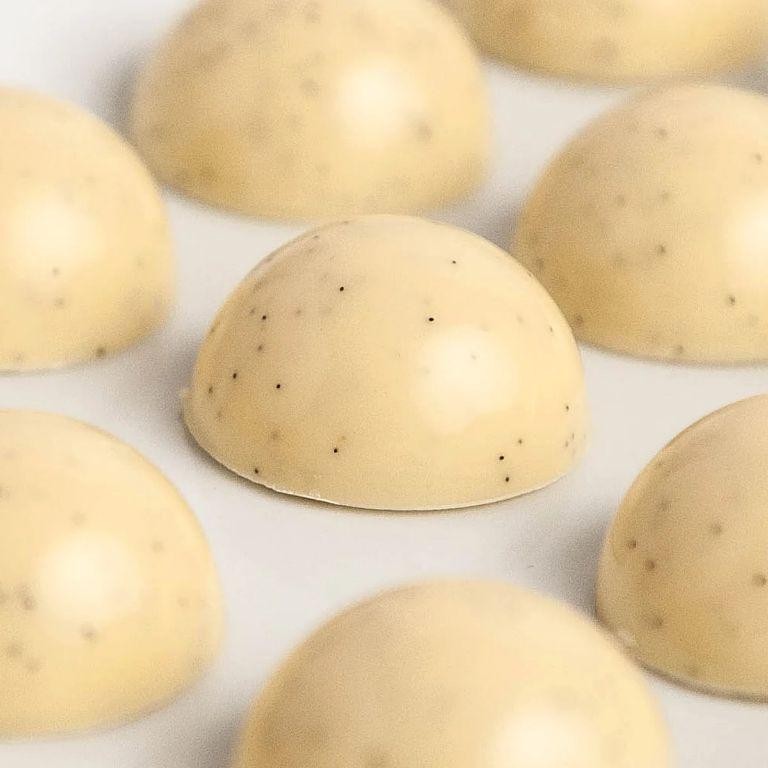
Nailing that gourmet candy vibe without the fuss? These Vanilla Bean Candy Mold Bonbons bring the elegance of a patisserie to your kitchen with minimal effort. They’re creamy, dreamy, and perfect for gifting or a sweet solo treat—let’s get molding!
Serving: 24 | Pre Time: 15 minutes | Cooking Time: 5 minutes
Ingredients
For the Bonbon Filling:
– 1 cup white chocolate chips
– 1/2 cup heavy cream
– 1 vanilla bean, split and seeds scraped
For Coating and Decorating:
– 2 cups dark chocolate chips
– 1 tbsp coconut oil
– Sprinkles or edible glitter (optional)
Instructions
1. Place white chocolate chips in a heatproof bowl.
2. In a small saucepan, combine heavy cream and vanilla bean seeds over medium heat.
3. Heat the cream mixture until it just begins to simmer at 180°F, then immediately pour it over the white chocolate chips.
4. Let the mixture sit undisturbed for 2 minutes to melt the chocolate.
5. Whisk the white chocolate and cream together until smooth and glossy.
6. Pour the filling into a candy mold with cavities, tapping the mold gently on the counter to remove air bubbles.
7. Freeze the mold for at least 2 hours until the filling is completely solid.
8. In a microwave-safe bowl, combine dark chocolate chips and coconut oil.
9. Microwave the chocolate in 30-second intervals, stirring between each, until fully melted and smooth at 110°F.
10. Remove the frozen bonbon centers from the mold.
11. Dip each bonbon center into the melted dark chocolate using a fork, letting excess chocolate drip off.
12. Place the coated bonbons on a parchment-lined tray and immediately add sprinkles if desired before the chocolate sets.
13. Allow the bonbons to set at room temperature for 30 minutes until the coating is firm.
Holding one of these bonbons reveals a velvety vanilla center that melts smoothly against the crisp dark chocolate shell. The real vanilla bean seeds add tiny flecks of flavor that shine through—try stacking them on a dessert plate with fresh berries for a stunning presentation that tastes as good as it looks.
Maple Walnut Candy Mold Candies
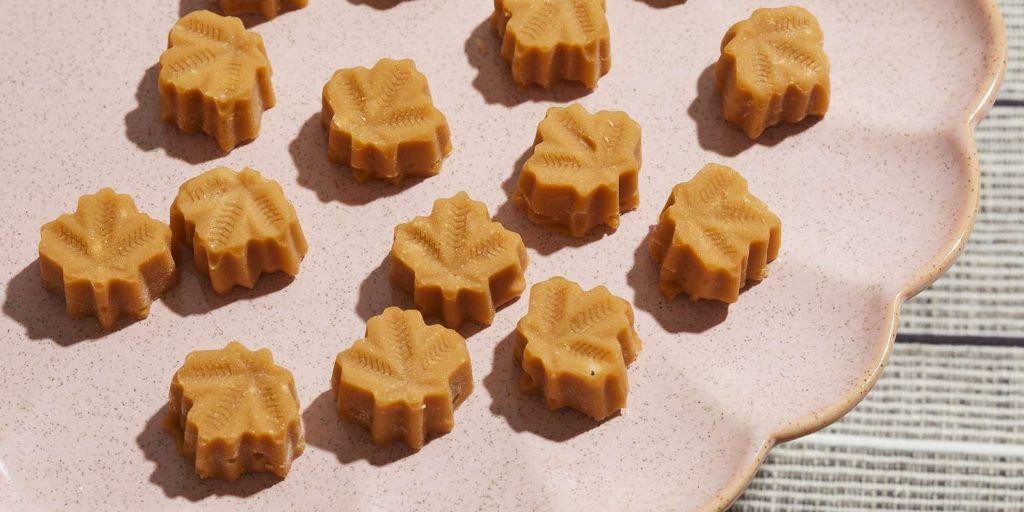
Satisfy your sweet tooth with these nostalgic Maple Walnut Candy Mold Candies. They’re a festive, no-bake treat that’s surprisingly simple to make. Grab your molds and let’s get started.
Serving: 24 candies | Pre Time: 15 minutes | Cooking Time: 10 minutes
Ingredients
For the Candy Base:
– 1 cup pure maple syrup
– 1/2 cup granulated sugar
– 1/4 cup unsalted butter
– 1/4 cup heavy cream
– 1/4 teaspoon salt
For Finishing:
– 1 cup chopped walnuts
– Non-stick cooking spray
Instructions
1. Lightly spray 24 candy molds with non-stick cooking spray and set them on a baking sheet.
2. Combine 1 cup pure maple syrup, 1/2 cup granulated sugar, 1/4 cup unsalted butter, 1/4 cup heavy cream, and 1/4 teaspoon salt in a medium saucepan.
3. Place the saucepan over medium heat and stir constantly with a wooden spoon until the butter melts and the sugar dissolves completely.
4. Attach a candy thermometer to the side of the pan, ensuring it doesn’t touch the bottom.
5. Bring the mixture to a boil without stirring and cook until the thermometer reads 240°F (soft-ball stage), which should take about 5-7 minutes. Tip: Avoid stirring during this boil to prevent crystallization.
6. Immediately remove the saucepan from the heat and let it cool, undisturbed, for 2 minutes until the bubbling subsides.
7. Stir in 1 cup chopped walnuts vigorously until they are fully coated and the mixture thickens slightly, about 1 minute. Tip: Work quickly here as the candy will start to set.
8. Carefully spoon the hot maple-walnut mixture into the prepared molds, filling each cavity to the top.
9. Let the candies cool at room temperature for 30 minutes until completely firm. Tip: For faster setting, you can refrigerate them for 15 minutes.
10. Gently pop the candies out of the molds once set.
Zero effort yields big reward with these candies. They boast a chewy, fudge-like texture with a deep maple flavor that’s perfectly balanced by the crunchy walnuts. Serve them on a holiday platter or wrap individually in wax paper for sweet homemade gifts.
Cookie Butter Candy Mold Treats
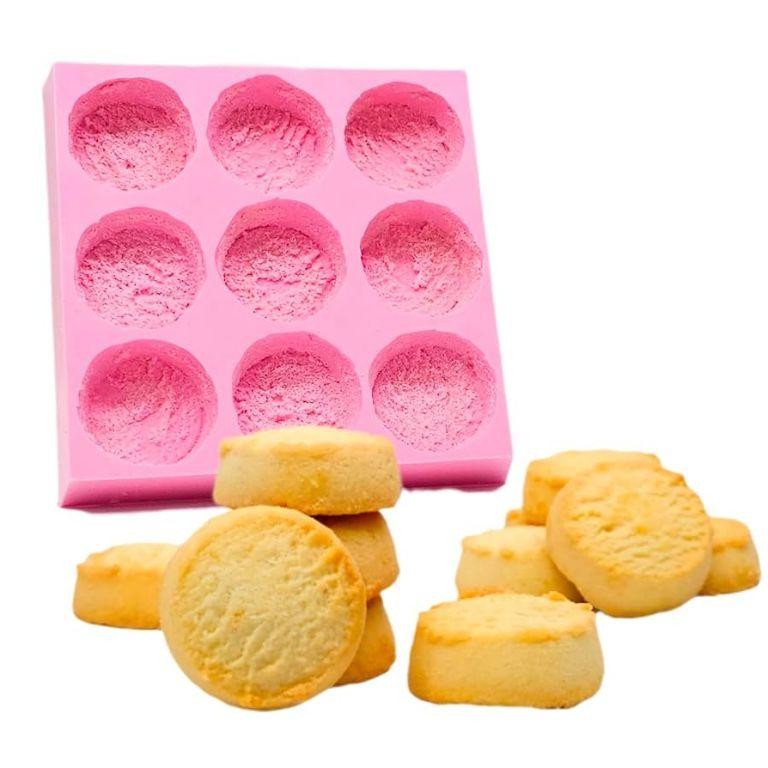
Brace yourselves for the easiest, most addictive holiday treat you’ll ever make. These Cookie Butter Candy Mold Treats combine the cozy flavor of speculoos with creamy white chocolate in a festive, no-bake package. Seriously, they’re dangerously simple and perfect for gifting or party platters.
Serving: 24 | Pre Time: 15 minutes | Cooking Time: 5 minutes
Ingredients
For the candy base:
– 12 oz (about 2 cups) white chocolate chips
– 1/2 cup smooth cookie butter (speculoos spread)
– 1/4 tsp fine sea salt
For topping (optional):
– Sprinkles, crushed cookies, or flaky sea salt for garnish
Instructions
1. Line a standard 24-cavity silicone candy mold with a flat baking sheet for stability.
2. Place the 12 oz white chocolate chips in a microwave-safe bowl. Microwave on high for 30 seconds, then stir thoroughly.
3. Continue microwaving in 15-second intervals, stirring after each, until the chocolate is completely melted and smooth—this should take about 60-90 seconds total. Tip: Stop microwaving when just a few lumps remain; residual heat will melt them as you stir to avoid scorching.
4. Immediately add the 1/2 cup cookie butter and 1/4 tsp fine sea salt to the melted white chocolate.
5. Stir vigorously with a spatula for 1-2 minutes until fully combined, glossy, and no streaks remain.
6. Working quickly, spoon or pipe the mixture into each cavity of the prepared mold, filling them to the top.
7. Gently tap the mold on the counter 2-3 times to release any air bubbles and create a smooth surface.
8. If using, immediately sprinkle your choice of garnish (sprinkles, crushed cookies, or flaky sea salt) over the tops before the mixture sets. Tip: For clean edges, use a small offset spatula to scrape any excess from the top of the mold.
9. Transfer the mold to the refrigerator. Chill for at least 45 minutes, or until the candies are completely firm to the touch.
10. Once set, carefully pop the treats out of the mold by gently flexing it from the back. Tip: If they stick, place the mold in the freezer for 5 minutes to contract the candies slightly for easy release.
A creamy, spiced cookie butter flavor shines through the sweet white chocolate, creating a smooth, melt-in-your-mouth texture that’s utterly irresistible. Serve them piled high in a festive bowl, or package them in clear cellophane bags tied with ribbon for charming homemade gifts. Their rich, balanced sweetness makes them a standout addition to any dessert table.
Orange Creamsicle Candy Mold Gummies
Whip up a nostalgic treat that’s pure sunshine in gummy form—these Orange Creamsicle Candy Mold Gummies blend zesty orange and creamy vanilla into a fun, moldable dessert. They’re easy, no-bake, and perfect for parties or a sweet pick-me-up. Get ready to play with flavors and shapes!
Serving: 24 gummies | Pre Time: 15 minutes | Cooking Time: 10 minutes
Ingredients
For the Orange Layer:
– 1 cup orange juice (freshly squeezed or bottled, no pulp)
– 1/2 cup granulated sugar
– 3 tbsp unflavored gelatin powder
– 1 tsp orange extract
– Orange food coloring (optional, 2–3 drops)
For the Cream Layer:
– 1 cup heavy cream
– 1/4 cup powdered sugar
– 1 tsp vanilla extract
– 1 tbsp unflavored gelatin powder
For Assembly:
– Cooking spray or vegetable oil (for greasing)
– Silicone candy molds (assorted shapes)
Instructions
1. Lightly grease silicone candy molds with cooking spray or vegetable oil to prevent sticking.
2. In a small saucepan, combine 1 cup orange juice, 1/2 cup granulated sugar, and 3 tbsp unflavored gelatin powder over low heat.
3. Whisk constantly for 5–7 minutes until the sugar and gelatin fully dissolve—do not let it boil to avoid a rubbery texture.
4. Remove from heat and stir in 1 tsp orange extract and orange food coloring if using, mixing until uniform.
5. Carefully pour the orange mixture into half of each mold cavity, filling them about halfway.
6. Place the molds in the refrigerator for 20–30 minutes until the orange layer is set and firm to the touch.
7. In a clean saucepan, combine 1 cup heavy cream, 1/4 cup powdered sugar, and 1 tbsp unflavored gelatin powder over low heat.
8. Whisk continuously for 3–5 minutes until the gelatin dissolves and the mixture is smooth and slightly thickened.
9. Remove from heat and stir in 1 tsp vanilla extract, then let it cool for 5 minutes to avoid melting the orange layer.
10. Pour the cream mixture over the set orange layer in the molds, filling to the top.
11. Refrigerate the molds for at least 2 hours, or until fully set and easy to pop out.
12. Gently remove the gummies from the molds by flexing the silicone edges.
Light and chewy, these gummies deliver a burst of citrus followed by a smooth vanilla finish—ideal for stacking on a platter or tossing into a lunchbox for a fun surprise. Store them in an airtight container in the fridge to keep their texture perfect for up to a week.
Dark Chocolate Sea Salt Candy Mold Bites
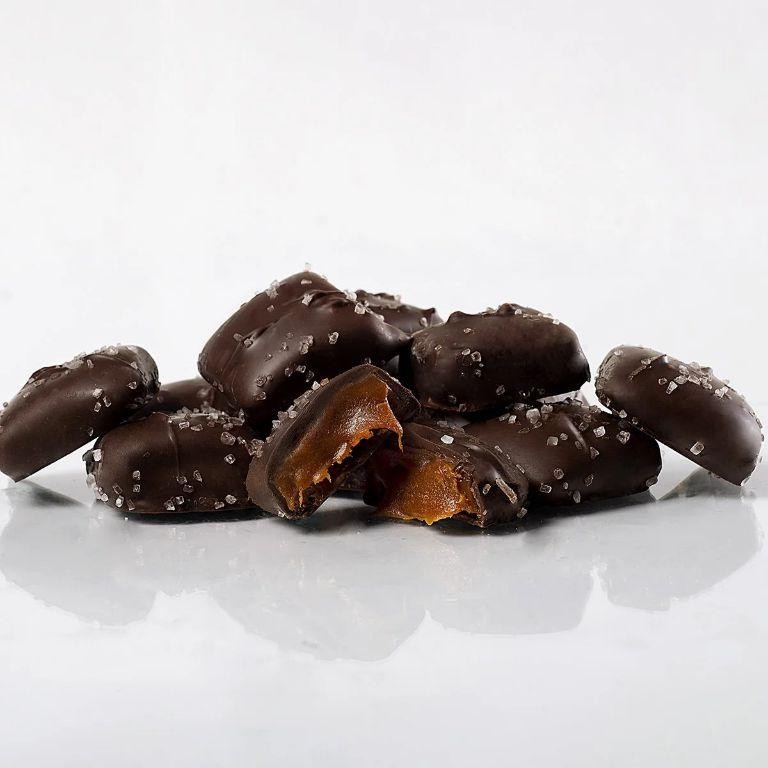
You need a sweet-salty fix that looks fancy but takes zero skill. Dark Chocolate Sea Salt Candy Mold Bites are your answer—rich, crunchy, and dangerously snackable.
Serving: 24 bites | Pre Time: 15 minutes | Cooking Time: 5 minutes
Ingredients
For the chocolate base:
– 12 oz dark chocolate chips (about 2 cups)
– 1 tsp coconut oil
For the filling:
– 1/2 cup roasted almonds, roughly chopped
– 1/4 cup dried cranberries
– 1 tsp flaky sea salt
Instructions
1. Line a silicone candy mold with 24 cavities and set it on a baking sheet.
2. Place the dark chocolate chips and coconut oil in a microwave-safe bowl.
3. Microwave the mixture on high for 30 seconds, then stir thoroughly with a spatula.
4. Repeat microwaving in 15-second intervals, stirring after each, until the chocolate is completely melted and smooth—this prevents burning.
5. Spoon about 1 tsp of melted chocolate into each cavity of the mold, coating the bottoms evenly.
6. Tap the mold gently on the counter to remove air bubbles for a glossy finish.
7. Sprinkle chopped almonds and dried cranberries evenly over the chocolate in each cavity.
8. Top each bite with a pinch of flaky sea salt.
9. Spoon the remaining melted chocolate over the fillings to cover them completely.
10. Use a toothpick to swirl the layers slightly, ensuring the fillings are sealed in.
11. Refrigerate the mold for at least 1 hour, or until the chocolate is fully set and firm to the touch.
12. Pop the bites out of the mold by flexing it gently from the edges.
Grab one and savor the snap of dark chocolate giving way to nutty crunch and tart fruit. These bites shine as a holiday gift in cellophane bags or crumbled over vanilla ice cream for a decadent sundae topping.
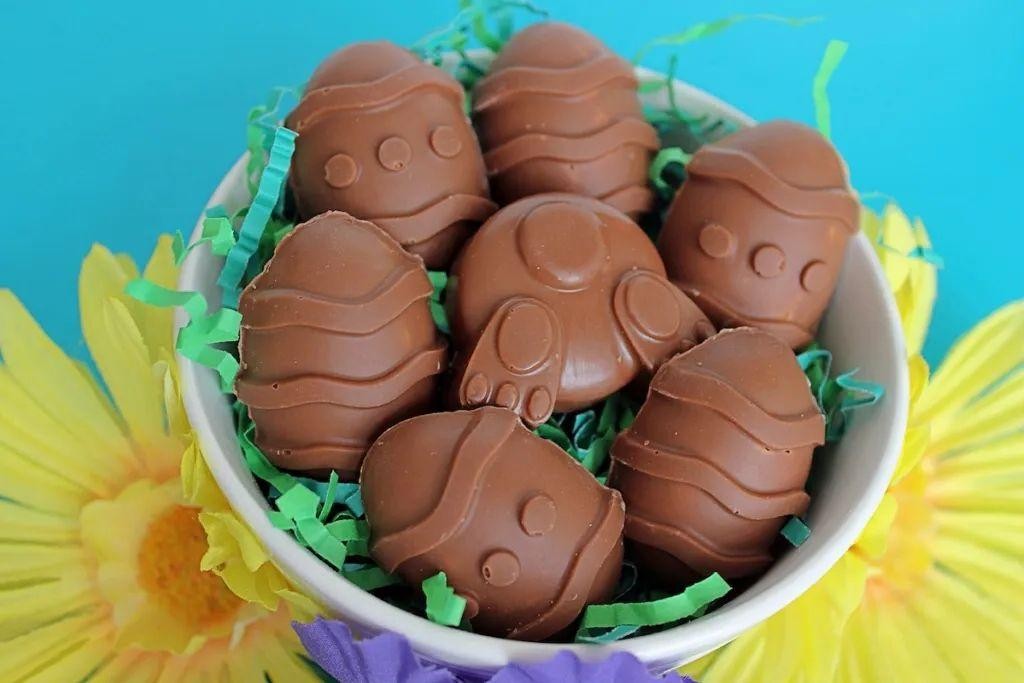
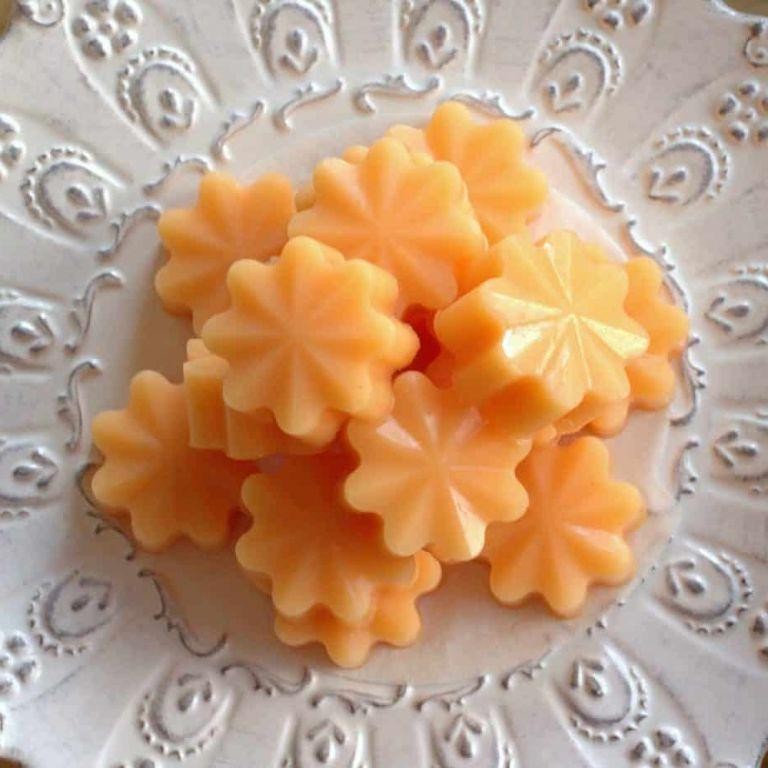
Pumpkin Spice Candy Mold Confections
Viral pumpkin spice vibes meet edible art in these stunning candy mold confections. Transform basic ingredients into festive, shareable treats that scream holiday magic—no baking required.
Serving: 24 | Pre Time: 15 minutes | Cooking Time: 5 minutes
Ingredients
For the Candy Base
– 1 cup white chocolate chips
– 1/4 cup canned pumpkin puree
– 1 tsp pumpkin pie spice
– 1/4 tsp ground cinnamon
For Assembly
– 24 silicone candy molds (pumpkin-shaped)
– Cooking spray
Instructions
1. Lightly coat 24 silicone pumpkin-shaped candy molds with cooking spray using a pastry brush.
2. Melt 1 cup white chocolate chips in a microwave-safe bowl in 30-second intervals, stirring after each, until completely smooth (about 90 seconds total).
3. Immediately stir in 1/4 cup canned pumpkin puree, 1 tsp pumpkin pie spice, and 1/4 tsp ground cinnamon until fully combined and glossy.
4. Tip: Work quickly while the mixture is warm to prevent seizing.
5. Spoon the pumpkin-chocolate mixture into each prepared mold cavity, filling to the top.
6. Gently tap the molds on the counter 5-6 times to release air bubbles and create a smooth surface.
7. Tip: Use a toothpick to pop any remaining bubbles for a flawless finish.
8. Refrigerate the filled molds for exactly 45 minutes until firm to the touch.
9. Carefully pop each candy out by flexing the silicone molds from the edges.
10. Tip: If candies stick, freeze for 10 minutes before removing.
Melt-in-your-mouth creamy with a warm spice kick, these confections boast a velvety texture that contrasts beautifully with their crisp molded shapes. Serve them piled high on a vintage platter or individually wrapped as party favors—their vibrant orange hue makes them edible autumn decor.
Blueberry Yogurt Candy Mold Drops

Make your holiday sweets healthier without sacrificing fun. These Blueberry Yogurt Candy Mold Drops are creamy, fruity, and perfect for festive snacking. They’re a no-bake treat that sets in minutes.
Serving: 24 drops | Pre Time: 15 minutes | Cooking Time: 0 minutes
Ingredients
For the Yogurt Mixture
– 2 cups plain Greek yogurt
– 1/4 cup honey
– 1 teaspoon vanilla extract
For the Blueberry Swirl
– 1 cup fresh blueberries
– 1 tablespoon lemon juice
For Assembly
– Non-stick cooking spray
Instructions
1. Place 1 cup fresh blueberries and 1 tablespoon lemon juice in a small saucepan over medium heat. 2. Cook the mixture for 5-7 minutes, mashing the blueberries with a spoon until they break down into a thick sauce. 3. Remove the saucepan from heat and let the blueberry sauce cool completely to room temperature, about 10 minutes. Tip: Cooling prevents the yogurt from curdling when mixed. 4. Lightly coat 24 cavities of a silicone candy mold with non-stick cooking spray. 5. In a medium bowl, combine 2 cups plain Greek yogurt, 1/4 cup honey, and 1 teaspoon vanilla extract. 6. Whisk the yogurt mixture vigorously for 1-2 minutes until smooth and slightly thickened. Tip: Whisking incorporates air for a fluffier texture. 7. Gently fold the cooled blueberry sauce into the yogurt mixture, leaving streaks for a marbled effect—do not overmix. 8. Spoon or pipe the yogurt-blueberry mixture evenly into the prepared candy mold cavities. 9. Tap the mold firmly on the counter 3-4 times to remove any air bubbles. 10. Freeze the mold for at least 2 hours, or until the drops are completely solid. Tip: Freezing overnight ensures they hold their shape best when unmolded. 11. Pop the frozen drops out of the mold by gently pressing on the silicone backs. 12. Transfer the drops to an airtight container and store in the freezer until ready to serve.
These drops have a creamy, ice-cream-like texture with a tangy blueberry swirl. They’re refreshingly cold and subtly sweet—perfect for a light dessert or a fun snack straight from the freezer. Try serving them on a platter with fresh mint for a festive touch.
Coconut Lime Candy Mold Delicacies
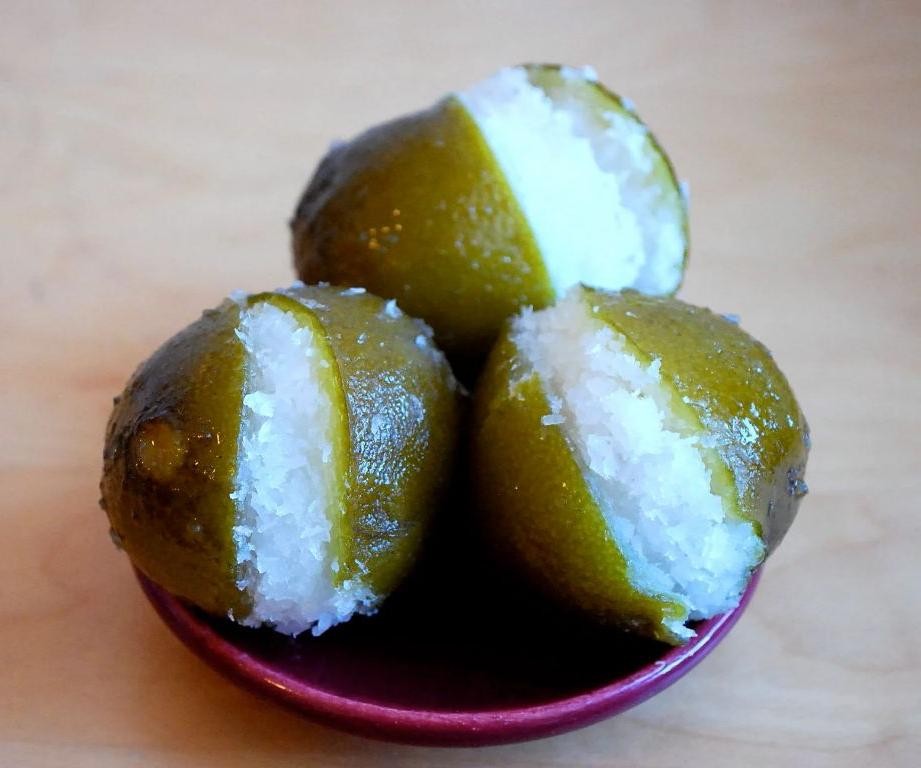
Unwrap a taste of the tropics with these vibrant Coconut Lime Candy Mold Delicacies. They’re the perfect make-ahead treat for holiday parties or a sweet, sunny escape. Get ready to impress with minimal effort and maximum flavor.
Serving: 12 | Pre Time: 20 minutes | Cooking Time: 0 minutes
Ingredients
For the Candy Base:
– 1 (14-ounce) can sweetened condensed milk
– 2 cups sweetened shredded coconut
– 1 tablespoon finely grated lime zest (from about 2 limes)
– 1/4 cup fresh lime juice (from about 2 limes)
– 1/2 teaspoon pure vanilla extract
For Coating & Garnish:
– 1 cup white chocolate chips
– 1 teaspoon coconut oil
– Extra sweetened shredded coconut for rolling
Instructions
1. In a medium bowl, combine the sweetened condensed milk, 2 cups shredded coconut, lime zest, lime juice, and vanilla extract.
2. Stir the mixture vigorously with a spatula for 2-3 minutes until it is fully combined and thickens slightly.
3. Tip: For the best texture, use finely grated lime zest and avoid the bitter white pith.
4. Scoop about 1 tablespoon of the mixture and roll it into a tight ball between your palms.
5. Place each ball into a cavity of a silicone candy mold. Press down gently to shape.
6. Transfer the filled mold to the freezer. Freeze for at least 1 hour, or until the candies are completely firm.
7. Tip: Using a silicone mold makes unmolding effortless once frozen.
8. In a microwave-safe bowl, combine the white chocolate chips and coconut oil.
9. Microwave the mixture on high power for 30-second intervals, stirring thoroughly after each interval, until completely melted and smooth.
10. Remove the frozen candy shapes from the mold. Working quickly, dip the bottom half of each candy into the melted white chocolate.
11. Immediately roll the chocolate-dipped portion in the extra shredded coconut to coat.
12. Place the finished candies on a parchment-lined tray. Let them sit at room temperature for 5 minutes to allow the chocolate to set.
13. Tip: If the chocolate begins to thicken while dipping, reheat it for 10-15 seconds in the microwave.
14. Prepare a serving platter. Arrange the candies on the platter for presentation.
Perfectly chewy with a bright, zesty lime punch and a creamy coconut core. The white chocolate shell adds a sweet crunch that contrasts beautifully. Serve them chilled on a bed of edible flowers for a stunning tropical dessert board.
Summary
Mouthwatering creations await in these 20 candy mold recipes perfect for any celebration! We hope you feel inspired to try making these sweet treats, share your favorite in the comments below, and pin this article to your Pinterest boards to save for your next baking adventure. Happy crafting!


