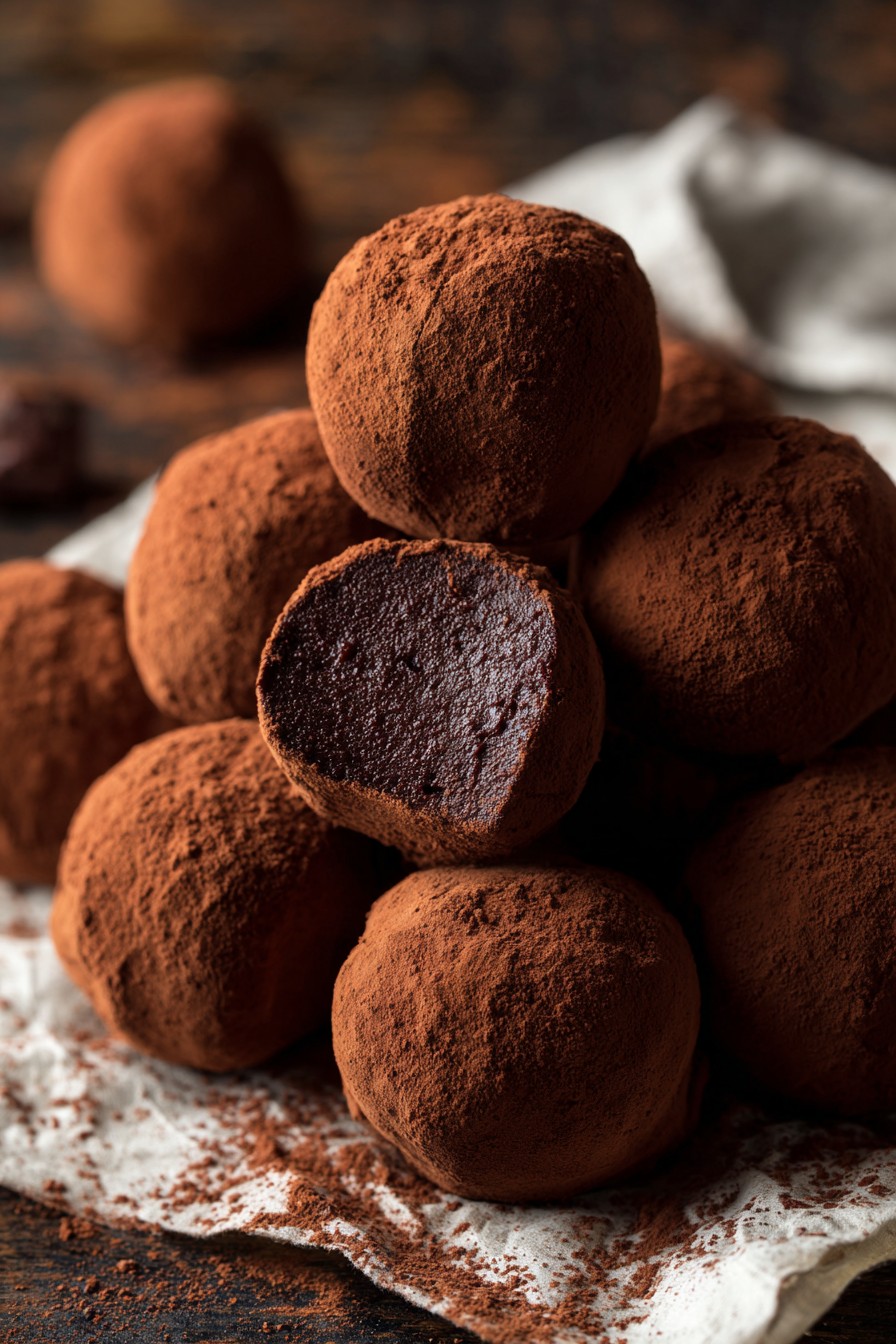
Savor the moment, my dear, as we embark on a culinary embrace that whispers of velvet nights and shared secrets. These chocolate truffles are more than mere confections; they are tiny, edible sonnets crafted to melt upon the tongue and linger in the heart. Imagine the rich, dark essence of fine chocolate, cradled in your hands, promising a sweetness that unfolds like a cherished memory.
Why This Recipe Works
- Uses a simple ganache base of just two ingredients for foolproof, luxurious texture.
- Chilling the mixture thoroughly ensures easy rolling and perfect, round shapes.
- The double-coating method with cocoa powder creates that classic, elegant, melt-in-your-mouth finish.
- It’s incredibly adaptable, inviting you to infuse it with your favorite liqueurs or spices.
- Perfect for making ahead, allowing the flavors to deepen and mature like a fine wine.
Ingredients
- 10 ounces high-quality semisweet or bittersweet chocolate, finely chopped
- 2/3 cup heavy cream
- 2 tablespoons unsalted butter, at room temperature and cut into small pieces
- 1 teaspoon pure vanilla extract
- A pinch of fine sea salt
- 1/2 cup unsweetened cocoa powder, for coating
- Optional: 2 tablespoons of your favorite liqueur, such as Grand Marnier or Chambord
Equipment Needed
- Medium saucepan
- Heatproof bowl
- Whisk
- Rubber spatula
- Baking sheet
- Parchment paper
- Small ice cream scoop or melon baller (about 1 teaspoon size)
- Two shallow bowls
Instructions
Step 1: Create the Silken Ganache Heart
Place your finely chopped chocolate into a clean, dry heatproof bowl. In a medium saucepan, pour the heavy cream and warm it over medium-low heat. You are not aiming for a boil, but for the gentlest simmer—watch for tiny bubbles to form just around the edges of the pan, which should take about 3 to 4 minutes. The moment you see that delicate lace of heat, remove the saucepan from the burner. Pour the warm cream directly over the waiting chocolate. Let this union rest, undisturbed, for a full three minutes. This quiet interlude allows the heat to gently coax the chocolate into softening. Then, starting from the center, whisk slowly and steadily until the mixture becomes a single, glossy, and impossibly smooth river of dark silk. This is your ganache, the very soul of the truffle. Whisk in the room-temperature butter pieces, one at a time, followed by the vanilla extract and that whisper of sea salt. If your heart desires, this is also the moment to stir in a tablespoon or two of a fragrant liqueur, letting it weave its own story into the chocolate. Tip: For the most velvety texture, ensure your chocolate is very finely chopped so it melts evenly and completely.
Step 2: The Patient Chill
Once your ganache is perfectly smooth, cover the bowl tightly with plastic wrap, pressing the wrap directly onto the surface of the chocolate. This intimate contact prevents a skin from forming. Now, practice the art of patience. Place the bowl in the refrigerator and let it chill for at least 3 hours, though I often find that 4 hours yields the ideal consistency. You are waiting for the ganache to become firm enough to hold its shape when scooped, yet still pliable and cool to the touch—think of the texture of very firm clay. This slow, cold transformation is essential; rushing it will only lead to a sticky, frustrating experience when you begin to shape your treasures. Use this time to clear a space in your kitchen, line a baking sheet with parchment paper, and perhaps pour yourself a glass of something delightful, anticipating the joy to come.
Step 3: Sculpting Your Chocolate Treasures
After the long chill, remove the bowl from the refrigerator. Using a small ice cream scoop or a melon baller that holds about 1 teaspoon of mixture, portion out the ganache. Work quickly but gently, as the warmth of your hands can soften the chocolate. Drop each scoop onto your parchment-lined baking sheet. Now, with clean, slightly damp hands, roll each portion between your palms. Do not apply pressure; simply cradle and rotate until a neat, rustic sphere forms. They need not be perfectly round—a little imperfection is part of their handmade charm. If the mixture becomes too soft and sticky, simply return the baking sheet to the refrigerator for 10-15 minutes to let it firm up again. You should have about 30 to 35 precious orbs. Once all are shaped, place the entire tray back into the refrigerator for another 30 minutes to set completely. Tip: Dampening your hands slightly with cold water prevents the ganache from sticking terribly as you roll.
Step 4: The First Embrace of Cocoa
Prepare two shallow bowls. Pour the unsweetened cocoa powder into one, leaving the other empty for now. Remove a few truffles from the refrigerator at a time, keeping the rest chilled. Take one truffle and roll it lightly in the bowl of cocoa powder until it is completely coated. This first coating acts as a delicate barrier, sealing in the soft center and providing a base for the final layer. Place the dusted truffle into the empty bowl. Repeat this process with all the truffles, working in small batches. Once they have all received their first cloak of cocoa, return the entire batch to the refrigerator for another 15 minutes. This short rest allows that initial layer to settle and dry slightly, ensuring the final coating will be even and beautiful, not clumpy or absorbed into the ganache.
Step 5: The Final, Velvety Adornment
For the final, defining touch, you will coat the truffles a second time. You may use the same cocoa powder, or for a more intense finish, sift a fresh 1/4 cup into a clean bowl. Remove the truffles from the refrigerator once more. One by one, roll them again in the cocoa powder, ensuring every last bit is covered in that soft, dark veil. As you finish each one, gently place it in a clean container or on a serving platter. Tip: For a pristine finish, use a fine-mesh sieve to dust a final, light shower of cocoa powder over the completed truffles. Your chocolate truffles are now complete. They are best served slightly cool, allowing the firm exterior to give way to the lush, melting center. Store them in a single layer in an airtight container in the refrigerator for up to two weeks, though I doubt they will last that long.
Tips and Tricks
For an ultra-smooth ganache, you can use an immersion blender to emulsify the chocolate and cream, which guarantees no tiny bits of unmelted chocolate. When adding liqueur, reduce the heavy cream by one tablespoon to account for the extra liquid and maintain the proper setting consistency. If you find rolling by hand too messy, you can use a small, cold cookie scoop to drop the ganache directly into the cocoa powder and gently shake the bowl to coat—this creates more rustic, less-perfectly-round truffles with a lovely, textured appearance. For a professional shine without a tempered chocolate shell, after the first chill, you can dip the shaped truffles in melted chocolate instead of using a second cocoa coating. Always use a high-quality chocolate you enjoy eating on its own, as it is the star of the show. To gift these, place them in small paper candy cups and arrange them in a beautiful box lined with parchment.
Recipe Variations
- Espresso Infusion: Add 1-2 teaspoons of instant espresso powder or very finely ground coffee to the warm cream before pouring it over the chocolate. The deep, roasted notes create a sophisticated mocha truffle.
- Citrus Zest: Infuse the cream with the zest of one orange or lemon by heating them together, then straining the zest out before pouring over the chocolate. The bright, aromatic oils will perfume the entire batch.
- Spiced Adventure: Whisk a 1/2 teaspoon of ground cinnamon, a pinch of cayenne pepper, and a 1/4 teaspoon of ground cardamom into the warm ganache for a truffle with a warm, intriguing kick.
- Nutty Crunch: After the first cocoa coating, roll the truffles in finely chopped toasted hazelnuts, pistachios, or almonds instead of the second cocoa layer for added texture and flavor.
- White Chocolate Dip: For a stunning contrast, after the final set, dip half of each cocoa-dusted truffle into melted white chocolate and let it harden on parchment paper.
Frequently Asked Questions
Q: Can I use chocolate chips instead of bar chocolate?
A: I do not recommend it. Chocolate chips contain stabilizers that prevent them from melting as smoothly as baking or bar chocolate. For the silkiest ganache, a high-quality bar chocolate that you chop yourself is essential.
Q: My ganache split or looks grainy. What happened?
A: This usually means the cream was too hot and shocked the chocolate, or you stirred too vigorously too soon. To rescue it, try whisking in a tablespoon of room-temperature cream or warm milk until it comes back together.
Q: How far in advance can I make these?
A: They are a perfect make-ahead dessert. The flavors improve after 24 hours. Store them in an airtight container in the fridge for up to 2 weeks, or freeze them (without the final coating) for up to 3 months. Thaw in the fridge and coat before serving.
Q: Can I make these without any special equipment?
A: Absolutely. A small pot, a glass bowl, a fork for whisking, and a teaspoon will work. Shaping with slightly damp hands is the most traditional method. The key is patience during the chilling stages.
Q: Why two coatings of cocoa powder?
A: The first coating seals the soft center and provides a dry base. The second coating after a brief chill gives that classic, velvety, thick layer that defines a perfect truffle and prevents the cocoa from becoming damp and pasty.
Summary
These chocolate truffles are an intimate culinary gesture, transforming simple cream and chocolate into decadent, hand-rolled treasures. With patience and a gentle touch, you create a dessert that speaks directly to the senses, perfect for sharing a moment of pure, indulgent connection.
Decadent Chocolate Truffles
30
servings45
minutes5
minutesIngredients
Instructions
- 1 Create the Ganache: Place chopped chocolate in a heatproof bowl. Heat cream in a saucepan over medium-low heat until it simmers at the edges (3-4 mins). Pour hot cream over chocolate, let sit 3 mins, then whisk until smooth. Whisk in butter, vanilla, salt, and optional liqueur until fully incorporated.
- 2 Chill: Cover bowl with plastic wrap pressed directly on the ganache surface. Refrigerate until firm, at least 3-4 hours.
- 3 Shape: Using a 1-teaspoon scoop, portion ganache onto a parchment-lined sheet. With slightly damp hands, quickly roll into balls. If sticky, chill for 10-15 mins. Return all shaped truffles to fridge for 30 mins to set.
- 4 First Coating: Roll each chilled truffle in cocoa powder until coated. Place in a separate bowl. Once all are coated, return to refrigerator for 15 minutes.
- 5 Final Coating: Roll truffles a second time in cocoa powder (use fresh if desired) for a thick, velvety finish. Store in an airtight container in the refrigerator.