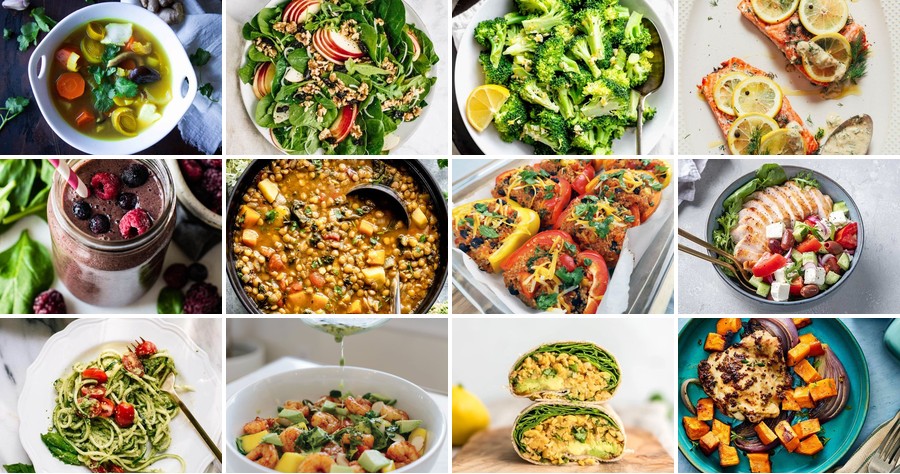
Venturing into healthy eating doesn’t have to be a chore! We’ve gathered 20 simple, nutritious recipes that are as delicious as they are good for you. Perfect for busy weeknights or relaxed weekends, these clean eats will make you feel fantastic without sacrificing flavor. Let’s dive into a world of wholesome, easy-to-make meals that your whole family will love.
Grilled Lemon Herb Chicken Salad
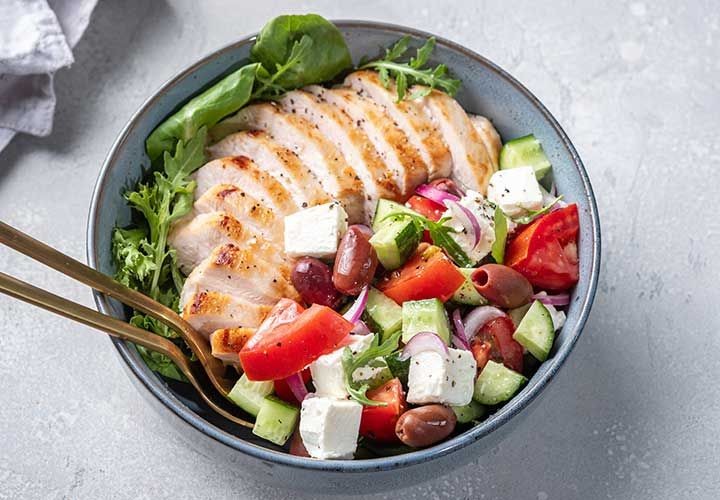
This grilled lemon herb chicken salad has become my go-to summer lunch—it’s bright, satisfying, and comes together faster than you can say ‘al fresco.’ I love making a big batch on Sunday to have ready for easy weekday meals. Trust me, the zesty marinade makes all the difference.
Serving: 4 | Pre Time: 20 minutes | Cooking Time: 15 minutes
Ingredients
– 2 boneless, skinless chicken breasts
– A generous ¼ cup of olive oil
– The juice of 2 lemons (about ⅓ cup)
– 3 cloves of garlic, minced
– A big handful of fresh parsley, chopped
– A couple of sprigs of fresh thyme, leaves stripped
– 1 teaspoon of kosher salt
– ½ teaspoon of freshly cracked black pepper
– 8 cups of chopped romaine lettuce
– 1 pint of cherry tomatoes, halved
– 1 English cucumber, sliced
– ½ of a red onion, thinly sliced
– ⅓ cup of crumbled feta cheese
Instructions
1. In a medium bowl, whisk together the ¼ cup olive oil, juice of 2 lemons, minced garlic, chopped parsley, thyme leaves, 1 teaspoon salt, and ½ teaspoon pepper to create the marinade.
2. Place the 2 chicken breasts in a large resealable bag and pour in the marinade, ensuring the chicken is fully coated. Seal the bag and refrigerate for at least 30 minutes, or up to 4 hours for deeper flavor.
3. Preheat your grill or grill pan to medium-high heat (about 400°F).
4. Remove the chicken from the marinade, letting any excess drip off, and discard the used marinade.
5. Grill the chicken for 6-7 minutes per side, or until the internal temperature reaches 165°F and the exterior has nice grill marks.
6. Transfer the grilled chicken to a cutting board and let it rest for 5 minutes to allow the juices to redistribute.
7. While the chicken rests, assemble the salad by combining the 8 cups romaine, halved cherry tomatoes, sliced cucumber, and sliced red onion in a large serving bowl.
8. Slice the rested chicken against the grain into ½-inch thick strips.
9. Arrange the sliced chicken over the salad base.
10. Top the salad evenly with the ⅓ cup crumbled feta cheese.
Grilled to perfection, the chicken stays wonderfully juicy and carries that bright lemon-herb flavor into every bite. I love the contrast of the cool, crisp veggies with the warm chicken, and the salty feta ties it all together. Sometimes I’ll serve it with a side of warm pita or turn it into a wrap for a quick lunch on the go.
Sweet Potato and Kale Buddha Bowl
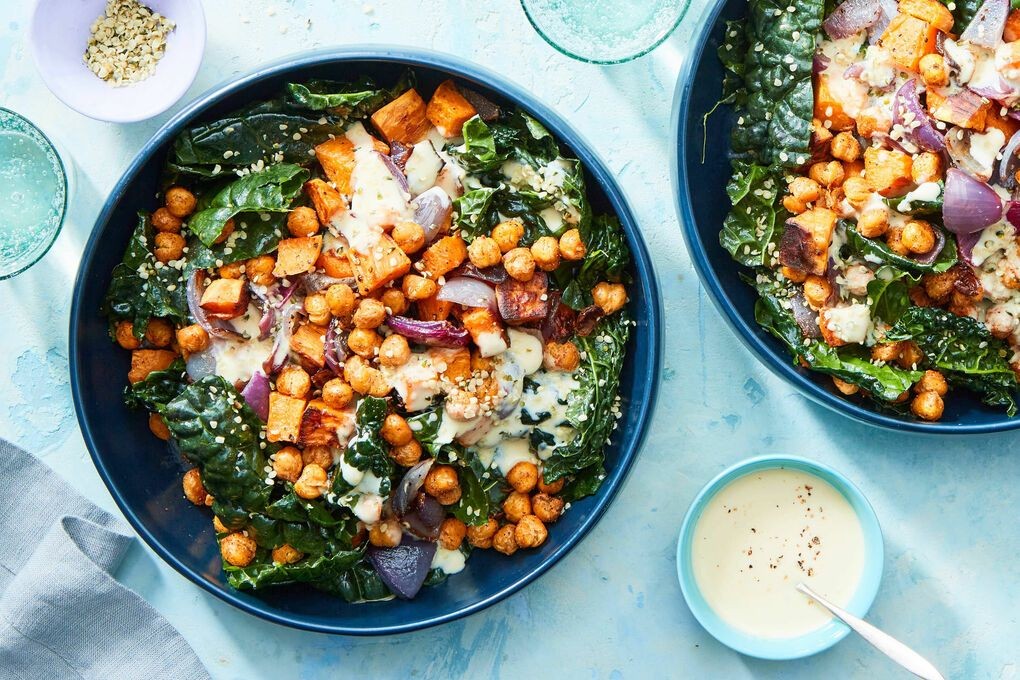
Every time I’m craving something hearty yet healthy, this sweet potato and kale Buddha bowl is my go-to—it’s like a warm hug in a bowl, especially on those busy weeknights when I need a quick, nourishing fix. I love how the roasted sweet potatoes caramelize into sweet, tender bites, and the kale gets just crispy enough to add a satisfying crunch. Trust me, once you try this combo, you’ll be making it on repeat!
Serving: 2 | Pre Time: 10 minutes | Cooking Time: 25 minutes
Ingredients
- 2 medium sweet potatoes, peeled and cubed into 1-inch pieces
- a couple of big handfuls of fresh kale, stems removed and torn into bite-sized pieces
- 1 cup of cooked quinoa (I use about ½ cup dry quinoa cooked according to package directions)
- a 15-ounce can of chickpeas, rinsed and drained
- 2 tablespoons of olive oil, divided
- a splash of apple cider vinegar (about 1 tablespoon)
- 1 teaspoon of smoked paprika
- ½ teaspoon of garlic powder
- a pinch of salt and black pepper
- optional: a drizzle of tahini or your favorite dressing for serving
Instructions
- Preheat your oven to 400°F and line a baking sheet with parchment paper.
- Toss the cubed sweet potatoes with 1 tablespoon of olive oil, smoked paprika, garlic powder, salt, and black pepper until evenly coated.
- Spread the sweet potatoes in a single layer on the baking sheet and roast for 20 minutes, flipping halfway through, until they’re fork-tender and slightly browned at the edges.
- While the sweet potatoes roast, heat the remaining 1 tablespoon of olive oil in a large skillet over medium heat.
- Add the chickpeas to the skillet and cook for 5–7 minutes, shaking the pan occasionally, until they’re golden and crispy.
- Transfer the cooked chickpeas to a bowl and set aside.
- In the same skillet, add the torn kale and apple cider vinegar, stirring for 2–3 minutes until the kale is wilted but still bright green.
- Tip: Don’t overcrowd the kale—cook it in batches if needed to keep it from steaming instead of sautéing.
- Divide the cooked quinoa between two bowls as a base layer.
- Top each bowl evenly with the roasted sweet potatoes, sautéed kale, and crispy chickpeas.
- Tip: For extra flavor, season each layer lightly with salt as you assemble.
- Drizzle with tahini or dressing if using, and serve immediately.
- Tip: If meal-prepping, store components separately and assemble just before eating to keep the textures intact.
You’ll love how the creamy sweet potatoes contrast with the crispy kale and chickpeas, creating a bowl that’s both comforting and vibrant. Yes, this Buddha bowl is a total flavor bomb—try it topped with a squeeze of lemon or avocado slices for an extra creamy twist!
Baked Salmon with Garlic and Dill
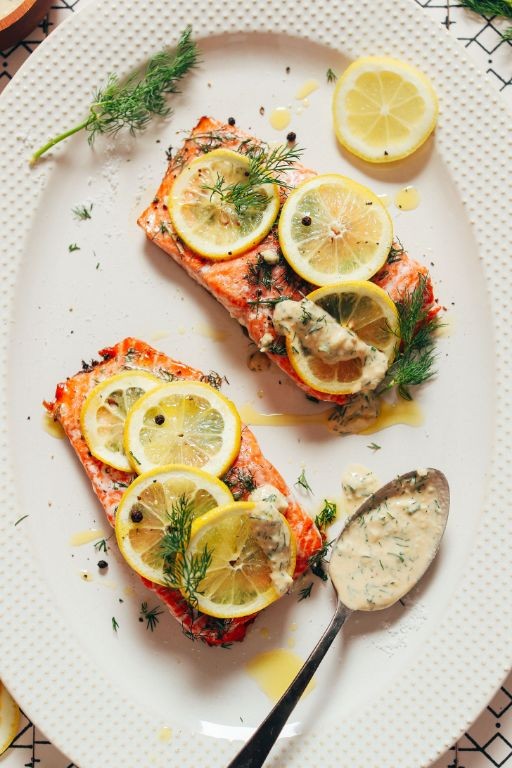
Yesterday, while prepping for my family’s holiday gathering, I realized I needed a show-stopping yet simple main dish—something elegant enough for a special dinner but easy enough to throw together on a busy day. That’s when this baked salmon with garlic and dill came to mind, a recipe I’ve relied on for years because it never fails to impress with minimal effort. Trust me, the aroma alone will have everyone gathering in the kitchen!
Serving: 4 | Pre Time: 10 minutes | Cooking Time: 15 minutes
Ingredients
– 4 salmon fillets (about 6 ounces each, skin-on or off—your choice!)
– 3 tablespoons of olive oil
– 4 cloves of garlic, minced (I always use fresh for the best punch)
– A big handful of fresh dill, chopped (about ¼ cup)
– 1 lemon, sliced into thin rounds
– A generous pinch of salt and black pepper
Instructions
1. Preheat your oven to 400°F and line a baking sheet with parchment paper for easy cleanup.
2. Pat the salmon fillets dry with paper towels to help the seasoning stick better.
3. In a small bowl, mix together the olive oil, minced garlic, and chopped dill until well combined.
4. Place the salmon fillets on the prepared baking sheet and brush the garlic-dill mixture evenly over the top of each fillet.
5. Season the fillets with a generous pinch of salt and black pepper.
6. Arrange the lemon slices on top of the salmon, overlapping slightly if needed.
7. Bake in the preheated oven for 12–15 minutes, until the salmon flakes easily with a fork and reaches an internal temperature of 145°F.
8. Remove from the oven and let it rest for 5 minutes before serving to allow the juices to redistribute.
The texture is wonderfully flaky and moist, with the garlic and dill infusing every bite with a bright, herby flavor. Try serving it over a bed of quinoa or with roasted asparagus for a complete meal that feels both cozy and festive!
Roasted Veggie and Hummus Sandwich
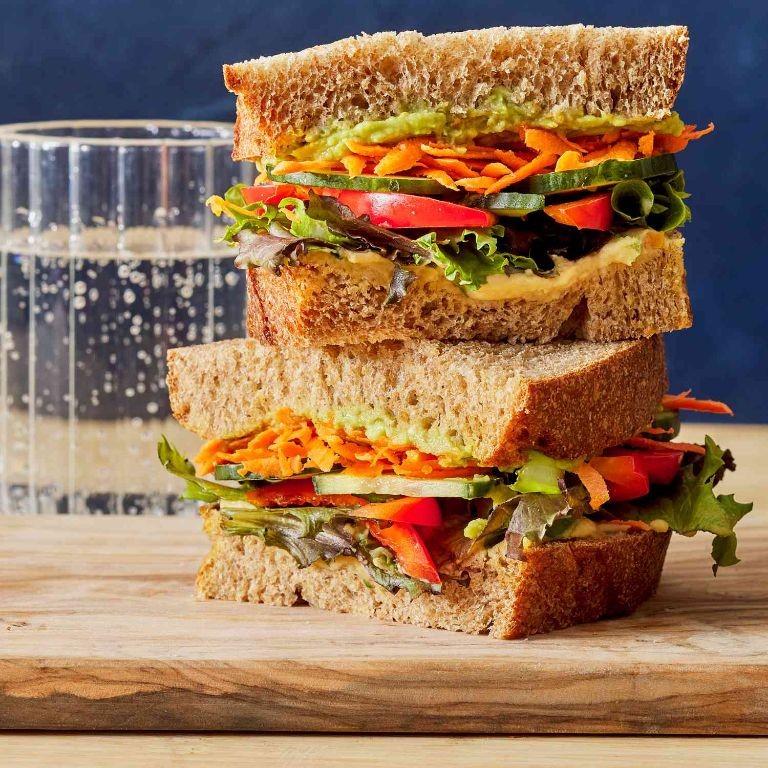
Veggie lovers, gather round! I’m sharing my go-to lunch that’s as satisfying as it is simple—a roasted veggie and hummus sandwich that always hits the spot. I started making these on busy weekdays when I needed something hearty but quick, and now it’s a staple in my kitchen.
Serving: 2 | Pre Time: 10 minutes | Cooking Time: 25 minutes
Ingredients
– 1 medium zucchini, sliced into half-inch rounds
– 1 red bell pepper, cut into strips
– 1 small red onion, thinly sliced
– A couple of tablespoons of olive oil
– A pinch of salt and black pepper
– 4 slices of whole-grain bread
– About a half cup of store-bought or homemade hummus
– A handful of fresh spinach leaves
Instructions
1. Preheat your oven to 425°F and line a baking sheet with parchment paper.
2. Toss the zucchini, bell pepper, and red onion with olive oil, salt, and black pepper in a large bowl until evenly coated.
3. Spread the veggies in a single layer on the baking sheet to ensure they roast evenly, not steam.
4. Roast in the oven for 20–25 minutes, flipping halfway through, until the edges are caramelized and tender.
5. While the veggies roast, toast the bread slices until golden and crisp—this adds a nice crunch that holds up to the hummus.
6. Let the roasted veggies cool for 5 minutes to prevent the bread from getting soggy when assembling.
7. Spread a generous layer of hummus on each slice of toasted bread.
8. Top two slices with the roasted veggies and a handful of spinach leaves, then cover with the remaining bread slices.
9. Slice each sandwich in half and serve immediately.
What makes this sandwich special is the contrast of warm, savory roasted veggies against the cool, creamy hummus, all wrapped in crunchy toast. Try adding a drizzle of balsamic glaze for extra tang, or pack it for a picnic—it’s just as delicious at room temperature.
Turmeric and Ginger Detox Soup

Last week, after one too many holiday parties, I found myself craving something that would reset my system without sacrificing flavor—enter this vibrant turmeric and ginger detox soup. It’s become my go-to for a cozy, nourishing meal that feels like a warm hug from the inside out, especially during this busy season. I love making a big batch on Sunday to enjoy throughout the week.
Serving: 4 | Pre Time: 15 minutes | Cooking Time: 25 minutes
Ingredients
– 1 tablespoon of olive oil
– 1 medium yellow onion, chopped
– 3 cloves of garlic, minced
– A 2-inch piece of fresh ginger, peeled and grated
– 1 tablespoon of ground turmeric
– 4 cups of vegetable broth
– 2 medium carrots, peeled and sliced into thin rounds
– 2 stalks of celery, chopped
– 1 can (15 ounces) of coconut milk
– A big handful of fresh spinach
– Juice from half a lemon
– A pinch of salt and black pepper
Instructions
1. Heat 1 tablespoon of olive oil in a large pot over medium heat for about 2 minutes until it shimmers lightly.
2. Add the chopped onion and cook for 5 minutes, stirring occasionally, until it turns soft and translucent.
3. Stir in the minced garlic, grated ginger, and 1 tablespoon of ground turmeric, cooking for 1 minute until fragrant—be careful not to burn it, as this can make the turmeric bitter.
4. Pour in 4 cups of vegetable broth and bring the mixture to a boil over high heat, which should take about 3-4 minutes.
5. Reduce the heat to medium-low, add the sliced carrots and chopped celery, and simmer for 15 minutes until the vegetables are tender when pierced with a fork.
6. Stir in the can of coconut milk and let it heat through for 2 minutes, avoiding a boil to prevent curdling.
7. Turn off the heat, add the handful of spinach and juice from half a lemon, stirring until the spinach wilts, about 1 minute.
8. Season with a pinch of salt and black pepper, then taste and adjust if needed—I find the lemon brightens it up perfectly.
Delightfully creamy with a subtle kick from the ginger, this soup has a velvety texture that’s both comforting and invigorating. I love serving it with a sprinkle of extra black pepper or a side of crusty bread for dipping, making it a versatile dish that’s as good for a quick lunch as it is for a light dinner.
Grilled Shrimp and Mango Salad
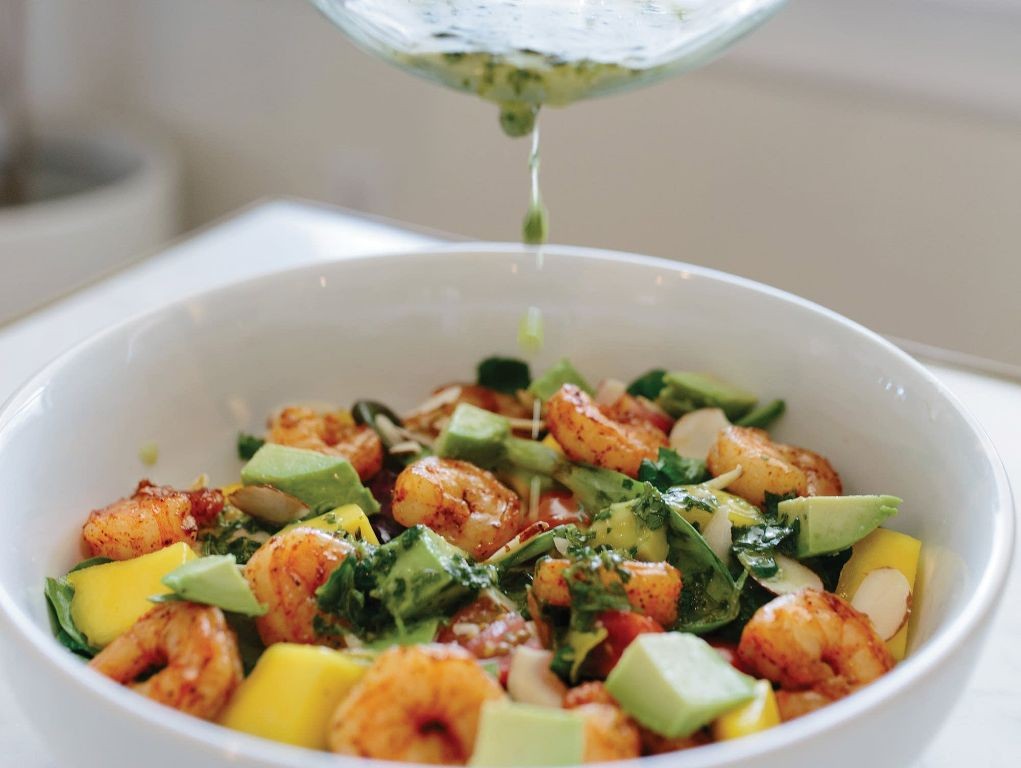
Let me tell you about the salad that saved my last summer barbecue when I realized I’d forgotten to make a side dish! Grilled shrimp and mango salad has become my go-to when I want something that feels fancy but comes together in minutes.
Serving: 4 | Pre Time: 15 minutes | Cooking Time: 8 minutes
Ingredients
– A pound of large shrimp, peeled and deveined (I leave the tails on because they look pretty)
– 2 ripe mangos, cut into 1-inch chunks
– A big handful of mixed greens (about 6 cups)
– A quarter of a red onion, thinly sliced
– A couple of tablespoons of olive oil
– A tablespoon of honey
– The juice from 1 lime
– A pinch of salt and a few cracks of black pepper
– A sprinkle of chili powder (optional, but I love the kick)
Instructions
1. Preheat your grill or grill pan to medium-high heat (about 400°F).
2. In a small bowl, whisk together 2 tablespoons of olive oil, 1 tablespoon of honey, the juice from 1 lime, a pinch of salt, and a few cracks of black pepper to make the dressing.
3. Pat the shrimp dry with paper towels and toss them with a drizzle of olive oil and a sprinkle of salt and pepper.
4. Place the shrimp on the hot grill and cook for 2-3 minutes per side until they turn pink and opaque with nice grill marks.
5. While the shrimp cook, arrange the mixed greens, mango chunks, and sliced red onion on a large platter.
6. Transfer the grilled shrimp to the platter with the salad ingredients.
7. Drizzle the dressing evenly over everything, then gently toss to combine.
8. For an extra flavor boost, sprinkle a little chili powder over the top if using.
Versatile enough for a quick lunch or impressive enough for guests, this salad delivers the perfect contrast between sweet mango, smoky shrimp, and tangy lime. I love serving it in individual bowls with extra lime wedges on the side—the colors make it almost too pretty to eat!
Chia Seed Pudding with Fresh Fruit

During the holiday rush, I find myself craving something nourishing yet effortless—enter this chia seed pudding that’s become my go-to for busy mornings or a light, sweet treat. It’s the kind of recipe I whip up on a Sunday night, so I have a ready-to-eat breakfast waiting for me all week long.
Serving: 4 | Pre Time: 5 minutes | Cooking Time: 0 minutes
Ingredients
- A half cup of chia seeds (I like the black ones for a pretty contrast)
- Two cups of your favorite milk—I usually grab almond milk from the fridge
- A couple of tablespoons of pure maple syrup, or honey if that’s what you have on hand
- A splash of vanilla extract, because it makes everything taste like dessert
- A pinch of salt to balance the sweetness
- Fresh fruit for topping—I’m using a cup of mixed berries and a sliced banana today
Instructions
- Grab a medium-sized mixing bowl and pour in the two cups of milk.
- Add the half cup of chia seeds to the milk in the bowl.
- Drizzle in the two tablespoons of maple syrup over the mixture.
- Splash in the vanilla extract—about a teaspoon’s worth does the trick.
- Sprinkle in the pinch of salt and give everything a good whisk for 30 seconds to combine thoroughly. Tip: Whisking right away prevents the chia seeds from clumping together as they soak.
- Cover the bowl with a lid or plastic wrap and place it in the refrigerator.
- Let the pudding chill for at least 4 hours, or ideally overnight for about 8 hours, until it thickens to a spoonable consistency. Tip: I sometimes give it a quick stir after the first hour to ensure even absorption.
- While the pudding sets, wash the cup of mixed berries and slice the banana just before serving to keep it from browning.
- Once thickened, divide the pudding evenly among four serving bowls or jars.
- Top each portion generously with the fresh berries and banana slices. Tip: For a fun twist, layer the fruit and pudding in a glass for a parfait effect—it looks gorgeous and makes it feel extra special.
Chia seed pudding sets into this wonderfully creamy, tapioca-like texture that’s surprisingly satisfying. The maple syrup adds a subtle warmth that pairs perfectly with the bright, juicy burst of fresh fruit—it’s like a dessert you can feel good about eating any time of day. I love serving it in mason jars for a portable breakfast or garnishing it with a sprinkle of coconut flakes for a tropical vibe.
Oven-Roasted Brussels Sprouts with Balsamic Glaze
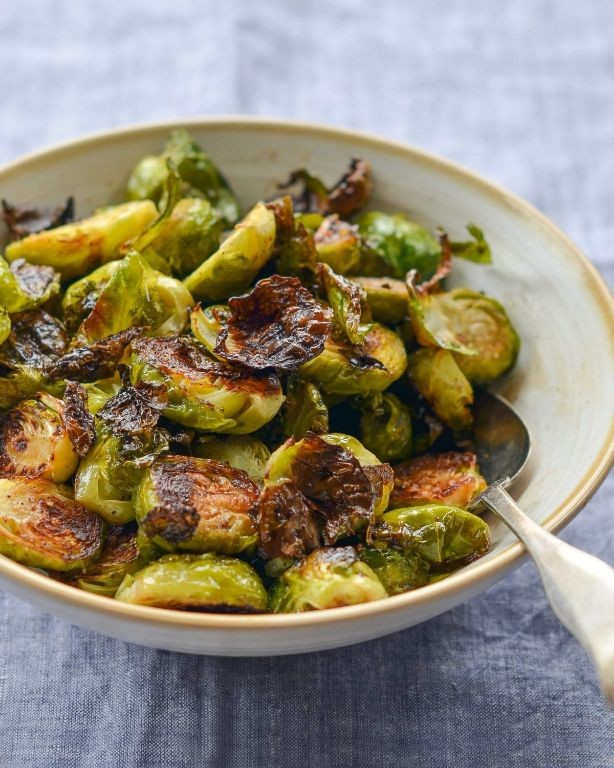
Let me tell you, I used to be one of those people who thought Brussels sprouts were just bitter little cabbages my mom forced me to eat. That all changed when I discovered the magic of roasting them until they’re crispy and caramelized, then drizzling them with a sweet-tangy balsamic glaze. It’s now my go-to side dish for holiday dinners and weeknight meals alike—even my picky nephew asks for seconds!
Serving: 4 | Pre Time: 10 minutes | Cooking Time: 25 minutes
Ingredients
– A pound and a half of fresh Brussels sprouts, trimmed and halved
– A couple of tablespoons of olive oil
– A good pinch of kosher salt and freshly ground black pepper
– A quarter cup of good balsamic vinegar
– A tablespoon of honey
– A splash of water
– A clove of garlic, minced
Instructions
1. Preheat your oven to 400°F (200°C) and line a large baking sheet with parchment paper for easy cleanup.
2. Place the halved Brussels sprouts in a large bowl and toss them with the olive oil, salt, and pepper until evenly coated.
3. Arrange the sprouts in a single layer on the prepared baking sheet, making sure they’re cut-side down—this helps them get that perfect golden-brown sear.
4. Roast in the preheated oven for 20-25 minutes, until the edges are crispy and caramelized, giving the pan a shake halfway through for even cooking.
5. While the sprouts roast, combine the balsamic vinegar, honey, water, and minced garlic in a small saucepan over medium heat.
6. Bring the mixture to a simmer, then reduce the heat to low and let it cook for 5-7 minutes, stirring occasionally, until it thickens slightly into a glaze. Tip: Watch it closely to prevent burning!
7. Remove the roasted Brussels sprouts from the oven and transfer them to a serving bowl.
8. Drizzle the warm balsamic glaze over the sprouts and toss gently to coat them evenly. Tip: If your glaze thickens too much while cooling, just add another tiny splash of water and reheat it briefly.
9. Serve immediately while hot. Tip: For extra flavor, sprinkle with some toasted pine nuts or grated Parmesan cheese right before serving.
What you get are sprouts with crispy, almost charred edges and tender centers, all wrapped in a sticky-sweet glaze with a hint of garlic. I love serving these alongside a simple roast chicken or tossing any leftovers into a grain bowl the next day—they’re just as delicious cold!
Spaghetti Squash with Marinara Sauce

Whenever I’m craving something comforting but want to keep things light, spaghetti squash is my go-to. It’s that magical vegetable that transforms into noodle-like strands with just a little roasting, and when paired with a simple marinara, it feels like a cozy hug in a bowl. I love making this on busy weeknights—it’s surprisingly hands-off once the squash is in the oven.
Serving: 4 | Pre Time: 10 minutes | Cooking Time: 50 minutes
Ingredients
– 1 medium spaghetti squash (about 3 to 4 pounds)
– A couple of tablespoons of olive oil
– A pinch of salt and black pepper
– 1 (28-ounce) can of crushed tomatoes
– 3 cloves of garlic, minced
– A splash of red wine (optional, but so good!)
– A small handful of fresh basil leaves, chopped
– A sprinkle of grated Parmesan cheese for serving
Instructions
1. Preheat your oven to 400°F (200°C).
2. Carefully slice the spaghetti squash in half lengthwise using a sharp knife—tip: microwave it for 2-3 minutes first to soften the skin and make cutting easier.
3. Scoop out all the seeds and stringy bits from each half with a spoon.
4. Drizzle about 1 tablespoon of olive oil over the cut sides of the squash, then season generously with salt and black pepper.
5. Place the squash halves cut-side down on a baking sheet lined with parchment paper.
6. Roast in the preheated oven for 40-45 minutes, until the flesh is tender and easily shreds with a fork—you’ll know it’s ready when the edges start to brown slightly.
7. While the squash roasts, heat the remaining tablespoon of olive oil in a large saucepan over medium heat.
8. Add the minced garlic and sauté for about 1 minute, until fragrant but not browned.
9. Pour in the can of crushed tomatoes and the optional splash of red wine, stirring to combine.
10. Bring the sauce to a gentle simmer, then reduce the heat to low and let it cook uncovered for 15-20 minutes, stirring occasionally—tip: this slow simmer helps deepen the flavors without burning.
11. Stir in the chopped fresh basil and season with a little more salt and pepper if needed.
12. Once the squash is done, remove it from the oven and let it cool for 5 minutes until safe to handle.
13. Use a fork to scrape the flesh of each squash half into long, spaghetti-like strands, transferring them to a serving bowl—tip: scrape from the edges toward the center for the best noodle texture.
14. Top the spaghetti squash strands with the warm marinara sauce.
15. Serve immediately, garnished with a sprinkle of grated Parmesan cheese.
You’ll love how the squash strands hold their slight crunch against the rich, garlicky marinara—it’s a satisfying twist on pasta night. For a fun variation, try stuffing the roasted squash halves with the sauce and baking them for an extra 10 minutes until bubbly.
Almond Butter and Banana Toast

Every morning when I’m rushing to get my kids out the door for school, I find myself craving something quick yet satisfying. This almond butter and banana toast has become my go-to solution—it’s the perfect balance of creamy, sweet, and crunchy that keeps me fueled until lunch. Honestly, I’ve made this so many times I could probably do it with my eyes closed!
Serving: 1 | Pre Time: 2 minutes | Cooking Time: 3 minutes
Ingredients
– 1 slice of your favorite bread (I use whole wheat)
– A generous smear of almond butter (about 2 tablespoons)
– Half a ripe banana, sliced into coins
– A tiny drizzle of honey (about 1 teaspoon)
– A small pinch of sea salt
– An optional sprinkle of cinnamon (just a dash!)
Instructions
1. Pop your bread slice into the toaster and toast it until golden brown and crisp, which usually takes about 2-3 minutes on medium setting—keep an eye on it so it doesn’t burn!
2. While the bread is toasting, slice half a banana into thin coins; I find using a slightly overripe banana adds extra sweetness without needing more honey.
3. Once the toast is ready, immediately spread a thick layer of almond butter over it while it’s still warm; this helps the almond butter melt slightly for a creamier texture.
4. Arrange the banana slices evenly on top of the almond butter in a single layer.
5. Drizzle honey lightly over the bananas, using about 1 teaspoon—tip: warm the honey jar in hot water for a few seconds first to make it easier to pour.
6. Sprinkle a tiny pinch of sea salt over everything to enhance the flavors; trust me, this little step makes a big difference!
7. If you like, add a dash of cinnamon on top for a warm, cozy touch.
8. Serve immediately while the toast is still warm and crispy.
Unbelievably simple, this toast delivers a delightful mix of textures: the crunch of the bread, the creaminess of the almond butter, and the soft sweetness of the banana. For a fun twist, try adding a handful of granola on top for extra crunch, or swap the honey for maple syrup on chilly mornings—it’s endlessly customizable to whatever you’re craving!
Herb-Roasted Chicken with Sweet Potatoes
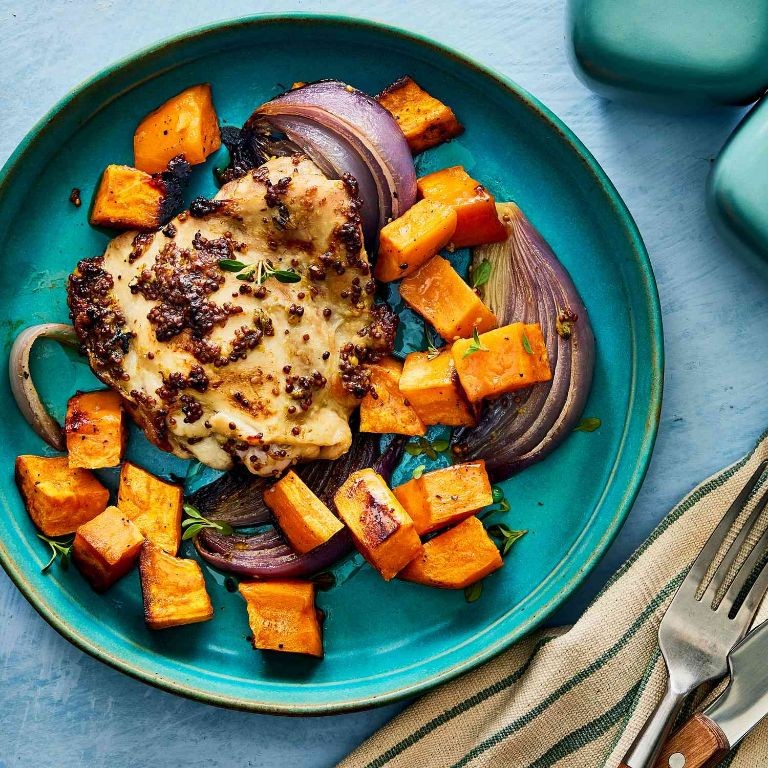
Remember those cozy Sunday dinners that make the whole house smell incredible? That’s exactly what this herb-roasted chicken with sweet potatoes brings to the table—a simple, one-pan wonder that feels like a warm hug. I love making this when I want something comforting but don’t want to fuss over multiple dishes; it’s become my go-to for lazy weekends or when friends drop by unexpectedly.
Serving: 4 | Pre Time: 15 minutes | Cooking Time: 60 minutes
Ingredients
– A whole chicken, about 4 pounds
– A couple of large sweet potatoes, peeled and cut into 1-inch chunks
– 3 tablespoons of olive oil
– 2 tablespoons of chopped fresh rosemary (or 1 tablespoon dried if that’s what you have on hand)
– 1 tablespoon of chopped fresh thyme
– 4 cloves of garlic, minced
– 1 teaspoon of salt
– ½ teaspoon of black pepper
– A splash of lemon juice (about 1 tablespoon)
Instructions
1. Preheat your oven to 425°F (218°C) to ensure it’s hot and ready for roasting.
2. Pat the chicken dry with paper towels—this helps the skin get crispy later.
3. In a small bowl, mix the olive oil, rosemary, thyme, minced garlic, salt, and pepper to create a herb paste.
4. Rub the herb paste all over the chicken, including under the skin for maximum flavor (tip: gently loosen the skin with your fingers first).
5. Place the sweet potato chunks in a large roasting pan and toss them with any leftover herb paste or a drizzle of olive oil.
6. Set the chicken on top of the sweet potatoes in the pan, breast-side up.
7. Roast in the preheated oven for 60 minutes, or until the chicken’s internal temperature reaches 165°F (74°C) when checked with a meat thermometer at the thickest part of the thigh (tip: avoid opening the oven too often to keep the heat steady).
8. Remove the pan from the oven and drizzle the lemon juice over the chicken and sweet potatoes.
9. Let the chicken rest for 10 minutes before carving to keep the juices locked in (tip: this resting time is key for tender meat).
10. Carve the chicken and serve it alongside the roasted sweet potatoes.
Perfectly golden and fragrant, this dish delivers juicy chicken with crispy skin and caramelized sweet potatoes that soak up all the herby goodness. I love pairing it with a simple green salad or even shredding the leftovers for tacos the next day—it’s versatile enough to shine in any meal.
Steamed Broccoli with Lemon and Garlic
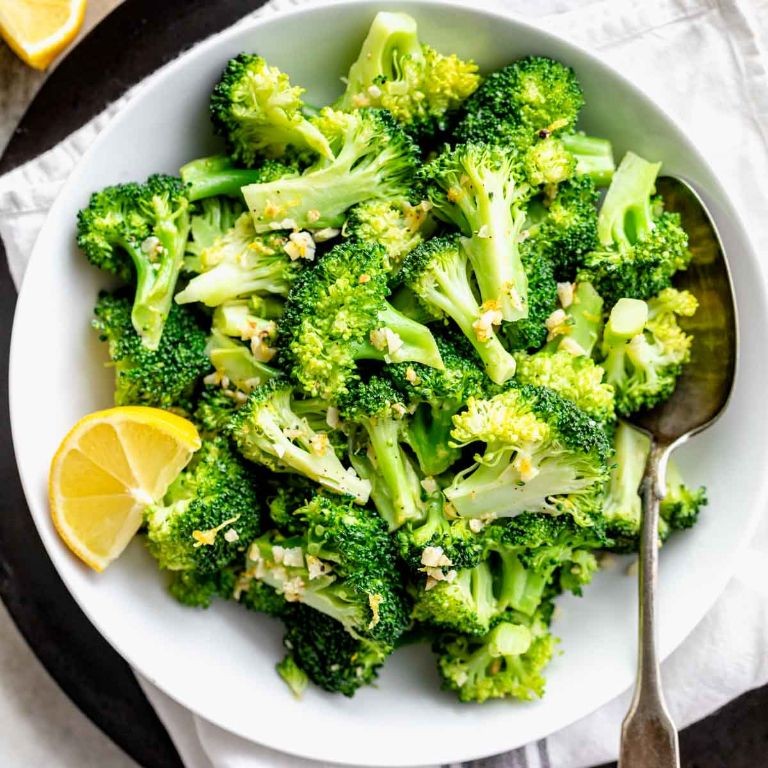
Every time I’m scrambling to pull together a healthy side dish that feels special but doesn’t keep me in the kitchen all night, I turn to this simple steamed broccoli with lemon and garlic. It’s my go-to for busy weeknights or when I need a bright, fresh counterpoint to a richer main. Honestly, I’ve made it so often I could probably do it with my eyes closed, but I still love how the lemon and garlic transform humble broccoli into something truly delicious.
Serving: 4 | Pre Time: 10 minutes | Cooking Time: 10 minutes
Ingredients
– A big head of fresh broccoli, cut into florets (about 4 cups worth)
– A couple of tablespoons of good olive oil
– 3 cloves of garlic, minced up nice and fine
– The juice from half a juicy lemon (save the other half for serving!)
– A generous pinch of kosher salt
– A few cracks of freshly ground black pepper
Instructions
1. Fill a large pot with about an inch of water and bring it to a rolling boil over high heat.
2. While the water heats, place your broccoli florets in a steamer basket that fits snugly inside the pot. Tip: Make sure the florets are roughly the same size so they cook evenly.
3. Once boiling, carefully set the steamer basket with broccoli into the pot and cover it tightly with a lid.
4. Steam the broccoli for exactly 5–6 minutes. You want it tender-crisp—pierce a floret with a fork; it should go in with just a little resistance.
5. While the broccoli steams, heat the olive oil in a small skillet over medium-low heat.
6. Add the minced garlic to the warm oil and cook for about 1 minute, stirring constantly, just until it becomes fragrant. Tip: Don’t let the garlic brown, or it’ll turn bitter.
7. Immediately remove the skillet from the heat and stir in the fresh lemon juice, kosher salt, and black pepper.
8. As soon as the broccoli is done, transfer it to a large serving bowl using tongs.
9. Pour the warm lemon-garlic dressing all over the hot broccoli and toss gently to coat every floret. Tip: Tossing while the broccoli is hot helps it absorb all the flavors beautifully.
10. Serve immediately.
Keeping it simple lets the natural sweetness of the broccoli shine through, while the garlic adds a savory depth and the lemon provides a bright, tangy zing that cuts through any richness. I love how the florets stay tender yet retain a satisfying bite. For a creative twist, try crumbling some feta over the top or serving it alongside grilled salmon for a complete, healthy meal.
Apple and Walnut Spinach Salad
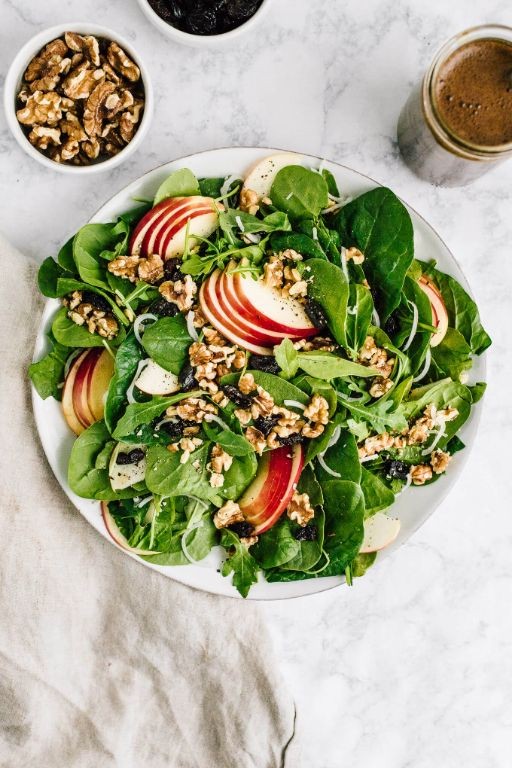
Ooh, the holiday season is in full swing, and I find myself craving something fresh and vibrant amidst all the rich treats. This Apple and Walnut Spinach Salad is my go-to for a quick, satisfying lunch that feels both indulgent and wholesome—it’s the perfect balance of sweet, crunchy, and savory that I can whip up even on my busiest days.
Serving: 4 | Pre Time: 15 minutes | Cooking Time: 0 minutes
Ingredients
– A big handful of fresh baby spinach leaves, about 6 cups loosely packed
– One crisp apple, cored and thinly sliced (I love Honeycrisp for its sweetness)
– A generous half-cup of walnut halves
– A couple of tablespoons of crumbled feta cheese
– For the dressing: a quarter-cup of olive oil, two tablespoons of apple cider vinegar, a teaspoon of honey, and a pinch of salt and pepper
Instructions
1. In a large salad bowl, gently toss the baby spinach leaves to separate them—this helps ensure every bite is evenly coated later. Tip: If your spinach seems a bit wilted, soak it in ice water for 5 minutes to crisp it up.
2. Add the thinly sliced apple to the bowl, arranging it over the spinach for a pretty presentation.
3. Toast the walnut halves in a dry skillet over medium heat for 3–5 minutes, stirring frequently until they’re fragrant and lightly golden. Tip: Keep an eye on them as they can burn quickly; remove from heat immediately once toasted.
4. Sprinkle the toasted walnuts and crumbled feta cheese evenly over the salad.
5. In a small jar or bowl, whisk together the olive oil, apple cider vinegar, honey, salt, and pepper until well combined. Tip: Taste the dressing before adding—if it’s too tart, add a bit more honey to balance it out.
6. Drizzle the dressing over the salad just before serving, tossing gently to coat all ingredients without crushing the spinach.
Just tossed together, this salad delivers a delightful crunch from the walnuts and apples against the tender spinach, with the tangy feta and sweet dressing tying it all together. I love serving it alongside grilled chicken for a heartier meal or packing it for a picnic—it’s surprisingly sturdy and doesn’t get soggy quickly!
Summary
Nourishing your body has never been easier with these 20 healthy, clean, and simple recipes. We hope you’re inspired to try them in your own kitchen! Please leave a comment below telling us which recipe is your favorite, and if you enjoyed this roundup, we’d be so grateful if you shared it on Pinterest. Happy cooking!


