Brimming with rich, velvety goodness, cocoa butter transforms everyday treats into luxurious indulgences. Whether you’re whipping up a silky dessert or a nourishing skincare treat, these 18 recipes showcase its incredible versatility. From decadent chocolates to soothing body butters, get ready to fall in love with this creamy ingredient. Let’s dive into these irresistible creations you’ll want to make again and again!
Homemade Cocoa Butter Body Butter

Homemade cocoa butter body butter is the ultimate winter skin savior—skip the store-bought stuff and whip up this rich, hydrating cream in minutes. Here’s how to make it.
Serving: 1 jar | Pre Time: 10 minutes | Cooking Time: 0 minutes
Ingredients
- 1/2 cup cocoa butter wafers (I love the ones that melt easily—they smell like chocolate heaven!)
- 1/4 cup coconut oil (extra-virgin is my go-to for that tropical scent)
- 1/4 cup sweet almond oil (this lightweight oil keeps it from feeling greasy)
- 10 drops vanilla essential oil (optional, but adds a cozy bakery vibe)
Instructions
- Place the cocoa butter wafers and coconut oil in a heatproof glass bowl.
- Create a double boiler by setting the bowl over a saucepan with 1 inch of simmering water on medium-low heat.
- Stir the mixture constantly with a silicone spatula for 5–7 minutes until fully melted and smooth—no lumps! Tip: Keep the heat low to avoid scorching the cocoa butter.
- Remove the bowl from the heat and let it cool at room temperature for 15 minutes until slightly thickened but still pourable.
- Add the sweet almond oil and vanilla essential oil to the bowl.
- Use a hand mixer on medium speed to whip the mixture for 3–5 minutes until it turns light, fluffy, and pale in color. Tip: Whip until soft peaks form for that luxurious body butter texture.
- Transfer the whipped body butter to a clean, airtight jar immediately. Tip: Store it in a cool, dark place to prevent separation—it’ll last up to 3 months.
Just whipped, this body butter is silky and melts into skin without residue. Use it right after a shower for deep hydration, or gift it in a cute jar with a ribbon—it’s perfect for dry elbows and cuticles too!
Cocoa Butter Lip Balm with Essential Oils

Skip the store-bought tubes and whip up this luxurious lip balm in your own kitchen. Seriously—it’s easier than you think, and you control every ingredient. Your lips will thank you with a silky, nourished feel all season long.
Serving: 6 tubes | Pre Time: 10 minutes | Cooking Time: 5 minutes
Ingredients
- 2 tablespoons cocoa butter wafers (I love the rich, chocolatey scent—it’s like dessert for your lips!)
- 1 tablespoon beeswax pellets (these give the balm its perfect firmness)
- 1 tablespoon coconut oil (extra-virgin is my go-to for maximum moisture)
- 10 drops peppermint essential oil (or swap in lavender for a calming vibe)
- 5 drops vitamin E oil (a little antioxidant boost to keep it fresh)
Instructions
- Gather all ingredients and set out 6 clean lip balm tubes or small tins.
- Place a heat-safe glass bowl over a saucepan with 1 inch of simmering water to create a double boiler—keep the water just below a boil to avoid scorching.
- Add the cocoa butter wafers, beeswax pellets, and coconut oil to the bowl.
- Stir gently with a silicone spatula until everything melts completely, about 3–4 minutes; the mixture should be smooth with no lumps.
- Remove the bowl from heat using oven mitts—tip: let it cool for 1 minute to prevent the essential oils from evaporating too quickly.
- Stir in the peppermint essential oil and vitamin E oil until fully blended.
- Carefully pour the mixture into the lip balm tubes, filling each to just below the rim.
- Let the balm sit at room temperature, undisturbed, for 30 minutes until fully set and firm to the touch.
- Screw on the caps once solid, and label with the date if storing.
Buttery smooth and subtly minty, this balm glides on without any greasy residue. Pack it in your purse, gift it to friends, or keep a tube by your bedside—it’s that versatile. The cocoa butter leaves a delicate sheen, making it perfect for a quick lip pick-me-up anytime.
Whipped Cocoa Butter Moisturizer
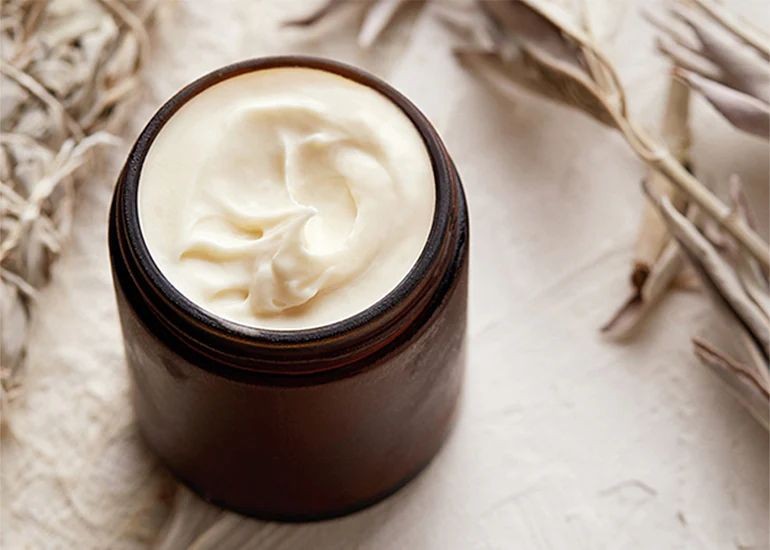
Banish dry skin forever with this whipped cocoa butter moisturizer that feels like a spa treatment in a jar. Blend three simple ingredients into a cloud-like cream that melts into your skin. Your winter skin will thank you instantly.
Serving: 1 jar | Pre Time: 5 minutes | Cooking Time: 10 minutes
Ingredients
– 1 cup raw cocoa butter wafers (I find these melt more evenly than blocks)
– ¼ cup fractionated coconut oil (this stays liquid at room temp—key for smooth texture)
– 10 drops lavender essential oil (my favorite for calming bedtime vibes)
Instructions
1. Place 1 cup raw cocoa butter wafers in a heatproof glass bowl.
2. Create a double boiler by setting the bowl over a saucepan with 2 inches of simmering water (tip: keep the water gently bubbling, not boiling, to prevent overheating).
3. Stir the cocoa butter constantly with a silicone spatula until fully melted, about 5–7 minutes—it should look clear and liquid.
4. Remove the bowl from heat and let it cool at room temperature for 3 minutes.
5. Add ¼ cup fractionated coconut oil to the melted cocoa butter and whisk to combine.
6. Place the mixture in the refrigerator for 15 minutes until it starts to solidify around the edges but is still soft in the center (tip: check at 10 minutes—you want a pudding-like consistency, not fully hard).
7. Transfer the partially set mixture to a stand mixer fitted with the whisk attachment.
8. Whip on medium-high speed for 4–5 minutes until light, fluffy, and doubled in volume (tip: scrape down the sides halfway through for even whipping).
9. Add 10 drops lavender essential oil during the last 30 seconds of whipping to incorporate evenly.
10. Scoop the whipped moisturizer into a clean, airtight glass jar.
Here’s the magic: this moisturizer whips into a silky, mousse-like texture that absorbs without greasiness. The cocoa butter delivers deep hydration with a subtle chocolatey scent, while the lavender adds a relaxing aroma—perfect for massaging into elbows and knees after a shower. Store it in a cool spot to maintain that fluffy consistency for weeks.
Cocoa Butter and Shea Butter Lotion Bars
You’re about to make the creamiest, most skin-loving bars you’ve ever touched. Forget sticky lotions—these solid bars melt on contact, leaving behind a silky, nourishing layer that feels like luxury. They’re the ultimate DIY gift or personal treat, and they couldn’t be easier to whip up.
Serving: 12 bars | Pre Time: 10 minutes | Cooking Time: 5 minutes
Ingredients
– 1 cup cocoa butter wafers (I love the rich chocolatey scent these give)
– 1 cup shea butter (go for unrefined—it has that lovely nutty aroma)
– 1/2 cup coconut oil (solid at room temp, it helps bind everything)
– 1/4 cup beeswax pellets (these are key for that solid bar texture)
– 20 drops lavender essential oil (optional, but it adds such a calming vibe)
Instructions
1. Place a heat-safe bowl over a pot of simmering water to create a double boiler—tip: keep the water level low so the bowl doesn’t touch it directly.
2. Add 1 cup cocoa butter wafers, 1 cup shea butter, 1/2 cup coconut oil, and 1/4 cup beeswax pellets to the bowl.
3. Stir the mixture continuously with a silicone spatula until everything melts completely, about 5 minutes—tip: don’t rush this; slow melting prevents separation.
4. Remove the bowl from the heat and let it cool for 2 minutes to avoid overheating the essential oil.
5. Stir in 20 drops lavender essential oil if using, mixing thoroughly to distribute the scent evenly.
6. Pour the liquid mixture into silicone molds or a lined baking dish—tip: use molds with fun shapes for gift-worthy bars.
7. Let the bars sit at room temperature for 1 hour until fully set and firm to the touch.
8. Pop the bars out of the molds and store them in an airtight container in a cool, dry place.
Unwrap one of these beauties and glide it over your skin—it transforms into a velvety, non-greasy layer that smells subtly of cocoa and lavender. Keep a bar in your bag for on-the-go hydration, or gift them in pretty tins for a handmade touch that everyone will adore.
Vegan Cocoa Butter Chocolate Truffles
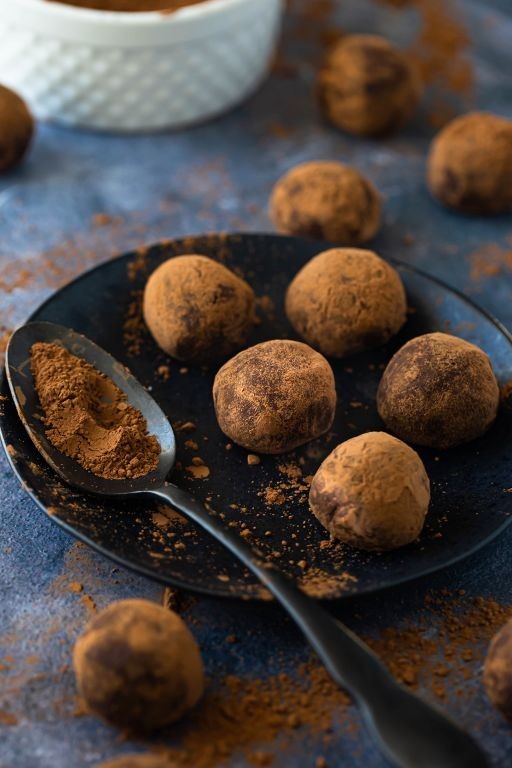
Ready to make the creamiest, dreamiest vegan chocolate truffles? These cocoa butter beauties are rich, melt-in-your-mouth, and shockingly simple. Serving: 24 truffles | Pre Time: 15 minutes | Cooking Time: 5 minutes
Ingredients
– 1 cup cocoa butter wafers (I find wafers melt more evenly than chunks)
– 1/2 cup full-fat coconut milk (shake the can well for that creamy fat)
– 1/3 cup pure maple syrup (the real stuff, not pancake syrup)
– 1 tsp pure vanilla extract (splurge on the good kind)
– 1/4 cup unsweetened cocoa powder, plus more for rolling
– A pinch of fine sea salt (it makes the chocolate flavor pop)
Instructions
1. Line a small baking sheet with parchment paper.
2. Place the cocoa butter wafers in a medium, heatproof bowl.
3. Pour the coconut milk into a small saucepan.
4. Heat the coconut milk over medium heat until it just begins to simmer, about 3-4 minutes. Tip: Don’t let it boil, or it might separate.
5. Immediately pour the hot coconut milk over the cocoa butter wafers.
6. Let the mixture sit, untouched, for 1 full minute to melt the wafers.
7. Whisk the mixture gently until completely smooth and glossy.
8. Whisk in the maple syrup, vanilla extract, and pinch of sea salt.
9. Sift the 1/4 cup of cocoa powder directly into the bowl. Tip: Sifting prevents lumps for a silky ganache.
10. Whisk vigorously until all the cocoa powder is incorporated and the mixture is thick and uniform.
11. Cover the bowl tightly with plastic wrap, pressing it directly onto the surface of the ganache.
12. Refrigerate the ganache for at least 2 hours, until it is very firm. Tip: You can leave it overnight for the easiest handling.
13. Scoop the firm ganache with a small cookie scoop or teaspoon to form 1-inch balls.
14. Roll each ball quickly between your palms to smooth it.
15. Roll each truffle in a shallow dish of additional cocoa powder to coat completely.
16. Place the finished truffles back on the parchment-lined tray.
17. Store the truffles in an airtight container in the refrigerator until ready to serve. Creamy, decadent, and with a perfect fudgy bite, these truffles are pure luxury. Chill them for a firm texture or let them sit out for 10 minutes for a softer, meltier experience—perfect with a shot of espresso.
Cocoa Butter Fudge with Nuts
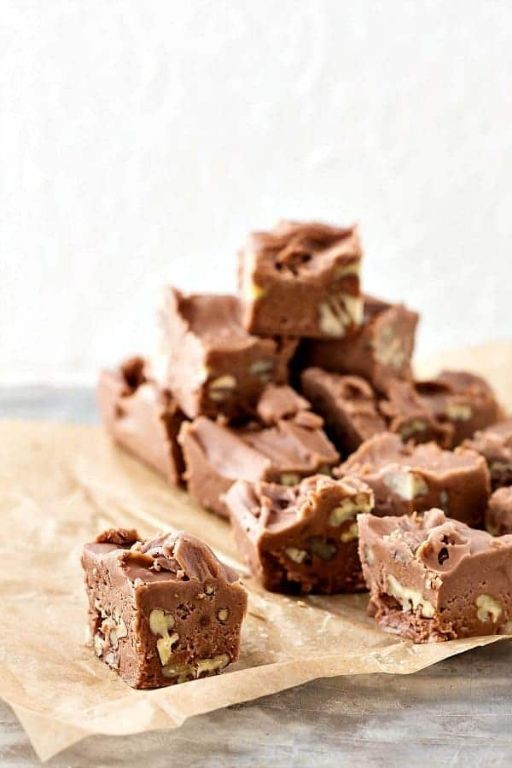
Hear that? That’s the sound of your sweet tooth doing a happy dance. This cocoa butter fudge is ridiculously smooth, packed with crunchy nuts, and comes together with minimal fuss—no candy thermometer needed. Let’s get to it.
Serving: 16 | Pre Time: 15 minutes | Cooking Time: 10 minutes
Ingredients
– 1 cup (200g) granulated sugar – I always use cane sugar for a cleaner sweetness.
– ½ cup (120ml) heavy cream – full-fat only, please; it makes the fudge extra creamy.
– ¼ cup (60g) cocoa butter, chopped – find it in the baking aisle, and chop it small for quick melting.
– ¼ cup (25g) unsweetened cocoa powder – I go for Dutch-processed for a deeper chocolate flavor.
– 1 tsp vanilla extract – pure vanilla is my non-negotiable here.
– ½ cup (60g) mixed nuts (like walnuts and almonds), roughly chopped – toast them first for maximum crunch.
– Pinch of salt – a flaky sea salt sprinkle at the end is magic.
Instructions
1. Line an 8×8-inch baking pan with parchment paper, letting it overhang the sides for easy removal later.
2. In a medium saucepan, combine 1 cup granulated sugar, ½ cup heavy cream, and a pinch of salt over medium heat.
3. Stir constantly with a wooden spoon until the sugar fully dissolves, about 3-4 minutes—no grains should remain.
4. Reduce heat to low and add ¼ cup chopped cocoa butter and ¼ cup unsweetened cocoa powder all at once.
5. Whisk vigorously until the mixture is completely smooth and the cocoa butter has melted, about 2 minutes. Tip: Keep the heat low to prevent scorching.
6. Remove the saucepan from the heat and stir in 1 tsp vanilla extract until well incorporated.
7. Fold in ½ cup roughly chopped mixed nuts using a spatula, ensuring they’re evenly distributed.
8. Immediately pour the fudge mixture into the prepared pan, spreading it into an even layer with the spatula.
9. Let the fudge cool at room temperature for 30 minutes, then refrigerate for at least 2 hours until firm. Tip: Don’t skip the fridge time—it sets the perfect texture.
10. Once set, lift the fudge out using the parchment overhang and cut it into 16 squares with a sharp knife. Tip: Wipe the knife clean between cuts for neat edges.
Ultra-creamy and studded with toasty nuts, this fudge melts luxuriously on the tongue with a rich cocoa hit. Serve it chilled for a firm bite, or let it sit out briefly to soften—either way, it’s a crowd-pleaser. Try crumbling it over vanilla ice cream for an instant dessert upgrade.
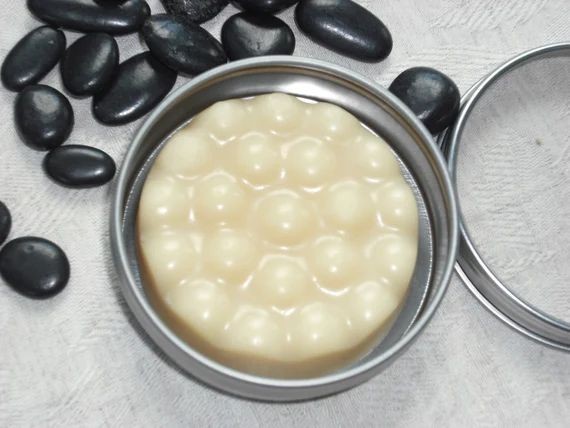
Cocoa Butter Meltaways Candy
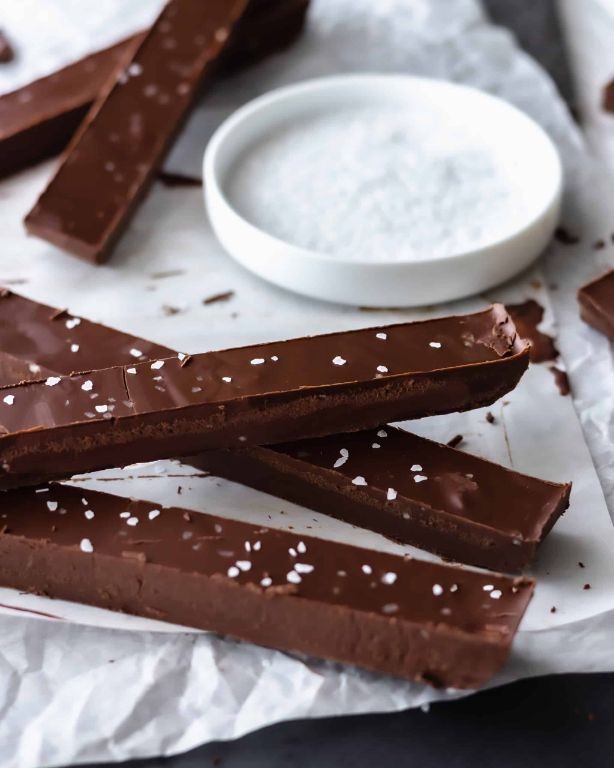
Zap your holiday stress with these Cocoa Butter Meltaways Candy—they’re creamy, dreamy, and disappear faster than you can say ‘dessert.’ Think silky-smooth chocolate meets buttery bliss, all wrapped in a bite-sized treat that’s perfect for gifting or gobbling up solo.
Serving: 24 pieces | Pre Time: 15 minutes | Cooking Time: 5 minutes
Ingredients
– 1 cup cocoa butter wafers (I grab these from the baking aisle—they melt like a dream)
– 1/2 cup powdered sugar (sift it first to avoid lumps, trust me)
– 1/4 cup heavy cream (full-fat is non-negotiable for that rich texture)
– 1 tsp pure vanilla extract (skip the imitation stuff for real flavor)
– Pinch of sea salt (a flaky Maldon salt elevates everything)
– Optional: 1/4 cup crushed peppermint candies for a festive twist (my kids love this addition)
Instructions
1. Line a mini muffin tin with 24 paper liners and set it aside on your counter.
2. Place the cocoa butter wafers in a heatproof bowl—I use a glass one for easy melting.
3. Create a double boiler: fill a saucepan with 1 inch of water and bring it to a simmer over medium heat, then set the bowl on top, ensuring it doesn’t touch the water.
4. Stir the wafers constantly with a silicone spatula until fully melted, about 3–4 minutes; tip: keep the heat low to prevent scorching.
5. Remove the bowl from the heat and let it cool for 1 minute—it should feel warm but not hot to the touch.
6. Whisk in the powdered sugar until smooth and no lumps remain, scraping the sides with the spatula.
7. Pour in the heavy cream and vanilla extract, then whisk vigorously for 30 seconds until glossy and combined.
8. Add the sea salt and optional crushed peppermint candies, folding gently with the spatula to distribute evenly.
9. Spoon the mixture into the prepared liners, filling each about 3/4 full; tip: work quickly before it starts to set.
10. Transfer the tin to the refrigerator and chill for at least 2 hours, or until firm to the touch—don’t rush this step!
11. Once set, pop the candies out of the liners and arrange them on a plate.
Fabulously smooth and decadent, these meltaways boast a velvety texture that literally dissolves on your tongue with a hint of vanilla warmth. Serve them chilled for a refreshing bite, or tuck them into cookie tins as edible holiday cheer—they’re so good, you might just hide a batch for yourself.
Cocoa Butter Hot Chocolate Mix
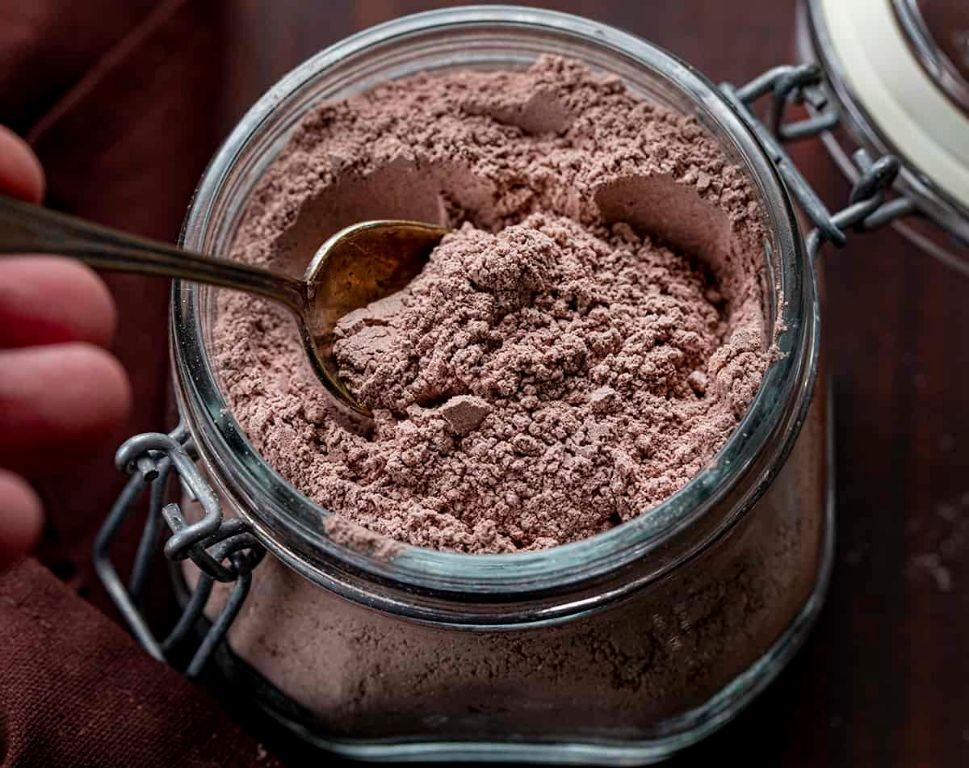
Banish boring hot chocolate forever—this cocoa butter version is a silky, decadent upgrade that feels like a warm hug. It’s the ultimate pantry staple for cozy nights, blending rich chocolate with a luxurious mouthfeel that store-bought mixes can’t touch.
Serving: 8 | Pre Time: 5 minutes | Cooking Time: 0 minutes
Ingredients
– 1 cup unsweetened cocoa powder (I use Dutch-processed for a deeper flavor)
– 1 cup granulated sugar (organic cane sugar adds a nice caramel note)
– 1/2 cup finely chopped cocoa butter (look for food-grade bars—they melt like a dream)
– 1/4 cup powdered milk (whole milk powder is my go-to for extra creaminess)
– 1 teaspoon vanilla bean powder (skip the extract here; the powder blends seamlessly)
– 1/4 teaspoon fine sea salt (a pinch balances the sweetness perfectly)
Instructions
1. Measure 1 cup unsweetened cocoa powder and 1 cup granulated sugar into a large mixing bowl.
2. Finely chop 1/2 cup cocoa butter into small pieces—this helps it blend evenly without clumping.
3. Add the chopped cocoa butter to the bowl with the cocoa powder and sugar.
4. Pour in 1/4 cup powdered milk and 1 teaspoon vanilla bean powder.
5. Sprinkle 1/4 teaspoon fine sea salt over the mixture.
6. Whisk all ingredients together vigorously for 2–3 minutes until fully combined and no lumps remain.
7. Transfer the mix to an airtight container, pressing it down gently to remove air pockets.
8. Store in a cool, dark place for up to 3 months—it won’t last that long, trust me!
Zesty with a velvety finish, this hot chocolate mix melts into steamed milk for a drink that’s both rich and smooth. Try it as a dip for fresh strawberries or dusted over whipped cream for an instant dessert upgrade—it’s the gift that keeps on giving.
Cocoa Butter and Coconut Oil Hair Mask

Just discovered the ultimate hair hack that’s blowing up my feed. Jump into this cocoa butter and coconut oil mask—your hair will thank you tomorrow.
Serving: 1 | Pre Time: 5 minutes | Cooking Time: 0 minutes
Ingredients
– 2 tablespoons cocoa butter (I grab the raw kind—it melts like a dream)
– 1 tablespoon coconut oil (extra virgin is my go-to for that tropical scent)
– 1 teaspoon honey (local raw honey adds a nice shine, trust me)
– 5 drops lavender essential oil (optional, but it’s my favorite for calming vibes)
Instructions
1. Measure 2 tablespoons of cocoa butter into a small microwave-safe bowl.
2. Add 1 tablespoon of coconut oil to the same bowl.
3. Microwave the mixture on high for 30 seconds, or until fully melted and smooth—tip: stir halfway to prevent hot spots.
4. Let the mixture cool for 2 minutes at room temperature.
5. Stir in 1 teaspoon of honey until fully incorporated.
6. Add 5 drops of lavender essential oil if using, and mix well—tip: this step is perfect for customizing with your favorite scent.
7. Apply the mask evenly to damp, towel-dried hair, focusing on the ends.
8. Cover your hair with a shower cap and leave it on for 30 minutes—tip: set a timer so you don’t forget!
9. Rinse thoroughly with warm water, then shampoo and condition as usual.
10. Pat your hair dry gently with a towel.
Yields silky-smooth strands with a subtle chocolatey aroma that lingers all day. Try it before a big event for that extra glossy finish, or mix in a dash of cinnamon for a festive twist during the holidays.
Cocoa Butter and Oatmeal Soothing Balm
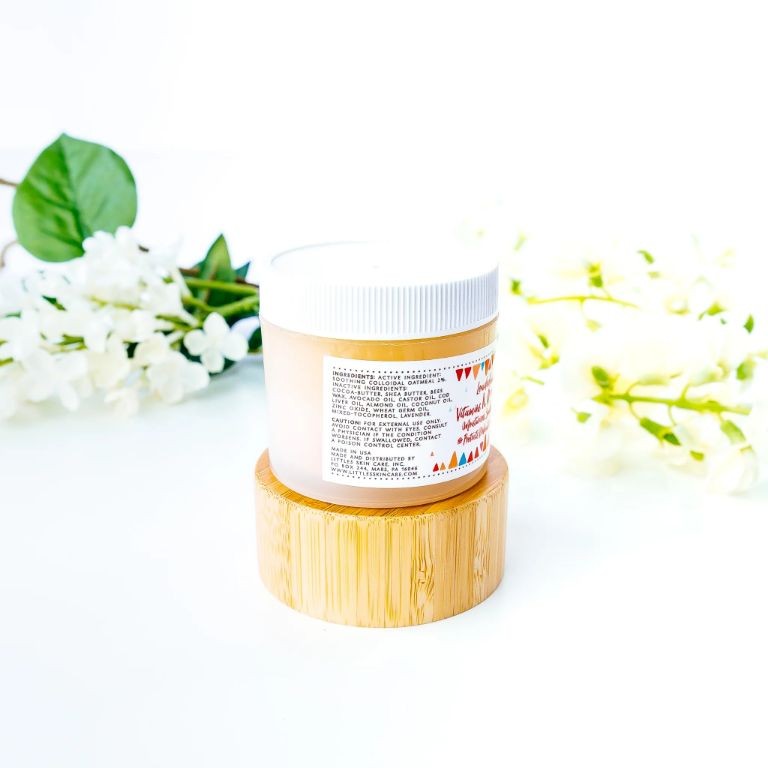
Melt away winter dryness with this ultra-nourishing balm. It’s a 3-ingredient wonder that transforms your skin in minutes—think of it as a spa treatment from your kitchen. Cocoa butter brings the hydration, oatmeal soothes irritation, and coconut oil locks it all in.
Serving: 1 jar | Pre Time: 5 minutes | Cooking Time: 10 minutes
Ingredients
– 1/2 cup cocoa butter wafers (I always use food-grade—it’s smoother and smells divine)
– 1/4 cup finely ground oatmeal (I pulse rolled oats in my blender for 30 seconds; it creates the perfect silky powder)
– 2 tbsp coconut oil (unrefined is my go-to for that tropical scent)
Instructions
1. Place the cocoa butter wafers and coconut oil in a heatproof glass bowl.
2. Create a double boiler by setting the bowl over a saucepan with 1 inch of simmering water (tip: keep the water at a gentle simmer, not a boil, to prevent overheating the ingredients).
3. Stir the mixture continuously with a silicone spatula until fully melted and combined, about 3–4 minutes.
4. Remove the bowl from the heat and let it cool for 2 minutes (tip: test the temperature by touching a drop to your wrist—it should feel warm, not hot).
5. Whisk in the ground oatmeal until no lumps remain and the mixture is smooth.
6. Pour the mixture into a clean 4-ounce glass jar.
7. Let the balm set at room temperature for 1 hour until firm (tip: avoid refrigerating, as it can cause separation).
8. Seal the jar with a lid and store in a cool, dark place.
Enjoy this balm’s rich, creamy texture that glides on without greasiness. It smells like a chocolate dream and works wonders on rough elbows or chapped lips—try swirling in a drop of lavender oil for a calming bedtime version.
Cocoa Butter Dipped Strawberries
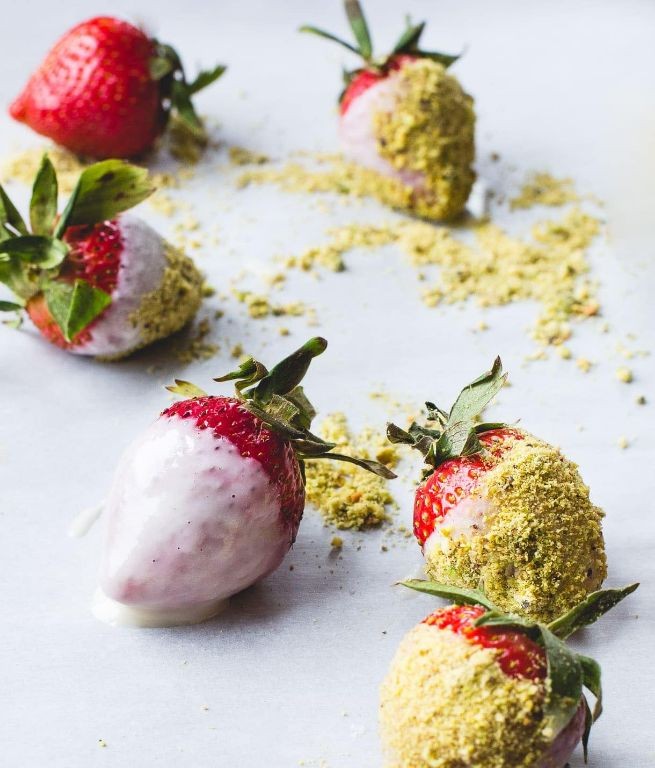
Skip the boring chocolate-dipped strawberries—these Cocoa Butter Dipped Strawberries are the glossy, sophisticated upgrade you didn’t know you needed. They’re ridiculously simple to make, look stunning on any dessert table, and deliver a smooth, rich flavor that’s way more interesting than plain chocolate. Trust me, once you try them, you’ll never go back.
Serving: 12 strawberries | Pre Time: 10 minutes | Cooking Time: 5 minutes
Ingredients
– 12 large fresh strawberries, washed and thoroughly dried—I pat them with a paper towel to avoid any water droplets, which can cause the coating to seize.
– 1 cup (about 200g) food-grade cocoa butter wafers, chopped for even melting—I find wafers melt more smoothly than blocks.
– 1 tbsp (15ml) refined coconut oil, which helps create a thin, glossy coating that sets perfectly.
– 1/4 tsp (1g) fine sea salt, my secret for balancing the sweetness and enhancing the cocoa flavor.
– Optional: 1 tsp (5g) vanilla extract for a subtle aromatic boost, but it’s totally fine to skip if you prefer pure cocoa.
Instructions
1. Line a baking sheet with parchment paper and set it aside—this prevents sticking and makes cleanup a breeze.
2. In a heatproof bowl, combine the chopped cocoa butter wafers and refined coconut oil.
3. Create a double boiler by placing the bowl over a saucepan of simmering water on medium-low heat, ensuring the bottom of the bowl doesn’t touch the water to avoid scorching.
4. Stir the mixture constantly with a silicone spatula until fully melted and smooth, about 3–4 minutes—it should look glossy and liquid with no lumps.
5. Remove the bowl from the heat and immediately stir in the fine sea salt and vanilla extract (if using) until well incorporated.
6. Let the mixture cool slightly for 1–2 minutes until it’s warm but not hot to the touch—this prevents the strawberries from wilting.
7. Hold a dried strawberry by the stem and dip it into the melted cocoa butter mixture, swirling to coat about two-thirds of the way up.
8. Lift the strawberry and gently shake off any excess coating over the bowl to avoid drips.
9. Place the dipped strawberry on the prepared parchment paper, repeating until all strawberries are coated.
10. Transfer the baking sheet to the refrigerator and chill for 15–20 minutes, or until the coating is firm and set—you can test by lightly touching it; it should feel hard and not sticky.
Perfectly set, these strawberries offer a crisp, delicate shell that gives way to juicy fruit inside. The cocoa butter adds a velvety richness without being overly sweet, making them ideal for pairing with a glass of sparkling wine or crumbling over ice cream for an extra-decadent treat.
Cocoa Butter Roasted Almonds
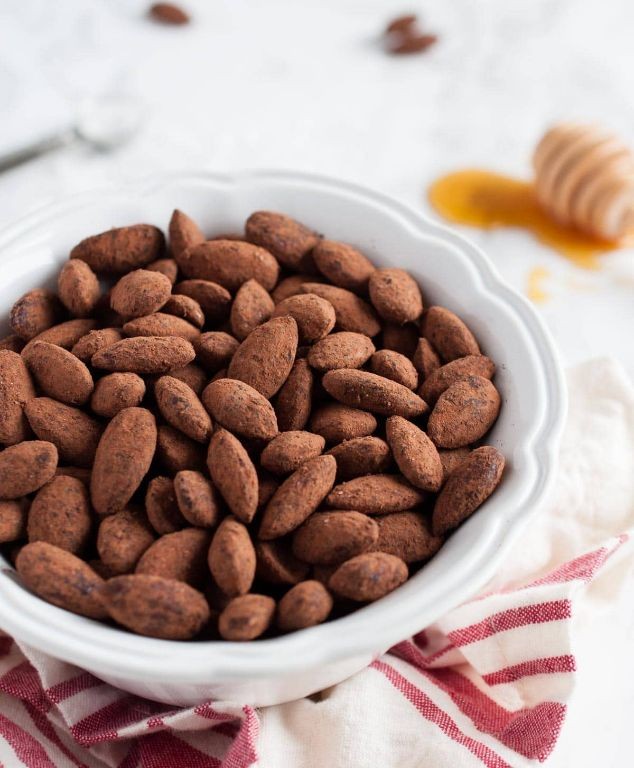
Satisfy that sweet-salty craving with these cocoa butter roasted almonds—they’re dangerously snackable, ridiculously easy, and ready in under 30 minutes.
Serving: 4 | Pre Time: 5 minutes | Cooking Time: 20 minutes
Ingredients
– 2 cups raw almonds (I always grab the whole ones for maximum crunch)
– 2 tbsp cocoa butter wafers (these melt like a dream compared to blocks)
– 1 tbsp granulated sugar (a little goes a long way for that subtle sweetness)
– 1/2 tsp fine sea salt (I swear by fine grain—it sticks better than coarse)
– 1/4 tsp ground cinnamon (my secret for a warm, cozy hint)
Instructions
1. Preheat your oven to 325°F and line a baking sheet with parchment paper.
2. Place the raw almonds in a single layer on the prepared baking sheet.
3. Roast the almonds in the preheated oven for 10 minutes to lightly toast them—this deepens their flavor.
4. While the almonds roast, melt the cocoa butter wafers in a microwave-safe bowl in 20-second bursts, stirring between each, until completely smooth.
5. Remove the almonds from the oven and immediately drizzle the melted cocoa butter over them, tossing quickly to coat evenly.
6. Sprinkle the granulated sugar, fine sea salt, and ground cinnamon over the almonds, tossing again until fully coated.
7. Return the almonds to the oven and roast for another 10 minutes at 325°F, stirring halfway through to prevent clumping.
8. Remove the almonds from the oven and let them cool completely on the baking sheet—they’ll crisp up as they cool, so don’t skip this!
9. Once cooled, break apart any clusters and transfer to an airtight container. They’re crunchy on the outside with a rich, buttery cocoa flavor that’s balanced by the salt and cinnamon. Toss them over yogurt, sprinkle on ice cream, or just grab a handful straight from the jar—they disappear fast!
Cocoa Butter Infused Coffee Creamer
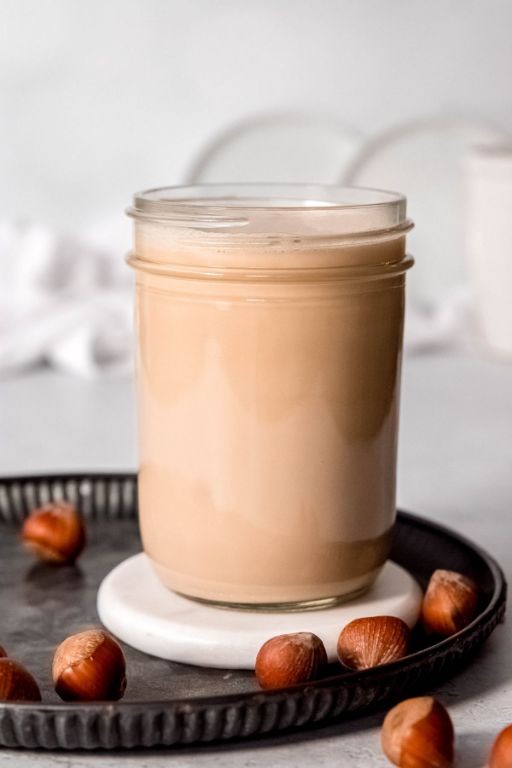
Pump up your morning routine with this decadent, homemade creamer. Forget the store-bought stuff—this cocoa butter-infused version is rich, smooth, and ridiculously easy to make. Your coffee will never be the same.
Serving: 16 | Pre Time: 5 minutes | Cooking Time: 10 minutes
Ingredients
– 1 cup heavy cream (I always use organic for the best flavor)
– 1 cup whole milk (2% works, but whole makes it extra creamy)
– 1/4 cup pure maple syrup (the real stuff—no pancake syrup here!)
– 2 tablespoons unsweetened cocoa powder (I prefer Dutch-processed for a deeper chocolate note)
– 1 ounce food-grade cocoa butter, chopped (find it in the baking aisle or online)
– 1 teaspoon pure vanilla extract (skip the imitation—it makes a difference)
– Pinch of fine sea salt (just a tiny bit to balance the sweetness)
Instructions
1. Combine 1 cup heavy cream, 1 cup whole milk, 1/4 cup pure maple syrup, 2 tablespoons unsweetened cocoa powder, and a pinch of fine sea salt in a small saucepan.
2. Place the saucepan over medium heat and whisk continuously until the mixture is smooth and just begins to steam, about 3-4 minutes. Tip: Whisking prevents the cocoa from clumping.
3. Add 1 ounce of chopped cocoa butter to the saucepan.
4. Reduce the heat to low and stir gently until the cocoa butter is completely melted and incorporated, about 2-3 minutes. Do not let it boil.
5. Remove the saucepan from the heat and stir in 1 teaspoon pure vanilla extract. Tip: Adding vanilla off the heat preserves its delicate flavor.
6. Let the mixture cool at room temperature for 5 minutes.
7. Pour the creamer through a fine-mesh strainer into a clean glass jar or bottle to catch any undissolved bits. Tip: Straining ensures a silky-smooth texture every time.
8. Seal the jar and refrigerate until completely chilled, at least 2 hours or overnight.
Chill it thoroughly for a thick, luxurious pour that transforms your daily brew. The cocoa butter adds a subtle, velvety mouthfeel, while the maple syrup lends a warm, caramel-like sweetness. Try it iced for a refreshing twist or blend it into a frothy latte for an extra-indulgent treat.
Cocoa Butter and Peppermint Foot Scrub
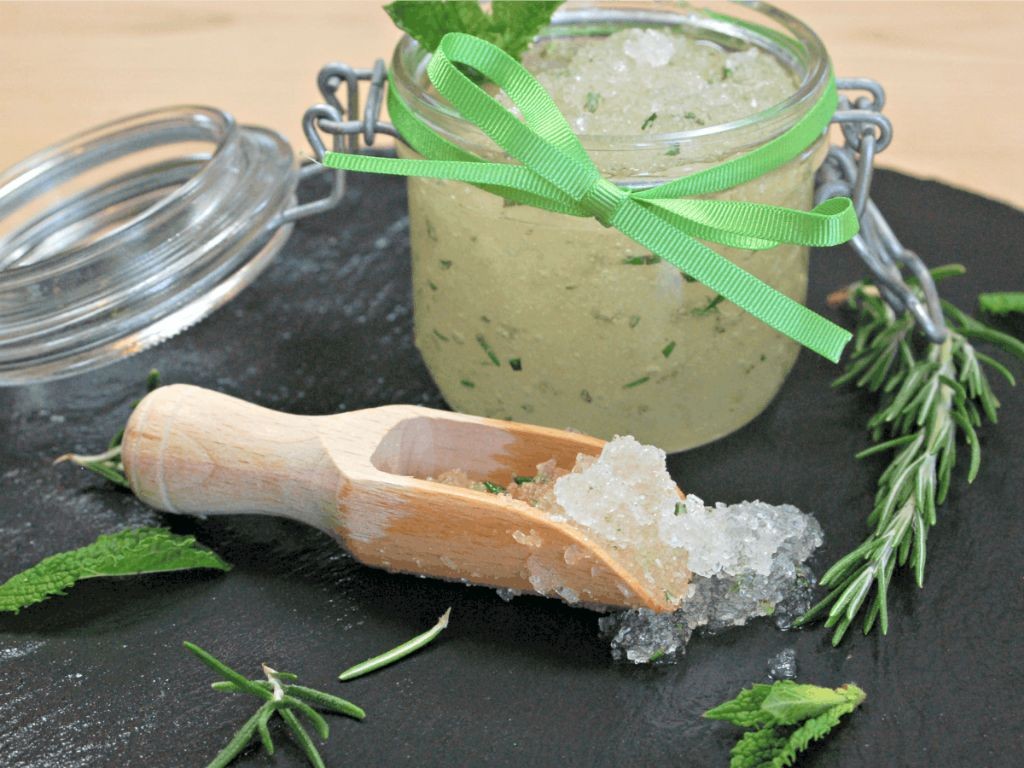
After a long day, your feet deserve a spa-level treat. This scrub combines rich cocoa butter with refreshing peppermint for a luxurious at-home pedicure that’s ridiculously easy to make.
Serving: 1 jar | Pre Time: 10 minutes | Cooking Time: 0 minutes
Ingredients
- 1/2 cup granulated sugar – I love how it gently buffs without being too harsh.
- 1/4 cup coconut oil, melted – extra virgin is my go-to for that tropical scent.
- 2 tbsp cocoa butter, grated – find it in the baking aisle; it smells like a chocolate bar!
- 1 tbsp coarse sea salt – the bigger crystals add amazing exfoliation.
- 10 drops peppermint essential oil – this gives that cool, tingly sensation I’m obsessed with.
Instructions
- Measure 1/2 cup granulated sugar into a medium mixing bowl.
- Add 1/4 cup melted coconut oil to the bowl. Tip: Melt it in 15-second bursts in the microwave to avoid overheating.
- Stir the sugar and oil together until fully combined, about 1 minute.
- Grate 2 tbsp cocoa butter directly into the mixture. Tip: Use a fine grater for easier blending.
- Mix in 1 tbsp coarse sea salt until evenly distributed.
- Add 10 drops peppermint essential oil and stir thoroughly. Tip: Start with 8 drops if you prefer a milder mint scent.
- Transfer the scrub to a clean, airtight jar, pressing it down gently to remove air pockets.
Velvety and aromatic, this scrub leaves skin incredibly soft with a lingering cocoa-mint fragrance. Store it in the shower for a quick pick-me-up, or gift it in a cute jar with a ribbon—it’s a homemade luxury everyone loves.
Cocoa Butter Pancakes with Chocolate Drizzle
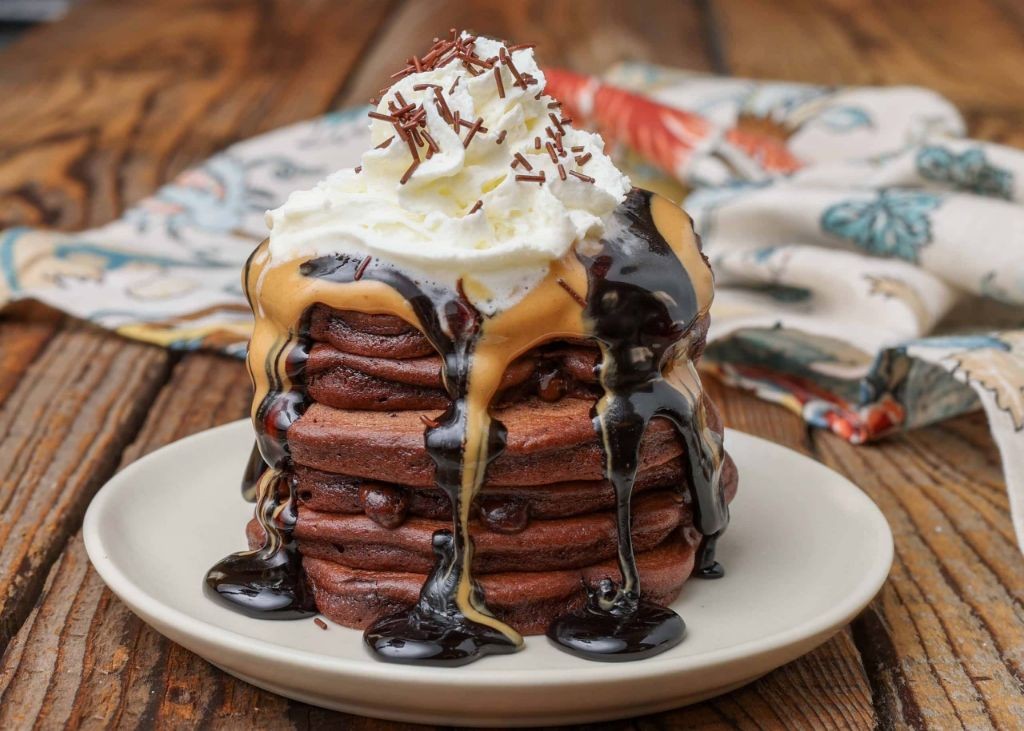
Satisfy your chocolate cravings with these decadent cocoa butter pancakes. They’re fluffy, rich, and drenched in a silky chocolate drizzle—perfect for a weekend treat or a dessert-for-breakfast moment. Trust me, you’ll want seconds.
Serving: 4 | Pre Time: 10 minutes | Cooking Time: 15 minutes
Ingredients
– 1 cup all-purpose flour (I always sift mine for extra fluffiness)
– 2 tbsp granulated sugar
– 2 tsp baking powder
– 1/4 tsp salt
– 1 cup whole milk (room temp works best for even mixing)
– 1 large egg (I prefer room temp eggs here to blend smoothly)
– 2 tbsp melted cocoa butter (this is the star—it adds a subtle chocolate aroma)
– 1 tsp vanilla extract
– 1/2 cup semi-sweet chocolate chips (for that gooey drizzle)
– 1 tbsp unsalted butter (for greasing the pan)
Instructions
1. In a large bowl, whisk together the all-purpose flour, granulated sugar, baking powder, and salt until fully combined.
2. In a separate medium bowl, whisk the whole milk, large egg, melted cocoa butter, and vanilla extract until smooth.
3. Pour the wet ingredients into the dry ingredients and stir gently until just combined—don’t overmix to keep the pancakes tender.
4. Heat a non-stick skillet or griddle over medium heat (about 350°F) and melt 1 tsp of the unsalted butter to coat the surface.
5. Pour 1/4 cup of batter onto the skillet for each pancake, cooking until bubbles form on the surface and edges look set, about 2-3 minutes.
6. Flip the pancakes and cook for another 1-2 minutes until golden brown and cooked through—press lightly to check for springiness.
7. Repeat with the remaining batter, adding more unsalted butter to the skillet as needed to prevent sticking.
8. While pancakes cook, melt the semi-sweet chocolate chips in a microwave-safe bowl in 30-second intervals, stirring between each, until smooth and pourable.
9. Stack the cooked pancakes on plates and drizzle generously with the melted chocolate.
Velvety and indulgent, these pancakes have a tender crumb from the cocoa butter and a rich chocolate finish. Serve them warm with a dollop of whipped cream or fresh berries for a colorful twist—they’re so good, you might skip the syrup altogether.
Cocoa Butter and Honey Face Mask
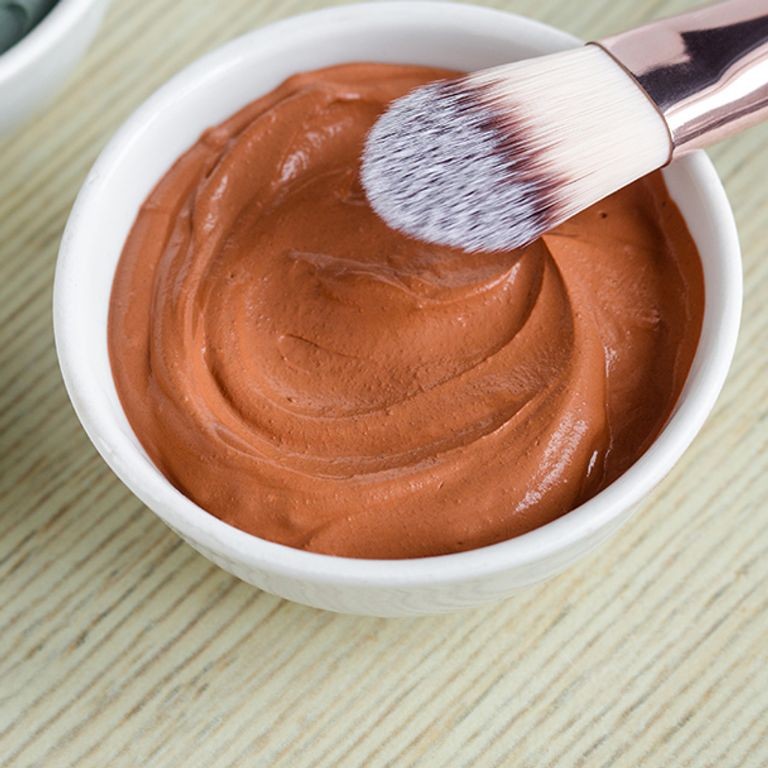
Just when you think your skincare routine needs a sweet upgrade, this cocoa butter and honey face mask delivers. Jump into this 3-ingredient DIY treatment that’s as luxurious as it is simple—your skin will thank you instantly.
Serving: 1 | Pre Time: 5 minutes | Cooking Time: 0 minutes
Ingredients
– 2 tablespoons raw cocoa butter (I always grab a high-quality bar and grate it myself for that ultra-smooth melt)
– 1 tablespoon raw honey (local honey is my go-to for its extra soothing properties)
– 1 teaspoon coconut oil (unrefined adds a subtle tropical scent I love)
Instructions
1. Grate 2 tablespoons of raw cocoa butter into a small, heat-safe bowl using a fine grater—this helps it melt evenly without clumps.
2. Place the bowl over a double boiler on medium heat, stirring constantly with a spoon until the cocoa butter is fully melted, about 2–3 minutes. Tip: Avoid direct heat to prevent burning the delicate cocoa butter.
3. Remove the bowl from the heat and immediately stir in 1 tablespoon of raw honey until it’s fully incorporated and the mixture is smooth.
4. Add 1 teaspoon of coconut oil to the bowl and whisk vigorously for 30 seconds to combine all ingredients into a creamy, uniform paste. Tip: Whisking while warm ensures no separation as it cools.
5. Let the mixture cool at room temperature for 5 minutes, then transfer it to a clean jar or container for storage. Tip: Store in a cool, dark place to maintain freshness for up to two weeks.
6. To use, apply a thin layer of the mask to clean, dry skin, avoiding the eye area, and leave it on for 15 minutes.
7. Rinse off thoroughly with lukewarm water and pat your face dry with a soft towel.
Notice how the mask sets into a velvety, non-drying layer that rinses clean without residue. It leaves skin feeling supple and lightly scented with cocoa—perfect for a solo pampering session or gifting in a cute jar with a handwritten note.
Cocoa Butter and Lavender Massage Candle
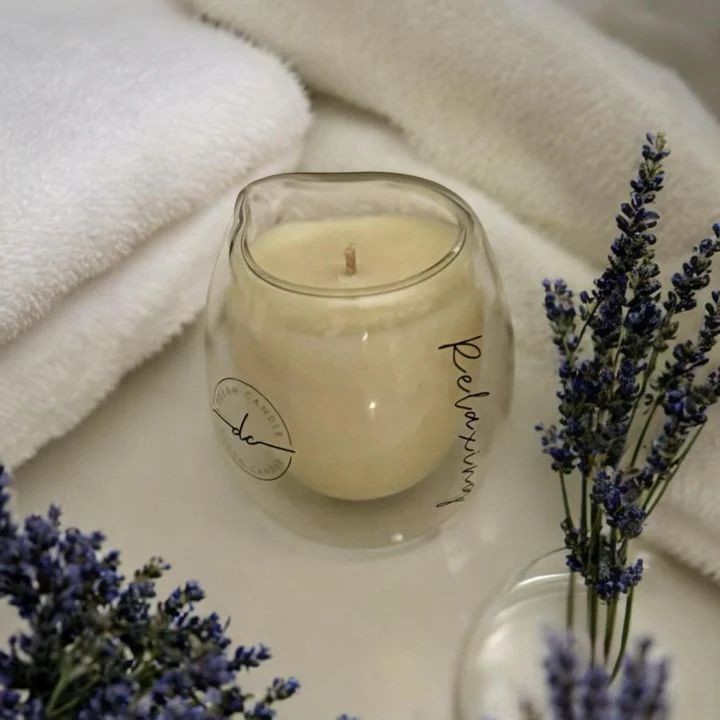
Venture beyond the kitchen with this sensual, edible experience that doubles as self-care. Melt away stress with a cocoa butter and lavender massage candle that’s as decadent to use as it is to make. Light it, let it pool, then massage the warm, fragrant oil into your skin—pure indulgence.
Serving: 1 candle | Pre Time: 10 minutes | Cooking Time: 15 minutes
Ingredients
- 1 cup food-grade cocoa butter wafers (I love the rich, chocolatey aroma—skip the blocks for easier melting)
- 1/4 cup coconut oil (extra-virgin is my go-to for its smooth texture)
- 15 drops lavender essential oil (therapeutic-grade ensures a calming scent)
- 1 cotton candle wick with a metal base (pre-tabbed wicks save so much hassle)
- 1 heat-safe glass jar, about 8 oz (I reuse pretty jam jars for a rustic touch)
Instructions
- Place the cocoa butter wafers and coconut oil in a double boiler over medium heat. Tip: If you don’t have a double boiler, set a heat-safe bowl over a pot of simmering water—this prevents scorching.
- Heat the mixture, stirring occasionally with a silicone spatula, until fully melted and smooth, about 5–7 minutes. The temperature should reach 120°F on a candy thermometer.
- Remove the double boiler from heat and let the mixture cool slightly for 2 minutes to avoid degrading the essential oil.
- Stir in the lavender essential oil until evenly incorporated. Tip: Add the oil off-heat to preserve its aromatic properties.
- Secure the candle wick to the bottom center of the glass jar using a dot of melted mixture or a wick sticker.
- Carefully pour the melted mixture into the jar, leaving about 1/2 inch of space at the top. Tip: Pour slowly to avoid dislodging the wick.
- Let the candle cool at room temperature, undisturbed, for 4–6 hours until completely solid and opaque.
- Trim the wick to 1/4 inch above the surface before first use.
Now, this candle yields a silky, velvety texture that melts at body temperature for a luxurious massage. Notice the subtle cocoa scent mingling with floral lavender—it’s soothing and subtly sweet. Get creative by gifting it in a decorative tin or pairing it with a cozy night in for ultimate relaxation.
Cocoa Butter Bath Bombs with Rose Petals
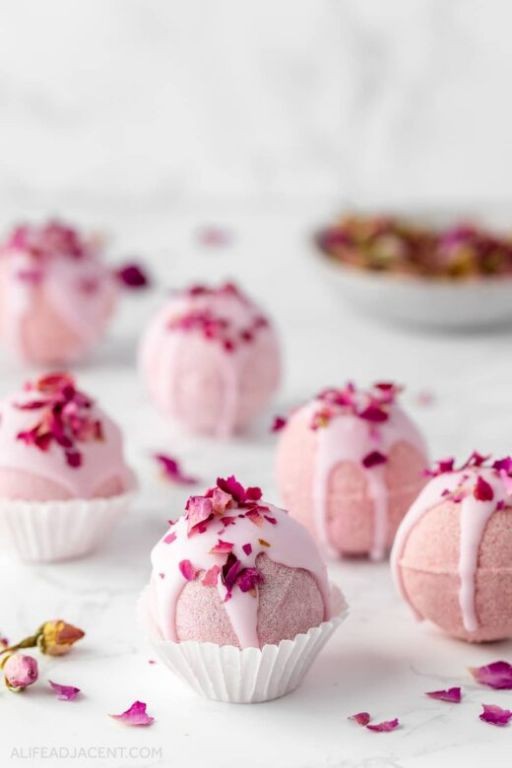
Viral-worthy self-care just dropped! Transform your bath into a chocolate-scented oasis with these cocoa butter bombs. Sprinkle rose petals for a touch of romance—your skin will thank you for the ultra-moisturizing treat.
Serving: 6 bath bombs | Pre Time: 15 minutes | Cooking Time: 0 minutes
Ingredients
– 1 cup baking soda (the fizzy base—don’t skip it!)
– ½ cup citric acid (find it in the canning aisle, it’s key for the fizz)
– ¼ cup cocoa butter, melted (I prefer food-grade for that rich chocolate aroma)
– 2 tbsp cornstarch (keeps everything smooth and clump-free)
– 1 tbsp dried rose petals (organic if you can—they look gorgeous peeking through)
– 10–15 drops rose essential oil (my go-to for a floral punch, adjust to your preference)
– Pink food coloring, optional (a few drops make them Instagram-pretty)
Instructions
1. Combine 1 cup baking soda, ½ cup citric acid, and 2 tbsp cornstarch in a large bowl. Tip: Whisk thoroughly to avoid lumps—this ensures even fizzing later.
2. Add 10–15 drops rose essential oil and a few drops of pink food coloring (if using) to the dry mixture. Stir until the color is uniform.
3. Slowly drizzle ¼ cup melted cocoa butter into the bowl while stirring constantly. Tip: Work quickly here—the mixture should feel like damp sand and hold together when squeezed.
4. Fold in 1 tbsp dried rose petals gently to distribute them evenly.
5. Pack the mixture firmly into bath bomb molds. Press hard to compact it—this prevents crumbling later.
6. Let the bombs dry in the molds at room temperature for 24 hours. Tip: Avoid humidity—a dry spot like a pantry works best for a solid finish.
7. Remove the bombs carefully from the molds once fully set.
Heavenly, right? These bombs melt into a silky, cocoa-infused bath that leaves skin butter-soft, with rose petals floating like confetti. Store them in an airtight jar to preserve the fragrance, or gift one to a friend for a spa-worthy moment—because self-care is always better shared.
Summary
Luscious cocoa butter recipes await! This roundup proves its versatility, from silky body butters to decadent desserts. We hope you find a new favorite to whip up in your kitchen. Give one a try, then let us know which you loved in the comments below. If you enjoyed this collection, please share it on Pinterest to spread the creamy, chocolatey joy!


