Envision a coffee experience that shatters the ordinary—a brew so profoundly smooth, so intensely flavorful, it feels like a revelation in a glass. This isn’t your average iced coffee; this is cold brew, a method that coaxes out deep chocolate notes, subtle nutty undertones, and a velvety body without a trace of bitterness. It’s the ultimate craft beverage for those who crave intensity without acidity, a liquid masterpiece you can master in your own kitchen.
Why This Recipe Works
- Low-and-Slow Extraction: Steeping coarse grounds in cold water for 12-24 hours gently pulls out rich, sweet flavors while leaving harsh acids and bitterness behind.
- Perfect Coffee-to-Water Ratio: Using 1 cup of coffee to 4 cups of water creates a potent concentrate that’s bold yet balanced, ideal for customizing strength.
- Coarse Grind is Key: A rough, chunky grind prevents over-extraction and sediment, ensuring a clean, crisp final brew.
- Chill Factor: The cold brewing process results in a coffee that’s inherently refreshing and less likely to become watered down when served over ice.
Ingredients
- 1 cup (approximately 85 grams) coarsely ground coffee beans (medium-dark roast recommended for deepest flavor)
- 4 cups (32 fluid ounces) cold, filtered water
- Ice cubes (for serving)
- Optional for serving: milk, cream, simple syrup, or flavored syrups
Equipment Needed
- Large glass jar or pitcher (at least 1.5-quart capacity)
- Fine-mesh sieve
- Cheesecloth or a nut milk bag
- Measuring cups
- Stirring spoon
- Airtight container for storage
Instructions
Step 1: Select and Grind Your Coffee Beans
Begin your journey by choosing high-quality, whole bean coffee—opt for a medium-dark or dark roast to unlock those profound, chocolatey depths and robust character. The bean’s origin story matters; single-origin beans from regions like Sumatra or Guatemala offer complex, earthy notes perfect for cold extraction. Now, grind those beans coarsely. You’re aiming for a texture reminiscent of rough sea salt, with distinct, chunky particles. This isn’t a fine espresso grind; a coarse grind is non-negotiable. It creates ample surface area for flavor extraction while preventing fine silt from muddying your brew. If you don’t own a grinder, purchase pre-ground coffee labeled specifically for cold brew. Tip: For the freshest, most aromatic results, grind your beans immediately before brewing to capture every volatile, flavorful compound.
Step 2: Combine Coffee and Water in Your Vessel
Take your large glass jar or pitcher—this is your brewing sanctuary. Pour in the full 1 cup of gloriously coarse coffee grounds. They should mound slightly, releasing a fragrant, earthy aroma that promises the richness to come. Slowly, deliberately, pour the 4 cups of cold, filtered water over the grounds. Use water that’s fresh and clean; avoid distilled water, as it can result in a flat taste. As you pour, watch the grounds bloom and darken, saturating completely. Once all water is added, take your stirring spoon and stir vigorously for a full 30 seconds. This ensures every coffee particle is fully immersed and wetted, kicking off an even, thorough extraction. The mixture will look like a dark, swirling storm cloud—this is the magic beginning.
Step 3: The Long, Flavor-Infusing Steep
This is where patience becomes your most powerful ingredient. Seal your jar tightly with its lid. Find a cool, dark spot on your countertop—away from direct sunlight or heat sources—and let it rest. The steeping time is critical: for a bright, vibrant concentrate, aim for 12 hours; for a deeper, more intense, and profoundly smooth elixir, push it to a full 24 hours. The room temperature should ideally be around 68–72°F. During this quiet revolution, time and temperature work in concert. Cold water gently coaxes out sugars, oils, and caffeine, while the prolonged contact builds incredible body and complexity. Do not disturb it; let the alchemy happen. Tip: If your kitchen is particularly warm, consider steeping in the refrigerator to slow extraction slightly and ensure food safety, though this may add an extra hour or two to your target time.
Step 4: Strain and Separate the Elixir
After your chosen steeping period—whether a brisk 12 or luxurious 24 hours—the moment of revelation arrives. Place your fine-mesh sieve over a large bowl or clean pitcher. Line the sieve with a double layer of cheesecloth or a nut milk bag; this is your filtration fortress. Slowly, carefully, pour the steeped mixture through this setup. You’ll witness a dark, aromatic liquid flowing through, leaving behind a thick, sludge-like bed of spent grounds. Allow it to drain completely—this may take a few minutes. For an even clearer, sediment-free brew, you can strain the liquid a second time through a fresh piece of cheesecloth. What remains in your bowl is pure, potent cold brew concentrate: inky black, fragrant, and shimmering with potential.
Step 5: Dilute, Serve, and Savor the Creation
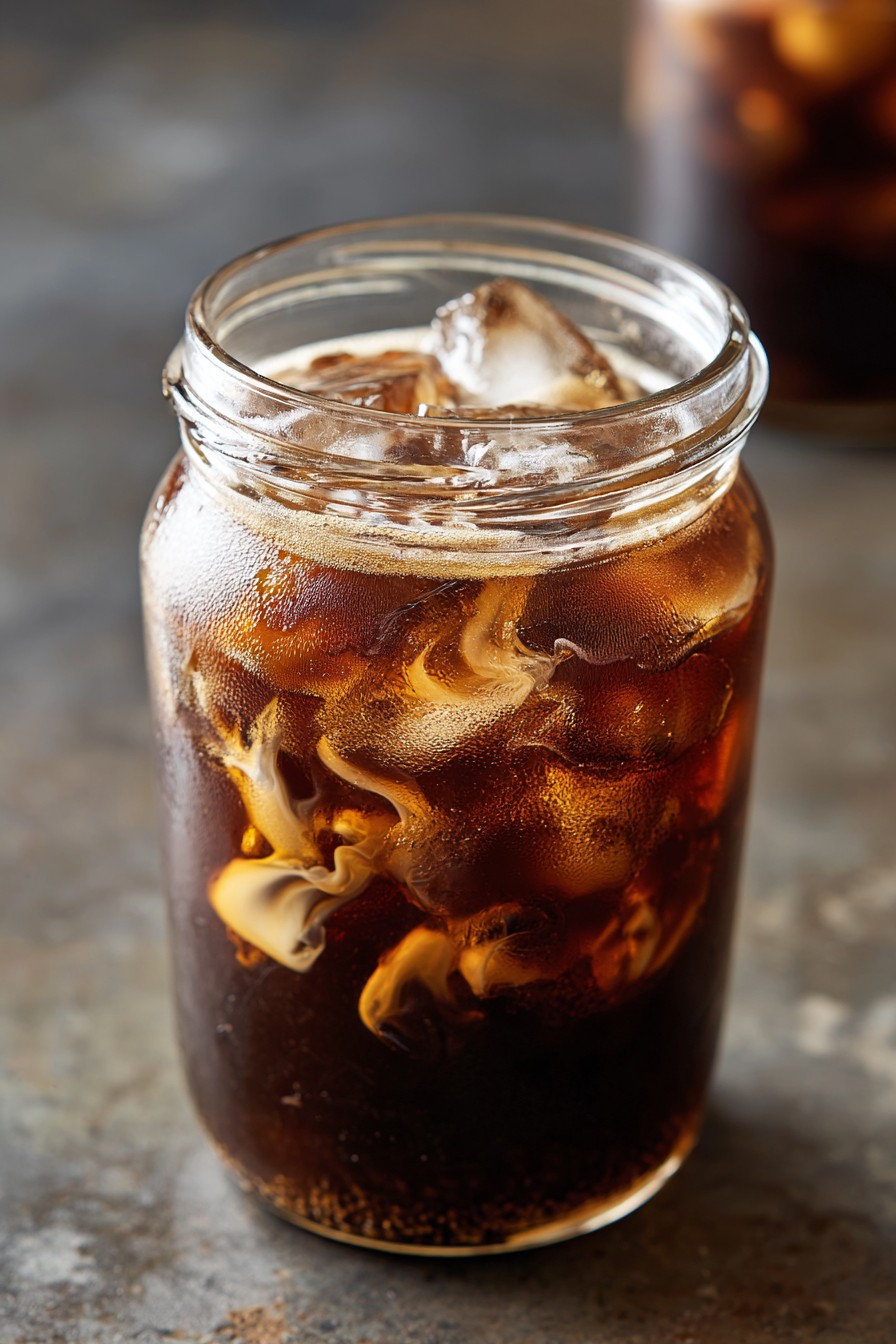
Your concentrate is powerful—meant to be tailored. For serving, the classic ratio is 1 part cold brew concentrate to 1 part water, milk, or cream over a glass full of fresh ice cubes. Fill a tall glass to the brim with ice, then pour in ½ cup of your concentrate. Add ½ cup of your chosen diluent—perhaps creamy oat milk for silkiness or sparkling water for effervescence. Stir gently to combine and chill. Taste immediately: you should experience a wave of smooth, bold coffee flavor, with low acidity and a clean finish. Tip: For an iced coffee that never gets diluted, make coffee ice cubes using some of your finished, diluted cold brew. They’ll chill your drink without watering down its intense character. Store any unused concentrate in an airtight container in the refrigerator, where it will keep its vibrant flavor for up to two weeks, ready to transform any moment.
Tips and Tricks
Elevate your cold brew from great to extraordinary with these pro insights. First, consider a “bloom” with a splash of hot water: before adding all the cold water, pour just ½ cup of hot water (around 200°F) over the grounds, stir for 30 seconds, then add the remaining cold water. This can help release more aromatic compounds initially. Second, for storage, use a glass container with a tight-sealing lid; plastic can sometimes impart flavors over time. Label your container with the brew date so you can track freshness. Third, if you find your concentrate too strong even after dilution, adjust your initial coffee-to-water ratio next time—try 1 cup coffee to 4.5 cups water for a slightly milder base. Finally, don’t discard the spent grounds! They make excellent garden compost or a natural deodorizer for your refrigerator.
Recipe Variations
- Spiced Cinnamon-Vanilla Cold Brew: Add 2 broken cinnamon sticks and 1 split vanilla bean (or 2 teaspoons vanilla extract) to the grounds before steeping for a warm, aromatic twist.
- Cocoa-Nib Infusion: Mix in ¼ cup of roasted cacao nibs with your coffee grounds for a deep, chocolate-forward brew that’s decadent without sweetness.
- Citrus-Zested Brightness: Add the zest of one orange or two lemons (using a vegetable peeler to get large strips) to the jar for a refreshing, bright top note.
- Coconut Water Base: Replace half of the filtered water with pure, unsweetened coconut water for a naturally sweet, tropical-tinged concentrate.
- Smoky Maple Bourbon Cold Brew (for adults): For serving, add 1 ounce of bourbon and ½ ounce of maple syrup to a glass of diluted cold brew over ice; garnish with an orange twist.
Frequently Asked Questions
Q: Can I use pre-ground coffee from the store?
A: Absolutely, but ensure it’s labeled for cold brew or has a coarse grind. Pre-ground for drip coffee is often too fine and can make your brew bitter and cloudy. For best flavor, grind fresh or buy from a roaster who offers a dedicated cold brew grind.
Q: How long does homemade cold brew concentrate last in the fridge?
A: When stored in a completely airtight container, your concentrate will maintain peak flavor for about 10-14 days. After that, it may lose some vibrancy but is still safe to drink. Always give it a quick sniff and taste before using.
Q: Why is my cold brew coming out weak or sour?
A: Weak brew often means your coffee-to-water ratio is off, your grind is too coarse, or your steep time was too short. A sour taste typically indicates under-extraction—try steeping for a longer period (closer to 24 hours) or using a slightly finer (but still coarse) grind.
Q: Do I have to dilute the concentrate, or can I drink it straight?
A: You can drink it straight over ice, but be warned—it’s incredibly potent and high in caffeine. Most people prefer diluting it with water or milk to balance the intensity and make it more palatable. Start with a 1:1 ratio and adjust to your taste.
Q: Is cold brew less acidic than hot coffee?
A: Yes, significantly. The cold brewing process extracts fewer acidic compounds, resulting in a smoother, gentler brew on the stomach. It’s often a great option for those who find hot-brewed coffee too acidic or harsh.
Summary
Mastering cold brew unlocks a world of smooth, intense coffee flavor—a customizable concentrate born from coarse grounds, cold water, and patient steeping, perfect for crafting refreshing, bold beverages anytime.
Cold Brew Coffee
8
servings10
minutesIngredients
Instructions
- 1 Combine 1 cup coarsely ground coffee and 4 cups cold, filtered water in a large jar.
- 2 Stir vigorously for 30 seconds to ensure all grounds are saturated.
- 3 Cover and steep at room temperature for 12-24 hours.
- 4 Strain through a fine-mesh sieve lined with cheesecloth into a clean container.
- 5 To serve, dilute concentrate with equal parts water or milk over ice. Store leftover concentrate in the refrigerator for up to 2 weeks.