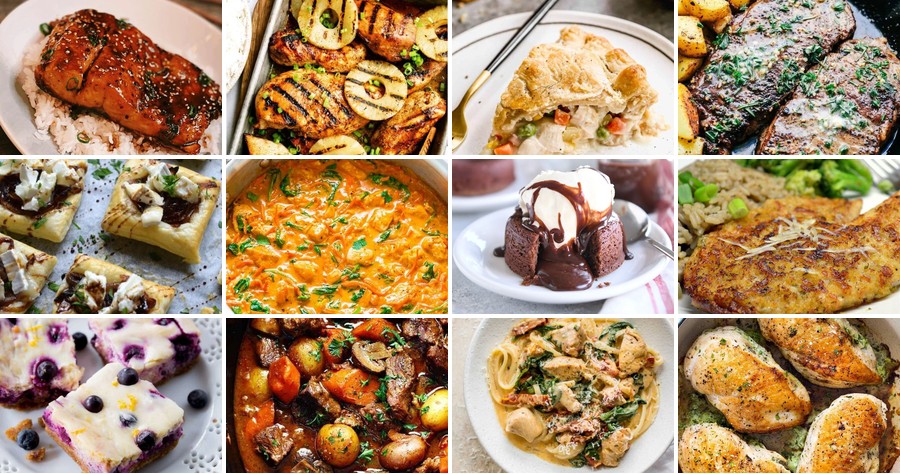
Oh, the joy of cooking! Whether you’re whipping up a quick weeknight dinner, celebrating with seasonal favorites, or craving some cozy comfort food, we’ve got you covered. Dive into these 20 amazing, delicious recipes perfect for every occasion—they’re sure to inspire your next kitchen adventure. Let’s get cooking!
Garlic Butter Herb Steak
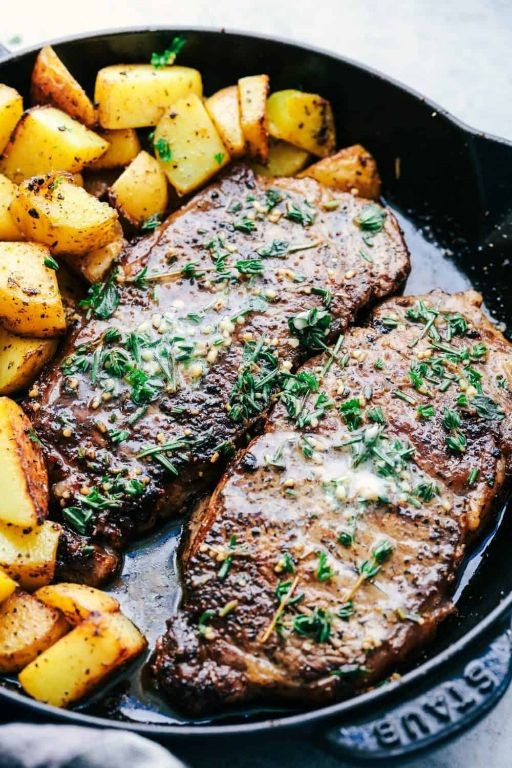
A sizzling skillet, a cloud of garlicky perfume, and a steak so juicy it’ll make you forget takeout exists. This Garlic Butter Herb Steak is your weeknight hero, transforming basic ingredients into a restaurant-worthy plate in minutes. Get ready to sear, baste, and devour.
Serving: 2 | Pre Time: 10 minutes | Cooking Time: 15 minutes
Ingredients
– A couple of 1-inch thick ribeye or strip steaks (about 12 oz each)
– A generous sprinkle of kosher salt and freshly cracked black pepper
– 2 tablespoons of high-smoke-point oil (like avocado or grapeseed)
– 4 tablespoons of unsalted butter
– 4 cloves of garlic, smashed
– A few sprigs of fresh thyme and rosemary
– A splash of beef broth or dry white wine (about ¼ cup)
Instructions
1. Pat your steaks completely dry with paper towels—this is key for a perfect sear.
2. Season both sides of the steaks liberally with kosher salt and black pepper.
3. Heat a large cast-iron or heavy skillet over medium-high heat for 2 full minutes until very hot.
4. Add the 2 tablespoons of high-smoke-point oil to the hot skillet and swirl to coat.
5. Carefully place the steaks in the skillet and sear undisturbed for 4-5 minutes to form a deep brown crust.
6. Flip the steaks using tongs and cook for another 3-4 minutes for medium-rare (135°F internal temperature).
7. Reduce the heat to medium-low and push the steaks to one side of the skillet.
8. Add the 4 tablespoons of unsalted butter, 4 smashed garlic cloves, and the fresh thyme and rosemary sprigs to the empty side.
9. Tilt the skillet slightly and, using a spoon, continuously baste the steaks with the foaming garlic butter for 1-2 minutes.
10. Transfer the steaks to a cutting board and let them rest for 5 full minutes—don’t skip this, it keeps the juices inside.
11. Return the skillet to medium heat and pour in the ¼ cup of beef broth or white wine, scraping up any browned bits from the bottom.
12. Simmer the sauce for 1-2 minutes until slightly reduced, then remove from heat.
13. Slice the rested steaks against the grain and drizzle with the pan sauce.
Resting transforms the steak, giving you a melt-in-your-mouth texture with a crisp, herby crust. The garlic butter sauce is liquid gold—toss it with roasted potatoes or drizzle over creamy mashed potatoes. This dish turns an ordinary Tuesday into a date-night feast without the fuss.
Creamy Tuscan Chicken Pasta
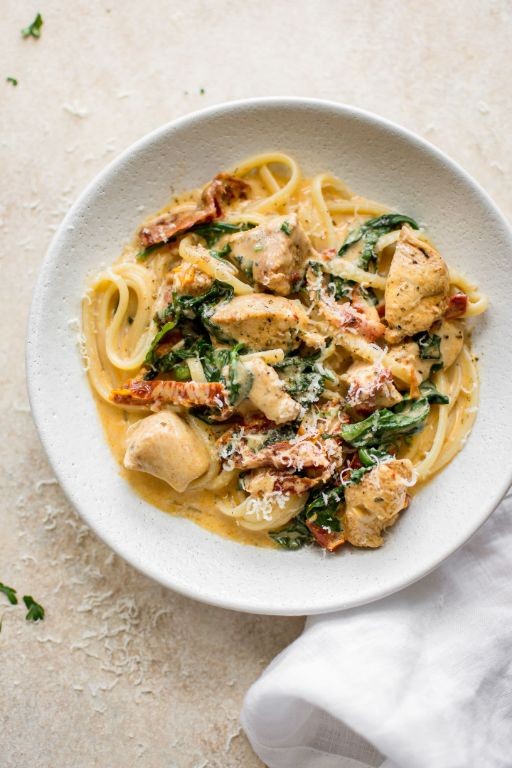
Every weeknight dinner just got a major glow-up. This Creamy Tuscan Chicken Pasta is your new 30-minute hero—packed with sun-dried tomatoes, spinach, and a garlicky parmesan cream sauce that clings to every noodle. Forget takeout; this one-pan wonder is pure comfort with a fancy twist.
Serving: 4 | Pre Time: 10 minutes | Cooking Time: 20 minutes
Ingredients
– 1 lb of boneless, skinless chicken breasts, cut into bite-sized chunks
– 8 oz of your favorite pasta (like penne or fettuccine)
– 2 tbsp of olive oil
– 3 cloves of garlic, minced
– 1 cup of heavy cream
– 1/2 cup of grated parmesan cheese
– A big handful of fresh spinach
– 1/2 cup of sun-dried tomatoes, chopped (the oil-packed kind adds extra flavor!)
– A splash of chicken broth (about 1/4 cup)
– Salt and pepper to season
Instructions
1. Bring a large pot of salted water to a boil and cook the pasta according to package directions until al dente, then drain and set aside. Tip: Reserve a little pasta water to thin the sauce later if needed.
2. While the pasta cooks, heat 1 tbsp of olive oil in a large skillet over medium-high heat.
3. Season the chicken chunks with salt and pepper, then add them to the skillet. Cook for 5-7 minutes, turning occasionally, until golden brown and cooked through. Remove the chicken from the skillet and set aside.
4. In the same skillet, add the remaining 1 tbsp of olive oil and reduce the heat to medium.
5. Add the minced garlic and sauté for about 1 minute, until fragrant but not browned. Tip: Keep the heat medium to avoid burning the garlic.
6. Pour in the heavy cream and chicken broth, stirring to combine. Let it simmer gently for 2-3 minutes until slightly thickened.
7. Stir in the grated parmesan cheese until melted and smooth.
8. Add the chopped sun-dried tomatoes and fresh spinach to the sauce, cooking for another 2 minutes until the spinach wilts.
9. Return the cooked chicken and drained pasta to the skillet, tossing everything together until well coated. Tip: If the sauce seems too thick, add a splash of the reserved pasta water to loosen it up.
10. Cook for an additional 1-2 minutes to heat through, then remove from heat.
Let this dish shine with its velvety sauce that hugs each pasta strand, offering a rich, savory flavor from the parmesan and a sweet-tangy kick from the sun-dried tomatoes. Serve it straight from the skillet for a cozy family meal, or garnish with extra parmesan and fresh basil for an Instagram-worthy plate.
Cheesy Bacon Stuffed Mushrooms

You need these cheesy bacon stuffed mushrooms in your life. They’re the ultimate party bite—savory, creamy, and impossible to stop eating.
Serving: 4 | Pre Time: 15 minutes | Cooking Time: 25 minutes
Ingredients
– 16 large white mushrooms, stems removed
– 6 slices of bacon, cooked crispy and crumbled
– 1 cup of shredded sharp cheddar cheese
– 4 ounces of cream cheese, softened
– 1/4 cup of finely chopped onion
– 2 cloves of garlic, minced
– A couple of tablespoons of chopped fresh parsley
– A splash of olive oil
– A pinch of salt and black pepper
Instructions
1. Preheat your oven to 375°F and line a baking sheet with parchment paper.
2. Gently wipe the mushroom caps clean with a damp paper towel—don’t rinse them, as they’ll soak up water.
3. In a medium bowl, combine the crumbled bacon, cheddar cheese, cream cheese, onion, garlic, parsley, salt, and pepper. Mix until fully blended.
4. Drizzle the mushroom caps with olive oil and season lightly with salt and pepper.
5. Spoon the cheese-bacon filling generously into each mushroom cap, mounding it slightly.
6. Arrange the stuffed mushrooms on the prepared baking sheet, spacing them about an inch apart.
7. Bake for 20-25 minutes, until the mushrooms are tender and the filling is golden and bubbly. Tip: For extra crispiness, broil for the last 2-3 minutes, watching closely to avoid burning.
8. Let the mushrooms cool for 5 minutes on the sheet before serving—they’ll be piping hot!
9. Garnish with extra parsley if desired.
Oozing with melted cheese and smoky bacon, these mushrooms deliver a satisfying crunch with every bite. Serve them warm straight from the oven, or get creative by drizzling with a balsamic glaze for a sweet-tangy twist.
Lemon Garlic Shrimp Scampi
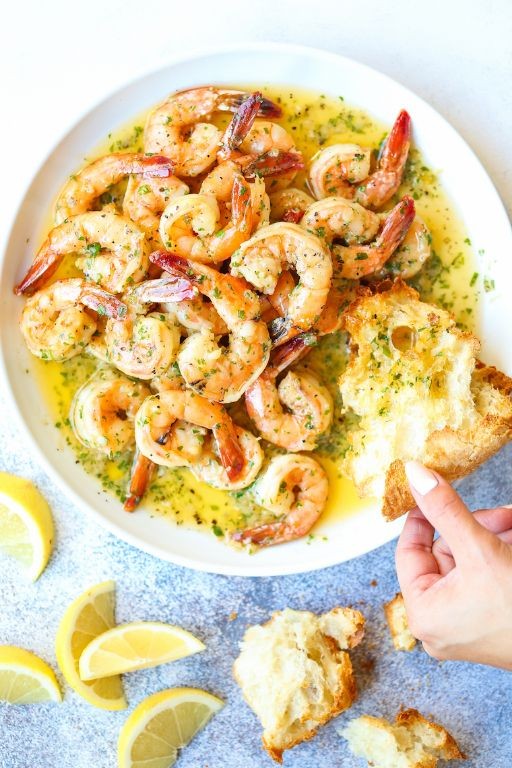
Get ready to ditch takeout—this lemon garlic shrimp scampi is your new 20-minute hero. Grab a skillet and let’s make magic happen.
Serving: 4 | Pre Time: 10 minutes | Cooking Time: 10 minutes
Ingredients
– 1 pound of large raw shrimp, peeled and deveined (tails on for looks!)
– 4 tablespoons of unsalted butter
– 4 cloves of garlic, minced
– A splash of dry white wine (about ¼ cup)
– Juice from 1 lemon (around 3 tablespoons)
– A couple of tablespoons of fresh parsley, chopped
– 8 ounces of linguine pasta
– Salt and freshly ground black pepper
– A pinch of red pepper flakes (optional, for a kick)
Instructions
1. Bring a large pot of salted water to a rolling boil over high heat.
2. Add the linguine and cook according to package directions until al dente, about 8–10 minutes, then drain and set aside. Tip: Reserve ½ cup of pasta water before draining—it helps create a silky sauce later.
3. While the pasta cooks, pat the shrimp completely dry with paper towels to ensure a good sear.
4. Heat a large skillet over medium-high heat and melt 2 tablespoons of butter.
5. Add the shrimp in a single layer and cook for 1–2 minutes per side until pink and opaque, then transfer to a plate.
6. Reduce the heat to medium and melt the remaining 2 tablespoons of butter in the same skillet.
7. Add the minced garlic and red pepper flakes (if using), and sauté for 30 seconds until fragrant but not browned.
8. Pour in the white wine and lemon juice, scraping up any browned bits from the bottom of the pan.
9. Let the sauce simmer for 2–3 minutes until slightly reduced.
10. Return the cooked shrimp to the skillet and toss to coat in the sauce.
11. Add the drained linguine and a splash of the reserved pasta water, tossing everything together until the pasta is well-coated. Tip: The starch in the pasta water helps the sauce cling beautifully.
12. Season with salt and black pepper to taste, then stir in the chopped parsley. Tip: Finish with an extra squeeze of lemon right before serving for a bright, fresh pop.
13. Plate immediately while hot.
Perfectly al dente pasta cradles plump, garlicky shrimp in a buttery, lemon-kissed sauce that’s light yet indulgent. Serve it straight from the skillet with crusty bread to soak up every last drop, or toss in a handful of cherry tomatoes for a colorful twist.
Baked Parmesan Crusted Tilapia
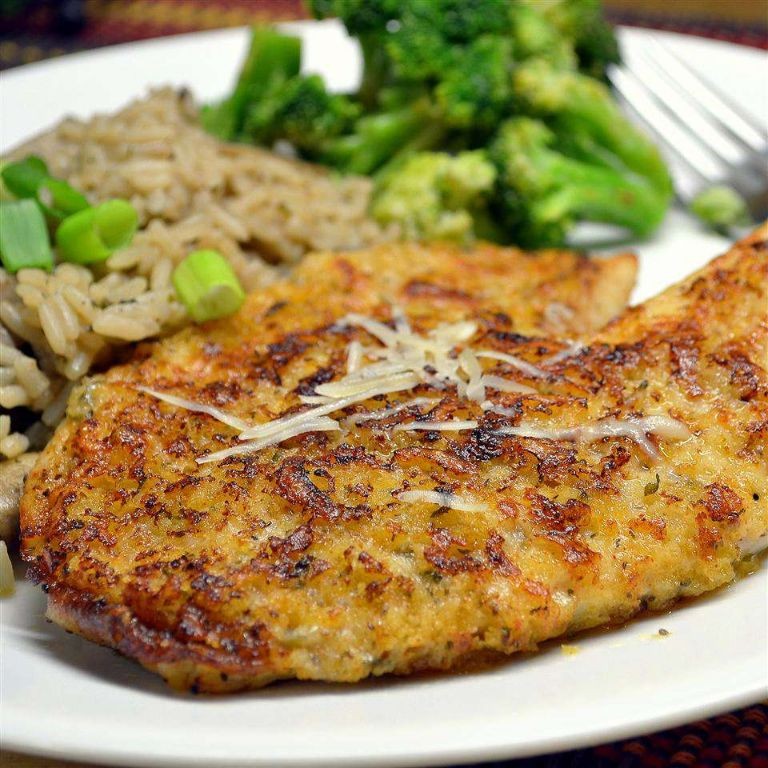
Need a crispy, healthy dinner that’s ready in 20 minutes? This baked tilapia delivers. Nail that golden crunch with a simple parmesan crust—no frying required.
Serving: 4 | Pre Time: 10 minutes | Cooking Time: 12 minutes
Ingredients
– 4 tilapia fillets (about 6 oz each)
– A couple of tablespoons of olive oil
– A big squeeze of lemon juice (about 2 tbsp)
– A cup of grated parmesan cheese
– Half a cup of panko breadcrumbs
– A teaspoon of garlic powder
– A teaspoon of paprika
– A pinch of salt and black pepper
Instructions
1. Preheat your oven to 400°F and line a baking sheet with parchment paper.
2. Pat the tilapia fillets completely dry with paper towels—this helps the crust stick better.
3. In a small bowl, whisk together the olive oil and lemon juice.
4. Brush this mixture evenly over both sides of each fillet.
5. In another bowl, mix the parmesan, panko, garlic powder, paprika, salt, and pepper.
6. Press the parmesan mixture firmly onto the top of each fillet to form a thick, even layer.
7. Place the fillets on the prepared baking sheet, crust-side up.
8. Bake for 10–12 minutes, until the crust is golden brown and the fish flakes easily with a fork. Tip: For extra crunch, broil for the last 1–2 minutes, watching closely to prevent burning.
9. Let the fish rest for 2–3 minutes before serving—this keeps it juicy.
Outrageously crunchy on the outside, tender and flaky inside. The parmesan adds a salty, umami punch that pairs perfectly with a simple arugula salad or over a bed of lemon rice for a complete meal.
One-Pot Creamy Cajun Chicken Pasta
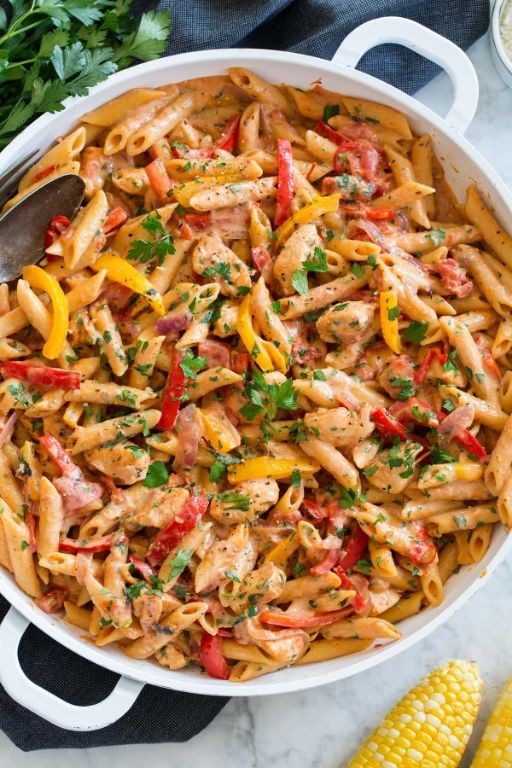
Make your weeknight dinner dreams come true with this creamy, spicy, and ridiculously easy pasta. It’s all cooked in one pot for maximum flavor and minimal cleanup. Get ready to ditch the takeout menu for good.
Serving: 4 | Pre Time: 10 minutes | Cooking Time: 25 minutes
Ingredients
– A couple of boneless, skinless chicken breasts, cut into bite-sized pieces
– A generous sprinkle of Cajun seasoning (about 2 tbsp)
– A glug of olive oil (about 2 tbsp)
– A small yellow onion, diced
– A few cloves of garlic, minced
– A box of penne pasta (about 12 oz)
– A couple of cups of chicken broth (about 4 cups)
– A big splash of heavy cream (about 1 cup)
– A handful of grated Parmesan cheese (about 1/2 cup)
– A couple of handfuls of fresh spinach
Instructions
1. Toss the chicken pieces with the Cajun seasoning until evenly coated.
2. Heat the olive oil in a large pot or Dutch oven over medium-high heat for 1 minute.
3. Add the seasoned chicken to the hot oil and cook for 5-7 minutes, stirring occasionally, until browned on all sides and cooked through. Remove the chicken from the pot and set it aside on a plate.
4. In the same pot, add the diced onion and cook for 3-4 minutes, stirring frequently, until softened and translucent.
5. Add the minced garlic and cook for 1 more minute, stirring constantly, until fragrant. Tip: Don’t let the garlic burn, or it will turn bitter.
6. Pour in the uncooked penne pasta and the chicken broth. Stir to combine.
7. Bring the mixture to a boil, then reduce the heat to maintain a simmer. Cover the pot and let it cook for 12 minutes, stirring once halfway through. Tip: The pasta should be al dente and most of the broth absorbed.
8. Stir in the heavy cream and grated Parmesan cheese until the cheese is melted and the sauce is creamy.
9. Add the cooked chicken and any accumulated juices back into the pot.
10. Fold in the fresh spinach and cook for 1-2 minutes, just until the spinach is wilted. Tip: Fresh spinach wilts quickly, so don’t overcook it.
Dive into a bowl where the tender, spiced chicken mingles with perfectly al dente pasta in a luxuriously creamy sauce. The fresh spinach adds a pop of color and a slight earthy balance. For a fun twist, serve it in shallow bowls with extra Parmesan and a sprinkle of chopped parsley or red pepper flakes on top.
Spicy Korean BBQ Beef Tacos

Alright, let’s get these tacos going. A flavor bomb that’s about to happen in your kitchen—Spicy Korean BBQ Beef Tacos. Think crispy, savory, and a little kick.
Serving: 4 | Pre Time: 15 minutes | Cooking Time: 20 minutes
Ingredients
- About 1 pound of thinly sliced beef sirloin
- A good glug of soy sauce (that’s about ¼ cup)
- A couple of tablespoons of gochujang paste
- A tablespoon of brown sugar
- A few cloves of garlic, minced up
- A splash of sesame oil
- A small onion, thinly sliced
- 8 small corn tortillas
- A handful of shredded cabbage
- Some chopped green onions for topping
- A lime, cut into wedges
Instructions
- In a bowl, whisk together the soy sauce, gochujang, brown sugar, minced garlic, and sesame oil until smooth. Tip: Taste the marinade now—if you want more heat, add an extra teaspoon of gochujang.
- Add the thinly sliced beef to the marinade, tossing to coat every piece evenly. Let it sit for 10 minutes at room temperature to soak up the flavors.
- While the beef marinates, heat a large skillet or wok over medium-high heat until a drop of water sizzles immediately.
- Add the sliced onion to the hot skillet and cook for 3-4 minutes, stirring often, until softened and starting to brown at the edges.
- Push the onions to the side of the skillet and add the marinated beef in a single layer. Let it cook undisturbed for 2 minutes to get a good sear.
- Flip the beef pieces and stir everything together, cooking for another 2-3 minutes until the beef is fully cooked through and the sauce has thickened slightly. Tip: Don’t overcrowd the pan—cook in batches if needed to avoid steaming the beef.
- While the beef cooks, warm the corn tortillas. Heat a separate dry skillet over medium heat and warm each tortilla for about 30 seconds per side until pliable and lightly toasted.
- To assemble, place a warm tortilla on a plate, add a scoop of the spicy beef and onion mixture, top with shredded cabbage and chopped green onions, and finish with a squeeze of fresh lime juice. Tip: For extra crunch, quickly pickle the cabbage in a mix of vinegar and sugar while the beef cooks.
Bite into that crispy tortilla giving way to tender, savory beef with a spicy-sweet kick from the gochujang. The fresh cabbage and lime cut through the richness perfectly. Serve these immediately while hot, or pile the filling into lettuce wraps for a low-carb twist—either way, they’re guaranteed to disappear fast.
Grilled Pineapple Teriyaki Chicken

Kick your weeknight dinner into high gear with this sweet-savory stunner. Fire up the grill for juicy chicken glazed in homemade teriyaki and caramelized pineapple rings—it’s a tropical escape on a plate.
Serving: 4 | Pre Time: 15 minutes | Cooking Time: 20 minutes
Ingredients
– 4 boneless, skinless chicken breasts (about 1.5 pounds total)
– 1 fresh pineapple, peeled and sliced into ½-inch rings
– ½ cup soy sauce (I use low-sodium)
– ¼ cup honey
– 2 tablespoons rice vinegar
– 1 tablespoon grated fresh ginger
– 2 cloves garlic, minced
– 1 tablespoon cornstarch
– 2 tablespoons water
– A splash of neutral oil (like avocado or vegetable oil)
– A couple of green onions, thinly sliced for garnish
Instructions
1. Pat the chicken breasts dry with paper towels and lightly brush both sides with oil.
2. In a small saucepan over medium heat, whisk together the soy sauce, honey, rice vinegar, ginger, and minced garlic. Bring to a simmer.
3. In a separate small bowl, stir the cornstarch and water until smooth to create a slurry.
4. Whisk the slurry into the simmering sauce and cook for 2–3 minutes, stirring constantly, until thickened. Remove from heat and set aside. (Tip: Let the sauce cool slightly—it’ll thicken more as it sits.)
5. Preheat your grill or grill pan to medium-high heat (about 400°F).
6. Place the chicken breasts on the hot grill and cook for 6–7 minutes per side, or until internal temperature reaches 165°F.
7. Brush the chicken generously with the teriyaki sauce during the last 2 minutes of cooking on each side.
8. While the chicken cooks, grill the pineapple rings for 2–3 minutes per side until they have dark grill marks and start to caramelize. (Tip: Don’t move the pineapple too early—let those marks form!)
9. Remove the chicken and pineapple from the grill and let the chicken rest for 5 minutes before slicing.
10. Slice the chicken against the grain and serve over rice or greens with the grilled pineapple on top.
11. Drizzle with any remaining teriyaki sauce and garnish with sliced green onions. (Tip: For extra flavor, brush the pineapple with a little sauce before grilling.)
Tender, juicy chicken meets sticky-sweet teriyaki and smoky, caramelized pineapple in every bite. The contrast of savory glaze and tropical fruit is seriously addictive—try stacking it all on a toasted bun for an epic sandwich twist.
Spinach and Artichoke Stuffed Chicken Breast

Outrageously creamy meets perfectly juicy—this stuffed chicken breast is your new weeknight hero. Forget boring chicken dinners; we’re packing it with a spinach-artichoke filling that’s straight from your favorite dip. Get ready for golden-brown perfection in under an hour.
Serving: 4 | Pre Time: 15 minutes | Cooking Time: 25 minutes
Ingredients
– 4 boneless, skinless chicken breasts (about 6 oz each)
– A 10-oz package of frozen chopped spinach, thawed and squeezed dry
– A 14-oz can of artichoke hearts, drained and chopped
– 1 cup of shredded mozzarella cheese
– ½ cup of grated Parmesan cheese
– 4 oz of cream cheese, softened
– 2 cloves of garlic, minced
– A splash of olive oil (about 2 tbsp)
– A couple of pinches of salt and black pepper
– ½ tsp of paprika
Instructions
1. Preheat your oven to 400°F and grab a baking dish.
2. In a medium bowl, mix the spinach, artichoke hearts, mozzarella, Parmesan, cream cheese, and garlic until combined—this is your filling. Tip: Squeeze the spinach really well to avoid a watery mess.
3. Lay each chicken breast flat and use a sharp knife to cut a horizontal pocket through the thickest part, being careful not to cut all the way through.
4. Season the chicken inside and out with salt, pepper, and paprika.
5. Stuff each pocket with about ¼ cup of the spinach-artichoke mixture, pressing it in gently.
6. Heat the olive oil in a large oven-safe skillet over medium-high heat.
7. Sear the stuffed chicken breasts for 3-4 minutes per side until golden brown. Tip: Don’t overcrowd the pan—do this in batches if needed for a better crust.
8. Transfer the skillet to the preheated oven and bake for 20-25 minutes, until the internal temperature hits 165°F. Tip: Use a meat thermometer to avoid overcooking and keep it juicy.
9. Let the chicken rest for 5 minutes before slicing.
Deliciously gooey cheese oozes out with every slice, while the chicken stays tender and moist. The garlicky, savory filling pairs perfectly with a simple side salad or roasted veggies—or slice it thin and serve over pasta for a decadent twist.
Thai Red Curry with Coconut Milk

Hangry? This Thai red curry with coconut milk is your 20-minute rescue mission—creamy, spicy, and packed with flavor. Grab your pot and let’s go.
Serving: 4 | Pre Time: 10 minutes | Cooking Time: 20 minutes
Ingredients
– A couple of tablespoons of vegetable oil
– 1 pound of boneless, skinless chicken thighs, cut into bite-sized pieces
– A medium onion, thinly sliced
– 2 cloves of garlic, minced
– A tablespoon of fresh ginger, grated
– 3 tablespoons of Thai red curry paste
– A 14-ounce can of full-fat coconut milk
– A splash of fish sauce
– A tablespoon of brown sugar
– A cup of broccoli florets
– A handful of fresh basil leaves
– Cooked jasmine rice for serving
Instructions
1. Heat 2 tablespoons of vegetable oil in a large skillet over medium-high heat until shimmering, about 1 minute.
2. Add 1 pound of chicken pieces and cook for 5–6 minutes, stirring occasionally, until browned on all sides. Tip: Don’t overcrowd the pan—work in batches if needed for even browning.
3. Transfer the chicken to a plate and set aside.
4. In the same skillet, add the sliced onion and cook for 3–4 minutes, stirring frequently, until softened.
5. Add the minced garlic and grated ginger, cooking for 1 minute until fragrant.
6. Stir in 3 tablespoons of Thai red curry paste and cook for 1 minute to toast it, releasing its oils.
7. Pour in the entire can of coconut milk, scraping up any browned bits from the bottom of the skillet.
8. Add a splash of fish sauce and 1 tablespoon of brown sugar, stirring to combine.
9. Bring the mixture to a simmer over medium heat, then reduce to low and let it bubble gently for 5 minutes to thicken slightly. Tip: Simmering low and slow helps the flavors meld without curdling the coconut milk.
10. Return the chicken to the skillet, along with 1 cup of broccoli florets.
11. Cover and cook for 5–7 minutes, until the chicken is cooked through and the broccoli is tender-crisp. Tip: Check the chicken’s internal temperature—it should reach 165°F for safety.
12. Remove from heat and stir in a handful of fresh basil leaves until just wilted.
13. Serve immediately over cooked jasmine rice.
Just spoon this curry over fluffy rice for a bowl that’s luxuriously creamy with a slow-building heat from the curry paste. The broccoli adds a nice crunch, while the basil gives it a fresh, aromatic finish—try topping it with extra basil or a squeeze of lime for a zesty twist.
Classic Beef Wellington
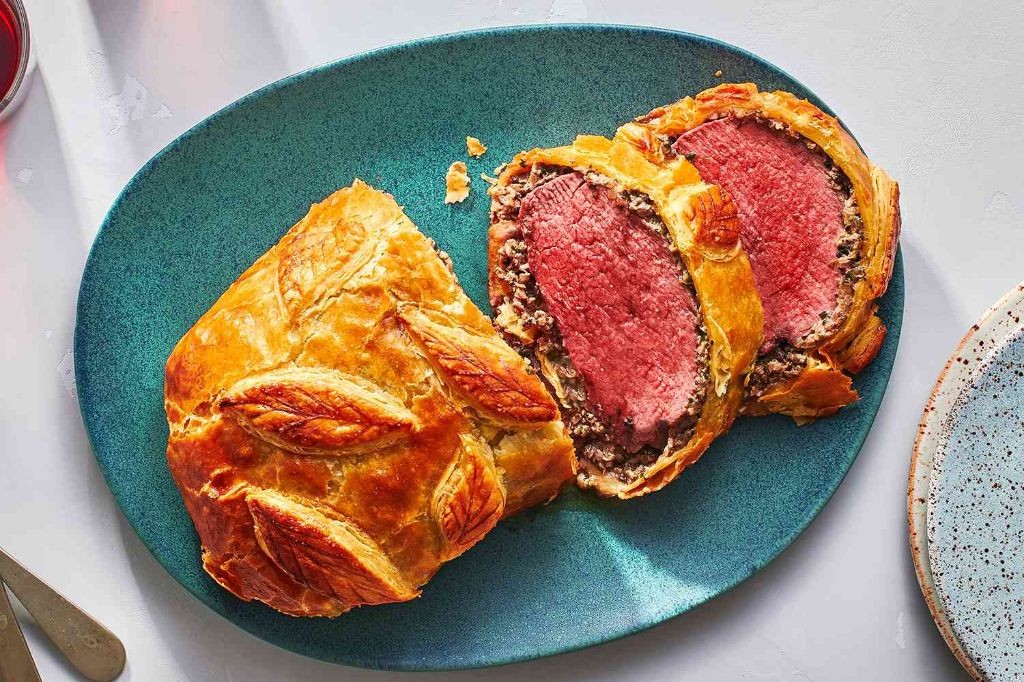
Gather your crew—this Classic Beef Wellington is the ultimate holiday showstopper. Wrap tender beef in mushroom duxelles and flaky pastry for a restaurant-worthy centerpiece. Get ready to impress with layers of savory flavor and buttery crunch.
Serving: 4 | Pre Time: 45 minutes | Cooking Time: 45 minutes
Ingredients
– A 1.5-pound beef tenderloin, trimmed
– A couple of tablespoons of olive oil
– A generous pinch of kosher salt and black pepper
– About 8 ounces of cremini mushrooms, finely chopped
– A small yellow onion, finely diced
– A splash of dry sherry or white wine
– A couple of sprigs of fresh thyme, leaves stripped
– A 14-ounce package of puff pastry, thawed
– A couple of tablespoons of Dijon mustard
– A large egg, beaten
Instructions
1. Preheat your oven to 425°F. Pat the beef tenderloin dry with paper towels.
2. Heat a couple of tablespoons of olive oil in a large skillet over high heat until shimmering, about 2 minutes.
3. Season the beef all over with a generous pinch of kosher salt and black pepper.
4. Sear the beef in the hot skillet for 2–3 minutes per side until deeply browned, turning with tongs to get all sides.
5. Transfer the seared beef to a plate and let it cool completely, about 20 minutes—this prevents soggy pastry.
6. In the same skillet over medium heat, add the finely chopped cremini mushrooms and diced yellow onion.
7. Cook the mushroom mixture, stirring often, for 8–10 minutes until all the liquid evaporates and it turns a deep brown.
8. Stir in a splash of dry sherry and cook for 1 minute to deglaze the pan, scraping up any browned bits.
9. Remove the skillet from heat and mix in the fresh thyme leaves; let the duxelles cool to room temperature.
10. Roll out the thawed puff pastry on a lightly floured surface to a 12×14-inch rectangle.
11. Spread the cooled mushroom duxelles evenly over the center of the pastry, leaving a 2-inch border.
12. Brush the seared beef all over with a couple of tablespoons of Dijon mustard.
13. Place the mustard-coated beef in the center of the mushroom layer on the pastry.
14. Wrap the pastry tightly around the beef, folding the edges over and sealing with your fingers.
15. Place the wrapped Wellington seam-side down on a baking sheet lined with parchment paper.
16. Brush the entire pastry with the beaten egg for a golden finish—this is your egg wash.
17. Use a sharp knife to score the top of the pastry with a decorative pattern, being careful not to cut through.
18. Bake in the preheated oven at 425°F for 25–30 minutes until the pastry is puffed and golden brown.
19. Insert a meat thermometer into the center of the beef; remove from the oven when it reads 125°F for medium-rare.
20. Let the Wellington rest on the baking sheet for 10 minutes before slicing—this keeps the juices inside.
Buttery, flaky pastry gives way to juicy, pink beef and an earthy mushroom layer in every bite. Serve thick slices with a simple arugula salad to cut the richness, or drizzle with a red wine reduction for extra flair. It’s a textural masterpiece that’s worth every minute of prep.
Homemade Chicken Pot Pie
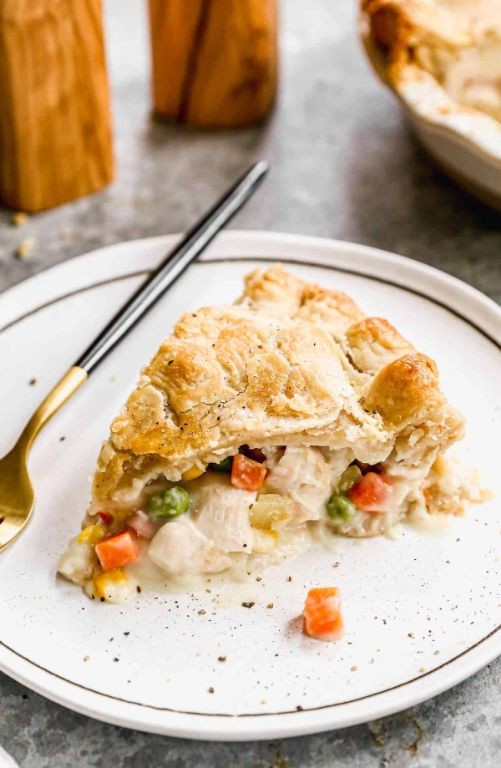
Let’s make the ultimate cozy dinner that’ll have everyone begging for seconds. This homemade chicken pot pie is pure comfort in a crust—flaky, creamy, and packed with flavor. No fancy skills required, just good vibes and a hungry crew.
Serving: 6 | Pre Time: 25 minutes | Cooking Time: 45 minutes
Ingredients
– A couple of store-bought pie crusts (one for the bottom, one for the top)
– About 2 cups of shredded cooked chicken (rotisserie chicken works great!)
– A cup of frozen mixed veggies (peas, carrots, corn—the classic trio)
– Half a cup of diced yellow onion
– A couple of cloves of garlic, minced
– 3 tablespoons of unsalted butter
– A quarter cup of all-purpose flour
– 2 cups of chicken broth
– A splash of heavy cream (about 1/3 cup)
– A teaspoon of dried thyme
– Salt and pepper to season
– An egg for that golden crust wash
Instructions
1. Preheat your oven to 375°F and grab a 9-inch pie dish.
2. Roll out one pie crust and press it into the dish, trimming any excess—no need to pre-bake it.
3. In a large skillet over medium heat, melt the butter until it’s bubbly.
4. Add the diced onion and cook for about 5 minutes, until it’s soft and translucent.
5. Stir in the minced garlic and cook for 1 more minute, just until fragrant.
6. Sprinkle the flour over the onion mixture and whisk constantly for 2 minutes to cook out the raw flour taste—this is your roux for thickening.
7. Slowly pour in the chicken broth while whisking to avoid lumps, then add the heavy cream.
8. Bring the mixture to a simmer and let it thicken for 3-4 minutes, stirring occasionally.
9. Add the shredded chicken, frozen veggies, dried thyme, salt, and pepper, stirring until everything’s coated and heated through.
10. Pour the filling into the pie crust, spreading it evenly.
11. Top with the second pie crust, crimp the edges with a fork to seal, and cut a few slits in the top for steam to escape.
12. Whisk the egg with a tablespoon of water and brush it over the crust for a shiny, golden finish.
13. Bake at 375°F for 40-45 minutes, until the crust is deeply golden and the filling is bubbling.
14. Let it cool for 10 minutes before slicing—this helps the filling set so it doesn’t run everywhere.
All that baking yields a flaky, buttery crust that shatters with each bite, hugging a creamy, savory filling studded with tender chicken and veggies. Serve it straight from the dish with a simple green salad for the perfect weeknight win, or get fancy by cutting it into individual portions for a cozy dinner party centerpiece.
Chocolate Lava Cake with Vanilla Ice Cream
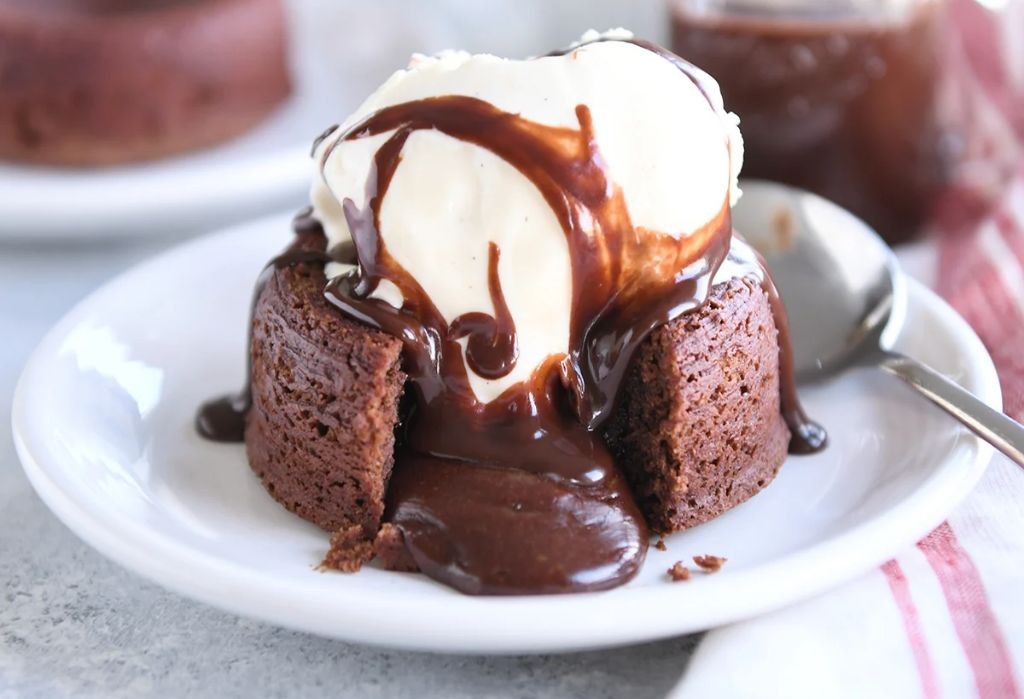
Zap your taste buds with this molten masterpiece. Picture cracking through a warm chocolate shell to reveal a gooey, lava-like center—then topping it with cool, creamy vanilla ice cream. It’s the ultimate dessert drama, ready in minutes.
Serving: 4 | Pre Time: 15 minutes | Cooking Time: 12 minutes
Ingredients
– 4 ounces of good-quality dark chocolate (chopped)
– ½ cup of unsalted butter (plus a little extra for greasing)
– 1 cup of powdered sugar
– 2 large eggs
– 2 large egg yolks
– 1 teaspoon of vanilla extract
– 6 tablespoons of all-purpose flour
– A pinch of salt
– 4 small scoops of vanilla ice cream (for serving)
Instructions
1. Preheat your oven to 425°F. Grease four 6-ounce ramekins with a bit of butter and dust them lightly with flour, tapping out any excess—this prevents sticking.
2. Place the chopped dark chocolate and ½ cup of butter in a microwave-safe bowl. Microwave in 30-second bursts, stirring after each, until fully melted and smooth (about 1–2 minutes total).
3. Whisk the powdered sugar into the melted chocolate mixture until well combined. Tip: Let it cool slightly so it doesn’t cook the eggs.
4. Add the 2 whole eggs, 2 egg yolks, and 1 teaspoon of vanilla extract to the bowl. Whisk vigorously until the mixture is glossy and uniform.
5. Gently fold in the 6 tablespoons of flour and a pinch of salt with a spatula until just incorporated—don’t overmix to keep the cake tender.
6. Divide the batter evenly among the prepared ramekins, filling each about ¾ full.
7. Bake on the middle rack for 10–12 minutes. The edges should look set and firm, but the centers will still jiggle slightly when shaken.
8. Remove from the oven and let the cakes cool in the ramekins for exactly 1 minute. Tip: This brief rest helps them hold their shape when inverted.
9. Run a knife around the edges of each ramekin to loosen the cakes. Place a small plate upside-down over a ramekin, then carefully flip it to release the cake. Repeat for all.
10. Immediately top each warm cake with a scoop of vanilla ice cream. Tip: Serve right away—the heat melts the ice cream into a creamy sauce.
Nothing beats that moment when your spoon breaks through the crisp exterior into the rich, flowing chocolate core. The cold vanilla ice cream melts into a silky pool, balancing the deep, bittersweet notes with creamy sweetness. Try garnishing with a sprinkle of sea salt or fresh berries for an extra pop of flavor.
Summary
From quick weeknight dinners to impressive party dishes, this collection offers something delicious for every moment. We hope these 20 recipes inspire your next kitchen adventure! Give them a try, then let us know your favorites in the comments below. If you loved this roundup, please share it on Pinterest to help other home cooks find their new go-to meals. Happy cooking!


