Zesty gatherings call for effortless feasting! As Friendsgiving approaches, we’ve gathered 20 crowd-pleasing recipes that are big on flavor but light on fuss. From comforting classics to seasonal twists, this roundup ensures your celebration is deliciously stress-free. Let’s make hosting a joy—read on for dishes that’ll have everyone asking for seconds!
Garlic Mashed Potatoes with Cream Cheese
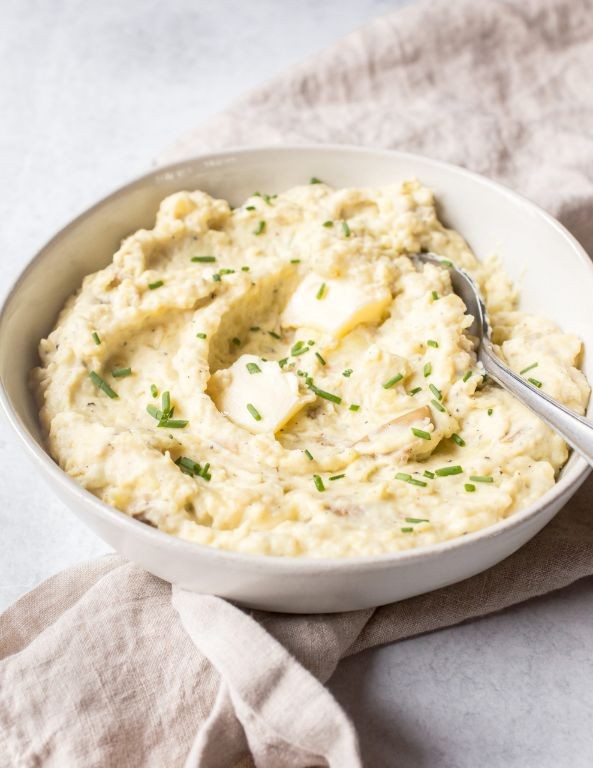
Mashed potatoes were always the side dish I’d skip at holiday dinners—until I discovered this garlicky, creamy version with cream cheese. My aunt brought it to Thanksgiving last year, and after one bite, I knew I had to recreate it at home. Now it’s my go-to comfort food for chilly evenings or when I’m craving something indulgent but easy.
Serving: 6 | Pre Time: 15 minutes | Cooking Time: 25 minutes
Ingredients
For the potatoes:
– 3 pounds Yukon Gold potatoes, peeled and quartered
– 1 tablespoon salt
– 6 cloves garlic, peeled
For the creamy mixture:
– 8 ounces cream cheese, softened to room temperature
– 1/2 cup unsalted butter, softened to room temperature
– 1/2 cup heavy cream
– 1 teaspoon black pepper
Instructions
1. Place the peeled and quartered Yukon Gold potatoes, peeled garlic cloves, and 1 tablespoon of salt in a large pot.
2. Cover the potatoes and garlic with cold water by about 1 inch.
3. Bring the pot to a boil over high heat, then reduce the heat to medium and simmer for 20–25 minutes, or until the potatoes are fork-tender. (Tip: Starting with cold water helps the potatoes cook evenly.)
4. Drain the potatoes and garlic thoroughly in a colander, then return them to the warm pot for 1 minute to evaporate excess moisture.
5. Transfer the potatoes and garlic to a large mixing bowl.
6. Add the softened cream cheese, softened unsalted butter, heavy cream, and black pepper to the bowl.
7. Use a potato masher to mash the mixture until smooth and creamy, about 2–3 minutes. (Tip: Avoid over-mashing, which can make the potatoes gluey.)
8. Taste the mashed potatoes and adjust seasoning if needed, but avoid adding more salt unless necessary. (Tip: The cream cheese adds a tangy flavor, so go easy on extra salt.)
9. Serve the mashed potatoes immediately while warm.
Perfectly creamy with a subtle garlic kick, these mashed potatoes are rich and velvety thanks to the cream cheese. I love topping them with a pat of butter and fresh chives, or pairing them with roasted chicken for a cozy weeknight meal.
Easy Green Bean Casserole
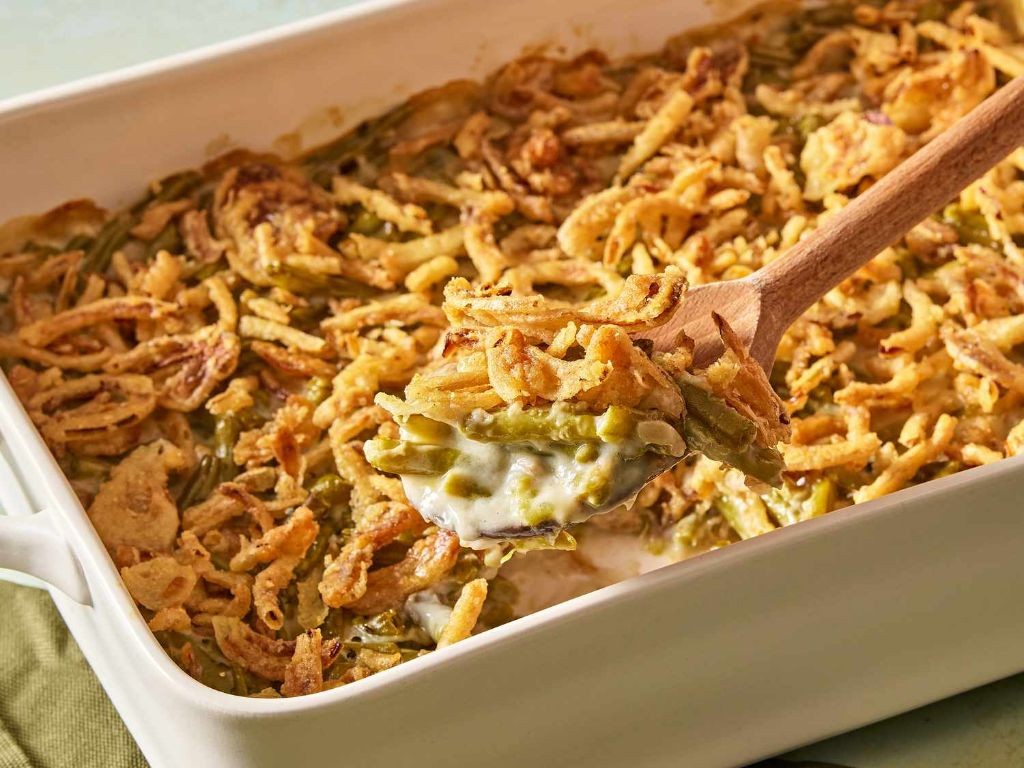
Now, let me tell you about the green bean casserole that saved my holiday sanity last year when my oven decided to quit right before guests arrived—this stovetop-to-oven version is my go-to for its forgiving nature and crowd-pleasing creaminess. I love how the crispy onions add that perfect crunch against the tender beans, making it feel festive without any fuss.
Serving: 8 | Pre Time: 15 minutes | Cooking Time: 30 minutes
Ingredients
For the base:
– 2 pounds fresh green beans, trimmed and cut into 2-inch pieces
– 1 tablespoon unsalted butter
– 1 small yellow onion, finely diced
For the sauce:
– 2 tablespoons all-purpose flour
– 1 cup whole milk
– 1 cup chicken broth
– 1/2 cup sour cream
– 1 teaspoon garlic powder
– 1/2 teaspoon black pepper
For the topping:
– 1 1/2 cups French-fried onions
Instructions
1. Bring a large pot of salted water to a rolling boil over high heat. 2. Add the green beans and boil for 5 minutes until bright green and slightly tender, then drain and set aside. 3. Preheat your oven to 350°F. 4. In a large oven-safe skillet, melt the butter over medium heat. 5. Add the diced onion and cook for 4–5 minutes, stirring occasionally, until translucent and fragrant. 6. Sprinkle the flour over the onions and cook for 1 minute, stirring constantly to form a paste. 7. Gradually whisk in the milk and chicken broth until smooth, then bring to a simmer. 8. Cook for 3–4 minutes, whisking frequently, until the sauce thickens enough to coat the back of a spoon. 9. Remove from heat and stir in the sour cream, garlic powder, and black pepper. 10. Fold in the blanched green beans until evenly coated. 11. Sprinkle the French-fried onions evenly over the top. 12. Bake uncovered for 20–25 minutes, until the casserole is bubbly around the edges and the topping is golden brown. 13. Let it rest for 5 minutes before serving to allow the sauce to set slightly.
Gently scoop into bowls to reveal layers of creamy sauce clinging to each bean, with a satisfying crackle from the onions. I sometimes add a dash of smoked paprika to the sauce for a subtle warmth, or serve it alongside roasted turkey for a classic holiday plate—it’s that versatile balance of comfort and crunch that keeps everyone coming back for seconds.
Classic Stuffing with Sage and Sausage
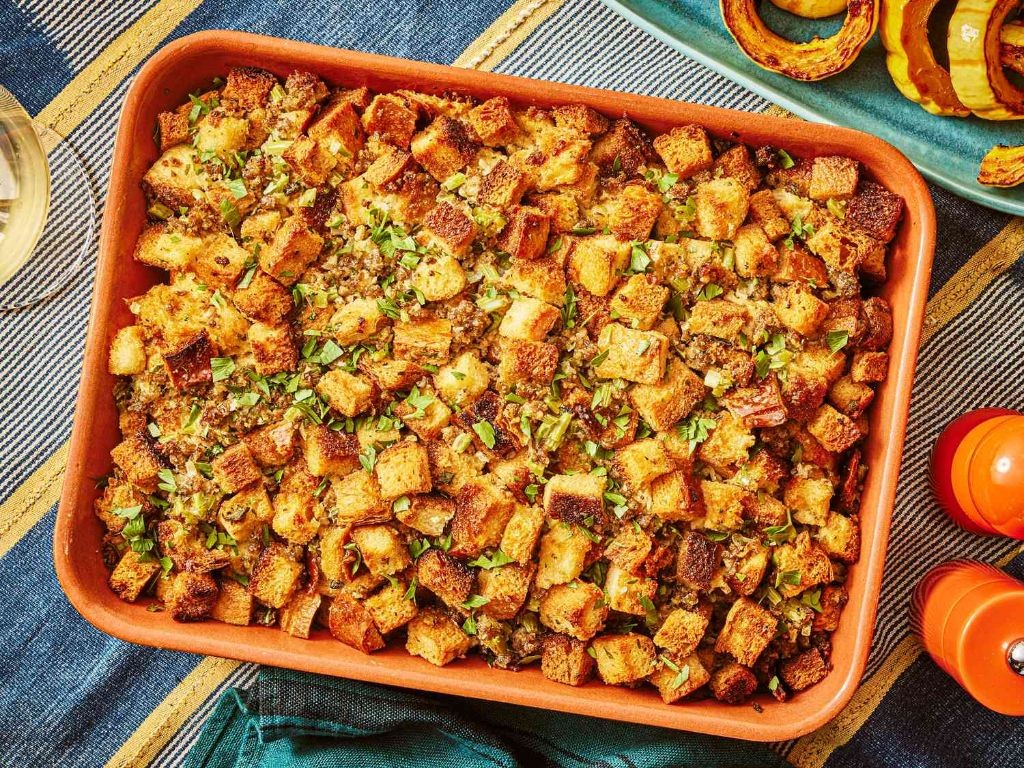
Zesty holiday gatherings just wouldn’t be complete without this comforting classic—my family’s been making this stuffing for as long as I can remember, and it’s always the first dish to disappear from the table. I love how the savory sausage and earthy sage come together, filling the kitchen with that unmistakable festive aroma. Trust me, once you try this version, it’ll become your new go-to for every special dinner.
Serving: 8 | Pre Time: 20 minutes | Cooking Time: 45 minutes
Ingredients
For the base:
– 1 lb Italian sausage (casings removed)
– 1 large yellow onion, diced
– 3 celery stalks, diced
– 4 tbsp unsalted butter
For the bread mixture:
– 8 cups day-old white bread, cubed (about 1-inch pieces)
– 2 tbsp fresh sage, finely chopped
– 1 tsp dried thyme
– 1 tsp salt
– ½ tsp black pepper
For the liquid:
– 2 cups chicken broth
– 2 large eggs, beaten
Instructions
1. Preheat your oven to 375°F and grease a 9×13-inch baking dish with butter or non-stick spray.
2. In a large skillet over medium heat, cook the Italian sausage, breaking it into small crumbles with a wooden spoon, for 8–10 minutes until browned and no longer pink.
3. Remove the cooked sausage from the skillet with a slotted spoon and set it aside in a large mixing bowl, leaving about 1 tablespoon of drippings in the skillet.
4. Add the diced onion and celery to the skillet and cook in the sausage drippings for 5–7 minutes, stirring occasionally, until softened and translucent.
5. Stir in the unsalted butter until melted, then pour this vegetable mixture into the bowl with the sausage.
6. Add the cubed white bread, fresh sage, dried thyme, salt, and black pepper to the bowl, and gently toss everything together until evenly combined.
7. In a separate small bowl, whisk together the chicken broth and beaten eggs until smooth.
8. Pour the broth-egg mixture over the bread mixture and fold gently with a spatula until all the bread is moistened—avoid overmixing to keep the texture light.
9. Transfer the stuffing to the prepared baking dish and spread it into an even layer.
10. Cover the dish tightly with aluminum foil and bake at 375°F for 25 minutes.
11. Remove the foil and bake uncovered for an additional 20 minutes, or until the top is golden brown and crispy.
12. Let the stuffing rest for 5 minutes before serving to allow the flavors to meld.
Craving that perfect balance of textures? This stuffing delivers a crispy, golden top with a moist, tender interior, thanks to the savory sausage and aromatic sage. Serve it straight from the oven alongside roasted turkey or as a hearty main with a side of cranberry sauce—it’s so flavorful, you might just skip the turkey altogether!
Cranberry Orange Sauce
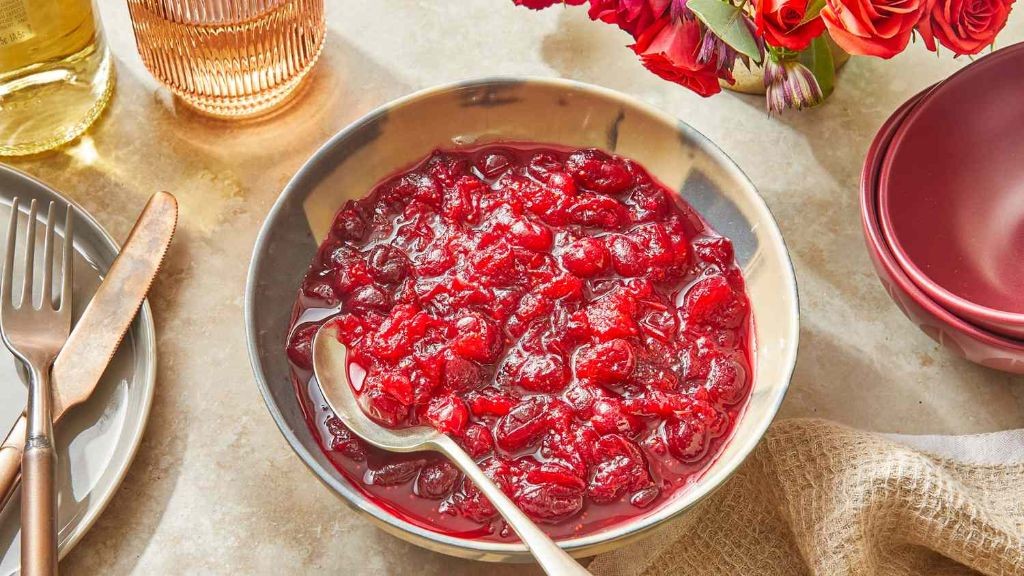
Over the years, I’ve tried countless cranberry sauce recipes, but this zesty orange version has become my absolute holiday staple—it’s the one dish my family actually requests by name! I love how the bright citrus cuts through the tart berries, creating a perfect balance that pairs beautifully with everything from turkey to leftover sandwiches.
Serving: 8 | Pre Time: 10 minutes | Cooking Time: 15 minutes
Ingredients
For the sauce:
– 12 oz fresh cranberries
– 1 cup granulated sugar
– 1 cup freshly squeezed orange juice (from about 2 large oranges)
– Zest of 1 large orange
– 1/4 tsp ground cinnamon
Instructions
1. Rinse the 12 oz of fresh cranberries under cold water in a colander, discarding any soft or discolored berries.
2. In a medium saucepan, combine 1 cup granulated sugar, 1 cup freshly squeezed orange juice, and the zest of 1 large orange.
3. Heat the mixture over medium heat, stirring constantly with a wooden spoon until the sugar completely dissolves, about 3 minutes.
4. Add the rinsed cranberries to the saucepan and stir to coat them evenly in the liquid.
5. Increase the heat to medium-high and bring the mixture to a gentle boil, which should take about 2-3 minutes.
6. Once boiling, reduce the heat to medium-low and simmer uncovered for 10 minutes, stirring occasionally to prevent sticking.
7. After 5 minutes of simmering, stir in 1/4 tsp ground cinnamon—this adds a warm depth without overpowering the citrus.
8. Continue simmering until about two-thirds of the cranberries have popped open and the sauce has thickened to a jam-like consistency, approximately 5 more minutes.
9. Remove the saucepan from the heat and let the sauce cool completely in the pan for 30 minutes; it will continue to thicken as it cools.
10. Transfer the cooled sauce to an airtight container and refrigerate for at least 2 hours before serving to allow the flavors to meld.
Really, this sauce transforms as it chills—the texture becomes beautifully glossy and spreadable, with plump berry pieces suspended in a vibrant, ruby-red syrup. The orange zest gives it a bright, aromatic finish that makes it fantastic not just with holiday meals, but stirred into yogurt or spooned over vanilla ice cream for a festive dessert twist.
Roasted Sweet Potatoes with Maple Glaze
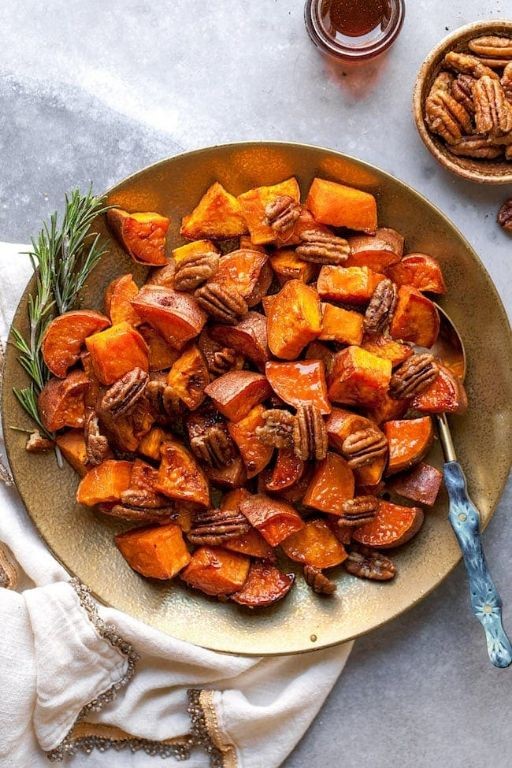
Remember those cozy winter evenings when you just crave something sweet, savory, and utterly comforting? I do, and that’s exactly why I’ve been perfecting this roasted sweet potato recipe—it’s become my go-to side dish for holiday gatherings or even a simple weeknight treat, with a maple glaze that always has everyone asking for seconds.
Serving: 4 | Pre Time: 10 minutes | Cooking Time: 30 minutes
Ingredients
– For the sweet potatoes: 2 large sweet potatoes (about 1.5 lbs), peeled and cubed into 1-inch pieces, 2 tbsp olive oil, 1/2 tsp salt, 1/4 tsp black pepper
– For the maple glaze: 1/4 cup pure maple syrup, 2 tbsp unsalted butter, 1 tbsp apple cider vinegar, 1/4 tsp ground cinnamon
Instructions
1. Preheat your oven to 400°F and line a baking sheet with parchment paper for easy cleanup—this tip saves you from scrubbing later!
2. In a large bowl, toss the cubed sweet potatoes with olive oil, salt, and black pepper until evenly coated.
3. Spread the sweet potatoes in a single layer on the prepared baking sheet, ensuring they aren’t crowded to help them roast evenly and get crispy edges.
4. Roast in the preheated oven for 25 minutes, stirring halfway through, until the sweet potatoes are tender and lightly browned at the edges.
5. While the sweet potatoes roast, prepare the glaze by combining maple syrup, butter, apple cider vinegar, and ground cinnamon in a small saucepan over medium heat.
6. Bring the glaze mixture to a simmer, stirring constantly, and cook for 3-5 minutes until it thickens slightly and becomes glossy—watch it closely to prevent burning, as maple syrup can scorch easily.
7. Remove the roasted sweet potatoes from the oven and immediately drizzle the warm maple glaze over them, tossing gently to coat every piece.
8. Return the glazed sweet potatoes to the oven and roast for an additional 5 minutes, allowing the glaze to caramelize and stick to the potatoes.
9. Transfer the sweet potatoes to a serving dish and let them cool for 2-3 minutes before serving to avoid burning your mouth—another handy tip for enjoying them safely!
What I love most about this dish is how the maple glaze creates a sticky-sweet coating that contrasts beautifully with the tender, slightly caramelized interior of the sweet potatoes. Serve them warm as a side with roasted chicken or over a bed of greens for a hearty salad, and don’t be surprised if they disappear quickly—the blend of savory and sweet is simply irresistible.
No-Knead Dinner Rolls
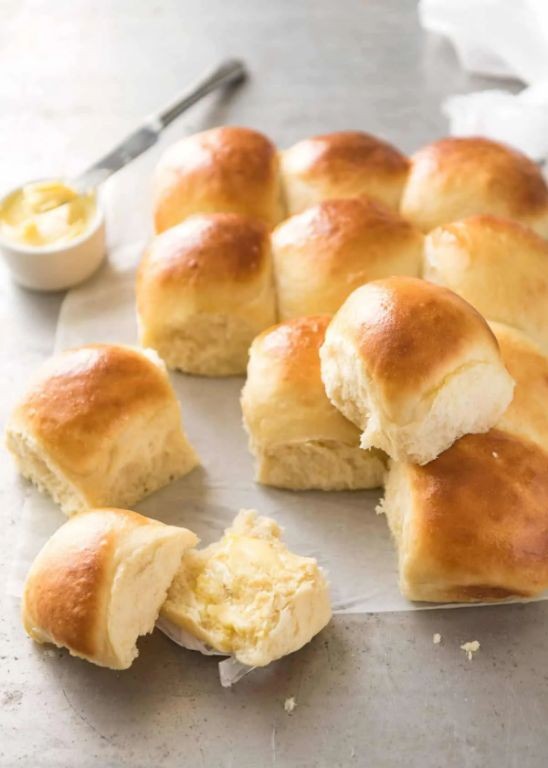
Every holiday season, I find myself scrambling to prepare a festive meal while also wanting to enjoy the company of my guests—that’s why I’ve fallen in love with these no-knead dinner rolls. They’re incredibly forgiving, requiring minimal effort for maximum reward, and they fill the kitchen with that irresistible warm-bread aroma that makes everyone gather around. Honestly, I’ve even started making them on regular weeknights because they’re just that simple and satisfying.
Serving: 12 | Pre Time: 15 minutes | Cooking Time: 25 minutes
Ingredients
For the dough:
– 3 cups all-purpose flour
– 1 ½ cups warm water (about 110°F)
– 1 packet (2 ¼ teaspoons) active dry yeast
– 1 teaspoon granulated sugar
– 1 ½ teaspoons salt
– 2 tablespoons olive oil
For finishing:
– 2 tablespoons melted butter
– Flaky sea salt for sprinkling
Instructions
1. In a large mixing bowl, combine the warm water, active dry yeast, and granulated sugar, then let it sit for 5 minutes until foamy—this ensures the yeast is active and ready to work its magic.
2. Add the all-purpose flour, salt, and olive oil to the yeast mixture, then stir with a wooden spoon until a shaggy dough forms and no dry flour remains; don’t worry about kneading, as the dough will be sticky.
3. Cover the bowl tightly with plastic wrap and let the dough rise at room temperature for 12–18 hours, or until it has doubled in size and is bubbly on top—I often start this the night before baking for an easy next-day prep.
4. Preheat your oven to 450°F and place a Dutch oven or heavy oven-safe pot with a lid inside to heat for 30 minutes.
5. Lightly flour a work surface, then turn the risen dough out onto it and gently shape it into a ball without overworking it; this helps maintain those airy pockets in the final rolls.
6. Carefully remove the hot Dutch oven from the oven, place the dough ball inside, cover with the lid, and bake for 30 minutes.
7. Remove the lid and bake for an additional 15 minutes, or until the top is golden brown and the internal temperature reaches 200°F when checked with a thermometer.
8. Transfer the baked bread to a wire rack, brush the top generously with melted butter, and sprinkle with flaky sea salt while still warm for extra flavor and a beautiful finish.
Glancing at these golden-brown rolls fresh from the oven, I’m always amazed by their crisp crust and soft, chewy interior that practically melts in your mouth. They have a subtle tang from the long fermentation, making them perfect for sopping up gravy or simply slathering with butter—my family loves tearing them apart straight from the loaf for a rustic, shareable treat.
One-Pan Roasted Brussels Sprouts with Bacon
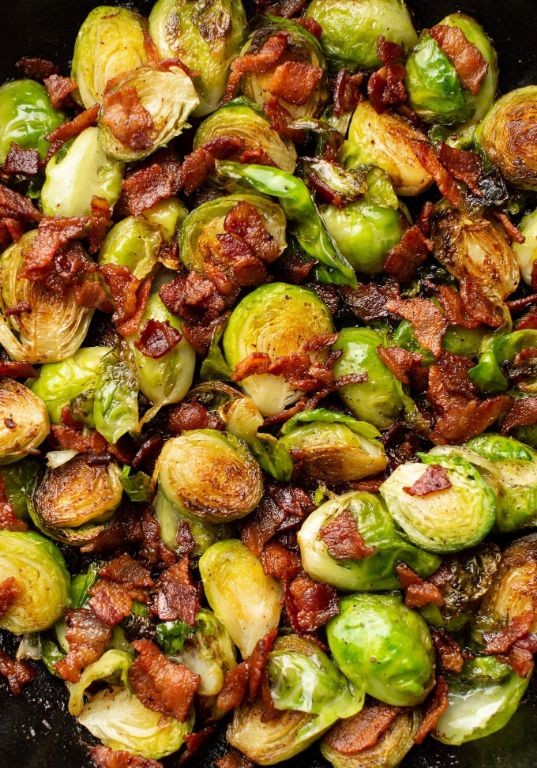
Sometimes, the simplest recipes are the ones that become weeknight staples, and this one-pan wonder is a perfect example. I first started making this when I needed a quick, hands-off side dish for a busy holiday season, and now it’s my go-to for turning skeptics into Brussels sprouts lovers. The magic, of course, is in the bacon.
Serving: 4 | Pre Time: 10 minutes | Cooking Time: 25 minutes
Ingredients
For the Roasting Pan:
– 1 lb fresh Brussels sprouts, trimmed and halved
– 4 slices thick-cut bacon, chopped into 1/2-inch pieces
– 2 tbsp olive oil
For the Seasoning:
– 1/2 tsp kosher salt
– 1/4 tsp freshly ground black pepper
– 2 tbsp pure maple syrup
– 1 tbsp balsamic vinegar
Instructions
1. Preheat your oven to 400°F (200°C).
2. Place the halved Brussels sprouts and chopped bacon on a large, rimmed baking sheet.
3. Drizzle the olive oil evenly over the Brussels sprouts and bacon.
4. Sprinkle the kosher salt and black pepper over everything on the baking sheet.
5. Use your hands or tongs to toss all the ingredients on the pan until the Brussels sprouts and bacon are evenly coated with the oil and seasonings.
6. Spread the mixture into a single, even layer on the baking sheet, ensuring the Brussels sprouts are cut-side down for better caramelization.
7. Roast in the preheated oven for 20 minutes.
8. Carefully remove the pan from the oven. The bacon should be crispy and the Brussels sprouts should be fork-tender with browned edges.
9. Drizzle the maple syrup and balsamic vinegar evenly over the hot contents of the pan.
10. Toss everything thoroughly to coat in the sweet and tangy glaze.
11. Return the pan to the oven and roast for an additional 5 minutes.
Getting the Brussels sprouts perfectly caramelized with that sweet, smoky, and slightly tangy glaze is what makes this dish special. I love serving it straight from the pan, maybe with a sprinkle of flaky sea salt, alongside a simple roast chicken or even tossed into a warm grain bowl for a hearty lunch.
Pumpkin Pie with Graham Cracker Crust
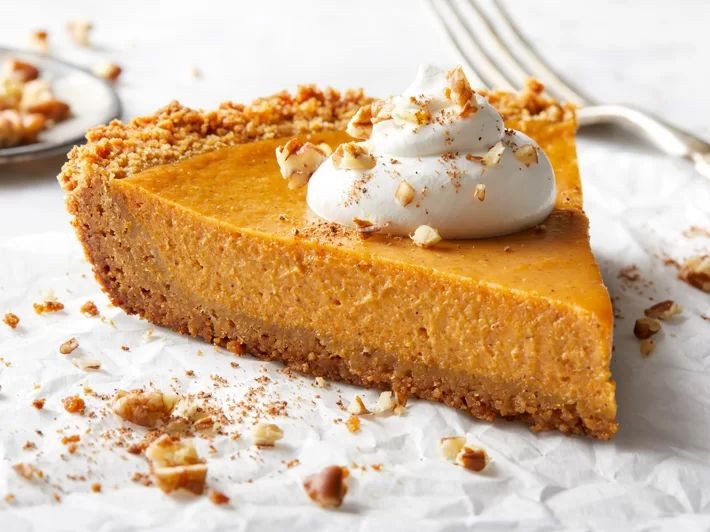
Zipping through holiday prep this year, I realized my classic pumpkin pie needed a twist—so I swapped the traditional pastry for a graham cracker crust, and let me tell you, it’s a game-changer. As someone who always has a spare can of pumpkin in the pantry (just in case!), this version feels cozier and simpler, perfect for those last-minute festive cravings. Trust me, once you try this crunchy, spiced base with the smooth filling, you’ll never go back.
Serving: 8 | Pre Time: 20 minutes | Cooking Time: 50 minutes
Ingredients
For the crust:
– 1 1/2 cups graham cracker crumbs (about 10 full sheets)
– 1/4 cup granulated sugar
– 6 tbsp unsalted butter, melted
For the filling:
– 1 can (15 oz) pumpkin puree
– 3/4 cup packed light brown sugar
– 1 tsp ground cinnamon
– 1/2 tsp ground ginger
– 1/4 tsp ground nutmeg
– 1/4 tsp salt
– 2 large eggs
– 1 cup heavy cream
Instructions
1. Preheat your oven to 350°F (175°C).
2. In a medium bowl, combine 1 1/2 cups graham cracker crumbs, 1/4 cup granulated sugar, and 6 tbsp melted unsalted butter until the mixture resembles wet sand.
3. Tip: Press the crumbs firmly into a 9-inch pie dish using the bottom of a measuring cup for an even layer—this prevents a crumbly crust.
4. Bake the crust for 10 minutes at 350°F, then remove it from the oven and let it cool slightly on a wire rack.
5. In a large bowl, whisk together 1 can pumpkin puree, 3/4 cup packed light brown sugar, 1 tsp ground cinnamon, 1/2 tsp ground ginger, 1/4 tsp ground nutmeg, and 1/4 tsp salt until smooth.
6. Add 2 large eggs one at a time, whisking well after each addition to incorporate air for a lighter texture.
7. Gradually pour in 1 cup heavy cream while whisking continuously to avoid curdling.
8. Tip: For extra silkiness, strain the filling through a fine-mesh sieve into the prepared crust to remove any lumps.
9. Carefully pour the filling into the cooled crust, smoothing the top with a spatula.
10. Bake at 350°F for 40-50 minutes, or until the edges are set but the center still jiggles slightly when shaken—a toothpick inserted should come out clean.
11. Tip: To prevent over-browning, tent the pie with aluminum foil after 30 minutes if the crust starts to darken too much.
12. Transfer the pie to a wire rack and let it cool completely, about 2 hours, then refrigerate for at least 4 hours or overnight to set fully.
13. Out of the oven, this pie boasts a firm, crackly crust that gives way to a velvety, spiced filling with just the right sweetness. I love serving it chilled with a dollop of whipped cream or a drizzle of caramel for an extra festive touch—it’s the ultimate holiday comfort in every slice.
Apple Cider Glazed Carrots
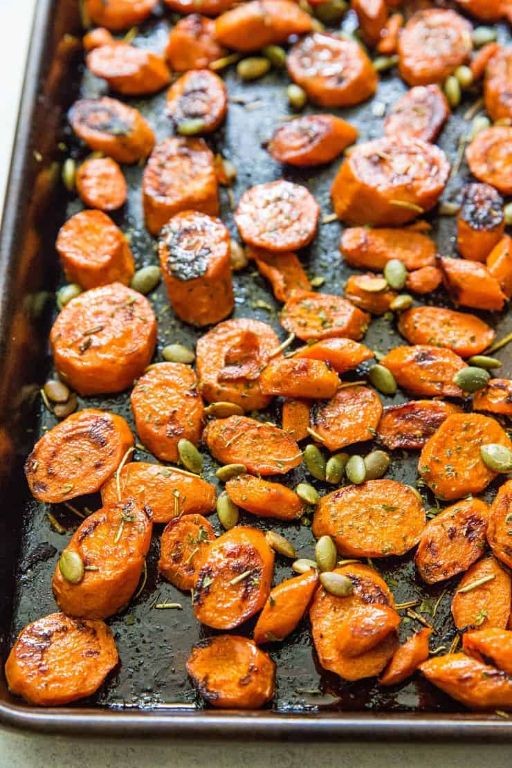
This time of year, when the air gets crisp and holiday gatherings fill the calendar, I find myself craving those simple, comforting side dishes that feel both festive and familiar. These Apple Cider Glazed Carrots are exactly that—a sweet, savory, and beautifully glossy addition to any table that always reminds me of cozy family dinners at my grandmother’s house.
Serving: 6 | Pre Time: 10 minutes | Cooking Time: 25 minutes
Ingredients
For the Carrots:
– 2 pounds of fresh carrots, peeled and sliced into 1/4-inch thick coins
– 2 tablespoons of unsalted butter
– 1/2 teaspoon of kosher salt
– 1/4 teaspoon of freshly ground black pepper
For the Glaze:
– 1 cup of apple cider
– 2 tablespoons of pure maple syrup
– 1 tablespoon of apple cider vinegar
– 1/2 teaspoon of ground cinnamon
– 1/4 teaspoon of ground nutmeg
Instructions
1. Place the sliced carrots in a large skillet and add just enough water to cover the bottom of the pan by about 1/4 inch.
2. Bring the water to a boil over high heat, then reduce the heat to medium, cover the skillet, and let the carrots steam for 8 minutes until they are just fork-tender. (Tip: Steaming them first ensures they cook evenly without burning.)
3. Drain any remaining water from the skillet and return it to medium heat.
4. Add the 2 tablespoons of unsalted butter to the skillet with the carrots and stir until the butter melts and coats the carrots, about 1 minute.
5. Sprinkle the 1/2 teaspoon of kosher salt and 1/4 teaspoon of black pepper over the carrots and stir to combine.
6. Pour in the 1 cup of apple cider, 2 tablespoons of maple syrup, and 1 tablespoon of apple cider vinegar.
7. Add the 1/2 teaspoon of ground cinnamon and 1/4 teaspoon of ground nutmeg, stirring everything together until well mixed.
8. Increase the heat to medium-high and bring the liquid to a simmer, then reduce the heat to maintain a gentle simmer.
9. Cook, stirring occasionally, for 12-15 minutes until the liquid has reduced to a thick, syrupy glaze that coats the back of a spoon. (Tip: Avoid stirring too frequently at the end to help the glaze develop a beautiful sheen.)
10. Remove the skillet from the heat and let the carrots rest for 2 minutes before serving to allow the glaze to set slightly. (Tip: A final rest helps the flavors meld and the texture perfect.)
Ultimately, you’re left with carrots that are tender yet retain a slight bite, enveloped in a sticky-sweet glaze with warm spice notes. The maple and cider create a deep caramelized flavor that’s irresistible, making these carrots a standout side that pairs wonderfully with roasted turkey or even a simple weeknight pork chop.
Cornbread Casserole with Cheese
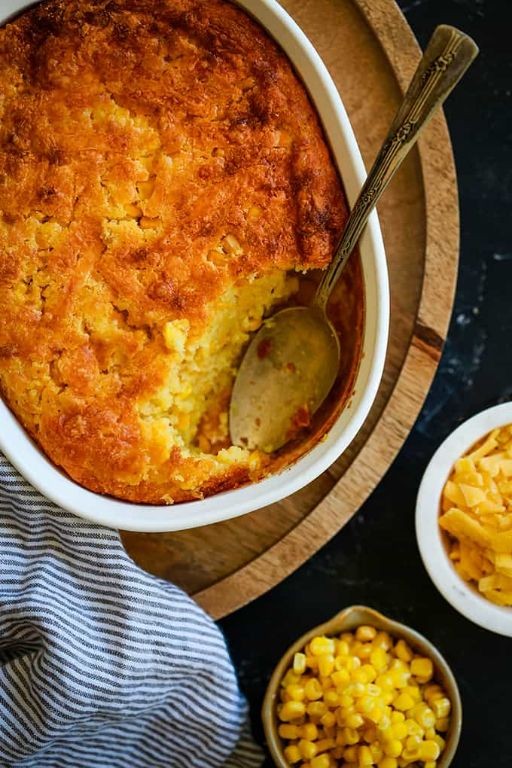
Holiday gatherings always bring back memories of my grandma’s kitchen, where the warm, cheesy aroma of this cornbread casserole would fill the air. It’s the ultimate comfort food that’s both hearty and incredibly easy to make, perfect for feeding a crowd without spending all day in the kitchen. I love how the golden, bubbly cheese topping contrasts with the moist, savory base—it’s a dish that never fails to disappear first from the table!
Serving: 8 | Pre Time: 15 minutes | Cooking Time: 45 minutes
Ingredients
For the casserole base:
– 1 (15 oz) can whole kernel corn, drained
– 1 (15 oz) can cream-style corn
– 1 (8.5 oz) box Jiffy corn muffin mix
– 1 cup sour cream
– ½ cup unsalted butter, melted
For the cheese topping:
– 1 ½ cups shredded cheddar cheese
– ½ cup shredded Monterey Jack cheese
Instructions
1. Preheat your oven to 350°F and grease a 9×13-inch baking dish with butter or non-stick spray.
2. In a large mixing bowl, combine the drained whole kernel corn, cream-style corn, Jiffy corn muffin mix, sour cream, and melted butter until fully incorporated. Tip: Mix gently to avoid overworking the batter, which can make the casserole dense.
3. Pour the mixture into the prepared baking dish and spread it evenly with a spatula.
4. Bake in the preheated oven for 30 minutes, or until the edges are lightly golden and the center is set but still slightly jiggly.
5. Remove the casserole from the oven and evenly sprinkle the shredded cheddar and Monterey Jack cheeses over the top. Tip: Let the casserole cool for 2-3 minutes before adding cheese to prevent it from sinking into the batter.
6. Return the casserole to the oven and bake for an additional 15 minutes, or until the cheese is fully melted and bubbly with golden spots.
7. Remove from the oven and let it rest for 10 minutes before serving. Tip: This resting time allows the casserole to firm up, making it easier to slice cleanly.
Zesty and satisfying, this casserole boasts a creamy interior with pops of sweet corn, all crowned by that irresistible, gooey cheese crust. Serve it warm alongside chili or roasted vegetables for a cozy meal, or enjoy leftovers reheated—the flavors meld even more beautifully the next day!
Quick and Easy Gravy

A cozy holiday dinner isn’t complete without a rich, flavorful gravy to tie everything together, and after years of frantic last-minute whisking, I’ve perfected a method that’s both quick and foolproof. This recipe is my go-to for Thanksgiving, Christmas, or any Sunday roast when I want that homemade taste without the stress, and it always earns compliments from my family, who used to tease me about my ‘lumpy gravy days.’
Serving: 6 | Pre Time: 5 minutes | Cooking Time: 15 minutes
Ingredients
For the roux:
– 4 tbsp unsalted butter
– 1/4 cup all-purpose flour
For the liquid base:
– 4 cups low-sodium chicken or turkey broth
– 1/2 cup pan drippings (optional, from roasted meat)
For seasoning:
– 1/2 tsp kosher salt
– 1/4 tsp freshly ground black pepper
– 1/4 tsp dried thyme
Instructions
1. Melt 4 tbsp unsalted butter in a medium saucepan over medium heat.
2. Whisk in 1/4 cup all-purpose flour to form a paste, cooking for 2-3 minutes until it turns a light golden brown, which removes the raw flour taste—this is your roux.
3. Gradually pour in 4 cups low-sodium chicken or turkey broth while whisking constantly to prevent lumps, starting with a slow stream.
4. If using, add 1/2 cup pan drippings from roasted meat to the saucepan for extra depth of flavor.
5. Bring the mixture to a gentle boil over medium-high heat, then reduce to a simmer.
6. Stir in 1/2 tsp kosher salt, 1/4 tsp freshly ground black pepper, and 1/4 tsp dried thyme.
7. Simmer uncovered for 8-10 minutes, stirring occasionally, until the gravy thickens to coat the back of a spoon—it should leave a clear trail when you run your finger through it.
8. Taste and adjust seasoning if needed, but avoid over-salting since the broth and drippings already contribute saltiness.
9. Remove from heat and serve immediately, or keep warm on low heat for up to 30 minutes, stirring occasionally to prevent a skin from forming.
Gracious, this gravy turns out silky-smooth with a savory, herb-kissed flavor that elevates mashed potatoes, turkey, or even biscuits. I love how it thickens just right without being gloppy, and for a creative twist, try drizzling it over roasted vegetables or using it as a base for a hearty pot pie filling—it’s versatile enough to become a staple in your kitchen year-round.
Roasted Garlic Parmesan Cauliflower
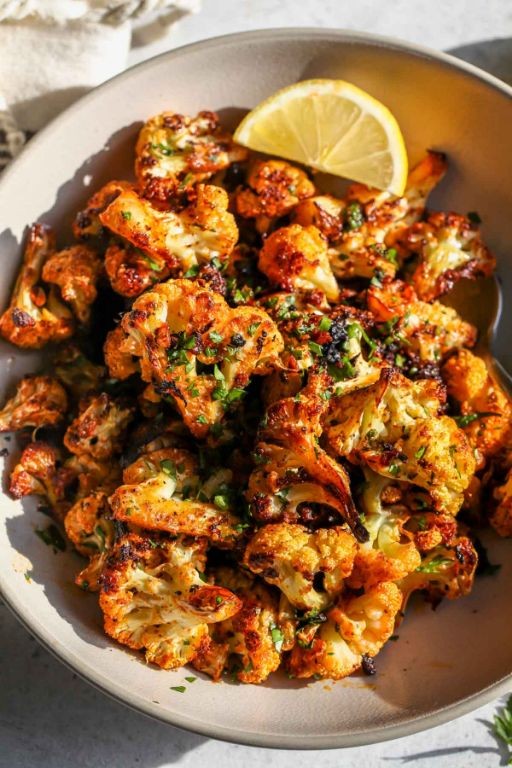
My kitchen always smells amazing when I’m roasting cauliflower—it’s one of those cozy, hands-off dishes I love to make on busy weeknights. Honestly, this roasted garlic parmesan version has become my go‑to because it’s so simple yet feels totally indulgent.
Serving: 4 | Pre Time: 10 minutes | Cooking Time: 25 minutes
Ingredients
For the cauliflower:
– 1 large head cauliflower, cut into 1‑inch florets
– 3 tablespoons olive oil
– 1/2 teaspoon kosher salt
– 1/4 teaspoon black pepper
For the garlic parmesan coating:
– 4 cloves garlic, minced
– 1/2 cup grated parmesan cheese
– 1/4 cup panko breadcrumbs
– 2 tablespoons chopped fresh parsley
Instructions
1. Preheat your oven to 425°F and line a large baking sheet with parchment paper.
2. In a large bowl, toss the cauliflower florets with olive oil, kosher salt, and black pepper until evenly coated.
3. Spread the cauliflower in a single layer on the prepared baking sheet, leaving space between florets for even browning.
4. Roast the cauliflower for 15 minutes at 425°F, until the edges start to turn golden brown.
5. While the cauliflower roasts, combine the minced garlic, grated parmesan cheese, panko breadcrumbs, and chopped fresh parsley in a small bowl.
6. After 15 minutes, remove the baking sheet from the oven and sprinkle the garlic parmesan mixture evenly over the cauliflower florets.
7. Return the baking sheet to the oven and roast for another 8–10 minutes at 425°F, until the topping is crispy and golden.
8. Let the cauliflower cool on the baking sheet for 2–3 minutes before serving to allow the topping to set.
You’ll love how the crispy, cheesy topping contrasts with the tender, caramelized cauliflower underneath. Try serving it over creamy polenta or alongside a simple grilled chicken for a complete meal that always impresses.
Chocolate Pecan Cobbler
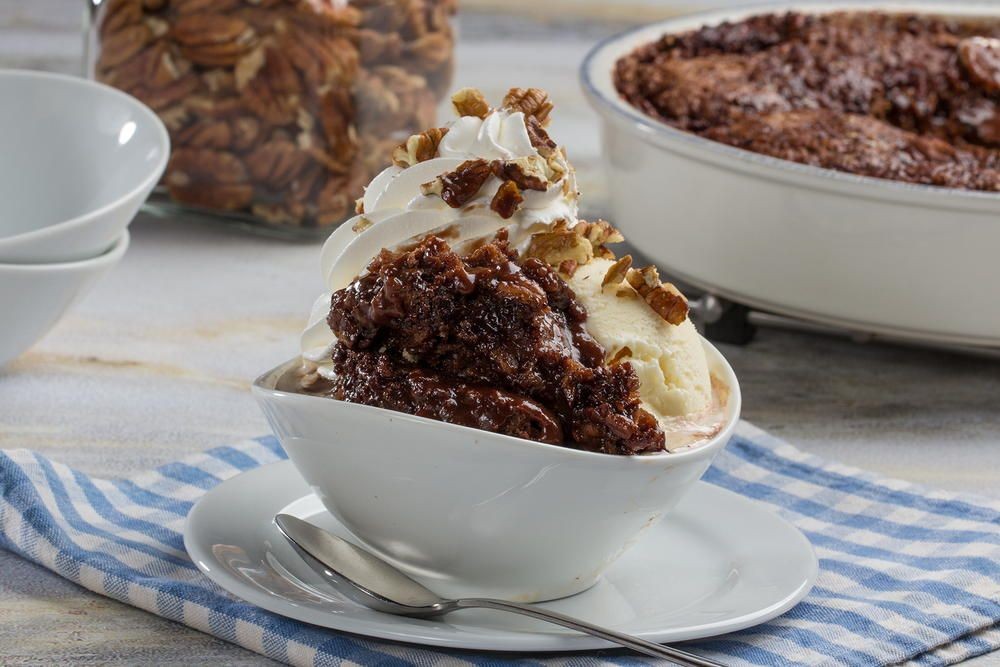
Ever have one of those days where you just need a warm, gooey chocolate dessert that feels like a hug? That’s exactly what this Chocolate Pecan Cobbler is for me—it’s my go-to when I’m craving something indulgent but easy enough to whip up on a cozy evening. I love how the rich chocolate sauce bubbles up around the cake-like topping, creating a dessert that’s both rustic and utterly comforting.
Serving: 8 | Pre Time: 15 minutes | Cooking Time: 40 minutes
Ingredients
For the batter:
– 1 cup all-purpose flour
– 1 cup granulated sugar
– 2 teaspoons baking powder
– 1/4 teaspoon salt
– 1/2 cup milk
– 1/4 cup unsalted butter, melted
– 1 teaspoon vanilla extract
For the topping:
– 1/2 cup chopped pecans
– 1/2 cup semisweet chocolate chips
For the sauce:
– 1/2 cup granulated sugar
– 1/2 cup packed brown sugar
– 1/4 cup unsweetened cocoa powder
– 1 1/2 cups boiling water
Instructions
1. Preheat your oven to 350°F and grease a 9×9-inch baking dish. Tip: Use butter for greasing to add extra flavor and prevent sticking.
2. In a medium bowl, whisk together 1 cup all-purpose flour, 1 cup granulated sugar, 2 teaspoons baking powder, and 1/4 teaspoon salt until well combined.
3. Add 1/2 cup milk, 1/4 cup melted unsalted butter, and 1 teaspoon vanilla extract to the dry ingredients, stirring just until a smooth batter forms—avoid overmixing to keep the texture tender.
4. Pour the batter into the prepared baking dish, spreading it evenly with a spatula.
5. Sprinkle 1/2 cup chopped pecans and 1/2 cup semisweet chocolate chips evenly over the batter layer.
6. In a separate bowl, mix 1/2 cup granulated sugar, 1/2 cup packed brown sugar, and 1/4 cup unsweetened cocoa powder until no lumps remain.
7. Slowly pour 1 1/2 cups boiling water over the sugar-cocoa mixture, whisking constantly until smooth to create a thin sauce. Tip: Boiling water helps dissolve the sugars quickly for a silky texture.
8. Gently pour the sauce over the batter and topping in the baking dish—do not stir, as the sauce will sink and form a gooey layer during baking.
9. Bake at 350°F for 35–40 minutes, or until the top is set and a toothpick inserted into the cake-like part comes out clean. Tip: Check at 35 minutes to avoid overbaking, as the sauce will thicken as it cools.
10. Remove from the oven and let it cool for 10–15 minutes before serving to allow the sauce to set slightly.
11. Serve warm, optionally with a scoop of vanilla ice cream or a dollop of whipped cream.
Rich and fudgy, this cobbler delights with a moist cake layer that gives way to a decadent chocolate-pecan sauce underneath. For a fun twist, try it with a sprinkle of sea salt or a drizzle of caramel sauce to balance the sweetness—it’s perfect for sharing with friends or savoring solo on a quiet night.
Summary
Overall, these 20 recipes make hosting a breeze, offering something for everyone at your Friendsgiving table. I hope you find a new favorite to share with your crowd! Give them a try, then drop a comment below telling me which dish you loved most. If this roundup helped you plan your feast, please share it on Pinterest to spread the joy. Happy cooking!