You’re always on the go, but that doesn’t mean you have to sacrifice healthy, delicious fuel. We’ve rounded up 20 of the best energy bar recipes—from no-bake bites to chewy granola bars—that are packed with natural ingredients and flavor. Perfect for busy mornings, afternoon slumps, or post-workout refueling. Let’s dive in and find your new favorite homemade snack!
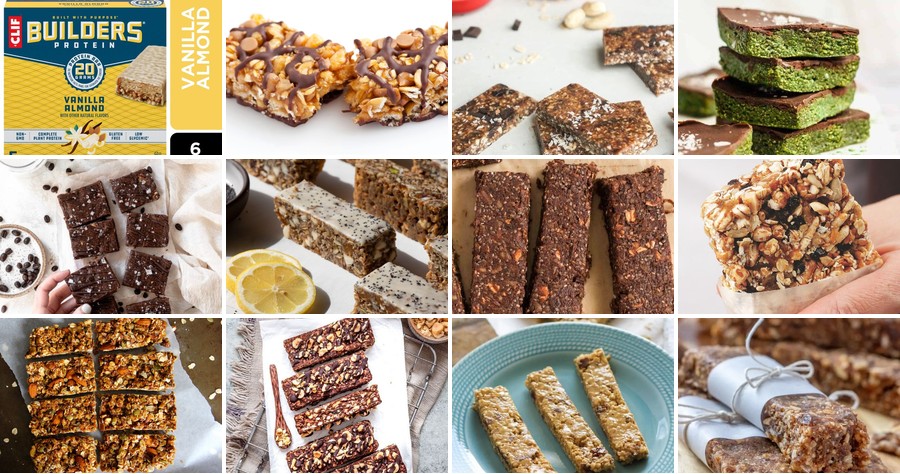
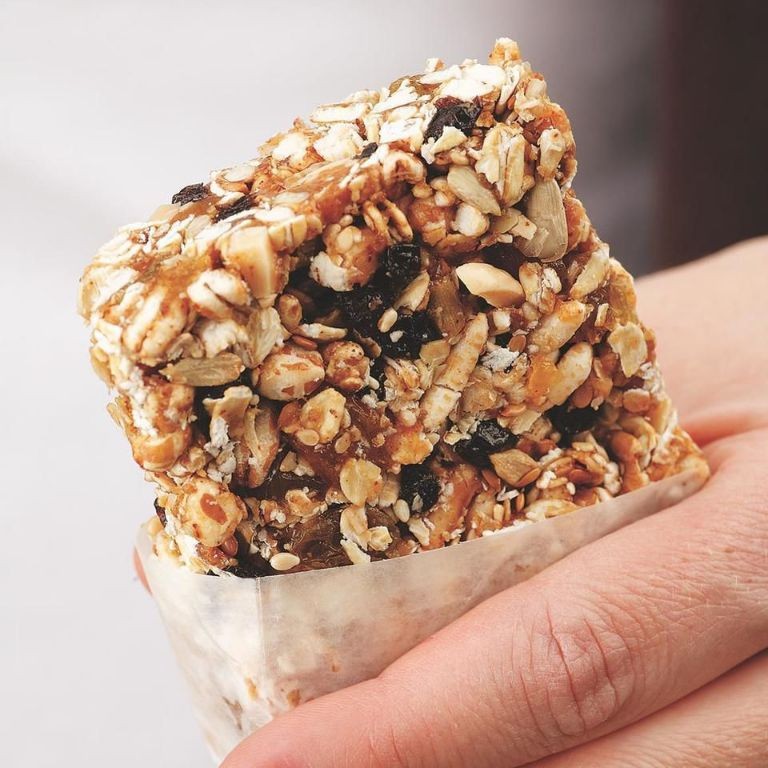
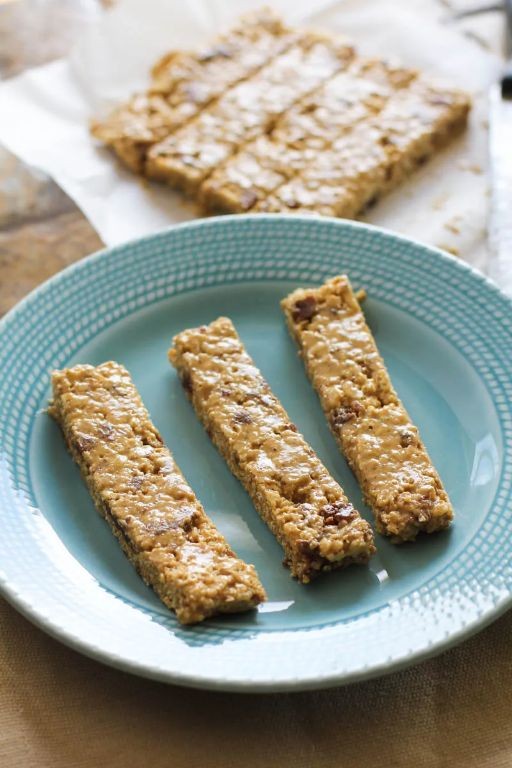
Peanut Butter Chocolate Chip Energy Bars

Brace yourself for a snack that’s about to become your new best friend—these peanut butter chocolate chip energy bars are the chewy, sweet, and secretly wholesome treat you’ll want to stash everywhere. Perfect for when hunger strikes between meetings or you need a quick pick-me-up before hitting the gym, they’re ridiculously easy to whip up with pantry staples. Honestly, they’re so good you might just forget they’re actually good for you!
Serving: 12 | Pre Time: 15 minutes | Cooking Time: 0 minutes
Ingredients
– 2 cups old-fashioned rolled oats (the hearty kind, not instant—trust me, it makes a difference in texture)
– 1 cup creamy peanut butter (I’m loyal to the natural, no-stir variety to avoid oily bars)
– ½ cup honey (local if you can swing it—it adds a lovely floral hint)
– ¼ cup mini chocolate chips (these melt better and distribute evenly, saving you from chocolate-less bites)
– 1 tsp vanilla extract (pure, not imitation—it’s worth the splurge for that warm aroma)
– A pinch of salt (just a dash to balance the sweetness and make those flavors pop)
Instructions
1. Line an 8×8-inch baking pan with parchment paper, letting the edges overhang for easy removal later—this little hack prevents sticking and makes cleanup a breeze.
2. In a large mixing bowl, combine 2 cups old-fashioned rolled oats, 1 cup creamy peanut butter, ½ cup honey, 1 tsp vanilla extract, and a pinch of salt.
3. Use a sturdy spatula or your hands to mix everything until fully incorporated and no dry spots remain; if the mixture feels too stiff, let it sit for 5 minutes to soften slightly.
4. Fold in ¼ cup mini chocolate chips gently to avoid crushing them, ensuring they’re evenly distributed throughout the dough.
5. Transfer the mixture to the prepared pan and press it down firmly and evenly with your hands or the bottom of a measuring cup—this compacts the bars so they hold together nicely without crumbling.
6. Chill the pan in the refrigerator for at least 2 hours, or until the bars are firm and set; don’t rush this step, as it’s key for that perfect chewy texture.
7. Once chilled, lift the bars out using the parchment overhang and place them on a cutting board.
8. Use a sharp knife to slice into 12 even rectangles, wiping the blade clean between cuts for neat edges.
These bars emerge delightfully chewy with a rich peanut butter base and melty chocolate bits in every bite. Store them in an airtight container in the fridge for up to a week, or wrap individually for on-the-go snacking—they’re fantastic crumbled over yogurt or paired with a cold glass of milk for an indulgent twist.
Oatmeal Raisin Almond Energy Bars
Ever feel like your afternoon slump needs a snack that won’t send you straight back to bed? Enter these Oatmeal Raisin Almond Energy Bars—they’re the chewy, sweet, and nutty superhero your snack drawer has been dreaming of, ready to tackle any 3 p.m. energy crisis with a wink and a crunch.
Serving: 12 | Pre Time: 15 minutes | Cooking Time: 25 minutes
Ingredients
- 2 cups old-fashioned rolled oats (not the quick-cook kind—they hold their texture better, trust me!)
- 1 cup creamy almond butter (I always go for the natural, stir-it-up kind for that rich flavor)
- 1/2 cup honey (local if you can swing it—it adds a lovely floral note)
- 1/2 cup raisins (plump ones are my favorite; they burst with sweetness in every bite)
- 1/2 cup chopped almonds (toasted first for extra crunch, because why not?)
- 1 tsp vanilla extract (pure, please—imitation just doesn’t cut it here)
- 1/2 tsp ground cinnamon (a warm hug for your taste buds)
- 1/4 tsp salt (a pinch to balance all that sweetness)
Instructions
- Preheat your oven to 350°F and line an 8×8-inch baking pan with parchment paper, letting it hang over the sides for easy removal later.
- In a large mixing bowl, combine the 2 cups old-fashioned rolled oats, 1/2 cup raisins, 1/2 cup chopped almonds, 1/2 tsp ground cinnamon, and 1/4 tsp salt, stirring until everything is evenly distributed.
- In a small saucepan over low heat, warm the 1 cup creamy almond butter and 1/2 cup honey together for about 2-3 minutes, stirring constantly until smooth and well-blended—this helps them mix seamlessly into the dry ingredients.
- Remove the saucepan from the heat and stir in the 1 tsp vanilla extract until fully incorporated.
- Pour the warm almond butter mixture over the dry ingredients in the large bowl, using a spatula to fold and stir until every oat and raisin is coated and the mixture holds together when pressed.
- Tip: If the mixture seems too dry, add a tablespoon of water to help it bind; too sticky? A sprinkle more oats will do the trick.
- Transfer the mixture to the prepared baking pan, pressing it down firmly and evenly with the back of a spoon or your hands to create a compact layer about 1-inch thick.
- Bake in the preheated oven for 20-25 minutes, or until the edges turn a light golden brown and the top feels set to the touch.
- Tip: For cleaner cuts, let the bars cool completely in the pan on a wire rack for at least 1 hour before slicing—patience pays off here!
- Once cooled, use the parchment paper to lift the slab out of the pan and cut it into 12 even bars with a sharp knife.
- Tip: Store leftovers in an airtight container at room temperature for up to a week, or freeze for a month-long stash of instant energy.
Kindly note that these bars emerge with a delightfully chewy texture from the oats, a sweet pop from the raisins, and a satisfying crunch from the almonds. Serve them crumbled over yogurt for breakfast, packed in lunchboxes for a midday boost, or simply enjoyed with a cup of coffee as your secret weapon against the afternoon blahs.
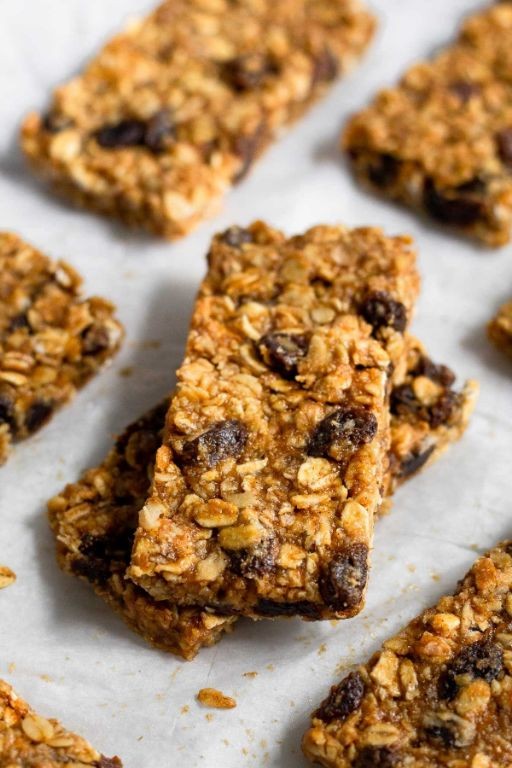
Banana Walnut Protein Energy Bars
Whew, let’s be real—sometimes you need a snack that’s more than just a sad desk banana. Enter these Banana Walnut Protein Energy Bars: the chewy, nutty, secretly healthy treat that’ll make your taste buds do a happy dance and your energy levels thank you.
Serving: 12 | Pre Time: 15 minutes | Cooking Time: 25 minutes
Ingredients
– 2 cups old-fashioned rolled oats (the heartier, the better—skip instant!)
– 1 cup mashed ripe bananas (about 2 large ones, the spottier, the sweeter)
– ½ cup creamy peanut butter (I’m loyal to the natural, no-stir kind)
– ⅓ cup honey (local if you can—it adds a floral hint)
– ½ cup chopped walnuts (toasted for extra crunch, trust me)
– ¼ cup vanilla protein powder (whey or plant-based, your pick)
– 1 tsp vanilla extract (the real deal, not imitation)
– ½ tsp ground cinnamon (a cozy sprinkle)
– ¼ tsp salt (just a pinch to balance the sweetness)
Instructions
1. Preheat your oven to 350°F and line an 8×8-inch baking pan with parchment paper, letting it overhang the sides for easy lifting later.
2. In a large bowl, combine 2 cups old-fashioned rolled oats, ½ cup chopped walnuts, ¼ cup vanilla protein powder, ½ tsp ground cinnamon, and ¼ tsp salt, stirring until evenly mixed.
3. In a medium microwave-safe bowl, heat ½ cup creamy peanut butter and ⅓ cup honey together for 30 seconds on high, then stir until smooth and pourable.
4. Add 1 cup mashed ripe bananas and 1 tsp vanilla extract to the peanut butter mixture, whisking vigorously until fully incorporated and no lumps remain.
5. Pour the wet ingredients into the dry oat mixture, using a spatula to fold everything together until the oats are thoroughly coated and sticky.
6. Transfer the mixture to the prepared baking pan, pressing it down firmly and evenly with your hands or the back of a spoon to compact it into a uniform layer.
7. Bake in the preheated oven for 20–25 minutes, or until the edges turn golden brown and the center feels set to the touch.
8. Remove the pan from the oven and let it cool completely in the pan on a wire rack for at least 1 hour to firm up—patience is key here!
9. Once cooled, use the parchment overhang to lift the slab out of the pan, then slice it into 12 even bars with a sharp knife.
10. Store the bars in an airtight container at room temperature for up to 5 days, or freeze them for longer freshness.
Oh, the joy of biting into these bars! They’re delightfully chewy with a subtle crunch from the walnuts, and the banana-peanut butter duo shines through in every wholesome bite. Serve them chilled for a firmer texture, or crumble one over yogurt for a protein-packed breakfast twist—no sad snacks allowed!
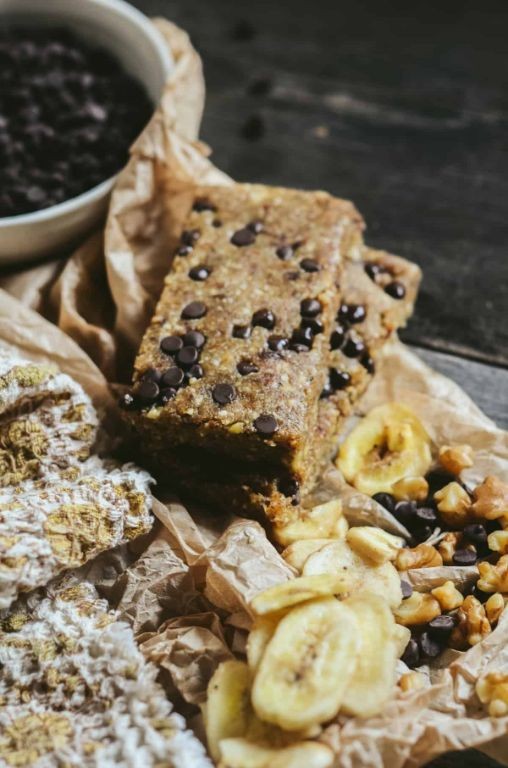
Dark Cherry and Coconut Energy Bars
Craving a snack that won’t leave you in a mid-afternoon slump? These Dark Cherry and Coconut Energy Bars are your deliciously chewy, no-bake ticket to sustained vitality—perfect for when your energy levels are running on empty but your sweet tooth is fully charged.
Serving: 12 | Pre Time: 15 minutes | Cooking Time: 0 minutes
Ingredients
– 1 cup pitted Medjool dates (soaked in warm water for 10 minutes if they’re feeling stiff—trust me, it makes blending a dream)
– 1 cup old-fashioned rolled oats (the hearty kind, not instant—they give the best texture)
– 1/2 cup unsweetened shredded coconut (toasted lightly in a dry pan for 2 minutes until golden, because toasted coconut is a flavor game-changer)
– 1/2 cup raw almonds (I give them a rough chop for some crunch, but you can keep ’em whole if you’re lazy like me sometimes)
– 1/4 cup dark cherry juice (100% pure, no added sugar—it adds a tart punch that balances the sweetness)
– 2 tbsp coconut oil, melted (extra-virgin is my go-to for that subtle tropical aroma)
– 1 tsp vanilla extract (the real stuff, please—imitation vanilla is a culinary crime)
– A pinch of sea salt (just a tiny pinch to make all the flavors pop)
Instructions
1. Line an 8×8-inch baking pan with parchment paper, letting the edges hang over for easy removal later—this little hack saves you from a sticky mess.
2. In a food processor, combine the pitted dates, rolled oats, shredded coconut, chopped almonds, dark cherry juice, melted coconut oil, vanilla extract, and sea salt.
3. Pulse the mixture for 1-2 minutes, scraping down the sides once halfway through, until it forms a sticky dough that holds together when pressed—if it’s too dry, add another tablespoon of cherry juice. Tip: Don’t over-process, or the oats will turn to dust instead of giving that perfect chew.
4. Transfer the dough to the prepared pan and press it firmly into an even layer using your hands or the bottom of a measuring cup—really pack it in to prevent crumbly bars. Tip: Wet your fingers slightly to keep the dough from sticking as you press.
5. Place the pan in the refrigerator for at least 1 hour, or until the bars are firm and set—patience is key here for clean slicing.
6. Remove the pan from the refrigerator, lift the bars out using the parchment paper overhang, and cut into 12 even rectangles with a sharp knife. Tip: Run the knife under hot water and wipe it dry between cuts for smooth edges.
7. Store the bars in an airtight container in the refrigerator for up to a week, or freeze for longer storage.
Absolutely divine in texture—chewy from the dates, with a satisfying crunch from the almonds and a tropical whisper from the coconut. The dark cherry juice lends a tangy brightness that cuts through the richness, making these bars a standout for post-workout fuel or a sneaky desk snack. Try crumbling one over Greek yogurt for a breakfast upgrade, or wrap them individually for on-the-go adventures.
Almond Butter and Honey Energy Bars
Miraculously, my kitchen experiments have finally produced something that won’t send my family running—these Almond Butter and Honey Energy Bars are the chewy, sweet, and secretly nutritious heroes your snack drawer deserves. They’re the perfect blend of ‘I made this’ and ‘I can actually eat this,’ requiring zero baking skills and about as much effort as convincing a toddler to share.
Serving: 12 bars | Pre Time: 10 minutes | Cooking Time: 0 minutes
Ingredients
– 1 cup creamy almond butter (I swear by the natural, stir-it-like-crazy kind—it’s worth the arm workout)
– ½ cup raw honey (local if you can swing it; the bees worked hard for this)
– 2 cups old-fashioned rolled oats (not instant—they hold their texture better, trust me)
– ½ cup chopped almonds (for a little crunch that says ‘fancy,’ but you can skip if you’re lazy)
– ¼ cup mini chocolate chips (because life’s too short for energy bars without chocolate)
– 1 tsp vanilla extract (the real stuff, not that imitation nonsense)
– A pinch of sea salt (to balance the sweetness and make you feel like a pro)
Instructions
1. Line an 8×8-inch baking pan with parchment paper, letting it hang over the edges for easy lifting later—this is your no-stick secret weapon.
2. In a large microwave-safe bowl, combine 1 cup creamy almond butter and ½ cup raw honey.
3. Microwave the mixture on high for 30 seconds, then stir until smooth and well-blended; if it’s too thick, heat in 10-second bursts, but don’t overdo it or it’ll seize up.
4. Stir in 1 tsp vanilla extract and a pinch of sea salt until fully incorporated.
5. Add 2 cups old-fashioned rolled oats and ½ cup chopped almonds to the bowl, mixing with a spatula until everything is evenly coated—get in there and fold it like you mean it.
6. Gently fold in ¼ cup mini chocolate chips to avoid melting them; a quick tip: if the mixture is warm, let it cool for a minute first to keep those chips intact.
7. Transfer the mixture to the prepared pan, pressing it down firmly and evenly with the back of a spoon or your hands to prevent crumbly bars.
8. Refrigerate the pan for at least 2 hours, or until the bars are firm and set—patience is key here, but you can sneak a taste if you must.
9. Use the parchment paper to lift the slab out of the pan, then cut it into 12 even bars with a sharp knife for clean edges.
Absolutely addictive, these bars boast a chewy texture with pops of crunch from the almonds and melty chocolate surprises. Store them in an airtight container in the fridge for up to a week, or wrap individually for grab-and-go fuel that’s way better than anything store-bought.
Pumpkin Spice Energy Bars

Dreading the post-holiday slump but craving those cozy pumpkin spice vibes? These energy bars are your edible superhero—packed with autumnal flavors and enough oomph to power through gift-wrapping marathons or Netflix binges. Let’s bake some magic!
Serving: 12 | Pre Time: 15 minutes | Cooking Time: 25 minutes
Ingredients
– 1 cup rolled oats (old-fashioned, not quick—they add the perfect chew)
– ½ cup pumpkin puree (canned works great, but homemade if you’re feeling fancy)
– ⅓ cup pure maple syrup (the real deal, not pancake syrup—trust me, it makes a difference)
– ¼ cup almond butter (creamy is my go-to for smooth blending)
– 1 large egg, at room temperature (it mixes in better without curdling)
– 1 tsp pumpkin pie spice (because who has time to measure cinnamon, ginger, and nutmeg separately?)
– ½ tsp vanilla extract (a splash of liquid happiness)
– ¼ tsp salt (just a pinch to balance the sweetness)
Instructions
1. Preheat your oven to 350°F and line an 8×8-inch baking pan with parchment paper, letting it overhang the edges for easy removal later.
2. In a large bowl, combine 1 cup rolled oats, ½ cup pumpkin puree, ⅓ cup pure maple syrup, ¼ cup almond butter, 1 large egg, 1 tsp pumpkin pie spice, ½ tsp vanilla extract, and ¼ tsp salt.
3. Stir everything together with a spatula until fully mixed—no dry spots should remain. Tip: If the batter feels too sticky, let it sit for 5 minutes; the oats will absorb some moisture.
4. Pour the batter into the prepared pan and spread it evenly with the spatula, smoothing the top.
5. Bake at 350°F for 22–25 minutes, until the edges are golden brown and a toothpick inserted in the center comes out clean. Tip: Don’t overbake, or the bars will dry out—start checking at 22 minutes.
6. Remove the pan from the oven and let it cool completely in the pan on a wire rack, about 1 hour. Tip: For cleaner cuts, chill the cooled bars in the fridge for 30 minutes before slicing.
7. Use the parchment paper overhang to lift the slab out of the pan, then cut into 12 even bars with a sharp knife.
Zesty with warm spices and subtly sweet, these bars have a soft, chewy texture that’s downright addictive. Serve them crumbled over yogurt for breakfast or stash a few in your bag for an on-the-go snack—they’re so good, you might forget they’re actually wholesome!
Chocolate Hazelnut Energy Bars
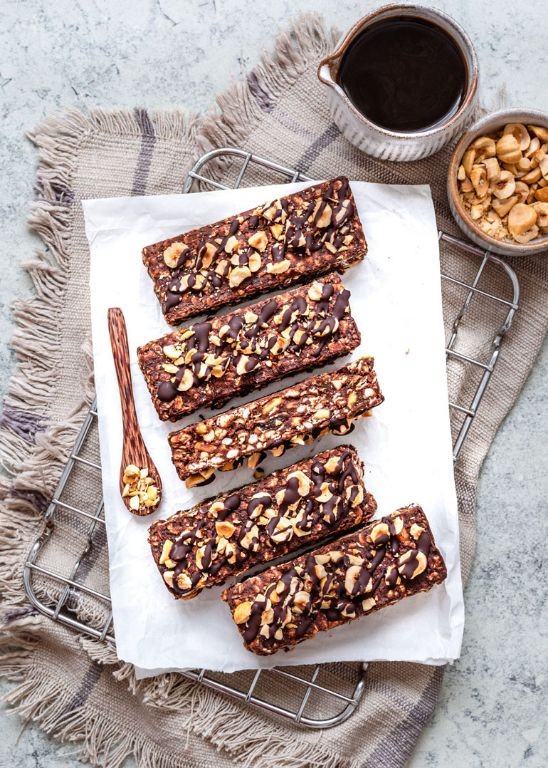
Vexed by mid-afternoon slumps and sad desk lunches? Let’s banish them with these no-bake Chocolate Hazelnut Energy Bars—your new secret weapon for a delicious, homemade energy boost that’s way better than anything from a wrapper. They’re ridiculously easy to whip up and taste like a treat, not a chore.
Serving: 12 bars | Pre Time: 15 minutes | Cooking Time: 0 minutes
Ingredients
– 2 cups old-fashioned rolled oats (not quick-cook, for the best chewy texture)
– 1 cup creamy chocolate hazelnut spread (like Nutella—the star of the show!)
– 1/2 cup honey (local if you can, it adds a lovely floral note)
– 1/2 cup chopped roasted hazelnuts (I buy them pre-roasted to save time, but toasting your own is a game-changer)
– 1/4 cup unsweetened shredded coconut (optional, but it adds a nice tropical hint)
– 1 tsp pure vanilla extract (skip the imitation stuff, please!)
– A generous pinch of sea salt (trust me, it makes the chocolate pop)
Instructions
1. Line an 8×8-inch baking pan with parchment paper, letting the edges hang over for easy removal later.
2. In a large mixing bowl, combine the 2 cups of old-fashioned rolled oats, 1/2 cup of chopped roasted hazelnuts, and 1/4 cup of unsweetened shredded coconut (if using).
3. In a medium saucepan over low heat, warm 1 cup of creamy chocolate hazelnut spread, 1/2 cup of honey, 1 tsp of pure vanilla extract, and a generous pinch of sea salt. Stir constantly with a spatula for about 2-3 minutes until the mixture is smooth and just warm to the touch—don’t let it bubble!
4. Pour the warm chocolate mixture over the dry ingredients in the large bowl. Tip: Work quickly here before it starts to set.
5. Stir everything together with a spatula until the oats and nuts are fully coated and no dry spots remain. It’ll be thick and sticky!
6. Transfer the mixture to the prepared baking pan. Use the spatula or your hands (lightly oiled to prevent sticking) to press it firmly into an even layer. Tip: Press really hard to ensure the bars hold together well after chilling.
7. Cover the pan with plastic wrap and refrigerate for at least 2 hours, or until completely firm. Tip: Overnight is even better for the flavors to meld.
8. Use the parchment paper edges to lift the slab out of the pan. Place it on a cutting board and slice into 12 even bars with a sharp knife.
9. Store the bars in an airtight container in the refrigerator for up to 2 weeks, or freeze for longer storage.
Kick back and enjoy—these bars are delightfully chewy from the oats, with a rich chocolate-hazelnut flavor that’s perfectly balanced by that hint of salt. I love crumbling one over Greek yogurt for breakfast or just grabbing one straight from the fridge when I need a quick, satisfying pick-me-up.
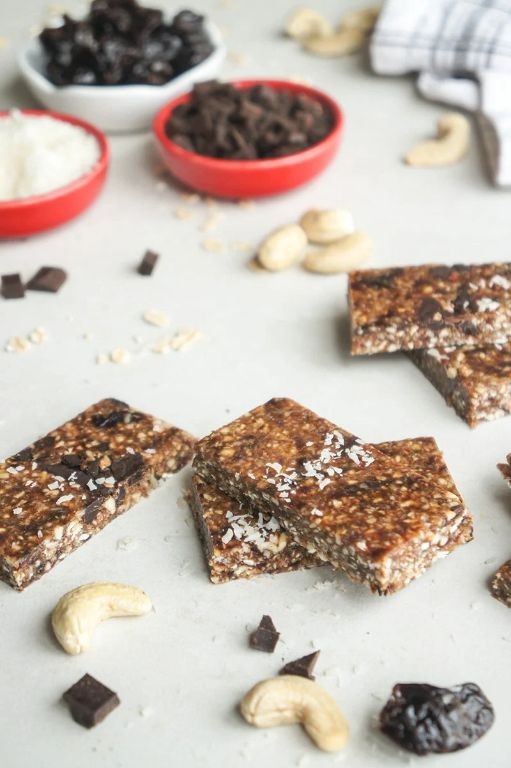
Blueberry Cashew Energy Bars

Packed with more pep than a double-shot espresso, these Blueberry Cashew Energy Bars are the snack that’ll save you from the 3 p.m. slump without any of the guilt. They’re like a chewy, fruity hug for your taste buds, and they come together faster than you can say “hangry.” Trust me, your future self will thank you for whipping up a batch.
Serving: 12 bars | Pre Time: 15 minutes | Cooking Time: 0 minutes
Ingredients
– 2 cups raw cashews (I like to give them a quick toast in a dry pan for extra flavor, but raw works perfectly)
– 1 cup pitted Medjool dates (soak them in warm water for 10 minutes if they’re feeling a bit stiff—it makes blending a dream)
– 1/2 cup dried blueberries (the chewier, the better!)
– 1/4 cup honey (local is my go-to for that floral kick)
– 1 tsp vanilla extract (the real stuff, please—imitation just doesn’t cut it)
– 1/4 tsp sea salt (a pinch to balance all that sweetness)
Instructions
1. Line an 8×8-inch baking pan with parchment paper, letting the edges hang over for easy removal later.
2. Add the 2 cups of raw cashews to a food processor and pulse for about 30 seconds until they’re coarsely chopped—you want some texture, not dust. Tip: If your processor is small, work in batches to avoid overworking the motor.
3. Pour the chopped cashews into a large mixing bowl and set aside.
4. Drain the 1 cup of pitted Medjool dates if soaked, then add them to the now-empty food processor along with the 1/2 cup of dried blueberries, 1/4 cup of honey, 1 tsp of vanilla extract, and 1/4 tsp of sea salt.
5. Process the mixture on high for 1-2 minutes until it forms a sticky, uniform paste. Tip: Scrape down the sides halfway through to ensure everything is well incorporated.
6. Add the date-blueberry paste to the bowl with the chopped cashews.
7. Use your hands or a spatula to mix everything together thoroughly for about 2 minutes—get in there and squish it until no dry spots remain and it holds together when pressed.
8. Transfer the mixture to the prepared baking pan and press it down firmly and evenly with your hands or the bottom of a measuring cup. Tip: For super neat bars, place a piece of parchment on top before pressing to prevent sticking.
9. Refrigerate the pan for at least 2 hours, or until the mixture is firm and set.
10. Lift the slab out of the pan using the parchment overhang and place it on a cutting board.
11. Use a sharp knife to slice the slab into 12 even bars, wiping the blade clean between cuts for cleaner edges.
12. Store the bars in an airtight container in the refrigerator for up to 2 weeks.
Now, let’s talk results: these bars boast a delightfully chewy texture with little crunchy bits from the cashews, and the blueberry flavor shines through without being overly sweet. Need a creative twist? Crumble one over Greek yogurt for breakfast or pack them on your next hike—they’re sturdy enough to survive a backpack adventure.
Matcha Green Tea Energy Bars
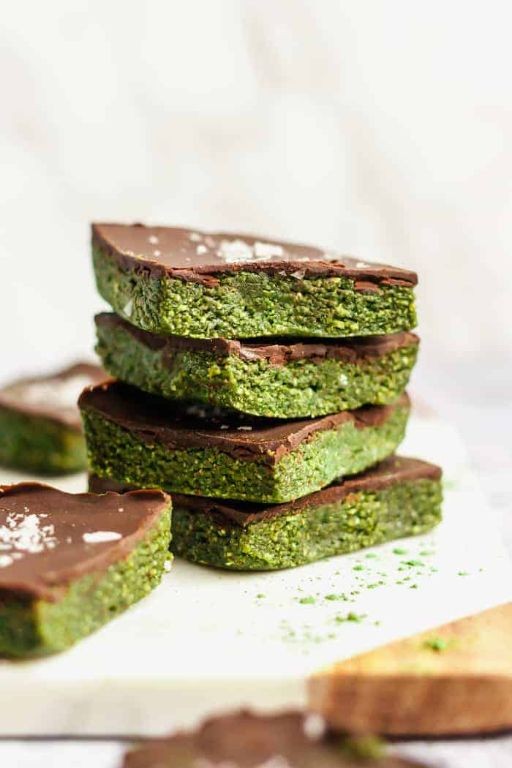
Phew, who else is running on caffeine and sheer willpower this holiday season? Let’s swap that third coffee for something that actually loves you back—these Matcha Green Tea Energy Bars are here to save your sanity with a zen-like boost and zero jitters. They’re like a yoga session in snack form, but way tastier and without the awkward downward dog.
Serving: 12 bars | Pre Time: 15 minutes | Cooking Time: 25 minutes
Ingredients
– 2 cups old-fashioned rolled oats (not instant—trust me, they hold texture better)
– 1 cup creamy almond butter (the kind that drips slowly, not the stiff stuff)
– ½ cup pure maple syrup (grade A for that rich caramel vibe)
– ¼ cup coconut oil, melted (extra-virgin is my go-to for a hint of tropical flair)
– 3 tablespoons high-quality matcha powder (splurge on the vibrant green stuff—it’s worth it!)
– 1 teaspoon vanilla extract (the real deal, not imitation)
– ½ teaspoon fine sea salt (a pinch to balance the sweetness)
– ½ cup chopped almonds (for a satisfying crunch)
– ⅓ cup dried cranberries (these little tart gems cut through the richness)
Instructions
1. Preheat your oven to 325°F and line an 8×8-inch baking pan with parchment paper, leaving some overhang for easy removal later.
2. In a large mixing bowl, combine the old-fashioned rolled oats, chopped almonds, and dried cranberries, stirring gently to distribute evenly.
3. In a medium saucepan over low heat, warm the creamy almond butter, pure maple syrup, and melted coconut oil, stirring constantly until smooth and fully blended—about 2-3 minutes. Tip: Don’t let it boil, or it might separate and get grainy.
4. Remove the saucepan from heat and whisk in the high-quality matcha powder, vanilla extract, and fine sea salt until the mixture is uniformly green with no lumps.
5. Pour the warm wet mixture over the dry ingredients in the bowl, and use a spatula to fold everything together until every oat is coated and sticky.
6. Transfer the mixture to the prepared baking pan, pressing it down firmly and evenly with the back of a spoon or your hands. Tip: Wet your fingers slightly to prevent sticking while pressing.
7. Bake in the preheated oven for 20-25 minutes, until the edges are lightly golden and the center feels set to the touch. Tip: Check at 20 minutes to avoid over-baking—these bars firm up as they cool.
8. Let the pan cool completely on a wire rack for at least 1 hour, then use the parchment overhang to lift out the slab and slice into 12 bars.
Buttery and chewy with a subtle earthy kick from the matcha, these bars are my secret weapon for hectic days. Serve them chilled for a firmer bite or crumbled over yogurt for a breakfast upgrade—either way, they’re a delicious rebellion against boring snacks.
Carrot Cake Energy Bars

Sick of energy bars that taste like cardboard with commitment issues? Let’s fix that with these Carrot Cake Energy Bars—they’re the chewy, spiced, secretly-veggie-packed snack that’ll make your afternoon slump wave a white flag. Think of them as your favorite cozy slice, but portable and ready to power you through holiday errands or a last-minute wrapping session.
Serving: 12 | Pre Time: 15 minutes | Cooking Time: 25 minutes
Ingredients
– 1 ½ cups old-fashioned rolled oats (not quick oats—they keep things delightfully chewy)
– 1 cup finely grated carrots (about 2 medium, and I always peel them first for a smoother texture)
– ½ cup almond butter (creamy is my go-to for perfect binding)
– ⅓ cup pure maple syrup (the real stuff, please—no pancake syrup imposters!)
– ¼ cup chopped walnuts (toasted first if you’re feeling fancy)
– 2 tbsp melted coconut oil (it adds a subtle tropical vibe)
– 1 tsp ground cinnamon (because carrot cake isn’t carrot cake without it)
– ½ tsp ground ginger (a little zing never hurt anyone)
– ¼ tsp fine sea salt (just a pinch to make all the flavors pop)
– ¼ cup raisins (optional, but they add a nice chewy surprise)
Instructions
1. Preheat your oven to 350°F and line an 8×8-inch baking pan with parchment paper, leaving some overhang for easy removal later.
2. In a large mixing bowl, combine the old-fashioned rolled oats, finely grated carrots, chopped walnuts, ground cinnamon, ground ginger, and fine sea salt. Stir until everything is evenly distributed—this is where the magic starts!
3. In a separate medium bowl, whisk together the almond butter, pure maple syrup, and melted coconut oil until smooth and fully incorporated. Tip: If your almond butter is stiff, warm it slightly for easier mixing.
4. Pour the wet mixture from step 3 into the dry ingredients from step 2. Use a spatula to fold and stir until no dry spots remain and the mixture is uniformly sticky.
5. Gently fold in the raisins, if using, making sure they’re evenly scattered throughout the batter.
6. Transfer the mixture to your prepared baking pan. Press it down firmly and evenly with your hands or the back of a measuring cup—really pack it in to prevent crumbly bars. Tip: Dampen your fingers slightly to avoid sticking.
7. Bake in the preheated oven for 22–25 minutes, or until the edges are golden brown and the center feels set to the touch. Tip: Don’t overbake, or they’ll dry out—we want chewy, not crunchy!
8. Remove the pan from the oven and let it cool completely in the pan on a wire rack, about 1 hour. This patience-testing step is crucial for clean slicing.
9. Once fully cooled, use the parchment overhang to lift the slab out of the pan. Place it on a cutting board and slice into 12 even bars.
10. Store the bars in an airtight container at room temperature for up to 5 days, or freeze for longer storage—they’re great straight from the freezer too!
What you get is a bar with a soft, dense chew, packed with warm cinnamon-ginger spice and little bursts of sweetness from the raisins. Serve them crumbled over yogurt for breakfast, or pack one in your bag as a guilt-free treat that actually tastes like dessert.
Chia Seed and Date Energy Bars
Feeling that mid-afternoon slump where coffee just won’t cut it? Let’s ditch the store-bought sugar bombs and make some Chia Seed and Date Energy Bars that actually taste good and won’t leave you crashing harder than a toddler after a juice box. These no-bake wonders are your secret weapon for a real, lasting energy boost.
Serving: 12 bars | Pre Time: 15 minutes | Cooking Time: 0 minutes
Ingredients
– 2 cups of pitted Medjool dates (the sticky, caramel-like superstars of the date world)
– 1 cup of old-fashioned rolled oats (not the quick-cook kind, they get too mushy)
– 1/2 cup of creamy almond butter (my pantry hero for everything)
– 1/4 cup of chia seeds (these tiny powerhouses are worth the hype)
– 1/4 cup of raw, unsalted almonds, roughly chopped (for a satisfying crunch)
– 1 teaspoon of pure vanilla extract (the good stuff makes all the difference)
– A generous pinch of sea salt (to make all the sweet flavors pop)
Instructions
1. Place the pitted Medjool dates into a food processor and pulse until they form a thick, sticky paste, about 1-2 minutes. Tip: If your dates seem dry, soak them in warm water for 10 minutes first, then drain thoroughly.
2. Add the old-fashioned rolled oats, creamy almond butter, chia seeds, chopped almonds, pure vanilla extract, and sea salt to the food processor with the date paste.
3. Process the mixture on high until everything is thoroughly combined and starts to clump together into a cohesive dough, about 1-2 minutes. It should hold together when pinched.
4. Line an 8×8 inch baking dish with parchment paper, letting the edges overhang for easy removal.
5. Transfer the dough from the food processor into the prepared baking dish.
6. Use slightly damp hands to press the mixture firmly and evenly into the dish, ensuring there are no gaps. Tip: Wetting your hands prevents the sticky dough from clinging.
7. Place the dish in the refrigerator and let the mixture set for at least 2 hours, or until completely firm.
8. Remove the set slab from the dish using the parchment paper overhang and place it on a cutting board.
9. Use a sharp knife to cut the slab into 12 even bars. Tip: Wiping the knife clean between cuts gives you cleaner edges.
10. Individually wrap each bar in parchment paper or store them all in an airtight container in the refrigerator.
Ready for a snack that’s chewy, nutty, and perfectly sweet without being cloying? The texture is delightfully dense yet tender, with little pops of crunch from the almonds. I love keeping a few in the freezer for an instant grab-and-go treat, or crumbling one over a bowl of Greek yogurt for a next-level breakfast.
Lemon Poppy Seed Energy Bars
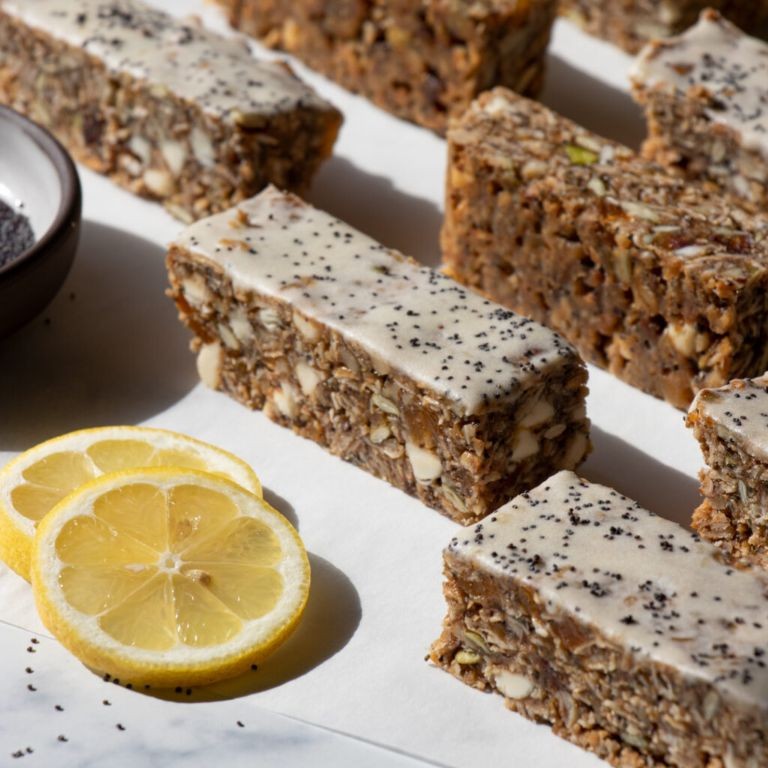
Let’s be real—sometimes you need a snack that’s more ‘zing!’ than ‘zzz.’ These lemon poppy seed energy bars are the cheerful, citrusy pick-me-up your afternoon craves, packed with wholesome ingredients and a sunny attitude. They’re so good, you might just forget they’re actually good for you!
Serving: 12 | Pre Time: 15 minutes | Cooking Time: 25 minutes
Ingredients
– 1 cup old-fashioned rolled oats (the heartier, the better—they give great chew)
– ½ cup almond flour (my go-to for a tender, nutty base)
– ¼ cup honey (local if you can—it adds a lovely floral note)
– 2 tbsp coconut oil, melted (it brings a subtle tropical vibe)
– 1 large egg, at room temperature (this helps everything bind smoothly)
– Zest of 1 lemon (get every last bit of that bright flavor!)
– 2 tbsp fresh lemon juice (squeezed right before using for maximum zing)
– 1 tbsp poppy seeds (for that classic speckled look and crunch)
– ½ tsp vanilla extract (a splash of warmth never hurts)
– ¼ tsp salt (just a pinch to balance the sweetness)
Instructions
1. Preheat your oven to 350°F and line an 8×8-inch baking pan with parchment paper, letting it overhang the sides for easy removal later.
2. In a large bowl, combine the rolled oats, almond flour, poppy seeds, and salt, stirring until evenly mixed.
3. In a separate medium bowl, whisk together the honey, melted coconut oil, egg, lemon zest, lemon juice, and vanilla extract until smooth and well-blended. Tip: If your honey is thick, warm it slightly for easier mixing.
4. Pour the wet ingredients into the dry ingredients and stir vigorously with a spatula until a thick, cohesive dough forms and no dry spots remain.
5. Transfer the dough to the prepared pan and press it firmly into an even layer, using the back of a spoon or your hands. Tip: Wet your fingers lightly to prevent sticking while pressing.
6. Bake in the preheated oven for 20–25 minutes, or until the edges are golden brown and the center feels set to the touch. Tip: Check at 20 minutes to avoid over-baking—these bars firm up as they cool.
7. Remove the pan from the oven and let it cool completely in the pan on a wire rack, about 1 hour, to allow the bars to set properly.
8. Once cooled, lift the parchment to remove the slab from the pan and cut it into 12 even bars with a sharp knife.
Who knew something so simple could be so satisfying? These bars boast a chewy, slightly crumbly texture with pops of poppy seed crunch, all wrapped up in a bright lemon hug. Serve them as a grab-and-go breakfast, crumbled over yogurt for a fun twist, or just enjoy one with your afternoon coffee—they’re guaranteed to add a little sunshine to your day!
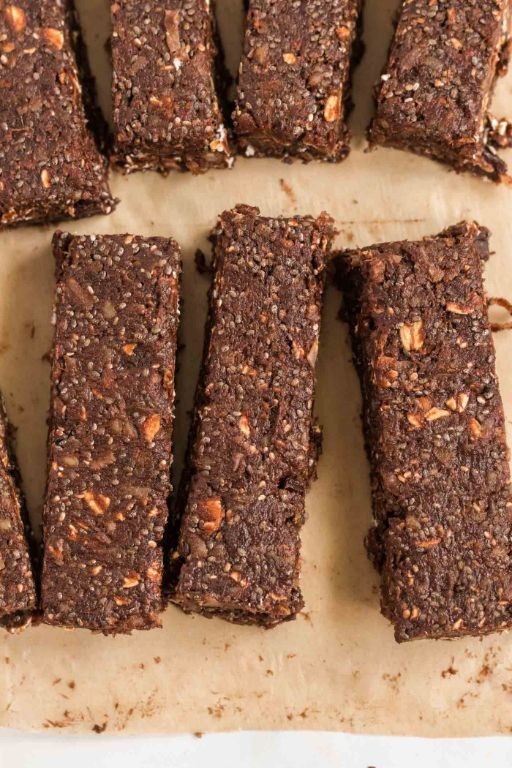
Espresso Chocolate Energy Bars
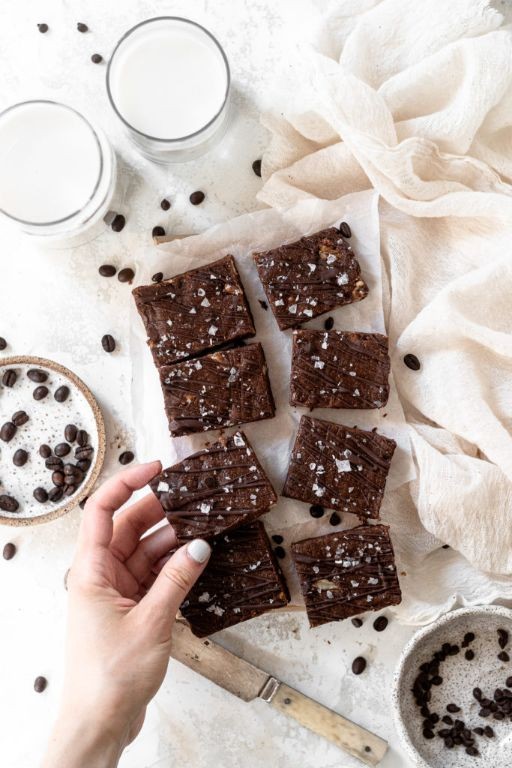
Alright, let’s get this coffee-powered party started! Espresso Chocolate Energy Bars are here to rescue your afternoon slump with a double shot of deliciousness—think chewy, chocolatey bliss that packs a caffeinated punch to keep you zooming past 3 PM like a superhero. Trust me, your taste buds (and your productivity) will thank you.
Serving: 12 | Pre Time: 15 minutes | Cooking Time: 25 minutes
Ingredients
– 1 cup old-fashioned rolled oats (not instant—they hold their texture better, I swear by it!)
– ½ cup creamy peanut butter (the natural kind is my go-to for that rich, nutty vibe)
– ⅓ cup pure maple syrup (grade A for sweetness without the guilt)
– ¼ cup unsweetened cocoa powder (go for the dark stuff—it adds depth)
– 2 tbsp finely ground espresso beans (freshly ground gives the best kick, like a morning wake-up call)
– 1 tsp vanilla extract (real deal, not imitation—it makes all the difference)
– ¼ tsp sea salt (a pinch balances the sweetness perfectly)
– ½ cup dark chocolate chips (I prefer 70% cacao for a bittersweet contrast)
Instructions
1. Preheat your oven to 350°F and line an 8×8-inch baking pan with parchment paper, letting it overhang the sides for easy removal later—no sticky messes!
2. In a large mixing bowl, combine 1 cup old-fashioned rolled oats, ¼ cup unsweetened cocoa powder, 2 tbsp finely ground espresso beans, and ¼ tsp sea salt, stirring until evenly mixed.
3. In a small saucepan over low heat, warm ½ cup creamy peanut butter and ⅓ cup pure maple syrup for 2-3 minutes, stirring constantly until smooth and slightly runny.
4. Remove the saucepan from heat and stir in 1 tsp vanilla extract until fully incorporated.
5. Pour the warm peanut butter mixture into the dry ingredients and mix vigorously with a spatula for about 1 minute until everything is well-coated and clumping together.
6. Fold in ½ cup dark chocolate chips gently to avoid melting them—they’ll stay whole for gooey pockets later.
7. Transfer the mixture to the prepared baking pan and press it down firmly and evenly with your hands or the back of a spoon to create a compact layer.
8. Bake in the preheated oven at 350°F for 20-25 minutes, until the edges are set and the top looks dry but not browned.
9. Remove the pan from the oven and let it cool completely in the pan on a wire rack for at least 1 hour—patience is key here to avoid crumbly bars.
10. Once cooled, lift the parchment paper to remove the slab, place it on a cutting board, and slice into 12 even bars using a sharp knife.
Chewy, chocolatey, and packed with espresso zing, these bars boast a fudgy texture that holds up in your lunchbox without turning into a mess. Serve them chilled for a firmer bite or slightly warmed to melt the chocolate chips into gooey pools—either way, they’re a caffeinated treat that beats store-bought snacks any day!
Strawberry Vanilla Energy Bars
Vexed by mid-afternoon slumps? Meet your new best friend: Strawberry Vanilla Energy Bars—the chewy, fruity, no-bake heroes that’ll power you through holiday chaos (or just a Netflix binge) without a sugar crash. Think of them as a hug in bar form, packed with real fruit and a hint of vanilla magic.
Serving: 12 bars | Pre Time: 15 minutes | Cooking Time: 0 minutes
Ingredients
– 2 cups old-fashioned rolled oats (not quick oats—they hold texture better, trust me)
– 1 cup dried strawberries, chopped small (I snag the unsweetened kind for a pure fruit punch)
– ½ cup creamy almond butter (any nut butter works, but almond’s my fave for mild flavor)
– ⅓ cup pure maple syrup (the real deal, not pancake syrup—it makes all the difference)
– 1 teaspoon vanilla extract (splash in a little extra if you’re feeling fancy)
– ¼ teaspoon fine sea salt (just a pinch to balance the sweetness)
Instructions
1. Line an 8×8-inch baking pan with parchment paper, letting it overhang the sides for easy lifting later.
2. In a large bowl, combine 2 cups old-fashioned rolled oats, 1 cup chopped dried strawberries, and ¼ teaspoon fine sea salt—toss them gently with your hands to mix evenly.
3. In a medium microwave-safe bowl, heat ½ cup creamy almond butter and ⅓ cup pure maple syrup together for 30 seconds on high power, just until warm and pourable (no need to boil it!).
4. Stir 1 teaspoon vanilla extract into the warm almond butter mixture until fully incorporated and glossy.
5. Pour the wet mixture over the dry ingredients in the large bowl, and use a spatula to fold everything together until every oat and strawberry bit is coated—this might take a minute of good stirring.
6. Tip: If the mix seems too dry, add another tablespoon of maple syrup; if too wet, sprinkle in a few more oats.
7. Transfer the mixture to the prepared pan, pressing it down firmly and evenly with the back of a measuring cup or your hands to compact it into a smooth layer.
8. Tip: Lay a piece of parchment over the top before pressing to avoid sticky fingers—a game-changer for neat bars!
9. Chill the pan in the refrigerator for at least 2 hours, or until the bars are firm and set (overnight is even better for maximum hold).
10. Tip: Don’t skip the chilling—it’s what gives these bars their perfect chewy texture without baking.
11. Lift the parchment to remove the slab from the pan, place it on a cutting board, and slice into 12 even bars using a sharp knife.
12. Store the bars in an airtight container in the fridge for up to a week, or freeze them for a month-long stash.
Soft and chewy with bursts of strawberry sweetness, these bars are like a portable dessert that won’t weigh you down. Serve them straight from the fridge for a cool treat, or crumble one over yogurt for a breakfast upgrade—either way, they’re guaranteed to vanish fast!
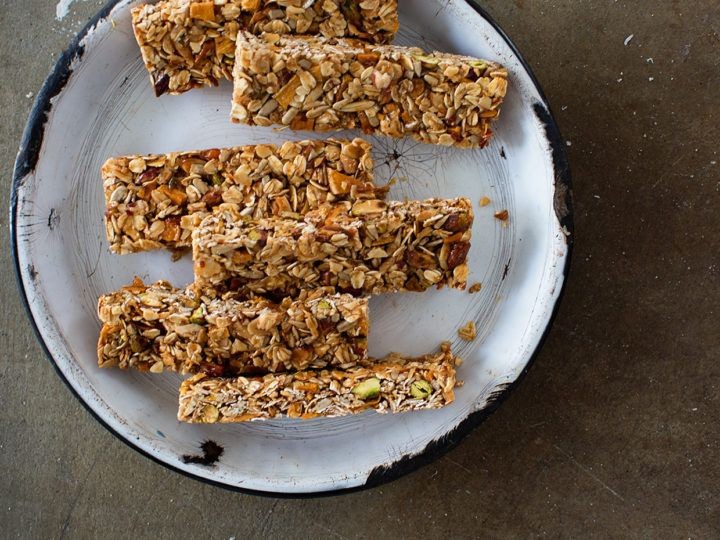
Pistachio Cranberry Energy Bars
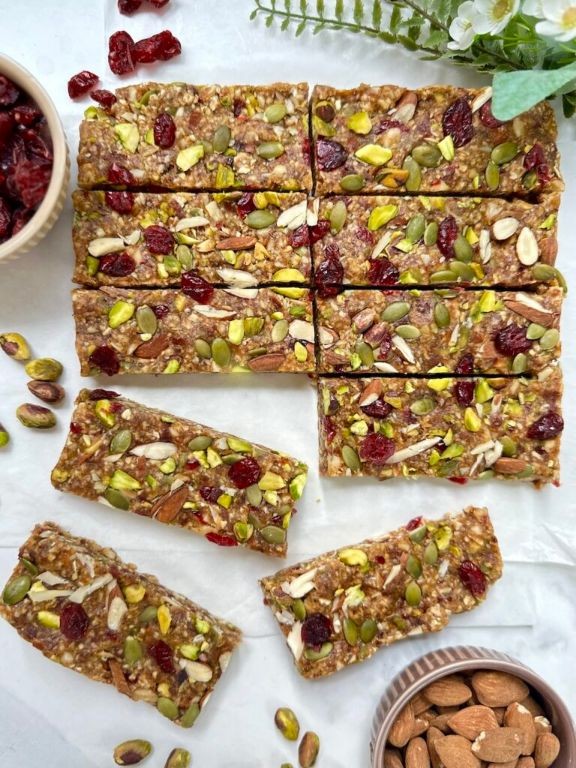
Brace yourself for a snack so good, it might just become your new reason to get out of bed (or at least your new reason to open the pantry). These Pistachio Cranberry Energy Bars are the chewy, sweet-tart, and nutty heroes we all need to power through the holiday hustle—no fancy kitchen skills required, just a serious craving for deliciousness.
Serving: 12 bars | Pre Time: 15 minutes | Cooking Time: 25 minutes
Ingredients
– 2 cups old-fashioned rolled oats (not the quick-cook kind—we want that hearty chew!)
– 1 cup creamy almond butter, well-stirred (the natural kind that separates is my go-to for maximum flavor)
– ½ cup pure maple syrup, the real stuff only, please (none of that “pancake syrup” imposter!)
– ½ cup dried cranberries, roughly chopped if you’re feeling fancy
– ½ cup shelled pistachios, lightly toasted and coarsely chopped (toasting is non-negotiable for that nutty crunch)
– 1 tsp pure vanilla extract (splurge on the good vanilla—it makes all the difference)
– ¼ tsp fine sea salt (a pinch to balance all that sweetness)
Instructions
1. Preheat your oven to 325°F and line an 8×8-inch baking pan with parchment paper, letting the edges hang over for easy removal later.
2. In a large mixing bowl, combine the old-fashioned rolled oats, chopped toasted pistachios, and chopped dried cranberries, stirring until evenly distributed.
3. In a medium saucepan over low heat, warm the creamy almond butter, pure maple syrup, pure vanilla extract, and fine sea salt, stirring constantly for about 2-3 minutes until the mixture is smooth and slightly runny. Tip: Don’t let it boil—just warm it enough to blend easily!
4. Pour the warm almond butter mixture over the oat mixture in the bowl, and use a spatula to fold everything together until fully coated and no dry spots remain.
5. Transfer the mixture to the prepared baking pan, pressing it down firmly and evenly with the back of a spoon or your hands. Tip: Press really hard here to prevent crumbly bars later!
6. Bake in the preheated oven for 20-25 minutes, until the edges are lightly golden brown and the center looks set. Tip: Check at 20 minutes—overbaking can make them dry.
7. Remove the pan from the oven and let it cool completely in the pan on a wire rack for at least 1 hour to firm up.
8. Once cooled, use the parchment paper edges to lift the slab out of the pan, then cut into 12 even bars with a sharp knife.
These bars boast a delightfully chewy texture with pops of tart cranberry and crunchy pistachio in every bite. Serve them crumbled over yogurt for breakfast or stash a few in your bag for an on-the-go energy boost—they’re so tasty, you might just “accidentally” eat the whole batch!
Sweet Potato Pecan Energy Bars
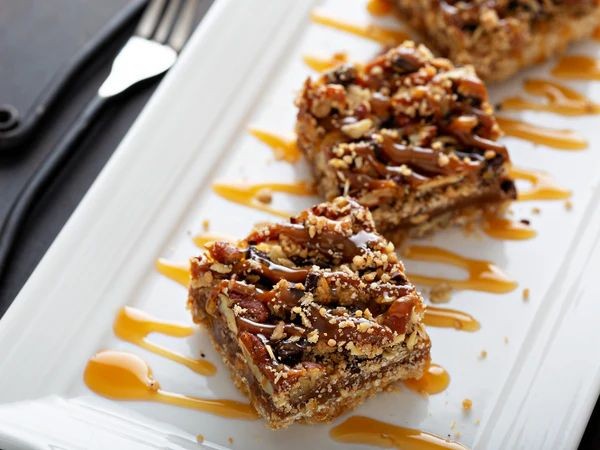
Just when you thought sweet potatoes were only for Thanksgiving casseroles, they’ve sneakily muscled their way into snack bar territory—and honestly, we’re not mad about it. These Sweet Potato Pecan Energy Bars are like a cozy hug for your taste buds, packed with enough natural sweetness and crunch to power you through that 3 p.m. slump without a sugar crash in sight. Consider them your new secret weapon for busy days when you need a boost that doesn’t taste like cardboard.
Serving: 12 bars | Pre Time: 15 minutes | Cooking Time: 25 minutes
Ingredients
– 1 medium sweet potato (about 1 cup mashed—roast it ahead for deeper flavor, trust me)
– 1 cup old-fashioned rolled oats (not quick-cook, they hold texture better)
– ½ cup chopped pecans (toasted first if you’re fancy, but raw works in a pinch)
– ¼ cup pure maple syrup (the real stuff, please—no pancake syrup imposters!)
– 2 tbsp coconut oil, melted (it adds a subtle tropical vibe)
– 1 tsp ground cinnamon (a generous dash makes everything cozy)
– ½ tsp vanilla extract (I splurge on the good vanilla here)
– A pinch of salt (balances the sweetness like a pro)
Instructions
1. Preheat your oven to 350°F and line an 8×8-inch baking pan with parchment paper, letting it hang over the sides for easy removal later.
2. Peel and cube the sweet potato, then steam or boil it until fork-tender, about 10–12 minutes. Tip: Mash it while warm for a smoother blend—no lumps allowed!
3. In a large bowl, combine the mashed sweet potato, oats, pecans, maple syrup, melted coconut oil, cinnamon, vanilla, and salt. Mix thoroughly until everything is evenly coated and sticky.
4. Press the mixture firmly into the prepared pan, using the back of a spoon or your hands to create an even layer. Tip: Wet your fingers slightly to prevent sticking while pressing.
5. Bake for 20–25 minutes, or until the edges are golden brown and the center feels set to the touch. Tip: Let it cool completely in the pan—this helps the bars firm up without crumbling.
6. Once cooled, lift the parchment to remove the slab, then cut into 12 even bars with a sharp knife.
Grab one fresh from the pan and savor that chewy, oat-filled texture with pops of pecan crunch. The sweet potato lends a moist, earthy sweetness that pairs perfectly with the cinnamon warmth, making these bars ideal for stashing in your gym bag or crumbling over yogurt for a breakfast upgrade. Honestly, they might just become your go-treat for any time you need a little pick-me-up!
Tropical Mango Coconut Energy Bars
Dreading that 3 p.m. energy crash? Ditch the sad desk snacks and meet your new tropical getaway in bar form—these Mango Coconut Energy Bars are here to rescue your afternoon with a burst of sunshine. They’re so easy, you’ll be dreaming of palm trees while your food processor does most of the work.
Serving: 12 | Pre Time: 15 minutes | Cooking Time: 0 minutes
Ingredients
– 1 cup old-fashioned rolled oats (not quick-cook—they hold their texture better, trust me)
– 1 cup unsweetened shredded coconut (toasted is my secret for extra flavor)
– 1 cup dried mango, chopped into small pieces (I go for the soft, chewy kind—no leathery bits!)
– 1/2 cup creamy almond butter (the natural, stir-first kind is my go-to for binding)
– 1/4 cup pure maple syrup (grade A for that caramel-like sweetness)
– 1/4 cup coconut oil, melted (it solidifies perfectly to hold everything together)
– 1 tsp vanilla extract (a splash of liquid gold)
– 1/4 tsp sea salt (just a pinch to make the flavors pop)
Instructions
1. Line an 8×8-inch baking pan with parchment paper, letting the edges hang over for easy removal later.
2. In a large bowl, combine 1 cup old-fashioned rolled oats, 1 cup unsweetened shredded coconut, and 1 cup chopped dried mango—give it a good stir with a spoon to mix evenly.
3. In a medium microwave-safe bowl, melt 1/4 cup coconut oil in 15-second bursts until fully liquid, then whisk in 1/2 cup creamy almond butter, 1/4 cup pure maple syrup, 1 tsp vanilla extract, and 1/4 tsp sea salt until smooth and glossy. Tip: If the almond butter is stiff, warm it slightly for easier blending.
4. Pour the wet mixture over the dry ingredients and use a spatula to fold everything together until every oat and mango piece is coated—it’ll look like a sticky, chunky dough.
5. Transfer the mixture to the prepared pan and press it down firmly and evenly with your hands or the bottom of a glass. Tip: Lay a piece of parchment on top while pressing to prevent sticking and ensure a smooth surface.
6. Refrigerate the pan for at least 2 hours, or until the bars are completely firm and set. Tip: Don’t rush this—chilling is key for clean slices!
7. Lift the slab out using the parchment overhang and place it on a cutting board. Use a sharp knife to slice into 12 even bars, wiping the blade between cuts for neat edges.
These bars are delightfully chewy with pops of sweet mango and a toasty coconut crunch—store them in the fridge for a grab-and-go treat, or wrap individually for a beach-worthy snack that’ll make you forget you’re stuck at your desk.
Vanilla Almond Protein Energy Bars
Hear ye, hear ye, snackers of America! If your afternoon slump feels like a marathon you didn’t train for, I’ve got the edible cheer squad you need. These Vanilla Almond Protein Energy Bars are the no-bake, pantry-raid heroes that will power you through holiday chaos or a regular Tuesday with equal gusto.
Serving: 12 bars | Pre Time: 15 minutes | Cooking Time: 0 minutes
Ingredients
– 2 cups old-fashioned rolled oats (the hearty kind, not instant—trust me, texture matters!)
– 1 cup creamy almond butter (I’m loyal to the stirred kind, but any natural variety works)
– 1/2 cup honey (local if you can swing it, for that floral kick)
– 1/2 cup vanilla protein powder (my go-to is whey-based for maximum binding power)
– 1/4 cup sliced almonds, toasted (toasting is non-negotiable for that nutty crunch)
– 1 tsp pure vanilla extract (skip the imitation stuff—your taste buds will thank you)
– A big pinch of sea salt (it makes the sweet flavors pop like confetti)
Instructions
1. Line an 8×8-inch baking pan with parchment paper, letting the edges hang over for easy bar removal later.
2. In a large mixing bowl, combine 2 cups of old-fashioned rolled oats and 1/2 cup of vanilla protein powder, stirring until no clumps remain. Tip: Sift the protein powder if it’s lumpy to avoid dry pockets in your bars.
3. In a medium saucepan over low heat, warm 1 cup of creamy almond butter, 1/2 cup of honey, and 1 tsp of pure vanilla extract, stirring constantly for about 2-3 minutes until the mixture is smooth and runny.
4. Pour the warm almond butter mixture into the dry oat mixture, adding a big pinch of sea salt, and stir vigorously with a spatula until everything is evenly coated and forms a thick, sticky dough.
5. Fold in 1/4 cup of toasted sliced almonds, distributing them evenly throughout the dough. Tip: Toast the almonds in a dry skillet over medium heat for 3-4 minutes until fragrant and golden—it unlocks their flavor!
6. Transfer the dough to the prepared baking pan, pressing it down firmly and evenly with your hands or the bottom of a measuring cup. Tip: Wet your hands slightly to prevent sticking while pressing.
7. Chill the pan in the refrigerator for at least 2 hours, or until the bars are firm and set.
8. Use the parchment paper overhang to lift the slab from the pan, then cut it into 12 even bars with a sharp knife.
Yeah, these bars are the snack-world equivalent of a cozy sweater—chewy from the oats, rich with vanilla warmth, and studded with toasty almond bits that crunch with every bite. Crumble one over Greek yogurt for a parfait, or just stash them in your bag for a hunger emergency; they’re forgiving friends that won’t crumble under pressure.
Summary
Crafting your own energy bars is a fantastic way to fuel your busy days with wholesome ingredients you trust. We hope this collection of 20 delicious recipes inspires your next kitchen adventure! Give a few a try, then pop back to let us know which ones you loved. If you found this roundup helpful, we’d be so grateful if you’d share it on Pinterest to help other home cooks.


