
Aren’t we all looking for that perfect quick fix on hectic weeknights? Dive into these 20 fast food-inspired recipes that bring the drive-thru magic right to your kitchen—no long lines or mystery ingredients required. From crispy chicken to loaded fries, these easy dishes are designed for busy home cooks craving comfort without the fuss. Let’s get cooking and turn those rushed evenings into delicious victories!
Homemade Crispy Chicken Tenders

Haven’t we all had those nights when nothing sounds better than crispy, golden chicken tenders? I know I have—especially after a long day when my kids are begging for something fun and satisfying. This homemade version is my go‑at‑home fix, and I promise it’s easier than you think, with a crunch that beats any drive‑thru.
Serving: 4 | Pre Time: 15 minutes | Cooking Time: 15 minutes
Ingredients
– 1.5 lbs chicken tenders (or boneless, skinless chicken breasts cut into strips)
– 1 cup all‑purpose flour
– 2 large eggs
– 1 cup panko breadcrumbs (for extra crunch, or use regular breadcrumbs)
– 1 tsp garlic powder
– 1 tsp paprika
– 1 tsp salt (adjust to taste)
– ½ tsp black pepper
– Vegetable oil for frying (about 2 cups, or any neutral oil with a high smoke point)
– Ranch dressing or honey mustard for serving (optional)
Instructions
1. Pat the chicken tenders completely dry with paper towels—this helps the coating stick better.
2. In a shallow bowl, whisk the eggs until smooth.
3. In a second shallow bowl, combine the flour, garlic powder, paprika, salt, and black pepper.
4. Place the panko breadcrumbs in a third shallow bowl.
5. Dredge each chicken tender first in the flour mixture, shaking off any excess.
6. Dip the floured tender into the beaten eggs, letting any extra drip off.
7. Press the tender firmly into the panko breadcrumbs, coating all sides evenly. Tip: Press gently to help the crumbs adhere without clumping.
8. Heat the vegetable oil in a large, heavy‑bottomed skillet or Dutch oven over medium‑high heat until it reaches 350°F on a deep‑fry thermometer.
9. Carefully place 3–4 coated tenders into the hot oil, avoiding overcrowding.
10. Fry for 3–4 minutes per side, or until the exterior is deep golden brown and crispy. Tip: Use tongs to flip them halfway through for even cooking.
11. Transfer the cooked tenders to a wire rack set over a baking sheet to drain—this keeps them crispier than paper towels.
12. Repeat with the remaining tenders, allowing the oil to return to 350°F between batches.
13. Let the tenders rest for 2–3 minutes before serving. Tip: A brief rest helps the coating set and prevents burning your mouth.
Really, that crunch is everything—crisp on the outside, juicy inside, with just a hint of spice from the paprika. I love piling them high with a side of ranch or drizzling them with honey for a sweet‑savory twist; they’re perfect for game day or a cozy family dinner.
Easy Loaded Nachos Supreme

Finally, after a long day, I crave something hearty, shareable, and utterly satisfying without a ton of fuss—that’s where these loaded nachos come in. Inspired by my family’s game-day tradition, this recipe is my go-to for a crowd-pleaser that feels indulgent yet comes together in a flash. I love how customizable it is, letting everyone pile on their favorite toppings.
Serving: 4 | Pre Time: 15 minutes | Cooking Time: 10 minutes
Ingredients
– 1 (12-ounce) bag tortilla chips
– 1 tablespoon vegetable oil (or any neutral oil)
– 1 pound ground beef (85% lean works well)
– 1 (1-ounce) packet taco seasoning
– 1 (15-ounce) can refried beans
– 2 cups shredded cheddar cheese (pre-shredded saves time)
– 1 cup pico de gallo (store-bought or homemade)
– 1/2 cup sour cream
– 1/4 cup sliced jalapeños (adjust for spice preference)
– 1/4 cup chopped fresh cilantro
Instructions
1. Preheat your oven to 400°F (200°C) and line a large baking sheet with parchment paper for easy cleanup.
2. Spread the tortilla chips in a single layer on the prepared baking sheet, avoiding overcrowding to ensure even melting.
3. Heat the vegetable oil in a large skillet over medium-high heat until shimmering, about 1 minute.
4. Add the ground beef to the skillet and cook, breaking it into small pieces with a spatula, for 5–7 minutes until no pink remains and it’s browned.
5. Drain any excess grease from the skillet, then stir in the taco seasoning and 1/4 cup of water, cooking for 2 more minutes until the mixture thickens slightly.
6. In a small saucepan, warm the refried beans over low heat for 3–4 minutes, stirring occasionally, until spreadable—this prevents them from cooling the nachos too quickly.
7. Spoon the warm refried beans evenly over the tortilla chips, followed by the seasoned ground beef.
8. Sprinkle the shredded cheddar cheese generously over the top, covering the beans and beef.
9. Bake in the preheated oven for 8–10 minutes, or until the cheese is fully melted and bubbly with golden edges.
10. Remove the baking sheet from the oven and let it cool for 2 minutes to set the layers before adding cold toppings.
11. Top the nachos with pico de gallo, dollops of sour cream, sliced jalapeños, and chopped fresh cilantro.
12. Serve immediately while warm and crispy.
Enjoy the contrast of the crunchy chips with the creamy beans and melted cheese, which makes every bite a delightful mix of textures. For a fun twist, try serving these nachos straight from the skillet at the table—it keeps them hot and encourages everyone to dig in together.
Quick Cheeseburger Sliders
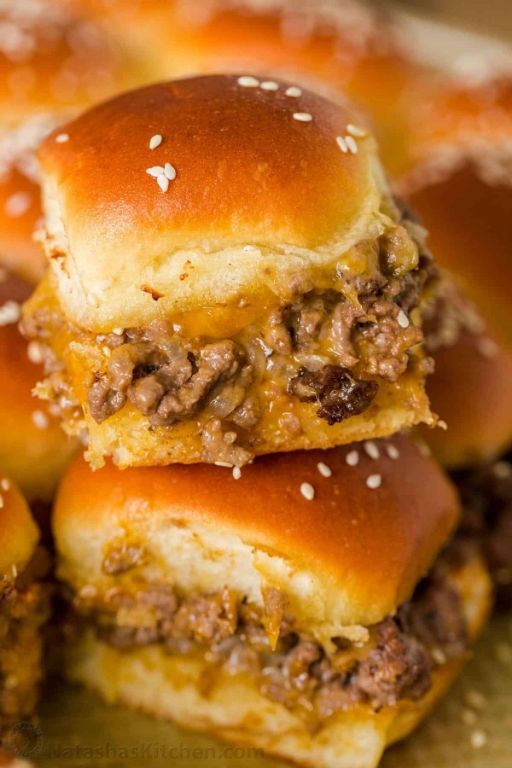
Remember those chaotic weeknights when everyone’s hungry, but you’re short on time? I’ve been there more times than I can count, and that’s exactly why I’ve perfected these Quick Cheeseburger Sliders—they’re my go-to lifesaver when I need something delicious on the table fast.
Serving: 12 sliders | Pre Time: 10 minutes | Cooking Time: 15 minutes
Ingredients
– 1 lb ground beef (80/20 blend for juiciness, or leaner if preferred)
– 1 tbsp vegetable oil (or any neutral oil)
– 1 tsp kosher salt
– 1/2 tsp black pepper
– 1/2 tsp garlic powder
– 12 slider buns (Hawaiian rolls work great for sweetness)
– 6 slices American cheese (torn in half, or use cheddar for sharper flavor)
– 1/4 cup ketchup
– 1/4 cup mayonnaise
– 1 tbsp yellow mustard
– 1/2 cup diced pickles (dill or bread-and-butter style)
– 1/4 cup diced white onion
Instructions
1. Heat a large skillet over medium-high heat and add 1 tbsp vegetable oil.
2. Place 1 lb ground beef in the skillet, breaking it into small crumbles with a spatula.
3. Cook the beef for 5-7 minutes, stirring occasionally, until no pink remains and it’s browned evenly.
4. Drain any excess grease from the skillet using a spoon or tilt method.
5. Sprinkle 1 tsp kosher salt, 1/2 tsp black pepper, and 1/2 tsp garlic powder over the beef, stirring to combine.
6. Reduce heat to low and arrange 12 slider buns on a baking sheet, cut-side up.
7. Spoon the seasoned beef evenly onto the bottom halves of the buns.
8. Top the beef with 6 slices American cheese (torn in half), placing one half on each slider.
9. In a small bowl, mix 1/4 cup ketchup, 1/4 cup mayonnaise, and 1 tbsp yellow mustard until smooth.
10. Spread the sauce mixture over the cheese on each slider.
11. Sprinkle 1/2 cup diced pickles and 1/4 cup diced white onion evenly over the sauce.
12. Place the top halves of the buns over the fillings, pressing gently to secure.
13. Bake the assembled sliders in a preheated oven at 350°F for 8-10 minutes, until the buns are golden and the cheese is melted.
14. Remove from the oven and let cool for 2 minutes before serving.
Know that these sliders come out with a perfect balance—the buns get slightly crispy while staying soft inside, and the melty cheese ties all the savory flavors together. I love serving them with extra pickles on the side or even stacking them for a fun party platter; they’re always a hit with both kids and adults!
Air Fryer French Fries
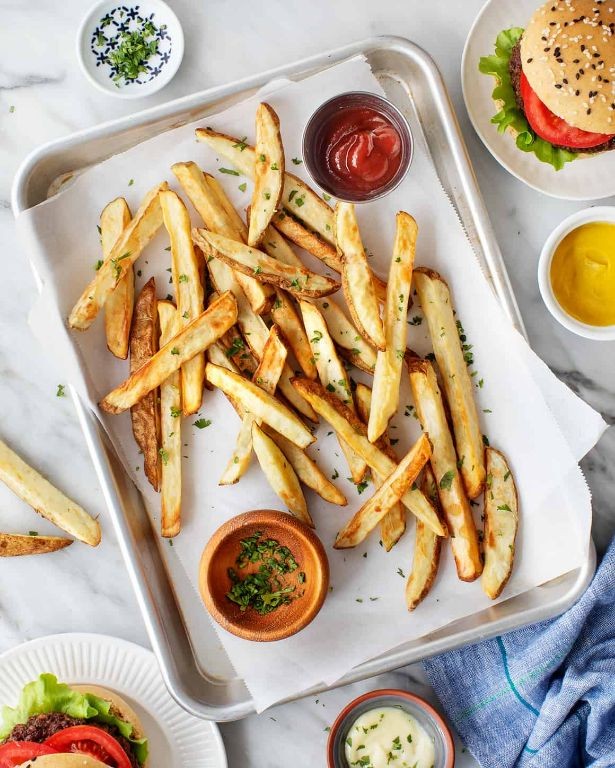
Gone are the days of soggy, greasy fries from the oven or the guilt of deep-frying—this air fryer method delivers that perfect crispy-on-the-outside, fluffy-on-the-inside texture we all crave. As a busy parent, I love how quick and hands-off it is, letting me whip up a batch for movie nights without heating up the whole kitchen. Trust me, once you try these, you’ll never go back to the frozen bag kind!
Serving: 4 | Pre Time: 10 minutes | Cooking Time: 20 minutes
Ingredients
– 2 large russet potatoes (about 1.5 lbs), scrubbed clean—peeling is optional for extra rustic texture
– 1 tbsp olive oil, or any neutral oil like avocado oil
– 1 tsp kosher salt, adjust to taste with more after cooking if desired
– ½ tsp garlic powder, for a savory kick (optional but recommended)
– ½ tsp paprika, adds a subtle smokiness and color
– Cooking spray, for lightly coating the air fryer basket to prevent sticking
Instructions
1. Cut the scrubbed potatoes into ¼-inch thick sticks, aiming for uniform sizes so they cook evenly—a mandoline slicer can help if you have one.
2. Soak the cut potatoes in a bowl of cold water for 10 minutes to remove excess starch, which helps them crisp up better in the air fryer.
3. Drain the potatoes and pat them completely dry with paper towels or a clean kitchen towel; any moisture left can lead to steaming instead of crisping.
4. In a large bowl, toss the dried potato sticks with 1 tbsp olive oil until evenly coated.
5. Sprinkle 1 tsp kosher salt, ½ tsp garlic powder, and ½ tsp paprika over the potatoes, then toss again to distribute the seasonings thoroughly.
6. Lightly spray the air fryer basket with cooking spray to prevent sticking.
7. Arrange the seasoned potatoes in a single layer in the basket, leaving some space between them for air circulation—cook in batches if needed to avoid overcrowding.
8. Air fry at 400°F for 10 minutes, then shake the basket or use tongs to flip the fries for even browning.
9. Continue air frying at 400°F for another 8–10 minutes, checking at the 8-minute mark until they’re golden brown and crispy to your liking—cooking time may vary slightly by air fryer model.
10. Transfer the fries to a serving plate immediately to stop the cooking process and maintain crispiness.
Zesty and satisfying, these fries come out with a delightful crunch that holds up to dipping, yet they’re tender inside without any greasy residue. I love serving them piled high with a side of homemade aioli or classic ketchup for a crowd-pleasing snack that disappears fast!
5-Minute Pizza Quesadillas
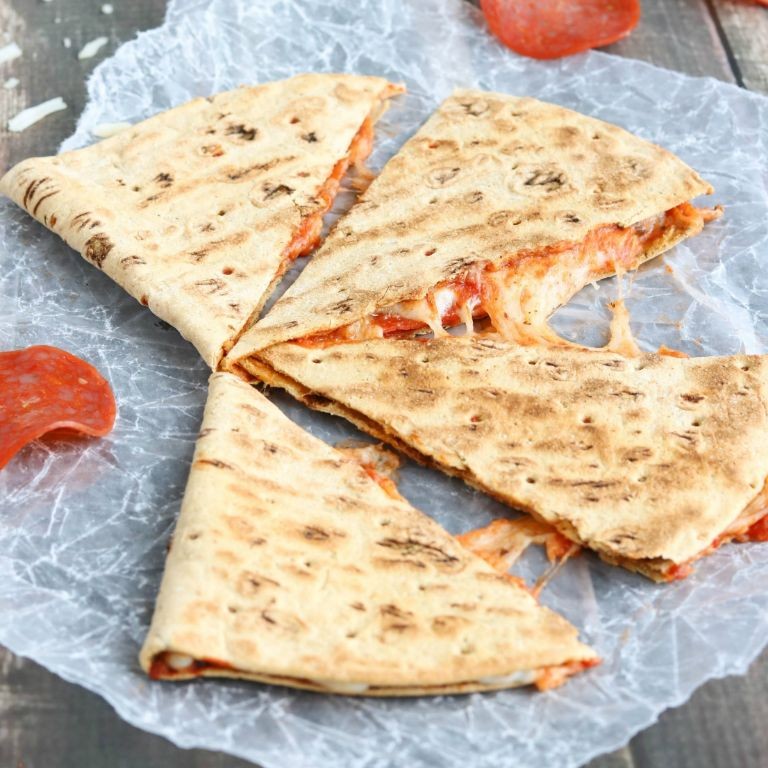
M y weeknights are a whirlwind of hungry kids and zero time to cook, so I’ve perfected this lightning-fast mashup that feels like a treat without the fuss. It’s my go‑to when the pizza craving hits but I can’t face waiting for dough to rise—think of it as a crispy, cheesy hug in a skillet.
Serving: 2 | Pre Time: 5 minutes | Cooking Time: 5 minutes
Ingredients
– 4 large flour tortillas (8-inch size, or use whole wheat for extra fiber)
– 1 cup shredded mozzarella cheese (pre‑shredded saves time, or grate your own for better melt)
– ½ cup pizza sauce (from a jar, or homemade if you have it handy)
– ¼ cup sliced pepperoni (about 20 slices, or substitute with cooked sausage crumbles)
– 2 tablespoons unsalted butter (softened, or use olive oil for a lighter option)
– ½ teaspoon dried oregano (optional, for an herby kick)
Instructions
1. Lay two tortillas flat on a clean work surface.
2. Spread ¼ cup of pizza sauce evenly over each tortilla, leaving a ½‑inch border around the edges to prevent spillage.
3. Sprinkle ½ cup of shredded mozzarella cheese evenly over the sauce on each tortilla.
4. Arrange half of the sliced pepperoni in a single layer over the cheese on each tortilla.
5. Sprinkle ¼ teaspoon of dried oregano over the pepperoni on each tortilla, if using.
6. Top each assembled tortilla with a second tortilla, pressing down gently to seal.
7. Heat a large non‑stick skillet or griddle over medium‑low heat (about 300°F) for 1 minute.
8. Spread 1 tablespoon of softened butter evenly over one side of each quesadilla.
9. Place one quesadilla, buttered‑side down, into the preheated skillet.
10. Cook for 2–3 minutes, until the bottom tortilla is golden brown and crispy—check by lifting an edge with a spatula.
11. Spread the remaining 1 tablespoon of butter over the top tortilla of the quesadilla in the skillet.
12. Carefully flip the quesadilla using a spatula.
13. Cook for another 2–3 minutes, until the second side is golden brown and the cheese is fully melted (no solid shreds should remain).
14. Transfer the cooked quesadilla to a cutting board and repeat steps 9–13 with the second quesadilla.
15. Let each quesadilla rest for 1 minute before slicing into quarters with a sharp knife or pizza cutter.
Zesty and satisfying, these quesadillas deliver a crackly exterior that gives way to a gooey, pepperoni‑flecked center. I love dunking the wedges in extra pizza sauce for a double dose of tang, or packing them cold in lunchboxes—they’re just as tasty at room temperature.
Speedy Fish Tacos with Creamy Slaw
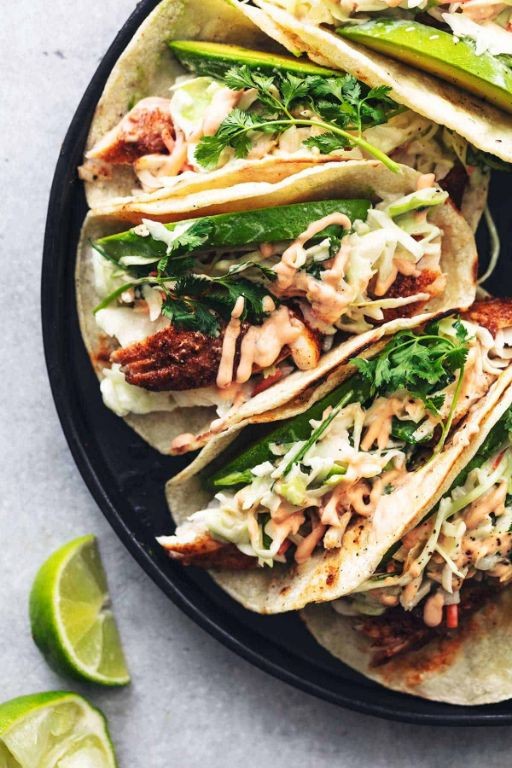
Recently, after a long day at work, I found myself craving something fresh and flavorful but didn’t want to spend hours in the kitchen—enter these speedy fish tacos! They’ve become my go‑to weeknight dinner because they come together in under 30 minutes, and that creamy slaw adds the perfect crunch. Honestly, I love how customizable they are; sometimes I’ll swap in whatever white fish is on sale, and it always turns out delicious.
Serving: 4 | Pre Time: 15 minutes | Cooking Time: 10 minutes
Ingredients
– 1 lb white fish fillets (like cod or tilapia), cut into 1‑inch strips
– 1 tbsp olive oil (or any neutral oil)
– 1 tsp chili powder
– 1/2 tsp ground cumin
– 1/4 tsp garlic powder
– 1/4 tsp salt
– 8 small corn tortillas
– 2 cups shredded cabbage
– 1/4 cup mayonnaise
– 1 tbsp lime juice
– 1 tbsp chopped fresh cilantro
– Lime wedges for serving
Instructions
1. Pat the 1 lb white fish fillets dry with paper towels to ensure a crisp sear.
2. In a small bowl, mix 1 tsp chili powder, 1/2 tsp ground cumin, 1/4 tsp garlic powder, and 1/4 tsp salt to create a seasoning blend.
3. Rub the seasoning blend evenly over all sides of the fish strips.
4. Heat 1 tbsp olive oil in a large skillet over medium‑high heat until it shimmers, about 2 minutes.
5. Add the seasoned fish to the skillet in a single layer, cooking for 3–4 minutes per side until the fish flakes easily with a fork and reaches an internal temperature of 145°F.
6. While the fish cooks, warm 8 small corn tortillas in a dry skillet over medium heat for 30 seconds per side until pliable, keeping them wrapped in a towel to stay soft.
7. In a medium bowl, combine 2 cups shredded cabbage, 1/4 cup mayonnaise, 1 tbsp lime juice, and 1 tbsp chopped fresh cilantro, tossing until the cabbage is evenly coated.
8. Assemble each taco by placing a few fish strips on a warm tortilla and topping with a generous spoonful of the creamy slaw.
9. Serve immediately with lime wedges on the side for squeezing over the tacos.
Zesty and satisfying, these tacos boast a wonderful contrast between the flaky, lightly spiced fish and the cool, crunchy slaw. For a fun twist, I sometimes add a drizzle of hot sauce or extra cilantro, and they’re always a hit whether served straight from the skillet or piled onto a platter for a casual dinner with friends.
Instant PB&J French Toast Sticks
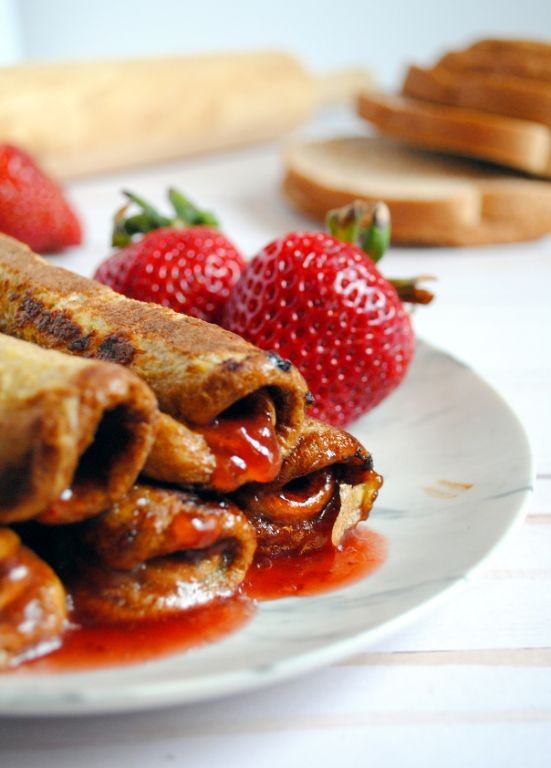
Remember those frantic weekday mornings when you’re scrambling to get everyone fed? I’ve been there more times than I can count, and that’s exactly why I fell in love with this hack. It turns a classic lunchbox staple into a warm, comforting breakfast in minutes, and my kids think I’m a genius for it.
Serving: 4 | Pre Time: 5 minutes | Cooking Time: 8 minutes
Ingredients
– 8 slices white sandwich bread, slightly stale works best
– 1/2 cup creamy peanut butter
– 1/4 cup strawberry jam, or your favorite flavor
– 2 large eggs
– 1/4 cup whole milk
– 1 tsp vanilla extract
– 1/2 tsp ground cinnamon
– 2 tbsp unsalted butter, for the skillet
– Maple syrup, for serving (optional)
Instructions
1. Lay out 8 slices of white sandwich bread on a clean work surface.
2. Spread 1 tablespoon of creamy peanut butter evenly onto 4 of the bread slices.
3. Spread 1 tablespoon of strawberry jam evenly onto the other 4 bread slices.
4. Press one peanut butter slice and one jam slice together to form 4 sandwiches, pressing the edges gently to seal.
5. Cut each sandwich into 3 even sticks using a sharp knife.
6. In a shallow bowl, whisk together 2 large eggs, 1/4 cup whole milk, 1 teaspoon vanilla extract, and 1/2 teaspoon ground cinnamon until fully combined and slightly frothy.
7. Heat a large non-stick skillet or griddle over medium heat and add 1 tablespoon of unsalted butter, letting it melt and coat the surface.
8. Working in batches, dip each sandwich stick into the egg mixture, turning to coat all sides, and let any excess drip off.
9. Place the coated sticks in the preheated skillet, cooking for 2-3 minutes per side until they are golden brown and crispy.
10. Add the remaining 1 tablespoon of butter to the skillet for the second batch and repeat the dipping and cooking process.
11. Transfer the cooked French toast sticks to a wire rack or paper towel-lined plate briefly.
12. Serve the sticks immediately while warm.
Just out of the skillet, they’re wonderfully crisp on the outside with a soft, gooey center where the peanut butter and jam melt together. For a fun twist, try serving them with a small bowl of extra jam for dipping instead of syrup—it really doubles down on that nostalgic flavor.
One-Pan Breakfast Burritos

Gosh, I don’t know about you, but my weekday mornings are pure chaos—kids scrambling for shoes, backpacks flying, and me desperately trying to get something warm and satisfying into everyone before we bolt out the door. That’s why I’ve perfected this one-pan breakfast burrito recipe; it’s my secret weapon for turning morning madness into a delicious, sit-down-worthy meal in under 30 minutes, with just one pan to wash!
Serving: 4 | Pre Time: 10 minutes | Cooking Time: 15 minutes
Ingredients
– 1 tbsp olive oil (or any neutral oil)
– 1/2 lb breakfast sausage, casings removed if needed
– 1 small yellow onion, diced (about 1 cup)
– 1 bell pepper (any color), diced (about 1 cup)
– 4 large eggs, beaten
– 1/4 cup milk (whole or 2%)
– 1/2 tsp salt
– 1/4 tsp black pepper
– 4 large flour tortillas (10-inch)
– 1 cup shredded cheddar cheese
– Optional: salsa, sour cream, or hot sauce for serving
Instructions
1. Heat 1 tbsp olive oil in a large skillet over medium-high heat (about 350°F) until shimmering, about 1 minute.
2. Add 1/2 lb breakfast sausage to the skillet, breaking it into small crumbles with a spatula.
3. Cook the sausage for 5-7 minutes, stirring occasionally, until it’s browned and no longer pink.
4. Add 1 diced small yellow onion and 1 diced bell pepper to the skillet with the sausage.
5. Sauté the vegetables for 4-5 minutes, stirring frequently, until they’re softened and the onions are translucent.
6. In a small bowl, whisk together 4 large eggs, 1/4 cup milk, 1/2 tsp salt, and 1/4 tsp black pepper until well combined.
7. Reduce the heat to medium-low (about 250°F) and pour the egg mixture evenly over the sausage and vegetables in the skillet.
8. Let the eggs cook undisturbed for 1 minute to set the bottom, then gently push the cooked edges toward the center with a spatula, tilting the pan to let the uncooked eggs flow to the edges.
9. Continue cooking the eggs for 3-4 minutes, gently stirring and folding, until they’re softly set but still slightly moist—they’ll finish cooking off the heat.
10. Remove the skillet from the heat and immediately sprinkle 1 cup shredded cheddar cheese over the egg mixture, letting it melt from the residual heat.
11. Warm 4 large flour tortillas in a dry skillet over medium heat for 20-30 seconds per side, or wrap them in a damp paper towel and microwave for 15-20 seconds until pliable.
12. Divide the cheesy egg and sausage mixture evenly among the warmed tortillas, placing it in the center of each.
13. Fold the bottom edge of each tortilla over the filling, then fold in the sides and roll tightly to form a burrito.
14. Serve the burritos immediately with optional salsa, sour cream, or hot sauce on the side.
Finally, these burritos are a total game-changer—the eggs stay fluffy and tender, the sausage adds a savory punch, and the melted cheese brings it all together in a cozy, handheld package. For a fun twist, I sometimes wrap them in foil and pop them in a lunchbox for a warm meal on the go, or slice them into pinwheels for a kid-friendly snack that disappears in seconds!
10-Minute Garlic Parmesan Knots
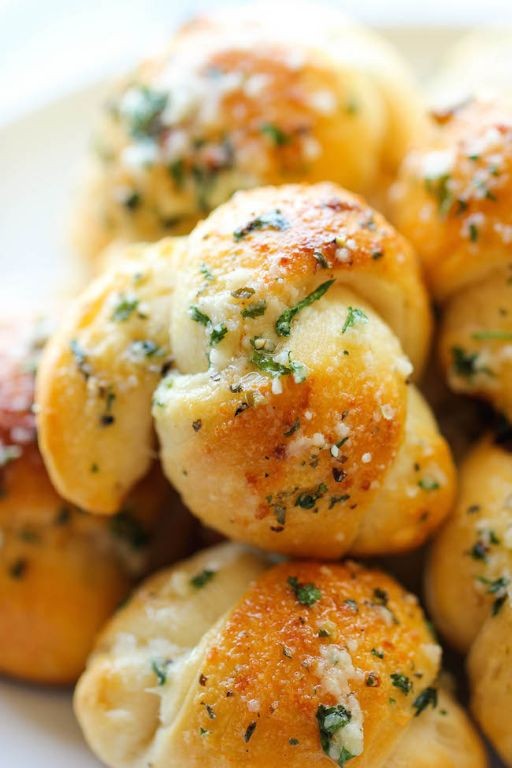
Last week, when my friends dropped by unexpectedly, I realized I had nothing impressive to serve with our spaghetti dinner. That’s when I whipped up these 10-Minute Garlic Parmesan Knots—they saved the night and have become my go‑in-a-pinch side ever since. Honestly, they’re so easy and quick that I now make them almost every time I’m craving something warm and cheesy.
Serving: 8 knots | Pre Time: 5 minutes | Cooking Time: 5 minutes
Ingredients
– 1 can (16 oz) refrigerated biscuit dough (I use the flaky kind for extra layers)
– ¼ cup unsalted butter, melted (or use salted butter and skip the added salt)
– 3 cloves garlic, minced (about 1 tbsp—fresh is best for punchy flavor)
– ¼ cup grated Parmesan cheese (the finely grated kind sticks better)
– 1 tbsp chopped fresh parsley (or 1 tsp dried parsley if that’s what you have)
– ¼ tsp salt (omit if using salted butter)
– ¼ tsp black pepper (adjust to your liking)
Instructions
1. Preheat your oven to 400°F and line a baking sheet with parchment paper.
2. Open the can of biscuit dough and separate the 8 biscuits onto a clean surface.
3. Roll each biscuit into a 6-inch rope shape—don’t worry about perfection; just stretch it gently.
4. Tie each rope into a simple knot, tucking the ends underneath to secure them.
5. Place the knots about 1 inch apart on the prepared baking sheet.
6. Bake the knots in the preheated oven for 5 minutes, or until they puff up and turn light golden.
7. While the knots bake, combine the melted butter, minced garlic, salt, and black pepper in a small bowl.
8. As soon as the knots come out of the oven, brush them generously with the garlic-butter mixture using a pastry brush.
9. Sprinkle the grated Parmesan cheese evenly over the warm knots so it melts slightly.
10. Garnish with chopped parsley for a fresh, colorful finish.
Fresh from the oven, these knots are delightfully soft inside with a buttery, garlicky crust and a salty Parmesan kick. I love tearing them apart while they’re still warm and dipping them into marinara sauce or even serving them alongside a hearty soup for a cozy meal.
Fast-Food Style Blender Pancakes
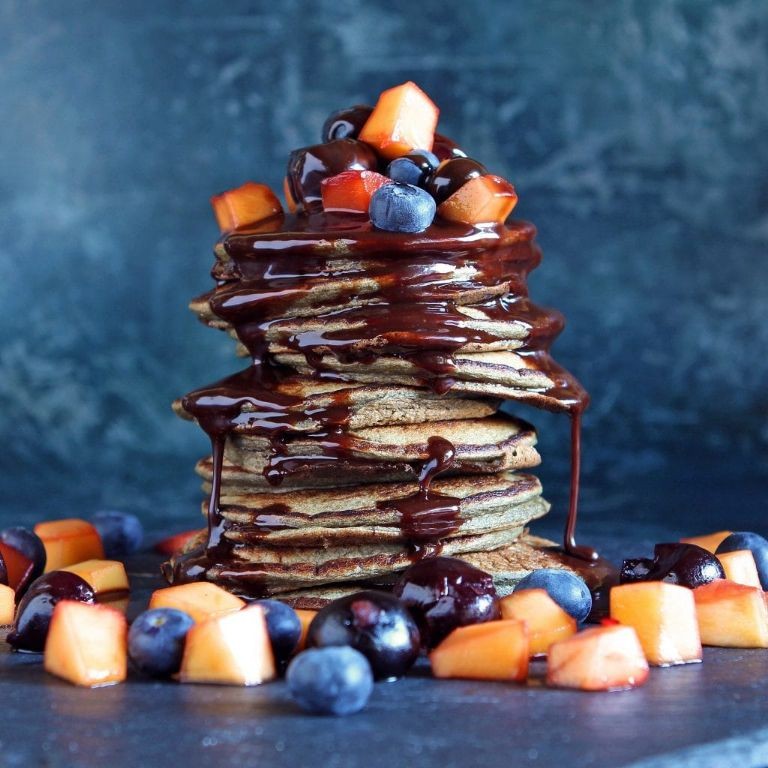
Gone are the days of pancake mix and complicated recipes—this fast-food style blender pancake recipe is my go-to for lazy weekend mornings when I want that fluffy, diner-style stack without the fuss. I stumbled upon this method after one too many sleepy attempts at whisking batter, and now my blender does all the work while I sip my coffee. It’s become a family favorite, especially when my kids beg for ‘restaurant pancakes’ at home.
Serving: 4 | Pre Time: 5 minutes | Cooking Time: 10 minutes
Ingredients
– 1 cup all-purpose flour (spooned and leveled for accuracy)
– 1 tablespoon granulated sugar (adjust to taste, I like it slightly sweet)
– 2 teaspoons baking powder (for maximum fluffiness)
– ½ teaspoon salt (balances the sweetness)
– 1 cup whole milk (or any milk you have on hand)
– 1 large egg (at room temperature blends better)
– 2 tablespoons unsalted butter, melted (or any neutral oil)
– 1 teaspoon vanilla extract (optional, but adds warmth)
– Cooking spray or extra butter for greasing
Instructions
1. Add 1 cup all-purpose flour, 1 tablespoon granulated sugar, 2 teaspoons baking powder, and ½ teaspoon salt to a blender, and blend on low speed for 10 seconds to combine the dry ingredients evenly.
2. Pour in 1 cup whole milk, crack in 1 large egg, add 2 tablespoons melted unsalted butter and 1 teaspoon vanilla extract, and blend on medium speed for 30 seconds until the batter is smooth with no lumps, scraping down the sides once if needed.
3. Heat a non-stick skillet or griddle over medium heat (around 350°F if using a thermometer) for 2 minutes, then lightly grease it with cooking spray or extra butter to prevent sticking.
4. Pour ¼ cup of batter onto the hot skillet for each pancake, cooking for 2–3 minutes until bubbles form on the surface and the edges look set.
5. Flip each pancake carefully with a spatula and cook for another 1–2 minutes until golden brown on both sides and cooked through (no wet batter in the center when tested).
6. Transfer the cooked pancakes to a plate and repeat with the remaining batter, regreasing the skillet as needed to keep them from sticking.
7. Serve immediately while hot. These pancakes turn out incredibly light and fluffy, with a subtle sweetness that pairs perfectly with maple syrup or fresh berries. Try stacking them high with a dollop of whipped cream for that classic diner feel, or get creative by folding in chocolate chips before cooking—my kids love that extra treat!
30-Minute Copycat Fried Chicken Sandwich
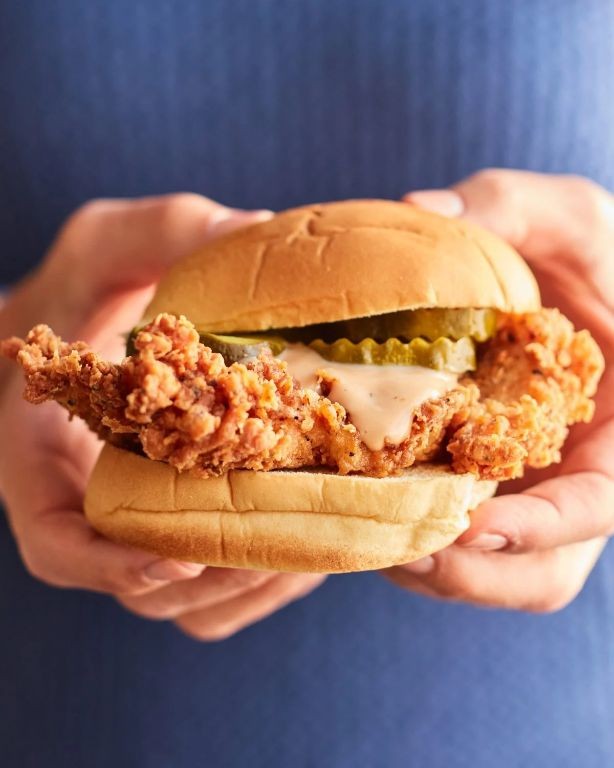
Unbelievably, I used to think making a restaurant-quality fried chicken sandwich at home required hours of prep and special equipment—until I perfected this 30-minute copycat version that rivals my favorite fast-food spot. As a busy parent, I’ve learned to keep my pantry stocked with these simple ingredients for those nights when a crispy, satisfying dinner feels non-negotiable. Trust me, once you try this method, you’ll never look at takeout the same way again.
Serving: 4 | Pre Time: 15 minutes | Cooking Time: 15 minutes
Ingredients
– 4 boneless, skinless chicken breasts (about 6 oz each, pounded to ½-inch thickness for even cooking)
– 1 cup buttermilk (or substitute with 1 cup milk mixed with 1 tbsp lemon juice, let sit 5 minutes)
– 1 cup all-purpose flour (for a gluten-free option, use a 1:1 gluten-free flour blend)
– 1 tsp paprika (smoked paprika adds a deeper flavor)
– 1 tsp garlic powder
– 1 tsp onion powder
– ½ tsp cayenne pepper (adjust to your spice preference)
– 1 tsp salt
– ½ tsp black pepper
– 2 cups vegetable oil (or any neutral oil with a high smoke point, like canola)
– 4 brioche buns (toasted lightly for extra crunch)
– 4 tbsp mayonnaise (Duke’s or Hellmann’s work great)
– 4 lettuce leaves (iceberg or romaine for crispness)
– 4 slices tomato
– 4 pickle slices (dill or bread-and-butter style)
Instructions
1. Place the chicken breasts between two sheets of plastic wrap and pound them to a uniform ½-inch thickness using a meat mallet or rolling pin to ensure even cooking.
2. In a shallow bowl, combine the buttermilk with ½ tsp salt and ¼ tsp black pepper, then submerge the chicken breasts fully, coating them evenly.
3. Let the chicken marinate in the buttermilk mixture at room temperature for 10 minutes to tenderize the meat—this step is key for juicy results.
4. In a separate shallow dish, mix the flour, paprika, garlic powder, onion powder, cayenne pepper, remaining ½ tsp salt, and ¼ tsp black pepper until well combined.
5. Remove one chicken breast from the buttermilk, allowing excess to drip off, then dredge it thoroughly in the flour mixture, pressing gently to adhere the coating.
6. Repeat the dredging process by dipping the floured chicken back into the buttermilk and then into the flour mixture again for an extra-crispy double coating.
7. Heat the vegetable oil in a large, heavy-bottomed skillet or Dutch oven over medium-high heat until it reaches 350°F on a kitchen thermometer.
8. Carefully place two coated chicken breasts into the hot oil, frying for 5–6 minutes per side until golden brown and the internal temperature reaches 165°F when checked with a meat thermometer.
9. Transfer the fried chicken to a wire rack set over a baking sheet to drain excess oil and keep it crispy, avoiding paper towels that can make it soggy.
10. Repeat the frying process with the remaining two chicken breasts, maintaining the oil temperature at 350°F throughout.
11. While the chicken rests for 2–3 minutes, toast the brioche buns in a dry skillet over medium heat for 1–2 minutes until lightly golden.
12. Spread 1 tbsp mayonnaise on the bottom half of each toasted bun, then layer with a lettuce leaf, tomato slice, and pickle slice.
13. Place one fried chicken breast on top of each assembled bun bottom, then cap with the top bun to complete the sandwich.
The result is a sandwich with an audibly crunchy exterior that gives way to tender, well-seasoned chicken inside—the double coating locks in moisture without greasiness. For a fun twist, I sometimes add a drizzle of hot honey or swap the mayo for a spicy aioli to play with flavors. Serve it immediately with extra pickles on the side for that perfect tangy contrast.
Quick Chicken and Cheese Empanadas

Perfect for those busy weeknights when you want something homemade but don’t have hours to spare, these Quick Chicken and Cheese Empanadas are my family’s go-to comfort food. I started making them years ago after a trip to a local food truck, and now they’re a staple in our freezer for last-minute dinners or game-day snacks.
Serving: 8 | Pre Time: 20 minutes | Cooking Time: 25 minutes
Ingredients
- 1 lb cooked chicken breast, shredded (I often use a rotisserie chicken for speed)
- 1 cup shredded Monterey Jack cheese (or a Mexican blend)
- 1/2 cup diced onion
- 1/4 cup chopped cilantro, plus more for garnish
- 1 tsp ground cumin
- 1/2 tsp chili powder
- 1/4 tsp black pepper
- 1 package (14 oz) refrigerated pie crusts (2 crusts), thawed if frozen
- 1 large egg, beaten (for egg wash)
- 1 tbsp olive oil (or any neutral oil)
- Optional: salsa or sour cream for serving
Instructions
- Preheat your oven to 400°F and line a baking sheet with parchment paper.
- Heat 1 tbsp olive oil in a skillet over medium heat for 1 minute until shimmering.
- Add 1/2 cup diced onion to the skillet and cook for 5 minutes, stirring occasionally, until softened and translucent.
- In a large bowl, combine the cooked onion, 1 lb shredded chicken, 1 cup shredded cheese, 1/4 cup chopped cilantro, 1 tsp cumin, 1/2 tsp chili powder, and 1/4 tsp black pepper, mixing until evenly distributed. Tip: Taste the filling now and adjust spices if needed, but avoid overmixing to keep the chicken tender.
- Unroll the 2 pie crusts on a lightly floured surface and use a 4-inch round cutter or bowl to cut out 8 circles from each crust, re-rolling scraps as needed.
- Place 2 tbsp of the chicken mixture in the center of each dough circle.
- Fold each circle in half over the filling to form a half-moon shape, pressing the edges together firmly with your fingers.
- Crimp the edges of each empanada with a fork to seal completely, which helps prevent leaks during baking. Tip: If the dough feels dry, dab a little water on the edges before sealing for a tighter bond.
- Arrange the empanadas on the prepared baking sheet, spacing them 1 inch apart.
- Brush the tops of each empanada lightly with the beaten egg wash using a pastry brush.
- Bake in the preheated oven for 20-25 minutes, until the crusts are golden brown and flaky. Tip: Rotate the baking sheet halfway through for even browning, as oven hotspots can cause uneven cooking.
- Remove from the oven and let cool on the sheet for 5 minutes before serving.
Enjoy these warm from the oven, where the crispy, buttery crust gives way to a savory, cheesy chicken filling with just a hint of spice. For a fun twist, I love serving them with a side of zesty salsa or a dollop of cool sour cream to balance the flavors—they’re always a hit at potlucks or as a quick weeknight treat!
Small-Batch Cinnamon Sugar Donuts

Perfect for a cozy winter evening like tonight, I was craving something sweet but didn’t want a huge batch of treats sitting around tempting me all week. That’s how these small-batch cinnamon sugar donuts were born in my kitchen—just enough to satisfy a sudden craving without the commitment of a dozen.
Serving: 6 donuts | Pre Time: 15 minutes | Cooking Time: 10 minutes
Ingredients
- 1 cup all-purpose flour (spooned and leveled for accuracy)
- 1/4 cup granulated sugar
- 1 1/2 tsp baking powder
- 1/2 tsp ground cinnamon
- 1/4 tsp salt
- 1/2 cup whole milk, at room temperature
- 1 large egg, at room temperature
- 2 tbsp unsalted butter, melted and cooled slightly
- 1 tsp pure vanilla extract
- 1 quart vegetable oil for frying (or any neutral oil with a high smoke point)
- 1/2 cup granulated sugar for coating
- 1 tbsp ground cinnamon for coating
Instructions
- In a medium bowl, whisk together 1 cup all-purpose flour, 1/4 cup granulated sugar, 1 1/2 tsp baking powder, 1/2 tsp ground cinnamon, and 1/4 tsp salt until no lumps remain.
- In a separate small bowl, whisk 1/2 cup whole milk, 1 large egg, 2 tbsp melted unsalted butter, and 1 tsp pure vanilla extract until fully combined and smooth.
- Pour the wet ingredients into the dry ingredients and stir with a spatula just until a sticky dough forms, being careful not to overmix to keep the donuts tender.
- Lightly flour a clean surface and turn the dough out onto it, then gently pat it into a 1/2-inch thick circle.
- Use a 2 1/2-inch round cookie cutter to cut out 6 donuts, re-rolling scraps once if needed, and place them on a parchment-lined baking sheet.
- In a heavy-bottomed pot or Dutch oven, heat 1 quart vegetable oil over medium heat until it reaches 350°F on a deep-fry thermometer, which typically takes about 5-7 minutes.
- Carefully add 2-3 donuts to the hot oil using a slotted spoon, frying for 60-90 seconds per side until they turn a deep golden brown and float to the surface.
- Transfer the fried donuts to a wire rack set over a baking sheet to drain excess oil for 1 minute while you repeat with the remaining batches.
- In a shallow bowl, mix 1/2 cup granulated sugar and 1 tbsp ground cinnamon until evenly combined for the coating.
- While the donuts are still warm but cool enough to handle, roll each one in the cinnamon sugar mixture until fully coated on all sides, pressing gently to help it adhere.
Out of the fryer, these donuts are wonderfully crisp on the outside with a soft, cakey interior that practically melts in your mouth. The cinnamon sugar adds a sweet, spiced crunch that pairs perfectly with a hot cup of coffee, or for a fun twist, try serving them with a side of warm apple compote for dipping.
Rapid Buffalo Cauliflower Bites
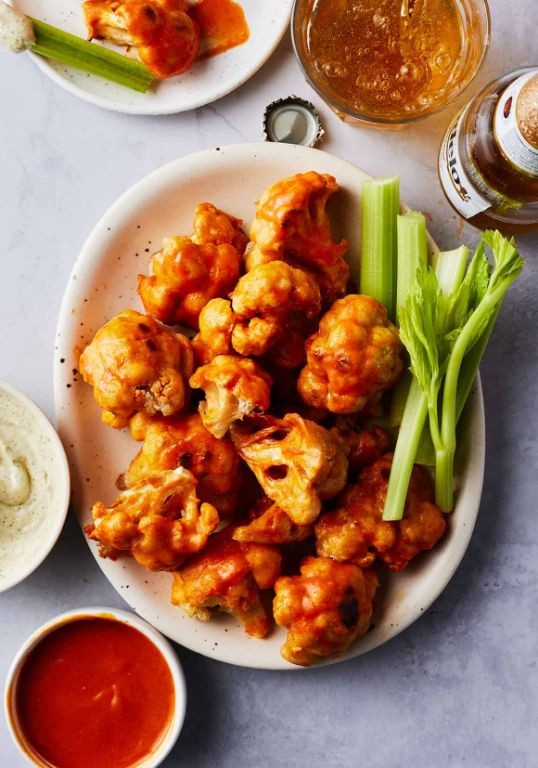
Just when I thought game day snacks couldn’t get any better, I discovered these crispy, spicy bites that have become my go-to for last-minute gatherings. My husband, who usually skips anything vegetable-forward, now requests them weekly—proof that even the most skeptical eaters can be won over with the right combination of crunch and heat.
Serving: 4 | Pre Time: 10 minutes | Cooking Time: 25 minutes
Ingredients
– 1 large head cauliflower, cut into bite-sized florets (about 4 cups)
– 1 cup all-purpose flour
– 1 cup water
– 1 tsp garlic powder
– 1/2 tsp salt
– 1/4 tsp black pepper
– 1/2 cup hot sauce, such as Frank’s RedHot
– 2 tbsp unsalted butter, melted
– 1 tbsp honey
– 2 tbsp olive oil, or any neutral oil
– Ranch or blue cheese dressing for serving, optional
Instructions
1. Preheat your oven to 450°F and line a large baking sheet with parchment paper.
2. In a large bowl, whisk together the flour, water, garlic powder, salt, and black pepper until smooth to create a batter.
3. Add the cauliflower florets to the batter and toss until evenly coated—I use my hands to ensure every nook gets covered.
4. Arrange the coated florets in a single layer on the prepared baking sheet, leaving space between each piece for even crisping.
5. Drizzle the olive oil over the florets and bake for 20 minutes, flipping halfway through, until golden brown and crispy.
6. While the cauliflower bakes, whisk together the hot sauce, melted butter, and honey in a small bowl until fully combined.
7. Remove the cauliflower from the oven and immediately toss it in the hot sauce mixture until thoroughly coated.
8. Return the coated cauliflower to the baking sheet and bake for an additional 5 minutes to set the sauce.
9. Serve the bites warm directly from the oven for the best texture.
Vibrantly spicy with a satisfying crunch, these bites are perfect for dipping into cool ranch dressing to balance the heat. I love serving them piled high on a platter with celery sticks for a complete buffalo experience that always disappears fast.
Speedy Philly Cheesesteak Skillet
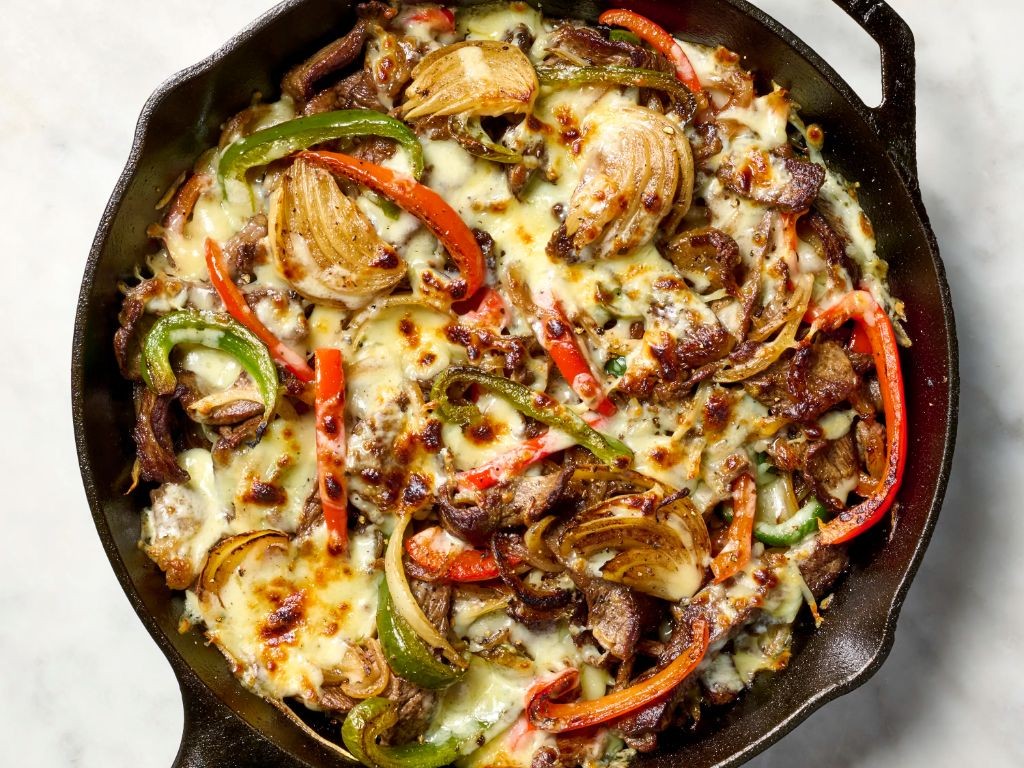
You won’t believe how often I’ve craved a classic Philly cheesesteak on a busy weeknight, only to talk myself out of the long prep and cleanup. That’s why this Speedy Philly Cheesesteak Skillet has become my go-to—it delivers all that savory, cheesy goodness in one pan and about 30 minutes flat.
Serving: 4 | Pre Time: 10 minutes | Cooking Time: 20 minutes
Ingredients
– 1 tablespoon olive oil (or any neutral oil)
– 1 pound thinly sliced ribeye steak, patted dry
– 1 large yellow onion, thinly sliced
– 1 large green bell pepper, thinly sliced
– 2 cloves garlic, minced
– 1 teaspoon Worcestershire sauce
– 1/2 teaspoon smoked paprika
– 1/4 teaspoon black pepper
– 4 slices provolone cheese
– 4 hoagie rolls, lightly toasted
Instructions
1. Heat the olive oil in a large skillet over medium-high heat until shimmering, about 1 minute.
2. Add the thinly sliced ribeye steak to the skillet in a single layer, cooking undisturbed for 2 minutes to develop a sear.
3. Flip the steak pieces and cook for another 2 minutes until no longer pink, then transfer to a plate.
4. In the same skillet, add the sliced onion and bell pepper, stirring to coat in the pan drippings.
5. Cook the vegetables for 6–8 minutes, stirring occasionally, until they are softened and lightly caramelized.
6. Stir in the minced garlic and cook for 1 minute until fragrant, being careful not to let it burn.
7. Return the cooked steak to the skillet with the vegetables.
8. Add the Worcestershire sauce, smoked paprika, and black pepper, stirring to combine everything evenly.
9. Reduce the heat to low and arrange the provolone cheese slices over the top of the skillet mixture.
10. Cover the skillet with a lid and let it sit for 2–3 minutes until the cheese is fully melted.
11. Remove the skillet from the heat and spoon the cheesy steak mixture into the toasted hoagie rolls.
A perfectly melted provolone blanket over tender steak and sweet caramelized veggies makes every bite irresistible. I love serving these with a side of crispy potato wedges or even scooping the skillet mixture over a bed of rice for a fun twist.
Fast Microwave Mug Mac and Cheese
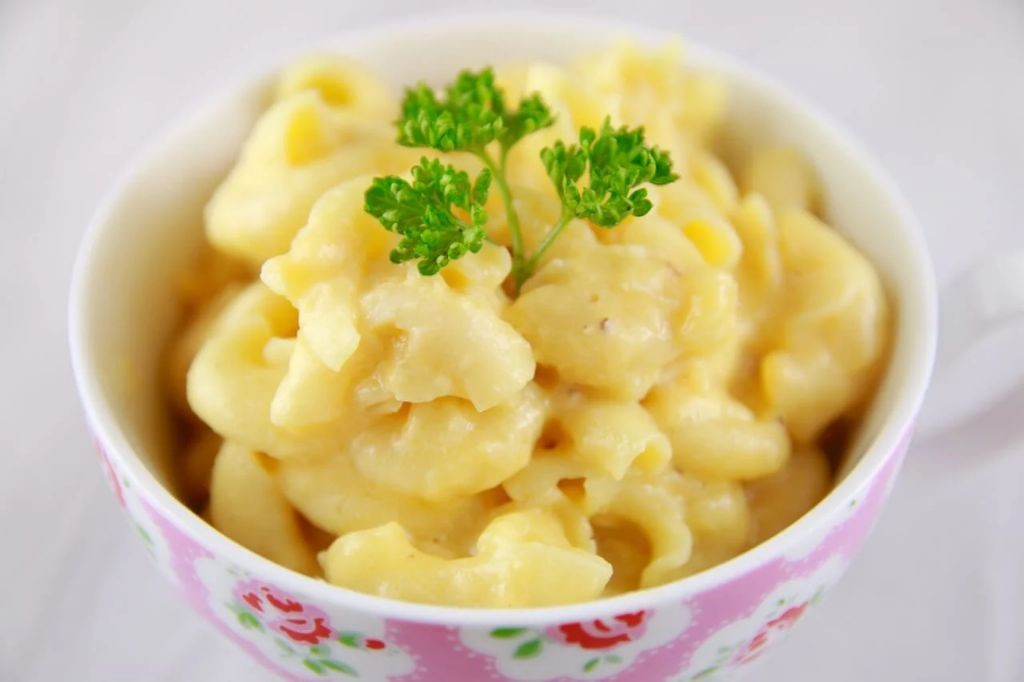
Now, I’ll be the first to admit that some nights, standing over a stove just isn’t in the cards. That’s where this lifesaver comes in—my go-to Fast Microwave Mug Mac and Cheese. It’s the ultimate cozy, cheesy fix when you need dinner in a flash, and it reminds me of those late-night study sessions in college where a mug was my only cooking vessel.
Serving: 1 | Pre Time: 2 minutes | Cooking Time: 3 minutes
Ingredients
– ½ cup elbow macaroni (or any small pasta shape)
– ½ cup water
– ¼ cup whole milk (for creaminess; 2% works too)
– ¼ cup shredded sharp cheddar cheese (pre-shredded melts easily)
– 1 tablespoon unsalted butter (adds richness)
– ⅛ teaspoon garlic powder (optional, for a flavor boost)
– Pinch of salt (adjust based on cheese saltiness)
Instructions
1. Place ½ cup elbow macaroni and ½ cup water in a large microwave-safe mug (at least 12-ounce capacity to prevent overflow).
2. Microwave the mug on high power for 2 minutes, then carefully stir the pasta to separate any clumps.
3. Microwave again on high power for 1 minute, or until the pasta is tender and most water is absorbed (check by tasting a piece—it should be al dente).
4. Tip: If water remains, drain any excess carefully using a spoon to avoid burns.
5. Immediately stir in 1 tablespoon unsalted butter until melted and coating the pasta.
6. Add ¼ cup whole milk, ¼ cup shredded sharp cheddar cheese, ⅛ teaspoon garlic powder, and a pinch of salt to the mug.
7. Stir vigorously for about 30 seconds until the cheese is fully melted and the sauce is smooth and creamy.
8. Tip: For extra creaminess, let it sit for 1 minute after stirring to thicken slightly.
9. Microwave on high power for 15 seconds if needed to reheat or melt any remaining cheese clumps, stirring once more.
10. Tip: Serve immediately to enjoy the best texture, as it can thicken upon standing.
Here’s the best part: this mac and cheese comes out wonderfully creamy with a gooey, stretchy cheese pull that’s pure comfort. The sharp cheddar gives it a tangy kick, and for a fun twist, I love topping it with a sprinkle of crispy bacon bits or a dash of hot sauce to spice things up.
Easy Sheet Pan Mozzarella Sticks
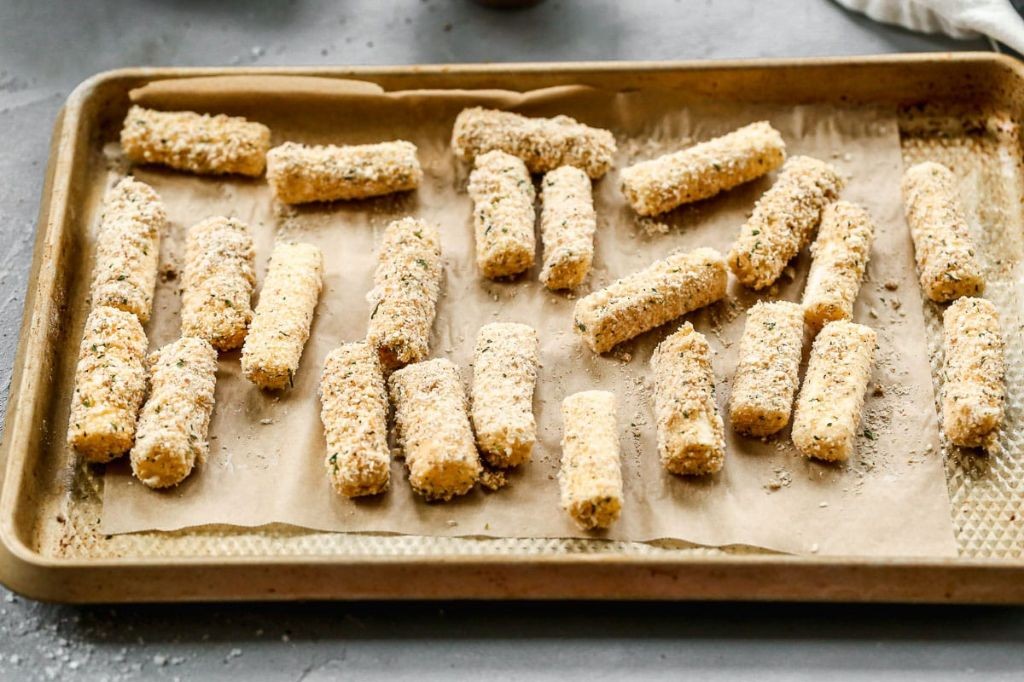
Pulling together a quick, crowd-pleasing appetizer on a busy weeknight is my kind of kitchen win. I love these Easy Sheet Pan Mozzarella Sticks because they ditch the messy deep fryer for a simple oven bake, and honestly, the crispy, gooey result is just as satisfying. It’s become my go-to for last-minute game days or when the kids have friends over.
Serving: 4 | Pre Time: 15 minutes | Cooking Time: 15 minutes
Ingredients
– 12 mozzarella string cheese sticks
– 1 cup all-purpose flour
– 2 large eggs, beaten
– 1 ½ cups Italian-style breadcrumbs (or plain breadcrumbs mixed with 1 tsp dried oregano and ½ tsp garlic powder)
– ¼ cup grated Parmesan cheese
– 2 tbsp olive oil (or any neutral oil)
– 1 cup marinara sauce, for serving
– Cooking spray
Instructions
1. Preheat your oven to 425°F (218°C) and line a large, rimmed baking sheet with parchment paper. Lightly coat the parchment with cooking spray.
2. Set up a breading station with three shallow bowls: place the all-purpose flour in the first bowl, the beaten eggs in the second, and mix the Italian-style breadcrumbs with the grated Parmesan cheese in the third bowl.
3. Working with one mozzarella string cheese stick at a time, coat it thoroughly in the flour, shaking off any excess. Tip: A light, even flour coating helps the egg adhere better.
4. Dip the floured cheese stick into the beaten eggs, letting any excess drip back into the bowl.
5. Immediately roll the cheese stick in the breadcrumb-Parmesan mixture, pressing gently to ensure a complete, even coating. Tip: For extra crunch, you can double-coat by repeating the egg and breadcrumb steps once.
6. Place the coated cheese stick on the prepared baking sheet. Repeat steps 3-5 with all remaining cheese sticks, arranging them in a single layer with about 1 inch of space between each.
7. Drizzle the 2 tablespoons of olive oil evenly over the tops of all the coated cheese sticks. Tip: This drizzle helps the breading crisp up beautifully in the oven without deep frying.
8. Bake in the preheated oven for 12-15 minutes, or until the coating is golden brown and crisp. Watch closely after the 10-minute mark to prevent over-browning.
9. While the mozzarella sticks bake, heat the 1 cup of marinara sauce in a small saucepan over medium-low heat until warm, about 5 minutes.
10. Remove the baking sheet from the oven and let the mozzarella sticks cool on the sheet for 2-3 minutes before serving—they will be extremely hot inside.
11. Serve the baked mozzarella sticks immediately with the warm marinara sauce for dipping.
Keeping these sticks simple means you get that fantastic contrast: a shatteringly crisp, herb-flecked crust giving way to a perfectly melted, stretchy cheese center. I sometimes sprinkle them with a little extra Parmesan right out of the oven or serve them alongside a cool ranch dip for a different twist.
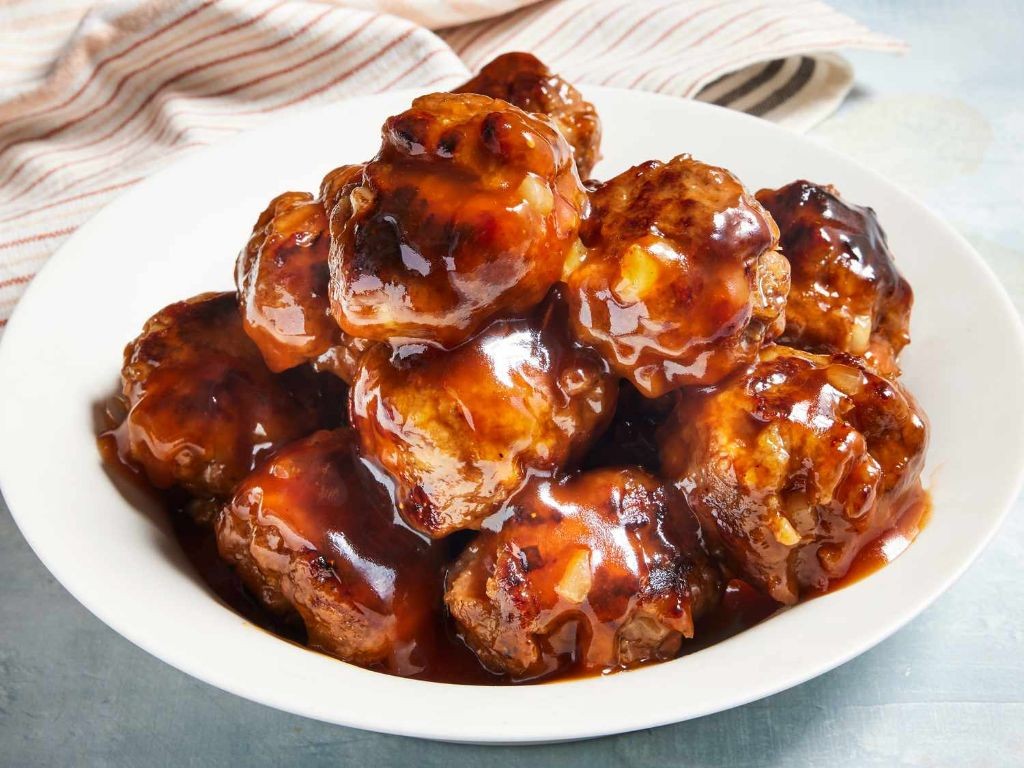
Quick Sweet and Sour Meatballs
Zesty and satisfying, these quick sweet and sour meatballs are my go-to weeknight lifesaver when I’m craving something cozy but don’t want to spend hours in the kitchen. I first made them for a last-minute potluck years ago, and now they’re a family favorite—my kids even help roll the meatballs, which makes the process feel like a fun little kitchen project. Honestly, they’re so simple and flavorful that I often double the batch to have leftovers for lunches.
Serving: 4 | Pre Time: 15 minutes | Cooking Time: 20 minutes
Ingredients
– 1 lb ground beef (I prefer 85% lean for juicier meatballs, but any works)
– 1/2 cup breadcrumbs (plain or panko, whichever you have on hand)
– 1 large egg, lightly beaten
– 1/4 cup finely chopped onion (I use yellow onion for a mild flavor)
– 2 cloves garlic, minced
– 1/2 tsp salt
– 1/4 tsp black pepper
– 1 tbsp vegetable oil (or any neutral oil for frying)
– 1 cup pineapple chunks, drained (reserve 1/4 cup juice from the can for the sauce)
– 1/2 cup ketchup
– 1/4 cup brown sugar, packed
– 2 tbsp soy sauce (use low-sodium if you prefer)
– 1 tbsp apple cider vinegar
– 1 tbsp cornstarch mixed with 2 tbsp cold water (for thickening the sauce)
– 2 green onions, thinly sliced (for garnish)
Instructions
1. In a large mixing bowl, combine the ground beef, breadcrumbs, egg, chopped onion, minced garlic, salt, and black pepper until just mixed—overworking can make the meatballs tough.
2. Shape the mixture into 1-inch meatballs, placing them on a plate; you should get about 20 meatballs.
3. Heat the vegetable oil in a large skillet over medium-high heat until it shimmers, about 1-2 minutes.
4. Add the meatballs to the skillet in a single layer, cooking for 3-4 minutes per side until browned all over and cooked through (they should reach an internal temperature of 160°F on a meat thermometer).
5. Remove the meatballs from the skillet and set them aside on a clean plate, leaving any drippings in the pan.
6. In the same skillet, reduce the heat to medium and add the ketchup, brown sugar, soy sauce, apple cider vinegar, and reserved pineapple juice, stirring to combine and scrape up any browned bits from the bottom—this adds depth to the sauce.
7. Bring the sauce to a gentle simmer, then stir in the cornstarch slurry and cook for 2-3 minutes until thickened and glossy, stirring constantly to prevent lumps.
8. Return the meatballs and any accumulated juices to the skillet, along with the pineapple chunks, tossing gently to coat everything in the sauce.
9. Simmer for an additional 2-3 minutes until the meatballs are heated through and the pineapple is slightly softened.
10. Remove from heat and garnish with sliced green onions.
These meatballs turn out tender and juicy with a perfect balance of tangy and sweet from the sauce. I love serving them over steamed rice or with a side of roasted veggies for a complete meal—they’re so versatile that you can even skewer them as appetizers for parties.
No-Yeast 15-Minute Flatbread Pizzas

Zipping through my kitchen on a busy Tuesday evening, I realized I hadn’t planned dinner—again. That’s when I remembered this lifesaver: flatbread pizzas that come together in minutes without any yeast or fancy dough-making. It’s become my go-to solution for those “what’s for dinner?” panic moments, and I love how customizable they are for picky eaters (my kids each get their own creation!).
Serving: 4 | Pre Time: 5 minutes | Cooking Time: 10 minutes
Ingredients
- 4 large flour tortillas (about 10-inch diameter, or use naan for a thicker base)
- 1 cup pizza sauce (store-bought or homemade, adjust amount based on preference)
- 2 cups shredded mozzarella cheese (pre-shredded works fine, or grate your own for better melt)
- 1/2 cup sliced pepperoni (or any toppings you like—mushrooms, bell peppers, etc.)
- 2 tbsp olive oil (or any neutral oil, for brushing)
- 1 tsp dried oregano (optional, for sprinkling)
- 1/4 tsp garlic powder (optional, adds extra flavor)
Instructions
- Preheat your oven to 425°F and line a large baking sheet with parchment paper.
- Place the flour tortillas on the prepared baking sheet, spacing them about 1 inch apart.
- Lightly brush the top of each tortilla with olive oil using a pastry brush—this helps them crisp up in the oven.
- Spread 1/4 cup of pizza sauce evenly over each tortilla, leaving a 1/2-inch border around the edges to prevent sogginess.
- Sprinkle 1/2 cup of shredded mozzarella cheese over the sauce on each tortilla.
- Arrange the pepperoni slices (or your chosen toppings) evenly over the cheese.
- If using, sprinkle a pinch of dried oregano and garlic powder over each pizza for added flavor.
- Bake in the preheated oven for 8–10 minutes, until the cheese is fully melted and bubbly and the tortilla edges are golden brown.
- Remove from the oven and let cool on the baking sheet for 2 minutes before slicing—this allows the cheese to set slightly so it doesn’t slide off.
- Use a pizza cutter or sharp knife to slice each flatbread pizza into quarters.
Delightfully crispy with a chewy center, these flatbreads have a satisfying texture that holds up to generous toppings. The quick bake gives the tortilla a lovely toastiness, while the melty cheese and savory sauce make it feel indulgent. Try serving them with a side salad for a complete meal, or cut them into smaller pieces for a fun appetizer at your next gathering—they disappear fast!
Fast-Food Inspired Strawberry Milkshake

Unexpectedly craving that nostalgic fast-food strawberry milkshake flavor but want to make it at home? I get it—sometimes a trip through the drive-thru just isn’t in the cards, especially during the holiday hustle. This copycat version comes together in minutes and tastes just like the classic, maybe even a little better because you control the sweetness.
Serving: 2 | Pre Time: 5 minutes | Cooking Time: 0 minutes
Ingredients
– 2 cups high-quality vanilla ice cream (slightly softened for easier blending)
– 1 cup whole milk, plus more if needed for thinning (2% works, but whole milk gives a richer texture)
– 1/3 cup strawberry syrup, plus extra for drizzling (I prefer a brand like Torani for that authentic diner flavor)
– 1/2 cup frozen strawberries (no need to thaw; they help chill the shake)
– Whipped cream for topping (optional, but highly recommended for the full experience)
Instructions
1. Add the 2 cups of vanilla ice cream, 1 cup of whole milk, 1/3 cup of strawberry syrup, and 1/2 cup of frozen strawberries to a high-powered blender.
2. Secure the blender lid tightly to prevent spills, as the frozen ingredients can make blending tricky at first.
3. Blend on high speed for 30–45 seconds, stopping to scrape down the sides with a spatula once if needed, until the mixture is completely smooth and no strawberry chunks remain.
4. Check the consistency by tilting the blender; if it’s too thick for your liking, add more milk 1 tablespoon at a time and blend for 10 seconds after each addition until it pours easily.
5. Pour the milkshake evenly into two tall glasses, filling them about three-quarters full to leave room for toppings.
6. Top each glass with a generous swirl of whipped cream, if using, for that classic creamy finish.
7. Drizzle 1–2 teaspoons of extra strawberry syrup over the whipped cream in each glass for added sweetness and visual appeal.
8. Serve immediately with a straw and a long spoon to scoop up every last bit.
Chilled to perfection, this shake boasts a velvety, thick texture that clings to the straw just right, with a sweet-tart strawberry flavor that’s unmistakably nostalgic. For a fun twist, try blending in a handful of fresh mint leaves or swapping the strawberry syrup for chocolate for a different fast-food favorite vibe.
Summary
Valuable for any busy week, these 20 fast-food recipes prove that delicious, satisfying meals don’t have to be complicated. We hope you find a new favorite to whip up on those hectic evenings! Give a few a try, then drop a comment below telling us which one you loved most. If this roundup helped you, please share it with your friends on Pinterest. Happy cooking!


