Just when you thought summer couldn’t get any sweeter, we’ve frozen 20 irresistible treats to beat the heat. From creamy no-churn ice creams to fruity popsicles, these refreshing desserts are perfect for lazy afternoons and backyard gatherings. Ready to cool down with minimal effort? Let’s dive into these frosty favorites that’ll have you reaching for the freezer all season long!
Strawberry Cheesecake Ice Cream
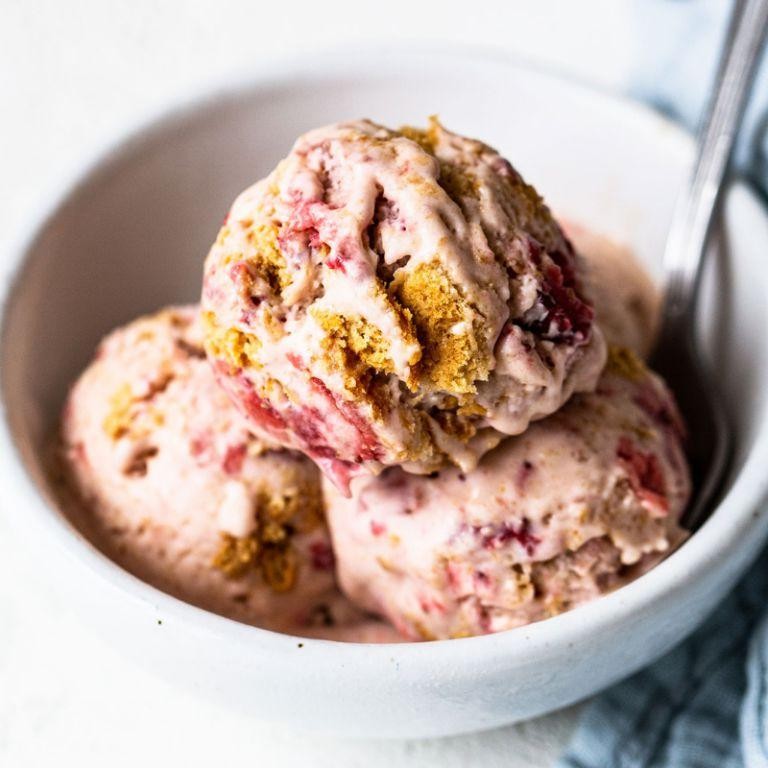
Craving something creamy, fruity, and downright dreamy? This no-churn strawberry cheesecake ice cream is your answer. It’s the perfect sweet treat to whip up for any summer gathering or cozy night in.
Serving: 8 | Pre Time: 20 minutes | Cooking Time: 0 minutes
Ingredients
For the strawberry swirl:
– 2 cups fresh strawberries, hulled and chopped
– 1/4 cup granulated sugar
– 1 tablespoon lemon juice
For the cheesecake base:
– 8 ounces full-fat cream cheese, softened to room temperature
– 1 (14-ounce) can sweetened condensed milk
– 1 teaspoon pure vanilla extract
– 1/4 teaspoon salt
For folding in:
– 2 cups heavy whipping cream, cold
Instructions
1. Combine the chopped strawberries, 1/4 cup granulated sugar, and 1 tablespoon lemon juice in a medium saucepan.
2. Cook the strawberry mixture over medium heat for 10-12 minutes, stirring frequently, until the strawberries break down and the sauce thickens slightly.
3. Remove the saucepan from the heat and let the strawberry sauce cool completely to room temperature. (Tip: Spread it on a plate to cool faster and prevent the ice cream base from melting later.)
4. In a large mixing bowl, use an electric mixer on medium speed to beat the 8 ounces of softened cream cheese until completely smooth and creamy, about 2 minutes.
5. Pour the entire can of sweetened condensed milk into the bowl with the cream cheese.
6. Add 1 teaspoon of pure vanilla extract and 1/4 teaspoon of salt to the bowl.
7. Beat the cream cheese mixture on medium-low speed until all ingredients are fully combined and smooth, about 1 minute. Set this bowl aside.
8. Pour 2 cups of cold heavy whipping cream into a separate, clean, large mixing bowl.
9. Use an electric mixer with clean beaters to whip the cream on high speed until stiff peaks form, about 3-4 minutes. (Tip: Chill your bowl and beaters in the freezer for 15 minutes beforehand for faster, higher-volume whipping.)
10. Gently fold about one-third of the whipped cream into the cream cheese mixture using a rubber spatula until just combined.
11. Fold in the remaining whipped cream until no white streaks remain, being careful not to deflate the mixture.
12. Pour half of the ice cream base into a 9×5-inch loaf pan or a 2-quart freezer-safe container.
13. Drizzle half of the cooled strawberry sauce over the first layer of base.
14. Use a knife or skewer to gently swirl the sauce into the base.
15. Pour the remaining ice cream base into the pan on top of the swirled layer.
16. Drizzle the remaining strawberry sauce over the top.
17. Use the knife or skewer again to create more decorative swirls throughout the top layer. (Tip: Avoid over-swirling to maintain beautiful ribbons of strawberry throughout the frozen dessert.)
18. Cover the container tightly with plastic wrap or a lid.
19. Freeze the ice cream for at least 6 hours, or preferably overnight, until completely firm.
Unbelievably creamy and packed with bright strawberry flavor, this ice cream has the perfect tangy-sweet balance of cheesecake. The texture is luxuriously smooth without an ice cream machine. Serve it in waffle cones, crumble graham crackers on top for extra crunch, or layer it in a glass with fresh berries for an epic sundae.
Chocolate Peanut Butter Banana Bites
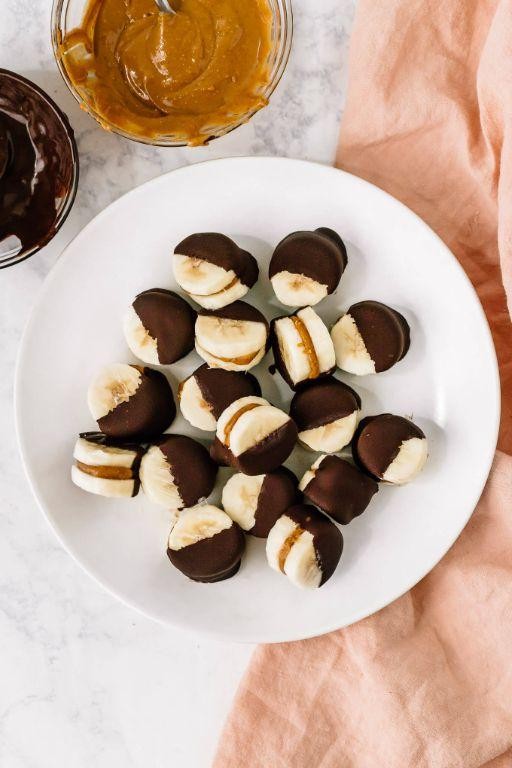
Let’s make a no-bake treat that’s pure magic. Chocolate Peanut Butter Banana Bites are your new fridge staple—creamy, crunchy, and ready in minutes.
Serving: 12 bites | Pre Time: 15 minutes | Cooking Time: 0 minutes
Ingredients
For the filling:
- 2 ripe medium bananas
- 1/2 cup creamy peanut butter
- 1 tablespoon honey
For the coating:
- 1 cup semi-sweet chocolate chips
- 1 teaspoon coconut oil
For garnish:
- 2 tablespoons crushed peanuts
Instructions
- Line a baking sheet with parchment paper.
- Peel the 2 ripe bananas and slice them into 12 even rounds, about 1/2-inch thick.
- In a small bowl, combine 1/2 cup creamy peanut butter and 1 tablespoon honey until smooth.
- Spread about 1 teaspoon of the peanut butter mixture onto each banana slice. Tip: Use slightly firm bananas to prevent the slices from becoming too mushy.
- Place the prepared banana slices on the lined baking sheet.
- Freeze the banana slices for 30 minutes, or until the peanut butter is firm to the touch.
- In a microwave-safe bowl, combine 1 cup semi-sweet chocolate chips and 1 teaspoon coconut oil.
- Microwave the mixture in 30-second intervals, stirring thoroughly after each interval, until completely melted and smooth, about 1-1.5 minutes total.
- Using a fork, dip each frozen banana bite into the melted chocolate, coating it completely.
- Let any excess chocolate drip back into the bowl.
- Immediately sprinkle the top of each coated bite with the 2 tablespoons of crushed peanuts. Tip: Work quickly before the chocolate sets to ensure the garnish sticks.
- Return the coated bites to the parchment-lined sheet.
- Place the baking sheet back in the freezer for 15 minutes, or until the chocolate shell is completely hard. Tip: For a cleaner snap, ensure the chocolate is fully set before serving.
You’ll love the contrast of the cold, creamy banana and peanut butter against the crisp chocolate shell. These bites are perfect straight from the freezer for an instant sweet fix.
Mango Coconut Sorbet
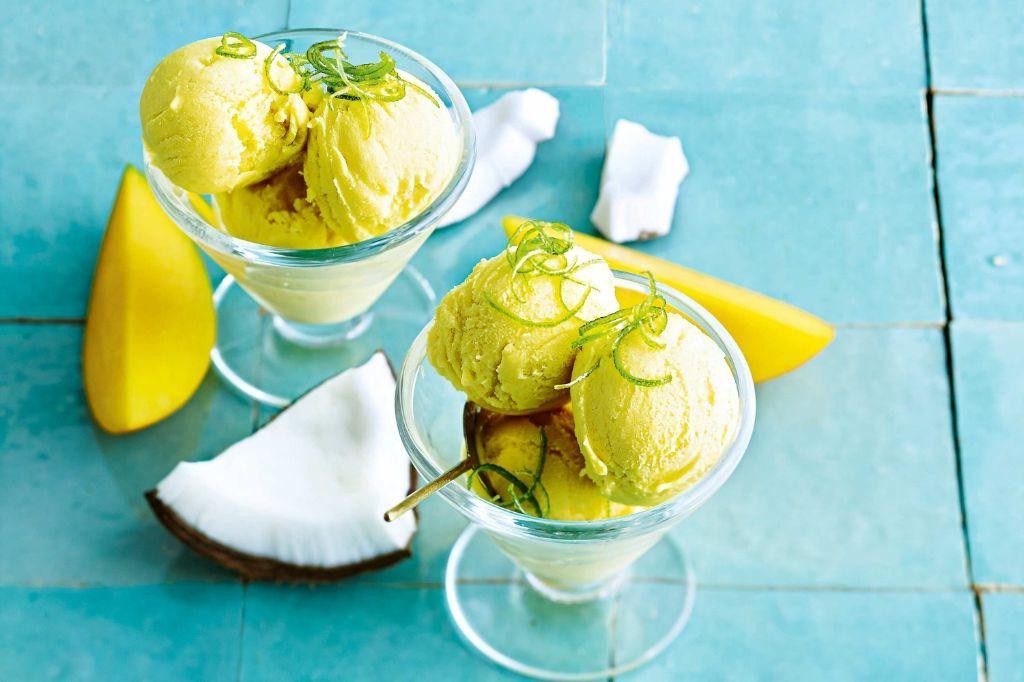
Nailed the tropical dessert craving without the dairy drama. This Mango Coconut Sorbet is your instant vacation in a bowl—creamy, dreamy, and ready to freeze. Blend, chill, and scoop your way to paradise.
Serving: 6 | Pre Time: 15 minutes | Cooking Time: 0 minutes
Ingredients
For the Sorbet Base
– 3 cups frozen mango chunks
– 1 (13.5 oz) can full-fat coconut milk, chilled
– 1/2 cup granulated sugar
– 1/4 cup fresh lime juice
– 1 teaspoon pure vanilla extract
– 1/4 teaspoon salt
Instructions
1. Combine all ingredients in a high-speed blender.
2. Blend on high for 60–90 seconds until completely smooth and no mango chunks remain.
3. Taste the mixture; if desired, add 1 more tablespoon of sugar and blend for 10 seconds to dissolve.
4. Pour the sorbet base into a 9×5-inch loaf pan or a shallow freezer-safe container.
5. Cover the container tightly with plastic wrap, pressing it directly onto the surface of the mixture to prevent ice crystals.
6. Freeze for at least 6 hours, or until completely firm and scoopable.
7. Remove the pan from the freezer and let it sit at room temperature for 5–10 minutes to soften slightly for easier scooping.
8. Scoop into bowls or cones using an ice cream scoop dipped in warm water.
Fresh from the freezer, this sorbet boasts a velvety, scoopable texture that melts luxuriously on the tongue. The ripe mango sings with bright sweetness, perfectly balanced by the rich coconut cream and a zesty lime kick. Serve it in hollowed-out coconut shells for a stunning presentation, or layer it with fresh berries and toasted coconut flakes for a vibrant parfait.
Raspberry Lemonade Granita
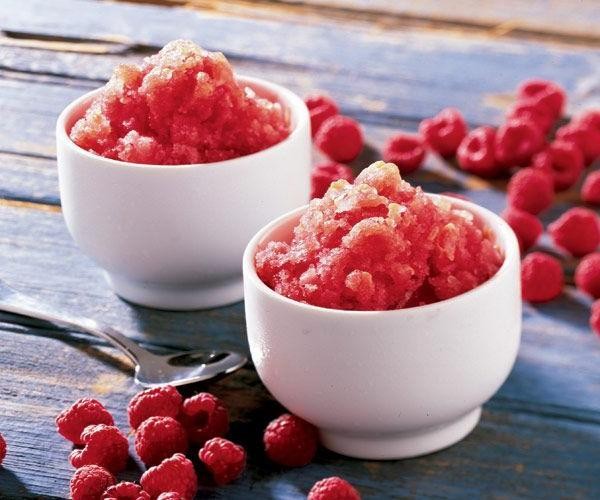
Get ready to crush the summer heat with this icy, tangy treat. Grab your blender and freeze your way to refreshment—this granita is pure sunshine in a glass.
Serving: 6 | Pre Time: 15 minutes | Cooking Time: 0 minutes
Ingredients
– For the base:
– 1 cup granulated sugar
– 1 cup water
– For the flavor:
– 1 cup fresh raspberries
– 1 cup freshly squeezed lemon juice (from about 4-6 lemons)
– 1 tablespoon lemon zest
– 1 cup cold water
Instructions
1. Combine 1 cup granulated sugar and 1 cup water in a small saucepan over medium heat.
2. Stir constantly until the sugar dissolves completely, about 3-5 minutes, then remove from heat to cool—this simple syrup prevents graininess.
3. Place 1 cup fresh raspberries in a blender and blend on high until smooth, about 30 seconds.
4. Pour the raspberry puree through a fine-mesh sieve into a large bowl, pressing with a spoon to extract all juice; discard the seeds for a smoother texture.
5. Add the cooled simple syrup, 1 cup freshly squeezed lemon juice, 1 tablespoon lemon zest, and 1 cup cold water to the bowl with the raspberry juice.
6. Whisk all ingredients together until fully combined, about 1 minute.
7. Pour the mixture into a shallow, freezer-safe dish, such as a 9×13-inch baking pan.
8. Place the dish uncovered in the freezer for 30 minutes.
9. After 30 minutes, remove the dish and use a fork to scrape the frozen edges into the center, breaking up any ice crystals—repeat this every 30 minutes for 3-4 hours until fully frozen and flaky.
10. Scoop the granita into serving glasses and serve immediately.
A perfect balance of sweet and tart, this granita boasts a light, crystalline texture that melts on the tongue. Serve it in chilled glasses for an extra-refreshing kick, or layer it with fresh berries for a vibrant dessert presentation.
Cookies and Cream Frozen Yogurt
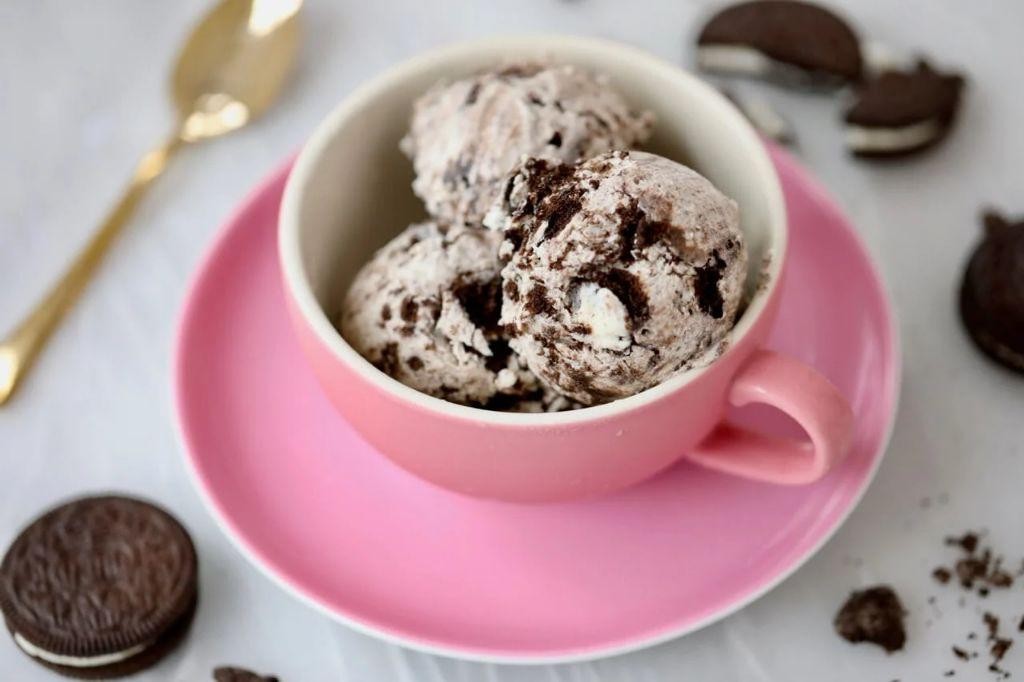
Whip up the ultimate summer treat with this creamy, crunchy Cookies and Cream Frozen Yogurt. Blend rich vanilla frozen yogurt with crushed Oreos for a dessert that’s ready in minutes. No ice cream maker needed—just freeze and devour.
Serving: 6 | Pre Time: 15 minutes | Cooking Time: 0 minutes
Ingredients
For the base:
– 4 cups vanilla frozen yogurt, softened at room temperature for 10 minutes
– 1 cup heavy cream
– 1/4 cup granulated sugar
For the mix-ins:
– 15 Oreo cookies, crushed into small chunks (about 1 1/2 cups)
– 1 tsp vanilla extract
Instructions
1. Place the softened vanilla frozen yogurt in a large mixing bowl.
2. In a separate bowl, pour in the heavy cream and granulated sugar.
3. Use an electric mixer on medium-high speed to whip the cream and sugar until stiff peaks form, about 3–4 minutes.
4. Gently fold the whipped cream into the frozen yogurt with a spatula until fully combined.
5. Stir in the vanilla extract for enhanced flavor.
6. Add the crushed Oreo cookies to the mixture and fold gently to distribute evenly, leaving some chunks for texture.
7. Transfer the mixture to a 9×5-inch loaf pan lined with parchment paper.
8. Smooth the top with the spatula to create an even layer.
9. Cover the pan tightly with plastic wrap, pressing it directly onto the surface to prevent ice crystals.
10. Freeze the pan for at least 6 hours or overnight until firm.
11. Remove from the freezer and let it sit at room temperature for 5–10 minutes to soften slightly before scooping.
12. Scoop into bowls or cones and serve immediately.
Unbelievably creamy with a satisfying crunch from the Oreo bits, this frozen yogurt melts smoothly on the tongue. Serve it in waffle cones for extra crunch or layer it in a parfait with fresh berries for a vibrant twist.
Pistachio Avocado Ice Cream
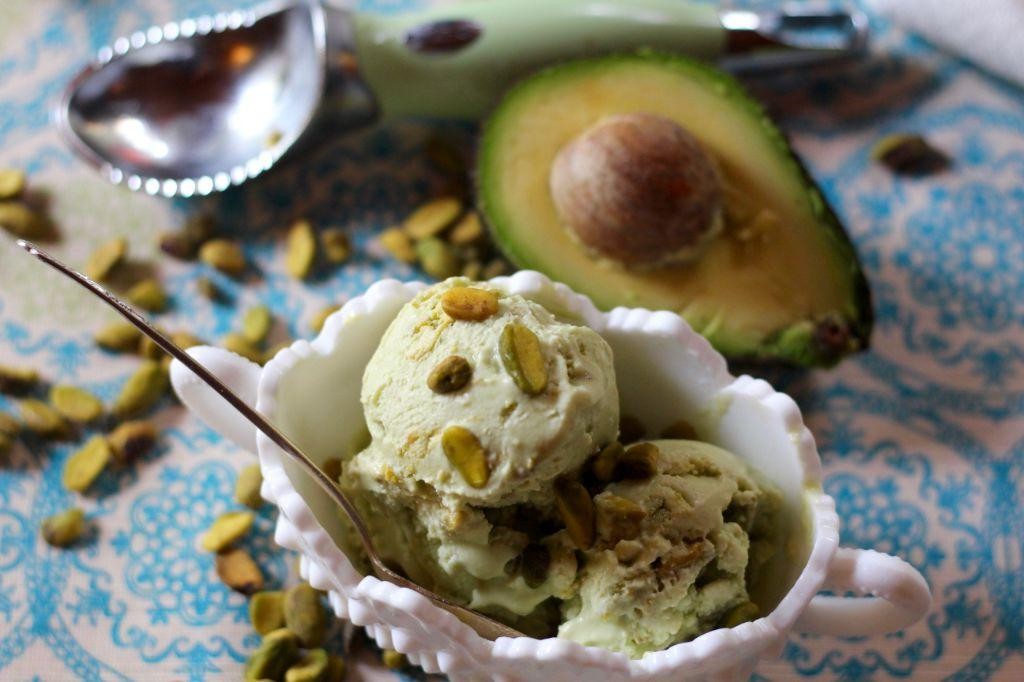
Whip up a creamy, dreamy dessert that’s secretly healthy. This Pistachio Avocado Ice Cream blends rich avocado with nutty pistachios for a dairy-free treat. You’ll love the vibrant green color and smooth texture—no ice cream maker needed.
Serving: 4 | Pre Time: 15 minutes | Cooking Time: 0 minutes
Ingredients
For the ice cream base:
– 2 ripe avocados, peeled and pitted
– 1/2 cup shelled pistachios, plus 2 tbsp for garnish
– 1/4 cup honey
– 1/4 cup unsweetened almond milk
– 1 tsp vanilla extract
– 1/4 tsp salt
For serving (optional):
– Fresh mint leaves
Instructions
1. Place the peeled and pitted avocados in a food processor or high-speed blender.
2. Add the 1/2 cup of shelled pistachios, honey, almond milk, vanilla extract, and salt to the food processor.
3. Blend the mixture on high speed for 2–3 minutes, scraping down the sides halfway through, until completely smooth and creamy. Tip: Use ripe avocados for the best texture—they should yield slightly to gentle pressure.
4. Transfer the blended mixture to a freezer-safe container with a lid.
5. Smooth the top with a spatula and cover the container tightly.
6. Freeze the ice cream for at least 6 hours, or until firm. Tip: For faster freezing, spread the mixture in a shallow pan before covering.
7. Remove the ice cream from the freezer 10 minutes before serving to soften slightly.
8. Scoop the ice cream into bowls or cones.
9. Garnish with the reserved 2 tablespoons of chopped pistachios and fresh mint leaves, if using. Tip: Toast the garnish pistachios in a dry skillet over medium heat for 3–4 minutes for extra crunch and flavor.
Chill out with this velvety ice cream that’s naturally sweet and packed with healthy fats. The avocado gives it an ultra-creamy mouthfeel, while pistachios add a delightful crunch. Serve it in waffle cones for a fun twist or top with a drizzle of dark chocolate for extra indulgence.
Blueberry Greek Yogurt Popsicles
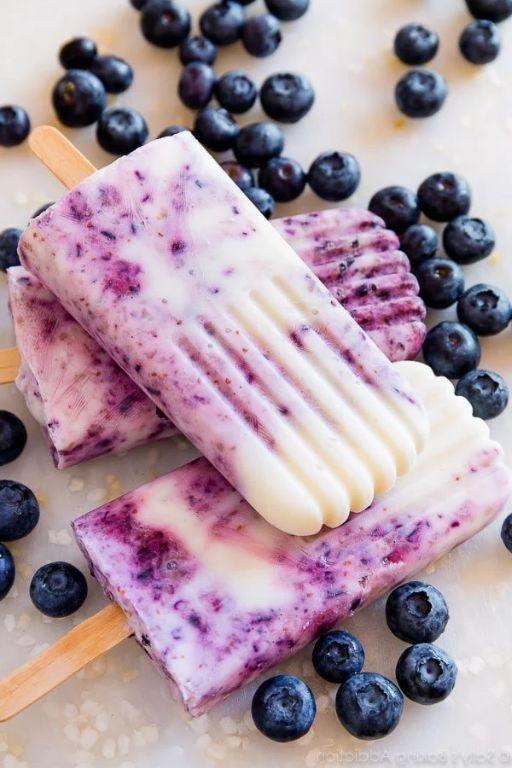
Perfect for beating the summer heat, these creamy Blueberry Greek Yogurt Popsicles are a healthy, no-bake treat. Packed with protein and bursting with berry flavor, they’re a guilt-free dessert you can whip up in minutes.
Serving: 6 | Pre Time: 15 minutes | Cooking Time: 0 minutes
Ingredients
- For the popsicle base:
- 2 cups plain Greek yogurt
- 1/4 cup honey
- 1 teaspoon vanilla extract
- For the blueberry swirl:
- 1 cup fresh or frozen blueberries
- 2 tablespoons granulated sugar
- 1 tablespoon lemon juice
Instructions
- Place 1 cup of blueberries, 2 tablespoons of sugar, and 1 tablespoon of lemon juice in a small saucepan over medium heat.
- Cook the mixture for 5–7 minutes, stirring frequently, until the blueberries burst and the sauce thickens slightly.
- Remove the blueberry sauce from the heat and let it cool completely to room temperature for about 15 minutes. Tip: Cooling prevents the yogurt from curdling when mixed.
- In a medium mixing bowl, combine 2 cups of Greek yogurt, 1/4 cup of honey, and 1 teaspoon of vanilla extract.
- Whisk the yogurt mixture vigorously for 1–2 minutes until completely smooth and well blended.
- Divide half of the yogurt mixture evenly among six popsicle molds, filling each about one-third full.
- Spoon a layer of the cooled blueberry sauce over the yogurt in each mold, using about half of the total sauce.
- Top each mold with the remaining yogurt mixture, leaving a 1/4-inch gap at the top for expansion. Tip: Tap the molds gently on the counter to remove any air bubbles.
- Insert popsicle sticks into the center of each mold.
- Freeze the popsicles for at least 6 hours, or preferably overnight, until completely solid. Tip: For easy removal, run the molds under warm water for 10–15 seconds before pulling out the popsicles.
Here’s the best part: you get a creamy, tangy yogurt base swirled with a sweet-tart blueberry ribbon that stays perfectly soft. Serve them straight from the freezer for a refreshing snack, or crumble one over a bowl of granola for a fun breakfast twist.
Matcha White Chocolate Semifreddo
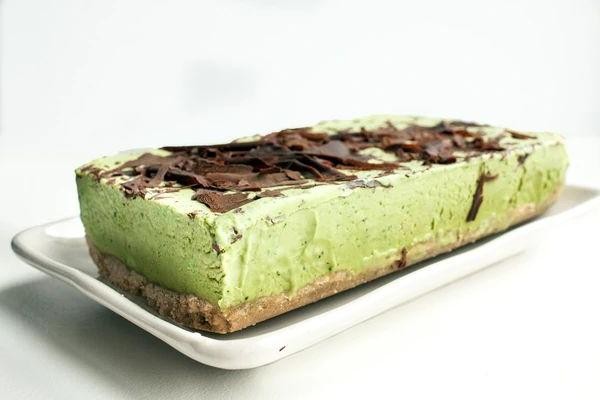
Ready to ditch boring desserts? This matcha white chocolate semifreddo is your new freezer hero—creamy, dreamy, and no ice cream maker needed. Rethink your holiday spread with this vibrant green showstopper that’s secretly simple.
Serving: 8 | Pre Time: 25 minutes | Cooking Time: 0 minutes
Ingredients
For the semifreddo base:
– 1 cup heavy cream
– 4 large egg yolks
– ½ cup granulated sugar
– 1 teaspoon vanilla extract
For the matcha white chocolate mixture:
– 8 ounces white chocolate, finely chopped
– 2 tablespoons high-quality matcha powder
– ¼ cup hot water (just under boiling, about 180°F)
For assembly:
– 1 9×5-inch loaf pan
– Plastic wrap
Instructions
1. Line a 9×5-inch loaf pan with plastic wrap, leaving overhang on all sides for easy removal later.
2. In a medium heatproof bowl, whisk together 4 large egg yolks and ½ cup granulated sugar until pale and slightly thickened, about 2 minutes.
3. Place the bowl over a saucepan of simmering water (double boiler method), ensuring the bottom of the bowl does not touch the water.
4. Whisk the egg yolk mixture constantly over the simmering water until it reaches 160°F on an instant-read thermometer, about 5-7 minutes; this pasteurizes the eggs safely.
5. Remove the bowl from the heat and whisk in 1 teaspoon vanilla extract; set aside to cool slightly.
6. In a separate small bowl, dissolve 2 tablespoons matcha powder in ¼ cup hot water (180°F), whisking vigorously until completely smooth with no lumps.
7. Place 8 ounces finely chopped white chocolate in another heatproof bowl and melt it using the double boiler method, stirring until smooth.
8. Immediately whisk the dissolved matcha mixture into the melted white chocolate until fully incorporated and vibrant green.
9. Gently fold the matcha-white chocolate mixture into the cooled egg yolk mixture until uniform.
10. In a large chilled bowl, whip 1 cup heavy cream with a hand mixer or stand mixer on medium-high speed until stiff peaks form, about 3-4 minutes.
11. Carefully fold the whipped cream into the matcha-egg mixture in three additions, using a spatula and gentle motions to maintain airiness.
12. Pour the mixture into the prepared loaf pan, smoothing the top with the spatula.
13. Cover the pan tightly with plastic wrap and freeze for at least 8 hours or overnight until completely firm.
14. To serve, lift the semifreddo out using the plastic wrap overhang, invert it onto a serving plate, and peel off the wrap.
15. Slice with a knife dipped in hot water for clean cuts, wiping the knife between slices.
This semifreddo delivers a velvety, mousse-like texture that melts luxuriously on the tongue. The earthy matcha perfectly balances the sweet white chocolate, creating a sophisticated yet playful flavor. Try serving slices with a drizzle of raspberry coulis or crushed pistachios for a stunning color contrast and extra crunch.
Peach Melba Parfait Icebox Cake
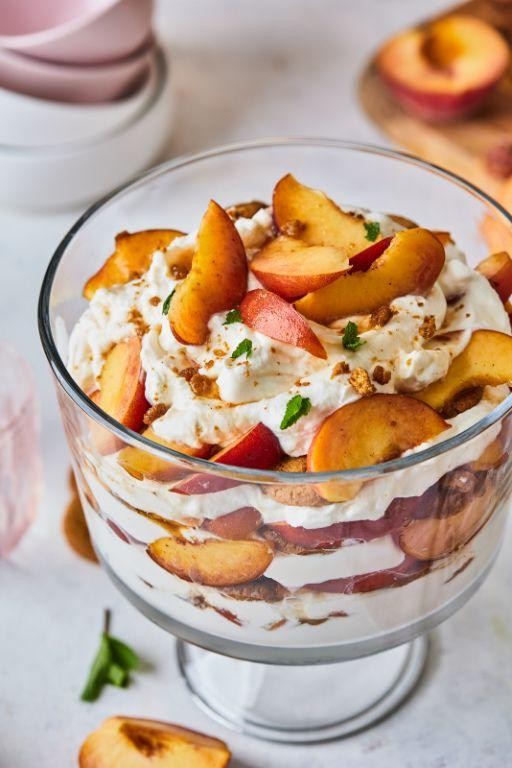
Brace your taste buds—this no-bake dessert is about to become your summer obsession. Layer juicy peaches, raspberry sauce, and whipped cream between graham crackers for a stunning, fuss-free treat that chills to perfection in the fridge. Seriously, it’s the easiest showstopper you’ll ever make.
Serving: 8 | Pre Time: 25 minutes | Cooking Time: 0 minutes
Ingredients
For the raspberry sauce:
– 12 oz fresh or frozen raspberries
– 1/2 cup granulated sugar
– 1 tbsp lemon juice
For the assembly:
– 1 (14.4 oz) box graham crackers
– 2 cups heavy whipping cream
– 1/4 cup powdered sugar
– 1 tsp vanilla extract
– 3 ripe peaches, thinly sliced
Instructions
1. Combine 12 oz raspberries, 1/2 cup granulated sugar, and 1 tbsp lemon juice in a small saucepan over medium heat.
2. Cook the mixture for 8–10 minutes, stirring frequently, until the raspberries break down and the sauce thickens slightly.
3. Strain the sauce through a fine-mesh sieve into a bowl to remove seeds, pressing with a spoon—this ensures a smooth texture.
4. Let the sauce cool completely at room temperature for 15 minutes.
5. Whip 2 cups heavy whipping cream, 1/4 cup powdered sugar, and 1 tsp vanilla extract in a large bowl with an electric mixer on high speed for 3–4 minutes until stiff peaks form.
6. Spread a thin layer of the whipped cream on the bottom of a 9×13-inch baking dish to prevent sticking.
7. Arrange a single layer of graham crackers over the whipped cream, breaking them to fit as needed.
8. Spread 1/3 of the remaining whipped cream evenly over the graham crackers.
9. Arrange a layer of thinly sliced peaches on top of the whipped cream.
10. Drizzle 1/3 of the cooled raspberry sauce over the peaches.
11. Repeat steps 7–10 twice more to create three total layers, ending with a final drizzle of raspberry sauce.
12. Cover the dish tightly with plastic wrap and refrigerate for at least 8 hours or overnight—this allows the graham crackers to soften like cake layers.
13. Slice and serve chilled directly from the fridge.
Nothing beats the creamy, dreamy texture where softened graham crackers meld with lush peaches and tart raspberry swirls. For a festive twist, top with fresh mint or a scoop of vanilla ice cream right before serving.
Tiramisu Affogato Sundae
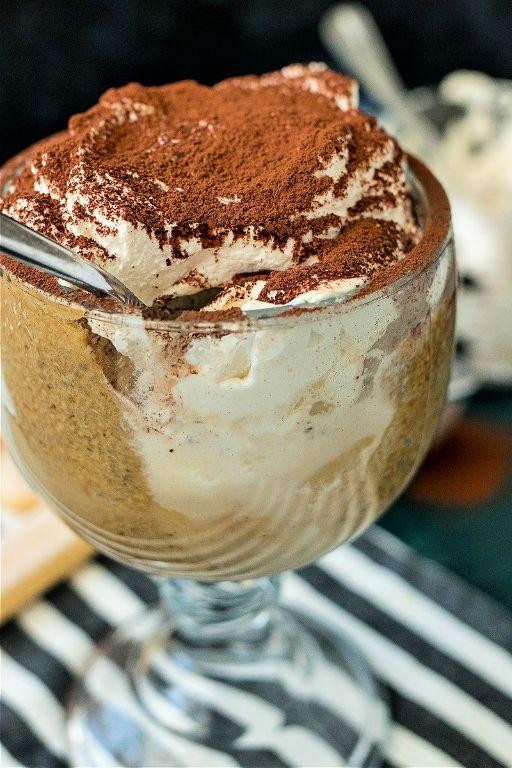
Forget the fork—this is tiramisu you eat with a spoon. Fusing Italian dessert royalty with a classic sundae, we’re layering coffee-soaked ladyfingers, mascarpone cream, and a shot of hot espresso right before serving. Think cold, creamy, caffeinated, and completely irresistible.
Serving: 4 | Pre Time: 20 minutes | Cooking Time: 0 minutes
Ingredients
For the coffee soak:
– 1 cup strong brewed coffee, cooled to room temperature
– 2 tbsp granulated sugar
For the mascarpone cream:
– 8 oz (1 cup) mascarpone cheese, cold
– 1/2 cup heavy cream, cold
– 1/4 cup powdered sugar
– 1 tsp pure vanilla extract
For assembly:
– 12 ladyfinger cookies (savoiardi)
– 4 shots hot espresso (about 1/2 cup total)
– Unsweetened cocoa powder, for dusting
Instructions
1. In a shallow bowl, stir 1 cup cooled coffee and 2 tbsp granulated sugar until the sugar fully dissolves.
2. Quickly dip 12 ladyfinger cookies into the coffee mixture for 2–3 seconds per side—they should be moist but not soggy. Tip: Work fast to prevent the cookies from disintegrating.
3. Arrange 3 dipped ladyfingers in the bottom of each of 4 serving glasses, breaking them to fit if needed.
4. In a large bowl, combine 8 oz cold mascarpone, 1/2 cup cold heavy cream, 1/4 cup powdered sugar, and 1 tsp vanilla extract.
5. Using a hand mixer on medium-high speed, beat the mixture for 2–3 minutes until stiff peaks form. Tip: Ensure all ingredients are cold for the fluffiest, most stable cream.
6. Divide half of the mascarpone cream evenly among the glasses, spreading it over the ladyfingers.
7. Add another layer of 3 dipped ladyfingers to each glass.
8. Top with the remaining mascarpone cream, smoothing it with the back of a spoon.
9. Dust the tops generously with unsweetened cocoa powder using a fine-mesh sieve. Tip: Chill the assembled sundaes for at least 1 hour to let the flavors meld—this prevents a runny texture.
10. Just before serving, pour 1 shot of hot espresso (about 2 tbsp) directly over each sundae.
Each spoonful delivers a warm espresso rush through the chilled, cloud-like cream and tender coffee-infused cookies. Expect a luxurious contrast between the hot liquid and cold layers, with the cocoa powder adding a bittersweet finish. Serve immediately for that dramatic affogato effect, or let guests pour their own espresso shot at the table for interactive fun.
Black Forest Frozen Mousse
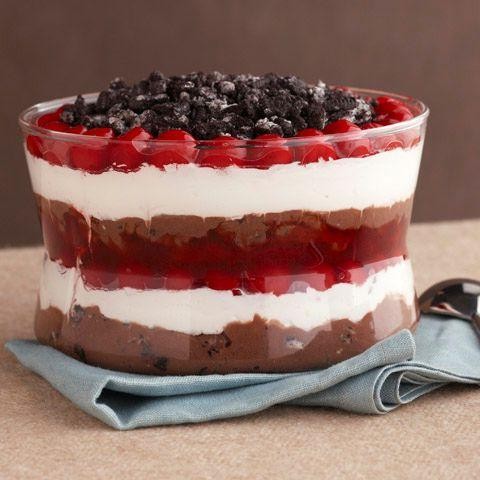
Let’s ditch the oven and dive into this no-bake, frozen twist on a classic. This Black Forest Frozen Mousse layers rich chocolate, tart cherries, and pillowy cream for a dessert that’s seriously cool. It’s the ultimate make-ahead showstopper for any holiday or summer party.
Serving: 8 | Pre Time: 25 minutes | Cooking Time: 0 minutes
Ingredients
For the Cherry Sauce:
– 1 (12-ounce) bag frozen dark sweet cherries
– 1/4 cup granulated sugar
– 1 tablespoon fresh lemon juice
– 1/4 teaspoon almond extract
For the Chocolate Mousse Base:
– 8 ounces semi-sweet chocolate, finely chopped
– 2 tablespoons unsalted butter
– 1/4 cup strong brewed coffee, cooled
– 1/8 teaspoon fine sea salt
For the Whipped Cream Layer:
– 1 1/2 cups heavy whipping cream, cold
– 1/4 cup powdered sugar
– 1 teaspoon pure vanilla extract
Instructions
1. Make the cherry sauce: Combine the frozen dark sweet cherries, granulated sugar, and lemon juice in a medium saucepan over medium heat.
2. Cook the mixture, stirring frequently, for 8-10 minutes until the cherries have broken down and the sauce has thickened slightly.
3. Remove the saucepan from the heat and stir in the almond extract. Tip: For a smoother sauce, you can press it through a fine-mesh sieve to remove skins.
4. Pour the cherry sauce into a bowl and let it cool completely to room temperature, about 20 minutes.
5. Prepare the chocolate mousse base: Place the finely chopped semi-sweet chocolate and unsalted butter in a heatproof bowl.
6. Heat the strong brewed coffee in a small saucepan until just simmering, then immediately pour it over the chocolate and butter.
7. Let the mixture sit undisturbed for 2 minutes, then whisk until completely smooth and glossy. Whisk in the fine sea salt. Tip: Ensure no water gets into the bowl, as it can cause the chocolate to seize.
8. Set the chocolate mixture aside to cool until it is just slightly warm to the touch, about 10 minutes.
9. Make the whipped cream layer: In a large, chilled bowl, combine the cold heavy whipping cream, powdered sugar, and vanilla extract.
10. Using a hand mixer or stand mixer fitted with the whisk attachment, beat the cream on medium-high speed until stiff peaks form, about 3-4 minutes. Tip: Chill your bowl and beaters beforehand for faster, more stable whipped cream.
11. Gently fold one-third of the whipped cream into the cooled chocolate mixture until no white streaks remain.
12. Fold in the remaining whipped cream in two additions, being careful not to deflate the mixture.
13. Assemble the dessert: Spoon half of the chocolate mousse into an 8×8-inch baking dish or a 9-inch springform pan, spreading it into an even layer.
14. Dollop and gently spread all of the cooled cherry sauce over the chocolate layer.
15. Top with the remaining chocolate mousse, spreading it carefully to cover the cherry layer completely.
16. Cover the dish tightly with plastic wrap and freeze for at least 6 hours, or preferably overnight, until completely firm.
Frozen solid, this mousse delivers a fantastic contrast: a creamy, airy chocolate texture gives way to a bold, jammy cherry core. Serve it straight from the freezer, slicing it into clean squares, or let it sit for 5 minutes to soften slightly for an ultra-smooth, mousse-like bite. Garnish with fresh cherries and chocolate shavings for a picture-perfect finish.
Key Lime Pie Ice Cream Sandwiches
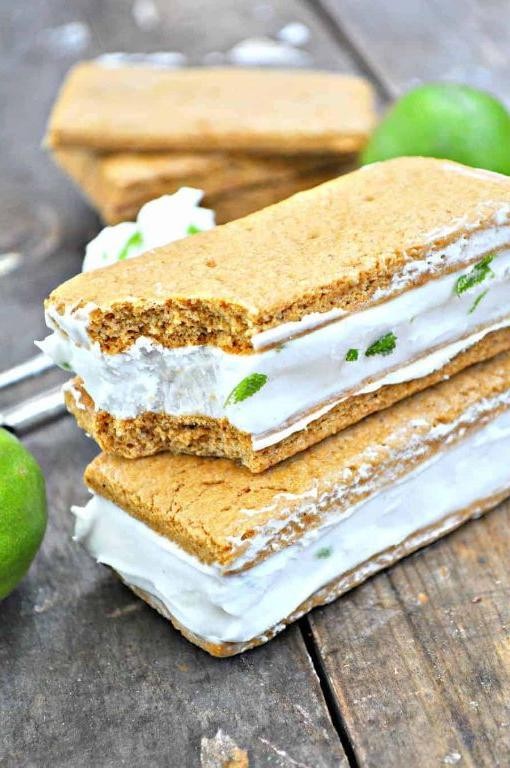
Mash up summer’s favorite pie with a frozen treat for the ultimate dessert hack. These Key Lime Pie Ice Cream Sandwiches deliver that iconic tart-sweet flavor in a handheld, no-bake format. They’re perfect for beating the heat with a nostalgic twist.
Serving: 12 | Pre Time: 25 minutes | Cooking Time: 0 minutes
Ingredients
For the crust:
– 2 cups graham cracker crumbs
– 1/3 cup granulated sugar
– 1/2 cup unsalted butter, melted
For the filling:
– 1 quart vanilla ice cream, slightly softened
– 1/2 cup key lime juice (freshly squeezed or bottled)
– 1 tablespoon key lime zest
For assembly:
– 1 cup sweetened shredded coconut, toasted
Instructions
1. Combine 2 cups graham cracker crumbs, 1/3 cup granulated sugar, and 1/2 cup melted unsalted butter in a medium bowl until the mixture resembles wet sand.
2. Press the crust mixture firmly and evenly into the bottom of a 9×13-inch baking dish lined with parchment paper, using the bottom of a measuring cup to compact it.
3. Place the crust in the freezer for 15 minutes to set completely.
4. In a large bowl, mix 1 quart slightly softened vanilla ice cream, 1/2 cup key lime juice, and 1 tablespoon key lime zest until fully combined and smooth.
5. Spread the key lime ice cream mixture evenly over the chilled crust.
6. Sprinkle 1 cup toasted sweetened shredded coconut evenly over the ice cream layer.
7. Cover the dish tightly with plastic wrap and freeze for at least 4 hours, or until completely firm.
8. Lift the frozen slab out of the dish using the parchment paper overhang and place it on a cutting board.
9. Cut the slab into 12 even rectangles using a sharp knife dipped in hot water for clean cuts.
10. Wrap each sandwich individually in parchment paper and store in a freezer-safe container.
Wrap these up for a party or keep them stashed for a quick sweet fix. The creamy, tangy ice cream contrasts beautifully with the crunchy, buttery crust and toasted coconut. Serve them straight from the freezer for a firm texture, or let them sit for 5 minutes to soften slightly—either way, they’re a refreshing, portable dessert that screams summer.
Caramelized Banana Nice Cream
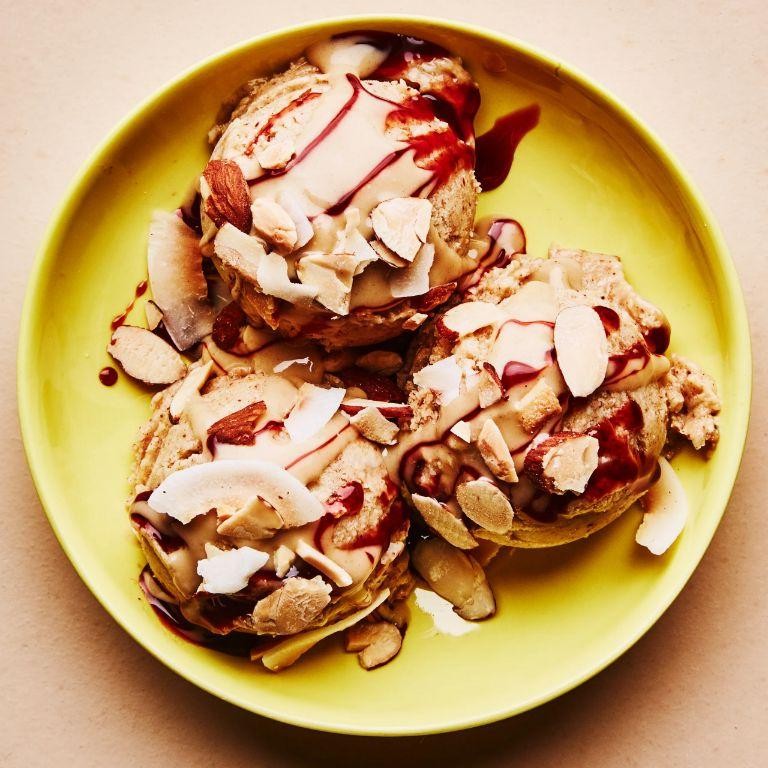
Grab your blender and forget the ice cream machine—this caramelized banana nice cream is about to become your new freezer obsession. Get ready to transform overripe bananas into a luscious, dairy-free dessert that’s secretly healthy. We’re talking deep caramel flavor, creamy texture, and zero guilt—let’s blend.
Serving: 4 | Pre Time: 10 minutes | Cooking Time: 10 minutes
Ingredients
For the caramelized bananas:
– 4 large ripe bananas, sliced into 1/2-inch rounds
– 2 tablespoons coconut oil
– 2 tablespoons maple syrup
– 1/2 teaspoon ground cinnamon
For the nice cream base:
– 2 cups frozen banana chunks (from about 3 bananas)
– 1/4 cup unsweetened almond milk
– 1 teaspoon vanilla extract
– Pinch of sea salt
Instructions
1. Heat a large non-stick skillet over medium heat and add 2 tablespoons of coconut oil.
2. Once the oil shimmers, arrange the banana slices in a single layer in the skillet.
3. Cook the bananas for 3–4 minutes without moving them to develop a golden-brown crust.
4. Flip each banana slice carefully using a spatula and cook for another 3–4 minutes until caramelized on both sides.
5. Drizzle 2 tablespoons of maple syrup evenly over the bananas in the skillet.
6. Sprinkle 1/2 teaspoon of ground cinnamon over the bananas and stir gently to coat.
7. Remove the skillet from heat and let the caramelized bananas cool completely for 10 minutes.
8. Add 2 cups of frozen banana chunks to a high-speed blender.
9. Pour in 1/4 cup of unsweetened almond milk, 1 teaspoon of vanilla extract, and a pinch of sea salt.
10. Blend on high speed for 30 seconds, using the tamper to push ingredients down if needed.
11. Add the cooled caramelized bananas to the blender with the nice cream base.
12. Pulse 5–6 times until the bananas are just swirled through, leaving some chunky pieces.
13. Transfer the mixture to a loaf pan lined with parchment paper and spread evenly.
14. Freeze for at least 4 hours until firm enough to scoop.
15. Serve immediately with extra caramelized banana slices on top if desired.
Make this nice cream your canvas—the caramelized bits create sweet, gooey pockets against the creamy frozen base. Top with crushed nuts or dark chocolate shavings for crunch, or layer it in a glass with granola for an epic parfait. Store leftovers in an airtight container; it stays scoopable straight from the freezer thanks to the banana’s natural creaminess.
Pina Colada Sorbet

Make your holiday dessert dreams a reality with this tropical escape. This Pina Colada Sorbet blends creamy coconut and bright pineapple into a frozen treat that’s dairy-free and refreshingly simple to whip up.
Serving: 6 | Pre Time: 15 minutes | Cooking Time: 0 minutes
Ingredients
For the Sorbet Base:
– 1 (20 oz) can crushed pineapple in juice, undrained
– 1 (13.5 oz) can full-fat coconut milk
– 1/2 cup granulated sugar
– 1/4 cup light rum (optional)
– 2 tbsp fresh lime juice
For Garnish (Optional):
– Toasted coconut flakes
– Fresh pineapple wedges
– Maraschino cherries
Instructions
1. Combine the undrained crushed pineapple, full-fat coconut milk, granulated sugar, light rum (if using), and fresh lime juice in a blender.
2. Blend the mixture on high speed for 60 seconds until completely smooth and frothy.
3. Pour the blended mixture into a 9×5-inch loaf pan or a shallow freezer-safe container.
4. Cover the container tightly with plastic wrap, pressing it directly onto the surface of the liquid to prevent ice crystals.
5. Freeze the mixture for 4 hours until it is firm around the edges but still slightly soft in the center.
6. Transfer the partially frozen sorbet back to the blender.
7. Blend the sorbet on high speed for 30 seconds until it becomes creamy and smooth, breaking up any large ice chunks.
8. Return the blended sorbet to the container, smoothing the top with a spatula.
9. Cover the container again with plastic wrap, pressing it onto the surface.
10. Freeze the sorbet for an additional 4 hours, or overnight, until it is completely firm and scoopable.
11. Scoop the sorbet into bowls or glasses using a warmed ice cream scoop for clean servings.
12. Garnish each serving with toasted coconut flakes, fresh pineapple wedges, and a maraschino cherry if desired.
Just scoop into chilled glasses for a stunning presentation—the texture is luxuriously smooth, not icy, with a perfect balance of sweet pineapple and rich coconut. Jazz it up by serving in hollowed-out pineapple halves or layering it with crushed graham crackers for a tropical ‘pie’ vibe.
Espresso Chip Gelato
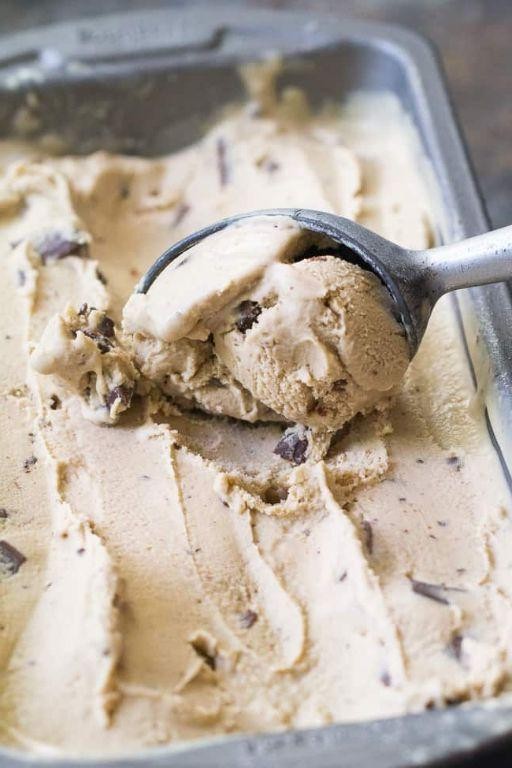
A rich, coffee-infused gelato studded with dark chocolate chips that’s smoother than your favorite playlist. Forget the ice cream shop—this homemade version is intensely creamy and packed with real espresso punch. Get ready to churn out a dessert that’ll have everyone begging for the recipe.
Serving: 6 | Pre Time: 15 minutes | Cooking Time: 0 minutes
Ingredients
For the gelato base:
– 2 cups whole milk
– 1 cup heavy cream
– ¾ cup granulated sugar
– 4 large egg yolks
– 1 tablespoon vanilla extract
For the flavoring:
– ¼ cup finely ground espresso beans
– ½ cup finely chopped dark chocolate (at least 70% cacao)
Instructions
1. Combine 2 cups whole milk, 1 cup heavy cream, and ¾ cup granulated sugar in a medium saucepan over medium heat.
2. Heat the mixture, stirring constantly, until the sugar dissolves completely and tiny bubbles form around the edges—about 5–7 minutes; do not let it boil.
3. Whisk 4 large egg yolks in a separate bowl until pale and slightly thickened, about 2 minutes.
4. Slowly pour about 1 cup of the hot milk mixture into the egg yolks while whisking vigorously to temper them and prevent scrambling.
5. Pour the tempered egg mixture back into the saucepan with the remaining milk mixture.
6. Cook over low heat, stirring constantly with a wooden spoon, until the mixture thickens enough to coat the back of the spoon—about 8–10 minutes; it should reach 170°F on an instant-read thermometer.
7. Remove from heat and immediately stir in ¼ cup finely ground espresso beans and 1 tablespoon vanilla extract until fully incorporated.
8. Pour the mixture through a fine-mesh sieve into a clean bowl to remove any espresso grounds or cooked egg bits.
9. Cover the bowl with plastic wrap, pressing it directly onto the surface of the mixture to prevent a skin from forming.
10. Chill in the refrigerator for at least 4 hours, or until completely cold—overnight is ideal for the best flavor development.
11. Churn the chilled mixture in an ice cream maker according to the manufacturer’s instructions, usually 20–25 minutes, until it reaches a soft-serve consistency.
12. In the last 2 minutes of churning, add ½ cup finely chopped dark chocolate through the opening to distribute evenly.
13. Transfer the gelato to an airtight container, smoothing the top with a spatula.
14. Freeze for at least 4 hours, or until firm enough to scoop.
Glossy and dense, this gelato melts slowly on the tongue with a bold espresso kick that’s balanced by bittersweet chocolate chunks. Serve it in chilled espresso cups for a double-coffee hit, or sandwich it between chewy chocolate cookies for an indulgent ice cream sandwich. The velvety texture holds up beautifully, making it perfect for elegant desserts or late-night spoonfuls straight from the freezer.
Cherry Almond Frozen Yogurt Bark
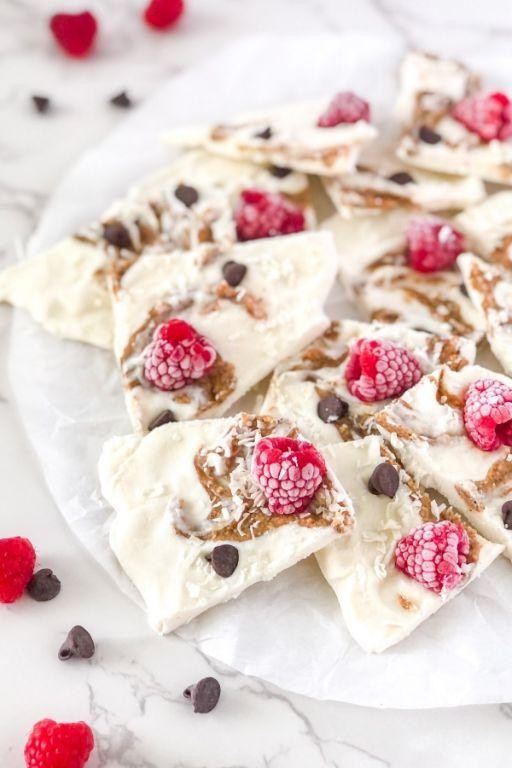
Unwrap a sweet, crunchy, and creamy treat that’s perfect for hot days or a quick dessert fix. This Cherry Almond Frozen Yogurt Bark blends tart cherries, nutty almonds, and smooth yogurt into a fuss-free frozen delight. Grab your sheet pan—it’s time to make magic happen.
Serving: 8 | Pre Time: 15 minutes | Cooking Time: 0 minutes
Ingredients
– For the yogurt base:
– 2 cups plain Greek yogurt
– 1/4 cup honey
– 1 teaspoon vanilla extract
– For the toppings:
– 1/2 cup dried cherries, chopped
– 1/2 cup sliced almonds
– 2 tablespoons white chocolate chips
Instructions
1. Line a rimmed baking sheet with parchment paper.
2. In a medium bowl, combine 2 cups plain Greek yogurt, 1/4 cup honey, and 1 teaspoon vanilla extract. Tip: Use full-fat yogurt for a creamier texture that freezes well without becoming icy.
3. Stir the mixture until smooth and fully incorporated.
4. Pour the yogurt mixture onto the prepared baking sheet.
5. Use a spatula to spread it into an even layer, about 1/4 inch thick.
6. Sprinkle 1/2 cup dried cherries, chopped, evenly over the yogurt layer.
7. Sprinkle 1/2 cup sliced almonds evenly over the cherries and yogurt.
8. Sprinkle 2 tablespoons white chocolate chips over the top. Tip: Chop the cherries finely to ensure they stick to the yogurt and don’t fall off when breaking the bark later.
9. Place the baking sheet in the freezer. Tip: Freeze on a flat surface to prevent the bark from sliding and becoming uneven.
10. Freeze for at least 4 hours, or until completely solid and firm to the touch.
11. Remove the baking sheet from the freezer.
12. Break the frozen bark into irregular pieces by hand or with a knife.
13. Serve immediately or store in an airtight container in the freezer for up to 2 weeks.
Now, you’ve got a batch of vibrant, snackable bark that’s bursting with chewy cherries and crunchy almonds. Notice how the yogurt stays creamy without turning rock-hard, making it easy to bite into straight from the freezer. Try crumbling it over oatmeal or blending it into a smoothie for a fun twist—it’s a versatile treat that’s as pretty as it is delicious.
Passion Fruit Coconut Paletas
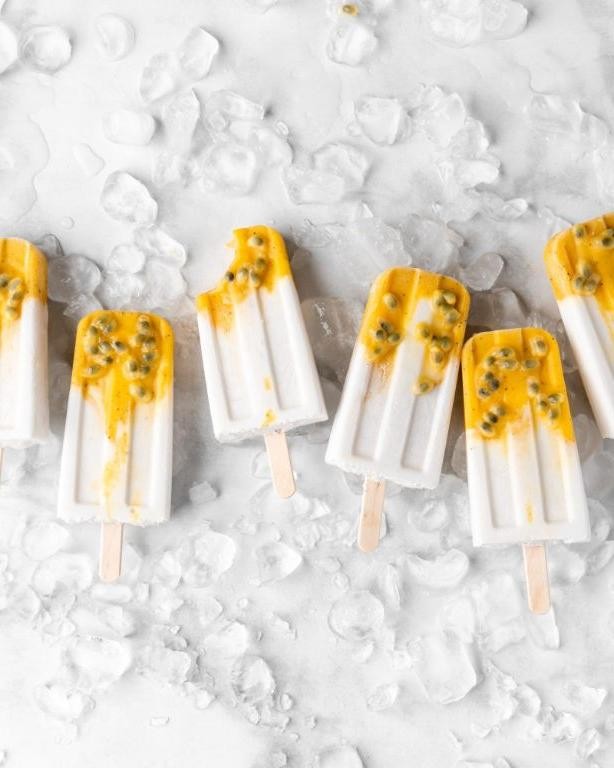
Vibe with a tropical escape that’s creamy, tangy, and totally no-bake. Passion Fruit Coconut Paletas are your frozen ticket to paradise—blend, freeze, and devour. These popsicles are a vibrant, two-toned dream with a luscious coconut base and a zesty passion fruit swirl.
Serving: 8 | Pre Time: 15 minutes | Cooking Time: 0 minutes
Ingredients
For the coconut layer:
– 1 (13.5 oz) can full-fat coconut milk
– 1/4 cup granulated sugar
– 1 teaspoon pure vanilla extract
For the passion fruit layer:
– 1/2 cup passion fruit pulp (thawed if frozen)
– 2 tablespoons granulated sugar
– 1 tablespoon fresh lime juice
Instructions
1. In a blender, combine 1 (13.5 oz) can full-fat coconut milk, 1/4 cup granulated sugar, and 1 teaspoon pure vanilla extract.
2. Blend the mixture on high speed for 30 seconds until completely smooth and the sugar is fully dissolved.
3. Pour the coconut mixture into a measuring cup with a spout for easy pouring later.
4. Rinse the blender jar thoroughly to remove any coconut residue.
5. In the clean blender, combine 1/2 cup passion fruit pulp, 2 tablespoons granulated sugar, and 1 tablespoon fresh lime juice.
6. Blend the passion fruit mixture on high speed for 20 seconds until smooth and well-combined.
7. Pour the passion fruit mixture into a separate measuring cup with a spout.
8. Arrange 8 popsicle molds on a flat surface, ensuring they are clean and dry.
9. Fill each popsicle mold halfway with the coconut mixture using the measuring cup.
10. Tap the molds gently on the counter 2-3 times to remove any air bubbles from the coconut layer.
11. Carefully pour the passion fruit mixture over the coconut layer in each mold, filling to the top.
12. Insert popsicle sticks into the center of each mold, pushing down until they hit the bottom.
13. Place the filled molds in the freezer on a level shelf.
14. Freeze the paletas for at least 6 hours, or until completely solid and firm to the touch.
15. To unmold, run the outside of each mold under warm tap water for 10-15 seconds until the paleta releases easily.
Here’s the scoop: these paletas boast a creamy coconut core that melts into a tart, seedy passion fruit swirl, creating a refreshing contrast. Serve them poolside with a sprinkle of toasted coconut flakes or dip the tips in dark chocolate for an extra indulgent twist—either way, they’re a frosty burst of sunshine.
Chocolate Hazelnut Frozen Custard
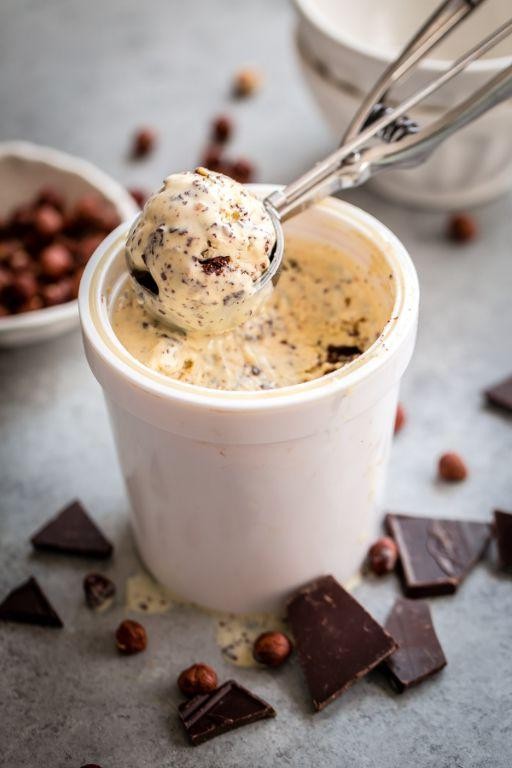
Ready to upgrade your dessert game? This Chocolate Hazelnut Frozen Custard delivers creamy, nutty perfection in every spoonful. Forget basic ice cream—this custard base creates a velvety texture that’s downright luxurious.
Serving: 6 | Pre Time: 25 minutes | Cooking Time: 10 minutes
Ingredients
For the custard base:
– 2 cups heavy cream
– 1 cup whole milk
– ¾ cup granulated sugar
– 6 large egg yolks
– ¼ teaspoon fine sea salt
For the flavor mix-ins:
– ¾ cup chocolate hazelnut spread (like Nutella)
– 1 teaspoon pure vanilla extract
– ½ cup chopped toasted hazelnuts
Instructions
1. Combine 2 cups heavy cream, 1 cup whole milk, and ¾ cup granulated sugar in a medium saucepan over medium heat.
2. Heat the mixture, stirring occasionally, until it reaches 170°F on a kitchen thermometer—do not let it boil.
3. Whisk 6 large egg yolks in a separate bowl until pale and slightly thickened.
4. Slowly pour about 1 cup of the hot cream mixture into the egg yolks while whisking constantly to temper them.
5. Pour the tempered egg mixture back into the saucepan with the remaining cream.
6. Cook over medium-low heat, stirring continuously with a wooden spoon, until the custard thickens and coats the back of the spoon (about 5–7 minutes).
7. Remove from heat and immediately stir in ¼ teaspoon fine sea salt and 1 teaspoon pure vanilla extract.
8. Strain the custard through a fine-mesh sieve into a clean bowl to remove any cooked egg bits.
9. Whisk in ¾ cup chocolate hazelnut spread until completely smooth and incorporated.
10. Cover the bowl with plastic wrap, pressing it directly onto the surface of the custard to prevent a skin from forming.
11. Chill the custard in the refrigerator for at least 4 hours, or until completely cold (overnight is ideal for best flavor).
12. Pour the chilled custard into an ice cream maker and churn according to the manufacturer’s instructions, usually 20–25 minutes.
13. In the last 2 minutes of churning, add ½ cup chopped toasted hazelnuts.
14. Transfer the frozen custard to an airtight container and freeze for at least 4 hours to firm up.
Serve scoops in chilled bowls or cones. The custard base gives it an incredibly smooth, rich mouthfeel that’s packed with roasted hazelnut flavor and ribbons of chocolate. For a decadent twist, drizzle with extra chocolate hazelnut spread or sprinkle with sea salt before serving.
Vanilla Bean Frozen Custard with Berry Swirl

Ditch the boring ice cream—this vanilla bean frozen custard with a vibrant berry swirl is your new summer obsession. It’s creamy, dreamy, and ridiculously easy to make at home. Get ready to impress everyone at your next BBQ or pool party.
Serving: 6 | Pre Time: 15 minutes | Cooking Time: 10 minutes
Ingredients
For the custard base:
– 2 cups heavy cream
– 1 cup whole milk
– 3/4 cup granulated sugar
– 6 large egg yolks
– 1 vanilla bean, split and seeds scraped
– 1/4 teaspoon salt
For the berry swirl:
– 2 cups mixed fresh berries (such as strawberries, raspberries, and blueberries)
– 1/4 cup granulated sugar
– 1 tablespoon fresh lemon juice
Instructions
1. Combine the heavy cream, whole milk, and scraped vanilla bean seeds in a medium saucepan. Heat over medium heat until it just begins to simmer, about 5-7 minutes, then immediately remove from heat.
2. Whisk the egg yolks, 3/4 cup granulated sugar, and salt in a separate bowl until pale and slightly thickened, about 2 minutes.
3. Slowly pour about 1 cup of the hot cream mixture into the egg yolk mixture while whisking constantly to temper the eggs and prevent scrambling.
4. Pour the tempered egg mixture back into the saucepan with the remaining cream.
5. Cook the custard over low heat, stirring constantly with a wooden spoon, until it thickens enough to coat the back of the spoon and reaches 170°F on a thermometer, about 5-8 minutes. Tip: Do not let it boil, or it will curdle.
6. Immediately strain the custard through a fine-mesh sieve into a clean bowl to remove any cooked egg bits.
7. Cover the bowl with plastic wrap, pressing it directly onto the surface of the custard to prevent a skin from forming. Chill in the refrigerator for at least 4 hours, or until completely cold.
8. While the custard chills, make the berry swirl: Combine the mixed berries, 1/4 cup granulated sugar, and lemon juice in a small saucepan.
9. Cook the berry mixture over medium heat, stirring occasionally, until the berries break down and the sauce thickens slightly, about 8-10 minutes.
10. Remove the berry sauce from heat and let it cool completely to room temperature.
11. Pour the chilled custard into your ice cream maker and churn according to the manufacturer’s instructions until it reaches a soft-serve consistency, about 20-25 minutes. Tip: Ensure your ice cream maker’s bowl is fully frozen for best results.
12. As you transfer the churned custard to a freezer-safe container, layer it with spoonfuls of the cooled berry sauce, gently swirling with a knife to create ribbons. Tip: Avoid over-mixing to maintain distinct swirls.
13. Cover the container and freeze the custard for at least 4 hours, or until firm.
Rich vanilla flavor melds with tangy berry swirls in every spoonful. The texture is luxuriously smooth—no ice crystals here! Serve it in waffle cones, layer it into a sundae with hot fudge, or enjoy it straight from the container at midnight.
Spiced Pumpkin Frozen Mousse
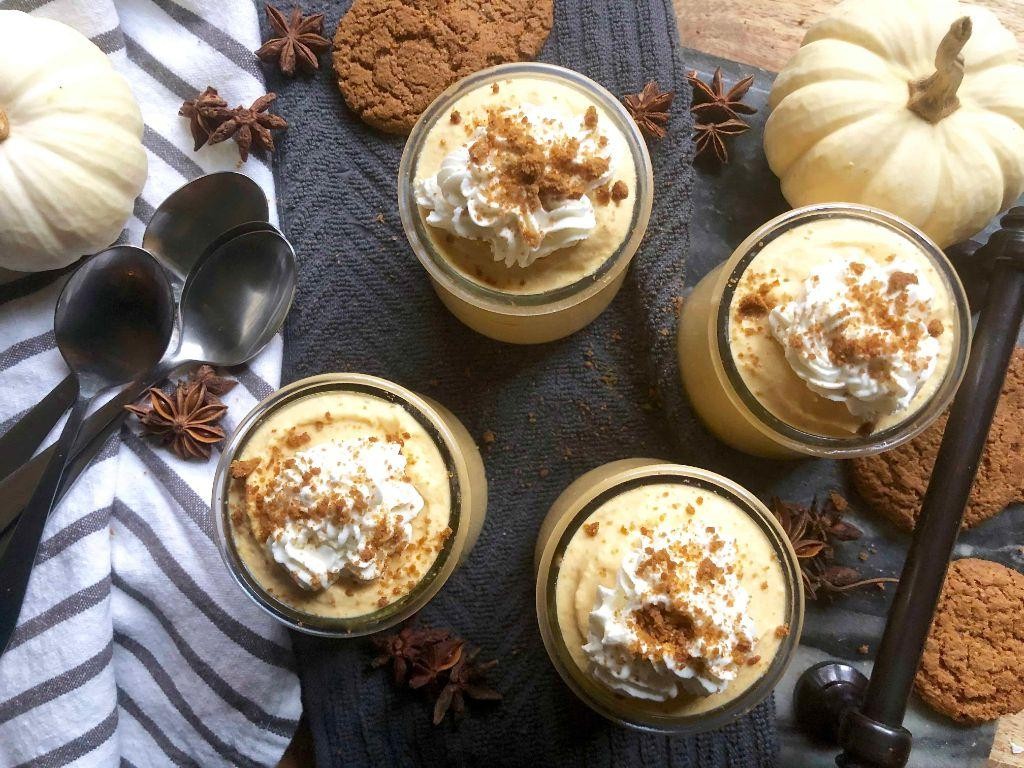
Tired of basic pumpkin pie? Transform leftover pumpkin puree into a creamy, spiced frozen mousse that’s ready to scoop straight from the freezer. It’s the ultimate no-bake holiday dessert that feels fancy but is secretly simple.
Serving: 8 | Pre Time: 20 minutes | Cooking Time: 0 minutes
Ingredients
For the mousse base:
– 1 (15 oz) can pumpkin puree
– 1 cup heavy cream
– 1 (8 oz) package cream cheese, softened
– 3/4 cup granulated sugar
– 1 tsp ground cinnamon
– 1/2 tsp ground ginger
– 1/4 tsp ground nutmeg
– 1/4 tsp ground cloves
For the whipped cream topping:
– 1/2 cup heavy cream
– 2 tbsp powdered sugar
– 1/2 tsp vanilla extract
Instructions
1. Place the softened cream cheese in a large mixing bowl. Beat with an electric mixer on medium speed for 1 minute until smooth and creamy.
2. Add the pumpkin puree, granulated sugar, cinnamon, ginger, nutmeg, and cloves to the bowl with the cream cheese. Tip: Scrape the sides of the bowl halfway through to ensure even mixing.
3. Beat the mixture on medium speed for 2 minutes until fully combined and no streaks remain.
4. In a separate, chilled bowl, pour in 1 cup of heavy cream. Whip on high speed for 3-4 minutes until stiff peaks form. Tip: Chill your bowl and beaters in the freezer for 10 minutes beforehand for faster whipping.
5. Gently fold the whipped cream into the pumpkin mixture using a rubber spatula until just combined and no white streaks are visible.
6. Transfer the mousse mixture into a 9×5 inch loaf pan. Smooth the top with a spatula.
7. Cover the pan tightly with plastic wrap, pressing it directly onto the surface of the mousse to prevent ice crystals.
8. Freeze for at least 6 hours, or until completely firm.
9. About 10 minutes before serving, make the topping: In the chilled bowl, combine 1/2 cup heavy cream, powdered sugar, and vanilla extract. Whip on high for 2-3 minutes until medium peaks form.
10. Remove the frozen mousse from the freezer. Let it sit at room temperature for 5 minutes to soften slightly for easier scooping. Tip: Run a knife under hot water and wipe it dry for clean slices.
11. Scoop or slice the mousse into servings. Top each serving with a dollop of the freshly whipped cream.
Chill out with a dessert that’s impossibly light yet rich, with warm spices that shine through the creamy freeze. Serve it in elegant glasses layered with crushed gingersnap cookies, or scoop it over a warm caramel sauce for a stunning hot-and-cold contrast.
Summary
Nothing beats beating the heat like these 20 irresistible frozen treats! From creamy classics to fruity delights, there’s a perfect dessert for every craving. We’d love to hear which recipes become your favorites—drop a comment below and share this sweet inspiration on Pinterest. Happy scooping!


