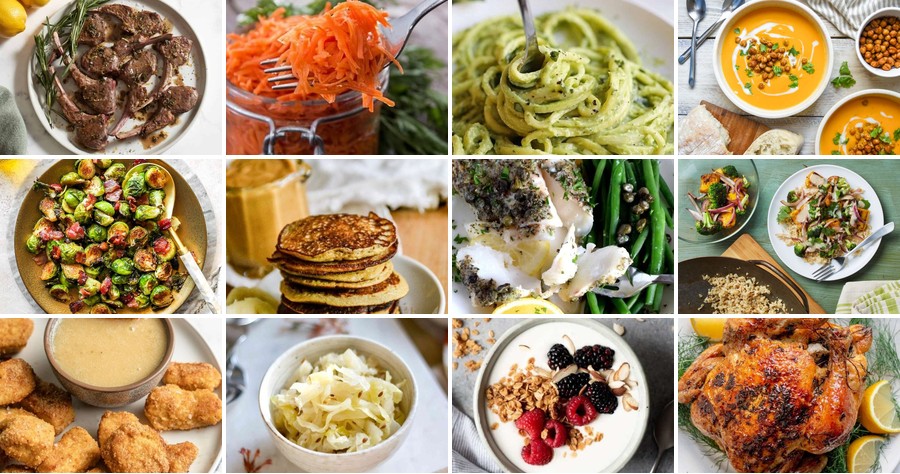
Ready to nourish your body and soothe your gut? The GAPS diet can feel overwhelming, but delicious healing is possible! We’ve gathered 20 wholesome, comforting recipes that make the journey enjoyable—from soothing soups to satisfying mains. Whether you’re new to GAPS or seeking fresh inspiration, these kitchen-tested dishes promise flavor and wellness. Let’s dive in and discover meals that truly heal from the inside out.
Slow-cooked beef bone broth

Oh, you know those chilly winter days when you just crave something warm and nourishing? This slow-cooked beef bone broth is exactly what you need—it’s like a hug in a bowl, simmering away to create the most comforting, flavorful base for soups, stews, or just sipping on its own.
Serving: 8 | Pre Time: 20 minutes | Cooking Time: 12 hours
Ingredients
– 4 pounds beef bones (I like a mix of marrow and knuckle bones for extra richness)
– 2 large yellow onions, quartered (no need to peel—the skins add beautiful color)
– 3 large carrots, chopped into 2-inch chunks (organic carrots have the best flavor here)
– 4 celery stalks, chopped into 2-inch chunks
– 4 cloves garlic, smashed (fresh garlic is key for that aromatic punch)
– 2 tablespoons apple cider vinegar (this helps draw out minerals from the bones)
– 1 tablespoon whole black peppercorns
– 2 bay leaves (dried bay leaves work perfectly)
– 1 tablespoon kosher salt (I prefer Diamond Crystal for its lighter texture)
– 12 cups cold water (use filtered water if you can—it makes a difference)
Instructions
1. Preheat your oven to 400°F. Place the beef bones on a rimmed baking sheet in a single layer. Roast for 30 minutes until deeply browned and fragrant.
2. Transfer the roasted bones to a large stockpot or slow cooker. Add the onions, carrots, celery, garlic, apple cider vinegar, black peppercorns, bay leaves, and kosher salt.
3. Pour in the cold water until everything is fully submerged. Bring to a gentle boil over high heat, then immediately reduce to a low simmer.
4. Skim off any foam or impurities that rise to the surface during the first hour of cooking—this keeps the broth clear and clean-tasting.
5. Cover and simmer on low heat for 12 hours, checking occasionally to ensure it’s barely bubbling. Tip: If using a slow cooker, set it to low for 12 hours.
6. After 12 hours, turn off the heat and let the broth cool slightly for about 30 minutes. Strain through a fine-mesh sieve into a large bowl, pressing on the solids to extract all the liquid.
7. Discard the solids. Let the broth cool to room temperature, then refrigerate for at least 4 hours until the fat solidifies on top.
8. Skim off and discard the solidified fat layer. Tip: Save a bit of the fat for cooking—it’s flavorful!
9. Reheat the broth gently on the stove over medium heat until warmed through, about 10 minutes. Tip: Taste and adjust salt if needed, but it should be well-seasoned from the slow cook.
10. Serve hot. As you ladle it out, you’ll notice the rich, gelatinous texture that sets beautifully when chilled. Aromatic and deeply savory, this broth shines as a sipping tonic with a squeeze of lemon or as the base for a hearty vegetable soup—just add noodles or rice for a complete meal.
Fermented sauerkraut with caraway seeds
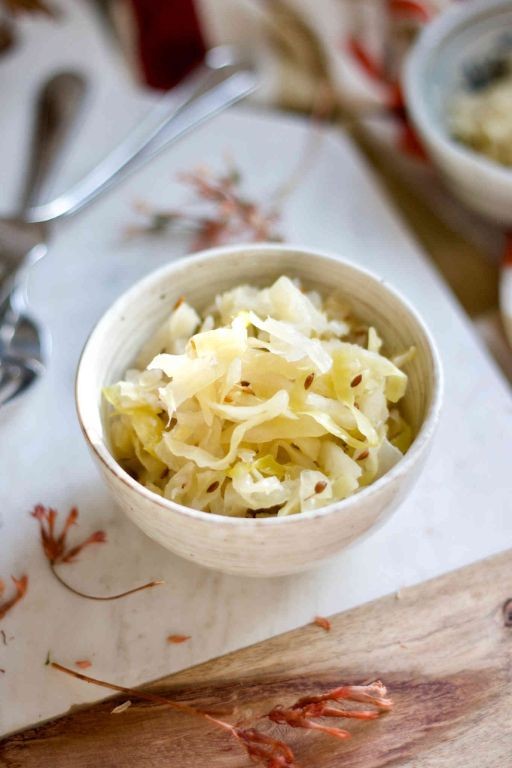
Kick off your fermentation journey with this simple sauerkraut recipe. It’s a tangy, crunchy side that’s surprisingly easy to make at home, and the caraway seeds add a lovely, earthy note that pairs perfectly with the sour cabbage. You’ll be amazed at how a few basic ingredients transform into something so delicious and gut-friendly.
Serving: 1 quart jar | Pre Time: 20 minutes | Cooking Time: 0 minutes (fermentation time: 1-4 weeks)
Ingredients
– 1 medium head green cabbage (about 2 pounds), cored and shredded—I find a mandoline slicer makes this super quick and gives nice, even shreds.
– 1 1/2 tablespoons fine sea salt (non-iodized is key for successful fermentation).
– 1 tablespoon caraway seeds (toasted lightly in a dry pan first for maximum flavor, if you have a minute).
– Filtered water, as needed (chlorinated tap water can hinder the good bacteria).
Instructions
1. In a large, clean bowl, combine the shredded cabbage and the 1 1/2 tablespoons of fine sea salt.
2. Massage and squeeze the cabbage with your hands for about 5-10 minutes, until it becomes limp and releases a good amount of liquid—you should have enough brine to mostly cover the cabbage when packed.
3. Mix in the 1 tablespoon of caraway seeds until evenly distributed throughout the cabbage mixture.
4. Tightly pack the cabbage mixture into a clean 1-quart glass jar, pressing down firmly with your fist or a tool to eliminate air pockets and submerge the cabbage in its own brine.
5. If the released brine does not completely cover the cabbage, pour in just enough filtered water to cover it by about 1 inch.
6. Place a smaller glass jar or fermentation weight inside the large jar to keep the cabbage fully submerged under the brine.
7. Loosely cover the jar with a lid or a cloth secured with a rubber band to allow gases to escape during fermentation.
8. Store the jar at room temperature, ideally between 65°F and 75°F, away from direct sunlight.
9. Check the jar daily for the first few days, pressing down the cabbage if it floats above the brine and skimming off any harmless white scum that may form on the surface.
10. Begin tasting the sauerkraut after 1 week; ferment for 1-4 weeks total until it reaches your desired level of tanginess and crunch.
11. Once fermented to your liking, seal the jar with a tight lid and transfer it to the refrigerator to slow the fermentation process.
Ooh, the wait is worth it! You’ll be rewarded with a crisp, pleasantly sour kraut with a subtle licorice-like warmth from the caraway. It’s fantastic piled high on a bratwurst, stirred into a potato salad for a zesty twist, or simply enjoyed straight from the jar as a tangy, probiotic-rich snack.
Roasted chicken with garlic and herbs
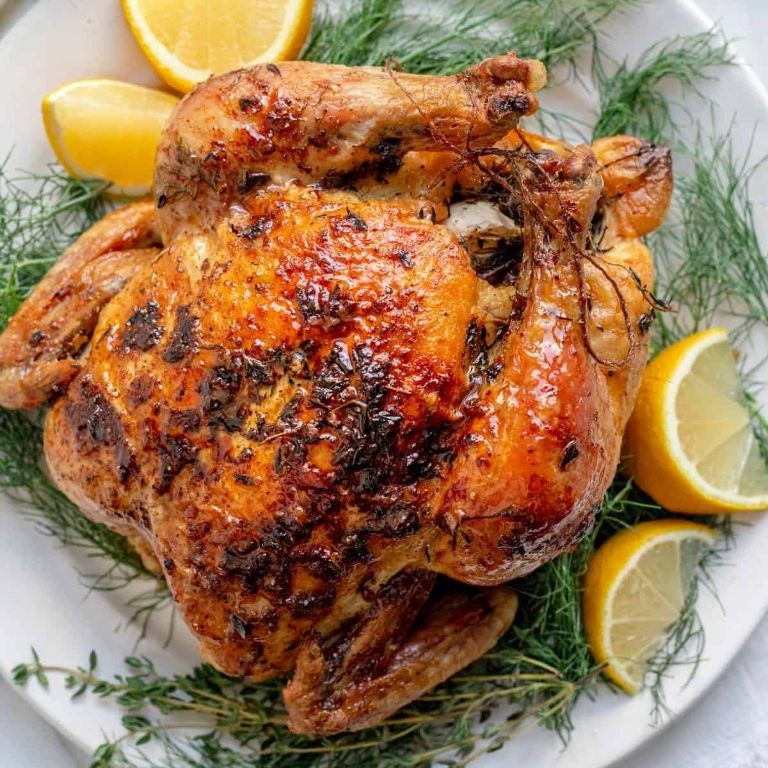
Venturing into the kitchen for a cozy meal? This roasted chicken with garlic and herbs is your ticket to a simple, flavorful dinner that feels like a hug on a plate. It’s the kind of dish that makes your home smell incredible and leaves everyone asking for seconds.
Serving: 4 | Pre Time: 15 minutes | Cooking Time: 90 minutes
Ingredients
– 1 whole chicken (about 4 pounds) – I like to pat it dry with paper towels for extra crispy skin.
– 1/4 cup extra virgin olive oil – my go-to for its rich flavor.
– 8 cloves garlic, minced – fresh is best here, trust me.
– 2 tbsp fresh rosemary, chopped – from my little herb garden if I’m lucky.
– 2 tbsp fresh thyme, chopped – it adds such a lovely earthy note.
– 1 tsp kosher salt – I prefer this over table salt for better seasoning.
– 1/2 tsp black pepper, freshly ground – it makes all the difference.
– 1 lemon, halved – for a bright zing tucked inside the chicken.
Instructions
1. Preheat your oven to 425°F (218°C).
2. In a small bowl, combine the olive oil, minced garlic, chopped rosemary, chopped thyme, kosher salt, and black pepper to make a paste.
3. Place the chicken in a roasting pan and rub the herb paste evenly all over the skin and under the skin where possible.
4. Stuff the cavity of the chicken with the halved lemon.
5. Tie the chicken legs together with kitchen twine to help it cook evenly.
6. Roast the chicken in the preheated oven for 15 minutes.
7. After 15 minutes, reduce the oven temperature to 375°F (190°C).
8. Continue roasting for about 1 hour and 15 minutes, or until a meat thermometer inserted into the thickest part of the thigh reads 165°F (74°C).
9. Remove the chicken from the oven and let it rest for 10 minutes before carving.
Just imagine pulling apart that golden-brown skin to reveal juicy, herb-infused meat—it’s pure comfort food magic. Serve it over a bed of mashed potatoes to soak up all those delicious pan juices, or shred the leftovers for tomorrow’s sandwiches.
Gut-healing chicken liver pâté
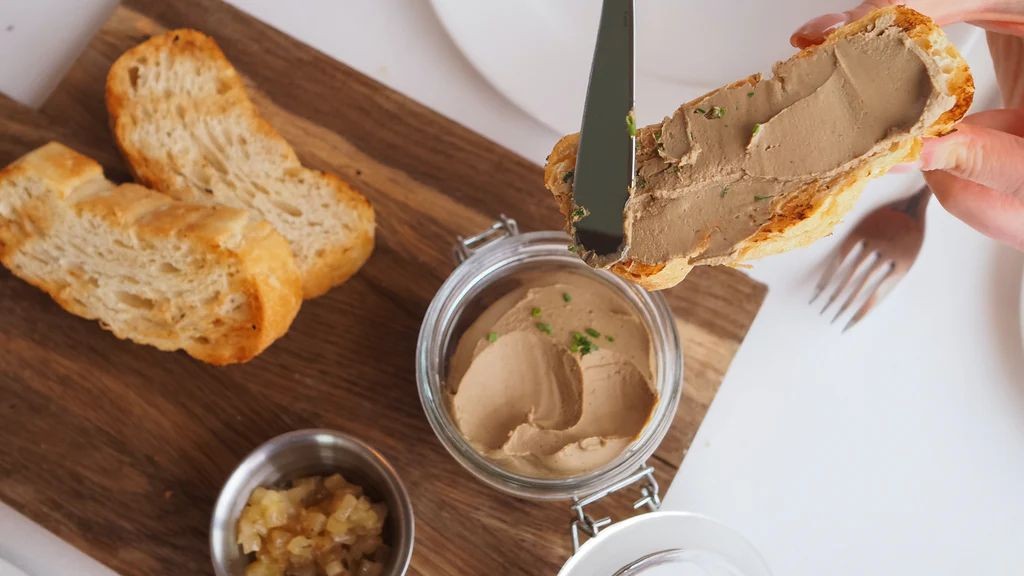
Brace yourself for a flavor-packed treat that’s surprisingly easy to make. This chicken liver pâté is not only delicious but also packed with nutrients that are great for your gut. You’ll love how creamy it turns out.
Serving: 6 | Pre Time: 15 minutes | Cooking Time: 20 minutes
Ingredients
– 1 lb chicken livers, cleaned and trimmed (I like to pat them dry with a paper towel for better browning)
– 1/2 cup unsalted butter, divided (room temperature butter blends in smoother)
– 1 medium yellow onion, finely chopped
– 2 cloves garlic, minced (fresh garlic gives the best punch)
– 1/4 cup brandy (it adds a lovely depth—don’t skip it!)
– 1/2 cup heavy cream
– 1 tsp fresh thyme leaves (dried works in a pinch, but fresh is my preference)
– 1/2 tsp salt
– 1/4 tsp black pepper
Instructions
1. Melt 2 tablespoons of butter in a large skillet over medium heat.
2. Add the chopped onion and cook for 5 minutes, stirring occasionally, until softened and translucent.
3. Stir in the minced garlic and cook for 1 more minute until fragrant.
4. Increase the heat to medium-high and add the chicken livers to the skillet.
5. Cook the livers for 4-5 minutes, turning once, until they are browned on the outside but still slightly pink inside (a tip: avoid overcooking to keep them tender).
6. Pour in the brandy carefully, as it may flame up briefly—let it simmer for 2 minutes to cook off the alcohol.
7. Transfer the entire skillet contents to a food processor and let it cool for 5 minutes.
8. Add the remaining 6 tablespoons of butter, heavy cream, thyme, salt, and pepper to the food processor.
9. Blend on high speed for 2-3 minutes until completely smooth and creamy (another tip: scrape down the sides halfway through for even blending).
10. Taste and adjust seasoning if needed, but be precise with the salt and pepper measurements.
11. Spoon the pâté into a serving dish or ramekins, smoothing the top with a spatula.
12. Cover the surface directly with plastic wrap to prevent a skin from forming (a final tip: press the wrap onto the pâté).
13. Refrigerate for at least 2 hours, or until firm and set.
Dive into this rich, velvety pâté that’s subtly sweet from the onions and brandy. It spreads beautifully on crackers or crusty bread, and the creamy texture makes it a crowd-pleaser. Try it with a dollop of fig jam for a sweet-savory twist that’ll wow your guests.
Grass-fed beef stew with root vegetables
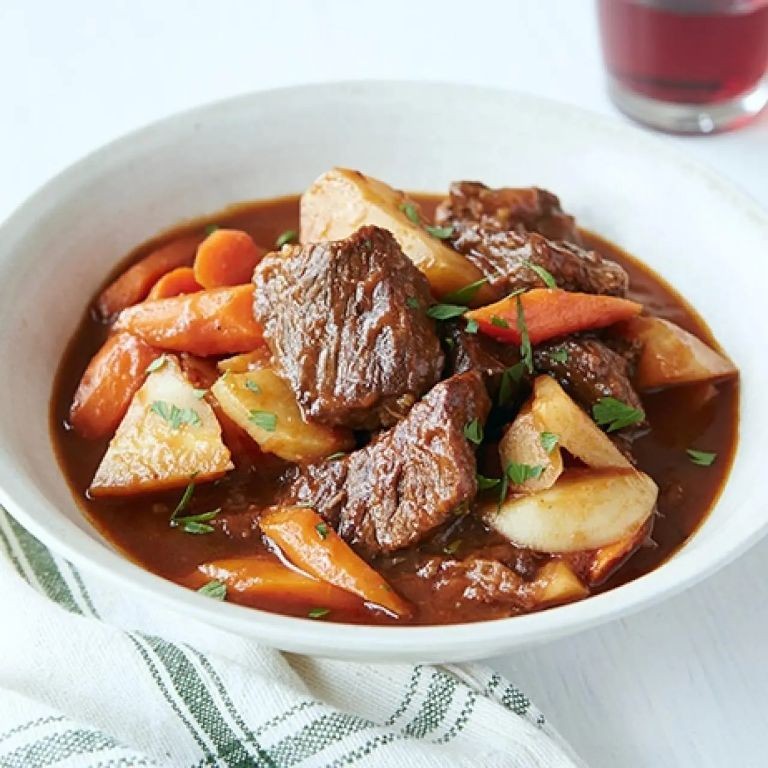
Let’s be honest—when the weather turns chilly, you just want something warm, hearty, and fuss-free. This grass-fed beef stew with root vegetables is exactly that: a cozy, one-pot wonder that fills your kitchen with the most comforting aroma. It’s the kind of meal that makes you want to curl up on the couch after a long day.
Serving: 6 | Pre Time: 20 minutes | Cooking Time: 2 hours 30 minutes
Ingredients
– 2 lbs grass-fed beef chuck, cut into 1-inch cubes (I find grass-fed has a richer flavor)
– 2 tbsp extra virgin olive oil, my go-to for sautéing
– 1 large yellow onion, diced
– 3 cloves garlic, minced
– 4 cups beef broth, low-sodium so you can control the salt
– 1 cup red wine, like a Cabernet for depth
– 2 tbsp tomato paste
– 2 large carrots, peeled and cut into 1-inch chunks
– 2 parsnips, peeled and cut into 1-inch chunks
– 2 russet potatoes, peeled and cut into 1-inch cubes
– 2 sprigs fresh rosemary
– 2 bay leaves
– 1 tsp kosher salt
– ½ tsp black pepper
– 2 tbsp all-purpose flour, for thickening
Instructions
1. Pat the beef cubes dry with paper towels to help them brown better.
2. Heat the olive oil in a large Dutch oven over medium-high heat until shimmering, about 2 minutes.
3. Add the beef in a single layer, working in batches if needed, and sear until browned on all sides, about 4-5 minutes per batch.
4. Remove the beef and set aside on a plate.
5. Add the onion to the pot and cook until softened, about 5 minutes, scraping up any browned bits from the bottom.
6. Stir in the garlic and cook for 1 minute until fragrant.
7. Sprinkle the flour over the onions and garlic, stirring constantly for 1 minute to cook off the raw taste.
8. Pour in the red wine, using a wooden spoon to deglaze the pot by scraping up all the browned bits.
9. Add the tomato paste, beef broth, rosemary, bay leaves, salt, and pepper, stirring to combine.
10. Return the seared beef to the pot, along with any accumulated juices.
11. Bring the mixture to a boil, then reduce the heat to low, cover, and simmer for 1 hour 30 minutes.
12. Add the carrots, parsnips, and potatoes to the pot, stirring to submerge them in the liquid.
13. Cover and continue simmering until the vegetables are tender and the beef is fork-tender, about 45 minutes to 1 hour.
14. Remove and discard the rosemary sprigs and bay leaves.
15. Taste and adjust seasoning with more salt or pepper if desired.
Very tender beef and soft, sweet root vegetables come together in a rich, savory broth that’s perfect for sopping up with crusty bread. For a fun twist, serve it over creamy polenta or with a sprinkle of fresh parsley on top—it’s comfort food at its best.
Homemade probiotic yogurt
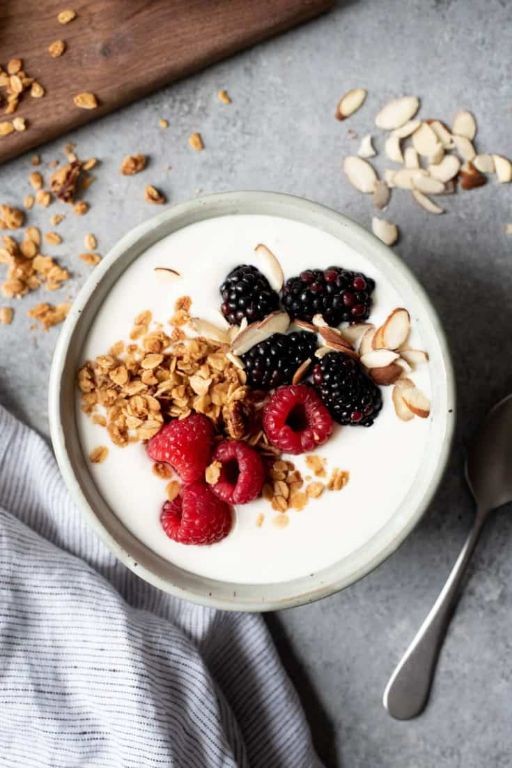
Venturing into homemade yogurt might sound intimidating, but trust me, it’s simpler than you think and so rewarding. You’ll get a creamy, tangy probiotic treat that’s perfect for breakfast bowls, smoothies, or just a spoonful straight from the jar.
Serving: 4 | Pre Time: 10 minutes | Cooking Time: 8 hours
Ingredients
– 4 cups whole milk (I find whole milk gives the creamiest texture, but 2% works too)
– 2 tablespoons plain yogurt with live cultures (this is your starter—grab your favorite brand from the fridge)
– 1 tablespoon honey or maple syrup (optional, for a touch of sweetness)
– A pinch of salt (just a tiny pinch to balance the flavors)
Instructions
1. Pour the 4 cups of whole milk into a heavy-bottomed saucepan.
2. Heat the milk over medium heat, stirring occasionally, until it reaches 180°F on a thermometer—this step pasteurizes it and changes the proteins for a thicker yogurt.
3. Remove the saucepan from the heat and let the milk cool down to 110°F, which should take about 30-45 minutes; you can speed this up by placing the pan in an ice bath, but don’t rush it or the cultures won’t thrive.
4. In a small bowl, whisk together 2 tablespoons of the plain yogurt with a few spoonfuls of the warm milk until smooth—this tempers the starter so it blends evenly.
5. Pour the tempered yogurt mixture back into the saucepan with the remaining warm milk and whisk gently to combine everything thoroughly.
6. Transfer the mixture to a clean glass jar or container with a lid.
7. Place the jar in a warm spot, like an oven with the light on or a yogurt maker, and let it culture undisturbed for 8 hours; the longer it sits, the tangier it gets, so check at 8 hours for your preferred taste.
8. After culturing, stir in 1 tablespoon of honey or maple syrup and a pinch of salt if using, then refrigerate the yogurt for at least 4 hours to set and chill.
9. Serve chilled and enjoy!
Achieving that perfect creamy texture is all about patience during the culturing process. This yogurt turns out delightfully tangy and smooth, ideal for layering with granola and fresh berries or blending into a probiotic-rich smoothie for a healthy boost.
Pumpkin soup with bone broth base
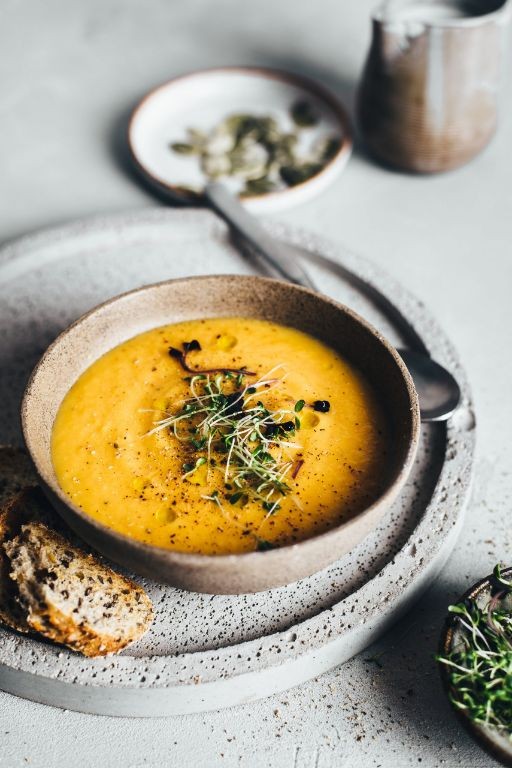
Just imagine curling up with a cozy bowl of this pumpkin soup as the weather turns crisp. It’s the perfect blend of sweet pumpkin and rich, savory bone broth that feels like a warm hug from the inside out. You’re going to love how simple it is to make something so comforting.
Serving: 4 | Pre Time: 10 minutes | Cooking Time: 30 minutes
Ingredients
- 2 tablespoons extra virgin olive oil (my go-to for that fruity base note)
- 1 medium yellow onion, diced (I like mine finely chopped so it melts right into the soup)
- 2 cloves garlic, minced (fresh is best here for maximum aroma)
- 4 cups pumpkin puree (I use canned for convenience, but homemade works great too)
- 4 cups chicken bone broth (homemade or store-bought—it adds such deep flavor)
- 1 cup heavy cream (room temperature blends in smoother)
- 1 teaspoon ground cinnamon
- 1/2 teaspoon ground nutmeg
- Salt and black pepper (I start with 1/2 teaspoon salt and adjust later)
- Optional: toasted pumpkin seeds for garnish (they add a nice crunch)
Instructions
- Heat the extra virgin olive oil in a large pot over medium heat until it shimmers, about 2 minutes.
- Add the diced yellow onion and cook, stirring occasionally, until softened and translucent, about 5-7 minutes. Tip: Don’t rush this step—letting the onions cook slowly builds a sweet foundation for the soup.
- Stir in the minced garlic and cook for 1 minute until fragrant, being careful not to let it burn.
- Pour in the pumpkin puree and chicken bone broth, then add the ground cinnamon and ground nutmeg.
- Bring the mixture to a gentle boil over medium-high heat, then reduce the heat to low and let it simmer uncovered for 20 minutes, stirring occasionally. Tip: Simmering helps the flavors meld together beautifully.
- Remove the pot from the heat and carefully blend the soup until smooth using an immersion blender or by transferring it in batches to a countertop blender. Tip: If using a countertop blender, let the soup cool slightly first and blend with the lid vented to avoid steam buildup.
- Return the blended soup to the pot if needed and place it over low heat.
- Stir in the heavy cream until fully incorporated and warmed through, about 2-3 minutes.
- Season with salt and black pepper to taste, starting with 1/2 teaspoon salt and adjusting as desired.
Let this soup cool for a few minutes before serving—it’s silky smooth with a velvety texture that clings to your spoon. The pumpkin shines through with a hint of warmth from the spices, balanced by the savory depth of the bone broth. Try topping it with those toasted pumpkin seeds for a bit of crunch, or swirl in a dollop of sour cream for extra creaminess on a chilly evening.
Pan-seared lamb chops with rosemary
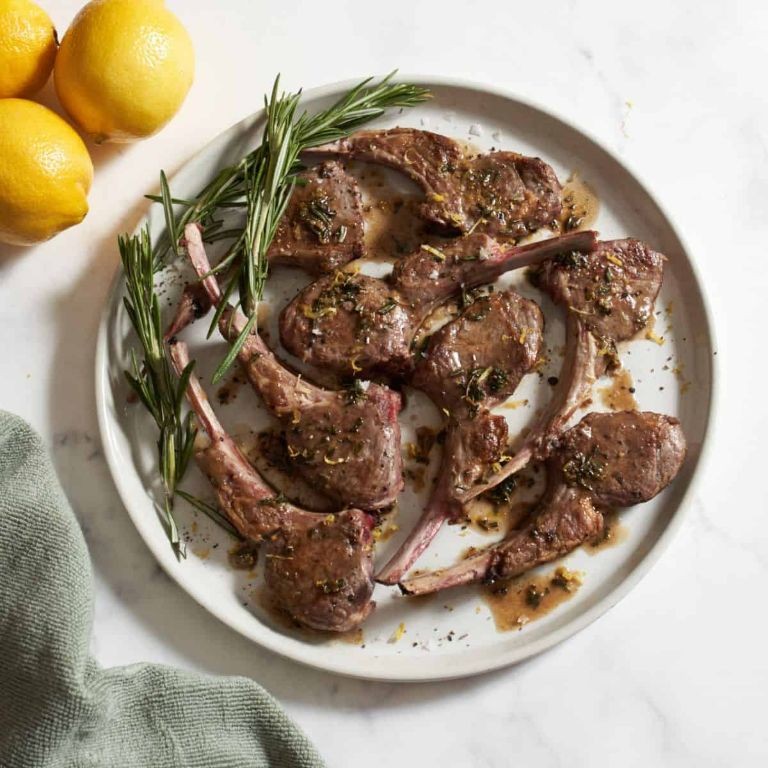
Ready to impress without the stress? These pan-seared lamb chops with rosemary are your secret weapon for a fancy-feeling dinner that comes together in under 30 minutes. You get that perfect, savory crust on the outside and juicy, tender meat inside—it’s the kind of meal that makes you feel like a pro, even on a busy weeknight.
Serving: 2 | Pre Time: 10 minutes | Cooking Time: 12 minutes
Ingredients
– 4 lamb loin chops, about 1-inch thick (I like to pat them super dry with paper towels for the best sear)
– 2 tbsp extra virgin olive oil (my go-to for its fruity flavor)
– 3 fresh rosemary sprigs (the aroma is just unbeatable compared to dried)
– 3 garlic cloves, lightly smashed (peeled, but leaving them whole keeps them from burning)
– 1 tsp kosher salt (I find it seasons more evenly than table salt)
– 1/2 tsp freshly ground black pepper
– 2 tbsp unsalted butter (for that rich, glossy finish)
Instructions
1. Take the lamb chops out of the refrigerator and let them sit at room temperature for 10 minutes.
2. Pat the lamb chops completely dry on all sides with paper towels.
3. Season both sides of each chop evenly with the kosher salt and black pepper.
4. Heat the extra virgin olive oil in a large skillet over medium-high heat until it shimmers, about 2 minutes.
5. Carefully place the lamb chops in the hot skillet. Do not move them for 3 minutes to form a deep golden-brown crust.
6. Flip the chops using tongs and cook for another 3 minutes on the second side for medium-rare.
7. Reduce the heat to medium and add the butter, smashed garlic cloves, and rosemary sprigs to the skillet.
8. Tilt the skillet slightly and, using a spoon, baste the chops continuously with the foaming butter for 1 minute.
9. Transfer the lamb chops to a clean plate and let them rest for 5 minutes before serving.
And just like that, dinner is served. The resting time is crucial—it lets the juices redistribute so every bite is incredibly tender. I love serving these right on the plate with the garlic and rosemary from the pan spooned over the top; the infused butter makes a simple but amazing sauce. Pair it with some creamy mashed potatoes or a crisp salad to soak up all those delicious flavors.
Fermented beet kvass
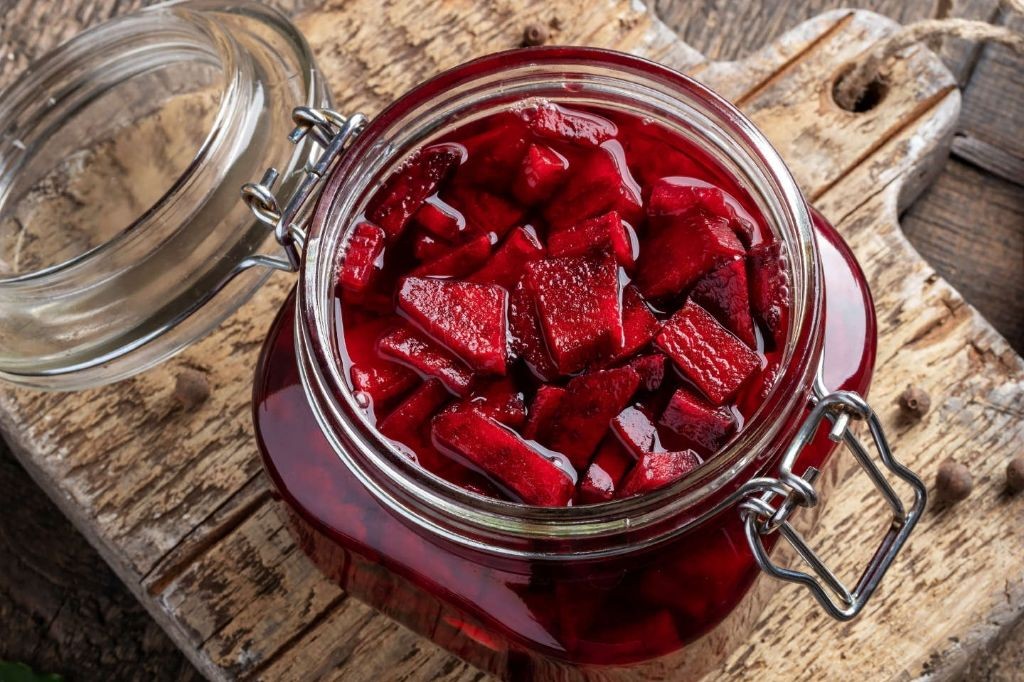
Now, if you’re looking for a gut-friendly drink that’s surprisingly refreshing, fermented beet kvass is your new best friend. It’s a vibrant, probiotic-rich tonic that’s easier to make than you think, and it adds a beautiful pop of color to your fridge. You’ll love its earthy, tangy kick—it’s like a health boost in a glass.
Serving: 1 quart | Pre Time: 15 minutes | Cooking Time: 0 minutes
Ingredients
– 1 large beet, peeled and chopped into 1-inch chunks (I like using organic beets for the best flavor)
– 1 tablespoon sea salt (fine-grain works best for dissolving)
– 4 cups filtered water, at room temperature (tap water can sometimes inhibit fermentation, so filtered is my go-to)
– 1/4 cup whey or sauerkraut brine (optional, but it gives the fermentation a helpful kickstart)
Instructions
1. Place the chopped beet chunks into a clean 1-quart glass jar.
2. Add the sea salt directly to the jar with the beets.
3. Pour the filtered water into the jar, leaving about 1 inch of space at the top.
4. If using, stir in the whey or sauerkraut brine with a clean spoon until everything is combined.
5. Cover the jar loosely with a lid or a cloth secured with a rubber band—this allows gases to escape during fermentation.
6. Let the jar sit at room temperature, away from direct sunlight, for 2 to 3 days. Tip: Check it daily; you’ll see bubbles forming, which means it’s working!
7. After 2 days, taste a small spoonful. If it’s tangy and slightly fizzy to your liking, it’s ready. Tip: If you prefer a stronger flavor, let it ferment for up to 5 days, but don’t go longer or it might become too sour.
8. Strain the liquid through a fine-mesh sieve into a clean bottle or jar, discarding the beet pieces (or save them for a salad!).
9. Seal the bottle tightly and store it in the refrigerator. Tip: It will keep for about a month chilled, and the flavor mellows nicely over time.
Rely on this kvass as a daily shot for digestion or mix it into sparkling water for a fancy mocktail. Its deep ruby color and earthy, slightly sour taste make it a unique staple—try it chilled straight up for the most refreshing zing.
Baked cod with butter and capers
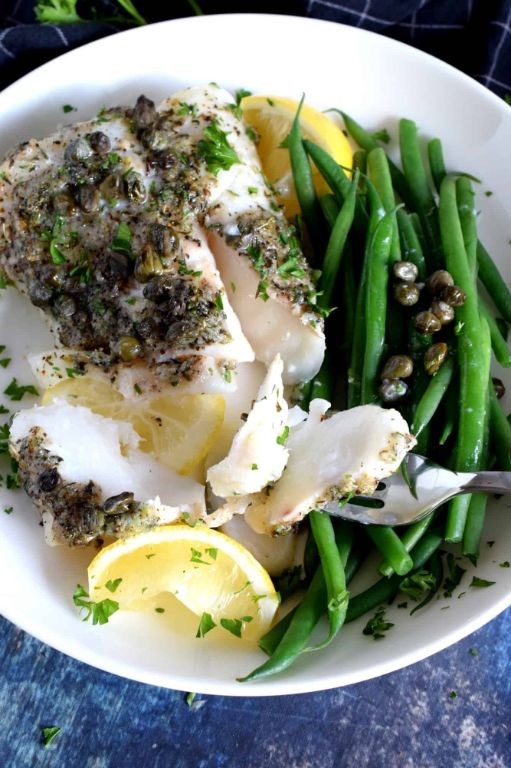
This baked cod with butter and capers is one of those easy, elegant dinners that feels fancy but comes together in no time. You’ll love how the buttery sauce gets infused with those briny capers, and the fish stays perfectly flaky and tender. It’s a weeknight lifesaver that’s impressive enough for guests too.
Serving: 4 | Pre Time: 10 minutes | Cooking Time: 15 minutes
Ingredients
– 4 (6-ounce) cod fillets, skinless – I like to pat them dry with paper towels first for better browning.
– 4 tablespoons unsalted butter, cut into small pieces – room temp butter melts more evenly.
– 2 tablespoons capers, drained – these little flavor bombs are key, so don’t skip them!
– 2 cloves garlic, minced – fresh is best here for that aromatic punch.
– 1 tablespoon fresh lemon juice – about half a lemon, squeezed right before using.
– 1/4 teaspoon salt – I use fine sea salt for even seasoning.
– 1/4 teaspoon black pepper – freshly ground adds the best flavor.
– 2 tablespoons chopped fresh parsley – for a bright, fresh finish.
Instructions
1. Preheat your oven to 400°F and lightly grease a baking dish just big enough to hold the fillets in a single layer.
2. Place the cod fillets in the prepared dish, making sure they aren’t touching – this helps them cook evenly.
3. Sprinkle the salt and pepper evenly over both sides of each fillet.
4. Scatter the minced garlic and drained capers evenly over and around the fillets in the dish.
5. Dot the top of each fillet with the pieces of room temperature butter.
6. Drizzle the fresh lemon juice evenly over everything in the dish.
7. Bake in the preheated oven for 12-15 minutes. The fish is done when it flakes easily with a fork and reaches an internal temperature of 145°F – a quick-read thermometer is your best friend here to avoid overcooking.
8. Remove the dish from the oven and immediately spoon the buttery pan juices over the fillets. Tip: Letting the fish rest for 2-3 minutes after baking allows the juices to redistribute, keeping it moist.
9. Sprinkle the chopped fresh parsley over the top just before serving.
Out of the oven, the cod is wonderfully flaky and moist, bathed in that rich, caper-studded butter sauce. The briny pop of the capers cuts through the richness perfectly. Try serving it over a bed of creamy mashed potatoes or with some crusty bread to soak up every last drop of that delicious sauce.
GAPS-friendly banana pancakes

Kicking off your morning with something both nourishing and delicious can be a challenge, especially on a special day like today. You know those days when you want a treat that feels indulgent but actually supports your gut? That’s where these GAPS-friendly banana pancakes come in—they’re the cozy, simple answer you’ve been looking for.
Serving: 2 | Pre Time: 5 minutes | Cooking Time: 10 minutes
Ingredients
– 2 large ripe bananas (the spottier, the sweeter—trust me on this)
– 4 large eggs (I prefer room temp eggs here; they blend smoother)
– 1/4 cup coconut flour (it soaks up moisture beautifully)
– 1/2 tsp baking soda (for that perfect little lift)
– 1 tbsp coconut oil, plus more for the pan (extra virgin olive oil is my go-to, but coconut keeps it GAPS-friendly)
– A pinch of sea salt (just a dash to balance the sweetness)
Instructions
1. Peel the 2 large ripe bananas and place them in a medium mixing bowl.
2. Mash the bananas thoroughly with a fork until no large chunks remain—it should look like a thick, lumpy puree.
3. Crack the 4 large eggs directly into the bowl with the mashed bananas.
4. Whisk the eggs and bananas together until fully combined and slightly frothy, about 1 minute.
5. Add the 1/4 cup coconut flour, 1/2 tsp baking soda, and a pinch of sea salt to the wet mixture.
6. Stir everything together with a spatula until just combined; let the batter sit for 2 minutes to allow the coconut flour to absorb the liquid (this prevents a gritty texture).
7. Heat a large non-stick skillet or griddle over medium-low heat (around 300°F if you have a thermometer).
8. Add 1 tsp of the 1 tbsp coconut oil to the skillet and swirl to coat the surface evenly.
9. Spoon about 1/4 cup of batter onto the skillet for each pancake, leaving space between them.
10. Cook the pancakes for 2–3 minutes, or until you see small bubbles form on the surface and the edges look set.
11. Carefully flip each pancake with a thin spatula and cook for another 1–2 minutes, until golden brown on both sides (if they brown too quickly, reduce the heat slightly).
12. Transfer the cooked pancakes to a plate and repeat with the remaining batter, adding more coconut oil to the skillet as needed.
13. Serve the pancakes warm straight from the skillet. Gorgeously tender with a hint of caramelized banana, these pancakes have a soft, almost custardy center that’s pure comfort. Try them stacked high with a dollop of coconut yogurt or a drizzle of honey for a festive touch—they’re so good, you might just make a second batch.
Slow-cooked pork ribs with honey glaze

Visions of sticky, fall-off-the-bone ribs are probably dancing in your head right now. You know the kind—the ones that make you close your eyes after the first bite. Well, today’s your lucky day because we’re making exactly that: slow-cooked pork ribs with a sweet honey glaze that’s seriously irresistible.
Serving: 4 | Pre Time: 15 minutes | Cooking Time: 3 hours 30 minutes
Ingredients
– 2 racks of pork baby back ribs (about 4 lbs total—trust me, you’ll want leftovers)
– 1/4 cup brown sugar, packed (the dark kind adds a deeper flavor)
– 2 tbsp smoked paprika (this is my secret for that smoky vibe without a grill)
– 1 tbsp garlic powder
– 1 tbsp onion powder
– 1 tsp black pepper, freshly ground if you can
– 1 tsp salt (I use kosher salt for even seasoning)
– 1/2 cup honey (local raw honey is my go-to for the best flavor)
– 1/4 cup apple cider vinegar (it balances the sweetness perfectly)
– 2 tbsp soy sauce (low-sodium works great here)
– 1 tbsp olive oil (extra virgin olive oil adds a nice fruity note)
Instructions
1. Preheat your oven to 275°F—low and slow is key for tender ribs.
2. Pat the pork ribs dry with paper towels; this helps the seasoning stick better.
3. In a small bowl, mix the brown sugar, smoked paprika, garlic powder, onion powder, black pepper, and salt until combined.
4. Rub the spice mixture all over both sides of the ribs, pressing it in gently.
5. Place the ribs on a large baking sheet lined with aluminum foil, meat-side up.
6. Tightly cover the ribs with another piece of foil, creating a sealed packet to trap moisture.
7. Bake the ribs in the preheated oven for 3 hours; they should be fork-tender when done.
8. While the ribs bake, make the glaze: in a saucepan over medium heat, combine the honey, apple cider vinegar, soy sauce, and olive oil.
9. Whisk the glaze constantly for 5-7 minutes until it thickens slightly and bubbles; remove it from the heat to cool.
10. Tip: Let the glaze cool for a few minutes—it’ll thicken more and be easier to brush on.
11. After 3 hours, carefully remove the ribs from the oven and uncover them.
12. Brush a generous layer of the honey glaze over the top of the ribs.
13. Increase the oven temperature to 400°F and return the ribs, uncovered, to the oven.
14. Bake for 15-20 minutes until the glaze is sticky and caramelized, watching closely to avoid burning.
15. Tip: For extra crispiness, broil the ribs on high for the last 2-3 minutes, but keep an eye on them!
16. Remove the ribs from the oven and let them rest for 10 minutes before slicing between the bones.
17. Tip: Resting allows the juices to redistribute, making every bite juicier.
18. Serve the ribs hot, drizzling with any remaining glaze from the pan.
Glazed to perfection, these ribs have a sticky-sweet crust that gives way to incredibly tender, juicy meat underneath. The smoky paprika and tangy vinegar in the glaze create a balanced flavor that’s not too heavy. Try serving them with a simple coleslaw or grilled corn for a summer BBQ vibe, even in December!
Roasted Brussels sprouts with bacon
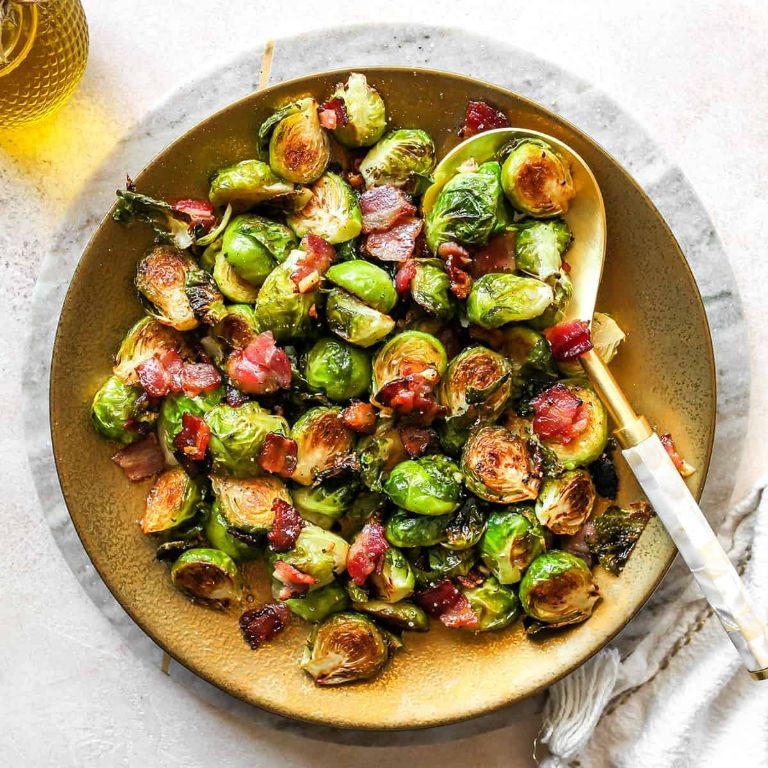
Finally, a side dish that steals the show every time. You know those roasted Brussels sprouts with bacon? They’re the perfect mix of crispy, salty, and sweet that makes you forget you’re eating your veggies. Honestly, they’re the first thing to disappear at my holiday table.
Serving: 4 | Pre Time: 10 minutes | Cooking Time: 25 minutes
Ingredients
– 1 pound Brussels sprouts, trimmed and halved (look for the smaller, tighter ones—they roast up nicer)
– 4 slices thick-cut bacon, chopped (the good smoky kind makes all the difference)
– 2 tablespoons extra virgin olive oil (my go-to for roasting)
– 2 tablespoons pure maple syrup (the real stuff, not pancake syrup)
– 1/2 teaspoon kosher salt
– 1/4 teaspoon freshly ground black pepper
Instructions
1. Preheat your oven to 400°F and line a large, rimmed baking sheet with parchment paper for easy cleanup.
2. Place the halved Brussels sprouts and chopped bacon on the prepared baking sheet.
3. Drizzle the olive oil and maple syrup evenly over the sprouts and bacon.
4. Sprinkle the kosher salt and black pepper over everything.
5. Use your hands to toss everything together until the sprouts and bacon are well coated. Tip: Don’t be shy—get in there and mix it all up so every piece gets some love.
6. Spread the mixture out in a single layer on the baking sheet, making sure the sprouts are cut-side down. Tip: This helps them get that perfect caramelized, crispy edge we all crave.
7. Roast in the preheated oven for 20 to 25 minutes. Tip: Start checking at 20 minutes—you want the bacon crispy and the sprouts tender with some browned bits.
8. Remove the baking sheet from the oven and let it sit for 2 minutes before serving.
Zesty caramelized edges from the maple syrup play off the salty, crispy bacon in every bite. The sprouts themselves turn tender inside while staying sturdy enough to scoop up. Try serving them over creamy polenta or alongside a simple roast chicken for a meal that feels special without any fuss.
Homemade chicken nuggets with almond flour

Who says you need to hit the drive-thru for crispy chicken nuggets? With just a few simple ingredients and some almond flour, you can whip up a batch that’s way tastier and healthier right at home. They’re perfect for a quick dinner or a fun snack the whole family will love.
Serving: 4 | Pre Time: 15 minutes | Cooking Time: 15 minutes
Ingredients
– 1 lb boneless, skinless chicken breasts, cut into 1-inch pieces (I find cutting them evenly helps them cook at the same rate)
– 1 cup almond flour (this gives a nice, nutty crunch that’s gluten-free)
– 2 large eggs, lightly beaten (I prefer room temp eggs here—they coat the chicken better)
– 1 tsp garlic powder
– 1 tsp paprika
– 1/2 tsp salt
– 1/4 tsp black pepper
– 1/4 cup avocado oil for frying (it has a high smoke point, so it’s my go-to for crispy results)
Instructions
1. Pat the chicken pieces dry with paper towels to help the coating stick better—this is a key tip for extra crispiness!
2. In a shallow bowl, mix the almond flour, garlic powder, paprika, salt, and pepper until well combined.
3. Place the beaten eggs in another shallow bowl next to the flour mixture.
4. Dip each chicken piece into the egg, letting any excess drip off.
5. Then, coat the chicken thoroughly in the almond flour mixture, pressing gently to adhere.
6. Heat the avocado oil in a large skillet over medium-high heat until it shimmers, about 350°F—use a thermometer if you have one for accuracy.
7. Carefully add the coated chicken pieces to the hot oil in a single layer, without overcrowding the pan.
8. Fry for 3–4 minutes per side, or until golden brown and cooked through (the internal temperature should reach 165°F).
9. Transfer the nuggets to a paper towel-lined plate to drain any excess oil.
10. Repeat with any remaining chicken, adding more oil if needed and letting it heat up between batches.
Here’s the best part: these nuggets come out with a satisfyingly crunchy exterior and tender, juicy chicken inside. Serve them hot with your favorite dipping sauce, or get creative by tossing them in a buffalo glaze for a spicy kick—they’re so versatile, you’ll want to make them again and again!
Fermented ginger carrots
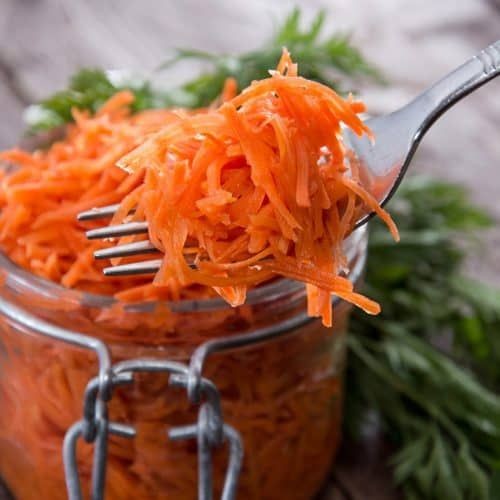
Aren’t you tired of the same old pickles? Let’s make something tangy, probiotic, and packed with flavor. This fermented ginger carrot recipe is surprisingly simple and adds a zesty crunch to any meal.
Serving: 1 quart jar | Pre Time: 15 minutes | Cooking Time: 0 minutes (fermentation time: 3-7 days)
Ingredients
– 1 pound carrots, peeled and cut into matchsticks (I like using organic carrots for the best flavor)
– 1 tablespoon fresh ginger, finely grated (don’t use powdered—fresh makes all the difference)
– 2 cloves garlic, minced (adjust to your taste, but I love the extra kick)
– 1 tablespoon sea salt (non-iodized salt is key for proper fermentation)
– 2 cups filtered water (tap water can sometimes hinder the good bacteria)
– 1 quart glass jar with lid (a clean mason jar works perfectly)
Instructions
1. Place the carrot matchsticks, grated ginger, and minced garlic into the clean quart jar.
2. In a separate bowl, dissolve 1 tablespoon of sea salt in 2 cups of filtered water to create a brine.
3. Pour the brine over the carrots in the jar, ensuring all ingredients are fully submerged—leave about 1 inch of space at the top.
4. Tip: Use a fermentation weight or a small, clean glass to keep the carrots under the brine, preventing mold.
5. Seal the jar loosely with the lid to allow gases to escape during fermentation.
6. Place the jar in a cool, dark spot at room temperature, ideally around 65-75°F.
7. Tip: Check the jar daily, pressing down any floating carrots with a clean spoon to keep them submerged.
8. Ferment for 3-7 days, tasting after day 3—the carrots should be tangy and slightly fizzy when ready.
9. Tip: Once fermented to your liking, tighten the lid and store the jar in the refrigerator to slow fermentation.
10. Serve the fermented ginger carrots chilled.
Now you’ve got a jar of vibrant, probiotic goodness ready to enjoy. These carrots develop a delightful crunch and a zesty, ginger-forward flavor that’s perfect on salads or as a snack. Next time you’re looking for a gut-friendly boost, try adding them to grain bowls or sandwiches for an extra tangy twist.
Herbed butternut squash mash
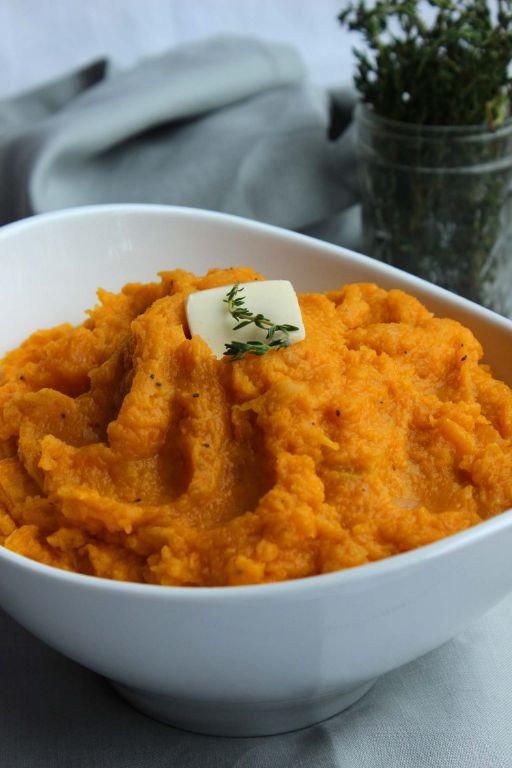
Ready to ditch the same old mashed potatoes? This herbed butternut squash mash is the creamy, dreamy side dish you didn’t know you needed. It’s packed with cozy fall flavor and comes together with surprisingly little effort.
Serving: 4 | Pre Time: 10 minutes | Cooking Time: 30 minutes
Ingredients
– 1 medium butternut squash (about 2 lbs), peeled, seeded, and cubed – trust me, pre-cubed from the store is a total time-saver.
– 2 tbsp unsalted butter – I always use unsalted to control the seasoning myself.
– 1/4 cup heavy cream, warmed slightly so it blends in smoothly without cooling the mash.
– 2 tbsp fresh sage leaves, finely chopped – fresh makes all the difference here, giving it that earthy punch.
– 1 tsp fresh thyme leaves
– 1/2 tsp garlic powder – a little shortcut that adds depth without the fuss of mincing.
– Salt and black pepper
– A drizzle of extra virgin olive oil for roasting – my go-to for its fruity flavor.
Instructions
1. Preheat your oven to 400°F (200°C) and line a baking sheet with parchment paper.
2. Toss the cubed butternut squash with a drizzle of olive oil, 1/4 tsp salt, and 1/4 tsp black pepper on the baking sheet until evenly coated.
3. Roast the squash for 25-30 minutes, stirring halfway through, until the pieces are fork-tender and lightly caramelized at the edges.
4. While the squash roasts, melt the butter in a small saucepan over low heat.
5. Add the chopped sage and thyme to the melted butter and cook for 1-2 minutes, just until fragrant—this infuses the butter with herby goodness.
6. Transfer the roasted squash to a large mixing bowl and let it cool for 5 minutes to avoid steaming up your mash.
7. Use a potato masher or fork to mash the squash until mostly smooth, leaving a few small chunks for texture if you like.
8. Pour the herbed butter and warmed heavy cream over the mashed squash.
9. Sprinkle in the garlic powder, plus an additional 1/4 tsp salt and 1/8 tsp black pepper.
10. Stir everything together until well combined and creamy, adjusting seasoning with more salt or pepper if needed.
Enjoy this mash warm—it’s silky and rich with a hint of sweetness from the squash, balanced by those earthy herbs. I love serving it alongside roasted chicken or as a bed for grilled sausages; it also makes a fantastic leftover spread on toast the next day.
Summary
Whether you’re starting your GAPS journey or looking for new healing meals, these 20 nutritious recipes offer delicious support. We hope you find some new favorites to nourish your body and bring comfort to your table. Give a recipe a try this week, leave a comment with your top pick, and feel free to share this roundup on Pinterest to help others discover these wholesome dishes!


