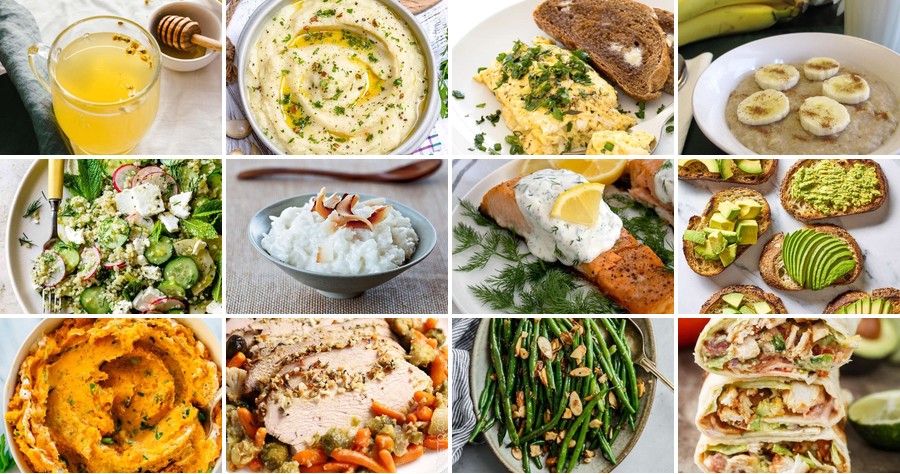
Ever feel like your favorite foods are fighting back? You’re not alone! For those managing GERD, mealtime can feel like a minefield. But delicious, soothing meals are absolutely possible. We’ve gathered 20 gentle, gut-friendly recipes that prioritize flavor without the flare-up. Get ready to rediscover the joy of eating with dishes designed for happy digestion. Let’s dive into these comforting creations!
Baked Salmon with Lemon-Dill Sauce
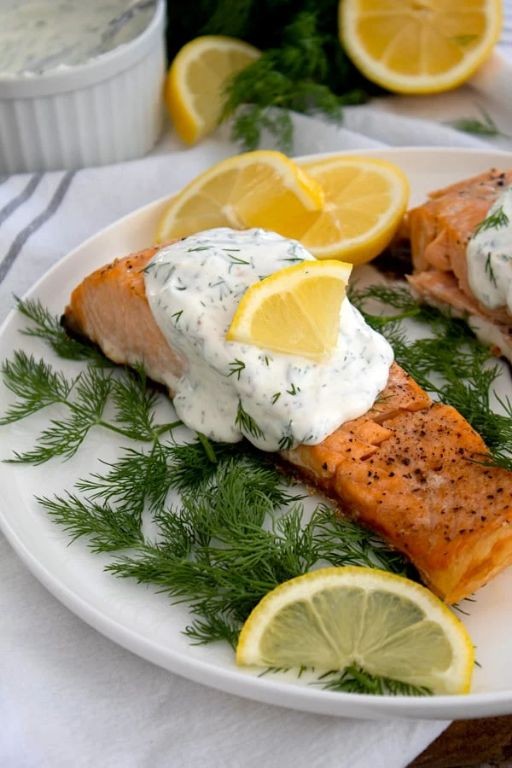
Punch up your weeknight dinner with this elegant baked salmon that comes together in under 30 minutes. Perfectly flaky fish gets a bright, herby lift from a creamy lemon-dill sauce—it’s restaurant-worthy without the fuss.
Serving: 4 | Prep Time: 10 minutes | Cooking Time: 15 minutes
Ingredients
– 4 (6-ounce) skin-on salmon fillets, patted dry
– 2 tablespoons extra-virgin olive oil
– 1 teaspoon kosher salt
– ½ teaspoon freshly cracked black pepper
– ½ cup crème fraîche
– 2 tablespoons freshly squeezed lemon juice
– 1 tablespoon finely chopped fresh dill
– 1 teaspoon lemon zest
– ¼ teaspoon fine sea salt
Instructions
1. Preheat your oven to 400°F (204°C) and line a rimmed baking sheet with parchment paper.
2. Place the 4 salmon fillets skin-side down on the prepared baking sheet.
3. Drizzle the 2 tablespoons of extra-virgin olive oil evenly over the top of each fillet.
4. Season the fillets evenly with 1 teaspoon of kosher salt and ½ teaspoon of freshly cracked black pepper.
5. Transfer the baking sheet to the preheated oven and bake for 12–15 minutes, until the salmon is opaque and flakes easily with a fork. (Tip: For extra-crispy skin, place the fillets directly on the rack above the baking sheet.)
6. While the salmon bakes, prepare the sauce by combining ½ cup of crème fraîche, 2 tablespoons of freshly squeezed lemon juice, 1 tablespoon of finely chopped fresh dill, 1 teaspoon of lemon zest, and ¼ teaspoon of fine sea salt in a small bowl.
7. Whisk the sauce ingredients vigorously until completely smooth and emulsified. (Tip: For a thinner consistency, whisk in a teaspoon of warm water.)
8. Remove the salmon from the oven and let it rest on the baking sheet for 3 minutes before serving. (Tip: Resting allows the juices to redistribute, ensuring moist fish.)
9. Plate each salmon fillet and spoon the lemon-dill sauce generously over the top.
Creamy, tangy sauce clings to each tender, buttery flake of salmon, creating a luxurious contrast. Serve it over a bed of lemon-herb quinoa or alongside roasted asparagus for a complete, vibrant plate that feels special any night of the week.
Oatmeal with Bananas and Almond Milk
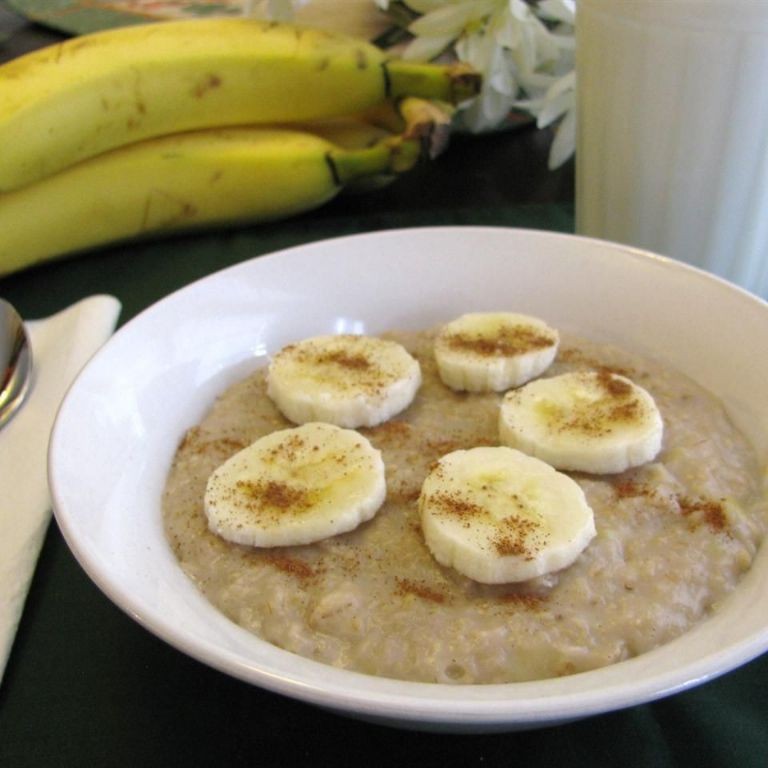
Nailing that cozy morning vibe just got easier. This creamy oatmeal with caramelized bananas and almond milk delivers comfort in a bowl—perfect for chilly mornings or quick fuel before your day starts.
Serving: 2 | Pre Time: 5 minutes | Cooking Time: 10 minutes
Ingredients
– 1 cup rolled oats
– 2 cups unsweetened almond milk
– 2 ripe bananas, sliced into ½-inch rounds
– 1 tablespoon pure maple syrup
– ½ teaspoon ground cinnamon
– ¼ teaspoon fine sea salt
– 1 tablespoon unsalted butter
– 2 tablespoons chopped toasted almonds
Instructions
1. Place a medium saucepan over medium heat. Add the unsalted butter and let it melt until foamy, about 30 seconds.
2. Add the sliced bananas in a single layer. Cook undisturbed for 2 minutes until the bottoms develop a golden-brown caramelization.
3. Flip each banana slice carefully with a spatula. Cook for another 2 minutes until both sides are caramelized and fragrant.
4. Tip: For deeper flavor, let the bananas develop a dark amber crust without burning—adjust heat to medium-low if needed.
5. Pour in the unsweetened almond milk and add the rolled oats, ground cinnamon, and fine sea salt. Stir to combine.
6. Bring the mixture to a gentle simmer over medium heat, then reduce to low. Cook for 5 minutes, stirring occasionally to prevent sticking.
7. Tip: For creamier oatmeal, stir more frequently during cooking to release the oats’ starches.
8. After 5 minutes, the oats should be tender and the liquid mostly absorbed. Remove from heat and stir in the pure maple syrup.
9. Divide the oatmeal between two bowls. Top evenly with the caramelized bananas and chopped toasted almonds.
10. Tip: Toast almonds in a dry skillet over medium heat for 3–4 minutes until golden and aromatic for enhanced crunch.
Delight in the contrast of creamy oats against sticky-sweet bananas, with toasted almonds adding a satisfying crunch. Serve it warm with a drizzle of extra maple syrup or a sprinkle of flaky sea salt for a savory twist. This dish shines as a make-ahead breakfast—store leftovers in the fridge and reheat with a splash of almond milk to revive its velvety texture.
Soft Scrambled Eggs with Fresh Herbs

Let’s transform breakfast boredom into a creamy, herb-flecked masterpiece. This technique delivers cloud-like texture every time—no rubbery eggs here. Grab your fork and get ready to level up your morning routine.
Serving: 2 | Pre Time: 5 minutes | Cooking Time: 8 minutes
Ingredients
– 4 large pasture-raised eggs, lightly beaten
– 2 tablespoons unsalted butter, divided
– 2 tablespoons heavy cream
– 1 tablespoon finely chopped fresh chives
– 1 tablespoon finely chopped fresh dill
– 1/2 teaspoon kosher salt
– 1/4 teaspoon freshly ground black pepper
– 1 tablespoon crème fraîche
Instructions
1. Crack 4 large pasture-raised eggs into a medium bowl and beat lightly with a whisk until just combined—avoid overmixing to prevent toughness.
2. Whisk 2 tablespoons heavy cream, 1/2 teaspoon kosher salt, and 1/4 teaspoon freshly ground black pepper into the eggs until fully incorporated.
3. Place a nonstick skillet over low heat and add 1 tablespoon unsalted butter, allowing it to melt completely and coat the pan evenly.
4. Pour the egg mixture into the skillet and let it sit undisturbed for 30 seconds to set slightly at the edges.
5. Using a silicone spatula, gently push the eggs from the edges toward the center, creating soft curds; repeat this motion every 20 seconds for 4–5 minutes until eggs are mostly set but still glossy.
6. Remove the skillet from heat and immediately stir in 1 tablespoon crème fraîche to stop the cooking process and add richness.
7. Fold in 1 tablespoon finely chopped fresh chives and 1 tablespoon finely chopped fresh dill until herbs are evenly distributed throughout the eggs.
8. Add the remaining 1 tablespoon unsalted butter to the skillet and stir gently until melted and fully incorporated into the eggs.
9. Transfer the scrambled eggs to plates immediately to prevent overcooking from residual heat.
Delicate curds melt on your tongue, infused with the bright, grassy notes of fresh herbs. Serve this over toasted sourdough with a drizzle of truffle oil or alongside smoked salmon for an elegant brunch upgrade—the creamy texture pairs perfectly with crisp textures.
Steamed Chicken and Rice with Ginger
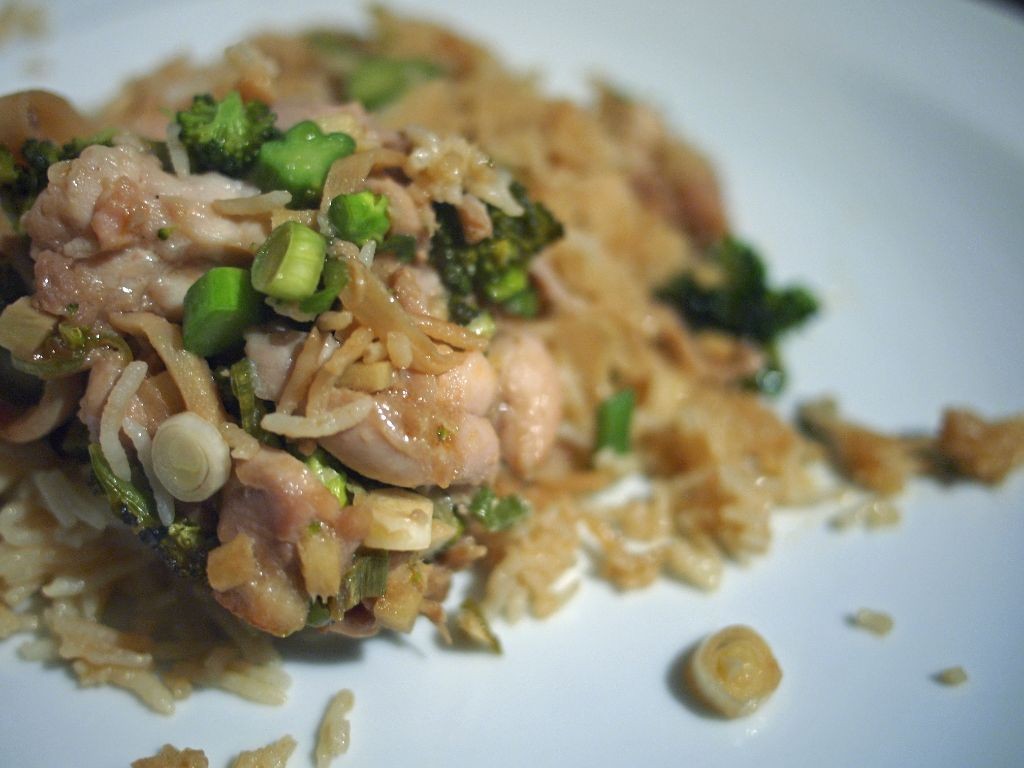
Aromatic ginger and tender chicken steam together with jasmine rice for a one-pot wonder that’s pure comfort. This dish delivers fluffy, fragrant rice infused with savory juices—no fuss, just flavor. Get ready to ditch the takeout menus.
Serving: 4 | Pre Time: 15 minutes | Cooking Time: 30 minutes
Ingredients
– 1 ½ cups jasmine rice, rinsed until water runs clear
– 1 ½ lbs boneless, skinless chicken thighs, trimmed of excess fat
– 2 tbsp fresh ginger, finely grated
– 3 cloves garlic, minced
– 2 tbsp neutral oil (such as avocado oil)
– 2 cups low-sodium chicken broth
– 2 tbsp soy sauce
– 1 tbsp toasted sesame oil
– 2 scallions, thinly sliced
– 1 tsp kosher salt
– ½ tsp freshly ground black pepper
Instructions
1. Rinse 1 ½ cups jasmine rice under cold water in a fine-mesh strainer until the water runs clear, about 1 minute, to remove excess starch for fluffier grains.
2. Pat 1 ½ lbs boneless, skinless chicken thighs dry with paper towels, then season evenly on both sides with 1 tsp kosher salt and ½ tsp freshly ground black pepper.
3. Heat 2 tbsp neutral oil in a large, heavy-bottomed pot or Dutch oven over medium-high heat until shimmering, about 2 minutes.
4. Add the seasoned chicken thighs to the pot and sear until golden brown on both sides, 3–4 minutes per side, to develop a rich fond.
5. Transfer the seared chicken to a plate and set aside, leaving any rendered fat in the pot.
6. Reduce the heat to medium and add 2 tbsp fresh ginger and 3 cloves minced garlic to the pot; sauté until fragrant, about 30 seconds, to bloom their aromatics without burning.
7. Pour in the rinsed jasmine rice and stir to coat in the oil and aromatics, toasting lightly for 1 minute to enhance its nutty flavor.
8. Add 2 cups low-sodium chicken broth and 2 tbsp soy sauce to the pot, scraping up any browned bits from the bottom with a wooden spoon to incorporate the fond.
9. Return the seared chicken thighs to the pot, nestling them into the rice mixture in a single layer.
10. Bring the liquid to a boil over high heat, then immediately reduce the heat to low, cover the pot tightly with a lid, and simmer undisturbed for 20 minutes.
11. After 20 minutes, remove the pot from the heat and let it rest, covered, for 5 minutes to allow the rice to steam and absorb any residual moisture.
12. Drizzle 1 tbsp toasted sesame oil over the top, then fluff the rice gently with a fork to separate the grains without mashing them.
13. Garnish with 2 thinly sliced scallions just before serving to add a fresh, crisp finish.
Kick back and savor the tender, juicy chicken that melts over each fluffy grain of rice, all infused with the warm, spicy notes of ginger. For a vibrant twist, top with a drizzle of chili crisp or serve alongside quick-pickled vegetables to cut through the richness.
Mashed Sweet Potatoes with Olive Oil

Bold, creamy, and effortlessly elegant—these mashed sweet potatoes ditch the dairy for a sophisticated olive oil finish. Transform humble roots into a velvety side that shines at holiday feasts or weeknight dinners. Get ready to make the simplest upgrade you’ll ever taste.
Serving: 6 | Pre Time: 15 minutes | Cooking Time: 45 minutes
Ingredients
– 3 pounds medium-sized sweet potatoes, peeled and cut into 1-inch cubes
– ¼ cup extra-virgin olive oil, plus additional for drizzling
– 2 tablespoons pure maple syrup
– 1 teaspoon fine sea salt
– ½ teaspoon freshly cracked black pepper
– ¼ teaspoon freshly grated nutmeg
Instructions
1. Place the peeled sweet potato cubes in a large stockpot and cover with cold water by 2 inches.
2. Bring the water to a rolling boil over high heat, then reduce to a steady simmer.
3. Simmer the potatoes uncovered for 25–30 minutes, or until a fork pierces the cubes with zero resistance.
4. Drain the potatoes thoroughly in a colander, then return them to the warm pot off the heat.
5. Let the potatoes steam-dry in the pot for 2 minutes to evaporate excess moisture—this prevents a watery mash.
6. Add the extra-virgin olive oil, pure maple syrup, fine sea salt, cracked black pepper, and freshly grated nutmeg to the pot.
7. Use a potato masher to crush the potatoes until mostly smooth but with some small, rustic chunks remaining.
8. For an ultra-silken texture, transfer the mixture to the bowl of a stand mixer fitted with the paddle attachment.
9. Mix on medium-low speed for 1–2 minutes until perfectly creamy and emulsified.
10. Taste and adjust seasoning with an extra pinch of sea salt if desired, but avoid overmixing.
11. Transfer the mashed sweet potatoes to a serving bowl and create swirls on the surface with the back of a spoon.
12. Drizzle lightly with additional extra-virgin olive oil just before serving.
Mellow sweetness from the maple syrup melds with the peppery finish of quality olive oil, creating a complex flavor profile far beyond ordinary mashed potatoes. The texture is luxuriously smooth yet retains enough body to hold its shape on a fork. Serve it warm topped with crispy fried sage or alongside herb-roasted chicken for a meal that feels both rustic and refined.
Grilled Shrimp with Asparagus
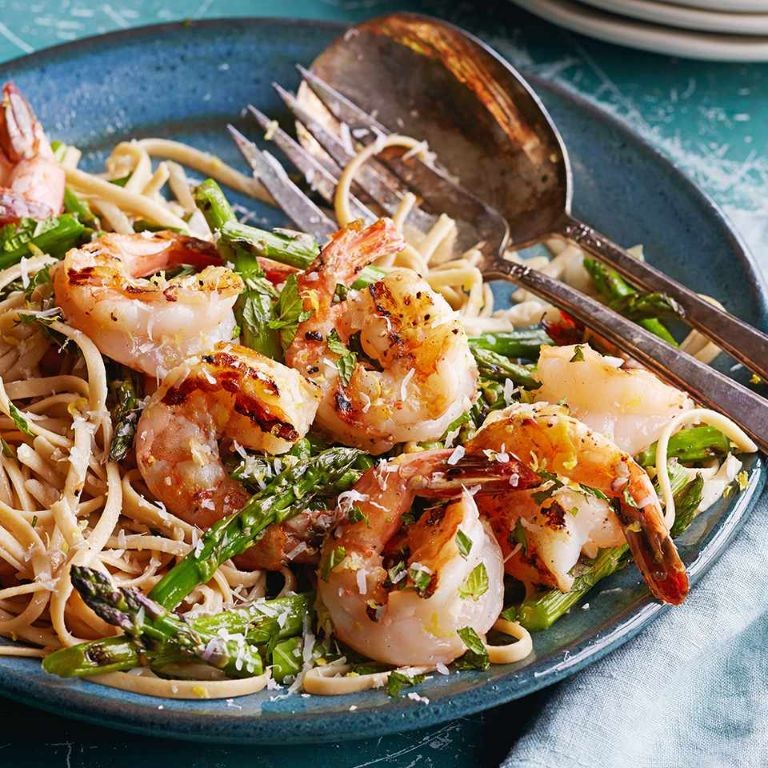
A summer dinner that’s ready in minutes. Grilled shrimp and asparagus come together for a fast, elegant meal—perfect for weeknights or entertaining. Fire up the grill and let’s go.
Serving: 4 | Pre Time: 15 minutes | Cooking Time: 10 minutes
Ingredients
– 1 lb large wild-caught shrimp, peeled and deveined
– 1 lb fresh asparagus spears, woody ends trimmed
– 3 tbsp extra-virgin olive oil
– 2 tbsp freshly squeezed lemon juice
– 3 garlic cloves, finely minced
– 1 tsp smoked paprika
– ½ tsp kosher salt
– ¼ tsp freshly cracked black pepper
– 2 tbsp unsalted butter, melted
– 1 tbsp finely chopped fresh parsley
Instructions
1. Pat the shrimp and asparagus spears completely dry with paper towels to ensure proper searing.
2. In a medium bowl, whisk together the olive oil, lemon juice, minced garlic, smoked paprika, kosher salt, and black pepper.
3. Add the shrimp to the bowl and toss to coat evenly. Let marinate at room temperature for 10 minutes.
4. Preheat a grill or grill pan to medium-high heat (about 400°F).
5. Brush the asparagus spears lightly with the melted butter.
6. Place the asparagus on the grill in a single layer. Grill for 4–5 minutes, turning once halfway, until tender-crisp and lightly charred.
7. Transfer the asparagus to a serving platter and tent loosely with foil to keep warm.
8. Thread the marinated shrimp onto metal or soaked wooden skewers for easier handling.
9. Grill the shrimp skewers for 2–3 minutes per side, until opaque and firm with visible grill marks.
10. Arrange the grilled shrimp over the asparagus on the platter.
11. Garnish with the finely chopped fresh parsley.
12. Serve immediately while hot.
Succulent shrimp with a smoky char pairs beautifully with the tender-crisp asparagus. The garlic-lemon marinade infuses every bite with bright, savory flavor. For a creative twist, serve over a bed of creamy polenta or alongside a zesty arugula salad.
Skinless Turkey Breast with Steamed Vegetables
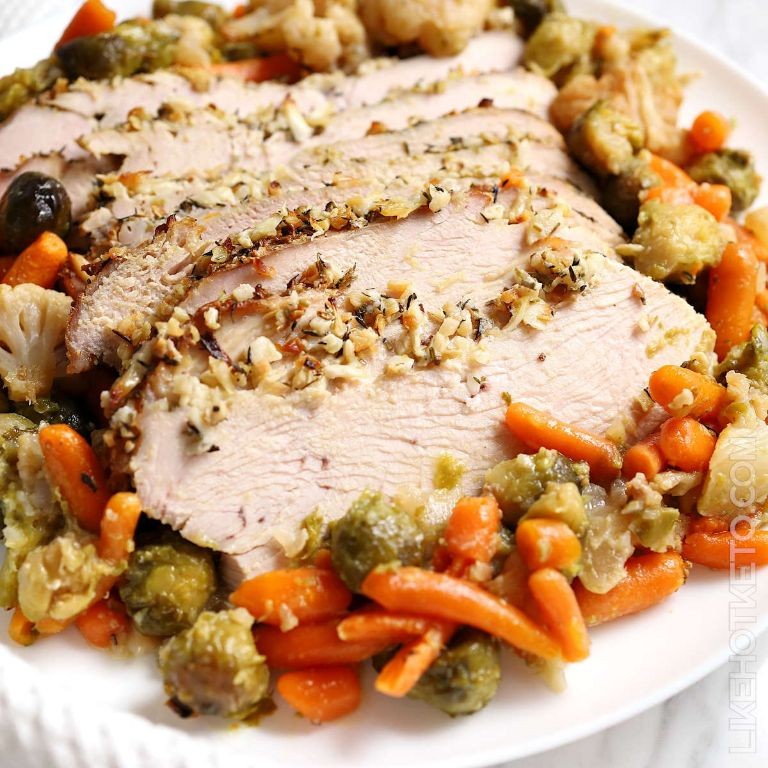
Forget bland health food—this lean protein powerhouse delivers juicy flavor without the fuss. Flash-sear that turkey, steam those veggies crisp, and plate a complete meal in under 30 minutes.
Serving: 4 | Pre Time: 10 minutes | Cooking Time: 18 minutes
Ingredients
– 1.5 lb boneless, skinless turkey breast, trimmed of silver skin
– 2 tbsp extra-virgin olive oil
– 1 tsp kosher salt
– ½ tsp freshly cracked black pepper
– 1 tsp smoked paprika
– 2 cloves garlic, minced
– 1 lb broccolini, ends trimmed
– 2 medium carrots, cut into ¼-inch bias slices
– ½ cup low-sodium chicken stock
– 1 tbsp unsalted butter
– 1 tbsp fresh lemon juice
– 2 tbsp chopped fresh parsley
Instructions
1. Pat the turkey breast completely dry with paper towels. 2. Rub all surfaces with 1 tbsp olive oil, then season evenly with kosher salt, black pepper, and smoked paprika. 3. Heat a large stainless-steel skillet over medium-high heat until a drop of water sizzles immediately. 4. Place the turkey breast in the dry, hot skillet and sear undisturbed for 4 minutes to form a golden-brown crust. 5. Flip the turkey and sear the opposite side for 4 minutes. 6. Reduce heat to medium-low, add minced garlic to the skillet around the turkey, and cook for 30 seconds until fragrant. 7. Transfer the turkey to a plate and tent loosely with foil. 8. Add the remaining 1 tbsp olive oil to the same skillet. 9. Add broccolini and carrot slices, tossing to coat in the oil and pan drippings. 10. Pour in the chicken stock and immediately cover the skillet with a tight-fitting lid. 11. Steam the vegetables for 5–6 minutes until the broccolini is bright green and tender-crisp. 12. Uncover the skillet and stir in unsalted butter until melted and glossy. 13. Return the turkey breast and any accumulated juices to the skillet, nestling it among the vegetables. 14. Spoon the buttery pan sauce over the turkey, then drizzle everything with fresh lemon juice. 15. Remove from heat and let the turkey rest in the skillet for 5 minutes to allow juices to redistribute. 16. Slice the turkey breast against the grain into ½-inch thick pieces. 17. Arrange the sliced turkey over the steamed vegetables on a serving platter. 18. Garnish with chopped fresh parsley. 19. Serve immediately while hot.
You’ll love the contrast of the seared, savory turkey against the bright, crisp-tender vegetables. That quick pan sauce pulls everything together with a glossy, lemony finish—try serving it over cauliflower rice for a low-carb twist or stuffing the slices into whole-grain wraps for next-day lunches.
Quinoa Salad with Cucumber and Mint
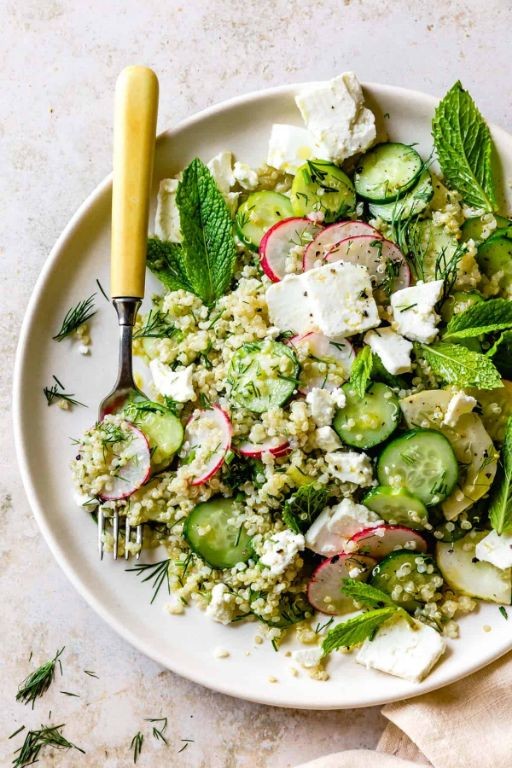
Nailing that perfect lunch? This quinoa salad delivers crisp freshness with every forkful—think cool cucumber, bright mint, and protein-packed quinoa in a zesty lemon dressing that’ll make your taste buds dance.
Serving: 4 | Pre Time: 15 minutes | Cooking Time: 15 minutes
Ingredients
– 1 cup white quinoa, rinsed under cold water
– 2 cups filtered water
– 1 English cucumber, finely diced
– ½ cup fresh mint leaves, chiffonade-cut
– ¼ cup extra-virgin olive oil
– 3 tablespoons freshly squeezed lemon juice
– 1 teaspoon fine sea salt
– ½ teaspoon freshly cracked black pepper
Instructions
1. Rinse 1 cup white quinoa under cold running water in a fine-mesh strainer for 1 minute to remove bitterness.
2. Combine rinsed quinoa and 2 cups filtered water in a medium saucepan over high heat.
3. Bring to a rolling boil, then immediately reduce heat to low and cover with a tight-fitting lid.
4. Simmer quinoa for exactly 15 minutes until all water is absorbed and grains are tender with visible spirals.
5. Tip: Fluff quinoa with a fork immediately after cooking to prevent clumping and spread on a baking sheet to cool completely to room temperature, about 10 minutes.
6. Finely dice 1 English cucumber into ¼-inch cubes, ensuring uniform pieces for even texture.
7. Stack fresh mint leaves, roll tightly, and slice into thin ribbons (chiffonade) with a sharp chef’s knife to preserve vibrant color.
8. Whisk ¼ cup extra-virgin olive oil, 3 tablespoons freshly squeezed lemon juice, 1 teaspoon fine sea salt, and ½ teaspoon freshly cracked black pepper in a small bowl until emulsified.
9. Tip: For a brighter dressing, zest one lemon before juicing and add zest to the whisked mixture.
10. Combine cooled quinoa, diced cucumber, and chiffonade mint in a large mixing bowl.
11. Pour dressing over quinoa mixture and gently toss with a silicone spatula until evenly coated.
12. Tip: Let salad rest for 5 minutes before serving to allow flavors to meld, tossing once more just before plating.
13. Divide salad among four serving bowls or pack into airtight containers for meal prep.
Hitting all the right notes, this salad offers a delightful contrast of fluffy quinoa against crunchy cucumber, with mint providing a refreshing herbal lift. Serve it chilled alongside grilled salmon for a complete meal, or scoop into lettuce cups for a low-carb twist—its vibrant, tangy profile makes it a standout at picnics or potlucks.
Low-Fat Yogurt with Honey and Chia Seeds
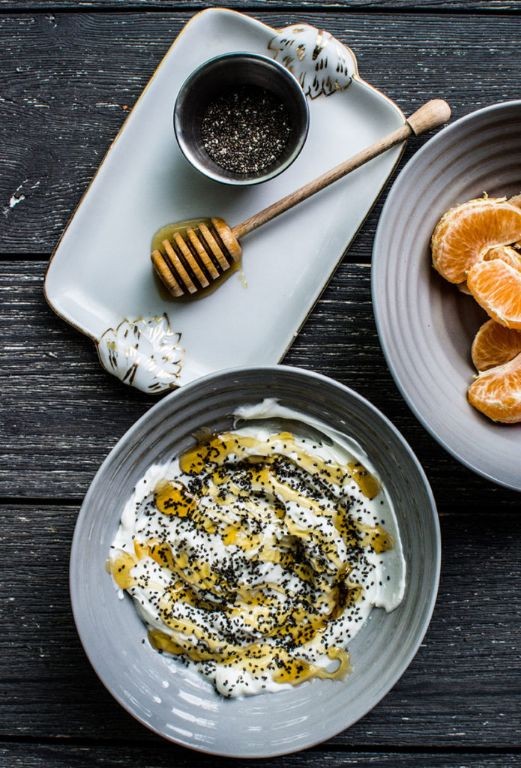
Banish bland breakfasts with this creamy, protein-packed bowl. Transform plain yogurt into a luxurious treat that fuels your morning without weighing you down. It’s the ultimate make-ahead meal for busy weekdays.
Serving: 1 | Pre Time: 5 minutes | Cooking Time: 0 minutes
Ingredients
– 1 cup plain low-fat Greek yogurt
– 1 tablespoon raw, unfiltered honey
– 1 tablespoon whole chia seeds
– ¼ teaspoon pure vanilla extract
– Pinch of fine sea salt
Instructions
1. Place 1 cup of plain low-fat Greek yogurt into a medium mixing bowl.
2. Drizzle 1 tablespoon of raw, unfiltered honey over the yogurt.
3. Add 1 tablespoon of whole chia seeds to the bowl.
4. Incorporate ¼ teaspoon of pure vanilla extract.
5. Sprinkle a pinch of fine sea salt over the mixture.
6. Vigorously whisk all ingredients together for 60 seconds, or until the honey is fully incorporated and no streaks remain. Tip: Whisking thoroughly prevents the honey from pooling at the bottom.
7. Transfer the mixture to a serving bowl or an airtight container if preparing ahead.
8. Cover the container and refrigerate for a minimum of 2 hours, or preferably overnight, to allow the chia seeds to fully hydrate and thicken the mixture. Tip: For optimal texture, let it rest for at least 4 hours; the chia seeds will absorb liquid and create a delightful pudding-like consistency.
9. Before serving, give the mixture a final stir to redistribute any settled seeds. Tip: For a vibrant presentation, top with fresh berries, a sprinkle of cinnamon, or toasted nuts just before eating.
Zesty vanilla and floral honey meld into the tangy yogurt, while the hydrated chia seeds provide a satisfying, gelatinous texture that contrasts with the creaminess. Enjoy it straight from the fridge for a cool, refreshing bite, or layer it in a glass with granola and seasonal fruit for an Instagram-worthy parfait. The subtle saltiness elevates the sweetness, creating a perfectly balanced flavor profile in every spoonful.
Herbed Lentil Soup
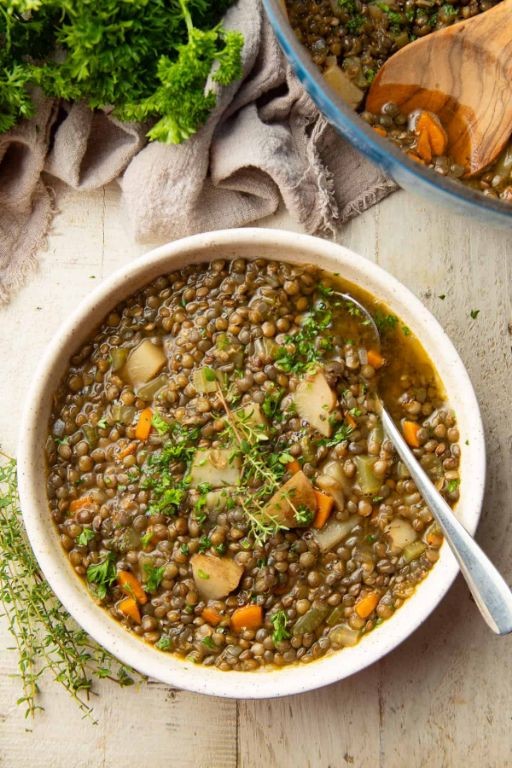
Every chilly evening demands this soul-warming herbed lentil soup. Grab your Dutch oven and transform humble ingredients into a velvety, herb-infused masterpiece. Skip the takeout—this cozy bowl is ready in under an hour.
Serving: 6 | Pre Time: 15 minutes | Cooking Time: 45 minutes
Ingredients
– 2 tablespoons extra-virgin olive oil
– 1 large yellow onion, finely diced
– 2 medium carrots, peeled and finely diced
– 2 celery stalks, finely diced
– 3 garlic cloves, minced
– 1 tablespoon tomato paste
– 1 ½ cups dried green lentils, rinsed and drained
– 6 cups low-sodium vegetable broth
– 2 bay leaves
– 1 teaspoon dried thyme
– ½ teaspoon smoked paprika
– 2 tablespoons unsalted butter
– ¼ cup fresh flat-leaf parsley, finely chopped
– ¼ cup fresh dill, finely chopped
– Kosher salt and freshly ground black pepper
Instructions
1. Heat the extra-virgin olive oil in a large Dutch oven over medium heat until shimmering, about 2 minutes.
2. Add the finely diced yellow onion, carrots, and celery, and sauté until the vegetables are softened and the onion is translucent, 8–10 minutes, stirring occasionally.
3. Stir in the minced garlic and tomato paste, and cook until fragrant and the paste darkens slightly, 1–2 minutes.
4. Add the rinsed green lentils, low-sodium vegetable broth, bay leaves, dried thyme, and smoked paprika to the pot.
5. Bring the mixture to a boil over high heat, then reduce the heat to low, cover, and simmer until the lentils are tender but not mushy, 30–35 minutes.
6. Remove the pot from the heat and discard the bay leaves.
7. Stir in the unsalted butter until fully melted and incorporated.
8. Fold in the finely chopped flat-leaf parsley and dill.
9. Season the soup with kosher salt and freshly ground black pepper, starting with 1 teaspoon of salt and ½ teaspoon of pepper, then adjust as needed after tasting.
10. Ladle the soup into bowls and serve immediately.
Rich, velvety lentils meld with the aromatic herbs for a deeply satisfying texture. The smoked paprika adds a subtle warmth that complements the fresh dill and parsley beautifully. For a creative twist, top each bowl with a dollop of crème fraîche and a sprinkle of crispy fried shallots.
Baked Cod with Steamed Carrots
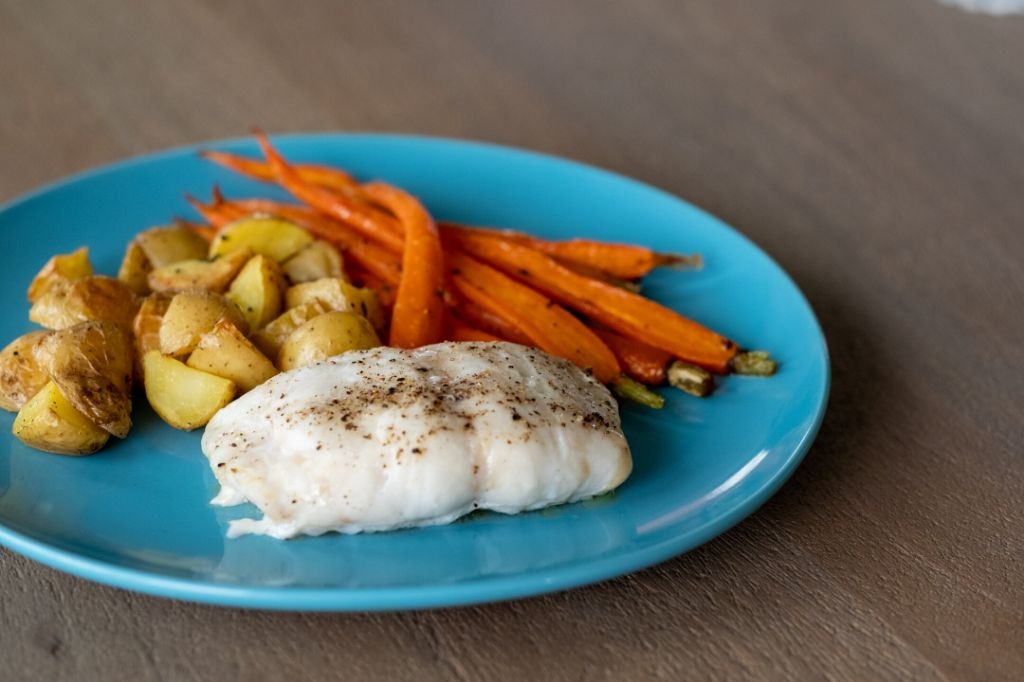
Out with the boring fish dinners! This baked cod with steamed carrots delivers restaurant-quality flavor with minimal effort. Serving: 4 | Pre Time: 15 minutes | Cooking Time: 20 minutes
Ingredients
– 4 (6-ounce) skinless cod fillets, patted dry
– 1 pound heirloom carrots, peeled and cut into 2-inch batons
– 3 tablespoons clarified butter, divided
– 2 tablespoons extra-virgin olive oil
– 2 teaspoons fresh lemon zest, finely grated
– 1 tablespoon freshly squeezed lemon juice
– 2 garlic cloves, minced
– 1 teaspoon fresh thyme leaves, stripped from stems
– ½ teaspoon smoked paprika
– Kosher salt and freshly ground black pepper
Instructions
1. Preheat your oven to 400°F (204°C) and position a rack in the center.
2. Arrange the carrot batons in a single layer in a steamer basket set over 1 inch of boiling water.
3. Steam the carrots for 8-10 minutes, until they are tender yet retain a slight bite when pierced with a fork.
4. Transfer the steamed carrots to a bowl and toss them with 1 tablespoon of clarified butter and a pinch of kosher salt.
5. Pat the cod fillets completely dry with paper towels to ensure proper searing.
6. Season both sides of each fillet generously with kosher salt and freshly ground black pepper.
7. Heat the remaining 2 tablespoons of clarified butter and the olive oil in a large oven-safe skillet over medium-high heat until shimmering.
8. Carefully place the cod fillets in the hot skillet and sear for 2 minutes without moving them to develop a golden crust.
9. Flip each fillet using a thin, flexible spatula to prevent breaking the delicate flesh.
10. Immediately transfer the entire skillet to the preheated oven.
11. Bake the cod for 8-10 minutes, until the flesh is opaque and flakes easily with a fork.
12. While the cod bakes, combine the lemon zest, lemon juice, minced garlic, thyme leaves, and smoked paprika in a small bowl to create a finishing sauce.
13. Remove the skillet from the oven and spoon the lemon-herb sauce over the hot cod fillets.
14. Let the fish rest in the skillet for 3 minutes to allow the juices to redistribute.
15. Plate the baked cod alongside the buttered steamed carrots.
Juicy, flaky cod meets a bright, aromatic sauce, while the sweet carrots provide a crisp-tender contrast. For a stunning presentation, arrange the carrots in a nest-like circle and place the cod at its center. A final sprinkle of flaky sea salt just before serving elevates the dish with a delightful textural crunch.
Avocado Toast with Whole-Grain Bread

Overhyped? Maybe. Overrated? Never. This avocado toast elevates the brunch staple with whole-grain depth and chef-level precision. Get ready to make the only version you’ll ever need.
Serving: 2 | Pre Time: 10 minutes | Cooking Time: 5 minutes
Ingredients
– 2 slices whole-grain artisan bread, 1-inch thick
– 1 large, ripe Hass avocado
– 1 tablespoon extra-virgin olive oil
– 1/2 teaspoon flaky sea salt
– 1/4 teaspoon freshly cracked black pepper
– 1/2 teaspoon Aleppo pepper flakes
– 1 tablespoon fresh lime juice
– 2 large, pasture-raised eggs
– 1 tablespoon clarified butter
– 2 tablespoons microgreens for garnish
Instructions
1. Preheat your oven’s broiler to high (approximately 500°F) and position a rack 6 inches from the heat element.
2. Place the whole-grain bread slices directly on the oven rack and broil for 90 seconds per side, watching closely until deeply toasted with visible char marks. Tip: Broiling instead of toasting creates a superior, crisp exterior that better supports the toppings.
3. Transfer the toasted bread to a cutting board and immediately rub the cut side of a garlic clove over one side of each slice for subtle, infused flavor.
4. Halve the Hass avocado and remove the pit. Scoop the flesh into a medium bowl.
5. Add the fresh lime juice, extra-virgin olive oil, flaky sea salt, and cracked black pepper to the avocado.
6. Mash the mixture with a fork until mostly smooth but with some small, textural chunks remaining. Tip: Mashing in the bowl, not on the toast, allows for even seasoning and prevents a soggy bread base.
7. Heat the clarified butter in a small non-stick skillet over medium heat until it shimmers, about 1 minute.
8. Crack the pasture-raised eggs directly into the skillet. Cook undisturbed for 2 minutes, then cover the skillet and cook for 1 additional minute until the whites are fully set and the yolks are runny.
9. Divide the mashed avocado mixture evenly between the two toast slices, spreading it to the edges.
10. Carefully place one cooked egg atop each prepared avocado toast.
11. Garnish each toast with a sprinkle of Aleppo pepper flakes and 1 tablespoon of microgreens. Tip: Aleppo pepper offers a mild, fruity heat that complements the avocado without overpowering it, unlike standard red pepper flakes.
Zesty lime and rich avocado meld into the nooks of charred, nutty bread, while the runny yolk creates a luxurious sauce. For a brunch showstopper, layer with crisp prosciutto or a drizzle of chili crisp before adding the egg. The contrast of creamy, crunchy, and spicy makes this far more than just smashed avocado on bread.
Spinach and Feta Omelette (Low Oil)

Unlock a protein-packed breakfast that delivers bold flavor without the grease. This spinach and feta omelette transforms simple ingredients into a vibrant, satisfying meal. Master the low-oil technique for a fluffy, golden result every time.
Serving: 1 | Pre Time: 5 minutes | Cooking Time: 4 minutes
Ingredients
– 2 large pasture-raised eggs, lightly beaten
– 1/4 cup fresh baby spinach leaves, roughly chopped
– 2 tbsp crumbled feta cheese
– 1 tsp clarified butter
– 1/8 tsp kosher salt
– 1/16 tsp freshly cracked black pepper
Instructions
1. Crack 2 large pasture-raised eggs into a small mixing bowl and lightly beat with a fork until just combined, creating small bubbles for lift.
2. Whisk 1/8 tsp kosher salt and 1/16 tsp freshly cracked black pepper into the beaten eggs until fully incorporated.
3. Heat a 10-inch nonstick skillet over medium-low heat for 90 seconds until evenly warm.
4. Add 1 tsp clarified butter to the skillet, swirling to coat the entire surface thinly and evenly.
5. Pour the seasoned egg mixture into the center of the skillet, immediately tilting to spread it into a thin, even layer.
6. Cook undisturbed for 60 seconds until the edges set and the bottom develops a light golden hue.
7. Sprinkle 1/4 cup roughly chopped fresh baby spinach leaves evenly over one half of the omelette.
8. Distribute 2 tbsp crumbled feta cheese over the spinach layer.
9. Gently lift the unfilled side with a silicone spatula and fold it over the filling, creating a half-moon shape.
10. Cook for another 60 seconds until the cheese begins to soften and the exterior turns golden brown.
11. Carefully slide the omelette onto a warm plate, using the spatula to support the fold.
Celebrate the creamy feta melting into the tender spinach, all wrapped in a delicate, golden egg blanket. The low-oil method yields a remarkably light texture without sacrificing richness. For a vibrant twist, serve alongside roasted cherry tomatoes or a drizzle of hot honey.
Chamomile Tea with Ginger

Yield to cozy vibes with this golden elixir. Chamomile Tea with Ginger blends floral whispers with spicy warmth—perfect for unwinding or soothing a scratchy throat. Grab your mug and let’s brew.
Serving: 2 | Pre Time: 5 minutes | Cooking Time: 10 minutes
Ingredients
– 2 cups filtered water
– 2 tablespoons dried chamomile flowers
– 1 (2-inch) piece fresh ginger root, peeled and thinly sliced
– 1 tablespoon raw honey
– 1 teaspoon fresh lemon juice
– 1 cinnamon stick (optional)
Instructions
1. Pour 2 cups filtered water into a small saucepan.
2. Add the 1 (2-inch) piece fresh ginger root, peeled and thinly sliced, to the water.
3. Bring the mixture to a boil over high heat, then reduce to a simmer.
4. Simmer for 5 minutes to infuse the ginger flavor fully.
5. Remove the saucepan from heat and immediately add 2 tablespoons dried chamomile flowers.
6. Steep the chamomile for 5 minutes, covered, to prevent volatile oils from escaping.
7. Strain the tea through a fine-mesh sieve into two mugs, discarding solids.
8. Stir in 1 tablespoon raw honey until fully dissolved.
9. Add 1 teaspoon fresh lemon juice to each mug for brightness.
10. Garnish with 1 cinnamon stick per mug, if using, for aromatic depth.
11. Serve immediately while hot.
This brew offers a silky texture with floral chamomile notes upfront, followed by a gentle ginger heat. Try it iced with a splash of sparkling water for a refreshing twist, or pair it with dark chocolate to highlight its earthy undertones.
Mashed Cauliflower with Garlic
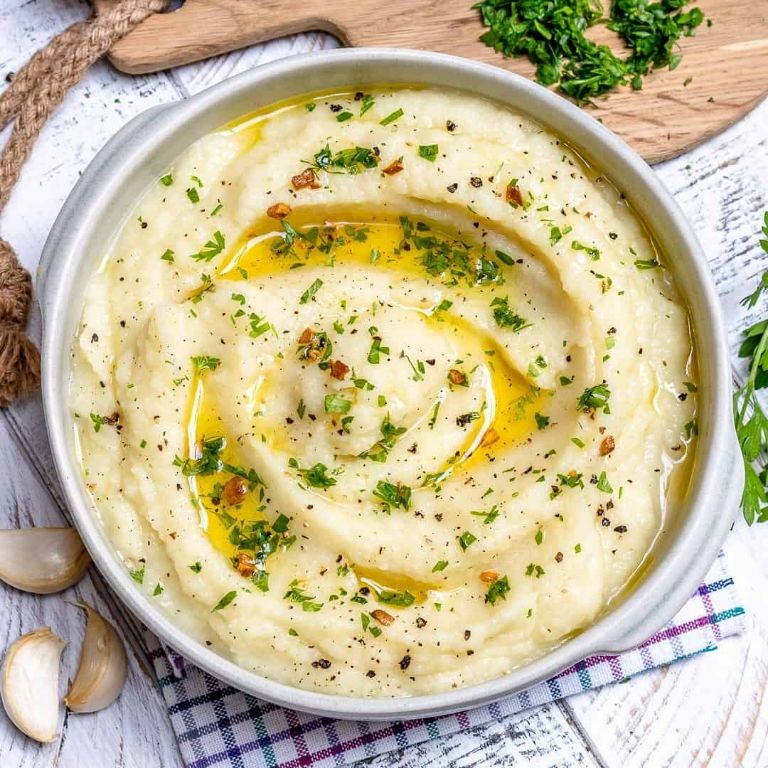
Kick your mashed potatoes to the curb. This creamy, garlicky cauliflower mash is the low-carb, flavor-packed side you didn’t know you needed. It’s a game-changer for weeknights and holiday tables alike.
Serving: 4 | Pre Time: 10 minutes | Cooking Time: 25 minutes
Ingredients
– 1 large head of cauliflower, cut into 1-inch florets
– 4 cloves of garlic, peeled and smashed
– 1/2 cup heavy cream
– 1/4 cup unsalted butter, cubed
– 2 tablespoons extra-virgin olive oil
– 1 teaspoon fine sea salt
– 1/2 teaspoon freshly cracked black pepper
– 1/4 cup freshly grated Parmigiano-Reggiano cheese
– 1 tablespoon fresh chives, finely chopped
Instructions
1. Place the cauliflower florets and smashed garlic cloves in a large steamer basket set over a pot of boiling water.
2. Cover the pot and steam the vegetables for 15-18 minutes, or until the cauliflower is fork-tender and easily pierced.
3. Transfer the steamed cauliflower and garlic to a colander and let drain for 3 full minutes to remove excess moisture, which prevents a watery final texture.
4. In a small saucepan over medium-low heat, combine the heavy cream and cubed butter, warming gently for 3-4 minutes until the butter is fully melted and the mixture is hot but not boiling.
5. Add the drained cauliflower and garlic to the bowl of a food processor.
6. Pour the warm cream-butter mixture over the cauliflower.
7. Add the extra-virgin olive oil, fine sea salt, and freshly cracked black pepper to the processor.
8. Process the mixture on high speed for 45-60 seconds, pausing once to scrape down the sides, until completely smooth and creamy.
9. Transfer the pureed mixture to a serving bowl and fold in the freshly grated Parmigiano-Reggiano cheese with a spatula until just incorporated.
10. Garnish the finished mash with the finely chopped fresh chives.
Cauliflower transforms into a luxuriously smooth, velvety puree that rivals any potato version. The roasted garlic flavor is mellow and pervasive, perfectly balanced by the richness of cream and the salty punch of Parmigiano-Reggiano. For a creative twist, serve it as a base for seared scallops or top with crispy fried shallots for added texture.
Poached Pears with Cinnamon
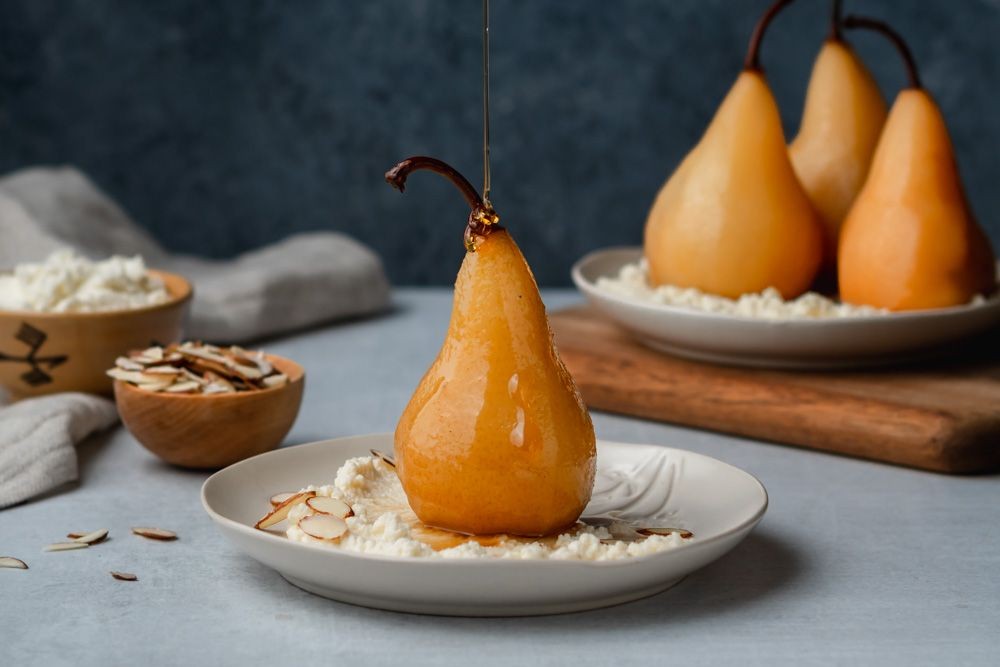
Zesty winter pears transform into a silky, spiced dessert. Simmer them in a fragrant syrup until tender. Serve warm or chilled for a cozy treat.
Serving: 4 | Pre Time: 10 minutes | Cooking Time: 25 minutes
Ingredients
– 4 firm Bosc pears, peeled, halved, and cored
– 2 cups granulated sugar
– 4 cups filtered water
– 2 whole cinnamon sticks
– 1 vanilla bean, split and seeds scraped
– 1 tablespoon fresh lemon juice
– 1/4 cup crème fraîche, for serving
– 1/4 cup toasted pecans, finely chopped, for garnish
Instructions
1. Combine 2 cups granulated sugar, 4 cups filtered water, 2 cinnamon sticks, and the scraped seeds and pod of 1 vanilla bean in a large saucepan over medium-high heat.
2. Stir the mixture constantly until the sugar fully dissolves, about 3 minutes, to create a clear syrup.
3. Add 1 tablespoon fresh lemon juice to the syrup and stir to incorporate.
4. Gently place 4 peeled, halved, and cored Bosc pears into the simmering syrup, ensuring they are fully submerged.
5. Reduce the heat to low, cover the saucepan, and poach the pears for 20–25 minutes, or until a paring knife inserts into the thickest part with no resistance.
6. Tip: Rotate the pears halfway through poaching for even color and flavor absorption.
7. Carefully remove the pears with a slotted spoon and transfer them to a serving dish.
8. Increase the heat to medium-high and boil the poaching liquid, uncovered, until it reduces by half and thickens to a syrup consistency, about 10 minutes.
9. Tip: For a glossy finish, brush the reduced syrup over the pears immediately after reduction.
10. Strain the syrup through a fine-mesh sieve to remove the cinnamon sticks and vanilla pod, then drizzle it over the pears.
11. Chill the pears and syrup in the refrigerator for at least 1 hour to set the flavors, if serving cold.
12. Tip: For optimal texture, serve the pears at room temperature within 2 hours of chilling.
13. Dollop 1/4 cup crème fraîche alongside the pears just before serving.
14. Sprinkle 1/4 cup finely chopped toasted pecans over the pears and crème fraîche as a garnish.
Warm poached pears offer a tender, almost melt-in-your-mouth texture, infused with the deep, woody notes of cinnamon and the floral sweetness of vanilla. The reduced syrup adds a sticky, caramel-like glaze that contrasts beautifully with the cool, tangy crème fraîche. For a creative twist, serve the pears over vanilla bean ice cream or alongside a slice of almond cake, using the extra syrup as a decadent drizzle.
Grilled Chicken Wrap with Lettuce (No Onion)

A grilled chicken wrap that skips the onion but packs all the flavor. This handheld meal is your new go-to for a quick, satisfying lunch that won’t leave you with onion breath. Get ready to wrap, roll, and devour.
Serving: 2 | Pre Time: 15 minutes | Cooking Time: 12 minutes
Ingredients
– 2 boneless, skinless chicken breasts (about 6 oz each)
– 1 tbsp extra-virgin olive oil
– 1 tsp smoked paprika
– 1/2 tsp garlic powder
– 1/4 tsp fine sea salt
– 1/4 tsp freshly cracked black pepper
– 4 large flour tortillas (10-inch diameter)
– 1 cup shredded romaine lettuce
– 1/2 cup crumbled feta cheese
– 1/4 cup Greek yogurt
– 1 tbsp freshly squeezed lemon juice
Instructions
1. Pat the chicken breasts completely dry with paper towels to ensure a proper sear.
2. In a small bowl, whisk together the extra-virgin olive oil, smoked paprika, garlic powder, fine sea salt, and freshly cracked black pepper to form a marinade.
3. Coat the chicken breasts evenly with the marinade and let them rest at room temperature for 10 minutes to allow the flavors to penetrate.
4. Preheat a grill or grill pan to medium-high heat (approximately 400°F).
5. Place the chicken on the hot grill and cook for 5-6 minutes per side, or until the internal temperature reaches 165°F when checked with an instant-read thermometer.
6. Transfer the grilled chicken to a cutting board and let it rest for 5 minutes to allow the juices to redistribute, then slice it thinly against the grain.
7. While the chicken rests, warm the flour tortillas in a dry skillet over medium heat for 30 seconds per side, just until pliable.
8. In another small bowl, combine the Greek yogurt and freshly squeezed lemon juice to create a tangy sauce.
9. Lay a warmed tortilla flat and spread 1 tablespoon of the lemon-yogurt sauce evenly across the center.
10. Arrange one-quarter of the sliced chicken in a horizontal line down the middle of the tortilla.
11. Top the chicken with 1/4 cup of shredded romaine lettuce and 2 tablespoons of crumbled feta cheese.
12. Fold the bottom edge of the tortilla up over the filling, then fold in the sides and roll tightly away from you to form a secure wrap. Repeat with the remaining ingredients.
Nothing beats the contrast of the warm, smoky chicken against the cool, crisp lettuce and creamy feta. The lemon-yogurt sauce adds a bright tang that cuts through the richness. For a creative twist, slice the wraps in half on a diagonal and serve with a side of pickled jalapeños for an extra kick.
Rice Pudding with Coconut Milk
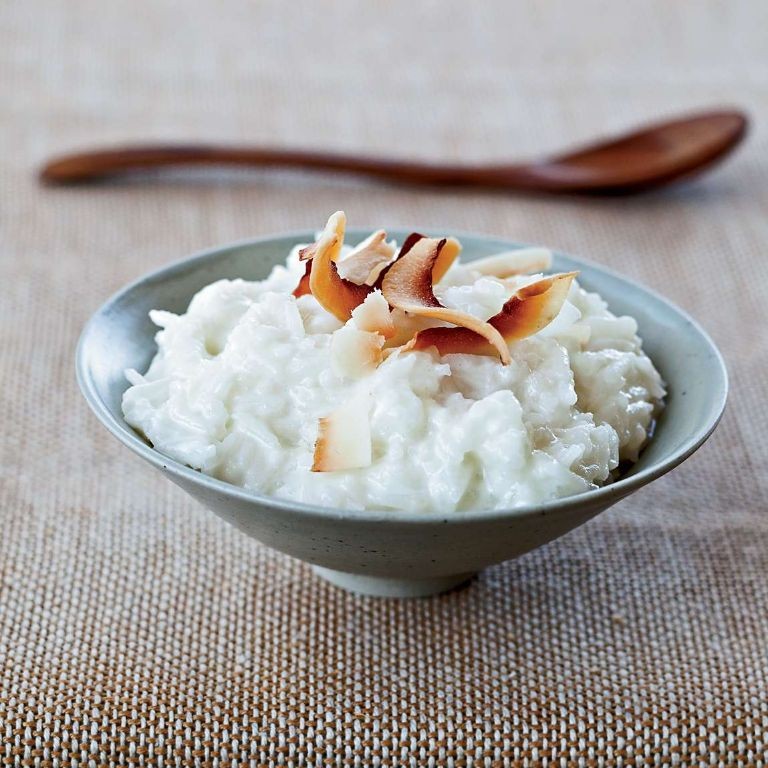
Tired of boring desserts? Transform humble rice into a creamy, tropical dream with this coconut milk rice pudding. It’s comfort food, elevated—and shockingly simple to make.
Serving: 6 | Pre Time: 5 minutes | Cooking Time: 45 minutes
Ingredients
– 1 cup medium-grain white rice, such as Arborio
– 4 cups full-fat coconut milk
– 1 cup granulated sugar
– 1/2 teaspoon fine sea salt
– 1 vanilla bean, split and seeds scraped
– 1/2 teaspoon ground cardamom
– 1/4 cup unsalted butter, cubed and chilled
– 1/4 cup toasted coconut flakes, for garnish
Instructions
1. Rinse 1 cup of medium-grain white rice under cold water in a fine-mesh strainer until the water runs clear.
2. In a heavy-bottomed saucepan, combine the rinsed rice, 4 cups of full-fat coconut milk, 1 cup of granulated sugar, 1/2 teaspoon of fine sea salt, and the seeds from 1 split vanilla bean.
3. Place the saucepan over medium-high heat and bring the mixture to a boil, stirring constantly with a wooden spoon to prevent sticking.
4. Immediately reduce the heat to low, cover the saucepan with a tight-fitting lid, and simmer for 25 minutes, stirring every 5 minutes to ensure even cooking and prevent scorching on the bottom.
5. After 25 minutes, remove the lid and stir in 1/2 teaspoon of ground cardamom.
6. Continue to cook uncovered over low heat for an additional 15-20 minutes, stirring frequently, until the rice is very tender and the pudding has thickened to a creamy, porridge-like consistency that coats the back of the spoon.
7. Remove the saucepan from the heat and immediately stir in 1/4 cup of cubed, chilled unsalted butter until it is fully melted and incorporated, which will give the pudding a rich, glossy finish.
8. Transfer the pudding to a large bowl or individual serving dishes and press a piece of plastic wrap directly onto the surface to prevent a skin from forming.
9. Refrigerate the pudding for at least 2 hours, or until completely chilled and set.
10. Before serving, garnish each portion with a sprinkle of 1/4 cup of toasted coconut flakes.
Buttery and lush, this pudding achieves a perfect balance between the creamy coconut and the warm spice of cardamom. Serve it chilled in elegant glasses for a dinner party, or warm it slightly for a cozy, comforting bowl. The toasted coconut adds a delightful crunch that contrasts beautifully with the silky texture.
Summary
Managing GERD can be easier with delicious food. This roundup offers 20 soothing recipes to support happy digestion. We hope you find new favorites to enjoy. Give them a try, leave a comment with your top picks, and share this article on Pinterest to help others find relief too. Happy cooking!


