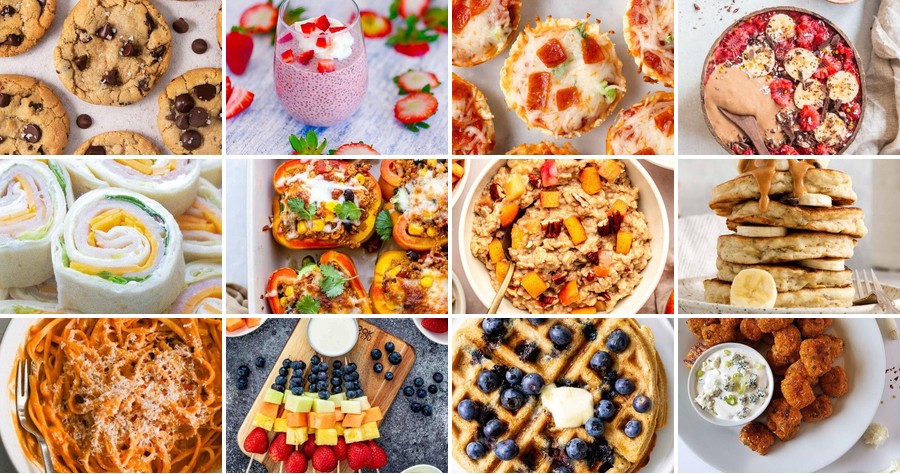
Busy parents, rejoice! Finding gluten-free meals that kids actually enjoy can feel like a puzzle, but we’ve cracked the code. This roundup is packed with 18 simple, family-friendly recipes that turn everyday ingredients into delicious dinners, snacks, and treats—no fuss required. Get ready to make mealtime easier and more exciting with options everyone will love. Let’s dive in!
Gluten Free Banana Pancakes
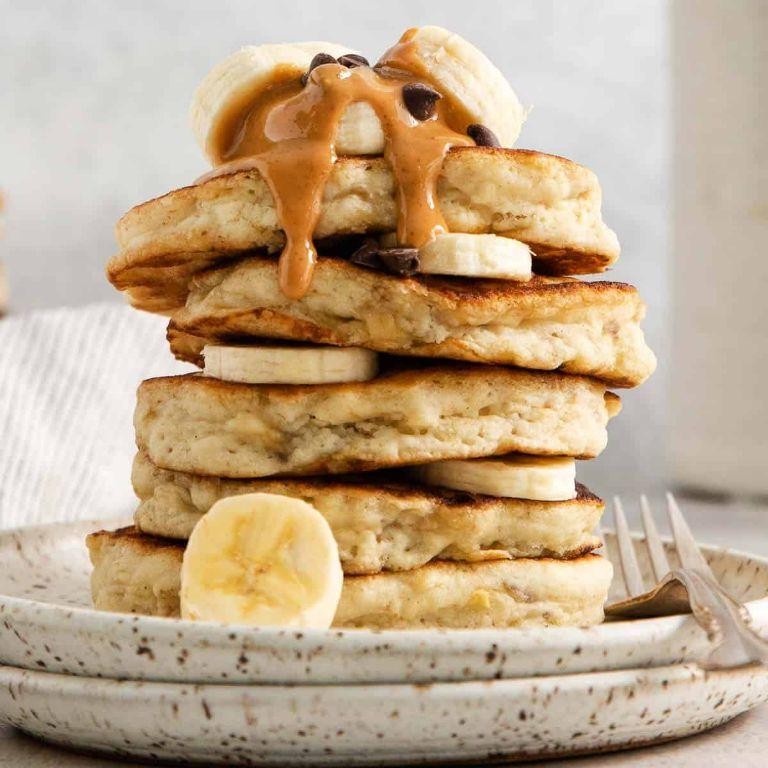
Picture this: a cozy weekend morning where you crave fluffy pancakes but need a gluten-free option that doesn’t compromise on texture or flavor. These gluten-free banana pancakes deliver exactly that—a simple, satisfying breakfast that comes together with pantry staples and ripe bananas.
Serving: 4 | Pre Time: 10 minutes | Cooking Time: 15 minutes
Ingredients
- 2 medium ripe bananas (the spottier, the sweeter—I always save overripe ones for this)
- 2 large eggs, preferably at room temperature for better mixing
- 1 cup gluten-free all-purpose flour blend (I use Bob’s Red Mill for reliable results)
- 1 teaspoon baking powder (make sure it’s fresh for maximum fluffiness)
- ½ teaspoon ground cinnamon (a warm touch my family loves)
- ¼ teaspoon salt (just a pinch to balance the sweetness)
- ¾ cup whole milk (or your favorite dairy-free alternative)
- 1 tablespoon pure maple syrup (the real stuff makes all the difference)
- 1 tablespoon unsalted butter, plus more for cooking (I always have Kerrygold on hand)
- ½ teaspoon pure vanilla extract (a splash adds depth)
Instructions
- Peel the bananas and place them in a medium mixing bowl.
- Mash the bananas thoroughly with a fork until only small lumps remain—about 1 minute of vigorous mashing.
- Crack the eggs directly into the bowl with the mashed bananas.
- Whisk the eggs and bananas together until fully combined and slightly frothy, about 30 seconds.
- Add the gluten-free flour, baking powder, cinnamon, and salt to the wet ingredients.
- Gently stir the dry ingredients into the wet mixture until just incorporated—overmixing can make pancakes tough.
- Pour in the milk, maple syrup, and vanilla extract.
- Stir the batter until smooth with no dry flour pockets visible, about 1 minute.
- Place a large nonstick skillet or griddle over medium heat and let it warm for 2 full minutes.
- Add ½ tablespoon of butter to the hot skillet, swirling to coat the surface evenly.
- Use a ¼-cup measuring cup to scoop batter onto the skillet, leaving 2 inches between pancakes.
- Cook the pancakes for 2–3 minutes until bubbles form across the surface and edges look set.
- Carefully flip each pancake with a thin spatula when the bottoms are golden brown.
- Cook the second side for 1–2 minutes until golden and cooked through—press gently; they should spring back.
- Transfer the cooked pancakes to a plate and repeat with remaining batter, adding more butter as needed.
Golden and tender, these pancakes boast a subtle banana sweetness with a hint of cinnamon warmth. The texture stays remarkably light thanks to the ripe bananas acting as a natural binder. For a festive twist, I love stacking them with fresh berries and a drizzle of honey or folding in chocolate chips right before cooking for a decadent treat.
Cheesy Gluten Free Pizza Bites
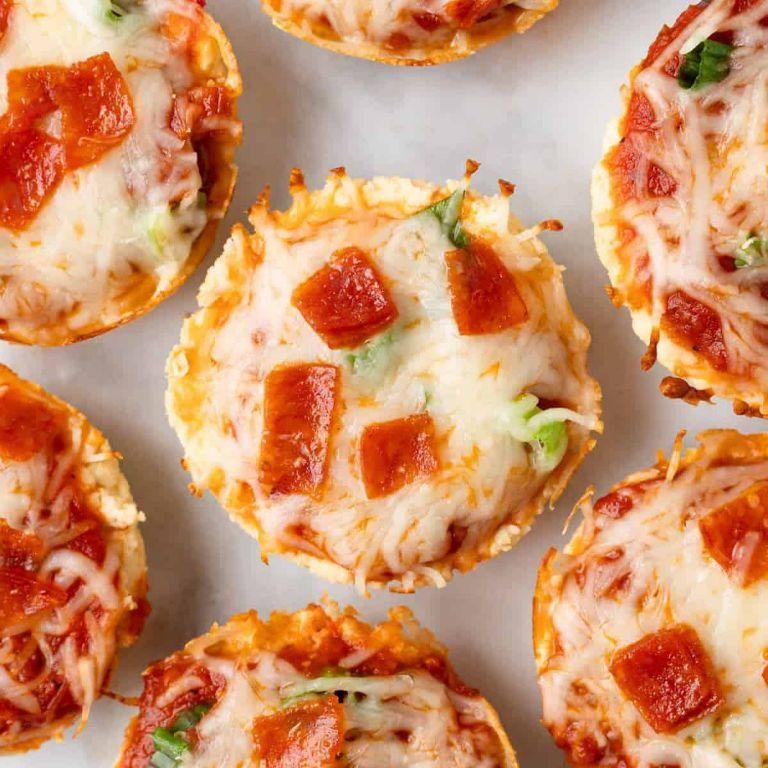
Nothing beats the joy of bite-sized comfort food that everyone can enjoy, especially during festive gatherings. Now, let’s dive into making these cheesy gluten-free pizza bites—they’re perfect for sharing and surprisingly simple to prepare, even if you’re new to gluten-free baking. You’ll love how they capture all the classic pizza flavors in a convenient, snackable form.
Serving: 24 bites | Pre Time: 15 minutes | Cooking Time: 20 minutes
Ingredients
– 2 cups gluten-free all-purpose flour blend (I like Bob’s Red Mill for its reliable texture)
– 1 cup shredded mozzarella cheese (full-fat melts best for that gooey stretch)
– ½ cup grated Parmesan cheese (freshly grated adds a sharper flavor)
– 1 large egg, at room temperature (this helps bind the dough smoothly)
– ½ cup unsweetened almond milk (or any milk you prefer; I find almond milk keeps it light)
– ¼ cup extra virgin olive oil (my go-to for a subtle fruity note)
– 1 tsp baking powder (ensure it’s fresh for good rise)
– 1 tsp dried oregano (crush it between your fingers to release more aroma)
– ½ tsp garlic powder (adds a savory kick without overpowering)
– ½ tsp salt (I use fine sea salt for even distribution)
– ½ cup pizza sauce (homemade or store-bought; I opt for a low-sugar variety)
– 24 pepperoni slices (or omit for a vegetarian version)
Instructions
1. Preheat your oven to 375°F (190°C) and line a baking sheet with parchment paper.
2. In a large mixing bowl, combine the gluten-free flour blend, baking powder, dried oregano, garlic powder, and salt, whisking them together until evenly mixed.
3. Add the shredded mozzarella cheese, grated Parmesan cheese, egg, almond milk, and extra virgin olive oil to the dry ingredients.
4. Stir the mixture with a spatula until a soft dough forms; if it feels too sticky, add a tablespoon more flour, but avoid overmixing to keep the bites tender.
5. Scoop about 1 tablespoon of dough per bite, rolling it into a ball between your palms, and place each ball on the prepared baking sheet, spacing them about 1 inch apart.
6. Gently press your thumb into the center of each dough ball to create a small indentation, being careful not to flatten it completely.
7. Spoon about ½ teaspoon of pizza sauce into each indentation, then top with a pepperoni slice, if using, pressing it lightly into the sauce.
8. Bake in the preheated oven for 18–20 minutes, or until the edges turn golden brown and the cheese is bubbly; rotate the sheet halfway through for even browning.
9. Remove the baking sheet from the oven and let the bites cool on the sheet for 5 minutes before transferring to a wire rack; this helps them set without becoming soggy.
10. Serve warm, and for an extra touch, sprinkle with fresh basil or a drizzle of olive oil right before eating.
These bites emerge with a crisp exterior that gives way to a soft, cheesy interior, bursting with savory herbs and tangy sauce. Try pairing them with a side of marinara for dipping or stacking them on a platter for a fun appetizer spread—they’re sure to disappear quickly at any gathering!
Gluten Free Chicken Nuggets

Let’s make crispy, gluten-free chicken nuggets that everyone will love—perfect for family dinners or game-day snacks. This recipe uses simple ingredients to create a satisfying crunch without any gluten, and I’ll guide you through each step methodically so even beginners can succeed. You’ll be amazed at how easy and delicious homemade nuggets can be.
Serving: 4 | Pre Time: 20 minutes | Cooking Time: 15 minutes
Ingredients
– 1 pound boneless, skinless chicken breasts, cut into 1-inch pieces—I find fresh chicken works best for tender nuggets.
– 1 cup gluten-free all-purpose flour, plus 2 tablespoons for dusting—my go-to brand has a nice blend that mimics regular flour.
– 2 large eggs, beaten—I prefer room temp eggs here for easier mixing.
– 1 cup gluten-free breadcrumbs, panko-style if available for extra crunch.
– 1 teaspoon garlic powder, which adds a subtle savory kick I always include.
– 1 teaspoon paprika, for a hint of color and warmth.
– 1/2 teaspoon salt, to enhance all the flavors.
– 1/4 teaspoon black pepper, freshly ground if possible.
– 1/2 cup avocado oil, or another high-smoke-point oil—this is my go-to for frying because it handles heat well.
– 1/4 cup honey, for a sweet dipping sauce option I love.
– 1/4 cup Dijon mustard, to balance the honey in the sauce.
Instructions
1. Place the chicken pieces on a cutting board and pat them dry with paper towels to ensure the coating sticks well.
2. In a shallow bowl, combine 1 cup gluten-free all-purpose flour, garlic powder, paprika, salt, and black pepper, mixing thoroughly with a fork.
3. In a second shallow bowl, beat the 2 large eggs until smooth and frothy.
4. In a third shallow bowl, pour the 1 cup gluten-free breadcrumbs, spreading them evenly.
5. Dredge each chicken piece first in the flour mixture, shaking off any excess—this creates a base layer for the egg to adhere to.
6. Dip the floured chicken into the beaten eggs, coating it completely and letting any drip off.
7. Roll the egg-coated chicken in the breadcrumbs, pressing gently to form an even, crispy crust.
8. Place the breaded nuggets on a parchment-lined baking sheet in a single layer, and let them rest for 10 minutes to help the coating set—this tip prevents it from falling off during frying.
9. Heat the 1/2 cup avocado oil in a large skillet over medium-high heat until it reaches 350°F, using a thermometer for accuracy to avoid burning.
10. Carefully add the nuggets to the hot oil in batches, frying for 3-4 minutes per side until golden brown and crispy—don’t overcrowd the pan, as this ensures even cooking and a perfect crunch.
11. Transfer the fried nuggets to a wire rack set over a baking sheet to drain excess oil, keeping them crisp instead of soggy.
12. In a small bowl, whisk together the 1/4 cup honey and 1/4 cup Dijon mustard until smooth for a quick dipping sauce.
13. Serve the nuggets immediately with the honey-mustard sauce on the side.
Golden and crunchy on the outside with juicy, tender chicken inside, these nuggets offer a satisfying texture that rivals any store-bought version. For a fun twist, try serving them with a side of sweet potato fries or a fresh salad to balance the richness—they’re versatile enough for any meal or snack time.
Homemade Gluten Free Mac and Cheese

Baking a comforting bowl of mac and cheese doesn’t have to mean compromising on dietary needs—this gluten-free version delivers all the creamy, cheesy goodness you crave, with a simple method perfect for weeknights. By using a few smart swaps and techniques, you’ll create a dish that’s both nostalgic and nourishing, proving that homemade always beats the boxed stuff. Let’s get started with the basics you’ll need to make this family favorite.
Serving: 6 | Pre Time: 15 minutes | Cooking Time: 25 minutes
Ingredients
– 12 oz gluten-free elbow pasta (I like brown rice pasta for its sturdy texture)
– 4 tbsp unsalted butter (I always use grass-fed for a richer flavor)
– 1/4 cup gluten-free all-purpose flour (Bob’s Red Mill is my trusty go-to)
– 2 cups whole milk (room temperature works best to prevent clumping)
– 2 cups shredded sharp cheddar cheese (freshly grated melts smoother than pre-shredded)
– 1/2 tsp garlic powder (a little secret for depth)
– 1/2 tsp paprika (smoked paprika adds a nice kick)
– Salt to taste (I start with 1/2 tsp and adjust later)
Instructions
1. Bring a large pot of salted water to a rolling boil over high heat.
2. Add the gluten-free elbow pasta to the boiling water and cook for 8–10 minutes, stirring occasionally, until al dente (check the package instructions, as gluten-free pasta can vary).
3. Drain the pasta in a colander and set it aside, but do not rinse it—the starch helps the sauce cling better.
4. In the same pot, melt the unsalted butter over medium heat until it’s bubbly and fragrant, about 2 minutes.
5. Whisk in the gluten-free all-purpose flour continuously for 1–2 minutes to form a smooth roux, which will thicken the sauce without lumps.
6. Gradually pour in the whole milk while whisking constantly to incorporate it smoothly into the roux.
7. Cook the mixture, stirring frequently, until it thickens to a creamy consistency that coats the back of a spoon, about 5–7 minutes.
8. Reduce the heat to low and stir in the shredded sharp cheddar cheese until it’s fully melted and the sauce is velvety, which should take 2–3 minutes.
9. Mix in the garlic powder and paprika, then taste and add salt if needed, starting with 1/2 tsp and adjusting to your preference.
10. Add the drained pasta back to the pot and gently toss it with the cheese sauce until every piece is evenly coated, heating for an additional 1–2 minutes to warm through.
Creamy and indulgent, this mac and cheese boasts a smooth texture from the well-emulsified sauce and a bold flavor from the sharp cheddar. For a fun twist, try topping it with crispy breadcrumbs or serving it alongside roasted vegetables to balance the richness.
Rainbow Fruit Skewers with Yogurt Dip
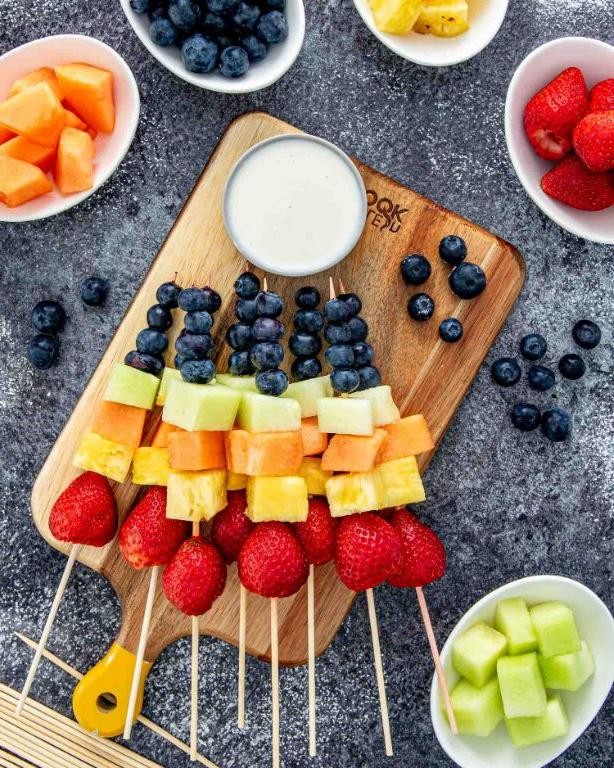
Just in time for holiday gatherings, these vibrant Rainbow Fruit Skewers with Yogurt Dip are a festive, no-bake treat that comes together in minutes. Join me as we walk through each simple step to create this colorful appetizer or dessert that’s sure to brighten any table. Let’s get started!
Serving: 6 | Pre Time: 20 minutes | Cooking Time: 0 minutes
Ingredients
– 1 cup plain Greek yogurt (I love the thick, creamy texture of full-fat for a richer dip)
– 1 tablespoon honey (local raw honey adds a lovely floral note)
– ½ teaspoon pure vanilla extract (my go-to for a warm, aromatic flavor)
– 1 pint fresh strawberries, hulled and halved
– 1 cup fresh pineapple chunks (about 1-inch pieces)
– 1 large banana, sliced into ½-inch rounds (I prefer slightly underripe bananas so they hold their shape better)
– 1 cup green grapes
– 1 cup blueberries
– 6 wooden skewers (soaked in water for 10 minutes to prevent burning—though we’re not cooking, this keeps them splinter-free)
Instructions
1. In a small mixing bowl, combine 1 cup plain Greek yogurt, 1 tablespoon honey, and ½ teaspoon pure vanilla extract.
2. Whisk the yogurt mixture vigorously for about 30 seconds until it’s smooth and fully blended, with no streaks of honey visible.
3. Cover the bowl with plastic wrap and refrigerate the dip for at least 15 minutes to let the flavors meld—this chilling time makes it extra creamy.
4. While the dip chills, prepare your fruits: hull and halve 1 pint of strawberries, cut 1 cup of pineapple into 1-inch chunks, slice 1 large banana into ½-inch rounds, and measure out 1 cup each of green grapes and blueberries.
5. Tip: Arrange the prepped fruits in separate bowls by color to make skewer assembly faster and more organized.
6. Take 6 wooden skewers that have been soaked in water for 10 minutes and pat them dry with a paper towel.
7. Thread the fruits onto each skewer in a rainbow pattern: start with 2 strawberry halves, followed by 2 pineapple chunks, 2 banana slices, 3-4 grapes, and finish with 3-4 blueberries.
8. Tip: Leave about 1 inch of space at the bottom of each skewer for easy handling, and push the fruits snugly together to prevent sliding.
9. Repeat the threading process for all 6 skewers, aiming for even distribution of fruits to ensure each skewer looks vibrant and balanced.
10. Once assembled, arrange the skewers on a serving platter in a single layer to keep them from toppling over.
11. Remove the yogurt dip from the refrigerator and give it a quick stir to refresh its consistency.
12. Tip: For a smoother dip, you can whisk it again for 10-15 seconds before serving to eliminate any separation that occurred during chilling.
13. Place the dip in a small bowl alongside the skewers on the platter.
14. Serve immediately, or cover loosely with plastic wrap and refrigerate for up to 1 hour if preparing ahead.
The resulting skewers offer a delightful crunch from the grapes and blueberries, balanced by the juicy sweetness of strawberries and pineapple, while the banana adds a soft, creamy contrast. This yogurt dip, with its tangy vanilla-honey notes, complements the fresh fruits perfectly—try drizzling any leftover dip over the skewers for an extra indulgent touch, or serve them as a fun, interactive centerpiece at your next brunch.
Gluten Free Mini Muffins
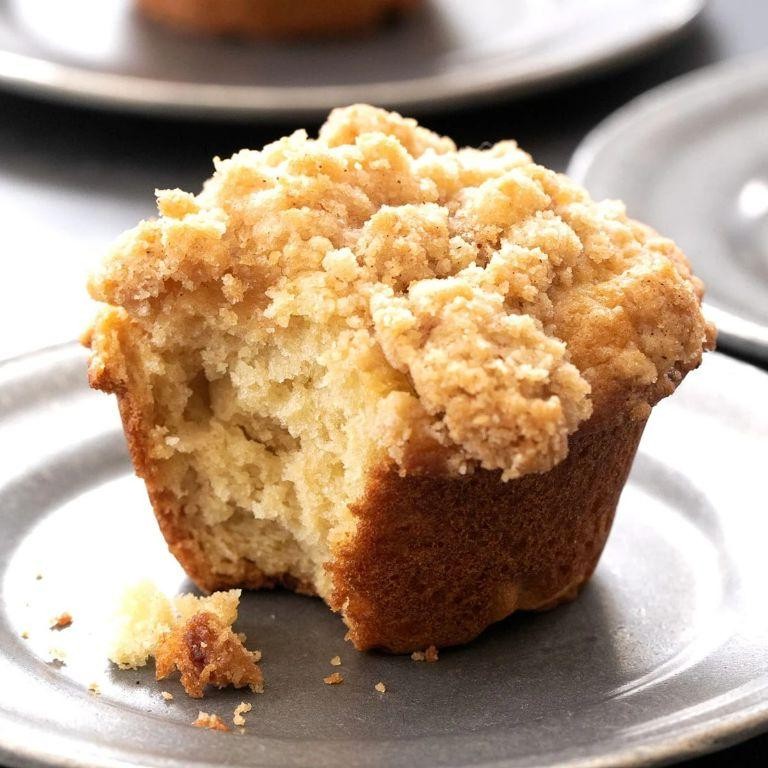
Whether you’re hosting a holiday brunch or need a quick gluten-free snack, these mini muffins are a delightful treat that everyone can enjoy. They’re simple to make with common pantry ingredients and bake up tender and flavorful in just minutes. Let’s walk through each step together so you can master this recipe on your first try.
Serving: 24 mini muffins | Pre Time: 15 minutes | Cooking Time: 12 minutes
Ingredients
– 1 cup gluten-free all-purpose flour blend (I like Bob’s Red Mill 1-to-1 for reliable results)
– 1/2 cup granulated sugar
– 1 tsp baking powder
– 1/4 tsp salt
– 1/2 cup whole milk, at room temperature for better mixing
– 1/4 cup unsalted butter, melted and slightly cooled (I always use unsalted to control the saltiness)
– 1 large egg, at room temperature to help the batter emulsify smoothly
– 1 tsp pure vanilla extract (the real stuff makes a noticeable difference in flavor)
Instructions
1. Preheat your oven to 375°F and lightly grease a 24-cup mini muffin tin with butter or non-stick spray.
2. In a medium bowl, whisk together the gluten-free flour blend, granulated sugar, baking powder, and salt until well combined.
3. In a separate large bowl, whisk the whole milk, melted unsalted butter, large egg, and pure vanilla extract until fully blended and smooth.
4. Tip: Add the dry ingredients to the wet ingredients gradually to prevent lumps—this ensures an even batter.
5. Gently fold the dry mixture into the wet mixture using a spatula until just combined; avoid overmixing to keep the muffins tender.
6. Spoon the batter evenly into the prepared mini muffin cups, filling each about 3/4 full.
7. Bake in the preheated oven at 375°F for 10–12 minutes, or until the tops are lightly golden and a toothpick inserted into the center comes out clean.
8. Tip: Rotate the muffin tin halfway through baking for even browning if your oven has hot spots.
9. Remove the muffin tin from the oven and let the muffins cool in the pan for 5 minutes to set.
10. Carefully transfer the muffins to a wire rack to cool completely.
11. Tip: Store any leftovers in an airtight container at room temperature for up to 3 days to maintain freshness.
Finally, these gluten-free mini muffins boast a soft, cake-like texture with a subtle sweetness from the vanilla. For a creative twist, serve them warm with a dollop of honey butter or alongside fresh berries for a colorful brunch spread.
Gluten Free Veggie Quesadillas
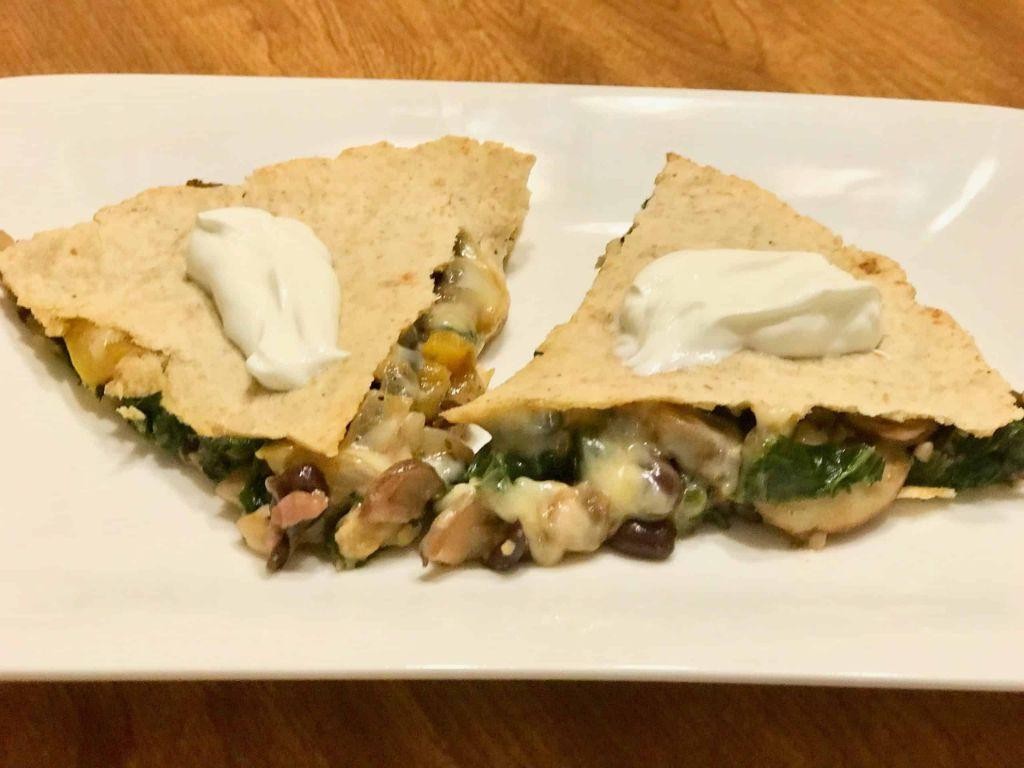
Gathering around the table for a quick, satisfying meal doesn’t have to be complicated, especially when you need a gluten-free option. Let’s walk through making these veggie-packed quesadillas together, step by step, so you can enjoy a crispy, cheesy dinner in no time.
Serving: 4 | Pre Time: 15 minutes | Cooking Time: 10 minutes
Ingredients
– 4 gluten-free tortillas (I like the ones that crisp up nicely without getting brittle)
– 1 cup shredded Monterey Jack cheese (a melty favorite that holds everything together)
– 1 tbsp extra virgin olive oil (my go-to for a light, flavorful sauté)
– 1 bell pepper, thinly sliced (I prefer red for its sweetness)
– 1 small zucchini, thinly sliced into half-moons
– 1/2 tsp ground cumin (it adds a warm, earthy note that I love)
– 1/4 tsp salt
Instructions
1. Heat 1 tbsp extra virgin olive oil in a large skillet over medium heat until it shimmers, about 1 minute.
2. Add 1 bell pepper, thinly sliced, and 1 small zucchini, thinly sliced, to the skillet. (Tip: Slicing veggies thinly ensures they cook quickly and evenly.)
3. Sauté the vegetables for 5-7 minutes, stirring occasionally, until they are tender and slightly browned.
4. Sprinkle 1/2 tsp ground cumin and 1/4 tsp salt over the vegetables, stir to combine, and cook for 1 more minute to toast the spices. Remove the skillet from the heat.
5. Place one gluten-free tortilla flat on a clean surface. Spread 1/4 cup of the cooked vegetables evenly over half of the tortilla.
6. Top the vegetables with 1/4 cup shredded Monterey Jack cheese. (Tip: Keep the filling on one half to make folding easier.)
7. Fold the empty half of the tortilla over the filling to create a half-moon shape, pressing gently.
8. Wipe the skillet clean with a paper towel and return it to medium heat. (Tip: A dry, hot skillet helps achieve a crispy exterior without extra oil.)
9. Cook the quesadilla for 2-3 minutes per side, until golden brown and the cheese is melted, pressing down lightly with a spatula.
10. Repeat steps 5-9 with the remaining tortillas, vegetables, and cheese.
Now you have a batch of golden, crispy quesadillas ready to enjoy. Notice how the melted cheese binds the tender veggies, while the cumin adds a subtle warmth. For a fun twist, serve them with a dollop of guacamole or a squeeze of lime to brighten up each bite.
Turkey and Cheese Roll-Ups with Lettuce
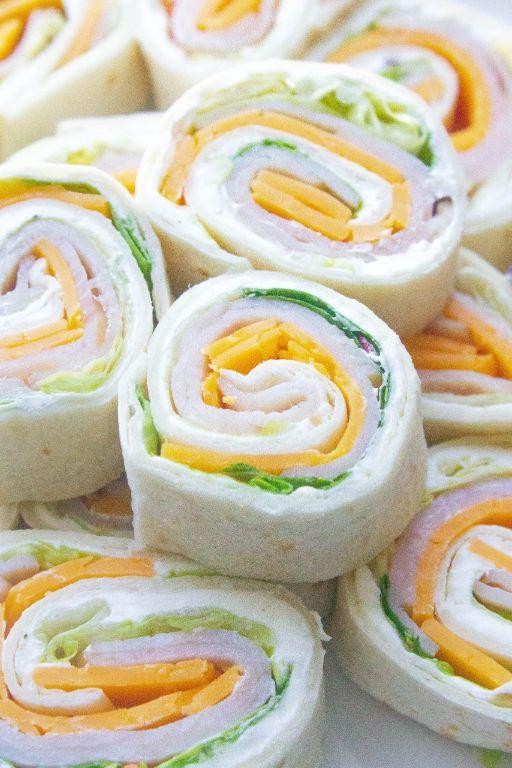
Often, the simplest recipes become the most cherished weeknight staples, and these Turkey and Cheese Roll-Ups are a perfect example—they’re quick, satisfying, and endlessly customizable. Let’s walk through making them together, step by step, so you can have a delicious, no-fuss meal ready in minutes.
Serving: 4 | Pre Time: 10 minutes | Cooking Time: 0 minutes
Ingredients
– 8 large flour tortillas (I like the soft, pliable ones for easy rolling)
– 1 lb thinly sliced turkey breast (deli-style works great here)
– 8 slices provolone cheese (sharp cheddar is a tasty alternative if you prefer)
– 1 head romaine lettuce, washed and dried thoroughly (crisp leaves are key for texture)
– 1/2 cup mayonnaise (I always use full-fat for the best creaminess)
– 2 tbsp Dijon mustard (a little tanginess balances the flavors perfectly)
Instructions
1. Lay one flour tortilla flat on a clean cutting board or countertop.
2. Spread 1 tablespoon of mayonnaise evenly over the entire surface of the tortilla, leaving a 1/2-inch border around the edges to prevent overflow.
3. Dot 3/4 teaspoon of Dijon mustard across the mayonnaise layer, using the back of a spoon to swirl it gently for even distribution.
4. Place 2 ounces of thinly sliced turkey breast in a single layer over the spread, covering most of the tortilla but avoiding the border.
5. Lay one slice of provolone cheese on top of the turkey, positioning it slightly off-center to help with rolling.
6. Arrange 2 to 3 large romaine lettuce leaves over the cheese, tearing them if needed to fit without overlapping too much.
7. Starting from the side closest to you, tightly roll the tortilla away from you, tucking in the ingredients as you go to create a firm cylinder.
8. Repeat steps 1 through 7 with the remaining tortillas and ingredients until all 8 roll-ups are assembled.
9. Use a sharp serrated knife to slice each roll-up in half crosswise, applying gentle pressure to avoid squishing the fillings.
10. Arrange the halves on a serving platter, cut sides up to showcase the colorful layers.
A delightful crunch from the fresh lettuce contrasts with the creamy, savory fillings, making each bite satisfyingly balanced. For a fun twist, serve these roll-ups alongside a bowl of tomato soup for dipping, or pack them whole in lunchboxes—they hold up beautifully for hours without getting soggy.
Gluten Free Spaghetti with Hidden Veggie Sauce
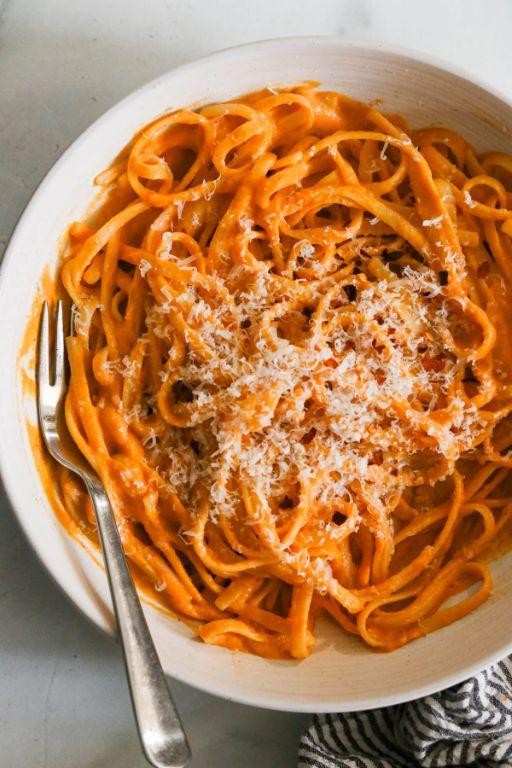
Here’s a gluten-free spaghetti recipe that cleverly sneaks vegetables into a rich, satisfying sauce—perfect for picky eaters or anyone wanting a nutrient boost without sacrificing flavor. This methodical approach ensures success even for beginners, with each step building toward a comforting, family-friendly meal.
Serving: 4 | Pre Time: 15 minutes | Cooking Time: 25 minutes
Ingredients
– 12 oz gluten-free spaghetti (I like brands with brown rice flour for better texture)
– 2 tbsp extra virgin olive oil (my go-to for its fruity aroma)
– 1 medium yellow onion, finely diced
– 3 cloves garlic, minced (fresh is best here for vibrant flavor)
– 1 large carrot, peeled and grated
– 1 medium zucchini, grated (squeeze out excess moisture with your hands)
– 1 (28 oz) can crushed tomatoes (I prefer San Marzano for sweetness)
– 1 tsp dried oregano
– ½ tsp salt
– ¼ tsp black pepper
– Fresh basil leaves for garnish (a handful torn right before serving)
Instructions
1. Bring a large pot of salted water to a rolling boil over high heat.
2. Add the gluten-free spaghetti and cook for 8–10 minutes, stirring occasionally to prevent sticking, until al dente (check package directions, as times vary).
3. Drain the spaghetti in a colander and set aside, reserving ½ cup of pasta water.
4. While the pasta cooks, heat the olive oil in a large skillet over medium heat until it shimmers, about 1 minute.
5. Add the diced onion and cook for 4–5 minutes, stirring frequently, until translucent and soft.
6. Stir in the minced garlic and cook for 30 seconds, just until fragrant to avoid burning.
7. Add the grated carrot and zucchini to the skillet, cooking for 3–4 minutes until they soften and blend into the mixture.
8. Pour in the crushed tomatoes, oregano, salt, and pepper, stirring to combine.
9. Reduce the heat to low and simmer the sauce uncovered for 10–12 minutes, stirring occasionally, until it thickens slightly.
10. Tip: If the sauce seems too thick, stir in the reserved pasta water 1 tablespoon at a time to reach your desired consistency.
11. Add the drained spaghetti to the skillet with the sauce, tossing gently to coat every strand evenly.
12. Remove from heat and garnish with torn fresh basil leaves.
Rely on this dish for its velvety sauce that clings to the spaghetti, with a subtle sweetness from the hidden veggies balancing the tangy tomatoes. Serve it topped with a sprinkle of nutritional yeast for a cheesy flavor or alongside a crisp green salad to round out the meal—it’s versatile enough for weeknights yet special enough for gatherings.
Quinoa and Veggie Stuffed Peppers
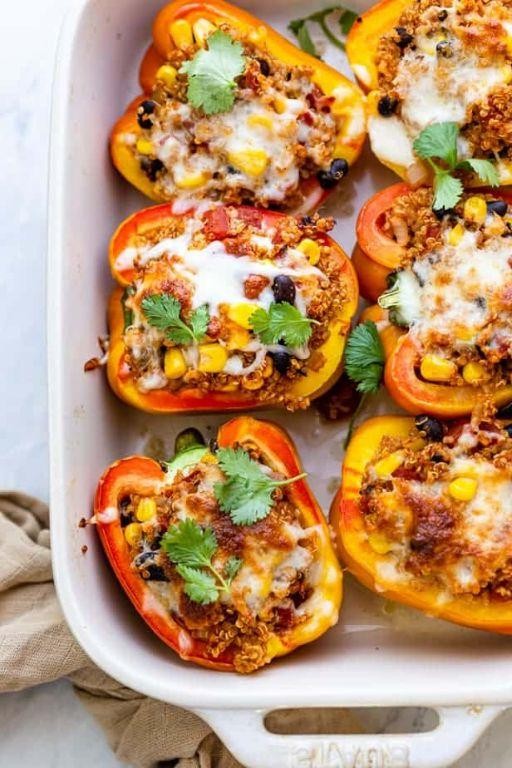
Discovering a wholesome meal that’s both nutritious and satisfying can be a delightful kitchen adventure. Quinoa and Veggie Stuffed Peppers are a perfect example—they combine vibrant bell peppers with a hearty, protein-packed filling for a complete dinner that feels special yet is straightforward to prepare. Let’s walk through making them together, step by step, so you can enjoy this colorful dish with confidence.
Serving: 4 | Pre Time: 20 minutes | Cooking Time: 40 minutes
Ingredients
– 4 large bell peppers, any color you like—I often mix red and yellow for a cheerful look
– 1 cup quinoa, rinsed well to remove any bitterness
– 2 cups vegetable broth, which adds more flavor than water
– 1 tablespoon extra virgin olive oil, my go-to for sautéing
– 1 small onion, finely diced
– 2 cloves garlic, minced—fresh is best for that aromatic punch
– 1 cup corn kernels, frozen works great here and saves time
– 1 cup black beans, rinsed and drained from a can for convenience
– 1 teaspoon ground cumin, for a warm, earthy note
– 1/2 teaspoon smoked paprika, which gives a subtle smoky depth
– 1/2 cup shredded cheddar cheese, plus extra for topping if you’re a cheese lover like me
– Salt, to season the filling evenly
Instructions
1. Preheat your oven to 375°F (190°C) to ensure it’s ready for baking.
2. Slice the tops off the bell peppers and remove the seeds and membranes, creating hollow shells for stuffing.
3. Place the peppers upright in a baking dish, and if they wobble, trim a tiny bit off the bottoms to help them stand steady—a handy tip for even cooking.
4. In a medium saucepan, combine the rinsed quinoa and vegetable broth, bring to a boil over high heat, then reduce to a simmer, cover, and cook for 15 minutes until the liquid is absorbed and quinoa is fluffy.
5. While the quinoa cooks, heat the olive oil in a large skillet over medium heat, then add the diced onion and sauté for 5 minutes until softened and translucent.
6. Add the minced garlic to the skillet and cook for 1 more minute, stirring constantly to prevent burning—garlic can turn bitter if overcooked.
7. Stir in the corn, black beans, cumin, and smoked paprika, and cook for 3-4 minutes until heated through, then remove from heat.
8. Fluff the cooked quinoa with a fork and mix it into the skillet with the veggie mixture, along with the shredded cheddar cheese and a pinch of salt, combining everything evenly.
9. Spoon the quinoa filling into the prepared bell peppers, packing it gently but firmly to fill them to the top.
10. Cover the baking dish with aluminum foil and bake at 375°F for 30 minutes, then remove the foil and bake for an additional 10 minutes until the peppers are tender and the filling is hot.
11. For a golden finish, sprinkle a little extra cheese on top during the last 5 minutes of baking if desired.
So, you’ll end up with peppers that are tender yet hold their shape, cradling a savory filling with a satisfying chew from the quinoa and beans. Serve them hot, perhaps with a dollop of sour cream or a fresh side salad, for a meal that’s as visually appealing as it is delicious.
Gluten Free Blueberry Waffles
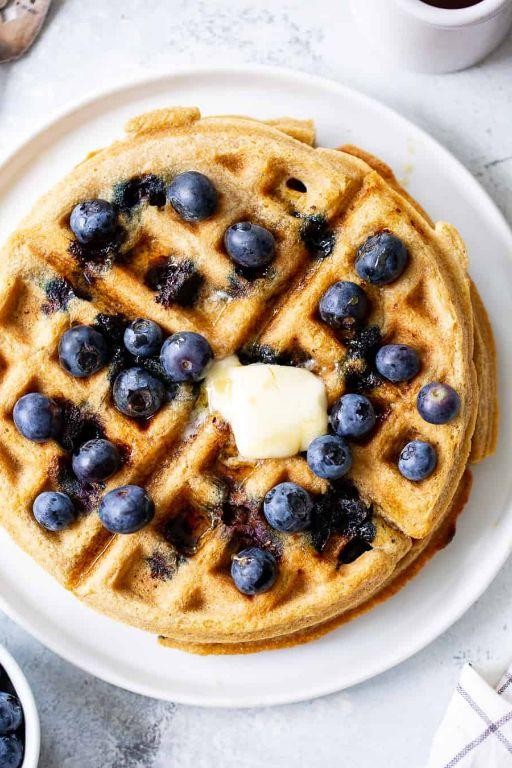
Gluten-free baking doesn’t have to be complicated, and these blueberry waffles prove just that. Get ready for a breakfast treat that’s both delicious and easy to make, perfect for a cozy morning at home.
Serving: 4 | Pre Time: 10 minutes | Cooking Time: 15 minutes
Ingredients
– 1 ½ cups gluten-free all-purpose flour (I like Bob’s Red Mill for its reliable texture)
– 2 tsp baking powder (make sure it’s fresh for maximum fluffiness)
– ¼ tsp salt (I prefer fine sea salt for even distribution)
– 2 large eggs, at room temperature (this helps them blend smoothly)
– 1 ¼ cups whole milk (you can substitute with almond milk if preferred)
– ¼ cup melted unsalted butter, cooled slightly (extra virgin olive oil works too, but butter adds richness)
– 2 tbsp granulated sugar (adjust to your sweetness preference)
– 1 tsp pure vanilla extract (the real stuff makes a difference)
– 1 cup fresh blueberries, rinsed and patted dry (frozen ones work, but thaw and drain them first)
– Non-stick cooking spray or extra butter for greasing
Instructions
1. Preheat your waffle iron to 375°F (medium-high setting) and lightly grease it with non-stick cooking spray or butter to prevent sticking.
2. In a large mixing bowl, whisk together 1 ½ cups gluten-free all-purpose flour, 2 tsp baking powder, and ¼ tsp salt until well combined, about 30 seconds.
3. In a separate medium bowl, crack 2 large eggs and beat them with a fork until frothy, approximately 1 minute.
4. Add 1 ¼ cups whole milk, ¼ cup melted unsalted butter, 2 tbsp granulated sugar, and 1 tsp pure vanilla extract to the beaten eggs, whisking until smooth, about 2 minutes.
5. Pour the wet ingredients into the dry ingredients and stir gently with a spatula until just combined; do not overmix to avoid tough waffles.
6. Gently fold in 1 cup fresh blueberries with a few strokes to distribute them evenly without crushing.
7. Scoop about ½ cup of batter onto the center of the preheated waffle iron, close the lid, and cook for 4-5 minutes, or until golden brown and crisp.
8. Carefully remove the waffle with a fork and repeat with the remaining batter, greasing the iron lightly between batches if needed.
9. Serve the waffles immediately while hot. A final tip: if making ahead, keep them warm in a 200°F oven on a baking sheet to maintain crispness.
All done! These waffles boast a tender, fluffy interior with bursts of juicy blueberries and a satisfyingly crisp exterior. Try topping them with a dollop of Greek yogurt and a drizzle of maple syrup for a delightful contrast, or stack them high for a festive brunch centerpiece that everyone will love.
Cauliflower Tots with Dipping Sauce
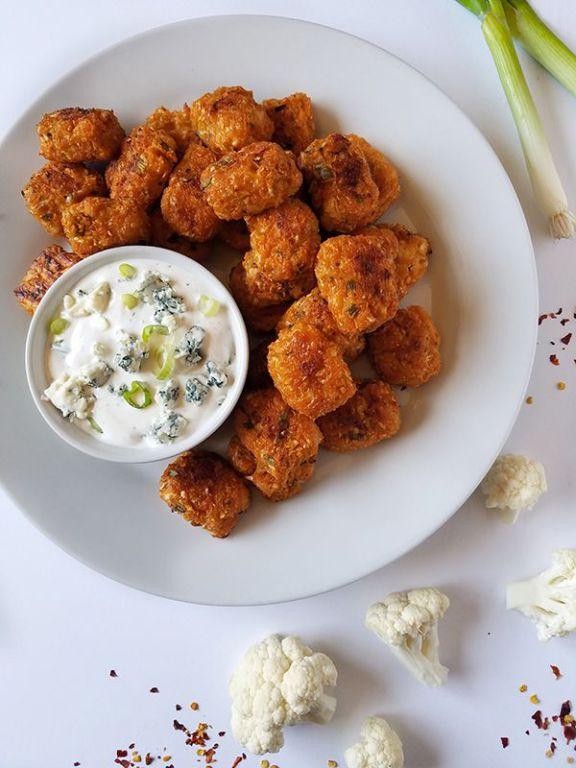
Delightfully crispy on the outside and tender within, these cauliflower tots are a clever veggie-packed twist on a classic snack that’s perfect for gatherings or a fun weeknight treat. Diving into this recipe, you’ll find it’s surprisingly simple to whip up, requiring just a handful of ingredients and a bit of hands-on shaping. Let’s get started—you’ll be amazed at how a humble head of cauliflower transforms into such a crowd-pleaser.
Serving: 4 | Pre Time: 20 minutes | Cooking Time: 25 minutes
Ingredients
– 1 medium head of cauliflower, cut into florets (I like to use fresh for the best texture, but frozen works in a pinch)
– 1 large egg, lightly beaten (room temp eggs blend more smoothly, so I set mine out ahead)
– 1/2 cup grated Parmesan cheese (the pre-grated kind is fine, but freshly grated melts beautifully)
– 1/4 cup all-purpose flour (I keep mine handy for binding—it’s my go-to for these tots)
– 1/2 teaspoon garlic powder (a little goes a long way to add savory depth)
– 1/2 teaspoon salt (I use fine sea salt for even distribution)
– 1/4 teaspoon black pepper (freshly ground pepper gives a nice kick)
– 2 tablespoons olive oil (extra virgin olive oil is my favorite for its fruity notes)
– 1/2 cup mayonnaise (I prefer full-fat for creaminess, but any type works)
– 2 tablespoons ketchup (a classic pairing that never disappoints)
– 1 teaspoon smoked paprika (this adds a subtle smoky flavor to the sauce)
Instructions
1. Preheat your oven to 400°F and line a baking sheet with parchment paper.
2. Steam the cauliflower florets in a pot with a steamer basket over boiling water for 8-10 minutes, until fork-tender—tip: don’t overcook, or they’ll become mushy.
3. Drain the cauliflower thoroughly in a colander, then transfer it to a clean kitchen towel and squeeze out as much moisture as possible; this step is key for crispy tots.
4. In a large bowl, mash the cauliflower with a fork until it resembles coarse crumbs.
5. Add the beaten egg, grated Parmesan, all-purpose flour, garlic powder, salt, and black pepper to the bowl.
6. Mix everything together with your hands until well combined and the mixture holds together when pressed.
7. Shape the mixture into small tot shapes, about 1 inch long, and place them on the prepared baking sheet.
8. Brush the tots lightly with olive oil using a pastry brush—tip: this helps them brown evenly in the oven.
9. Bake in the preheated oven for 20-25 minutes, flipping halfway through, until golden brown and crispy.
10. While the tots bake, whisk together the mayonnaise, ketchup, and smoked paprika in a small bowl until smooth for the dipping sauce.
11. Remove the tots from the oven and let them cool on the baking sheet for 5 minutes to firm up.
12. Serve the cauliflower tots warm with the dipping sauce on the side.
Lovingly crisp and golden, these tots offer a satisfying crunch that gives way to a soft, savory interior. Their mild cauliflower flavor pairs wonderfully with the tangy, smoky dipping sauce, making them irresistible for dipping. For a creative twist, try serving them alongside a fresh salad or as a playful appetizer at your next dinner party—they’re sure to disappear quickly!
Strawberry Chia Seed Pudding

Venturing into healthy breakfasts doesn’t have to be complicated, and this Strawberry Chia Seed Pudding is the perfect proof. It’s a simple, make-ahead dish where a few basic ingredients transform overnight into a creamy, satisfying treat. Let’s walk through each step together to ensure your first batch is a success.
Serving: 4 | Pre Time: 10 minutes | Cooking Time: 0 minutes
Ingredients
– 2 cups fresh strawberries, hulled and sliced (frozen work too, but fresh gives the brightest flavor)
– 1/4 cup pure maple syrup, my favorite natural sweetener for its rich depth
– 1 teaspoon pure vanilla extract, which I always splurge on for the best aroma
– 1 1/2 cups unsweetened almond milk, though any milk you love will do
– 1/2 cup chia seeds, the tiny powerhouses that create the pudding’s texture
Instructions
1. Place the sliced strawberries, maple syrup, and vanilla extract into a blender.
2. Blend the mixture on high speed for about 30 seconds until it becomes a completely smooth puree with no chunks.
3. Pour the strawberry puree into a large mixing bowl or a 4-cup glass measuring cup with a spout for easy pouring later.
4. Add the unsweetened almond milk to the bowl with the strawberry puree.
5. Use a whisk to vigorously stir the almond milk and strawberry puree together until they are fully combined and uniform in color.
6. Sprinkle the chia seeds into the liquid mixture in the bowl.
7. Immediately whisk the chia seeds into the liquid for a full 60 seconds to prevent them from clumping together as they start to absorb the liquid.
8. Cover the bowl tightly with plastic wrap or a lid.
9. Place the covered bowl in the refrigerator for a minimum of 4 hours, but I always recommend leaving it overnight for the best, thickest texture.
10. After chilling, remove the bowl from the refrigerator and give the pudding a final stir to incorporate any seeds that settled.
11. Divide the pudding evenly among four serving glasses or bowls.
12. Serve the pudding immediately, or return the individual servings to the refrigerator until ready to eat.
Dense and creamy with a subtle crunch from the seeds, this pudding delights with its vibrant strawberry flavor. For a creative twist, I love layering it in a glass with granola and fresh berry slices for a parfait, or topping it with a dollop of coconut whipped cream for extra indulgence.
Summary
Mouthwatering and nutritious, these gluten-free recipes make family meals a breeze. We hope this collection inspires you to whip up something delicious for your little ones. Give a recipe a try, leave a comment with your family’s favorite, and don’t forget to share the love by pinning this article on Pinterest for other parents to discover!


