
Venture beyond the usual with canned chicken! Whether you’re racing against the clock for a weeknight dinner or craving a comforting, protein-packed meal, this versatile pantry staple is your secret weapon. We’ve rounded up 20 quick, healthy, and delicious recipes that transform simple canned chicken into something truly special. Get ready to be inspired—your next favorite meal is just a scroll away.
Healthy Canned Chicken Salad with Greek Yogurt
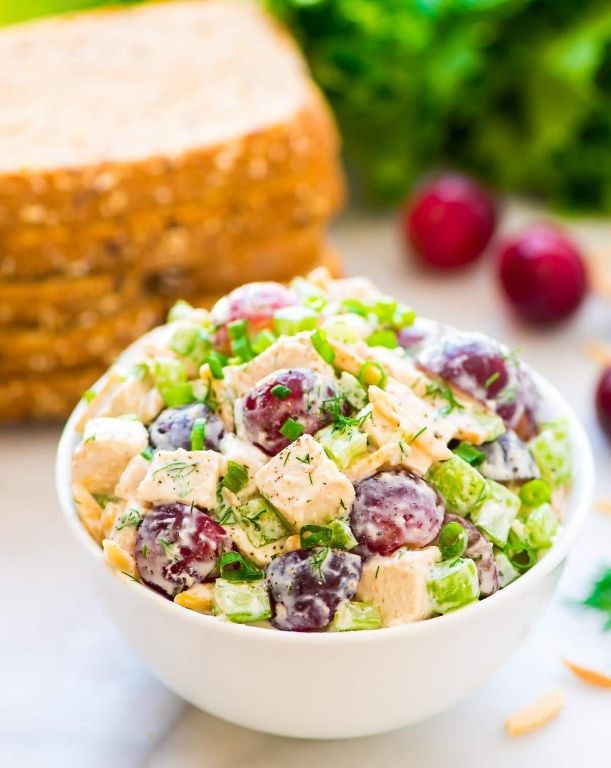
Lately, I’ve been craving something simple yet satisfying—a meal that doesn’t demand much from me on these quiet afternoons. This canned chicken salad, made creamy with Greek yogurt instead of mayonnaise, feels like a gentle nod to both nourishment and ease, a small act of care in a busy season.
Serving: 4 | Pre Time: 15 minutes | Cooking Time: 0 minutes
Ingredients
– Canned chicken – 2 (12.5 oz) cans
– Plain Greek yogurt – ¾ cup
– Celery – ½ cup, finely chopped
– Red onion – ¼ cup, finely chopped
– Lemon juice – 2 tbsp
– Dijon mustard – 1 tsp
– Salt – ½ tsp
– Black pepper – ¼ tsp
Instructions
1. Drain the canned chicken thoroughly in a colander for 2 minutes to remove excess liquid, then transfer it to a large mixing bowl.
2. Use a fork to shred the chicken into fine pieces, breaking apart any large chunks until the texture is uniformly flaky.
3. Add the Greek yogurt, lemon juice, and Dijon mustard to the bowl, stirring gently with a spatula until the mixture is evenly combined and creamy.
4. Fold in the finely chopped celery and red onion, distributing them throughout the salad to add crunch and a subtle sharpness.
5. Season the mixture with salt and black pepper, stirring again for 30 seconds to ensure the flavors are well integrated.
6. Cover the bowl with plastic wrap and refrigerate the salad for at least 1 hour to allow the ingredients to meld and chill thoroughly.
7. Before serving, give the salad a final stir and adjust seasoning if needed, tasting for balance between tangy and savory notes.
Bright and refreshing, this salad offers a creamy texture with pleasant bites of celery, while the lemon juice cuts through the richness for a light finish. Try it stuffed into whole-wheat pitas with crisp lettuce, or spread over toasted sourdough for a quick, protein-packed lunch that feels both wholesome and indulgent.
Low-Carb Canned Chicken Lettuce Wraps
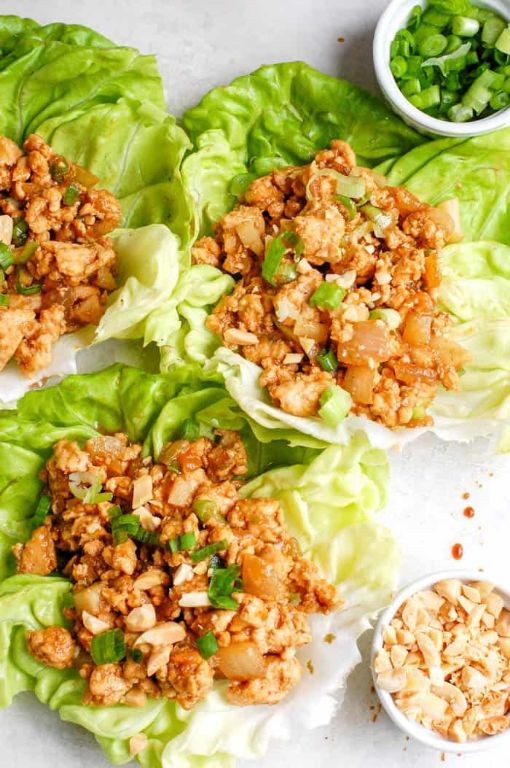
Holding a can of chicken in my hand, I pause to consider how something so simple can transform into a meal that feels both nourishing and intentional. In this quiet kitchen moment, I’m reminded that eating well doesn’t require complexity, just a few thoughtful touches to turn pantry staples into something special.
Serving: 4 | Pre Time: 10 minutes | Cooking Time: 5 minutes
Ingredients
– Canned chicken – 2 (12.5 oz) cans
– Mayonnaise – ¼ cup
– Dijon mustard – 1 tbsp
– Lemon juice – 1 tbsp
– Salt – ½ tsp
– Black pepper – ¼ tsp
– Butter lettuce leaves – 8 large leaves
Instructions
1. Drain both cans of chicken completely in a colander, pressing gently with a spoon to remove excess liquid—this prevents the mixture from becoming watery.
2. Transfer the drained chicken to a medium mixing bowl and use a fork to flake it into fine, even shreds, breaking up any large chunks for a uniform texture.
3. Add the mayonnaise, Dijon mustard, lemon juice, salt, and black pepper directly to the bowl with the chicken.
4. Stir all ingredients together with a spatula for about 1 minute, until fully combined and creamy, ensuring no dry spots remain.
5. Taste the mixture and adjust seasoning if needed, but avoid overmixing to keep it light and fluffy.
6. Rinse the butter lettuce leaves under cold water and pat them completely dry with paper towels—this helps the wraps hold together without slipping.
7. Spoon approximately ¼ cup of the chicken mixture onto the center of each lettuce leaf, spreading it slightly but leaving a border to prevent spillage.
8. Serve immediately, or cover and refrigerate for up to 1 hour to let the flavors meld, though the lettuce is best when crisp and fresh.
Vividly crisp lettuce cradles the creamy, tangy chicken, offering a satisfying crunch with each bite that contrasts the soft filling. For a creative twist, top these wraps with a sprinkle of sesame seeds or a drizzle of sriracha before folding, adding a subtle heat that complements the mild flavors beautifully.
Canned Chicken and Quinoa Stuffed Peppers

Facing the quiet hum of the kitchen, I find comfort in the simple act of transforming humble ingredients into something warm and nourishing. This recipe, born from pantry staples, is a gentle reminder that a satisfying meal doesn’t require complexity, just a bit of care and time.
Serving: 4 | Pre Time: 15 minutes | Cooking Time: 45 minutes
Ingredients
– Bell peppers – 4 large
– Canned chicken – 2 (12.5 oz) cans
– Cooked quinoa – 2 cups
– Shredded cheddar cheese – 1 cup
– Olive oil – 2 tbsp
– Salt – 1 tsp
– Black pepper – ½ tsp
Instructions
1. Preheat your oven to 375°F.
2. Slice the tops off the bell peppers and remove all seeds and membranes from the inside.
3. Place the hollowed peppers upright in a baking dish just large enough to hold them snugly.
4. Drizzle 1 tablespoon of olive oil over the peppers, ensuring the insides are lightly coated to prevent sticking.
5. In a large mixing bowl, combine the canned chicken, cooked quinoa, ¾ cup of shredded cheddar cheese, salt, and black pepper.
6. Gently mix the filling with a fork until everything is evenly distributed, being careful not to break the chicken down too finely for better texture.
7. Spoon the chicken and quinoa mixture into each pepper, packing it down lightly and mounding it slightly at the top.
8. Top each stuffed pepper with the remaining ¼ cup of shredded cheddar cheese.
9. Drizzle the remaining 1 tablespoon of olive oil over the cheese-topped peppers.
10. Cover the baking dish tightly with aluminum foil.
11. Bake at 375°F for 30 minutes.
12. Remove the foil and continue baking for an additional 15 minutes, or until the cheese is fully melted and the pepper skins are tender with slight charring at the edges.
13. Let the peppers rest in the baking dish for 5 minutes before serving to allow the filling to set.
Ultimately, these peppers offer a delightful contrast: the tender, yielding flesh of the bell pepper gives way to a hearty, slightly grainy filling from the quinoa, all bound together by the creamy, savory notes of chicken and cheese. For a bright finish, consider serving them with a simple side salad or a dollop of cool sour cream to cut through the richness.
Easy Canned Chicken Avocado Wraps
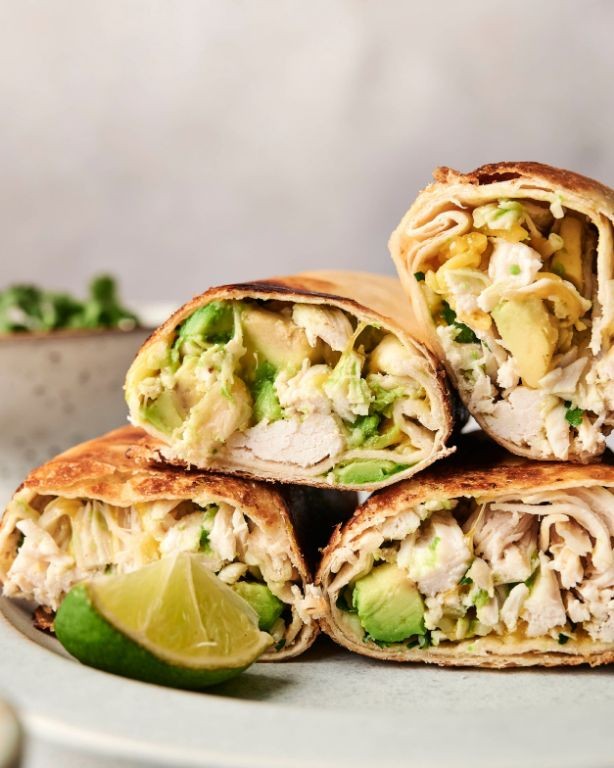
Venturing into the kitchen on a quiet afternoon, I find myself drawn to simplicity—to meals that feel like a gentle exhale rather than a project. This recipe is just that: a soft assembly of pantry staples and fresh, creamy avocado, wrapped up for a moment of quiet nourishment.
Serving: 4 | Pre Time: 10 minutes | Cooking Time: 0 minutes
Ingredients
– Canned chicken – 1 (12.5 oz) can
– Avocado – 1 large
– Lime juice – 1 tbsp
– Salt – ¼ tsp
– Black pepper – ⅛ tsp
– Large flour tortillas – 4
Instructions
1. Drain the canned chicken thoroughly in a colander over the sink, pressing gently with a fork to remove excess liquid for a less soggy texture.
2. Place the drained chicken in a medium mixing bowl.
3. Cut the avocado in half, remove the pit, and scoop the flesh into the bowl with the chicken.
4. Add the lime juice, salt, and black pepper to the bowl.
5. Mash the mixture with a fork until the avocado is creamy and the ingredients are well combined, but leave some small chunks of chicken for texture.
6. Lay one flour tortilla flat on a clean surface.
7. Spoon one-quarter of the chicken-avocado mixture onto the center of the tortilla.
8. Fold the bottom edge of the tortilla up over the filling, then fold in the sides, and roll tightly from the bottom to form a wrap. Tip: If the tortillas are stiff, warm them in a dry skillet over medium heat for 10-15 seconds per side to make them more pliable and prevent tearing.
9. Repeat steps 6-8 with the remaining tortillas and filling.
10. Serve the wraps immediately. Tip: For a crispier exterior, you can lightly toast the assembled wraps in a skillet over medium heat for 1-2 minutes per side until golden brown.
Mellow and creamy, the avocado melds with the tender chicken, offering a smooth, rich bite that’s brightened by the hint of lime. The wraps hold together neatly, making them perfect for a quiet lunch at the kitchen table or wrapped in parchment for a gentle picnic under a tree. Try drizzling them with a little hot sauce or serving alongside crisp carrot sticks for a subtle contrast in texture.
Healthy Canned Chicken Soup with Vegetables

Wandering through the kitchen on this quiet afternoon, I find myself craving something simple yet nourishing—a soup that requires little effort but offers deep comfort. This canned chicken soup with vegetables is my gentle answer to that craving, a humble bowl that feels like a warm embrace on a chilly day.
Serving: 4 | Pre Time: 10 minutes | Cooking Time: 25 minutes
Ingredients
– Olive oil – 1 tbsp
– Onion – 1 medium, diced
– Carrots – 2 medium, sliced into rounds
– Celery – 2 stalks, chopped
– Canned chicken – 12.5 oz can, drained
– Low-sodium chicken broth – 4 cups
– Dried thyme – ½ tsp
– Salt – ¼ tsp
– Black pepper – ⅛ tsp
– Frozen peas – 1 cup
Instructions
1. Heat olive oil in a large pot over medium heat until it shimmers lightly, about 1 minute.
2. Add diced onion, sliced carrots, and chopped celery to the pot, stirring to coat them in the oil.
3. Sauté the vegetables for 8–10 minutes, stirring occasionally, until the onion turns translucent and the carrots begin to soften at the edges.
4. Tip: Let the vegetables cook undisturbed for a minute between stirs to develop a subtle caramelized flavor.
5. Pour in the low-sodium chicken broth, scraping the bottom of the pot to release any browned bits.
6. Stir in the drained canned chicken, dried thyme, salt, and black pepper.
7. Bring the soup to a gentle boil, then reduce the heat to low and cover the pot with a lid.
8. Simmer the soup for 15 minutes, checking that it maintains a slow bubble without boiling over.
9. Tip: Simmering with the lid on helps retain moisture and meld the flavors evenly.
10. Add the frozen peas to the pot and stir gently to distribute them throughout the soup.
11. Continue simmering uncovered for 5 minutes, until the peas are heated through and tender but still bright green.
12. Tip: Add the peas late in the cooking process to preserve their vibrant color and fresh taste.
13. Remove the pot from the heat and let the soup rest for 2 minutes before serving.
14. Ladle the soup into bowls while it’s still warm.
Each spoonful offers a tender mix of soft chicken and crisp-tender vegetables in a subtly savory broth. Enjoy it as is, or for a heartier meal, serve it over a scoop of cooked quinoa or with a slice of crusty whole-grain bread on the side.
Canned Chicken and Black Bean Burrito Bowls

Zipping open a can of chicken on a quiet afternoon feels like uncovering a small, practical treasure—a shortcut to warmth without the fuss. This bowl comes together with humble pantry staples, each ingredient whispering comfort as it simmers, inviting you to slow down and savor the simplicity of a meal that feels both nourishing and effortless.
Serving: 2 | Pre Time: 5 minutes | Cooking Time: 15 minutes
Ingredients
– Canned chicken – 1 (12.5 oz) can
– Black beans – 1 (15 oz) can
– White rice – 1 cup
– Water – 2 cups
– Olive oil – 1 tbsp
– Chili powder – 1 tsp
– Cumin – ½ tsp
– Salt – ¼ tsp
Instructions
1. Rinse 1 cup of white rice under cold water in a fine-mesh strainer until the water runs clear, which removes excess starch for fluffier grains.
2. In a medium saucepan, combine the rinsed rice and 2 cups of water, then bring to a boil over high heat.
3. Once boiling, reduce the heat to low, cover the saucepan, and simmer for 15 minutes exactly without lifting the lid, allowing the rice to steam properly.
4. While the rice cooks, heat 1 tbsp of olive oil in a skillet over medium heat until it shimmers lightly.
5. Drain the liquid from 1 can of chicken and add the chicken to the skillet, breaking it apart with a spatula into shreds.
6. Cook the chicken for 3–4 minutes, stirring occasionally, until it turns lightly golden and heated through.
7. Drain and rinse 1 can of black beans under cold water to reduce sodium, then add them to the skillet with the chicken.
8. Sprinkle 1 tsp of chili powder, ½ tsp of cumin, and ¼ tsp of salt over the mixture, stirring to coat evenly for about 2 minutes until fragrant.
9. Remove the skillet from the heat and let it sit for 1 minute to allow the flavors to meld.
10. Fluff the cooked rice with a fork to separate the grains before dividing it between two bowls.
11. Top each bowl of rice with the chicken and bean mixture, spooning it evenly over the center.
Gently, the soft rice cradles the savory chicken and beans, their spices mingling into a cozy, earthy warmth. For a bright twist, drizzle with lime juice or add a dollop of sour cream, letting the creamy textures contrast with the hearty base in a way that feels both familiar and freshly inviting.
Light Canned Chicken Pasta with Spinach
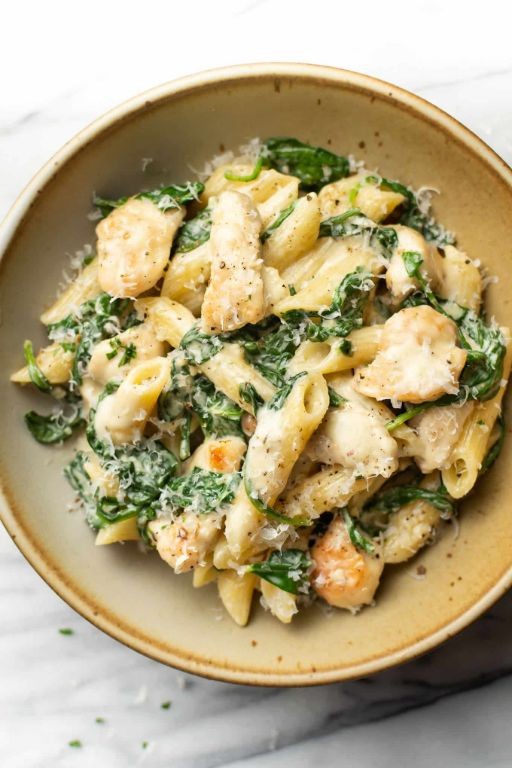
Just as the winter light fades early this afternoon, I find myself craving something simple and nourishing—a quiet meal that comes together with what’s already in the pantry, gentle on the spirit and the schedule.
Serving: 4 | Pre Time: 5 minutes | Cooking Time: 15 minutes
Ingredients
– Olive oil – 2 tbsp
– Garlic – 3 cloves, minced
– Canned chicken – 12.5 oz can, drained
– Chicken broth – 2 cups
– Pasta – 8 oz short shape (like penne)
– Spinach – 4 cups fresh
– Salt – ½ tsp
– Black pepper – ¼ tsp
Instructions
1. Heat olive oil in a large skillet over medium heat until it shimmers lightly.
2. Add minced garlic and sauté for 1 minute, stirring constantly until fragrant but not browned.
3. Stir in drained canned chicken and cook for 2 minutes to warm through and lightly sear.
4. Pour in chicken broth and bring to a gentle boil over medium-high heat.
5. Add pasta directly to the skillet, ensuring it’s submerged in the broth.
6. Reduce heat to medium-low, cover, and simmer for 10 minutes, stirring halfway through to prevent sticking.
7. Uncover and stir in fresh spinach until wilted, about 2 minutes.
8. Season with salt and black pepper, then remove from heat.
9. Let rest for 3 minutes off the heat to allow flavors to meld and pasta to absorb remaining liquid.
Velvety from the starchy pasta broth and bright with pops of green spinach, this dish offers a tender, comforting bite with minimal effort—try it topped with a sprinkle of red pepper flakes for a gentle warmth, or alongside crusty bread to soak up every last drop.
Canned Chicken and Sweet Potato Hash
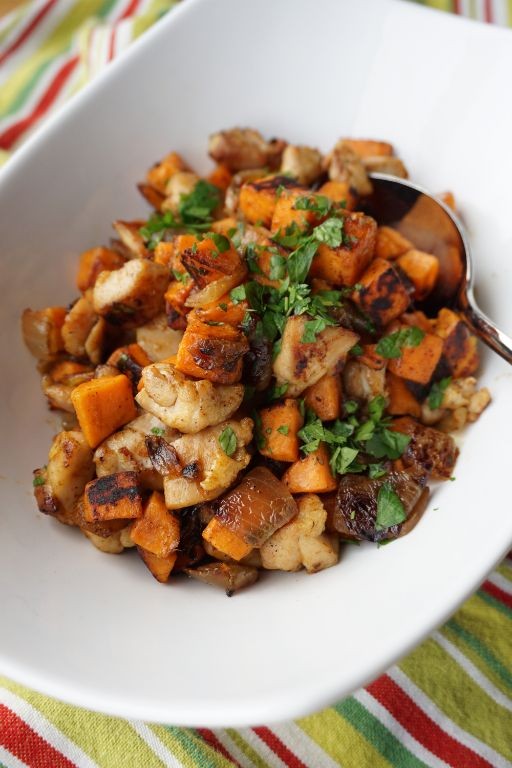
A quiet evening in the kitchen, with the soft glow of the stove and the gentle sizzle of something simple coming together—this canned chicken and sweet potato hash is the kind of humble, comforting meal that feels like a warm sigh at the end of a long day. It’s a pantry-friendly dish that transforms a few basic ingredients into a nourishing, one-pan wonder, perfect for those moments when you need sustenance without the fuss.
Serving: 4 | Pre Time: 10 minutes | Cooking Time: 25 minutes
Ingredients
– Olive oil – 2 tbsp
– Sweet potato – 1 large, peeled and diced into ½-inch cubes
– Onion – 1 medium, diced
– Canned chicken – 12.5 oz can, drained
– Salt – ½ tsp
– Black pepper – ¼ tsp
– Paprika – ½ tsp
Instructions
1. Heat 2 tbsp of olive oil in a large skillet over medium heat until it shimmers, about 1 minute.
2. Add the diced sweet potato to the skillet in a single layer, cooking undisturbed for 5 minutes to develop a golden crust.
3. Stir the sweet potatoes, then add the diced onion, cooking for another 5 minutes until the onion softens and turns translucent.
4. Tip: If the skillet seems dry, add a splash of water to prevent sticking and help steam the sweet potatoes until tender when pierced with a fork.
5. Add the drained canned chicken, breaking it apart with a spatula into bite-sized pieces, and cook for 3 minutes to warm through.
6. Sprinkle in ½ tsp salt, ¼ tsp black pepper, and ½ tsp paprika, stirring to coat everything evenly.
7. Tip: For deeper flavor, let the hash cook undisturbed for 2–3 minutes to allow the bottom to crisp up slightly.
8. Reduce the heat to low and cook for an additional 5 minutes, stirring occasionally, until the sweet potatoes are fully tender and the mixture is heated through.
9. Tip: Taste and adjust seasoning if needed, but avoid over-salting as the canned chicken already contains some sodium.
10. Remove from heat and let rest for 2 minutes before serving.
The hash emerges with a delightful contrast—soft, sweet potatoes meld with the savory, shredded chicken, while the edges crisp up into golden bits that add a satisfying crunch. Serve it straight from the skillet, perhaps topped with a fried egg for a creamy yolk that mingles with the spices, or spoon it over toast for a hearty breakfast that feels like a gentle hug.
Healthy Canned Chicken Caesar Salad
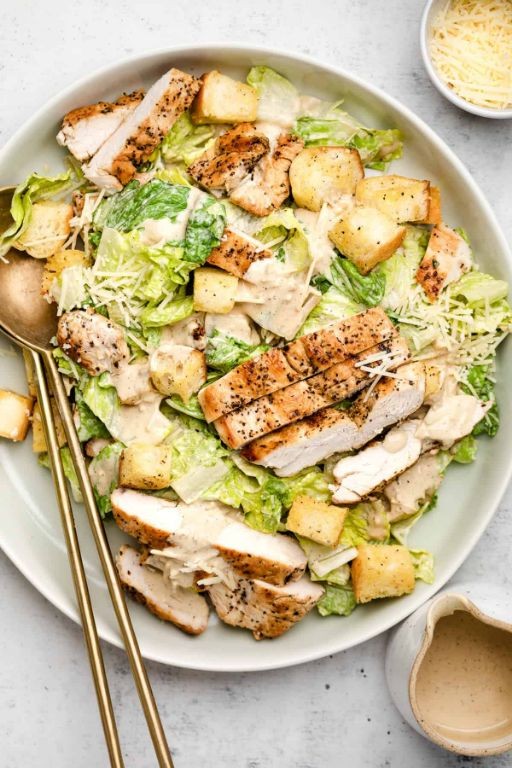
Now, as the afternoon light fades on this quiet December day, I find myself reaching for something simple yet satisfying—a salad that feels both nourishing and effortless, born from pantry staples and a gentle desire for comfort.
Serving: 2 | Pre Time: 10 minutes | Cooking Time: 0 minutes
Ingredients
– Romaine lettuce – 4 cups
– Canned chicken – 1 (12.5 oz) can
– Caesar dressing – ¼ cup
– Parmesan cheese – ¼ cup, grated
– Croutons – ½ cup
Instructions
1. Drain the canned chicken thoroughly in a colander over the sink for 1 minute to remove excess liquid, which helps prevent a soggy salad.
2. Rinse the romaine lettuce under cold running water for 30 seconds, then pat it completely dry with paper towels to ensure crispness.
3. Tear the dried romaine lettuce into bite-sized pieces directly into a large mixing bowl.
4. Add the drained canned chicken to the bowl with the lettuce.
5. Pour the Caesar dressing over the lettuce and chicken in the bowl.
6. Toss the mixture gently with salad tongs for about 1 minute until everything is evenly coated with the dressing.
7. Sprinkle the grated Parmesan cheese evenly over the tossed salad.
8. Add the croutons on top just before serving to keep them crunchy, avoiding sogginess.
9. Divide the salad evenly between two serving plates using the tongs.
After assembling, the salad offers a delightful contrast of crisp lettuce and tender chicken, with the creamy dressing and sharp Parmesan melding into a savory, umami-rich flavor. For a creative twist, try serving it in individual mason jars for a portable lunch or topping it with a soft-boiled egg for added richness.
Canned Chicken and Veggie Stir-Fry
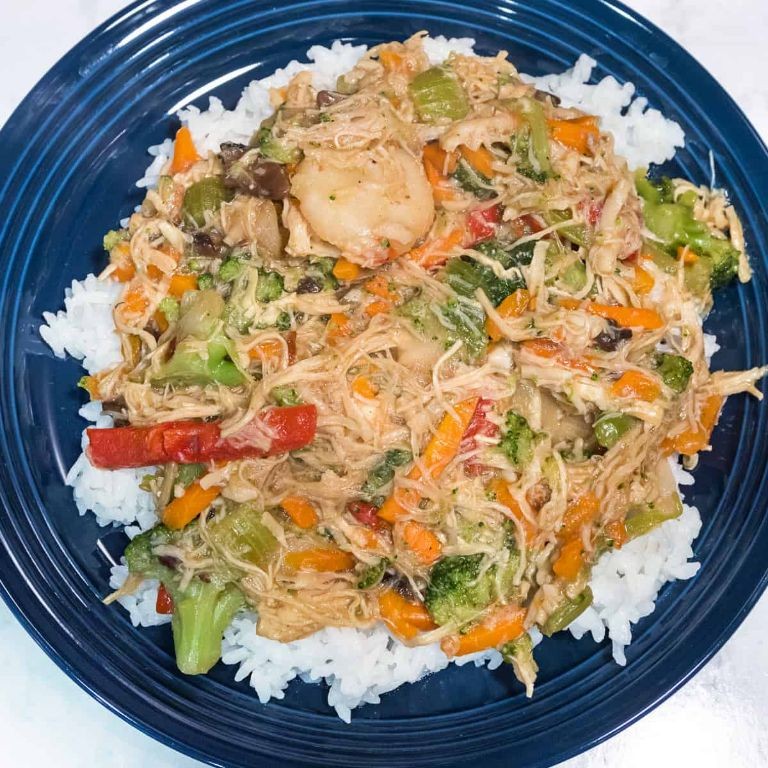
Dinner tonight came from a quiet moment of kitchen simplicity, when the pantry offered its humble treasures and the desire for something warm and nourishing felt more important than anything elaborate. It’s a gentle reminder that a satisfying meal doesn’t require a grand production, just a few reliable staples and a bit of care.
Serving: 2 | Pre Time: 5 minutes | Cooking Time: 10 minutes
Ingredients
– Olive oil – 1 tbsp
– Garlic – 2 cloves, minced
– Frozen mixed vegetables – 2 cups
– Canned chicken – 1 (12.5 oz) can, drained
– Soy sauce – 2 tbsp
– Sesame oil – 1 tsp
Instructions
1. Place a large skillet or wok over medium-high heat and add 1 tablespoon of olive oil.
2. Add 2 cloves of minced garlic to the hot oil and sauté for exactly 1 minute, until fragrant but not browned.
3. Add 2 cups of frozen mixed vegetables to the skillet, spreading them in an even layer.
4. Cook the vegetables, stirring occasionally, for 5-7 minutes until they are hot throughout and any ice crystals have evaporated.
5. While the vegetables cook, open and thoroughly drain one 12.5-ounce can of chicken, using a fork to break any large chunks into smaller pieces.
6. Add the drained canned chicken to the skillet with the vegetables, stirring to combine.
7. Pour 2 tablespoons of soy sauce over the chicken and vegetable mixture, stirring gently to coat everything evenly.
8. Continue cooking the stir-fry for an additional 2-3 minutes, allowing the soy sauce to reduce slightly and the flavors to meld.
9. Remove the skillet from the heat and drizzle 1 teaspoon of sesame oil over the top, giving one final gentle stir to incorporate.
Using canned chicken creates a tender, shreddable texture that soaks up the savory soy sauce beautifully, while the quick-cooked vegetables retain a pleasant, slight crunch. The subtle nuttiness from the sesame oil at the finish ties it all together, making this stir-fry perfect served simply over a bed of steamed rice or tucked into a warm tortilla for an easy wrap.
Low-Calorie Canned Chicken Tacos

Unwrapping a can of chicken on a quiet afternoon feels like opening a small promise—something simple, nourishing, and ready to become a little more. With a few pantry staples, this low-calorie filling transforms into soft tacos that comfort without weighing you down.
Serving: 4 | Pre Time: 10 minutes | Cooking Time: 15 minutes
Ingredients
– Canned chicken – 12 oz
– Taco seasoning – 2 tbsp
– Water – ¼ cup
– Corn tortillas – 8
– Lime – 1
– Shredded lettuce – 1 cup
– Salsa – ½ cup
Instructions
1. Drain the canned chicken thoroughly in a colander over the sink.
2. Heat a non-stick skillet over medium heat for 2 minutes.
3. Add the drained chicken to the skillet and cook for 3 minutes, breaking it apart with a wooden spoon until it’s in small shreds.
4. Sprinkle the taco seasoning evenly over the chicken and stir to coat.
5. Pour in the water and simmer for 5 minutes, stirring occasionally, until the liquid is absorbed and the chicken is fragrant.
6. While the chicken simmers, warm the corn tortillas one at a time in a dry skillet over medium heat for 30 seconds per side until pliable and lightly toasted.
7. Transfer the warmed tortillas to a plate and cover with a clean kitchen towel to keep them soft.
8. Remove the skillet from the heat and let the chicken rest for 2 minutes.
9. Cut the lime in half and squeeze the juice from one half over the chicken, stirring gently.
10. To assemble, place 2 tablespoons of chicken in the center of each tortilla.
11. Top each taco with 2 tablespoons of shredded lettuce and 1 tablespoon of salsa.
12. Serve immediately with the remaining lime half on the side for extra brightness.
Vibrant and tender, these tacos offer a light crunch from the lettuce against the warmly spiced chicken. The lime’s acidity cuts through the richness, making each bite feel fresh and balanced—try stacking them open-faced on a platter for a casual, shareable meal.
Canned Chicken and Brown Rice Casserole

Dusk settles softly outside the window, and in the quiet kitchen, I find myself reaching for simple comforts—the kind that require little fuss but fill the room with warmth. This casserole is one of those humble treasures, born from pantry staples and a desire for something nourishing without the effort of a grand production.
Serving: 6 | Pre Time: 15 minutes | Cooking Time: 45 minutes
Ingredients
– Canned chicken – 2 (12.5 oz) cans
– Brown rice – 1 cup
– Cream of chicken soup – 1 (10.5 oz) can
– Milk – ½ cup
– Shredded cheddar cheese – 1 cup
– Frozen mixed vegetables – 1 cup
– Salt – ½ tsp
– Black pepper – ¼ tsp
– Butter – 2 tbsp
Instructions
1. Preheat the oven to 375°F and lightly grease a 9×13-inch baking dish with butter.
2. Drain the canned chicken thoroughly in a colander, then flake it with a fork into small pieces in a large mixing bowl.
3. Add the brown rice, cream of chicken soup, milk, frozen mixed vegetables, salt, and black pepper to the bowl with the chicken.
4. Stir all ingredients together until evenly combined, ensuring the rice is fully coated in the soup mixture.
5. Transfer the mixture to the prepared baking dish, spreading it into an even layer with a spatula.
6. Cover the dish tightly with aluminum foil and bake at 375°F for 30 minutes.
7. Remove the foil and sprinkle the shredded cheddar cheese evenly over the top of the casserole.
8. Return the dish to the oven, uncovered, and bake for an additional 15 minutes at 375°F, or until the cheese is melted and bubbly and the edges are lightly golden.
9. Let the casserole rest on a wire rack for 10 minutes before serving to allow the rice to absorb any remaining liquid and set properly.
Nothing beats the creamy texture that melds with the chewy brown rice, while the vegetables add a subtle crunch. For a creative twist, top individual servings with a dollop of sour cream or a sprinkle of fresh herbs like parsley.
Healthy Canned Chicken and Broccoli Bake

Holding this warm bowl on a quiet winter evening, I’m reminded how simple pantry staples can transform into something deeply comforting. This bake comes together with minimal fuss, letting the tender chicken and crisp broccoli meld under a golden, cheesy crust.
Serving: 4 | Pre Time: 10 minutes | Cooking Time: 25 minutes
Ingredients
– Canned chicken – 2 (12.5 oz) cans, drained
– Broccoli florets – 4 cups
– Cream of chicken soup – 1 (10.5 oz) can
– Shredded cheddar cheese – 1 cup
– Milk – ½ cup
– Salt – ½ tsp
– Black pepper – ¼ tsp
Instructions
1. Preheat your oven to 375°F and lightly grease a 9×13-inch baking dish.
2. Drain the canned chicken thoroughly in a colander to remove excess liquid, which helps prevent a soggy bake.
3. In a large mixing bowl, combine the drained canned chicken, broccoli florets, cream of chicken soup, milk, salt, and black pepper.
4. Stir the mixture until all ingredients are evenly coated, about 1–2 minutes.
5. Transfer the mixture to the prepared baking dish and spread it into an even layer.
6. Sprinkle the shredded cheddar cheese evenly over the top of the mixture.
7. Place the baking dish in the preheated oven and bake for 25 minutes.
8. Check the bake at 25 minutes—the cheese should be fully melted and bubbly, and the edges should be lightly golden brown.
9. Remove the baking dish from the oven and let it rest for 5 minutes before serving to allow the flavors to settle.
You’ll find the texture delightfully creamy with a slight crunch from the broccoli, while the cheddar adds a rich, savory depth. For a creative twist, try serving it over toasted whole-grain bread or alongside a crisp green salad for a complete meal.
Canned Chicken and Zucchini Noodles
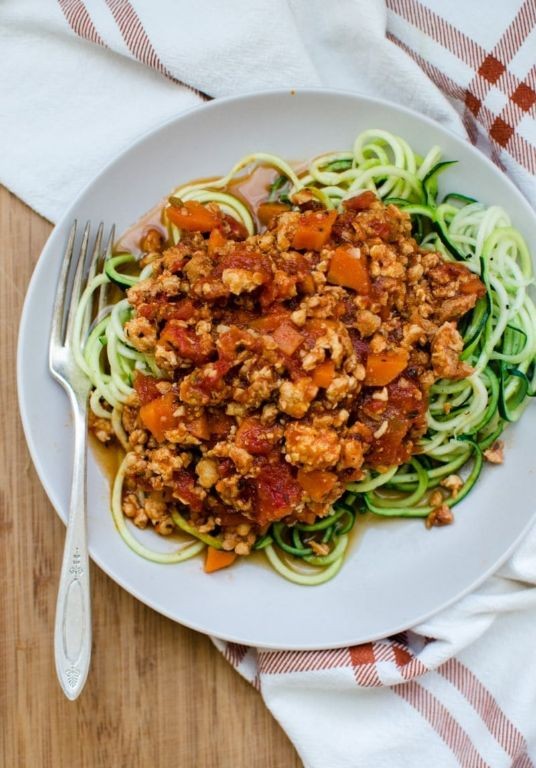
Zigzagging through the pantry on a quiet afternoon, I found myself reaching for the simplest of staples—a can of chicken and a few zucchini from the fridge, longing for something that felt both effortless and nourishing. Sometimes, the most comforting meals emerge not from elaborate plans, but from these quiet, reflective moments of gathering what’s already there.
Serving: 2 | Pre Time: 10 minutes | Cooking Time: 15 minutes
Ingredients
– Canned chicken – 1 (12.5 oz) can
– Zucchini – 2 medium
– Olive oil – 1 tbsp
– Garlic – 2 cloves
– Salt – ½ tsp
– Black pepper – ¼ tsp
– Lemon juice – 1 tbsp
Instructions
1. Drain the canned chicken thoroughly in a colander, pressing gently with a spoon to remove excess liquid—this helps prevent a watery sauce later.
2. Wash the zucchini and trim off the ends, then use a spiralizer to create long, thin noodles, aiming for about 4 cups total.
3. Mince the garlic cloves finely to ensure even flavor distribution without burning.
4. Heat the olive oil in a large skillet over medium heat until it shimmers lightly, about 2 minutes.
5. Add the minced garlic to the skillet and sauté for 1 minute, stirring constantly until fragrant but not browned.
6. Add the drained canned chicken to the skillet, breaking it apart with a spatula into small shreds, and cook for 3–4 minutes until lightly browned.
7. Stir in the zucchini noodles, tossing gently to coat them in the oil and chicken mixture.
8. Cook the mixture for 5–7 minutes, stirring occasionally, until the zucchini noodles are tender but still have a slight bite—avoid overcooking to keep them from becoming mushy.
9. Season with the salt and black pepper, then drizzle the lemon juice over the top and toss to combine evenly.
10. Remove the skillet from the heat and let it rest for 2 minutes before serving to allow the flavors to meld.
Each bite offers a tender contrast between the savory, shredded chicken and the delicate, slightly crisp zucchini noodles, with a bright hint of lemon tying it all together. Enjoy it warm straight from the skillet, or for a creative twist, top it with a sprinkle of grated Parmesan or fresh herbs like basil to add an extra layer of freshness.
Light Canned Chicken and Corn Chowder

Just now, as the winter light fades outside my kitchen window, I find myself reaching for the simplest of comforts—a warm bowl of chowder made from humble pantry staples. It’s a quiet, forgiving recipe that asks for little and gives back so much warmth.
Serving: 4 | Pre Time: 5 minutes | Cooking Time: 20 minutes
Ingredients
– Butter – 2 tbsp
– All-purpose flour – 2 tbsp
– Chicken broth – 4 cups
– Canned chicken – 2 (12.5 oz) cans, drained
– Canned corn – 1 (15 oz) can, drained
– Heavy cream – 1 cup
– Salt – ½ tsp
– Black pepper – ¼ tsp
Instructions
1. Melt the butter in a large pot over medium heat, swirling occasionally until fully liquid and just beginning to foam.
2. Sprinkle the flour into the melted butter and whisk continuously for 2 minutes to form a smooth, pale roux—this cooks out the raw flour taste.
3. Slowly pour in the chicken broth while whisking constantly to prevent lumps from forming.
4. Bring the mixture to a gentle simmer over medium-high heat, then reduce to medium-low and let it bubble softly for 5 minutes to thicken slightly.
5. Add the drained canned chicken and canned corn, stirring gently to combine.
6. Pour in the heavy cream and stir until fully incorporated.
7. Season with salt and black pepper, stirring to distribute evenly.
8. Simmer the chowder uncovered over low heat for 10 minutes, stirring occasionally to prevent sticking on the bottom.
9. Remove from heat and let it rest for 5 minutes before serving—this allows the flavors to meld and the soup to thicken to a perfect, creamy consistency.
Gently ladled into bowls, this chowder offers a velvety, comforting texture with tender shreds of chicken and sweet pops of corn. The subtle richness from the cream balances the savory broth beautifully, making it ideal for a quiet evening. Try topping it with a sprinkle of fresh chives or serving it alongside crusty bread for dipping.
Canned Chicken and Kale Stuffed Sweet Potatoes

Kindly, as the afternoon light fades on this winter day, I find myself drawn to simple comforts that require little effort but offer deep nourishment. This recipe emerged from a quiet moment of pantry rummaging, transforming humble ingredients into something warm and complete.
Serving: 2 | Pre Time: 10 minutes | Cooking Time: 50 minutes
Ingredients
– Sweet potatoes – 2 medium
– Olive oil – 1 tbsp
– Canned chicken – 1 (12.5 oz) can
– Kale – 2 cups, chopped
– Garlic powder – ½ tsp
– Salt – ¼ tsp
– Black pepper – ¼ tsp
Instructions
1. Preheat your oven to 400°F.
2. Scrub the sweet potatoes thoroughly under cold running water and pat them completely dry with a clean kitchen towel.
3. Prick each sweet potato 5–6 times all over with a fork to allow steam to escape during baking.
4. Rub the sweet potatoes evenly with 1 tbsp of olive oil and place them directly on the middle oven rack with a baking sheet on the rack below to catch any drips.
5. Bake for 45–50 minutes, or until the potatoes are very tender when pierced with a fork and the skins are slightly puckered.
6. While the potatoes bake, drain the canned chicken completely in a colander and use your hands to flake it into small pieces in a medium mixing bowl.
7. Add the chopped kale, garlic powder, salt, and black pepper to the bowl with the chicken and mix gently until everything is evenly combined.
8. Once the sweet potatoes are baked, remove them from the oven and let them cool just enough to handle, about 5 minutes.
9. Carefully slice each potato open lengthwise down the center and use a fork to fluff the insides, creating a well for the filling.
10. Divide the chicken and kale mixture evenly between the two potatoes, packing it gently into the center.
11. Return the stuffed potatoes to the oven and bake for an additional 5 minutes at 400°F to warm the filling through.
12. Remove from the oven and let rest for 2 minutes before serving.
The baked sweet potato becomes meltingly soft, its natural sweetness a quiet backdrop to the savory, slightly toothsome filling. The kale retains a pleasant bite against the tender chicken, creating a comforting contrast in each forkful. For a different take, try crumbling a little feta over the top just before the final bake, or serve alongside a simple arugula salad dressed with lemon.
Healthy Canned Chicken and Eggplant Parmesan
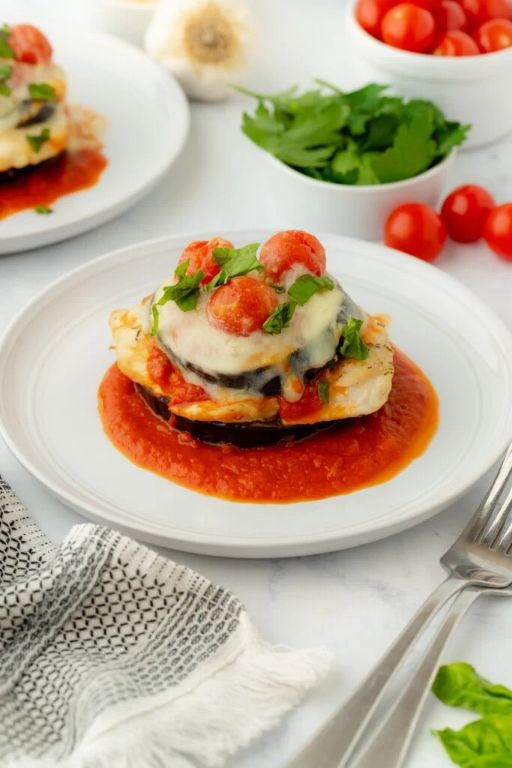
Under the soft glow of the kitchen light, I find myself reaching for the simplest of pantry staples, a quiet comfort for a winter evening. This dish transforms humble canned chicken and earthy eggplant into a layered, baked meal that feels both nourishing and deeply satisfying, a gentle reminder that good food doesn’t require complexity.
Serving: 4 | Pre Time: 15 minutes | Cooking Time: 45 minutes
Ingredients
– Canned chicken – 2 (12.5 oz) cans, drained
– Eggplant – 1 large, about 1.5 lbs
– Olive oil – 3 tbsp
– Salt – 1 tsp
– Black pepper – ½ tsp
– Marinara sauce – 24 oz jar
– Shredded mozzarella cheese – 2 cups
– Grated Parmesan cheese – ½ cup
Instructions
1. Preheat your oven to 375°F (190°C).
2. Slice the eggplant into ¼-inch thick rounds.
3. Arrange the eggplant slices in a single layer on a baking sheet lined with parchment paper.
4. Brush both sides of each eggplant slice evenly with the 3 tbsp of olive oil.
5. Sprinkle the 1 tsp of salt and ½ tsp of black pepper evenly over the oiled eggplant slices.
6. Bake the eggplant for 20 minutes, or until the slices are tender and lightly golden at the edges.
7. While the eggplant bakes, drain the liquid from the 2 cans of chicken completely.
8. In a medium bowl, gently flake the drained canned chicken with a fork to separate it.
9. Spread ½ cup of the marinara sauce evenly across the bottom of a 9×13 inch baking dish.
10. Arrange half of the baked eggplant slices in a single layer over the sauce.
11. Top the eggplant layer evenly with all of the flaked canned chicken.
12. Pour 1 cup of the marinara sauce over the chicken layer.
13. Sprinkle 1 cup of the shredded mozzarella cheese over the sauce.
14. Arrange the remaining baked eggplant slices in a final layer.
15. Pour the remaining marinara sauce over the top eggplant layer.
16. Sprinkle the remaining 1 cup of mozzarella cheese and the ½ cup of grated Parmesan cheese evenly over the top.
17. Bake the assembled dish, uncovered, at 375°F for 25 minutes, or until the cheese is melted, bubbly, and has golden spots.
18. Remove the dish from the oven and let it rest for 5 minutes before serving.
Soft layers of tender eggplant cradle the savory, seasoned chicken, all bound together by rich, melted cheeses. The baked edges of the eggplant add a subtle, pleasant texture against the creamy interior. Serve it over a bed of zucchini noodles for a lighter meal, or with a slice of crusty bread to soak up every bit of the flavorful sauce.
Canned Chicken and Chickpea Curry

When the evening light slants through the kitchen window, and the world outside feels heavy with holiday bustle, there’s a quiet comfort in pulling together a meal from the pantry. This simple curry, born from canned chicken and chickpeas, simmers into something deeply satisfying—a gentle warmth for a weary December day.
Serving: 4 | Pre Time: 10 minutes | Cooking Time: 25 minutes
Ingredients
– Olive oil – 2 tbsp
– Yellow onion – 1 medium, diced
– Garlic – 3 cloves, minced
– Ground cumin – 1 tsp
– Ground coriander – 1 tsp
– Turmeric – ½ tsp
– Crushed red pepper flakes – ¼ tsp
– Canned diced tomatoes – 1 (14.5 oz) can
– Canned chickpeas – 1 (15 oz) can, drained and rinsed
– Canned chicken – 2 (5 oz) cans, drained
– Full-fat coconut milk – 1 (13.5 oz) can
– Salt – ½ tsp
– Fresh cilantro – ¼ cup, chopped
Instructions
1. Heat 2 tbsp olive oil in a large pot or Dutch oven over medium heat for 1 minute until shimmering.
2. Add 1 diced yellow onion and cook for 5–7 minutes, stirring occasionally, until softened and translucent.
3. Stir in 3 minced garlic cloves and cook for 1 minute until fragrant, being careful not to let it brown.
4. Add 1 tsp ground cumin, 1 tsp ground coriander, ½ tsp turmeric, and ¼ tsp crushed red pepper flakes, toasting the spices with the onions for 30 seconds to release their oils—this deepens the flavor.
5. Pour in 1 can of diced tomatoes with their juices, scraping the bottom of the pot to lift any browned bits.
6. Add 1 can of drained and rinsed chickpeas and 2 cans of drained canned chicken, stirring gently to combine.
7. Pour in 1 can of full-fat coconut milk and ½ tsp salt, stirring until the sauce is uniform.
8. Bring the curry to a gentle simmer over medium heat, then reduce the heat to low, cover, and let it cook for 15 minutes, stirring once halfway through—this allows the flavors to meld without reducing the sauce too much.
9. Uncover and simmer for an additional 5 minutes to slightly thicken the sauce, checking that it coats the back of a spoon.
10. Remove from heat and stir in ¼ cup chopped fresh cilantro just before serving, which adds a bright, fresh note.
The texture is softly creamy from the coconut milk, with the chickpeas offering a tender bite and the chicken shredding into the rich, warmly spiced tomato base. This curry holds beautifully over steamed rice or with a side of naan for dipping, and it tastes even better the next day as the spices settle into a deeper, more comforting harmony.
Low-Fat Canned Chicken and Rice Soup
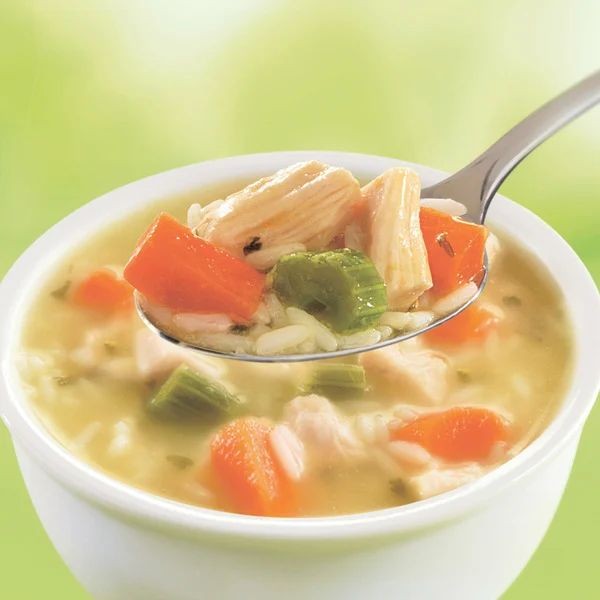
Just now, as the winter light fades outside my window, I find myself reaching for something simple and comforting—a quiet moment with a bowl of soup that feels like a gentle exhale. This version, made with humble pantry staples, is a warm, steadying presence on a chilly afternoon.
Serving: 4 | Pre Time: 5 minutes | Cooking Time: 25 minutes
Ingredients
– Olive oil – 1 tbsp
– Yellow onion – 1 medium, diced
– Carrots – 2 medium, peeled and diced
– Celery – 2 stalks, diced
– Low-sodium chicken broth – 4 cups
– Water – 2 cups
– Long-grain white rice – 1 cup
– Canned chicken breast – 12.5 oz can, drained
– Dried thyme – ½ tsp
– Salt – ¼ tsp
– Black pepper – ⅛ tsp
Instructions
1. Heat 1 tbsp of olive oil in a large pot over medium heat for 1 minute until shimmering.
2. Add 1 diced yellow onion, 2 diced carrots, and 2 diced celery stalks to the pot.
3. Cook the vegetables for 8–10 minutes, stirring occasionally, until the onions are translucent and the carrots begin to soften.
4. Pour in 4 cups of low-sodium chicken broth and 2 cups of water, then increase the heat to high.
5. Bring the liquid to a rolling boil, which should take about 3–4 minutes.
6. Stir in 1 cup of long-grain white rice, ½ tsp of dried thyme, ¼ tsp of salt, and ⅛ tsp of black pepper.
7. Reduce the heat to low, cover the pot with a lid, and simmer for 15 minutes without stirring to allow the rice to cook evenly.
8. After 15 minutes, remove the lid and add the drained 12.5 oz can of chicken breast, flaking it gently with a fork.
9. Simmer uncovered for an additional 5 minutes to heat the chicken through, stirring once halfway.
10. Turn off the heat and let the soup sit for 2 minutes before serving to allow the flavors to meld.
This soup yields a light, brothy texture with tender rice and soft vegetables that melt into each spoonful. The shredded chicken adds a subtle heartiness without heaviness, making it a soothing meal to enjoy with a slice of crusty bread for dipping, perhaps by a softly lit window as evening settles in.
Canned Chicken and Cucumber Salad with Lemon Dressing
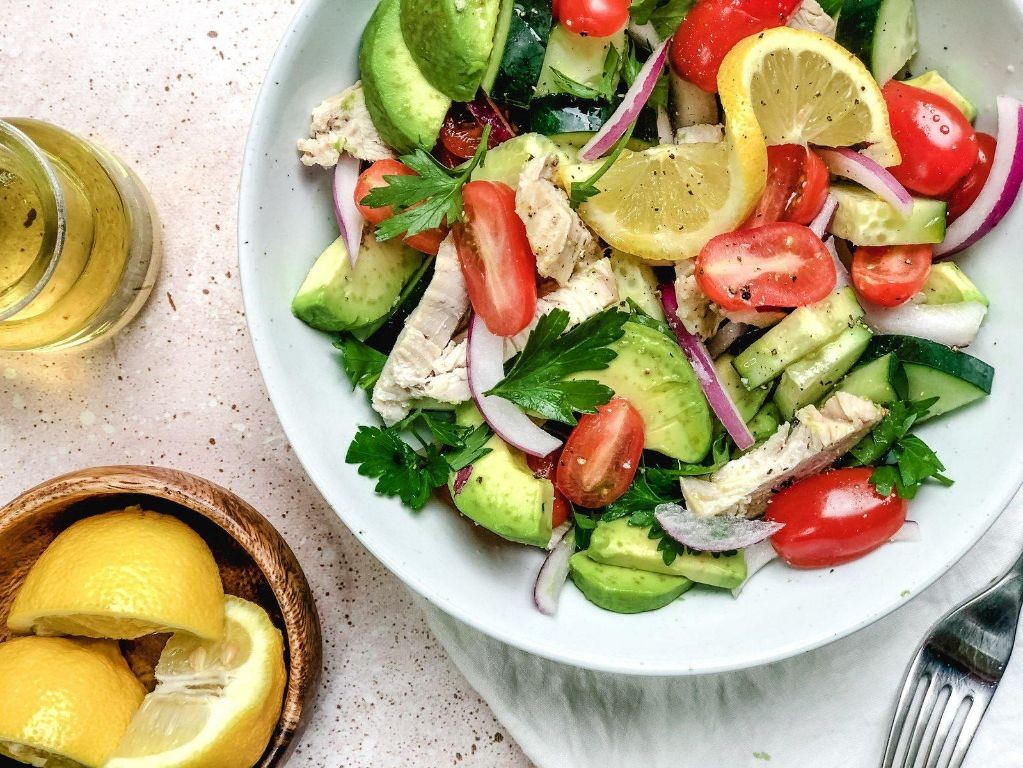
Remembering the quiet afternoons of my childhood, I often find myself reaching for simple, comforting dishes that require little effort but deliver bright, satisfying flavors. This salad, born from pantry staples and a crisp cucumber, feels like a gentle pause in a busy day—a reminder that nourishment doesn’t need to be complicated to feel special.
Serving: 2 | Pre Time: 15 minutes | Cooking Time: 0 minutes
Ingredients
– Canned chicken – 1 (12.5 oz) can
– English cucumber – 1 medium
– Lemon – 1
– Olive oil – 2 tbsp
– Salt – ½ tsp
– Black pepper – ¼ tsp
Instructions
1. Drain the canned chicken thoroughly in a colander, pressing gently with a fork to remove excess liquid—this helps prevent a watery dressing. 2. Transfer the drained chicken to a medium mixing bowl and use two forks to shred it into fine, uniform pieces. 3. Wash the cucumber and slice it in half lengthwise; use a spoon to scrape out and discard the watery seeds from each half. 4. Thinly slice the cucumber halves crosswise into half-moons, about ⅛-inch thick, for a crisp texture. 5. Add the cucumber slices to the bowl with the shredded chicken. 6. Roll the lemon firmly on the countertop under your palm for 10 seconds to soften it and maximize juice yield. 7. Cut the lemon in half and juice it directly into a small bowl, straining out any seeds with your fingers or a fork. 8. Whisk the lemon juice, olive oil, salt, and black pepper together in the small bowl until fully emulsified. 9. Pour the dressing over the chicken and cucumber in the mixing bowl. 10. Gently toss everything together with a large spoon until evenly coated, being careful not to crush the cucumber. 11. Let the salad rest at room temperature for 5 minutes to allow the flavors to meld. 12. Divide the salad between two plates or bowls for serving.
Just as the lemon brightens the mild chicken, the cucumber offers a refreshing crunch that makes each bite lively. Serve it over a bed of butter lettuce for extra greens, or scoop it into whole-wheat pita pockets for a portable lunch—the creamy dressing clings beautifully to every ingredient, creating a harmony of tangy and tender.
Summary
Now you have a fantastic collection of 20 quick, healthy canned chicken recipes to make mealtime a breeze! These delicious ideas prove that convenience and nutrition can go hand-in-hand. I’d love to hear which recipes become your new favorites—please leave a comment below and share this roundup on Pinterest to help other home cooks discover these tasty solutions!