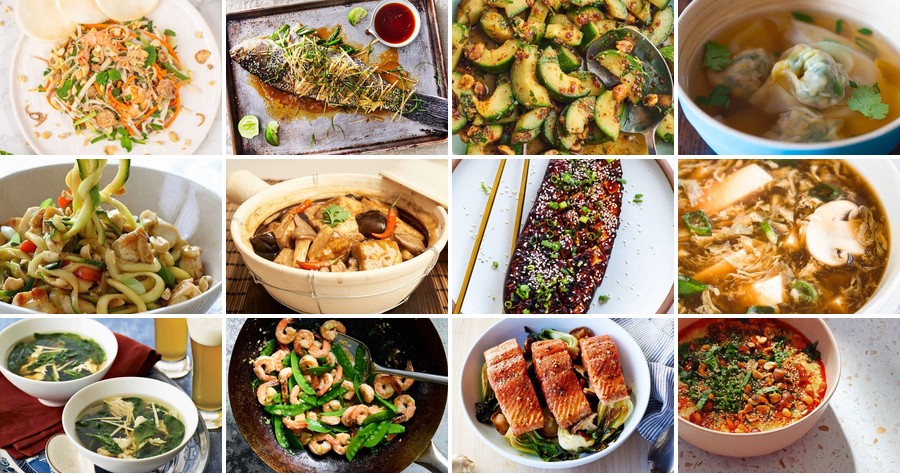
Many of us think healthy eating means bland meals, but Chinese cuisine proves otherwise! This collection of 18 flavorful recipes turns weight loss into a delicious adventure. From quick stir-fries to comforting soups, each dish is packed with taste while keeping things light. Ready to cook up something amazing? Let’s dive into these mouthwatering, healthy Chinese favorites that’ll make your kitchen—and your waistline—happy.
Steamed Ginger Soy Salmon with Bok Choy
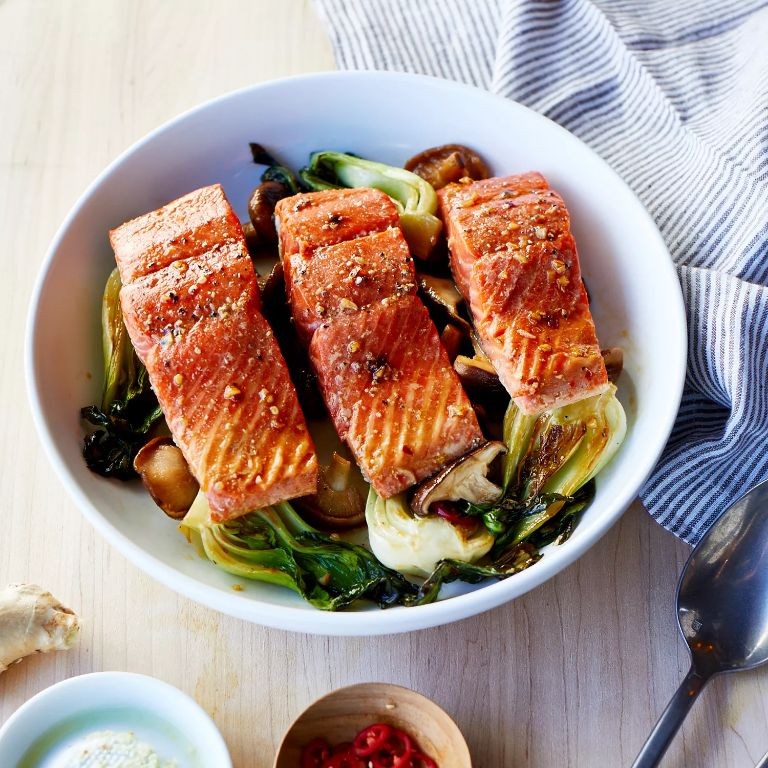
Often, as the evening light fades into a soft blue, I find myself drawn to the quiet ritual of preparing a meal that feels both nourishing and gentle. This steamed salmon, fragrant with ginger and soy, nestled among tender bok choy, is one of those quiet comforts that seems to slow the world down for a moment.
Serving: 2 | Pre Time: 15 minutes | Cooking Time: 15 minutes
Ingredients
For the Salmon and Bok Choy
– 2 (6-ounce) salmon fillets, skin-on
– 4 heads baby bok choy, halved lengthwise
– 1 tablespoon toasted sesame oil
For the Steaming Sauce
– 1/4 cup low-sodium soy sauce
– 2 tablespoons rice vinegar
– 1 tablespoon honey
– 1 tablespoon finely grated fresh ginger
– 2 cloves garlic, minced
– 1/4 teaspoon red pepper flakes
For Garnish
– 2 green onions, thinly sliced
– 1 teaspoon sesame seeds
Instructions
1. Rinse the 4 heads of baby bok choy under cold water, then pat them completely dry with paper towels.
2. Cut each bok choy head in half lengthwise, from the stem through the leaves.
3. Pat the 2 salmon fillets dry with paper towels and check for any remaining pin bones, removing them with tweezers if found.
4. In a small bowl, whisk together 1/4 cup low-sodium soy sauce, 2 tablespoons rice vinegar, 1 tablespoon honey, 1 tablespoon finely grated fresh ginger, 2 minced garlic cloves, and 1/4 teaspoon red pepper flakes until the honey is fully dissolved.
5. Pour 1 inch of water into a wide pot or skillet that can fit a steamer basket and bring it to a boil over high heat.
6. Arrange the halved bok choy in a single layer in the steamer basket, then carefully place the 2 salmon fillets, skin-side down, on top of the bok choy.
7. Drizzle 1 tablespoon of toasted sesame oil evenly over the salmon and bok choy.
8. Pour the prepared sauce from the bowl over the salmon and bok choy, ensuring it coats them evenly.
9. Once the water is boiling, place the steamer basket into the pot, cover it tightly with a lid, and reduce the heat to medium to maintain a steady steam.
10. Steam for 12 minutes, or until the salmon flakes easily with a fork and the bok choy stems are tender when pierced with a knife.
11. Carefully remove the steamer basket from the pot.
12. Transfer the steamed salmon and bok choy to serving plates using a spatula, pouring any remaining sauce from the basket over the top.
13. Garnish the plates evenly with 2 thinly sliced green onions and 1 teaspoon of sesame seeds.
Velvety and flaky, the salmon melts under the savory-sweet glaze, while the bok choy provides a crisp, juicy contrast that soaks up the fragrant sauce. For a simple twist, serve it over a bed of steamed jasmine rice to catch every last drop, or alongside a bright cucumber salad to cut through the richness.
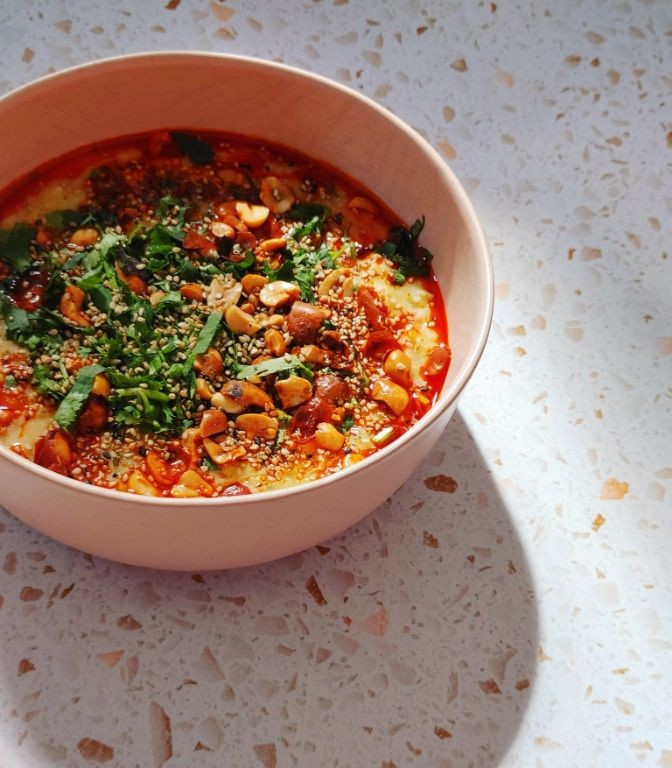
Sichuan-Style Spicy Cucumber Salad
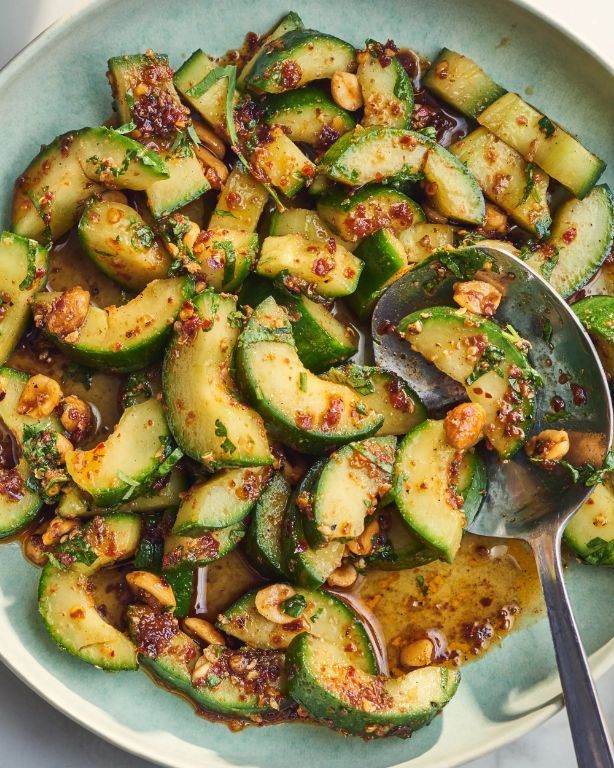
Kneading the memory of a summer evening, I find myself craving something crisp and bright to cut through the winter’s heavy meals. This Sichuan-style cucumber salad, with its sharp, numbing heat and refreshing crunch, feels like a whispered promise of warmer days. It’s a simple, vibrant dish that awakens the senses.
Serving: 4 | Pre Time: 15 minutes | Cooking Time: 0 minutes
Ingredients
For the cucumbers:
– 2 large English cucumbers (about 1 1/2 lbs total)
– 1 tsp kosher salt
For the dressing:
– 3 tbsp Chinkiang black vinegar
– 2 tbsp light soy sauce
– 1 tbsp toasted sesame oil
– 2 tsp granulated sugar
– 1 tsp Sichuan peppercorns, finely ground
– 1-2 tsp chili oil (with sediment), depending on desired heat
– 2 cloves garlic, minced
– 1-inch piece fresh ginger, minced
For garnish:
– 2 tbsp roasted peanuts, roughly chopped
– 1 green onion, thinly sliced
Instructions
1. Wash and dry the 2 English cucumbers thoroughly. Trim off the ends.
2. Using the flat side of a cleaver or a rolling pin, gently smash each cucumber until it cracks open and flattens slightly; this technique, called ‘pai huang gua,’ creates craggy edges that better absorb the dressing.
3. Tear the smashed cucumbers by hand into rough, bite-sized chunks, about 1 to 1 1/2 inches long, and place them in a large mixing bowl.
4. Sprinkle the 1 tsp of kosher salt over the cucumber pieces. Toss gently with your hands to coat evenly, then set aside for 10 minutes to draw out excess water, which prevents a watery salad.
5. While the cucumbers rest, prepare the dressing. In a small bowl, whisk together the 3 tbsp Chinkiang black vinegar, 2 tbsp light soy sauce, 1 tbsp toasted sesame oil, 2 tsp granulated sugar, 1 tsp ground Sichuan peppercorns, 1-2 tsp chili oil, 2 cloves of minced garlic, and the minced 1-inch piece of ginger until the sugar is fully dissolved.
6. After 10 minutes, drain the liquid released from the salted cucumbers by gently squeezing handfuls over the sink or using a colander; pat the cucumbers dry with a paper towel and return them to the mixing bowl.
7. Pour the prepared dressing over the cucumbers. Using tongs or your hands, toss everything together until the cucumbers are evenly and generously coated.
8. Transfer the dressed salad to a serving plate or shallow bowl. Sprinkle the 2 tbsp of chopped roasted peanuts and the sliced green onion evenly over the top as garnish.
9. Let the salad sit for 5 minutes before serving to allow the flavors to meld, though it can be enjoyed immediately for a brighter, sharper taste.
Beneath the initial tingle of Sichuan pepper and chili heat lies a cool, juicy crunch that is utterly refreshing. The peanuts add a welcome earthy contrast to the bright, pungent dressing. Try serving it alongside grilled meats or tucked into lettuce cups for a light, hands-on appetizer.
Garlic Green Beans with Almonds
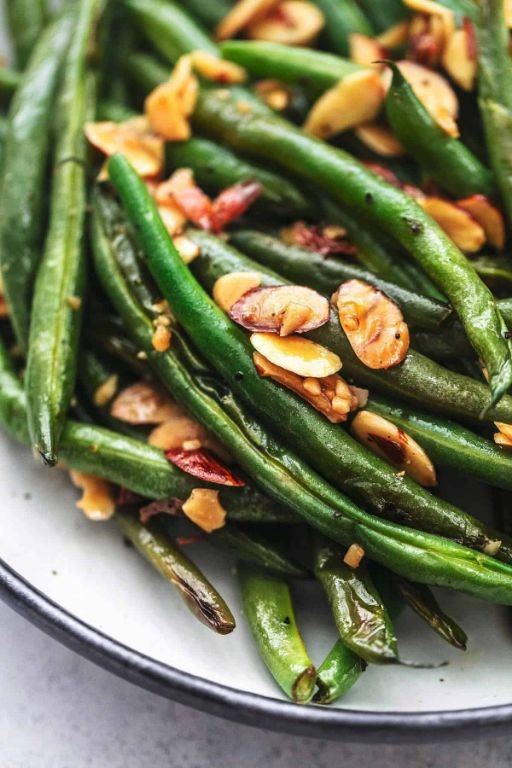
Remembering the quiet evenings of my childhood, I can still picture my grandmother’s hands moving slowly over a bowl of fresh green beans, the crisp snap of each bean breaking the kitchen’s silence. There’s something deeply comforting about transforming simple ingredients into a dish that feels both nourishing and celebratory, a small ritual that connects past and present.
Serving: 4 | Pre Time: 10 minutes | Cooking Time: 15 minutes
Ingredients
For the beans and almonds:
– 1 pound fresh green beans, ends trimmed
– 1/4 cup sliced almonds
– 2 tablespoons olive oil
For the garlic mixture:
– 4 cloves garlic, minced
– 1/4 teaspoon salt
– 1/8 teaspoon black pepper
For finishing:
– 1 tablespoon lemon juice
Instructions
1. Bring a large pot of water to a rolling boil over high heat.
2. Add the trimmed green beans to the boiling water and cook for exactly 3 minutes to blanch them.
3. Immediately drain the beans in a colander and rinse under cold running water for 1 minute to stop the cooking process, which helps retain their vibrant green color and crisp texture.
4. Pat the blanched green beans completely dry with paper towels to ensure they sauté properly without steaming.
5. Heat the olive oil in a large skillet over medium heat for 1 minute until it shimmers slightly.
6. Add the sliced almonds to the skillet and toast for 2-3 minutes, stirring constantly, until they turn golden brown and fragrant.
7. Transfer the toasted almonds to a small bowl, leaving the oil in the skillet.
8. Increase the skillet heat to medium-high and add the dried green beans.
9. Sauté the beans for 5-6 minutes, stirring occasionally, until they develop slight char marks and become tender-crisp.
10. Reduce the heat to medium-low and push the beans to the sides of the skillet.
11. Add the minced garlic to the center of the skillet and cook for 30-45 seconds, just until fragrant but not browned, to prevent bitterness.
12. Sprinkle the salt and black pepper over the garlic and beans, then toss everything together for 1 minute to combine.
13. Remove the skillet from the heat and stir in the lemon juice and toasted almonds.
14. Transfer the mixture to a serving dish immediately.
Ultimately, you’ll find the beans maintain a satisfying snap while the toasted almonds add a delicate crunch, their nuttiness perfectly complementing the sweet, caramelized garlic. Serve this warm alongside roasted chicken or over a bed of creamy polenta for a complete meal that feels both rustic and refined.
Stir-Fried Shrimp with Snow Peas and Mushrooms
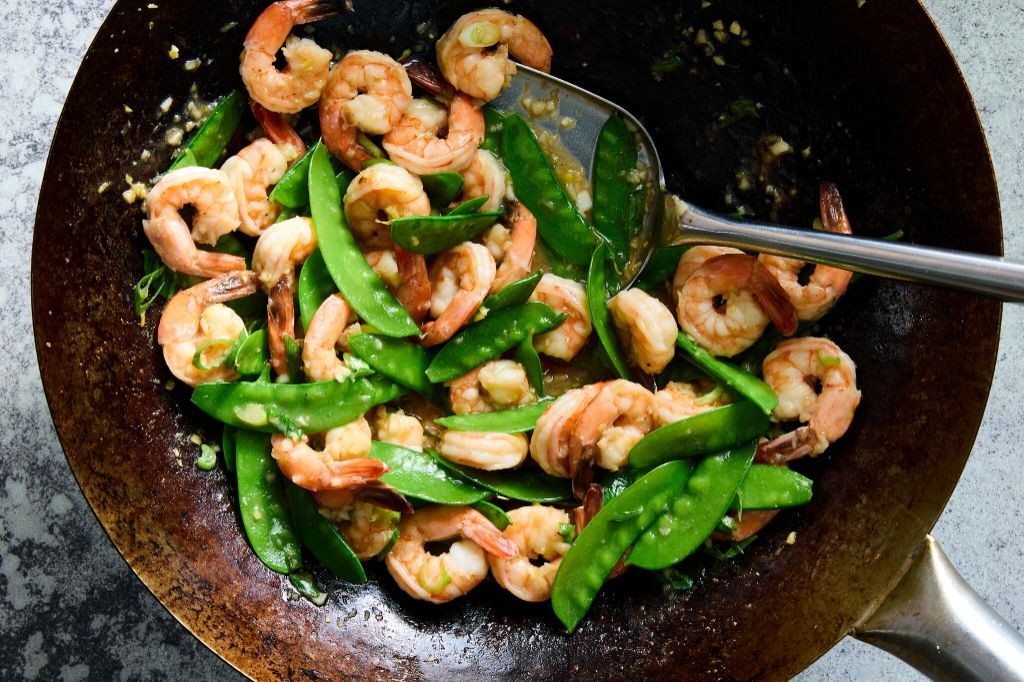
There’s something quietly comforting about a simple stir-fry on a winter evening, the sizzle of the pan a soft counterpoint to the quiet outside, and this dish—with its tender shrimp, crisp snow peas, and earthy mushrooms—feels like a gentle embrace after a long day.
Serving: 4 | Pre Time: 15 minutes | Cooking Time: 10 minutes
Ingredients
For the shrimp:
– 1 lb large shrimp, peeled and deveined
– 1 tbsp cornstarch
– 1 tbsp soy sauce
– 1 tbsp vegetable oil
For the vegetables:
– 8 oz snow peas, trimmed
– 8 oz cremini mushrooms, sliced
– 2 cloves garlic, minced
– 1 tbsp fresh ginger, grated
For the sauce:
– 1/4 cup chicken broth
– 2 tbsp soy sauce
– 1 tbsp oyster sauce
– 1 tsp sesame oil
– 1 tsp cornstarch
For cooking:
– 2 tbsp vegetable oil, divided
Instructions
1. In a medium bowl, combine the shrimp, 1 tbsp cornstarch, 1 tbsp soy sauce, and 1 tbsp vegetable oil, tossing gently to coat evenly, and let it marinate for 10 minutes at room temperature to tenderize the shrimp.
2. While the shrimp marinates, whisk together the chicken broth, 2 tbsp soy sauce, oyster sauce, sesame oil, and 1 tsp cornstarch in a small bowl until smooth to create the sauce, setting it aside.
3. Heat a large wok or skillet over high heat until a drop of water sizzles and evaporates immediately, about 2 minutes, then add 1 tbsp vegetable oil and swirl to coat the surface.
4. Add the marinated shrimp to the hot wok in a single layer, cooking without stirring for 1 minute until the bottoms turn pink and opaque, then flip each shrimp and cook for another 30 seconds until just cooked through, transferring them to a clean plate to prevent overcooking.
5. Add the remaining 1 tbsp vegetable oil to the same wok, then stir in the garlic and ginger, cooking for 30 seconds until fragrant but not browned to avoid bitterness.
6. Add the snow peas and mushrooms to the wok, stirring constantly for 3–4 minutes until the snow peas are bright green and crisp-tender and the mushrooms have released their moisture and softened.
7. Give the reserved sauce a quick stir to recombine, then pour it over the vegetables, cooking for 1 minute until the sauce thickens and coats everything evenly, bubbling slightly.
8. Return the cooked shrimp to the wok, gently tossing everything together for 30 seconds to heat through and combine, then immediately remove from the heat.
9. Serve the stir-fry hot over steamed rice or noodles. Each bite offers a lovely contrast—the shrimp are plump and juicy, the snow peas snap with freshness, and the mushrooms lend a deep, savory note, making it perfect for a cozy dinner or a quick, elegant lunch the next day.
Braised Tofu with Shiitake Mushrooms
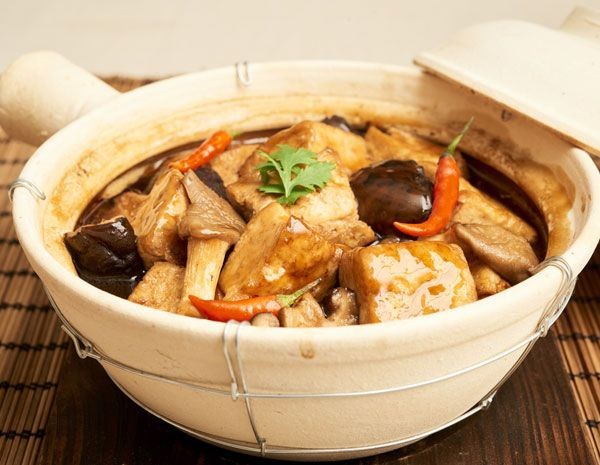
Cradling a warm bowl on a quiet evening, I find myself returning to this simple, nourishing dish that feels like a gentle embrace after a long day. It’s a humble combination of tofu and mushrooms, slowly braised until deeply flavorful and tender, perfect for a reflective meal alone or shared softly with loved ones.
Serving: 4 | Pre Time: 20 minutes | Cooking Time: 45 minutes
Ingredients
– For the tofu and mushrooms:
– 1 (14-ounce) block firm tofu, pressed and cut into 1-inch cubes
– 1 ounce dried shiitake mushrooms (about 10-12 mushrooms)
– 1 tablespoon vegetable oil
– For the braising liquid:
– 2 cups water
– 3 tablespoons soy sauce
– 1 tablespoon maple syrup
– 1 teaspoon grated fresh ginger
– 2 cloves garlic, minced
– 1/2 teaspoon toasted sesame oil
Instructions
1. Place the dried shiitake mushrooms in a medium bowl and cover with 2 cups of hot water; let soak for 15 minutes until softened, then drain, reserving the soaking liquid, and slice the mushrooms, discarding the tough stems.
2. Heat 1 tablespoon vegetable oil in a large skillet or Dutch oven over medium heat until shimmering, about 2 minutes.
3. Add the tofu cubes in a single layer and cook for 4-5 minutes per side until golden brown, turning gently with a spatula to avoid breaking them.
4. Tip: Pressing the tofu beforehand removes excess moisture, helping it brown better and absorb more flavor during braising.
5. Add the sliced shiitake mushrooms to the skillet and cook for 2 minutes, stirring occasionally.
6. Pour in the reserved mushroom soaking liquid, 3 tablespoons soy sauce, 1 tablespoon maple syrup, 1 teaspoon grated ginger, and 2 cloves minced garlic.
7. Bring the mixture to a gentle simmer, then reduce the heat to low, cover, and braise for 30 minutes, stirring halfway through.
8. Tip: Keep the heat low to prevent the tofu from toughening; a slow braise allows the flavors to meld beautifully.
9. Uncover and stir in 1/2 teaspoon toasted sesame oil; simmer uncovered for 5 more minutes until the sauce thickens slightly.
10. Tip: The sauce should coat the back of a spoon; if it’s too thin, simmer a few extra minutes, but avoid overcooking the tofu.
11. Remove from heat and let rest for 5 minutes before serving.
Silken tofu cubes soak up the savory-sweet braising liquid, becoming tender and almost custardy, while the shiitakes lend an earthy depth that lingers warmly. Serve it over steamed jasmine rice to catch every drop of sauce, or alongside sautéed greens for a comforting, complete meal that feels both nourishing and quietly celebratory.
Wonton Soup with Spinach and Lean Pork
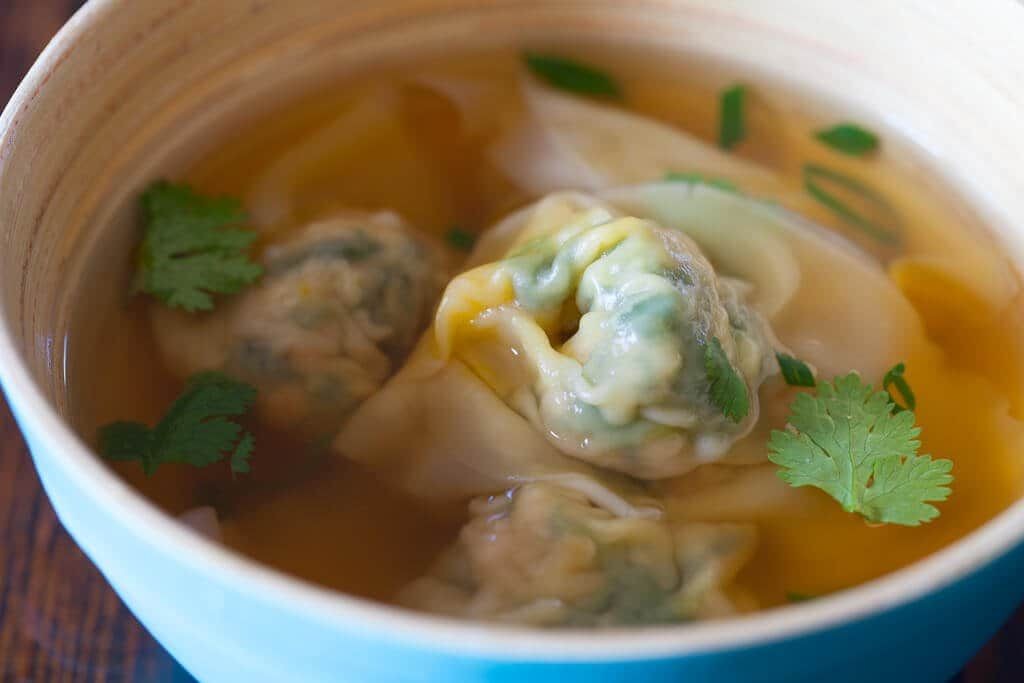
Venturing into the kitchen on a quiet evening, I find myself drawn to the gentle art of wrapping and simmering, a comforting ritual that yields this delicate soup. It’s a humble bowl that cradles tender pork-filled parcels and vibrant spinach in a clear, savory broth, perfect for a reflective moment alone.
Serving: 4 | Pre Time: 30 minutes | Cooking Time: 20 minutes
Ingredients
For the wonton filling:
– 1/2 lb lean ground pork
– 1 tbsp soy sauce
– 1 tsp grated fresh ginger
– 1/2 tsp sesame oil
– 1/4 tsp white pepper
For the soup:
– 6 cups chicken broth
– 1 tbsp soy sauce
– 1/2 tsp salt
– 4 cups fresh spinach leaves
For assembly:
– 24 wonton wrappers
– 1 large egg, beaten
Instructions
1. In a medium bowl, combine 1/2 lb lean ground pork, 1 tbsp soy sauce, 1 tsp grated fresh ginger, 1/2 tsp sesame oil, and 1/4 tsp white pepper until fully mixed.
2. Place 1 wonton wrapper on a clean surface and brush the edges lightly with beaten egg using a pastry brush.
3. Spoon 1 tsp of the pork filling into the center of the wrapper.
4. Fold the wrapper diagonally to form a triangle, pressing the edges firmly to seal, ensuring no air pockets remain to prevent bursting during cooking.
5. Repeat steps 2-4 until all filling is used, covering finished wontons with a damp towel to prevent drying.
6. In a large pot, bring 6 cups chicken broth to a boil over high heat.
7. Add 1 tbsp soy sauce and 1/2 tsp salt to the boiling broth, stirring to dissolve.
8. Reduce heat to medium and gently add the wontons to the broth one by one.
9. Simmer the wontons for 8-10 minutes, or until they float to the surface and the pork filling is cooked through, stirring occasionally to prevent sticking.
10. Add 4 cups fresh spinach leaves to the pot and cook for 1-2 minutes, just until wilted but still bright green, to preserve nutrients and texture.
11. Ladle the soup into bowls, distributing wontons and spinach evenly.
Keeping this soup simple allows the clean flavors to shine—the silky wonton wrappers give way to juicy pork, while the spinach adds a fresh, earthy note. Serve it immediately, perhaps with a sprinkle of green onions or a dash of chili oil for a subtle kick, and let its warmth fill the quiet space around you.
Kung Pao Chicken with Zucchini Noodles
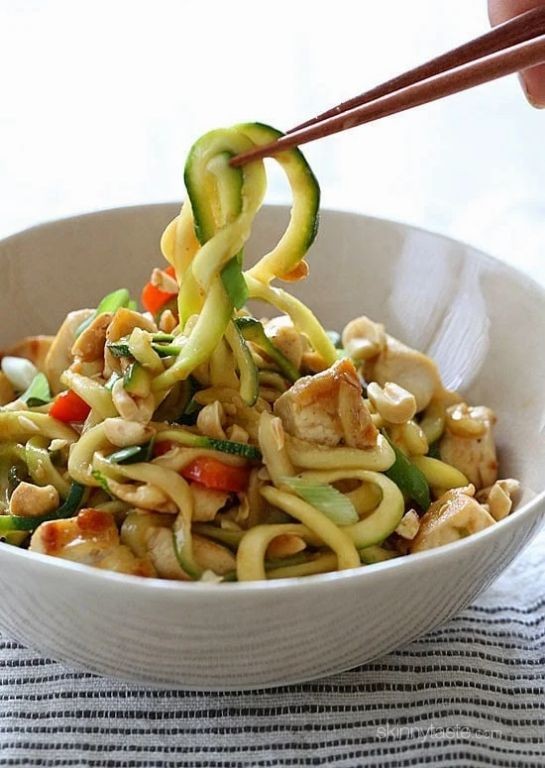
Holding a warm bowl on this quiet evening, I find myself returning to this simple, comforting dish—a gentle twist on a classic that feels both nourishing and familiar, like a soft conversation with the kitchen. It’s a quiet dance of textures and flavors, perfect for a reflective meal alone.
Serving: 4 | Pre Time: 15 minutes | Cooking Time: 15 minutes
Ingredients
For the chicken:
– 1 pound boneless, skinless chicken breasts, cut into 1-inch cubes
– 2 tablespoons cornstarch
– 1 tablespoon vegetable oil
For the sauce:
– 1/4 cup low-sodium soy sauce
– 2 tablespoons rice vinegar
– 1 tablespoon honey
– 1 teaspoon sesame oil
– 1/2 teaspoon red pepper flakes
– 2 cloves garlic, minced
– 1 teaspoon grated fresh ginger
For the vegetables:
– 4 medium zucchinis, spiralized into noodles
– 1/2 cup unsalted roasted peanuts
– 2 green onions, thinly sliced
Instructions
1. In a medium bowl, toss the cubed chicken with 2 tablespoons cornstarch until evenly coated.
2. Heat 1 tablespoon vegetable oil in a large skillet or wok over medium-high heat until it shimmers, about 1 minute.
3. Add the coated chicken to the hot skillet in a single layer, cooking undisturbed for 3 minutes to develop a golden sear.
4. Flip the chicken pieces and cook for another 3 minutes, or until the internal temperature reaches 165°F on an instant-read thermometer.
5. Transfer the cooked chicken to a clean plate, leaving any oil in the skillet.
6. In a small bowl, whisk together 1/4 cup low-sodium soy sauce, 2 tablespoons rice vinegar, 1 tablespoon honey, 1 teaspoon sesame oil, 1/2 teaspoon red pepper flakes, 2 minced garlic cloves, and 1 teaspoon grated ginger until smooth.
7. Reduce the skillet heat to medium and pour the sauce mixture into the skillet, stirring constantly for 1 minute until it slightly thickens.
8. Add the spiralized zucchini noodles to the skillet, tossing gently with the sauce for 2 minutes until just softened but still crisp-tender.
9. Return the cooked chicken to the skillet along with 1/2 cup unsalted roasted peanuts, stirring everything together for 1 minute to combine and warm through.
10. Remove the skillet from the heat and sprinkle with 2 thinly sliced green onions.
Mildly spicy and deeply savory, the tender chicken mingles with the crisp zucchini noodles, while the peanuts add a satisfying crunch. Serve it warm in shallow bowls, perhaps with a sprinkle of extra green onions for a fresh finish, letting the gentle heat and nutty notes linger on the palate like a quiet memory.
Clear Broth Hot and Sour Soup
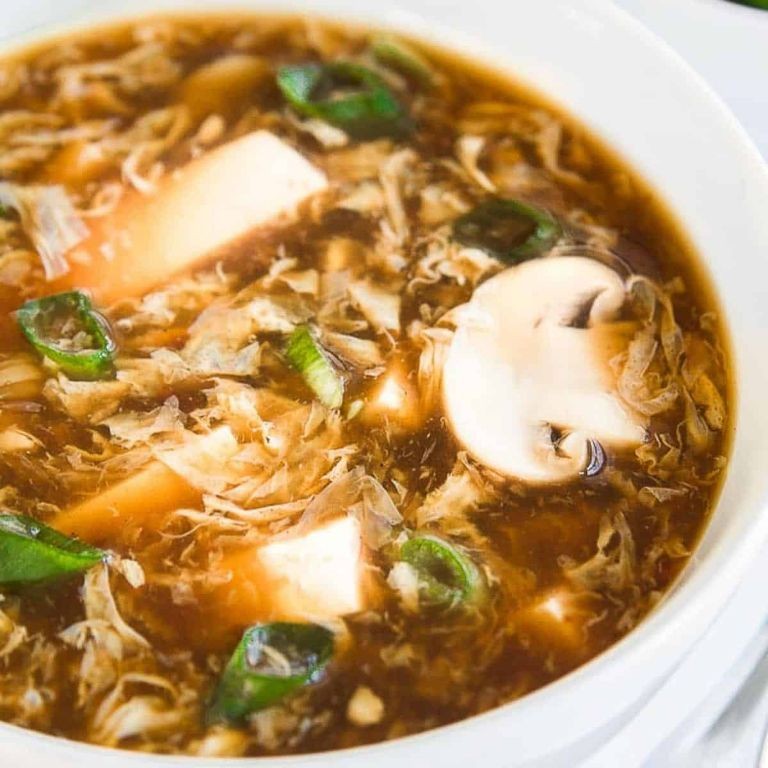
Musing quietly in the kitchen, I find myself drawn to the gentle steam rising from a pot, a simple ritual that transforms humble ingredients into something deeply comforting. This clear broth hot and sour soup feels like a quiet conversation between warmth and tang, a delicate balance that soothes the soul on a reflective evening. It’s a dish that whispers rather than shouts, inviting you to slow down and savor each subtle note.
Serving: 4 | Pre Time: 15 minutes | Cooking Time: 25 minutes
Ingredients
For the broth:
– 6 cups chicken broth
– 1 tbsp vegetable oil
– 2 cloves garlic, minced
– 1-inch piece ginger, grated
For the vegetables and protein:
– 4 oz firm tofu, cut into ½-inch cubes
– ½ cup shiitake mushrooms, thinly sliced
– ¼ cup bamboo shoots, julienned
For seasoning and finishing:
– 3 tbsp rice vinegar
– 2 tbsp soy sauce
– 1 tsp white pepper
– 1 large egg, lightly beaten
– 2 green onions, thinly sliced
– 1 tsp sesame oil
Instructions
1. Heat 1 tbsp vegetable oil in a large pot over medium heat until it shimmers, about 1 minute.
2. Add 2 cloves minced garlic and 1-inch grated ginger, stirring constantly for 30 seconds until fragrant but not browned.
3. Pour in 6 cups chicken broth and bring to a gentle simmer over medium-high heat, which should take about 5 minutes.
4. Reduce heat to medium-low and add 4 oz tofu cubes, ½ cup shiitake mushrooms, and ¼ cup bamboo shoots, simmering uncovered for 10 minutes to soften the vegetables.
5. Stir in 3 tbsp rice vinegar, 2 tbsp soy sauce, and 1 tsp white pepper, mixing well to combine the flavors evenly.
6. While stirring the soup in a circular motion, slowly drizzle in 1 lightly beaten egg to form thin ribbons, which takes about 30 seconds.
7. Remove the pot from heat and stir in 2 sliced green onions and 1 tsp sesame oil just before serving.
8. Ladle the soup into bowls immediately to preserve the delicate texture of the egg ribbons.
Each spoonful offers a silky broth with tender tofu and crisp bamboo shoots, the tang of vinegar softening into a peppery warmth. Enjoy it alongside steamed rice for a light meal, or garnish with extra green onions for a fresh, vibrant finish.
Scallion Ginger Steamed Fish
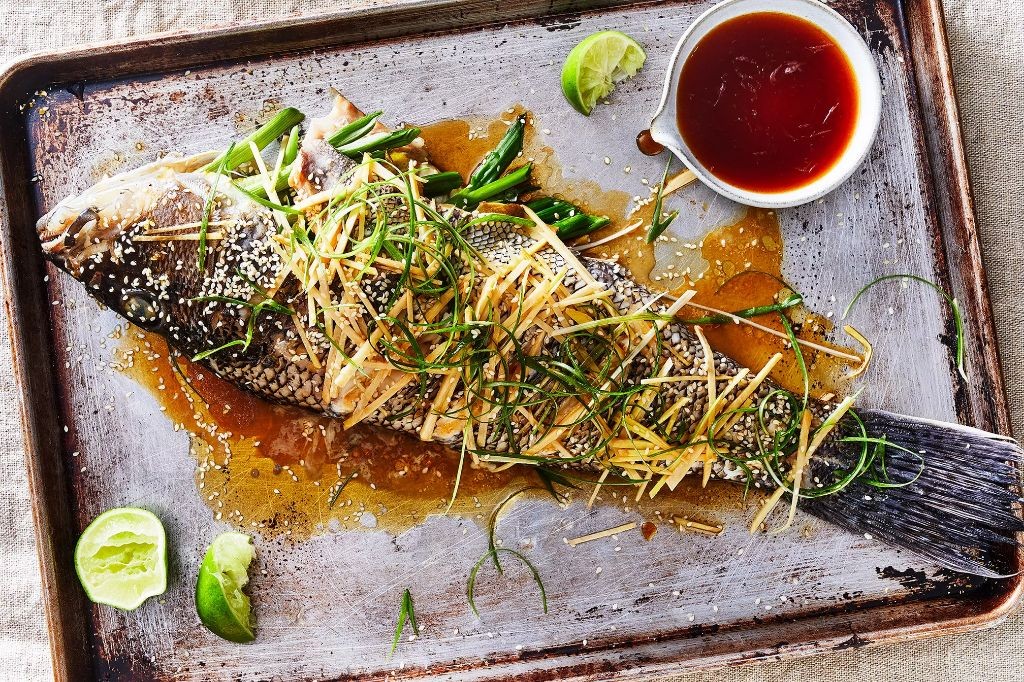
Tonight, as the winter light fades outside my window, I find myself drawn to the quiet simplicity of a dish that feels like a gentle exhale—steamed fish with scallion and ginger, a recipe that whispers of comfort and clarity in every tender bite.
Serving: 4 | Pre Time: 15 minutes | Cooking Time: 15 minutes
Ingredients
For the fish and steaming:
– 1 whole white fish (about 2 lbs), such as sea bass or snapper, cleaned and scaled
– 1 teaspoon kosher salt
– 1 tablespoon Shaoxing wine
– 1-inch piece fresh ginger, thinly sliced into 6 rounds
For the aromatics and sauce:
– 4 scallions, white and green parts separated and thinly sliced
– 2-inch piece fresh ginger, julienned into thin matchsticks
– 3 tablespoons neutral oil (like vegetable or canola oil)
– 2 tablespoons light soy sauce
– 1 teaspoon sesame oil
– ¼ teaspoon white pepper
Instructions
1. Pat the fish dry thoroughly with paper towels inside and out to ensure even steaming and prevent sogginess.
2. Score the fish with 3 shallow diagonal cuts on each side to help it cook evenly and absorb flavors.
3. Rub the fish all over with 1 teaspoon kosher salt and 1 tablespoon Shaoxing wine, including inside the cavity.
4. Place the 6 ginger slices in a single layer on a heatproof plate that fits inside your steamer basket.
5. Lay the fish on top of the ginger slices, arranging it so it lies flat without overlapping the plate edges.
6. Bring 2 inches of water to a rolling boil in a wok or pot fitted with a steamer rack over high heat.
7. Carefully place the plate with the fish into the steamer, cover tightly with a lid, and steam for exactly 12 minutes over medium-high heat.
8. While the fish steams, combine the sliced scallion whites, julienned ginger, 2 tablespoons light soy sauce, 1 teaspoon sesame oil, and ¼ teaspoon white pepper in a small bowl.
9. Heat 3 tablespoons neutral oil in a small saucepan over medium heat until it shimmers and reaches 350°F, about 2 minutes.
10. Once the fish is cooked—it should flake easily with a fork and the eyes will turn white—carefully remove the plate from the steamer using tongs and pour off any accumulated liquid.
11. Scatter the scallion greens evenly over the steamed fish for a fresh, colorful garnish.
12. Pour the soy sauce mixture over the fish, focusing on the scored areas to let it seep into the flesh.
13. Immediately drizzle the hot oil over the aromatics on the fish; you’ll hear a satisfying sizzle as the flavors bloom.
14. Serve the fish directly from the plate while it’s still piping hot to enjoy the contrast of textures.
On the plate, the fish yields with a delicate flakiness, infused with the warm, earthy notes of ginger and the bright punch of scallion. The hot oil crisps the aromatics just slightly, adding a whisper of texture against the silky flesh—perfect alongside steamed jasmine rice to soak up every drop of the savory sauce, or with a side of blanched bok choy for a light, balanced meal.
Miso-Glazed Eggplant with Sesame Seeds
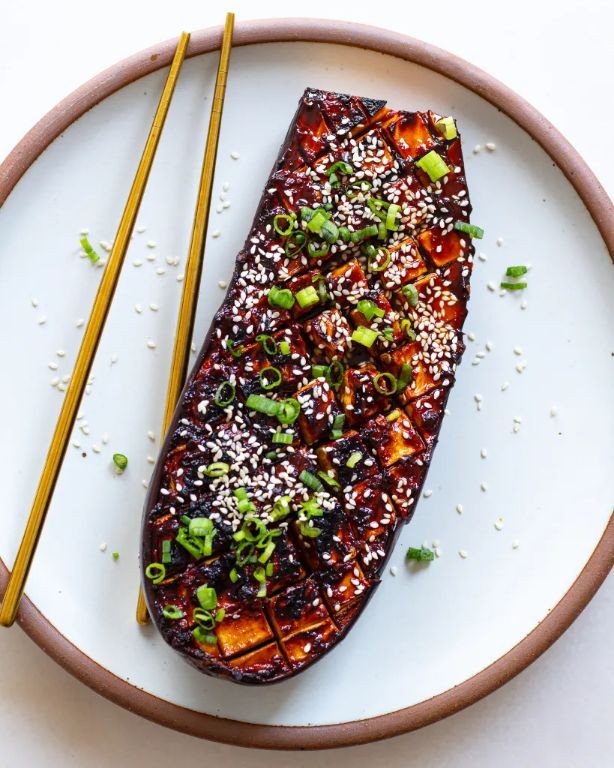
Sometimes the simplest ingredients, when given a little attention, transform into something quietly profound. This miso-glazed eggplant, with its glossy finish and nutty sesame seeds, feels like a gentle embrace on a quiet evening—a humble vegetable elevated to a dish that’s both comforting and elegant.
Serving: 4 | Pre Time: 10 minutes | Cooking Time: 25 minutes
Ingredients
For the eggplant:
– 2 medium eggplants (about 1½ lbs total)
– 2 tbsp vegetable oil
– ½ tsp kosher salt
For the glaze:
– 3 tbsp white miso paste
– 1 tbsp honey
– 1 tbsp rice vinegar
– 1 tbsp water
– 1 tsp grated fresh ginger
For finishing:
– 1 tbsp toasted sesame seeds
– 1 thinly sliced green onion (scallion)
Instructions
1. Preheat your oven to 425°F and line a large baking sheet with parchment paper.
2. Slice each eggplant in half lengthwise, then use the tip of a knife to score the flesh in a crosshatch pattern, being careful not to cut through the skin.
3. Brush the cut sides of the eggplant halves evenly with the 2 tbsp of vegetable oil and sprinkle them with the ½ tsp of kosher salt.
4. Place the eggplant halves cut-side down on the prepared baking sheet and roast for 15 minutes.
5. While the eggplant roasts, whisk together the 3 tbsp white miso paste, 1 tbsp honey, 1 tbsp rice vinegar, 1 tbsp water, and 1 tsp grated ginger in a small bowl until completely smooth.
6. After 15 minutes, carefully flip the eggplant halves over so the cut sides face up. (Tip: The skin should be slightly wrinkled and the flesh beginning to soften.)
7. Spoon the miso glaze evenly over the scored flesh of each eggplant half, using the back of the spoon to spread it into the grooves.
8. Return the baking sheet to the oven and roast for another 8–10 minutes, until the glaze is bubbly and caramelized at the edges. (Tip: Watch closely near the end to prevent burning.)
9. Remove the baking sheet from the oven and let the eggplant rest for 5 minutes to allow the flavors to settle. (Tip: This resting time helps the glaze set slightly.)
10. Sprinkle the roasted eggplant halves evenly with the 1 tbsp toasted sesame seeds and the sliced green onion before serving.
The flesh becomes impossibly tender, almost silky, beneath the sticky-sweet and savory glaze that caramelizes into a beautiful lacquer. Serve it warm over a bowl of steamed rice, letting the rich umami sauce mingle with the grains, or alongside simply grilled fish for a complete, nourishing meal.
Chicken and Broccoli Stir-Fry with Oyster Sauce
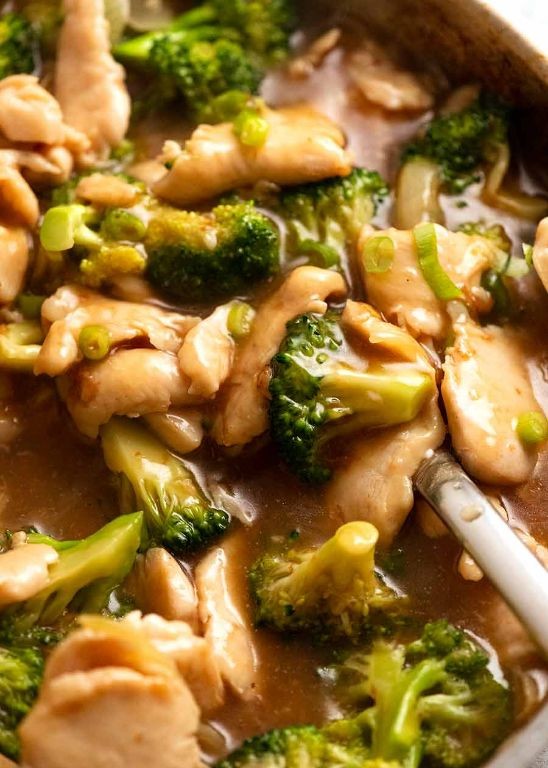
Evenings like this, with the kitchen quiet and the world outside hushed, call for something simple yet deeply comforting—a meal that comes together with gentle motions and fills the air with a warm, savory promise.
Serving: 4 | Pre Time: 15 minutes | Cooking Time: 15 minutes
Ingredients
For the sauce:
– 1/4 cup oyster sauce
– 2 tbsp low-sodium soy sauce
– 1 tbsp rice vinegar
– 1 tsp toasted sesame oil
– 1/2 cup water
For the stir-fry:
– 1 lb boneless, skinless chicken thighs, cut into 1-inch pieces
– 1/4 cup cornstarch
– 3 tbsp vegetable oil, divided
– 4 cups broccoli florets (about 1 large head)
– 3 cloves garlic, minced
– 1 tbsp fresh ginger, grated
Instructions
1. In a small bowl, whisk together 1/4 cup oyster sauce, 2 tbsp low-sodium soy sauce, 1 tbsp rice vinegar, 1 tsp toasted sesame oil, and 1/2 cup water until smooth. Set aside.
2. Place 1 lb of chicken pieces in a medium bowl and toss with 1/4 cup cornstarch until evenly coated.
3. Heat 2 tbsp of vegetable oil in a large skillet or wok over medium-high heat until it shimmers, about 2 minutes.
4. Add the coated chicken to the hot oil in a single layer. Cook without stirring for 4 minutes to develop a golden crust.
5. Flip the chicken pieces and cook for another 3 minutes until browned and cooked through. Transfer to a plate.
6. Add the remaining 1 tbsp of vegetable oil to the same skillet. Add 4 cups of broccoli florets and stir-fry for 3 minutes until bright green and slightly tender.
7. Push the broccoli to the sides of the skillet. Add 3 cloves of minced garlic and 1 tbsp of grated ginger to the center and cook for 30 seconds until fragrant.
8. Pour the prepared sauce into the skillet and bring to a simmer over medium heat, stirring gently.
9. Return the cooked chicken to the skillet, stirring to coat everything in the sauce. Simmer for 2 minutes until the sauce thickens slightly and clings to the ingredients.
10. Remove from heat and let rest for 1 minute before serving.
Lightly glossy from the oyster sauce, each bite offers tender chicken with crisp-tender broccoli in a savory, umami-rich glaze. Serve it over steamed jasmine rice to soak up every drop, or spoon it into lettuce cups for a fresh, crunchy contrast.
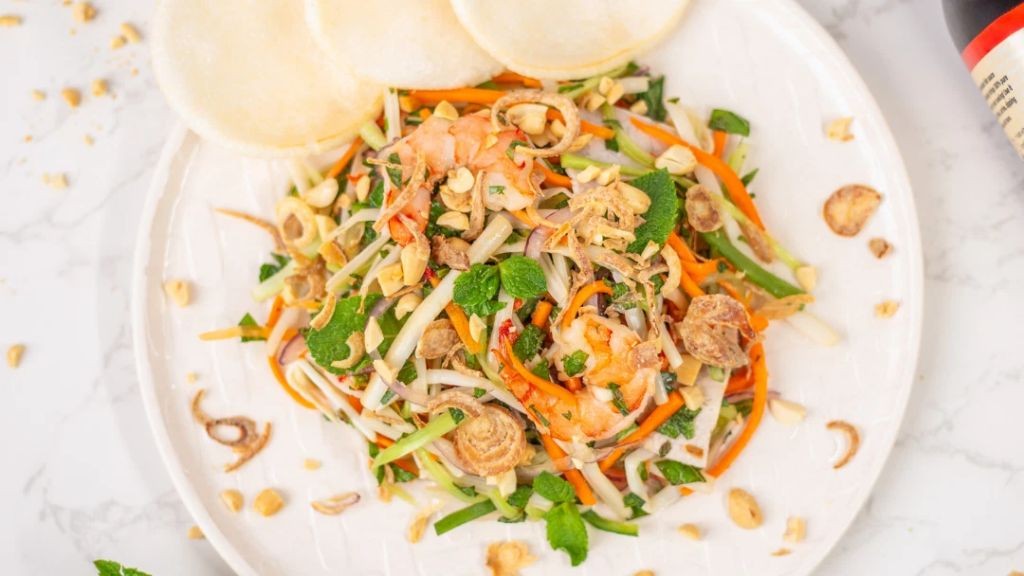
Lotus Root Salad with Honey Lime Dressing
Remembering the quiet crunch of lotus root from a market visit last autumn, I’ve been longing to recreate that crisp, clean bite at home, pairing it with a dressing that’s both sweet and bright to lift the spirit on a gray day.
Serving: 4 | Pre Time: 20 minutes | Cooking Time: 5 minutes
Ingredients
For the Salad
– 1 large lotus root (about 12 oz), peeled
– 1 medium carrot, peeled
– 1/4 small red cabbage
– 1/4 cup fresh cilantro leaves
For the Honey Lime Dressing
– 3 tbsp fresh lime juice
– 2 tbsp honey
– 1 tbsp extra-virgin olive oil
– 1/4 tsp fine sea salt
Instructions
1. Fill a medium saucepan with 4 cups of water and bring it to a rolling boil over high heat.
2. While the water heats, slice the peeled lotus root into 1/8-inch thick rounds using a sharp knife or mandoline for uniform pieces.
3. Once the water is boiling, carefully add the lotus root slices and blanch them for exactly 2 minutes to soften them slightly while retaining crunch.
4. Immediately drain the lotus root in a colander and rinse under cold running water for 1 minute to stop the cooking process, which helps preserve their pale color and crisp texture.
5. Pat the blanched lotus root dry thoroughly with paper towels to prevent the salad from becoming watery.
6. Using the large holes of a box grater, shred the peeled carrot into a large mixing bowl.
7. Thinly slice the red cabbage into 1/4-inch strips and add them to the bowl with the carrot.
8. Add the dried lotus root slices and cilantro leaves to the mixing bowl.
9. In a small bowl, whisk together the lime juice, honey, olive oil, and sea salt until the honey is fully dissolved and the mixture is emulsified, about 30 seconds of vigorous whisking.
10. Pour the dressing over the salad ingredients in the large bowl.
11. Using clean hands or salad tongs, gently toss everything together for about 1 minute until all components are evenly coated with the dressing.
Using this salad feels like a small celebration of textures—the lotus root offers a satisfying, water-chestnut-like crunch against the softer shreds of carrot and cabbage, all brightened by the tangy-sweet dressing that clings perfectly. For a heartier meal, try topping it with grilled shrimp or serving it alongside seared salmon to let the fresh flavors shine.
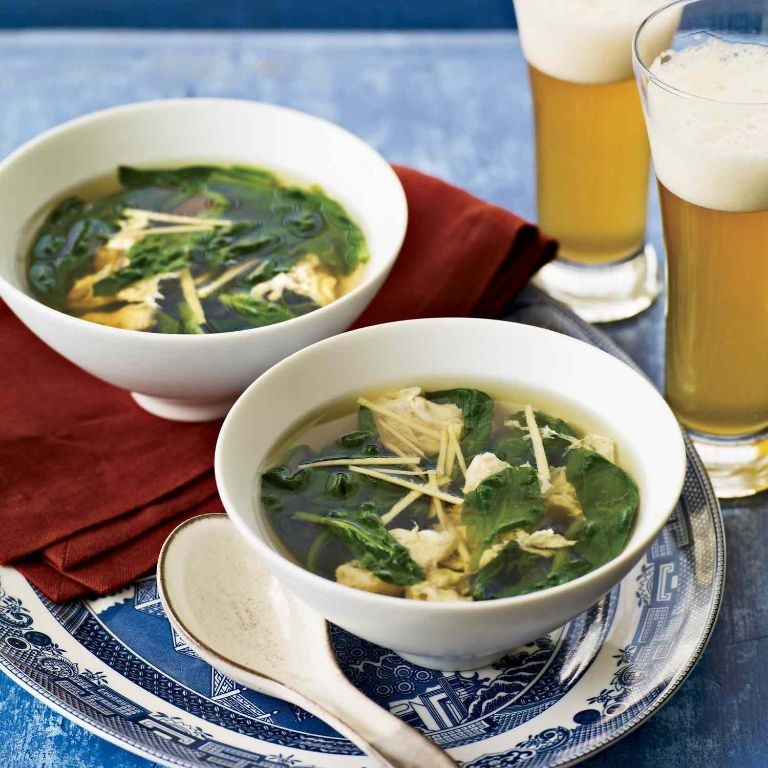
Spinach and Egg Drop Soup
Just now, as the winter light fades outside my kitchen window, I find myself craving something simple and nourishing—a quiet moment with a bowl of soup that feels like a gentle embrace. This spinach and egg drop soup is exactly that, a humble recipe where a few basic ingredients come together to create something deeply comforting and warm.
Serving: 4 | Pre Time: 10 minutes | Cooking Time: 15 minutes
Ingredients
For the broth:
– 6 cups low-sodium chicken broth
– 1 tablespoon soy sauce
– 1 teaspoon sesame oil
– 1/2 teaspoon ground ginger
For the soup:
– 4 cups fresh spinach leaves, roughly chopped
– 3 large eggs
– 2 green onions, thinly sliced
– 1/4 teaspoon white pepper
Instructions
1. Pour 6 cups of low-sodium chicken broth into a large pot and place it over medium-high heat.
2. Add 1 tablespoon of soy sauce, 1 teaspoon of sesame oil, and 1/2 teaspoon of ground ginger to the broth, stirring gently to combine.
3. Bring the broth to a boil, which should take about 5-7 minutes, then reduce the heat to maintain a steady simmer.
4. Tip: For a clearer broth, avoid stirring too vigorously once it simmers to prevent cloudiness.
5. Add 4 cups of roughly chopped fresh spinach leaves to the simmering broth, stirring until the spinach wilts, about 2 minutes.
6. In a small bowl, whisk 3 large eggs until the yolks and whites are fully blended and smooth.
7. Tip: Whisk the eggs thoroughly to ensure they create delicate ribbons when dropped into the soup.
8. While the soup simmers, slowly pour the whisked eggs in a thin, steady stream into the pot, using a fork to gently stir in a circular motion as you pour.
9. Cook the egg ribbons for 1 minute, or until they are set and opaque, then remove the pot from the heat immediately.
10. Stir in 2 thinly sliced green onions and 1/4 teaspoon of white pepper until evenly distributed.
11. Tip: Adding the green onions off the heat preserves their fresh crunch and vibrant color.
12. Ladle the soup into bowls and serve hot.
Silky egg ribbons float among tender spinach leaves, offering a smooth texture that contrasts with the slight bite of green onions. The broth carries a subtle warmth from ginger and a savory depth from soy sauce, making each spoonful feel restorative and light—perfect for a quiet evening or as a starter to a larger meal.
Black Pepper Beef with Bell Peppers
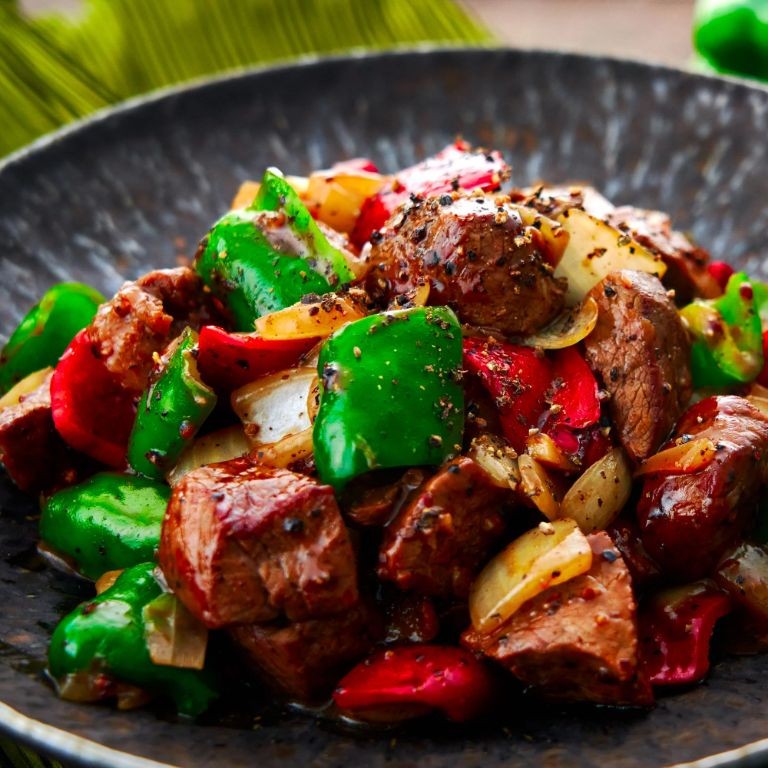
Here in the quiet kitchen, as evening settles outside, I find myself drawn to the familiar sizzle of beef meeting a hot pan—a sound that promises warmth and comfort. This black pepper beef with bell peppers is one of those dishes that feels like a gentle embrace, with its bold, peppery notes softened by the sweetness of crisp vegetables, perfect for a cozy weeknight dinner when you crave something both hearty and soothing.
Serving: 4 | Pre Time: 15 minutes | Cooking Time: 15 minutes
Ingredients
For the beef:
– 1 pound flank steak, thinly sliced against the grain
– 2 tablespoons soy sauce
– 1 tablespoon cornstarch
– 1 tablespoon vegetable oil
For the sauce:
– 1/4 cup low-sodium soy sauce
– 2 tablespoons oyster sauce
– 1 tablespoon freshly ground black pepper
– 1 teaspoon sugar
– 1/2 cup water
For the vegetables and cooking:
– 1 large red bell pepper, sliced into strips
– 1 large green bell pepper, sliced into strips
– 1 medium onion, sliced
– 2 cloves garlic, minced
– 2 tablespoons vegetable oil
Instructions
1. In a medium bowl, combine the sliced flank steak with 2 tablespoons soy sauce and 1 tablespoon cornstarch, tossing until the beef is evenly coated, and let it marinate for 10 minutes at room temperature to tenderize the meat.
2. While the beef marinates, whisk together 1/4 cup soy sauce, 2 tablespoons oyster sauce, 1 tablespoon black pepper, 1 teaspoon sugar, and 1/2 cup water in a small bowl to make the sauce, setting it aside for later use.
3. Heat 2 tablespoons vegetable oil in a large skillet or wok over medium-high heat until it shimmers, about 2 minutes, then add the marinated beef in a single layer, cooking without stirring for 2 minutes to achieve a golden-brown sear.
4. Flip the beef slices and cook for an additional 1 minute until browned on both sides, then transfer the beef to a clean plate, leaving any juices in the pan.
5. In the same skillet, add 1 tablespoon vegetable oil and heat over medium heat, then add the sliced onion, cooking for 3 minutes until it becomes translucent and slightly softened.
6. Add the minced garlic to the skillet and cook for 30 seconds until fragrant, being careful not to let it burn, as this can impart a bitter flavor to the dish.
7. Stir in the sliced red and green bell peppers, cooking for 4 minutes until they are tender-crisp and bright in color, which helps retain their nutritional value and fresh taste.
8. Return the cooked beef to the skillet with the vegetables, pouring the prepared sauce over the top, and stir everything together to combine evenly.
9. Increase the heat to high and bring the mixture to a simmer, cooking for 2 minutes until the sauce thickens slightly and coats the beef and vegetables, then remove from heat immediately to prevent overcooking.
This dish offers a delightful contrast of textures, with the tender, juicy beef complemented by the crisp bell peppers, all enveloped in a rich, peppery sauce that lingers warmly on the palate. Try serving it over a bed of fluffy jasmine rice or alongside steamed broccoli for a complete meal that feels both nourishing and indulgent.
Steamed Dumplings with Lean Turkey Filling
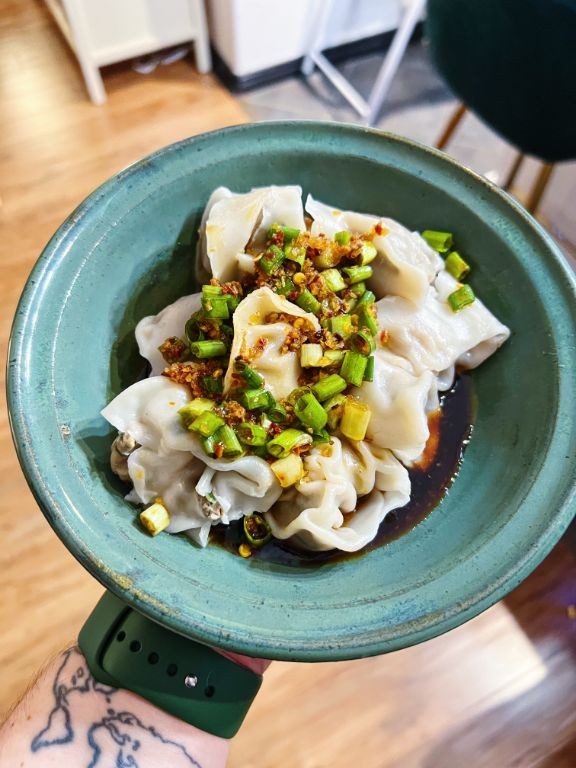
Venturing into the kitchen on this quiet evening, I find myself drawn to the gentle art of folding dumplings, a process that feels like a quiet conversation between hands and dough. This version, filled with lean turkey, offers a lighter, comforting twist on a classic, perfect for a reflective meal that warms from the inside out.
Serving: 4 | Pre Time: 40 minutes | Cooking Time: 15 minutes
Ingredients
For the Filling:
– 1 lb ground lean turkey (93% lean)
– 1/4 cup finely chopped green onions
– 2 tbsp low-sodium soy sauce
– 1 tbsp grated fresh ginger
– 1 tsp sesame oil
– 1/2 tsp ground white pepper
For Assembly and Cooking:
– 1 package (about 40) round dumpling wrappers
– 1/4 cup water, for sealing wrappers
– 2 tbsp vegetable oil, for cooking
– 1 cup water, for steaming
Instructions
1. In a medium bowl, combine the ground turkey, green onions, soy sauce, ginger, sesame oil, and white pepper. Mix with a fork or your hands until just combined; avoid overmixing to keep the filling tender.
2. Place 1 dumpling wrapper on a clean, dry surface. Spoon 1 teaspoon of the turkey filling into the center of the wrapper.
3. Dip your fingertip into the 1/4 cup of water and moisten the edges of the wrapper.
4. Fold the wrapper in half over the filling to form a half-moon shape. Pinch the edges firmly together to seal, pleating the top edge if desired for a traditional look. Tip: Ensure the seal is tight to prevent filling from leaking during cooking.
5. Repeat steps 2-4 with the remaining wrappers and filling, placing finished dumplings on a parchment-lined baking sheet without touching.
6. Heat the vegetable oil in a large non-stick skillet or wok over medium-high heat until it shimmers, about 2 minutes.
7. Arrange the dumplings in the skillet in a single layer, flat-side down, without crowding. Cook for 2-3 minutes until the bottoms turn golden brown and crisp.
8. Carefully pour the 1 cup of water into the skillet—it will sizzle—and immediately cover with a tight-fitting lid. Tip: Use a clear lid to monitor the steaming without losing heat.
9. Reduce the heat to medium-low and steam the dumplings for 8-10 minutes, until the wrappers become translucent and the filling is cooked through (internal temperature should reach 165°F).
10. Remove the lid and let any remaining water evaporate for 1-2 minutes to re-crisp the bottoms. Tip: Check one dumpling by cutting it open to ensure the turkey is no longer pink before serving.
11. Transfer the dumplings to a serving plate using a spatula.
Gently lifting a dumpling reveals its delicate, steamed wrapper giving way to a savory, moist filling, with the turkey offering a subtle, lean richness balanced by the ginger and soy. Serve them hot, perhaps with a simple dipping sauce of soy and vinegar, or alongside a crisp salad for a light, satisfying meal that feels both nourishing and serene.
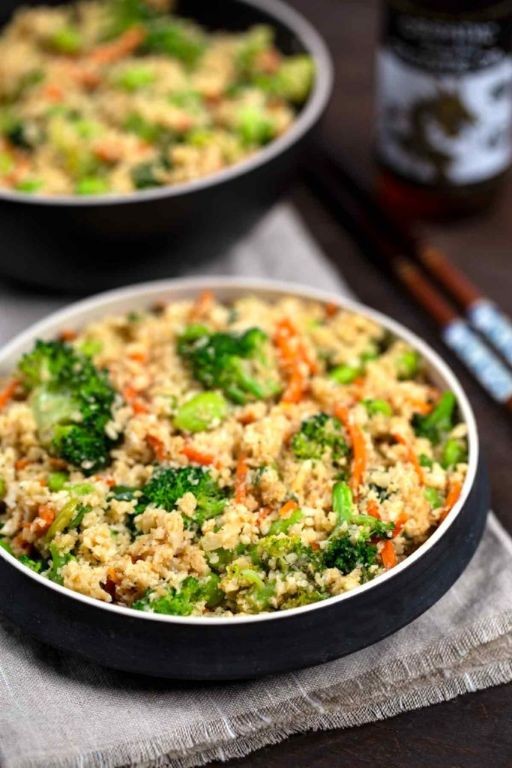
Stir-Fried Cauliflower Rice with Edamame
A quiet evening often calls for something simple yet nourishing, a meal that feels like a gentle pause in the day. Stir-fried cauliflower rice with edamame is just that—a light, vibrant dish that comes together with a comforting rhythm, turning humble ingredients into a warm, satisfying bowl.
Serving: 4 | Pre Time: 15 minutes | Cooking Time: 10 minutes
Ingredients
For the cauliflower rice:
– 1 large head of cauliflower, riced into 4 cups
– 2 tbsp olive oil
For the stir-fry:
– 1 cup shelled edamame, thawed if frozen
– 1 medium carrot, finely diced (about 1/2 cup)
– 2 cloves garlic, minced
– 1 tbsp fresh ginger, grated
For the sauce:
– 3 tbsp low-sodium soy sauce
– 1 tbsp rice vinegar
– 1 tsp sesame oil
– 1/4 tsp red pepper flakes
For garnish:
– 2 green onions, thinly sliced
– 1 tbsp sesame seeds
Instructions
1. Place the riced cauliflower in a clean kitchen towel and squeeze firmly over the sink to remove excess moisture, which helps prevent sogginess during cooking.
2. Heat 1 tbsp of olive oil in a large skillet or wok over medium-high heat until it shimmers, about 1 minute.
3. Add the riced cauliflower to the skillet and stir-fry for 5 minutes, until it turns lightly golden and tender, stirring occasionally to avoid burning.
4. Push the cauliflower to one side of the skillet and add the remaining 1 tbsp of olive oil to the empty space.
5. Add the edamame, diced carrot, minced garlic, and grated ginger to the oil, stir-frying for 2 minutes until fragrant and the carrots soften slightly.
6. Combine the cauliflower with the vegetable mixture in the skillet, stirring gently to integrate.
7. In a small bowl, whisk together the soy sauce, rice vinegar, sesame oil, and red pepper flakes until well blended.
8. Pour the sauce evenly over the cauliflower and vegetable mixture in the skillet.
9. Continue stir-frying for 2 more minutes, ensuring everything is coated and heated through, which allows the flavors to meld.
10. Remove the skillet from the heat and let it sit for 1 minute to settle.
11. Transfer the stir-fry to serving bowls and garnish with sliced green onions and sesame seeds.
But the true joy lies in the texture—each bite offers a tender crunch from the edamame against the fluffy cauliflower rice, all wrapped in a savory, slightly tangy sauce. Try serving it topped with a soft-boiled egg or alongside grilled tofu for a heartier meal, letting the subtle warmth of ginger and garlic linger on the palate like a quiet reminder of home.
Red Lentil Congee with Garlic Chives
Musing quietly in the kitchen as evening settles, I find comfort in the gentle rhythm of stirring this simple pot—a warm, creamy red lentil congee that feels like a soft embrace on a quiet night, with the subtle sharpness of garlic chives weaving through each spoonful.
Serving: 4 | Pre Time: 10 minutes | Cooking Time: 45 minutes
Ingredients
For the congee base:
– 1 cup red lentils, rinsed
– 4 cups water
– 1 teaspoon salt
For finishing:
– 1 tablespoon olive oil
– 1 cup garlic chives, chopped
– 1 tablespoon soy sauce
Instructions
1. In a medium pot, combine 1 cup rinsed red lentils and 4 cups water, then bring to a boil over medium-high heat.
2. Reduce the heat to low, cover the pot, and simmer for 30 minutes, stirring occasionally to prevent sticking—this slow cooking develops a creamy texture.
3. After 30 minutes, stir in 1 teaspoon salt and continue simmering uncovered for 10 more minutes, until the congee thickens to a porridge-like consistency.
4. While the congee simmers, heat 1 tablespoon olive oil in a small skillet over medium heat until it shimmers, about 2 minutes.
5. Add 1 cup chopped garlic chives to the skillet and sauté for 3-4 minutes, until they soften and release a fragrant aroma, being careful not to burn them.
6. Stir the sautéed garlic chives and 1 tablespoon soy sauce into the congee, mixing gently to combine evenly.
7. Remove the pot from the heat and let it rest for 5 minutes to allow the flavors to meld—this resting time enhances the depth of taste.
Kneading the silky smoothness of the congee with the crisp bite of garlic chives creates a comforting balance, perfect for ladling into bowls and garnishing with a drizzle of extra olive oil or a sprinkle of toasted sesame seeds for added texture.
Summary
Here’s to discovering that healthy eating can be incredibly delicious! This collection of 18 flavorful Chinese recipes proves you don’t have to sacrifice taste for your wellness goals. We’d love to hear which dish becomes your new favorite—leave a comment below and share this roundup on Pinterest to inspire fellow home cooks on their journey!


