Feeling like healthy eating has to break the bank? Think again! We’ve gathered 20 mouthwatering, budget-friendly recipes that prove nutritious meals can be simple, satisfying, and seriously delicious. From quick weeknight dinners to cozy comfort food, get ready to transform your kitchen routine without stressing your wallet. Let’s dive in and discover your new favorite go-to dishes!
Baked sweet potatoes with chickpeas

Perfectly roasted sweet potatoes, their caramelized edges glistening with olive oil, cradle a hearty medley of spiced chickpeas in this elegant yet approachable dish. It’s a symphony of earthy sweetness and savory warmth, ideal for a cozy winter evening or a sophisticated weeknight dinner. This recipe transforms humble ingredients into a visually stunning and deeply satisfying meal that celebrates simplicity and flavor.
Serving: 4 | Pre Time: 15 minutes | Cooking Time: 45 minutes
Ingredients
For the sweet potatoes:
– 4 medium sweet potatoes (about 2 pounds), scrubbed and patted dry
– 2 tablespoons olive oil
– 1 teaspoon kosher salt
For the chickpeas:
– 2 (15-ounce) cans chickpeas, drained and rinsed
– 2 tablespoons olive oil
– 1 teaspoon ground cumin
– 1 teaspoon smoked paprika
– 1/2 teaspoon garlic powder
– 1/2 teaspoon kosher salt
– 1/4 teaspoon black pepper
For serving:
– 1/4 cup fresh parsley, finely chopped
– 1/4 cup plain Greek yogurt
Instructions
1. Preheat your oven to 400°F and line a large baking sheet with parchment paper.
2. Pierce each sweet potato 4-5 times with a fork to allow steam to escape during baking.
3. Rub the sweet potatoes evenly with 2 tablespoons of olive oil and sprinkle with 1 teaspoon of kosher salt.
4. Place the sweet potatoes on the prepared baking sheet and bake for 45 minutes, or until they are tender when pierced with a knife and the skins are slightly crisp.
5. While the sweet potatoes bake, toss the drained chickpeas in a medium bowl with 2 tablespoons of olive oil, 1 teaspoon of ground cumin, 1 teaspoon of smoked paprika, 1/2 teaspoon of garlic powder, 1/2 teaspoon of kosher salt, and 1/4 teaspoon of black pepper until evenly coated.
6. Spread the seasoned chickpeas in a single layer on a separate parchment-lined baking sheet.
7. Roast the chickpeas in the oven at 400°F for 20-25 minutes, shaking the pan halfway through, until they are golden brown and crisp.
8. Remove both the sweet potatoes and chickpeas from the oven and let the sweet potatoes cool for 5 minutes.
9. Carefully slice each sweet potato open lengthwise and gently fluff the insides with a fork.
10. Divide the roasted chickpeas evenly among the sweet potatoes, spooning them over the top.
11. Garnish each serving with a dollop of Greek yogurt and a sprinkle of fresh parsley.
Each bite offers a delightful contrast: the creamy, sweet potato flesh against the crunchy, spiced chickpeas, with the cool yogurt adding a tangy balance. For a creative twist, serve this dish alongside a simple arugula salad dressed with lemon vinaigrette to complement the earthy flavors. Elegantly rustic, it’s a meal that feels both nourishing and indulgent, perfect for sharing or savoring solo.
Oatmeal with banana and peanut butter
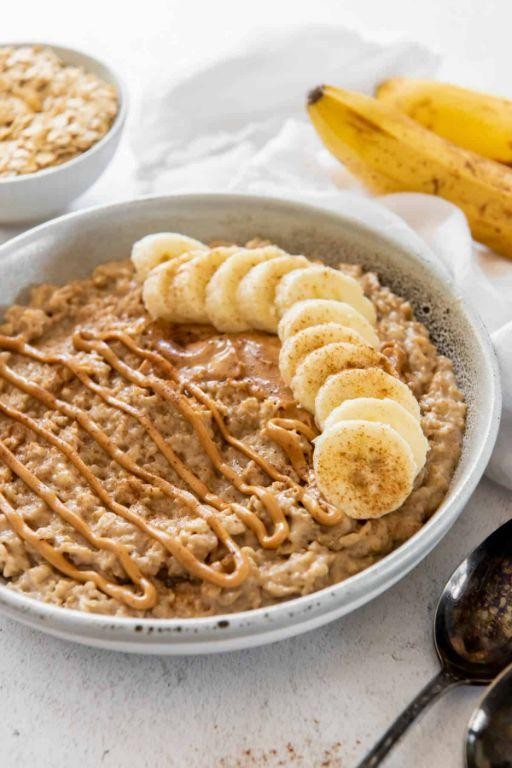
There’s something profoundly comforting about a bowl of oatmeal, especially when it’s elevated with the creamy richness of peanut butter and the natural sweetness of ripe banana. This simple yet sophisticated breakfast transforms humble ingredients into a nourishing masterpiece, offering a warm embrace to start any morning. It’s a timeless combination that feels both indulgent and wholesome, proving that elegance often lies in simplicity.
Serving: 1 | Pre Time: 2 minutes | Cooking Time: 5 minutes
Ingredients
For the oatmeal:
– 1/2 cup old-fashioned rolled oats
– 1 cup water or milk (dairy or non-dairy)
– 1/8 teaspoon fine sea salt
For the topping:
– 1 medium ripe banana, sliced
– 2 tablespoons creamy peanut butter
Instructions
1. In a small saucepan, combine 1/2 cup old-fashioned rolled oats, 1 cup water or milk, and 1/8 teaspoon fine sea salt.
2. Place the saucepan over medium-high heat and bring the mixture to a gentle boil, stirring occasionally to prevent sticking.
3. Reduce the heat to low and simmer the oatmeal for 4–5 minutes, stirring frequently, until it thickens to your desired consistency. Tip: For creamier oats, use milk instead of water and stir more often during simmering.
4. While the oatmeal cooks, slice 1 medium ripe banana into 1/4-inch rounds. Tip: Choose a banana with some brown speckles for maximum sweetness and easier mashing if desired.
5. Once the oatmeal is cooked, remove the saucepan from the heat and immediately stir in 2 tablespoons creamy peanut butter until fully incorporated and smooth. Tip: If the peanut butter is too thick, warm it slightly in the microwave for 10 seconds to make blending easier.
6. Transfer the peanut butter oatmeal to a serving bowl and top evenly with the sliced banana.
Oatmeal emerges luxuriously creamy from the melted peanut butter, with each spoonful offering a delightful contrast between the warm, nutty base and the cool, soft banana slices. The natural sugars in the banana caramelize slightly against the heat, enhancing the overall sweetness without added sugar. For a creative twist, drizzle with a touch of honey or sprinkle with cinnamon just before serving to add another layer of aromatic depth.
Stir-fried tofu with mixed vegetables

On a crisp winter evening when time feels precious yet nourishment remains essential, this stir-fried tofu with mixed vegetables emerges as the perfect solution—a vibrant, plant-based dish that balances simplicity with sophisticated flavors, transforming humble ingredients into a colorful, satisfying meal. Offering both visual appeal and nutritional harmony, it’s a versatile recipe that adapts effortlessly to seasonal produce or pantry staples, making it ideal for weeknight dinners or elegant gatherings alike.
Serving: 4 | Pre Time: 15 minutes | Cooking Time: 15 minutes
Ingredients
For the tofu:
– 1 (14-ounce) block extra-firm tofu, pressed for 10 minutes and cut into 1-inch cubes
– 2 tablespoons cornstarch
– ¼ teaspoon salt
– 2 tablespoons vegetable oil
For the vegetables:
– 1 tablespoon vegetable oil
– 1 red bell pepper, thinly sliced into ¼-inch strips
– 1 cup broccoli florets, cut into bite-sized pieces
– 1 cup snap peas, trimmed
– 1 medium carrot, julienned into 2-inch matchsticks
– 2 cloves garlic, minced
– 1 teaspoon grated fresh ginger
For the sauce:
– ¼ cup low-sodium soy sauce
– 2 tablespoons rice vinegar
– 1 tablespoon maple syrup
– 1 teaspoon toasted sesame oil
– 1 tablespoon cornstarch mixed with 2 tablespoons water
Instructions
1. Pat the pressed tofu cubes dry with paper towels to remove excess moisture. 2. In a medium bowl, toss the tofu cubes with 2 tablespoons cornstarch and ¼ teaspoon salt until evenly coated. 3. Heat 2 tablespoons vegetable oil in a large skillet or wok over medium-high heat until shimmering, about 2 minutes. 4. Add the coated tofu cubes in a single layer, cooking for 3–4 minutes per side until golden brown and crispy, then transfer to a plate. 5. In the same skillet, heat 1 tablespoon vegetable oil over medium-high heat. 6. Add the sliced red bell pepper, broccoli florets, snap peas, and julienned carrot, stirring constantly for 4–5 minutes until the vegetables are tender-crisp and bright in color. 7. Stir in the minced garlic and grated ginger, cooking for 30 seconds until fragrant. 8. Pour in the low-sodium soy sauce, rice vinegar, maple syrup, and toasted sesame oil, stirring to combine. 9. Return the crispy tofu to the skillet, gently folding it into the vegetables and sauce. 10. Add the cornstarch-water mixture to the skillet, stirring continuously for 1–2 minutes until the sauce thickens and coats the ingredients evenly. 11. Remove from heat and serve immediately.
This dish delights with contrasting textures—the crispy tofu yields to a tender interior, while the vegetables retain a satisfying crunch. The savory-sweet sauce, enhanced by ginger and garlic, clings beautifully to each component, creating a harmonious blend. Try serving it over jasmine rice or quinoa for a complete meal, or garnish with sesame seeds and sliced green onions for an extra touch of elegance.
Homemade vegetable stir-fry with brown rice
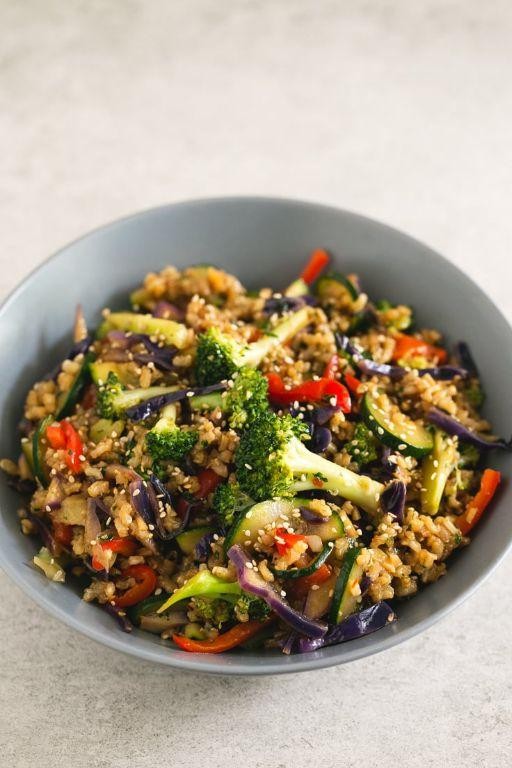
Keen to elevate your weeknight dinner with a dish that’s both nourishing and vibrant? This homemade vegetable stir-fry with brown rice transforms humble ingredients into a symphony of color and flavor, offering a wholesome, satisfying meal that feels as special as it is simple to prepare.
Serving: 4 | Pre Time: 15 minutes | Cooking Time: 25 minutes
Ingredients
For the Brown Rice:
– 1 cup brown rice
– 2 cups water
– 1/2 tsp salt
For the Stir-Fry:
– 2 tbsp vegetable oil, divided
– 1 lb mixed vegetables (such as bell peppers, broccoli florets, carrots, and snap peas), cut into uniform 1-inch pieces
– 3 cloves garlic, minced
– 1 tbsp fresh ginger, grated
For the Sauce:
– 1/4 cup low-sodium soy sauce
– 2 tbsp rice vinegar
– 1 tbsp honey
– 1 tsp cornstarch
– 1/4 cup water
Instructions
1. Rinse 1 cup of brown rice under cold water until the water runs clear to remove excess starch, which helps prevent clumping.
2. In a medium saucepan, combine the rinsed rice, 2 cups of water, and 1/2 tsp salt. Bring to a boil over high heat.
3. Reduce the heat to low, cover the saucepan, and simmer for 20 minutes, or until the rice is tender and the water is absorbed. Remove from heat and let it sit, covered, for 5 minutes to steam.
4. While the rice cooks, whisk together 1/4 cup low-sodium soy sauce, 2 tbsp rice vinegar, 1 tbsp honey, 1 tsp cornstarch, and 1/4 cup water in a small bowl until smooth to create the sauce.
5. Heat 1 tbsp vegetable oil in a large skillet or wok over medium-high heat until shimmering, about 1 minute.
6. Add 1 lb of mixed vegetables to the skillet and stir-fry for 5-7 minutes, until they are crisp-tender and lightly charred at the edges.
7. Push the vegetables to the sides of the skillet and add the remaining 1 tbsp vegetable oil to the center. Add 3 cloves minced garlic and 1 tbsp grated ginger, cooking for 30 seconds until fragrant, being careful not to burn them.
8. Pour the prepared sauce into the skillet, stirring constantly for 1-2 minutes until it thickens and coats the vegetables evenly.
9. Fluff the cooked brown rice with a fork and divide it among four serving bowls.
10. Top each bowl of rice with the vegetable stir-fry mixture, ensuring an even distribution.
Perfectly balanced, this dish delights with tender-crisp vegetables glazed in a savory-sweet sauce atop nutty brown rice. For a creative twist, garnish with toasted sesame seeds or a sprinkle of red pepper flakes to add a subtle crunch or heat, making each bite a harmonious blend of textures and flavors that’s sure to become a weeknight favorite.
Egg and spinach whole wheat wrap

Meticulously crafted for a nourishing yet indulgent meal, this egg and spinach whole wheat wrap combines wholesome ingredients with elegant simplicity. It’s a versatile dish that transitions effortlessly from a leisurely weekend brunch to a quick, satisfying weeknight dinner. The vibrant green spinach and fluffy scrambled eggs enveloped in a warm, nutty whole wheat tortilla create a harmonious balance of flavor and texture.
Serving: 2 | Pre Time: 5 minutes | Cooking Time: 10 minutes
Ingredients
For the wrap filling:
– 4 large eggs
– 2 cups fresh spinach leaves, packed
– 1/4 cup whole milk
– 1 tbsp unsalted butter
– 1/4 tsp kosher salt
– 1/8 tsp freshly ground black pepper
For assembly:
– 2 whole wheat tortillas (10-inch diameter)
– 2 tbsp crumbled feta cheese
Instructions
1. Crack the eggs into a medium bowl and whisk vigorously with the whole milk, kosher salt, and black pepper until fully combined and slightly frothy, about 30 seconds.
2. Heat a non-stick skillet over medium-low heat and add the unsalted butter, swirling until melted and foamy.
3. Pour the egg mixture into the skillet and let it sit undisturbed for 20 seconds to set slightly at the edges.
4. Using a silicone spatula, gently push the cooked edges toward the center, tilting the pan to allow uncooked egg to flow to the edges; repeat this process for 3–4 minutes until eggs are softly set but still slightly moist.
5. Immediately transfer the scrambled eggs to a clean plate to prevent overcooking.
6. In the same skillet over medium heat, add the fresh spinach leaves and cook for 1–2 minutes, stirring constantly, until just wilted but still bright green.
7. Warm the whole wheat tortillas in a dry skillet over medium heat for 30 seconds per side until pliable and lightly toasted.
8. Divide the scrambled eggs evenly between the two tortillas, placing them in the center of each.
9. Top the eggs with the wilted spinach, distributing it evenly.
10. Sprinkle 1 tablespoon of crumbled feta cheese over the spinach on each wrap.
11. Fold the bottom edge of each tortilla up over the filling, then fold in the sides and roll tightly away from you to form a secure wrap.
12. Serve immediately, or wrap in parchment paper for a portable meal.
Soft, fluffy scrambled eggs meld with the tender, earthy spinach, while the whole wheat tortilla adds a subtle nuttiness and satisfying chew. The salty tang of feta cheese provides a bright counterpoint to the rich eggs. For an elegant presentation, slice the wraps diagonally and serve with a side of fresh fruit or a simple arugula salad drizzled with lemon vinaigrette.
Chickpea and avocado sandwich
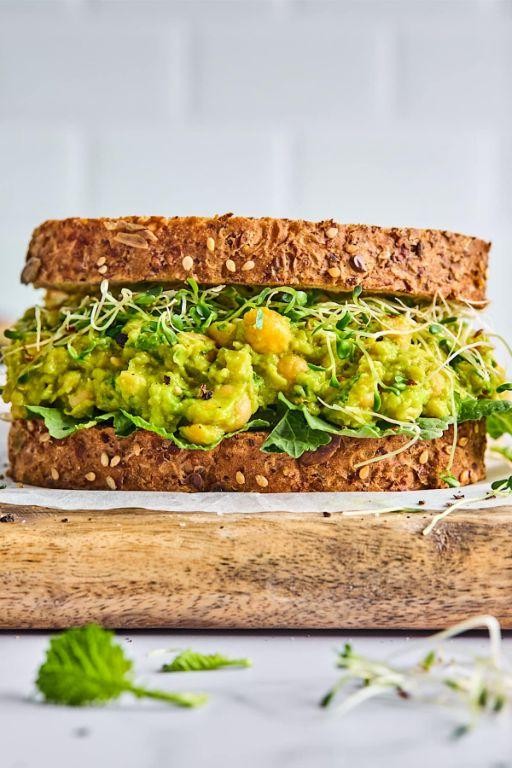
Wondrously simple yet sophisticated, this chickpea and avocado sandwich transforms humble ingredients into an elegant lunchtime masterpiece. With creamy textures and bright flavors, it offers a satisfying plant-based meal that feels both nourishing and indulgent. Perfect for a quick yet refined midday escape, it proves that extraordinary food need not be complicated.
Serving: 2 | Pre Time: 15 minutes | Cooking Time: 0 minutes
Ingredients
For the chickpea mash:
– 1 (15-ounce) can chickpeas, drained and rinsed
– 1 tablespoon fresh lemon juice
– 1 tablespoon extra-virgin olive oil
– 1/4 teaspoon kosher salt
– 1/8 teaspoon freshly ground black pepper
For assembly:
– 1 ripe avocado, pitted and peeled
– 4 slices whole-grain bread, toasted
– 1/4 cup microgreens or arugula
– 2 tablespoons thinly sliced red onion
Instructions
1. Place the drained chickpeas in a medium bowl and mash them thoroughly with a fork until mostly broken down but still slightly chunky.
2. Add the lemon juice, olive oil, salt, and pepper to the mashed chickpeas, then stir vigorously with the fork for 30 seconds until well combined and creamy.
3. Halve the avocado, remove the pit, scoop the flesh into a small bowl, and mash lightly with a fork until spreadable but retaining some texture.
4. Toast the bread slices in a toaster or oven until golden brown and crisp, about 2-3 minutes at 400°F if using an oven.
5. Spread half of the mashed avocado evenly onto two slices of the toasted bread, covering the surface completely.
6. Divide the chickpea mixture evenly between the two avocado-toasted slices, spreading it in an even layer over the avocado.
7. Sprinkle 1 tablespoon of sliced red onion over the chickpea layer on each sandwich.
8. Top each sandwich with 2 tablespoons of microgreens or arugula, arranging them gently to avoid crushing.
9. Place the remaining two slices of toasted bread on top to complete the sandwiches, pressing down lightly to adhere.
10. Cut each sandwich in half diagonally with a sharp serrated knife for clean edges.
Vibrant and satisfying, this sandwich delights with contrasting textures: the creamy avocado and chickpea mash against the crisp toast and fresh greens. The bright lemon and peppery notes make it a refreshing choice for a light lunch or picnic. For a creative twist, serve it open-faced on a toasted baguette slice, garnished with a drizzle of olive oil and a sprinkle of flaky sea salt.
One-pot vegetable pasta

Just when the holiday hustle leaves you craving something both nourishing and effortless, this one-pot vegetable pasta emerges as the ultimate weeknight savior—a vibrant medley of seasonal produce simmered to perfection in a rich, garlic-infused tomato broth that clings lovingly to every strand of pasta.
Serving: 4 | Prep Time: 15 minutes | Cooking Time: 25 minutes
Ingredients
For the Base:
– 2 tablespoons extra-virgin olive oil
– 1 medium yellow onion, finely diced
– 4 cloves garlic, minced
– 1 teaspoon dried oregano
– ½ teaspoon red pepper flakes (optional)
For the Vegetables and Pasta:
– 1 medium zucchini, cut into ½-inch half-moons
– 1 red bell pepper, cut into ½-inch strips
– 8 ounces cremini mushrooms, sliced
– 1 (28-ounce) can crushed tomatoes
– 4 cups vegetable broth
– 12 ounces dried linguine or fettuccine
– 1 teaspoon kosher salt
– ½ teaspoon freshly ground black pepper
For Finishing:
– ½ cup freshly grated Parmesan cheese
– ¼ cup chopped fresh basil leaves
Instructions
1. Heat the olive oil in a large Dutch oven or heavy-bottomed pot over medium heat until shimmering, about 2 minutes.
2. Add the diced onion and cook, stirring occasionally, until translucent and softened, about 5 minutes.
3. Stir in the minced garlic, dried oregano, and red pepper flakes (if using), and cook until fragrant, about 1 minute, being careful not to let the garlic brown.
4. Add the zucchini, red bell pepper, and cremini mushrooms to the pot. Cook, stirring occasionally, until the vegetables just begin to soften, about 5 minutes.
5. Pour in the crushed tomatoes and vegetable broth, then add the linguine, kosher salt, and black pepper. Tip: Break the pasta in half if necessary to ensure it’s fully submerged in the liquid.
6. Increase the heat to high and bring the mixture to a boil, which should take about 4–5 minutes.
7. Once boiling, immediately reduce the heat to a steady simmer. Cook uncovered, stirring every 2–3 minutes to prevent sticking, until the pasta is al dente and most of the liquid has been absorbed, about 12–14 minutes. Tip: The pasta should be tender but still have a slight bite; avoid overcooking, as it will continue to absorb liquid off the heat.
8. Remove the pot from the heat and stir in the grated Parmesan cheese until melted and creamy. Tip: For a richer sauce, let the pasta rest off the heat for 2 minutes before serving to allow the flavors to meld.
9. Divide the pasta among bowls and garnish generously with the chopped fresh basil.
Velvety strands of pasta, imbued with the essence of garlic and sweet tomatoes, cradle tender-crisp vegetables in a luxuriously silky sauce. Serve it straight from the pot for a cozy family dinner, or elevate it for guests with a drizzle of high-quality olive oil and an extra sprinkle of Parmesan.
Greek yogurt with honey and granola

Crafted with simplicity yet brimming with elegance, this Greek yogurt with honey and granola transforms humble ingredients into a sublime breakfast or dessert. Its creamy, tangy base provides the perfect canvas for the sweet, floral notes of honey and the satisfying crunch of homemade granola, offering a harmonious balance of textures and flavors in every spoonful.
Serving: 2 | Pre Time: 10 minutes | Cooking Time: 20 minutes
Ingredients
For the Granola
– 1 cup old-fashioned rolled oats
– 1/4 cup sliced almonds
– 2 tbsp pure maple syrup
– 1 tbsp coconut oil, melted
– 1/4 tsp ground cinnamon
– Pinch of sea salt
For Assembly
– 2 cups plain Greek yogurt (full-fat recommended)
– 4 tbsp raw honey
– 1/2 cup fresh mixed berries (such as blueberries and raspberries)
Instructions
1. Preheat your oven to 325°F and line a baking sheet with parchment paper.
2. In a medium bowl, combine the rolled oats, sliced almonds, maple syrup, melted coconut oil, ground cinnamon, and sea salt, stirring until the oats are evenly coated.
3. Spread the mixture in a single, even layer on the prepared baking sheet.
4. Bake for 15–20 minutes, stirring halfway through, until the granola is golden brown and fragrant, watching closely to prevent burning.
5. Remove the granola from the oven and let it cool completely on the baking sheet for about 10 minutes to crisp up.
6. While the granola cools, divide the Greek yogurt evenly between two serving bowls.
7. Drizzle 2 tablespoons of raw honey over the yogurt in each bowl, swirling gently with a spoon for a marbled effect.
8. Sprinkle the cooled granola generously over the yogurt and honey layers.
9. Top each bowl with 1/4 cup of fresh mixed berries, arranging them artfully for visual appeal.
Zesty and refreshing, this dish delights with its contrast of cool, creamy yogurt against the warm, toasty granola, while the honey lends a luxurious silkiness. For a creative twist, layer the components in a glass parfait or substitute seasonal fruits like sliced peaches or pomegranate seeds to highlight different times of the year.
Roasted cauliflower with turmeric

Just as the winter chill settles in, a vibrant, golden-hued dish emerges to warm both kitchen and soul: roasted cauliflower with turmeric. This elegant yet approachable recipe transforms humble florets into a fragrant, caramelized masterpiece, where earthy turmeric and aromatic spices create a symphony of flavor. Perfect for holiday gatherings or a cozy weeknight, it’s a dish that promises to delight the senses with its rich color and comforting aroma.
Serving: 4 | Pre Time: 15 minutes | Cooking Time: 30 minutes
Ingredients
For the cauliflower:
– 1 large head cauliflower, cut into 1-inch florets
– 3 tablespoons olive oil
– 1 teaspoon ground turmeric
– 1/2 teaspoon ground cumin
– 1/2 teaspoon smoked paprika
– 1/4 teaspoon black pepper
– 1 teaspoon kosher salt
For finishing:
– 2 tablespoons fresh lemon juice
– 2 tablespoons chopped fresh parsley
Instructions
1. Preheat the oven to 425°F and line a large baking sheet with parchment paper.
2. In a large bowl, whisk together the olive oil, turmeric, cumin, smoked paprika, black pepper, and kosher salt until fully combined.
3. Add the cauliflower florets to the bowl and toss thoroughly with the spice mixture, ensuring each piece is evenly coated.
4. Spread the cauliflower in a single layer on the prepared baking sheet, leaving space between florets to allow for proper browning.
5. Roast in the preheated oven for 25–30 minutes, flipping the florets halfway through, until they are tender and golden-brown at the edges.
6. Remove the baking sheet from the oven and drizzle the roasted cauliflower with fresh lemon juice while still hot.
7. Transfer the cauliflower to a serving dish and garnish with chopped fresh parsley.
Lusciously tender with crisp, caramelized edges, this roasted cauliflower offers a delightful contrast in textures. The turmeric infuses each bite with a warm, earthy depth, beautifully balanced by the bright acidity of lemon and the freshness of parsley. For a creative twist, serve it over a bed of creamy polenta or alongside grilled chicken for a complete, elegant meal.
Black bean and corn tacos

Heralding the vibrant flavors of the Southwest, these black bean and corn tacos offer a symphony of textures and tastes that are both nourishing and deeply satisfying. Perfect for a festive weeknight dinner or a casual gathering, they come together with minimal effort for maximum reward.
Serving: 4 | Pre Time: 15 minutes | Cooking Time: 15 minutes
Ingredients
For the Filling
– 1 tablespoon olive oil
– 1 medium yellow onion, finely diced
– 2 cloves garlic, minced
– 1 (15-ounce) can black beans, drained and rinsed
– 1 cup frozen corn kernels
– 1 teaspoon ground cumin
– 1/2 teaspoon chili powder
– 1/4 teaspoon smoked paprika
– 1/4 cup vegetable broth
– 2 tablespoons fresh lime juice
– Salt
For Assembly
– 8 small corn tortillas
– 1/2 cup crumbled queso fresco or cotija cheese
– 1/4 cup chopped fresh cilantro
– 1 ripe avocado, sliced
– 1/4 cup sour cream
Instructions
1. Heat the olive oil in a large skillet over medium heat until it shimmers, about 1 minute.
2. Add the diced onion and cook, stirring occasionally, until translucent and softened, about 5 minutes.
3. Stir in the minced garlic and cook until fragrant, about 30 seconds, being careful not to let it brown.
4. Add the drained black beans, frozen corn, cumin, chili powder, and smoked paprika to the skillet. Stir to coat the vegetables evenly with the spices.
5. Pour in the vegetable broth and bring the mixture to a gentle simmer. Cook, stirring occasionally, until the liquid is mostly absorbed and the corn is heated through, about 5 minutes. Tip: Using vegetable broth instead of water adds a subtle depth of flavor to the filling.
6. Remove the skillet from the heat and stir in the fresh lime juice. Season with salt to your preference.
7. While the filling rests, warm the corn tortillas. Heat a separate dry skillet or griddle over medium-high heat. Warm each tortilla for about 30 seconds per side, until pliable and lightly toasted in spots. Tip: Keep the warmed tortillas wrapped in a clean kitchen towel to stay soft and warm.
8. To assemble, spoon a generous portion of the black bean and corn filling into the center of each warmed tortilla.
9. Top each taco with crumbled queso fresco, chopped cilantro, sliced avocado, and a dollop of sour cream. Tip: For extra brightness, serve with additional lime wedges on the side.
Layers of creamy avocado and tangy cheese beautifully contrast the hearty, spiced bean mixture, creating a delightful play of textures in every bite. The fresh cilantro and lime juice cut through the richness, making these tacos feel light yet utterly satisfying. For a creative twist, try serving the filling over a bed of crisp romaine lettuce as a vibrant taco salad.
Homemade hummus with carrot sticks
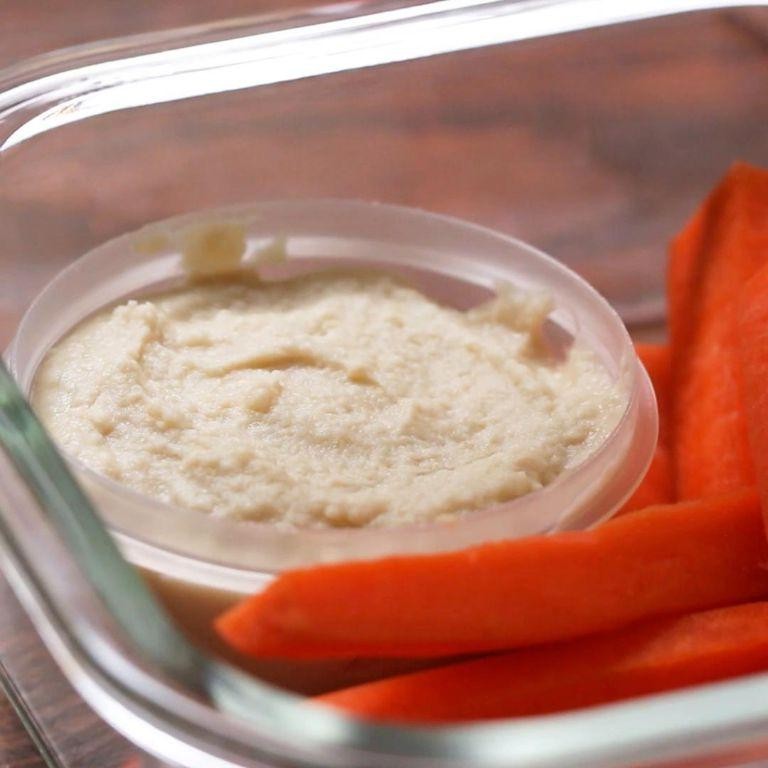
Luminous in its simplicity yet profound in flavor, this homemade hummus with carrot sticks offers a refreshing departure from store-bought dips. Crafted from pantry staples, it transforms humble chickpeas into a velvety, herb-kissed spread that pairs perfectly with crisp, sweet carrots. This elegant appetizer requires minimal effort but delivers maximum satisfaction, making it ideal for impromptu gatherings or a wholesome snack.
Serving: 4 | Pre Time: 15 minutes | Cooking Time: 0 minutes
Ingredients
For the hummus:
– 1 (15-ounce) can chickpeas, drained and rinsed
– 1/4 cup tahini
– 3 tablespoons fresh lemon juice
– 2 tablespoons extra-virgin olive oil, plus extra for drizzling
– 1 small garlic clove, minced
– 1/2 teaspoon ground cumin
– 1/4 teaspoon kosher salt
– 2-3 tablespoons ice water
For serving:
– 4 medium carrots, peeled and cut into 3-inch sticks
– 1 tablespoon chopped fresh parsley
Instructions
1. Combine the chickpeas, tahini, lemon juice, 2 tablespoons olive oil, minced garlic, cumin, and salt in a food processor.
2. Process the mixture on high speed for 1 minute until it forms a coarse paste, scraping down the sides with a spatula as needed.
3. With the processor running on low, slowly drizzle in 2 tablespoons of ice water through the feed tube and process for 30 seconds until smooth. Tip: Using ice water helps create an exceptionally creamy texture by preventing the tahini from seizing.
4. Check the consistency of the hummus; if it appears too thick, add the remaining 1 tablespoon of ice water and process for another 15 seconds.
5. Transfer the hummus to a shallow serving bowl and use the back of a spoon to create swirls on the surface.
6. Drizzle the hummus lightly with extra-virgin olive oil and sprinkle evenly with the chopped parsley. Tip: For optimal flavor, let the hummus rest at room temperature for 10 minutes before serving to allow the garlic and cumin notes to meld.
7. Arrange the carrot sticks around the bowl of hummus for dipping. Tip: To keep carrots crisp, store them in ice water for 5 minutes before cutting and pat dry thoroughly.
Delicately smooth with a subtle nuttiness from the tahini, this hummus boasts a bright acidity from fresh lemon that balances the earthy cumin. The carrot sticks provide a satisfying crunch and natural sweetness, making each dip a harmonious blend of textures. For a creative twist, serve alongside warm pita triangles or as a vibrant spread on crostini topped with microgreens.
Zucchini and tomato frittata
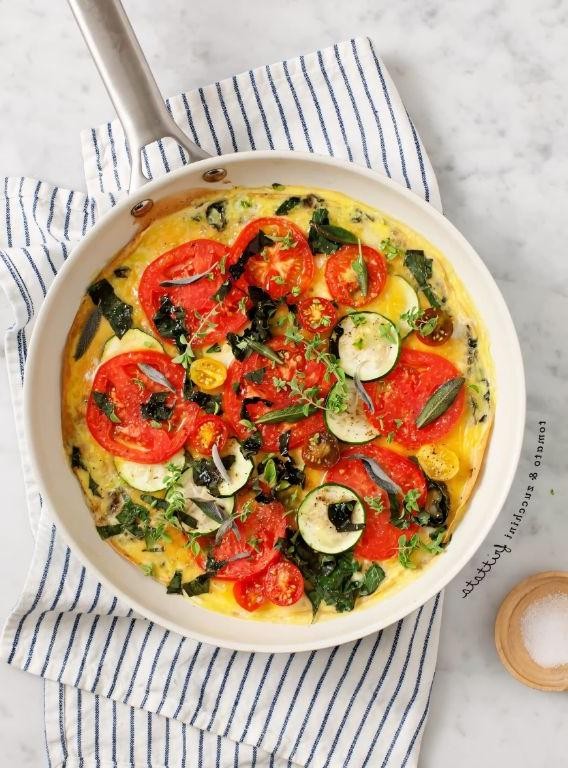
Nestled among the vibrant flavors of summer produce, a zucchini and tomato frittata emerges as a versatile centerpiece, effortlessly bridging the gap between a leisurely weekend brunch and an elegant weeknight supper. This Italian-inspired egg dish celebrates the garden’s bounty with a harmonious blend of tender vegetables and creamy, set eggs, all baked to golden perfection in a single skillet. Its simplicity belies a depth of flavor that feels both comforting and refined, making it an ideal canvas for seasonal improvisation or a steadfast classic to return to time and again.
Serving: 4 | Pre Time: 15 minutes | Cooking Time: 25 minutes
Ingredients
For the vegetable base:
– 2 tablespoons olive oil
– 1 medium zucchini (about 8 ounces), thinly sliced into 1/4-inch rounds
– 1 cup cherry tomatoes, halved
– 1/2 teaspoon kosher salt
– 1/4 teaspoon freshly ground black pepper
For the egg mixture:
– 8 large eggs
– 1/4 cup whole milk
– 1/2 cup grated Parmesan cheese
– 1 tablespoon chopped fresh basil
– 1/4 teaspoon kosher salt
Instructions
1. Preheat your oven to 375°F (190°C).
2. Heat 2 tablespoons of olive oil in a 10-inch oven-safe nonstick skillet over medium heat until shimmering, about 2 minutes.
3. Add the thinly sliced zucchini rounds to the skillet in a single layer, cooking until lightly golden and tender, about 5–7 minutes, flipping halfway through for even browning.
4. Stir in the halved cherry tomatoes, 1/2 teaspoon kosher salt, and 1/4 teaspoon black pepper, cooking until the tomatoes just begin to soften and release their juices, about 3 minutes. Tip: Avoid overcooking the tomatoes to maintain a bright, fresh texture in the final frittata.
5. In a medium bowl, whisk together 8 large eggs, 1/4 cup whole milk, 1/2 cup grated Parmesan cheese, 1 tablespoon chopped fresh basil, and 1/4 teaspoon kosher salt until fully combined and slightly frothy.
6. Pour the egg mixture evenly over the sautéed vegetables in the skillet, gently shaking the pan to distribute the ingredients.
7. Cook on the stovetop over medium-low heat without stirring until the edges begin to set, about 4–5 minutes. Tip: Running a silicone spatula around the edges helps create a clean release and encourages even cooking.
8. Transfer the skillet to the preheated oven and bake until the frittata is fully set in the center and the top is lightly golden, about 12–15 minutes. Tip: To test for doneness, insert a knife into the center—it should come out clean with no wet egg residue.
9. Remove the skillet from the oven using oven mitts and let the frittata cool in the pan for 5 minutes before slicing.
10. Slide the frittata onto a cutting board or serve directly from the skillet, slicing into wedges.
Buttery and tender from the slow-cooked zucchini, each bite of this frittata offers a delightful contrast between the creamy egg base and the juicy bursts of tomato. Serve it warm or at room temperature, perhaps with a drizzle of high-quality olive oil and a sprinkle of flaky sea salt for an extra layer of sophistication, or pair it with a simple arugula salad dressed in lemon vinaigrette to balance its richness.
Barley and mushroom stew
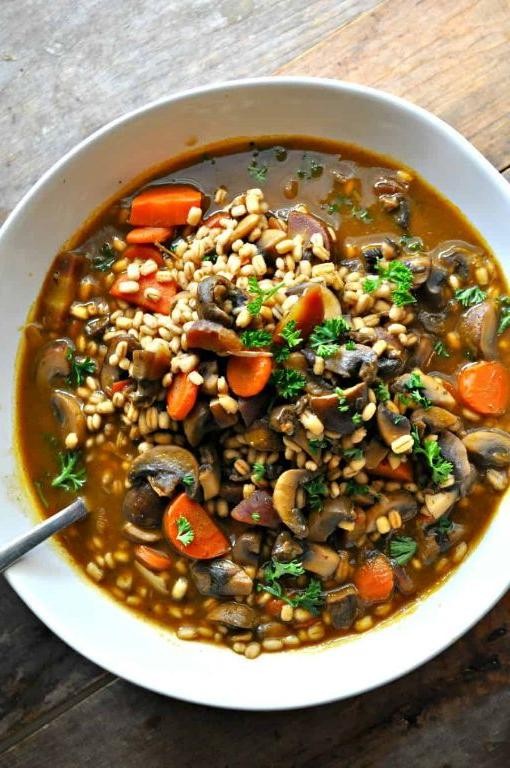
Crafted for cozy winter evenings, this barley and mushroom stew offers a hearty embrace of earthy flavors and satisfying textures. Its rich, savory broth and tender grains make it a comforting centerpiece that nourishes both body and soul.
Serving: 6 | Prep Time: 20 minutes | Cooking Time: 50 minutes
Ingredients
For the Base:
– 2 tablespoons olive oil
– 1 large yellow onion, finely diced
– 3 cloves garlic, minced
– 1 pound cremini mushrooms, sliced ¼-inch thick
– 1 teaspoon dried thyme
– ½ teaspoon smoked paprika
For the Stew:
– 1 cup pearled barley, rinsed
– 4 cups vegetable broth
– 2 cups water
– 2 medium carrots, peeled and diced into ½-inch pieces
– 2 celery stalks, diced into ½-inch pieces
– 1 bay leaf
– 1 teaspoon salt
– ½ teaspoon black pepper
For Finishing:
– 2 tablespoons fresh parsley, chopped
– 1 tablespoon balsamic vinegar
Instructions
1. Heat olive oil in a large Dutch oven or heavy-bottomed pot over medium heat until shimmering, about 2 minutes.
2. Add diced onion and cook, stirring occasionally, until translucent and softened, 5–7 minutes.
3. Stir in minced garlic and cook until fragrant, 30 seconds.
4. Add sliced mushrooms in a single layer and cook undisturbed for 4 minutes to develop a golden sear, then stir and cook until they release their liquid and brown, 8–10 minutes total.
5. Sprinkle dried thyme and smoked paprika over the mushroom mixture, stirring to coat evenly for 30 seconds.
6. Add rinsed barley, vegetable broth, water, diced carrots, diced celery, bay leaf, salt, and black pepper to the pot.
7. Bring to a boil over high heat, then reduce heat to low, cover, and simmer for 40 minutes, stirring halfway through to prevent sticking.
8. Remove the lid and simmer uncovered for 10 minutes to slightly thicken the broth.
9. Discard the bay leaf, then stir in chopped parsley and balsamic vinegar until incorporated.
10. Remove from heat and let rest for 5 minutes before serving.
Unveiling a velvety broth that clings to each chewy barley pearl, this stew delivers deep umami notes from the caramelized mushrooms, balanced by the sweet acidity of balsamic. Serve it in shallow bowls garnished with extra parsley, or alongside crusty bread for soaking up every last drop.
Spicy roasted chickpeas

Transform humble chickpeas into a sophisticated snack with this recipe for spicy roasted chickpeas, where a crisp exterior gives way to a tender, creamy interior, all enrobed in a warmly aromatic spice blend that promises both comfort and a gentle kick. This elegant yet simple preparation elevates a pantry staple into a crave-worthy treat perfect for gatherings or a refined solo indulgence.
Serving: 4 | Pre Time: 10 minutes | Cooking Time: 30 minutes
Ingredients
For the chickpeas:
– 2 (15-ounce) cans chickpeas, drained and rinsed
– 1 tablespoon olive oil
For the spice blend:
– 1 teaspoon smoked paprika
– 1/2 teaspoon garlic powder
– 1/2 teaspoon onion powder
– 1/4 teaspoon cayenne pepper
– 1/2 teaspoon salt
Instructions
1. Preheat your oven to 400°F and line a large baking sheet with parchment paper.
2. Pat the drained and rinsed chickpeas completely dry with a clean kitchen towel or paper towels to ensure maximum crispiness during roasting.
3. In a medium bowl, toss the dried chickpeas with 1 tablespoon of olive oil until evenly coated.
4. In a small bowl, whisk together 1 teaspoon smoked paprika, 1/2 teaspoon garlic powder, 1/2 teaspoon onion powder, 1/4 teaspoon cayenne pepper, and 1/2 teaspoon salt to create the spice blend.
5. Sprinkle the spice blend over the oiled chickpeas and toss vigorously until every chickpea is uniformly covered with the spices.
6. Spread the seasoned chickpeas in a single, uncrowded layer on the prepared baking sheet to allow for proper air circulation and even browning.
7. Roast the chickpeas in the preheated oven at 400°F for 25-30 minutes, shaking the pan halfway through the cooking time to promote uniform crisping and prevent burning.
8. Remove the baking sheet from the oven when the chickpeas are deeply golden brown, firm to the touch, and make a light rattling sound when shaken on the tray.
9. Let the roasted chickpeas cool completely on the baking sheet for about 10 minutes; they will continue to crisp up as they cool.
Crisp, warmly spiced, and utterly addictive, these chickpeas offer a satisfying crunch that mellows into a creamy center. Serve them still slightly warm in a elegant bowl as a cocktail accompaniment, or sprinkle over a salad for a textural contrast that elevates any simple dish.
Apple and cinnamon overnight oats
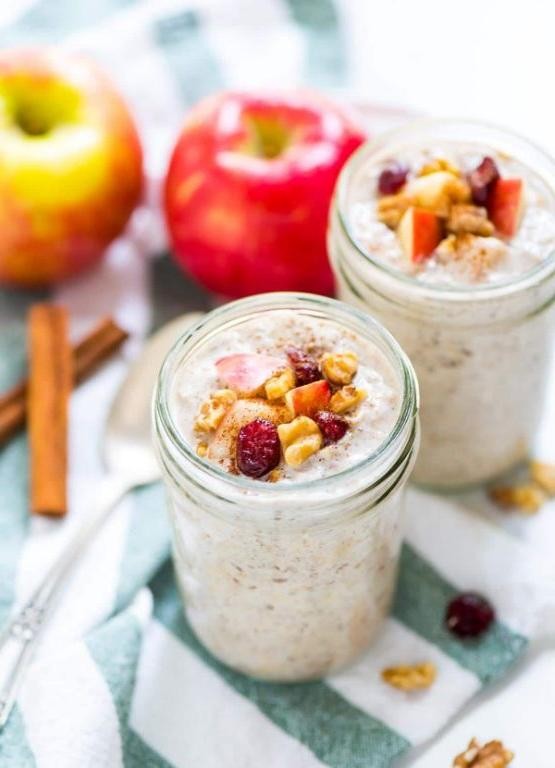
Crafted for those seeking a nourishing yet effortless morning ritual, these apple and cinnamon overnight oats transform humble ingredients into a creamy, spiced delight. As the oats soften overnight, they absorb the warm flavors of cinnamon and sweet apple, creating a breakfast that feels both comforting and elegant—perfect for busy mornings or leisurely brunches.
Serving: 2 | Pre Time: 10 minutes | Cooking Time: 0 minutes
Ingredients
For the Oat Base:
– 1 cup old-fashioned rolled oats
– 1 cup unsweetened almond milk
– 1 tablespoon pure maple syrup
– 1 teaspoon ground cinnamon
For the Apple Topping:
– 1 medium apple (such as Honeycrisp), peeled and diced into 1/4-inch pieces
– 1 tablespoon unsalted butter
– 1/4 teaspoon ground cinnamon
Instructions
1. In a medium mixing bowl, combine 1 cup old-fashioned rolled oats, 1 cup unsweetened almond milk, 1 tablespoon pure maple syrup, and 1 teaspoon ground cinnamon. Stir until all ingredients are fully incorporated.
2. Divide the oat mixture evenly between two 12-ounce jars or airtight containers, leaving about 1 inch of space at the top for the apple topping.
3. Seal the jars tightly with lids and refrigerate for at least 8 hours or overnight, allowing the oats to soften and absorb the liquid.
4. In a small skillet over medium heat, melt 1 tablespoon unsalted butter until it bubbles lightly, about 1 minute.
5. Add 1 medium peeled and diced apple and 1/4 teaspoon ground cinnamon to the skillet, stirring to coat the apple pieces evenly with the butter and cinnamon.
6. Cook the apple mixture, stirring occasionally, until the apples are tender and lightly caramelized, about 5–7 minutes; they should be soft but not mushy.
7. Remove the skillet from the heat and let the apple topping cool to room temperature, about 10 minutes.
8. Spoon the cooled apple topping evenly over the chilled oat mixture in the jars just before serving.
9. Stir gently to combine the layers, if desired, and serve immediately.
The result is a luxuriously creamy texture with tender oats that meld seamlessly with the warm, spiced apple pieces, offering a harmonious balance of sweetness and earthy cinnamon notes. For a creative twist, top with a dollop of Greek yogurt or a sprinkle of toasted walnuts to add a delightful crunch and extra protein.
Garlic roasted Brussels sprouts
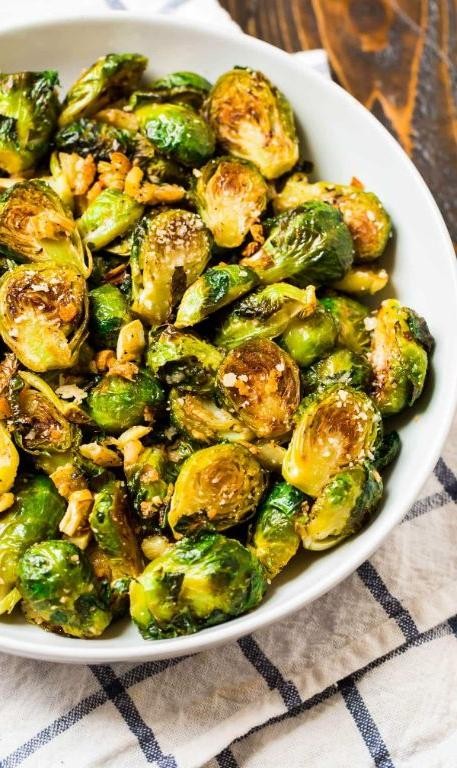
Savor the transformation of humble Brussels sprouts into a caramelized, aromatic delight with this simple yet sophisticated preparation. Roasting at high heat coaxes out their natural sweetness while garlic infuses each bite with savory depth, creating a side dish that feels both rustic and refined. Perfect for holiday tables or weeknight dinners, these sprouts emerge from the oven with crispy edges and tender centers, ready to elevate any meal.
Serving: 4 | Pre Time: 10 minutes | Cooking Time: 25 minutes
Ingredients
For the Brussels Sprouts
– 1 ½ pounds Brussels sprouts, trimmed and halved lengthwise
– 3 tablespoons extra-virgin olive oil
– ¾ teaspoon kosher salt
– ½ teaspoon freshly ground black pepper
For the Garlic Mixture
– 4 large garlic cloves, minced
– 1 tablespoon fresh lemon juice
Instructions
1. Preheat your oven to 425°F and line a large, rimmed baking sheet with parchment paper for easy cleanup.
2. In a large bowl, toss the halved Brussels sprouts with olive oil, salt, and pepper until evenly coated.
3. Arrange the sprouts in a single layer on the prepared baking sheet, ensuring they are cut-side down to maximize caramelization.
4. Roast for 20 minutes at 425°F, until the sprouts are tender when pierced with a fork and the cut sides are deeply golden brown.
5. While the sprouts roast, combine the minced garlic and lemon juice in a small bowl and let it sit to mellow the garlic’s raw bite.
6. Remove the baking sheet from the oven and immediately drizzle the garlic-lemon mixture over the hot sprouts, tossing gently to coat.
7. Return the sheet to the oven and roast for an additional 5 minutes at 425°F, just until the garlic is fragrant but not burnt.
8. Transfer the roasted Brussels sprouts to a serving dish, scraping up any crispy bits from the parchment.
Just out of the oven, these sprouts offer a delightful contrast of textures—crispy, almost chip-like outer leaves giving way to tender, creamy interiors. The roasted garlic mellows into a sweet, nutty flavor that perfectly complements the sprouts’ natural earthiness, while the bright lemon finish cuts through the richness. For a creative twist, sprinkle with toasted pine nuts or shaved Parmesan just before serving, or fold them into a grain bowl with quinoa and roasted chicken for a complete meal.
Tomato and cucumber salad with lemon dressing
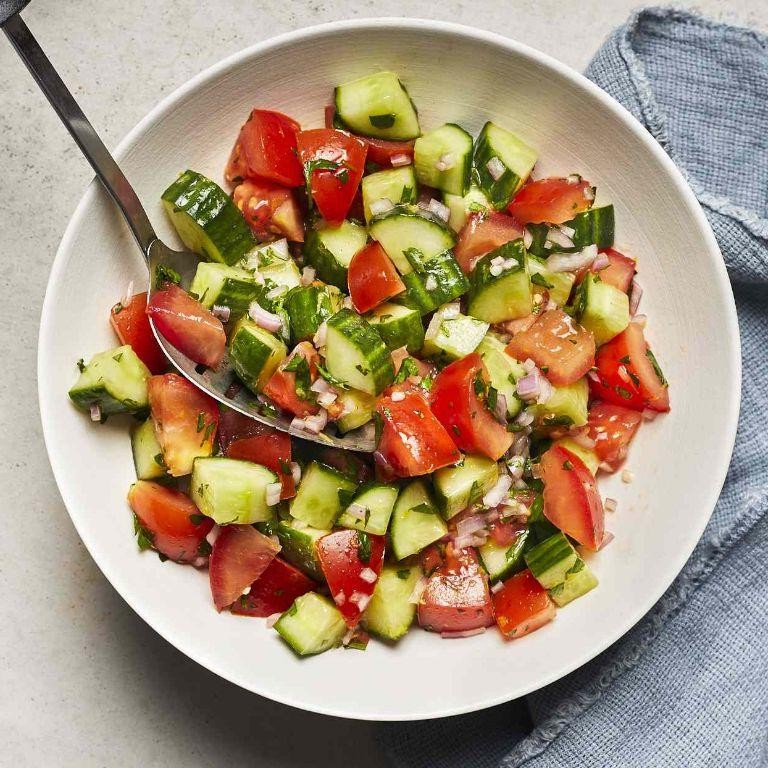
On a sweltering summer afternoon, when the heat seems to press down from the sky, few dishes refresh the palate and spirit quite like a vibrant, crisp salad. This tomato and cucumber salad, kissed with a bright lemon dressing, is a celebration of peak-season produce, transforming simple ingredients into an elegant, hydrating side dish that feels both effortless and sophisticated. It’s the perfect answer to a light lunch or a vibrant accompaniment to grilled mains.
Serving: 4 | Pre Time: 15 minutes | Cooking Time: 0 minutes
Ingredients
For the Salad:
– 1 pound ripe heirloom tomatoes (about 3 medium), cored and cut into 1-inch wedges
– 1 large English cucumber (about 12 ounces), halved lengthwise and sliced into 1/4-inch thick half-moons
– 1/4 cup thinly sliced red onion
– 1/4 cup fresh basil leaves, torn
– 1/4 teaspoon fine sea salt
For the Lemon Dressing:
– 3 tablespoons extra-virgin olive oil
– 2 tablespoons fresh lemon juice
– 1 teaspoon honey
– 1/4 teaspoon freshly ground black pepper
Instructions
1. Place the tomato wedges and cucumber slices in a large, shallow serving bowl.
2. Sprinkle the 1/4 teaspoon of fine sea salt evenly over the vegetables and gently toss to coat. Let them sit for 10 minutes; this step draws out natural juices to create a light base for the dressing.
3. While the vegetables rest, prepare the dressing. In a small bowl or jar, vigorously whisk together the 3 tablespoons of extra-virgin olive oil, 2 tablespoons of fresh lemon juice, 1 teaspoon of honey, and 1/4 teaspoon of black pepper until the mixture is fully emulsified and slightly thickened.
4. After 10 minutes, add the 1/4 cup of thinly sliced red onion and the 1/4 cup of torn basil leaves to the bowl with the tomatoes and cucumber.
5. Pour the prepared lemon dressing over the salad ingredients.
6. Using salad servers or two large spoons, gently toss the salad until every piece is lightly and evenly coated with the dressing, being careful not to crush the tender tomato wedges.
7. For optimal flavor, let the assembled salad stand at room temperature for 5 minutes before serving to allow the flavors to meld.
Bright, clean, and utterly refreshing, this salad offers a delightful contrast of textures: the juicy burst of tomato against the cool, crisp snap of cucumber. The lemon dressing provides a tangy, slightly sweet backbone that highlights the vegetables’ natural sweetness without overpowering them. For a creative twist, serve it atop a bed of creamy ricotta or alongside simply grilled fish for a complete, light meal that sings of summer.
Peanut butter and banana smoothie
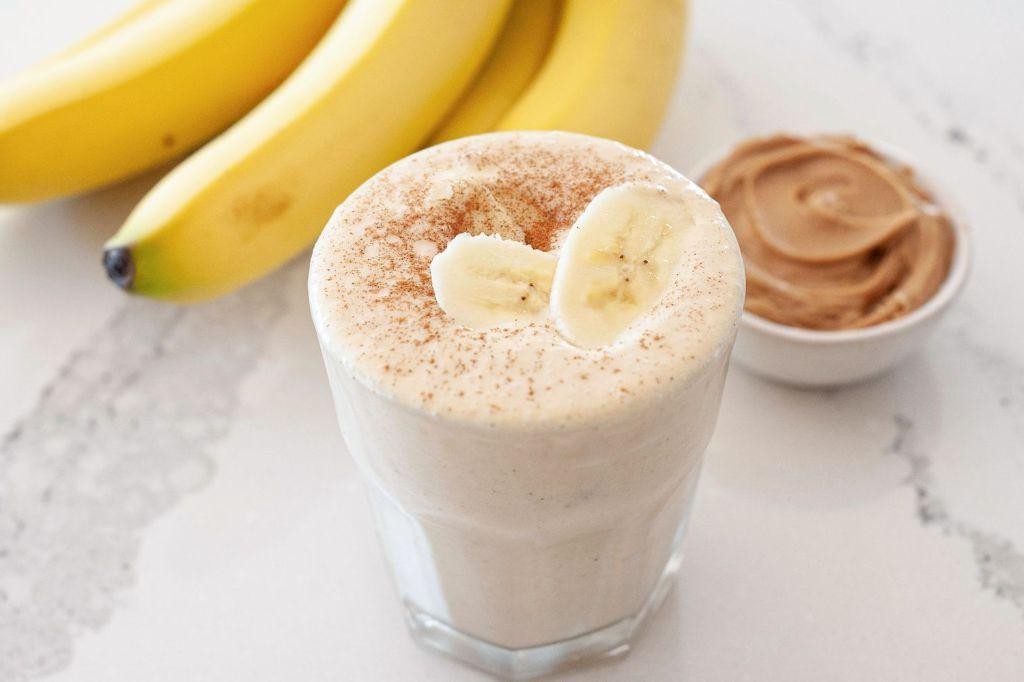
Venturing into the realm of effortless elegance, this peanut butter and banana smoothie transforms humble pantry staples into a creamy, dreamy elixir that feels both nourishing and decadent. Perfect for a quick breakfast or a revitalizing afternoon treat, its harmonious blend of flavors offers a comforting richness that belies its simple preparation.
Serving: 2 | Prep Time: 5 minutes | Cooking Time: 0 minutes
Ingredients
For the Smoothie Base:
- 2 large ripe bananas, peeled and sliced
- 1/4 cup creamy peanut butter
- 1 1/2 cups whole milk
- 1 tablespoon pure maple syrup
- 1/2 teaspoon pure vanilla extract
- 1 cup ice cubes
For Optional Garnish:
- 1 tablespoon chopped roasted peanuts
- 1/2 banana, thinly sliced
Instructions
- Place the sliced bananas, peanut butter, whole milk, maple syrup, and vanilla extract into a high-speed blender pitcher.
- Secure the lid tightly on the blender.
- Blend the mixture on high speed for 45 seconds, or until completely smooth and no lumps of peanut butter remain.
- Add the 1 cup of ice cubes to the blender pitcher.
- Blend again on high speed for 30-45 seconds, until the ice is fully crushed and the smoothie is thick and frothy.
- Pour the smoothie evenly into two tall glasses.
- Garnish each glass with a sprinkle of chopped roasted peanuts and a few thin slices of the remaining half banana, if desired.
- Serve immediately with a straw.
Effortlessly smooth and luxuriously thick, the final texture is a velvety cascade that clings to the glass. The dominant, comforting flavor of roasted peanut butter is perfectly balanced by the natural sweetness of ripe banana and the subtle caramel notes of maple, creating a deeply satisfying sip. For a playful twist, drizzle a little extra maple syrup over the foam or blend in a handful of spinach for a hidden nutrient boost without altering the classic flavor profile.
Summary
Nourishing your family doesn’t have to break the bank or your schedule! We hope this list of 20 delicious, healthy, and easy recipes inspires your next budget-friendly meal. Give one a try this week—we’d love to hear which recipe becomes your new favorite in the comments below. If you found this roundup helpful, please share it on Pinterest to help other home cooks discover these tasty ideas!


