Picture this: the sizzle of fresh ingredients hitting a hot grill, the irresistible aroma filling your backyard, and friends gathered around for an unforgettable meal. That’s the magic of hibachi-style cooking—perfect for entertaining with flair! From savory proteins to vibrant veggies, these recipes bring restaurant excitement right to your home. Ready to fire up the grill and impress your guests? Let’s dive into these 20 sizzling favorites!
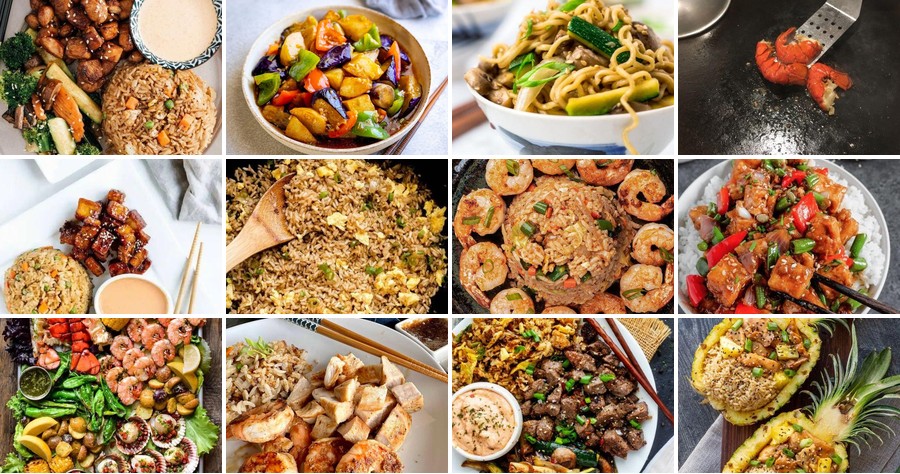
Teriyaki Chicken Hibachi
Holding this warm bowl tonight, I’m reminded how some meals feel like quiet conversations with memory—the sizzle of the grill, the sweet-salty aroma that fills the kitchen, a simple comfort that needs no special occasion.
Serving: 4 | Pre Time: 15 minutes | Cooking Time: 20 minutes
Ingredients
– Boneless, skinless chicken thighs – 1.5 lbs
– Soy sauce – ½ cup
– Brown sugar – ¼ cup
– Mirin – 3 tbsp
– Garlic – 3 cloves, minced
– Ginger – 1 tbsp, grated
– Vegetable oil – 2 tbsp
– Cooked white rice – 4 cups
– Green onions – 3, sliced
Instructions
1. In a medium bowl, whisk together ½ cup soy sauce, ¼ cup brown sugar, 3 tbsp mirin, 3 minced garlic cloves, and 1 tbsp grated ginger until the sugar dissolves completely.
2. Cut 1.5 lbs of chicken thighs into 1-inch cubes and add them to the bowl, tossing to coat every piece evenly. Let marinate at room temperature for 10 minutes—this brief rest allows the flavors to penetrate without toughening the meat.
3. Heat 2 tbsp vegetable oil in a large skillet or wok over medium-high heat until it shimmers, about 2 minutes.
4. Using tongs, remove the chicken from the marinade, letting excess liquid drip off, and reserve the marinade in the bowl. Add the chicken to the hot skillet in a single layer.
5. Cook the chicken undisturbed for 4–5 minutes until the bottoms develop a deep golden-brown crust, then flip each piece and cook for another 4–5 minutes until cooked through and no longer pink inside.
6. Pour the reserved marinade into the skillet, scraping up any browned bits from the bottom with a wooden spoon. Bring to a boil, then reduce heat to medium-low and simmer for 3–4 minutes until the sauce thickens enough to coat the back of a spoon.
7. Divide 4 cups of cooked white rice among four bowls. Spoon the teriyaki chicken and sauce evenly over the rice, ensuring each portion gets a glossy coating.
8. Garnish with sliced green onions just before serving to add a fresh, crisp contrast to the rich dish.
Buttery-soft chicken glazed in that sticky-sweet sauce clings to fluffy rice, each bite balanced by the sharpness of green onions. Try it tucked into lettuce wraps for a lighter twist, or let the leftovers mingle overnight—the flavors deepen into something even more comforting by the next day.
Garlic Butter Shrimp Hibachi
Venturing into the quiet of the kitchen, I find a simple comfort in the sizzle of shrimp, a moment where garlic and butter transform into something deeply familiar and warm.
Serving: 2 | Pre Time: 10 minutes | Cooking Time: 10 minutes
Ingredients
– Large shrimp, peeled and deveined – 1 lb
– Unsalted butter – 4 tbsp
– Garlic cloves, minced – 4
– Soy sauce – 2 tbsp
– Lemon juice – 1 tbsp
– Vegetable oil – 1 tbsp
– Salt – ½ tsp
– Black pepper – ¼ tsp
Instructions
1. Pat the shrimp completely dry with paper towels to ensure a good sear.
2. Season the shrimp evenly on both sides with the salt and black pepper.
3. Heat a large skillet or wok over medium-high heat for 2 minutes until a drop of water sizzles and evaporates immediately.
4. Add the vegetable oil to the hot skillet and swirl to coat the surface.
5. Add the shrimp to the skillet in a single layer, cooking for 2 minutes without moving them to develop a golden crust.
6. Flip each shrimp and cook for another 1-2 minutes until they are pink and opaque throughout.
7. Transfer the cooked shrimp to a clean plate, leaving any juices in the skillet.
8. Reduce the heat to medium-low and add the butter to the same skillet.
9. Once the butter has melted, add the minced garlic and cook for 1 minute, stirring constantly, until fragrant but not browned.
10. Pour in the soy sauce and lemon juice, stirring to combine the sauce and scrape up any browned bits from the pan.
11. Return the shrimp to the skillet, tossing gently to coat them evenly in the garlic butter sauce for about 30 seconds.
12. Remove the skillet from the heat immediately to prevent the shrimp from overcooking.
Melted butter clings to each tender shrimp, creating a glossy, savory sauce with the bright punch of lemon. Serve it straight from the skillet over a bed of steamed rice to soak up every drop, or let it cool slightly and tuck it into warm tortillas for a quick, flavorful wrap.
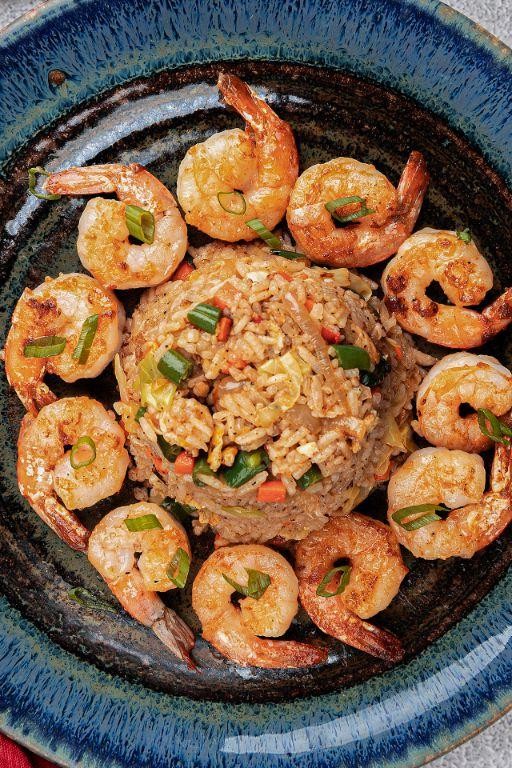
Beef and Vegetable Hibachi Skewers
Falling into the rhythm of chopping and threading, there’s a quiet satisfaction in preparing these skewers—a simple, hands-on meal that feels both festive and grounding on a winter evening. The sizzle of beef and vegetables on the grill brings a warmth that goes beyond the plate, a small, savory celebration of the season.
Serving: 4 | Pre Time: 20 minutes | Cooking Time: 10 minutes
Ingredients
– Sirloin steak – 1 lb
– Soy sauce – ¼ cup
– Sesame oil – 2 tbsp
– Garlic – 2 cloves, minced
– Bell peppers – 2, cut into 1-inch pieces
– Onion – 1, cut into 1-inch pieces
– Zucchini – 1, cut into ½-inch slices
– Skewers – 8, soaked in water for 30 minutes
Instructions
1. Cut the sirloin steak into 1-inch cubes and place them in a bowl.
2. In a small bowl, whisk together the soy sauce, sesame oil, and minced garlic to make the marinade.
3. Pour the marinade over the beef cubes, ensuring all pieces are coated, and let it marinate at room temperature for 15 minutes.
4. While the beef marinates, thread the bell peppers, onion, and zucchini onto the soaked skewers, alternating the vegetables evenly.
5. Preheat a grill or grill pan to medium-high heat, about 400°F.
6. Thread the marinated beef cubes onto separate skewers, leaving a small space between each piece for even cooking.
7. Place the vegetable skewers on the grill and cook for 4 minutes, turning once halfway through, until they start to char slightly.
8. Add the beef skewers to the grill and cook for 3 minutes per side, or until the internal temperature reaches 145°F for medium-rare, basting with any remaining marinade during the first minute.
9. Remove all skewers from the grill and let them rest for 2 minutes before serving.
Soft and juicy from the marinade, the beef pairs with the crisp-tender vegetables in a harmony of savory and sweet notes. Serve these skewers over a bed of steamed rice or with a side of ginger sauce for dipping, letting the simple flavors shine through the smoky grill marks.
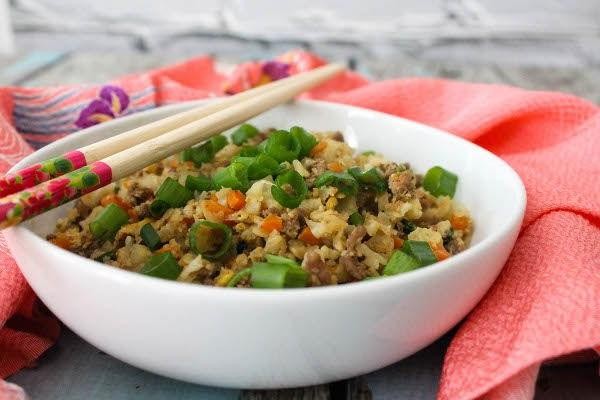
Fried Rice Hibachi Style
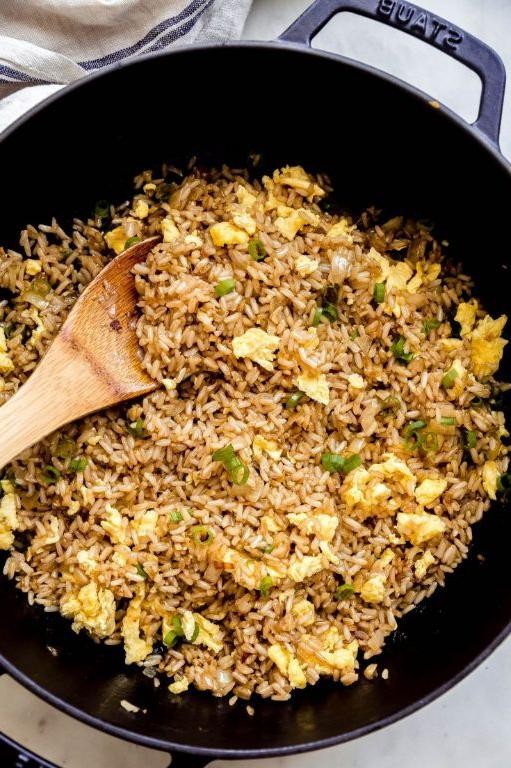
Cooking sometimes feels like a quiet conversation with the past, a way to gather scattered pieces of memory into something warm and whole. This fried rice, inspired by the sizzle of a hibachi grill, is one of those simple, comforting dishes that feels like a small celebration on a plate.
Serving: 4 | Pre Time: 15 minutes | Cooking Time: 15 minutes
Ingredients
– Day-old cooked white rice – 4 cups
– Large eggs – 2
– Cooked chicken breast, diced – 1 cup
– Frozen peas and carrots mix – 1 cup
– Soy sauce – 3 tbsp
– Sesame oil – 1 tbsp
– Vegetable oil – 2 tbsp
– Green onions, sliced – ¼ cup
Instructions
1. Crack the 2 eggs into a small bowl and whisk them with a fork until the yolks and whites are fully combined.
2. Heat a large skillet or wok over medium-high heat for 2 minutes until the surface feels hot when you hold your hand above it.
3. Add 1 tablespoon of vegetable oil to the hot skillet and swirl it to coat the bottom evenly.
4. Pour the whisked eggs into the skillet and let them cook undisturbed for 30 seconds until the edges begin to set.
5. Gently scramble the eggs with a spatula for about 1 minute, breaking them into small, fluffy curds, then transfer them to a clean plate. (Tip: Scrambling the eggs first ensures they stay tender and don’t overcook when mixed back in later.)
6. Add the remaining 1 tablespoon of vegetable oil to the same skillet.
7. Add the 1 cup of diced cooked chicken breast and the 1 cup of frozen peas and carrots to the skillet.
8. Stir-fry the chicken and vegetables for 3–4 minutes over medium-high heat until the vegetables are thawed and heated through.
9. Add the 4 cups of day-old cooked white rice to the skillet, breaking up any large clumps with the spatula. (Tip: Using cold, day-old rice prevents it from becoming mushy and helps achieve the perfect separate grain texture.)
10. Stir-fry the rice with the chicken and vegetables for 2 minutes, mixing everything evenly.
11. Pour the 3 tablespoons of soy sauce and 1 tablespoon of sesame oil over the rice mixture.
12. Continue stir-frying for 2 more minutes, ensuring the sauces are distributed throughout the rice.
13. Return the scrambled eggs to the skillet and add the ¼ cup of sliced green onions.
14. Gently fold everything together for 1 final minute over medium heat until fully combined and heated through. (Tip: A final fold, rather than vigorous stirring, keeps the ingredients distinct and preserves the eggs’ texture.)
15. Remove the skillet from the heat.
Gently scoop the fried rice into bowls, noticing how each grain remains separate yet coated in a savory sheen. The subtle nuttiness from the sesame oil mingles with the salty soy, while the peas and carrots add little bursts of sweetness. For a fun twist, serve it with a drizzle of sriracha or alongside grilled shrimp for a fuller hibachi-style meal.
Zucchini and Mushroom Hibachi
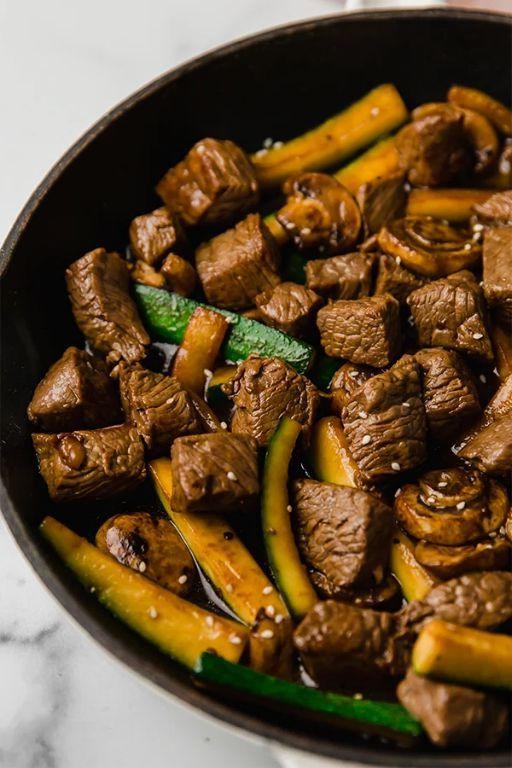
A quiet evening like this always makes me crave something simple yet deeply satisfying, the kind of meal that feels like a warm embrace after a long day. There’s a gentle comfort in the sizzle of vegetables on a hot surface, a small ritual that turns humble ingredients into something special. This zucchini and mushroom hibachi is exactly that—a quick, one-pan wonder that brings the lively spirit of a teppanyaki grill right to your quiet kitchen.
Serving: 2 | Pre Time: 10 minutes | Cooking Time: 15 minutes
Ingredients
– Zucchini – 2 medium
– Cremini mushrooms – 8 oz
– Unsalted butter – 2 tbsp
– Soy sauce – 3 tbsp
– Garlic – 2 cloves, minced
– Vegetable oil – 1 tbsp
– Salt – ¼ tsp
– Black pepper – ¼ tsp
Instructions
1. Wash the zucchini and mushrooms under cold running water, then pat them completely dry with paper towels to ensure they sear properly instead of steaming.
2. Slice the zucchini into ¼-inch thick half-moons and slice the mushrooms into ¼-inch thick pieces.
3. Place a large skillet or flat griddle over medium-high heat and add the vegetable oil, heating it for 1 minute until it shimmers.
4. Add the zucchini and mushrooms to the hot skillet in a single layer, cooking them for 5-7 minutes without stirring to allow a golden-brown crust to develop on one side.
5. Flip the vegetables with a spatula and cook for another 4-5 minutes until they are tender and browned on both sides.
6. Push the vegetables to one side of the skillet and reduce the heat to medium.
7. Add the butter to the empty side of the skillet and let it melt completely, about 30 seconds.
8. Add the minced garlic to the melted butter and sauté for 1 minute until fragrant, being careful not to let it burn.
9. Pour the soy sauce over the garlic-butter mixture and stir to combine, letting it bubble for 30 seconds to create a simple sauce.
10. Toss the cooked vegetables in the sauce until evenly coated, then season with the salt and black pepper, stirring for 1 final minute to heat through.
Gently caramelized edges on the zucchini give way to a tender bite, while the mushrooms soak up the savory, garlic-infused butter and soy sauce, creating a rich umami depth. Serve it straight from the skillet over a bed of steamed rice for a complete meal, or enjoy it as a hearty side—its simplicity makes it wonderfully adaptable to any quiet dinner moment.
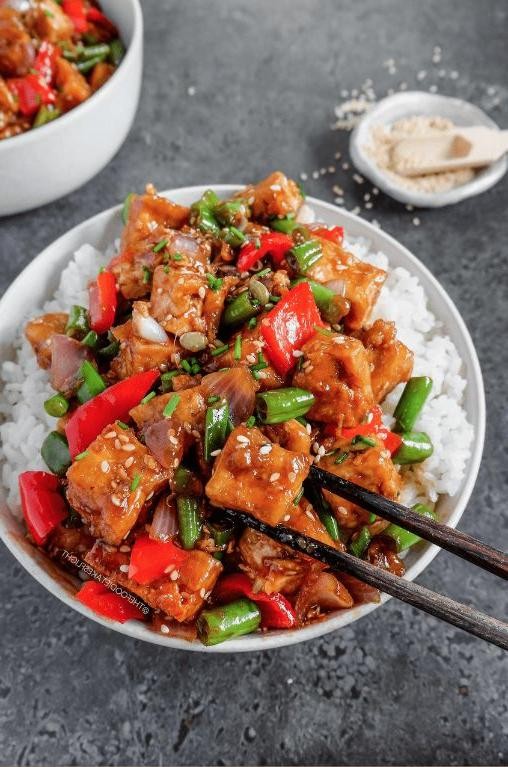
Spicy Tofu Hibachi

Under the soft glow of the kitchen light, I find myself drawn to the quiet sizzle of a pan, a moment of calm before the vibrant flavors unfold. This spicy tofu hibachi is my simple, comforting answer to a craving for something warm and boldly seasoned, a dish that feels both familiar and excitingly new.
Serving: 2 | Pre Time: 15 minutes | Cooking Time: 15 minutes
Ingredients
– Extra-firm tofu – 14 oz block
– Soy sauce – 3 tbsp
– Sriracha – 1 tbsp
– Sesame oil – 2 tbsp
– Garlic – 2 cloves
– Ginger – 1-inch piece
– Onion – ½ medium
– Bell pepper – 1 medium
– Zucchini – 1 medium
– Cooked white rice – 2 cups
Instructions
1. Press the extra-firm tofu between paper towels with a heavy plate for 10 minutes to remove excess water, then cut it into 1-inch cubes.
2. Mince the garlic and ginger finely, and slice the onion, bell pepper, and zucchini into thin strips.
3. In a small bowl, whisk together the soy sauce and sriracha to make the sauce.
4. Heat 1 tbsp of sesame oil in a large skillet or wok over medium-high heat until it shimmers, about 1 minute.
5. Add the tofu cubes to the skillet and cook for 5-7 minutes, turning occasionally, until golden brown on all sides; tip: avoid overcrowding the pan to ensure even browning.
6. Remove the tofu from the skillet and set it aside on a plate.
7. Add the remaining 1 tbsp of sesame oil to the same skillet, then add the minced garlic and ginger, stirring for 30 seconds until fragrant.
8. Add the sliced onion, bell pepper, and zucchini to the skillet, and stir-fry for 4-5 minutes until the vegetables are tender-crisp; tip: keep the heat high to quickly sear the veggies without making them soggy.
9. Return the tofu to the skillet with the vegetables, then pour the soy sauce and sriracha mixture over everything.
10. Toss everything together in the skillet and cook for 2 more minutes, allowing the sauce to coat evenly and thicken slightly; tip: if the sauce reduces too quickly, add a splash of water to prevent burning.
11. Serve the spicy tofu hibachi immediately over the cooked white rice.
Vividly charred edges on the tofu give way to a soft, creamy interior, while the vegetables retain a satisfying crunch. The heat from the sriracha builds gently, balanced by the savory depth of soy sauce and the nutty aroma of sesame oil—try wrapping scoops in warm lettuce leaves for a fresh, handheld twist.
Lemon Pepper Salmon Hibachi
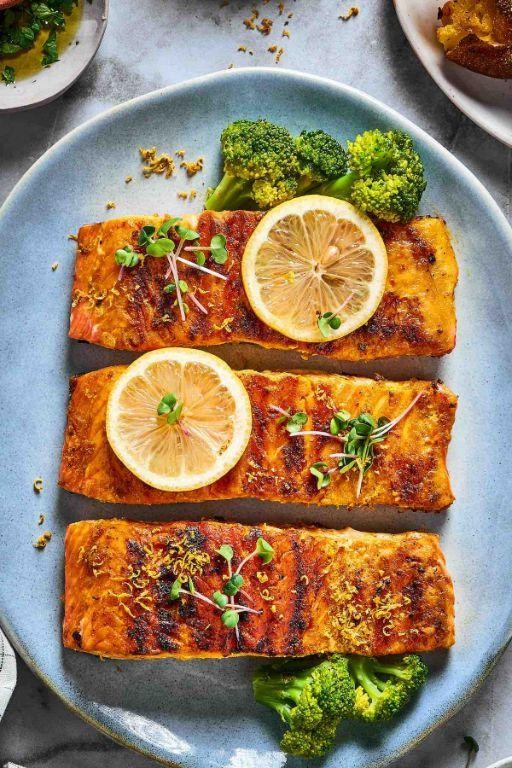
Evenings like this, when the kitchen grows quiet and the world outside fades to a gentle hum, I find myself drawn to simple, bright flavors that feel both grounding and celebratory. Lemon Pepper Salmon Hibachi is just that—a dish that transforms a few humble ingredients into something warm and vibrant, perfect for a quiet dinner that still feels special. It’s a recipe that moves at a gentle pace, inviting you to savor each step as much as the final bite.
Serving: 2 | Pre Time: 10 minutes | Cooking Time: 15 minutes
Ingredients
– Salmon fillets – 2 (6 oz each)
– Olive oil – 2 tbsp
– Lemon – 1
– Black pepper – 1 tsp
– Salt – ½ tsp
– Soy sauce – 2 tbsp
– Unsalted butter – 2 tbsp
– Garlic – 2 cloves
– Zucchini – 1 medium
– White onion – ½ medium
Instructions
1. Pat the salmon fillets completely dry with paper towels to ensure a crisp sear.
2. Season both sides of the salmon evenly with salt and black pepper.
3. Heat 1 tablespoon of olive oil in a large skillet or hibachi grill over medium-high heat until it shimmers, about 2 minutes.
4. Place the salmon skin-side down in the skillet and cook undisturbed for 5 minutes to develop a golden crust.
5. Flip the salmon carefully with a spatula and cook for another 4 minutes until the internal temperature reaches 145°F.
6. Remove the salmon from the skillet and set it aside on a plate, loosely tented with foil to keep warm.
7. Add the remaining 1 tablespoon of olive oil to the same skillet over medium heat.
8. Thinly slice the zucchini and onion, then add them to the skillet, stirring occasionally for 6–7 minutes until tender-crisp.
9. Mince the garlic and add it to the vegetables, cooking for 1 minute until fragrant.
10. Zest the lemon, then juice half of it directly into the skillet.
11. Add the soy sauce and butter to the skillet, stirring until the butter melts and coats the vegetables, about 1 minute.
12. Return the salmon to the skillet, spooning the sauce and vegetables over the top to warm through for 1 minute.
13. Slice the remaining lemon half into wedges for serving.
Lightly flaky and infused with zesty lemon-pepper notes, the salmon pairs beautifully with the buttery, garlic-kissed vegetables. For a creative twist, serve it over a bed of steamed jasmine rice or with a side of crisp cucumber salad to balance the richness, letting each component shine in its simplicity.
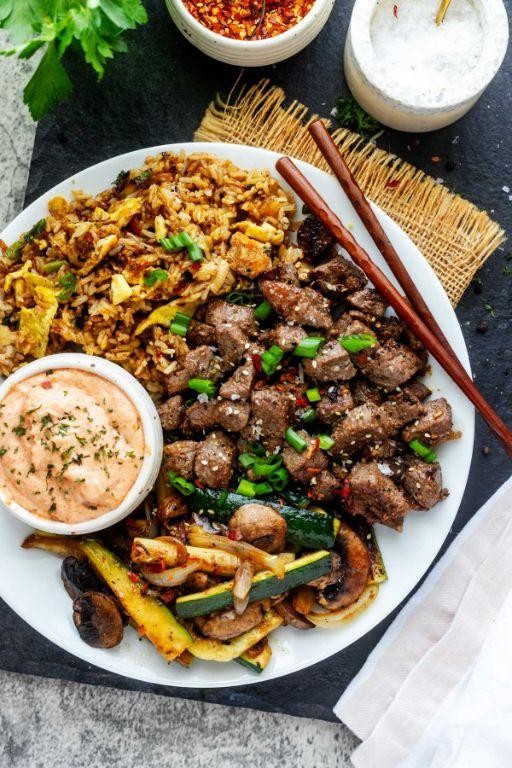
Hibachi Steak with Ginger Sauce
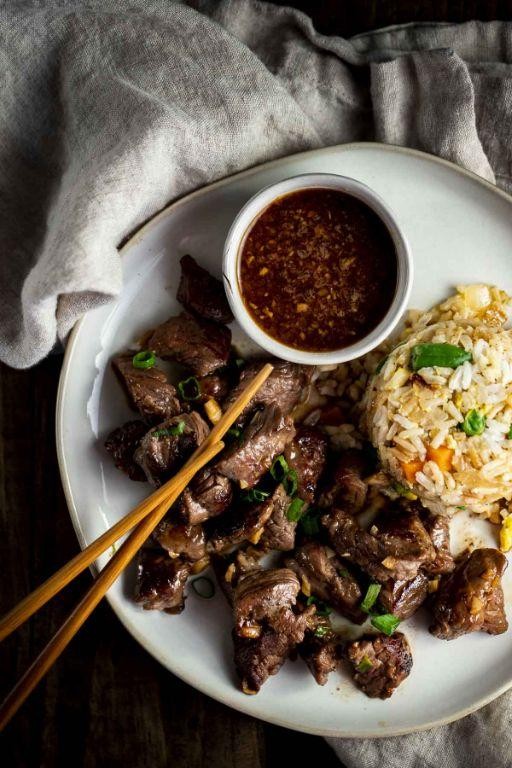
Kneading my thoughts into this quiet evening, I find myself drawn to the sizzle of a memory—a hibachi grill’s warmth cutting through a winter night. This recipe, a simple homage to that comfort, brings the bold, savory joy of steak together with a bright, gingery kiss, all from the stillness of a home kitchen.
Serving: 2 | Pre Time: 15 minutes | Cooking Time: 10 minutes
Ingredients
– Ribeye steak – 1 lb
– Soy sauce – ¼ cup
– Fresh ginger – 1 tbsp, grated
– Garlic – 2 cloves, minced
– Vegetable oil – 2 tbsp
– Salt – ½ tsp
– Black pepper – ¼ tsp
Instructions
1. Pat the ribeye steak dry with paper towels to ensure a good sear.
2. Season both sides of the steak evenly with salt and black pepper.
3. Heat a large skillet or grill pan over high heat until it begins to smoke lightly, about 3 minutes.
4. Add 1 tablespoon of vegetable oil to the hot pan, swirling to coat the surface.
5. Place the steak in the pan and cook undisturbed for 3 minutes to form a deep brown crust.
6. Flip the steak using tongs and cook for another 3 minutes for medium-rare, or until it reaches an internal temperature of 135°F on a meat thermometer.
7. Transfer the steak to a cutting board and let it rest for 5 minutes to allow juices to redistribute.
8. While the steak rests, reduce the heat to medium and add the remaining 1 tablespoon of vegetable oil to the same pan.
9. Sauté the minced garlic and grated ginger in the oil for 1 minute, until fragrant but not browned.
10. Pour in the soy sauce and simmer for 2 minutes, stirring occasionally, until the sauce slightly thickens.
11. Slice the rested steak against the grain into ½-inch thick strips.
12. Drizzle the ginger sauce over the sliced steak just before serving.
That first bite reveals a tender, juicy interior with a perfectly charred edge, while the sauce adds a zesty, umami depth that lingers warmly. Try serving it over a bed of steamed rice or with crisp vegetables to soak up every last drop, turning a simple meal into a cozy celebration.
Vegetable Noodle Hibachi
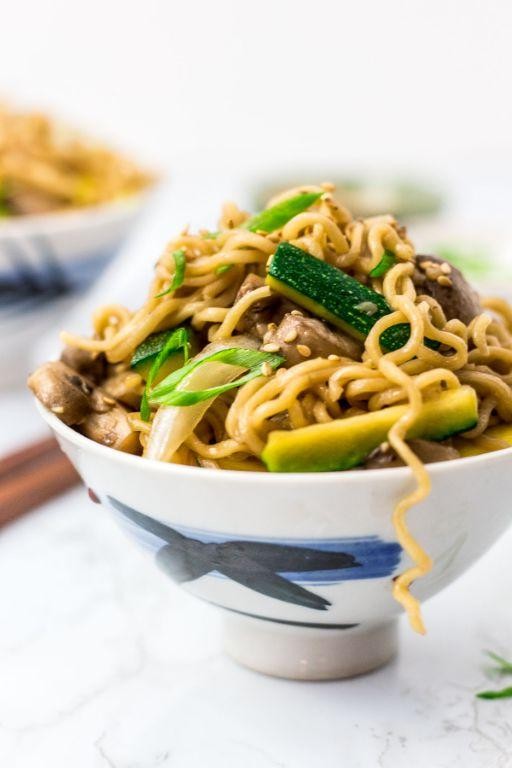
Zigzagging through the quiet kitchen tonight, I find myself reaching for the familiar comfort of a wok and the simple vegetables waiting on the counter. There’s a gentle sizzle to come, a quiet meal to make for one, or perhaps to share if the mood strikes.
Serving: 2 | Pre Time: 15 minutes | Cooking Time: 15 minutes
Ingredients
– Vegetable oil – 2 tbsp
– Garlic – 2 cloves, minced
– Ginger – 1 tsp, grated
– Yellow onion – ½, thinly sliced
– Carrot – 1, julienned
– Zucchini – 1, julienned
– Soy sauce – 3 tbsp
– Sesame oil – 1 tsp
– Spaghetti – 8 oz
– Salt – ½ tsp
Instructions
1. Fill a large pot with 4 quarts of water, add the ½ tsp of salt, and bring it to a rolling boil over high heat.
2. Add the 8 oz of spaghetti to the boiling water and cook for 9 minutes exactly, stirring occasionally to prevent sticking.
3. While the pasta cooks, heat 2 tbsp of vegetable oil in a large wok or skillet over medium-high heat until it shimmers, about 2 minutes.
4. Add the minced garlic and grated ginger to the hot oil and stir constantly for 30 seconds until fragrant but not browned.
5. Tip: To prevent burning, keep the garlic and ginger moving in the pan.
6. Add the thinly sliced ½ onion and julienned carrot to the wok and stir-fry for 4 minutes until the onion is translucent.
7. Add the julienned zucchini and continue stir-frying for 3 more minutes until all vegetables are tender-crisp.
8. Drain the cooked spaghetti thoroughly and add it directly to the wok with the vegetables.
9. Pour 3 tbsp of soy sauce and 1 tsp of sesame oil over the noodles and vegetables.
10. Tip: For even coating, toss everything together using two utensils, like tongs and a spatula.
11. Stir-fry the entire mixture for 2 minutes, ensuring the sauce is evenly distributed and the noodles are lightly coated.
12. Tip: Let the mixture sit undisturbed for 30 seconds at the end to allow a slight caramelization on the bottom for extra flavor.
13. Remove the wok from the heat.
Each strand of spaghetti carries the glossy sheen of the sauce, clinging to crisp-tender vegetables with a savory, slightly sweet depth from the careful stir-fry. Enjoy it straight from the wok for that authentic hibachi feel, or garnish with a sprinkle of sesame seeds if you have them on hand.
Pineapple Chicken Hibachi
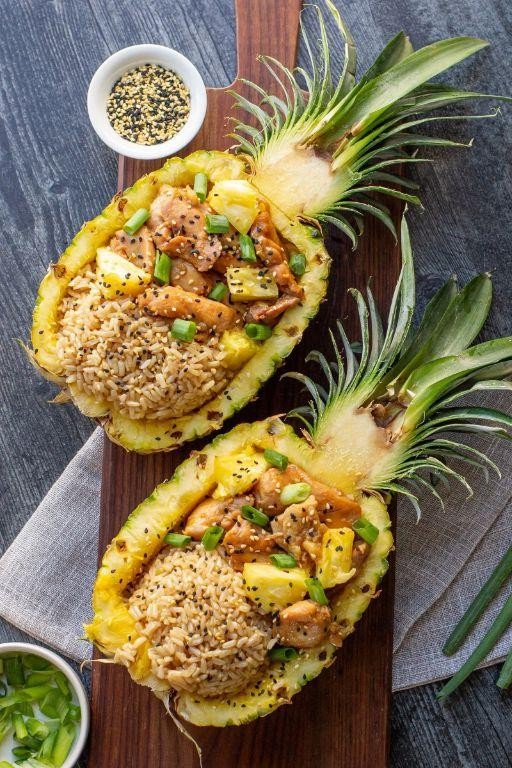
Wandering through the kitchen tonight, I found myself craving something that felt both familiar and a little celebratory, a quiet nod to the season outside. The sizzle of a hot pan and the sweet, caramelizing scent of pineapple seemed to promise just that kind of comforting warmth.
Serving: 4 | Pre Time: 15 minutes | Cooking Time: 20 minutes
Ingredients
– Boneless, skinless chicken breast – 1.5 lbs
– Soy sauce – ¼ cup
– Fresh pineapple chunks – 2 cups
– Vegetable oil – 2 tbsp
– Unsalted butter – 2 tbsp
– Garlic cloves, minced – 3
– Cooked white rice – 4 cups
Instructions
1. Cut the 1.5 lbs of boneless, skinless chicken breast into 1-inch cubes.
2. Place the cubed chicken in a bowl and pour ¼ cup of soy sauce over it, stirring to coat evenly. Let it marinate for 10 minutes at room temperature.
3. While the chicken marinates, heat a large skillet or wok over medium-high heat for 2 minutes until hot.
4. Add 2 tbsp of vegetable oil to the hot skillet, swirling to coat the surface.
5. Add the marinated chicken cubes to the skillet in a single layer, cooking for 4-5 minutes without stirring to allow a golden-brown crust to form. Tip: Resist the urge to move the chicken too soon; this searing creates flavorful fond in the pan.
6. Flip each chicken piece and cook for another 4-5 minutes until the internal temperature reaches 165°F when checked with a meat thermometer.
7. Transfer the cooked chicken to a clean plate and set aside.
8. Reduce the heat to medium and add 2 tbsp of unsalted butter to the same skillet.
9. Once the butter melts, add 3 minced garlic cloves, sautéing for 30 seconds until fragrant but not browned.
10. Add 2 cups of fresh pineapple chunks to the skillet, cooking for 3-4 minutes, stirring occasionally, until they soften and develop light caramelization. Tip: Use fresh pineapple for the best texture, as canned varieties can become too mushy.
11. Return the cooked chicken to the skillet with the pineapple, tossing everything together for 1 minute to combine and reheat.
12. Serve the pineapple chicken immediately over 4 cups of cooked white rice. Tip: For an authentic hibachi touch, garnish with a sprinkle of sesame seeds just before serving.
Diving into this dish, the tender chicken mingles with juicy, caramelized pineapple in a savory-sweet glaze that clings to each grain of rice. The contrast between the soft fruit and the seared meat makes every bite dynamic, perfect for piling into bowls or wrapping in warm tortillas for a handheld twist on a cozy dinner.
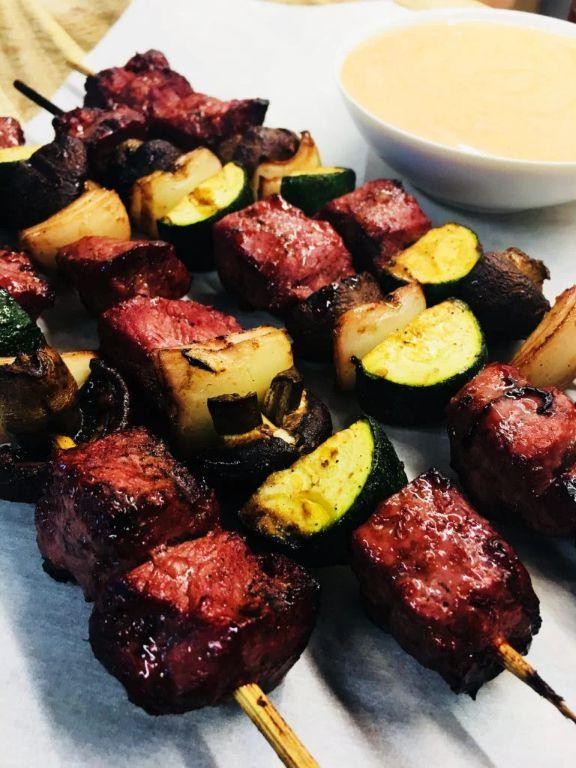
Scallop Hibachi with Soy Glaze
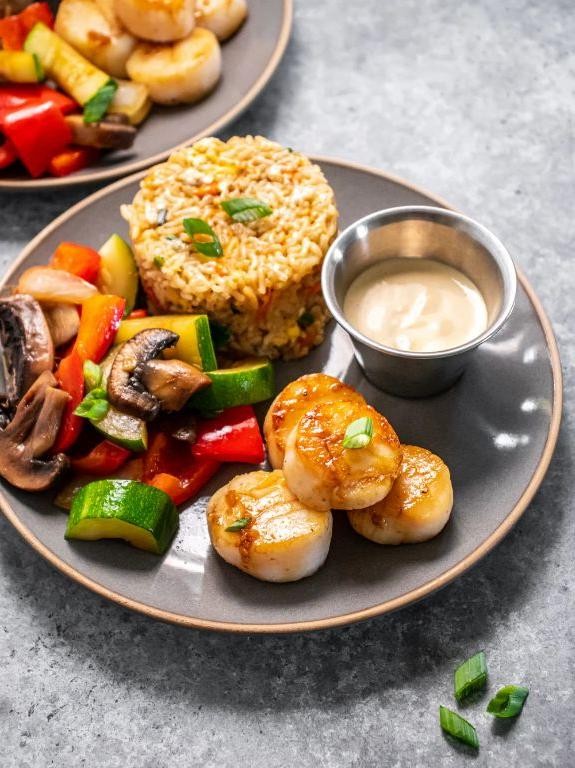
Dusk settles softly outside my window, the sky painted in hues of indigo and gold. In the quiet kitchen, I find myself drawn to the simple elegance of seared scallops, their sweet brininess a gentle reminder of coastal evenings. This recipe transforms them into a comforting hibachi-style dish with a glossy soy glaze, perfect for a reflective meal at home.
Serving: 2 | Pre Time: 10 minutes | Cooking Time: 10 minutes
Ingredients
– Scallops – 8 large
– Soy sauce – ¼ cup
– Honey – 2 tbsp
– Garlic – 2 cloves, minced
– Ginger – 1 tsp, grated
– Vegetable oil – 1 tbsp
– Green onions – 2, sliced
Instructions
1. Pat the scallops completely dry with paper towels to ensure a crisp sear.
2. In a small bowl, whisk together the soy sauce, honey, minced garlic, and grated ginger until smooth.
3. Heat the vegetable oil in a large skillet over medium-high heat until it shimmers, about 2 minutes.
4. Place the scallops in the skillet, spacing them apart, and sear for 2 minutes without moving them to develop a golden-brown crust.
5. Flip the scallops carefully and cook for another 1–2 minutes until just opaque in the center, then transfer to a plate.
6. Reduce the heat to medium and pour the soy mixture into the skillet, letting it simmer for 3–4 minutes until thickened to a glaze consistency.
7. Return the scallops to the skillet, tossing gently to coat them evenly in the glaze for 30 seconds.
8. Remove from heat and sprinkle with sliced green onions.
Warm and tender, the scallops melt on the tongue with a caramelized sweetness from the glaze, balanced by the savory depth of soy and aromatic ginger. Serve them over steamed rice or alongside crisp vegetables for a meal that feels both nourishing and quietly celebratory, the flavors lingering like a gentle embrace.
Hibachi-Style Lobster Tail
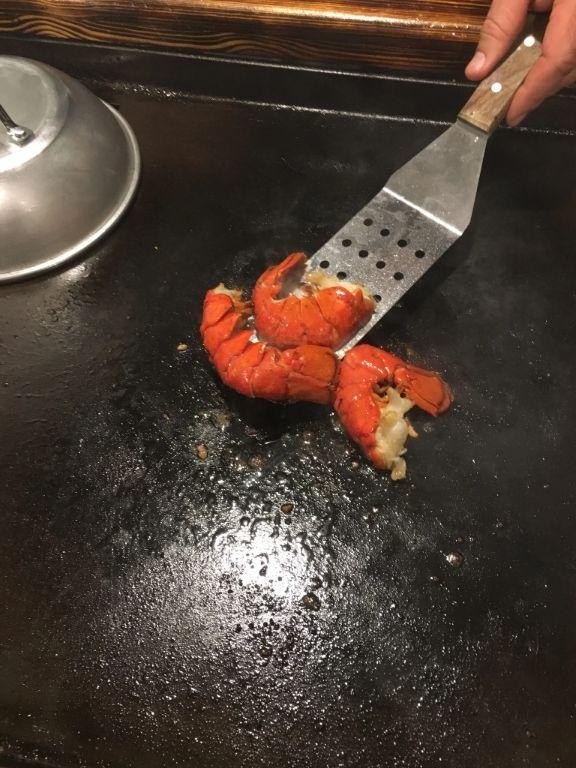
Beneath the soft glow of kitchen lights, as the year draws to a close, there’s a quiet luxury in preparing something special—a dish that transforms an ordinary evening into a small celebration, with the sizzle and aroma of a restaurant favorite brought right to your own stove.
Serving: 2 | Pre Time: 15 minutes | Cooking Time: 10 minutes
Ingredients
– Lobster tails – 2 (6-8 oz each)
– Butter – 4 tbsp
– Soy sauce – 2 tbsp
– Garlic – 2 cloves, minced
– Lemon – 1
– Vegetable oil – 1 tbsp
– Salt – ½ tsp
– Black pepper – ¼ tsp
Instructions
1. Preheat a large skillet or griddle over medium-high heat until a drop of water sizzles immediately upon contact.
2. Using kitchen shears, carefully cut through the top shell of each lobster tail lengthwise, then gently pull the meat upward to rest atop the shell.
3. Pat the lobster meat completely dry with paper towels to ensure a good sear.
4. Brush the lobster meat lightly with 1 tbsp of vegetable oil, then season evenly on all sides with ½ tsp salt and ¼ tsp black pepper.
5. Place the lobster tails, meat-side down, onto the preheated skillet and cook undisturbed for 3 minutes to develop a golden-brown crust.
6. Flip the lobster tails carefully using tongs and cook shell-side down for an additional 4 minutes, or until the internal temperature reaches 145°F when checked with an instant-read thermometer.
7. While the lobster cooks, melt 4 tbsp of butter in a small saucepan over low heat, then stir in 2 tbsp of soy sauce and 2 cloves of minced garlic, cooking for 1 minute until fragrant.
8. Remove the cooked lobster tails from the skillet and drizzle generously with the warm garlic-soy butter sauce.
9. Squeeze the juice of half a lemon over the lobster just before serving to brighten the flavors.
After the final step, wrap up with 2–3 natural sentences about the texture, flavor, or a creative way to serve it — no generic conclusions. The first word of your introduction must begin with the letter ‘A’.
Achieving that signature hibachi char gives the lobster a subtly smoky sweetness, while the tender interior remains almost custard-like in its richness. For a playful twist, serve it alongside a simple mound of fried rice, letting the garlic butter mingle with the grains, or garnish with thinly sliced scallions for a fresh, crisp contrast.
Sweet and Sour Pork Hibachi
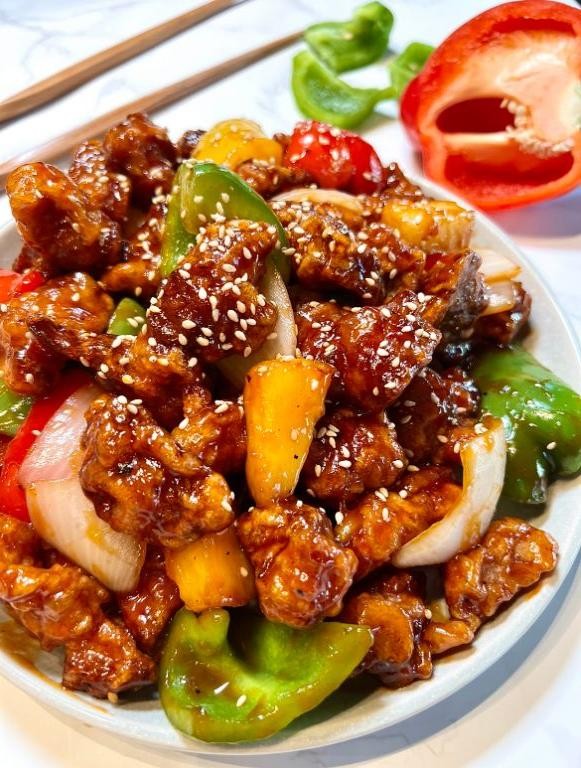
Evenings like this, with the kitchen quiet and the world outside hushed, feel made for cooking something that bridges comfort and celebration. Sweet and sour pork hibachi is that dish—a familiar favorite transformed by the searing heat of the grill, where caramelized edges meet a glossy, tangy-sweet sauce. It’s a simple joy to prepare, turning a few ingredients into a vibrant, satisfying meal.
Serving: 4 | Pre Time: 20 minutes | Cooking Time: 15 minutes
Ingredients
– Pork tenderloin – 1 lb
– Soy sauce – ¼ cup
– Rice vinegar – 2 tbsp
– Ketchup – ¼ cup
– Brown sugar – 2 tbsp
– Garlic – 2 cloves, minced
– Ginger – 1 tsp, grated
– Cornstarch – 1 tbsp
– Vegetable oil – 2 tbsp
– Green onions – 2, sliced
Instructions
1. Cut the pork tenderloin into 1-inch cubes and pat them dry with paper towels to ensure a good sear.
2. In a small bowl, whisk together the soy sauce, rice vinegar, ketchup, brown sugar, minced garlic, and grated ginger to make the sauce.
3. Heat a large skillet or hibachi grill over high heat until it’s very hot, about 3–4 minutes, then add 1 tablespoon of vegetable oil.
4. Add the pork cubes to the skillet in a single layer, leaving space between them to avoid steaming, and cook for 3–4 minutes without moving them to develop a golden-brown crust.
5. Flip the pork cubes and cook for another 3–4 minutes until they’re cooked through and reach an internal temperature of 145°F.
6. Remove the pork from the skillet and set it aside on a plate, covering it loosely to keep it warm.
7. Reduce the heat to medium and add the remaining 1 tablespoon of vegetable oil to the same skillet.
8. Pour the sauce mixture into the skillet and bring it to a simmer, stirring occasionally, for about 2 minutes until it slightly thickens.
9. In a separate small bowl, mix the cornstarch with 1 tablespoon of water to create a slurry, then stir it into the simmering sauce to thicken it further, cooking for 1–2 more minutes until glossy.
10. Return the cooked pork to the skillet, tossing it gently in the sauce to coat evenly, and cook for 1 minute to reheat.
11. Remove the skillet from the heat and stir in the sliced green onions just before serving.
You’ll find the pork tender and juicy, with a crisp exterior that gives way to the sauce’s bright, balanced sweetness and tang. Serve it over steamed rice or with a side of grilled vegetables for a complete meal that feels both indulgent and light, perfect for savoring on a quiet evening.
Eggplant and Bell Pepper Hibachi
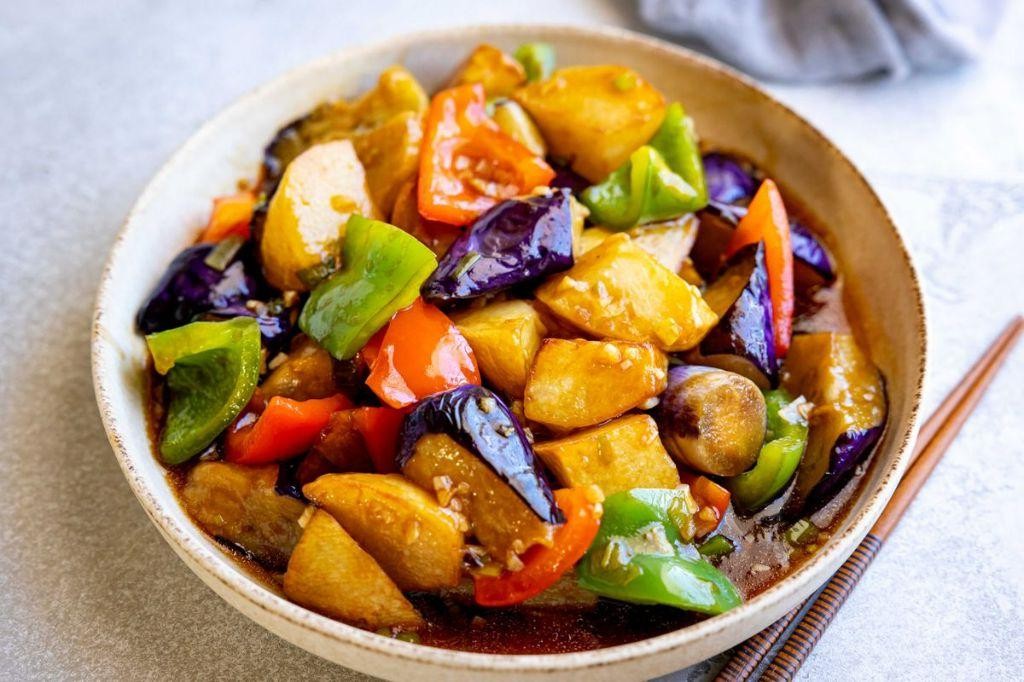
Maybe it’s the quiet sizzle of vegetables hitting a hot surface, or the way the kitchen fills with a savory, smoky aroma, but there’s something deeply comforting about this simple hibachi. It feels like a small, warm ritual on a winter evening, transforming humble ingredients into something vibrant and nourishing.
Serving: 4 | Pre Time: 15 minutes | Cooking Time: 20 minutes
Ingredients
– Eggplant – 1 large (about 1 lb), cut into 1-inch cubes
– Red bell pepper – 1 large, cut into 1-inch pieces
– Yellow onion – 1 medium, sliced into ½-inch strips
– Soy sauce – 3 tbsp
– Sesame oil – 2 tbsp
– Garlic – 3 cloves, minced
– Vegetable oil – 2 tbsp
– Salt – ½ tsp
Instructions
1. Place the cubed eggplant in a colander, sprinkle with ½ tsp salt, and let it sit for 10 minutes to draw out moisture, which helps it brown better without becoming soggy.
2. Pat the eggplant dry thoroughly with paper towels to remove the released liquid and excess salt.
3. Heat a large skillet or wok over medium-high heat and add 1 tbsp vegetable oil.
4. Add the eggplant cubes in a single layer and cook for 5–7 minutes, stirring occasionally, until they are golden brown on all sides and tender when pierced with a fork.
5. Transfer the cooked eggplant to a plate and set aside.
6. In the same skillet, add the remaining 1 tbsp vegetable oil.
7. Add the sliced onion and cook for 3–4 minutes, stirring frequently, until it begins to soften and turn translucent.
8. Add the bell pepper pieces and cook for another 4–5 minutes, until they are slightly charred at the edges but still crisp-tender.
9. Push the vegetables to the sides of the skillet, creating a well in the center.
10. Add the minced garlic to the center and cook for 30 seconds, just until fragrant, being careful not to let it burn.
11. Return the cooked eggplant to the skillet and mix everything together gently.
12. Pour the soy sauce and sesame oil evenly over the vegetables.
13. Toss everything to coat thoroughly and cook for 1–2 more minutes, allowing the sauces to heat through and glaze the vegetables.
14. Remove from heat and serve immediately.
Now, the finished dish offers a delightful contrast: the eggplant melts into a creamy softness, while the peppers retain a gentle crunch. Their sweetness balances the savory depth from the soy and sesame, creating a harmony that feels both rustic and refined. Nestle it over a bed of steamed rice or alongside grilled tofu for a complete, comforting meal that celebrates simplicity.
Spicy Garlic Hibachi Noodles
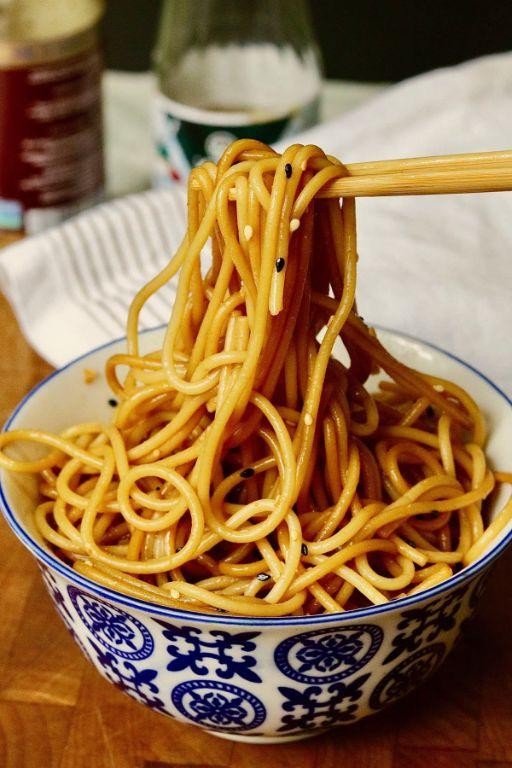
Beneath the soft glow of kitchen lights, I find myself craving something that warms from the inside out, a dish that feels like a quiet celebration on a plate. It’s the kind of meal that turns a simple evening into a moment of comfort, with aromas that fill the kitchen and promise something deeply satisfying.
Serving: 2 | Pre Time: 10 minutes | Cooking Time: 15 minutes
Ingredients
– Spaghetti – 8 oz
– Vegetable oil – 2 tbsp
– Garlic – 4 cloves, minced
– Soy sauce – 3 tbsp
– Sriracha – 1 tbsp
– Unsalted butter – 2 tbsp
– Green onions – 2, sliced
Instructions
1. Bring a large pot of salted water to a rolling boil over high heat.
2. Add 8 oz of spaghetti to the boiling water and cook for 9 minutes, stirring occasionally to prevent sticking, until al dente (firm to the bite).
3. Drain the spaghetti in a colander, but do not rinse it to help the sauce cling better later.
4. Heat 2 tbsp of vegetable oil in a large skillet or wok over medium-high heat until it shimmers, about 1 minute.
5. Add 4 cloves of minced garlic to the hot oil and sauté for 30 seconds, stirring constantly, until fragrant but not browned to avoid bitterness.
6. Pour in 3 tbsp of soy sauce and 1 tbsp of Sriracha, stirring to combine for 10 seconds.
7. Add the drained spaghetti to the skillet, tossing with tongs to coat evenly in the sauce for 1 minute.
8. Reduce the heat to low and stir in 2 tbsp of unsalted butter until melted and creamy, about 30 seconds.
9. Remove the skillet from the heat and fold in 2 sliced green onions, reserving some for garnish if desired.
10. Serve immediately while hot.
A final toss brings it all together: the noodles are slick and glossy, carrying a bold kick of garlic and heat that mellows into a rich, buttery finish. For a creative twist, top it with a fried egg or serve alongside grilled shrimp, letting the spicy sauce soak into every bite.
Chicken and Shrimp Combo Hibachi
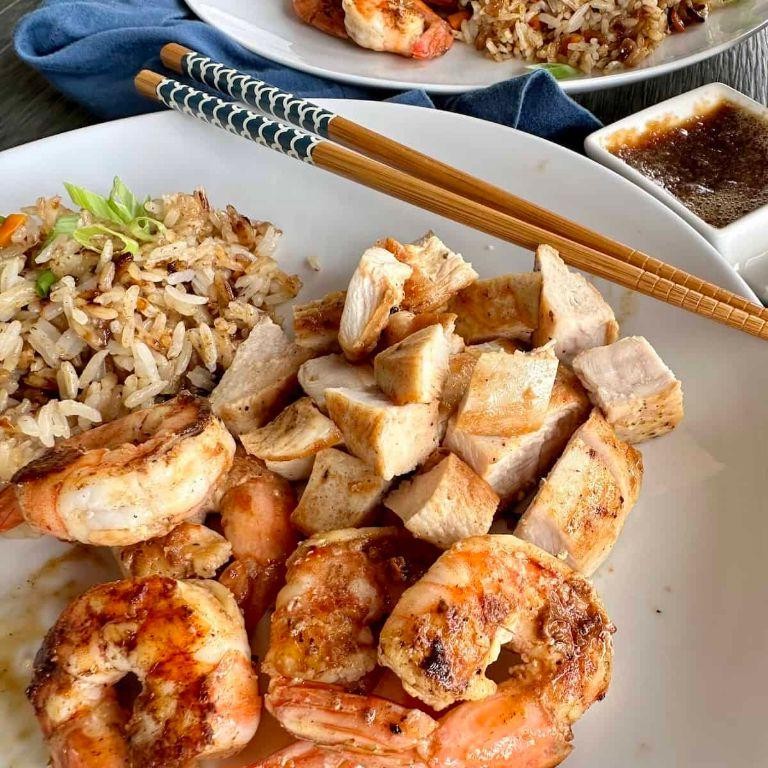
Tonight, as the winter evening settles in, I find myself drawn to the comforting sizzle of a hibachi grill, where chicken and shrimp come together in a simple, satisfying dance. There’s something quietly magical about watching these two proteins mingle over high heat, each bringing its own gentle flavor to the table. Let’s gather just a few ingredients and create this cozy combo, perfect for a reflective dinner at home.
Serving: 2 | Pre Time: 10 minutes | Cooking Time: 15 minutes
Ingredients
– Chicken breast – 1 lb, cut into 1-inch cubes
– Shrimp – ½ lb, peeled and deveined
– Soy sauce – 3 tbsp
– Vegetable oil – 2 tbsp
– Garlic – 2 cloves, minced
– Salt – ½ tsp
– Black pepper – ¼ tsp
Instructions
1. Pat the chicken and shrimp dry with paper towels to ensure a good sear.
2. In a small bowl, combine the soy sauce, minced garlic, salt, and black pepper to make a marinade.
3. Place the chicken and shrimp in a separate bowl, pour the marinade over them, and toss to coat evenly. Let sit for 5 minutes at room temperature.
4. Heat a large skillet or hibachi grill over high heat until it reaches 400°F, then add 1 tbsp of vegetable oil and swirl to coat the surface.
5. Add the chicken cubes to the skillet in a single layer, cooking for 4–5 minutes per side until golden brown and the internal temperature reaches 165°F.
6. Remove the chicken from the skillet and set aside on a plate, covering loosely with foil to keep warm.
7. Add the remaining 1 tbsp of vegetable oil to the same skillet, then add the shrimp in a single layer.
8. Cook the shrimp for 2–3 minutes per side until they turn pink and opaque, being careful not to overcrowd the pan to avoid steaming.
9. Return the chicken to the skillet with the shrimp, tossing everything together for 1 minute to reheat and blend the flavors.
10. Serve immediately while hot. One final tip: for extra tenderness, avoid moving the proteins too much while searing to develop a nice crust.
On the plate, the chicken offers a juicy, hearty bite, while the shrimp adds a delicate sweetness that melts softly with each mouthful. Try serving it over a bed of steamed rice or with a side of crisp vegetables to soak up the savory garlic-soy notes, making for a meal that feels both indulgent and effortlessly simple.
Hibachi-Style Fried Cauliflower
Remembering the sizzle of a hibachi grill on a quiet evening like this, I find comfort in recreating that warmth at home with a simple vegetable twist. This dish transforms humble cauliflower into something crisp and savory, perfect for a cozy night in.
Serving: 4 | Pre Time: 15 minutes | Cooking Time: 20 minutes
Ingredients
– Cauliflower – 1 large head
– Soy sauce – ¼ cup
– Sesame oil – 2 tbsp
– Garlic powder – 1 tsp
– Cornstarch – ½ cup
– Vegetable oil – ¼ cup
Instructions
1. Cut the cauliflower into bite-sized florets, ensuring they are uniform for even cooking.
2. In a large bowl, whisk together the soy sauce, sesame oil, and garlic powder until fully combined.
3. Add the cauliflower florets to the bowl and toss gently to coat them evenly with the marinade.
4. Let the cauliflower marinate at room temperature for 10 minutes to absorb the flavors.
5. Place the cornstarch in a shallow dish and dredge each marinated floret until lightly coated, shaking off any excess.
6. Heat the vegetable oil in a large skillet over medium-high heat until it shimmers, about 350°F.
7. Carefully add the coated cauliflower to the skillet in a single layer, avoiding overcrowding to ensure crispiness.
8. Fry the cauliflower for 4-5 minutes per side, turning once, until golden brown and crispy on all edges.
9. Transfer the fried cauliflower to a paper towel-lined plate to drain any excess oil.
10. Serve immediately while hot for the best texture.
The cauliflower emerges with a satisfying crunch on the outside, tender within, and a rich umami depth from the marinade. Try pairing it with a drizzle of extra soy sauce or over steamed rice for a complete, comforting meal.
Caramelized Onion Hibachi Steak
Wandering through the kitchen tonight, I found myself craving something deeply savory and quietly celebratory—a meal that feels like a gift to the end of the day. The slow, sweet transformation of onions meeting the quick, searing heat of steak creates a harmony that’s both simple and profoundly satisfying.
Serving: 2 | Pre Time: 10 minutes | Cooking Time: 25 minutes
Ingredients
– Yellow onion – 1 large
– Unsalted butter – 2 tbsp
– Granulated sugar – 1 tsp
– Ribeye steak – 1 lb
– Soy sauce – 2 tbsp
– Vegetable oil – 1 tbsp
– Salt – ½ tsp
– Black pepper – ¼ tsp
Instructions
1. Slice the yellow onion into thin, uniform half-moons.
2. Melt the unsalted butter in a large skillet over medium-low heat.
3. Add the sliced onion and granulated sugar to the skillet, stirring to coat.
4. Cook the onion, stirring occasionally, for 20 minutes until deeply golden brown and soft.
5. While the onion cooks, pat the ribeye steak dry with paper towels.
6. Season both sides of the steak evenly with the salt and black pepper.
7. Heat the vegetable oil in a separate heavy skillet over high heat until it shimmers.
8. Place the steak in the hot skillet and sear undisturbed for 4 minutes.
9. Flip the steak and sear the other side for 4 minutes for medium-rare (135°F internal temperature).
10. Transfer the steak to a cutting board and let it rest for 5 minutes.
11. Pour the soy sauce into the skillet with the caramelized onions, stirring to combine.
12. Slice the rested steak against the grain into ½-inch thick strips.
13. Arrange the steak slices on plates and top generously with the soy-caramelized onion mixture.
Gently, the steak yields to each bite with a juicy tenderness, while the onions melt into a sweet, umami-rich glaze that clings to every slice. For a playful twist, try serving it over a bed of crisp shredded cabbage or tucked into warm flour tortillas with a sprinkle of sesame seeds.
Ginger Sesame Tofu Hibachi
Holding the warm bowl in my hands, I remember how this simple dish came to be—a quiet evening, the sizzle of tofu meeting a hot pan, and the comforting aroma of ginger and sesame filling the kitchen. It’s a humble, nourishing meal that feels like a gentle embrace after a long day, perfect for those moments when you crave something both familiar and new.
Serving: 2 | Pre Time: 15 minutes | Cooking Time: 15 minutes
Ingredients
– Firm tofu – 14 oz
– Soy sauce – ¼ cup
– Sesame oil – 2 tbsp
– Fresh ginger – 1 tbsp, minced
– Garlic – 2 cloves, minced
– Cornstarch – 2 tbsp
– Vegetable oil – 2 tbsp
– Green onions – 2, sliced
– Sesame seeds – 1 tbsp
Instructions
1. Press the tofu between paper towels for 10 minutes to remove excess moisture, then cut it into 1-inch cubes.
2. In a small bowl, whisk together the soy sauce, sesame oil, minced ginger, and minced garlic to create the marinade.
3. Place the tofu cubes in a shallow dish, pour the marinade over them, and let sit for 5 minutes, gently tossing halfway through to coat evenly.
4. Remove the tofu from the marinade, reserving the liquid, and toss the cubes in cornstarch until lightly coated on all sides.
5. Heat vegetable oil in a large skillet over medium-high heat until it shimmers, about 2 minutes.
6. Add the tofu to the skillet in a single layer, cooking for 3–4 minutes per side until golden brown and crispy, flipping carefully with a spatula.
7. Pour the reserved marinade into the skillet, reduce heat to medium, and simmer for 2 minutes until the sauce thickens and coats the tofu.
8. Remove from heat, sprinkle with sliced green onions and sesame seeds, and serve immediately.
The tofu emerges with a crisp exterior that gives way to a tender, juicy interior, while the ginger and sesame meld into a savory, slightly sweet glaze. Try it over steamed rice or tucked into lettuce wraps for a refreshing twist, letting the flavors linger on your palate like a quiet memory.
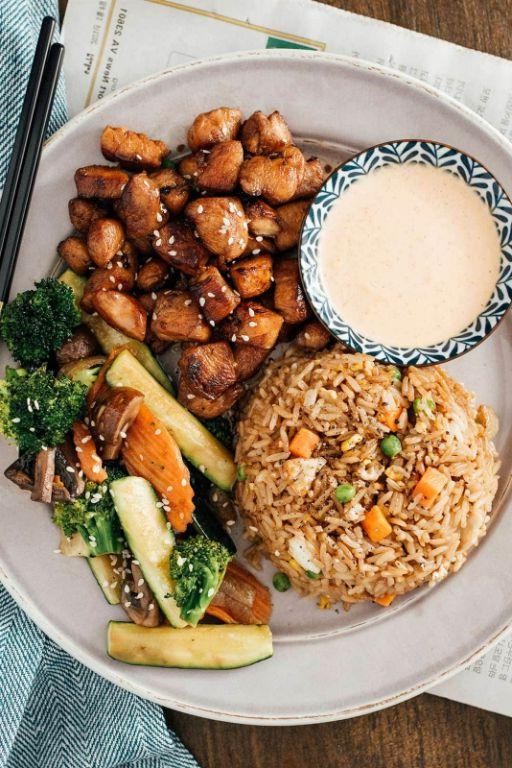
Mixed Seafood Hibachi Platter
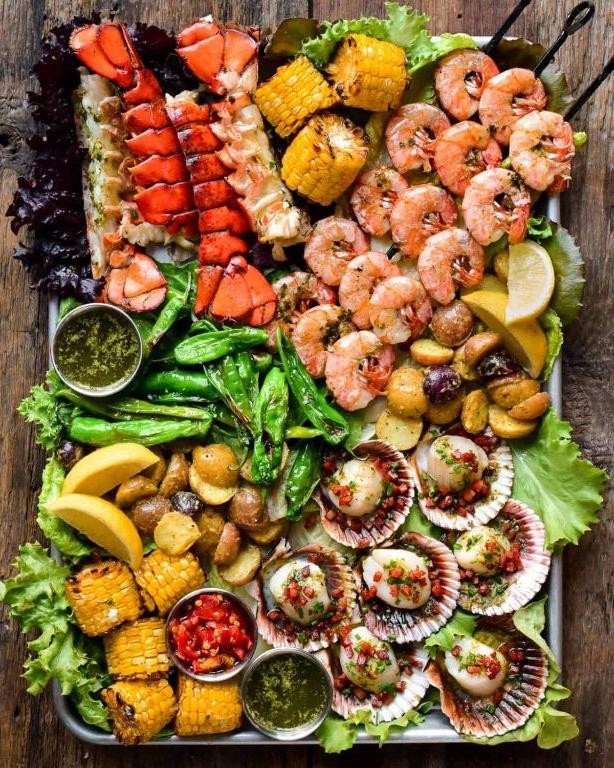
A quiet evening, the sizzle of a hot grill, and the gentle aroma of the ocean—this mixed seafood hibachi platter feels like a peaceful celebration, a simple yet elegant way to gather warmth from the sea. It’s a dish that unfolds slowly, each piece cooked with care, inviting you to savor the process as much as the result.
Serving: 2 | Pre Time: 15 minutes | Cooking Time: 20 minutes
Ingredients
– Large shrimp – 8 oz
– Scallops – 6 oz
– Salmon fillet – 6 oz
– Soy sauce – ¼ cup
– Unsalted butter – 2 tbsp
– Garlic – 2 cloves, minced
– Vegetable oil – 1 tbsp
– Salt – ½ tsp
– Black pepper – ¼ tsp
Instructions
1. Pat the shrimp, scallops, and salmon fillet dry with paper towels to ensure a crisp sear.
2. Season all seafood evenly with salt and black pepper.
3. Heat a large skillet or hibachi grill over medium-high heat until it reaches 400°F, then add vegetable oil.
4. Place the salmon skin-side down in the skillet and cook for 4 minutes without moving to form a golden crust.
5. Flip the salmon and cook for another 3 minutes until the internal temperature reaches 145°F, then remove and set aside.
6. Add the shrimp to the same skillet and cook for 2 minutes per side until they turn pink and opaque.
7. Remove the shrimp and add the scallops, cooking for 1½ minutes per side until lightly browned and firm to the touch.
8. Reduce the heat to low and melt the unsalted butter in the skillet.
9. Add the minced garlic to the butter and sauté for 30 seconds until fragrant, being careful not to burn it.
10. Pour in the soy sauce, stirring gently to combine with the butter and garlic into a glossy sauce.
11. Return all the cooked seafood to the skillet, tossing gently to coat evenly in the sauce for about 1 minute.
12. Serve immediately on a warm platter.
Now, the platter rests—a harmony of textures from the flaky salmon, tender shrimp, and buttery scallops, all glazed in that savory soy-garlic sauce. Nestle it beside steamed rice or crisp vegetables for a complete meal that feels both comforting and refined, perfect for a quiet dinner under soft lighting.
Summary
Overall, this collection of 20 hibachi grill recipes offers everything you need to host a memorable, interactive meal that will wow your guests. We hope you’re inspired to fire up the grill and try a few! Don’t forget to leave a comment telling us your favorite recipe and share this roundup on Pinterest to spread the sizzle. Happy grilling!


