Mmm, can you smell that? It’s the sweet scent of summer winding down and the smoky promise of a perfect Labor Day BBQ. Whether you’re hosting a backyard bash or just craving some seasonal comfort food, we’ve gathered 20 crowd-pleasing recipes that’ll make your celebration deliciously memorable. Get ready to fire up the grill and dive into these mouthwatering ideas!
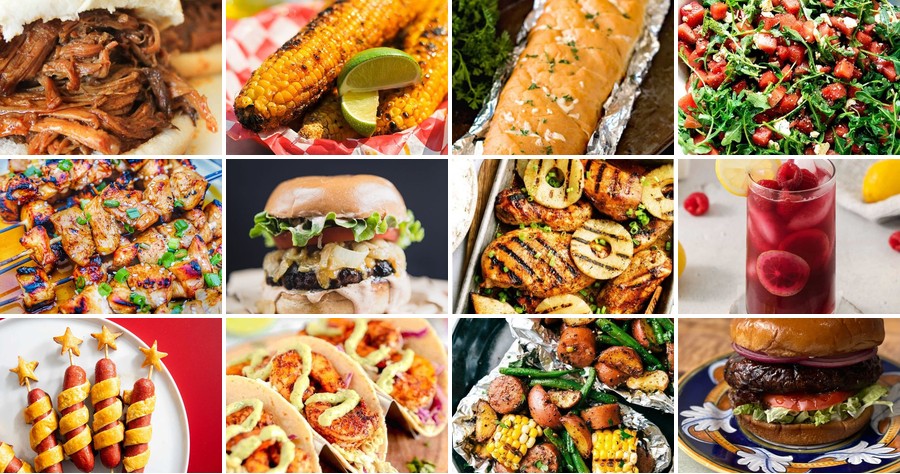
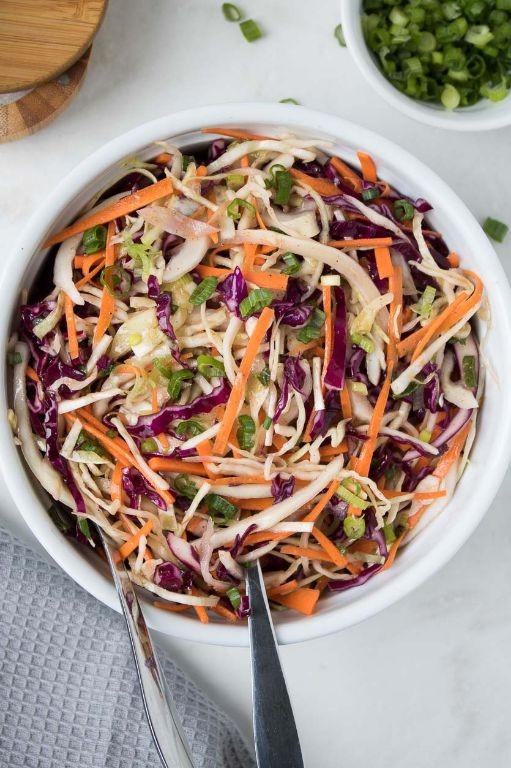
Classic Juicy Grilled Burgers with Secret Sauce
Just when you think you’ve had the perfect burger, this recipe comes along with its secret sauce to change your mind. It’s the kind of backyard classic that makes any day feel like a celebration, and trust me, once you try it, you’ll be making it all summer long.
Serving: 4 | Pre Time: 15 minutes | Cooking Time: 10 minutes
Ingredients
– 1 ½ lbs ground beef (80/20 blend for the best juicy fat ratio)
– 1 tsp kosher salt (I always use Diamond Crystal for its flaky texture)
– ½ tsp freshly ground black pepper
– 4 hamburger buns, preferably brioche for that soft, sweet touch
– ½ cup mayonnaise (Duke’s is my Southern go-to for richness)
– 2 tbsp ketchup
– 1 tbsp yellow mustard
– 1 tbsp sweet pickle relish (the secret ingredient that adds a tangy crunch)
– 4 slices American cheese (it melts perfectly every time)
– 1 tbsp vegetable oil (for greasing the grill grates)
Instructions
1. In a medium bowl, gently mix the ground beef, kosher salt, and black pepper until just combined—overmixing makes tough burgers.
2. Divide the meat into 4 equal portions and shape them into ¾-inch thick patties, pressing a slight dimple in the center to prevent puffing during cooking.
3. Preheat your grill to medium-high heat, about 400°F, and lightly oil the grates with vegetable oil to prevent sticking.
4. Place the patties on the grill and cook for 4-5 minutes without moving them, until you see grill marks and juices pool on top.
5. Flip the burgers and cook for another 3-4 minutes for medium doneness, or until an instant-read thermometer reads 160°F.
6. While the burgers cook, whisk together the mayonnaise, ketchup, yellow mustard, and sweet pickle relish in a small bowl to make the secret sauce.
7. In the last minute of cooking, place a slice of American cheese on each patty and close the grill lid to melt it completely.
8. Toast the hamburger buns on the grill for about 30 seconds, just until lightly golden and warm.
9. Assemble the burgers by spreading a generous amount of secret sauce on both halves of each bun, then top with a cheesy patty.
For the ultimate bite, these burgers are juicy with a smoky char from the grill, balanced by the creamy, tangy sauce that clings to every nook. Feel free to pile on extra toppings like crisp lettuce or tomato, but honestly, they’re so flavorful they can stand alone on a busy weeknight.
Smoky BBQ Pulled Pork Sandwiches

Just imagine sinking your teeth into the most tender, smoky pulled pork piled high on a soft bun. You’re about to make the ultimate BBQ sandwich that’s perfect for feeding a crowd or just treating yourself. It’s easier than you think, and the flavor payoff is huge.
Serving: 8 | Pre Time: 15 minutes | Cooking Time: 8 hours
Ingredients
– 4 lbs pork shoulder (also called pork butt—it’s the same cut and my favorite for shredding)
– 1 tbsp brown sugar (for that hint of caramelized sweetness)
– 1 tbsp smoked paprika (this is the secret to the smoky flavor without a smoker)
– 1 tbsp garlic powder (I always keep a big jar in my pantry)
– 1 tsp salt (kosher salt works best here)
– 1 tsp black pepper (freshly ground if you have it)
– 1 cup BBQ sauce (use your favorite store-bought brand to keep it simple)
– 8 hamburger buns (brioche buns are extra soft and delicious)
– 1 cup coleslaw (I like a tangy vinegar-based slaw for contrast)
Instructions
1. Preheat your oven to 300°F.
2. Pat the pork shoulder dry with paper towels—this helps the seasoning stick better.
3. In a small bowl, mix together the brown sugar, smoked paprika, garlic powder, salt, and black pepper.
4. Rub the spice mixture all over the pork shoulder, covering every surface.
5. Place the seasoned pork in a large Dutch oven or oven-safe pot with a lid.
6. Cover the pot and transfer it to the preheated oven.
7. Cook the pork for 6 hours without opening the lid—trust the process, as this low-and-slow method makes it tender.
8. After 6 hours, remove the pot from the oven and check if the pork shreds easily with a fork; if not, cook for another 30-60 minutes.
9. Transfer the pork to a cutting board and let it rest for 15 minutes—this keeps it juicy.
10. Use two forks to shred the pork into bite-sized pieces, discarding any large fat chunks.
11. Return the shredded pork to the pot and stir in the BBQ sauce until fully coated.
12. Toast the hamburger buns lightly in a toaster or oven for 2-3 minutes until warm.
13. Pile the BBQ pulled pork onto the bottom half of each bun.
14. Top the pork with a generous spoonful of coleslaw.
15. Place the top bun over the coleslaw to complete the sandwich.
16. Serve immediately while warm.
Perfectly tender and packed with smoky-sweet flavor, these sandwiches are a total crowd-pleaser. The pork practically melts in your mouth, and the coleslaw adds a refreshing crunch that balances the richness. Try serving them with extra BBQ sauce on the side for dipping, or pile the leftovers on nachos for a fun twist the next day.
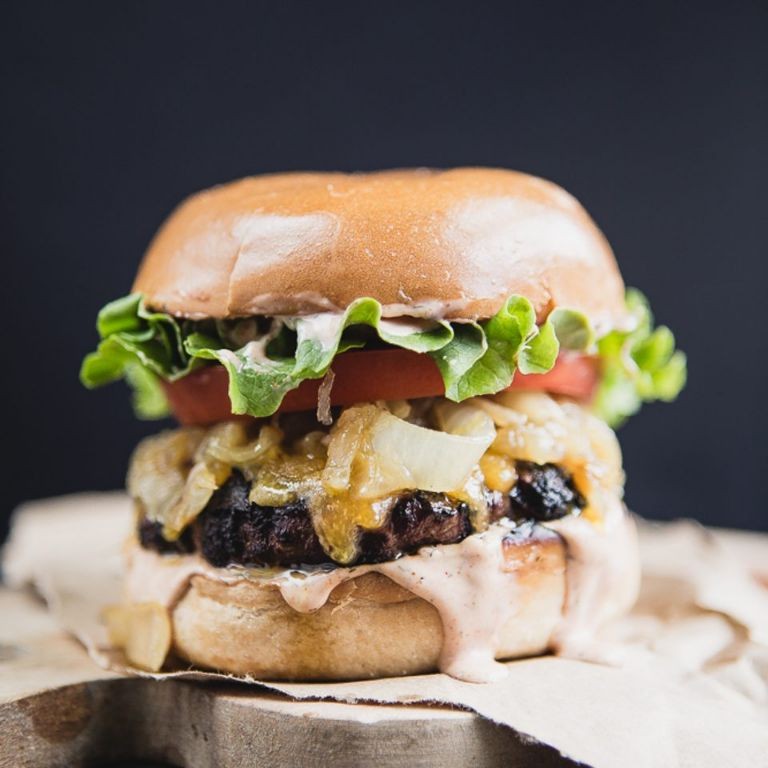
Grilled Honey Garlic Chicken Skewers
Nothing says summer like the smell of sizzling skewers on the grill. You’re going to love how easy these honey garlic chicken skewers are to throw together, and the sweet, savory glaze is absolutely addictive. Perfect for your next backyard barbecue or a quick weeknight dinner.
Serving: 4 | Pre Time: 20 minutes | Cooking Time: 15 minutes
Ingredients
- 1.5 lbs boneless, skinless chicken thighs, cut into 1-inch pieces (I find thighs stay juicier on the grill than breasts)
- 1/4 cup honey (local honey adds a lovely floral note if you have it)
- 3 tbsp soy sauce (I use low-sodium to better control the saltiness)
- 4 cloves garlic, minced (fresh is best for that punchy flavor)
- 1 tbsp olive oil (extra virgin olive oil is my go-to for marinades)
- 1 tbsp rice vinegar (it gives the glaze a nice tangy balance)
- 1/2 tsp black pepper, freshly ground
- 8 wooden skewers, soaked in water for 30 minutes (this prevents them from burning)
Instructions
- In a medium bowl, whisk together 1/4 cup honey, 3 tbsp soy sauce, 4 cloves of minced garlic, 1 tbsp olive oil, 1 tbsp rice vinegar, and 1/2 tsp black pepper until fully combined.
- Add 1.5 lbs of cubed chicken thighs to the bowl, tossing to coat every piece evenly in the marinade.
- Cover the bowl and let the chicken marinate in the refrigerator for at least 30 minutes, or up to 4 hours for deeper flavor.
- While the chicken marinates, soak 8 wooden skewers in a tray of water for a full 30 minutes to prevent charring on the grill.
- Preheat your grill to medium-high heat, aiming for a surface temperature of about 400°F.
- Thread the marinated chicken pieces onto the soaked skewers, leaving a small space between each piece for even cooking.
- Place the skewers on the preheated grill and cook for 5-7 minutes.
- Flip the skewers using tongs and cook for another 5-7 minutes, until the chicken is cooked through and registers 165°F on an instant-read thermometer.
- Brush the skewers with any remaining marinade from the bowl during the last 2 minutes of grilling to build a sticky glaze. Tip: Only use marinade that hasn’t touched raw chicken, or boil it first for safety.
- Transfer the grilled skewers to a clean plate and let them rest for 3-5 minutes before serving. Tip: This rest allows the juices to redistribute, keeping the chicken tender.
Mouthwatering and tender, these skewers have a perfect caramelized crust from the honey glaze. The garlic adds a savory depth that pairs wonderfully with the subtle sweetness. Serve them over a bed of fluffy rice with a side of grilled veggies, or chop them up for a fantastic salad topper—they’re incredibly versatile.
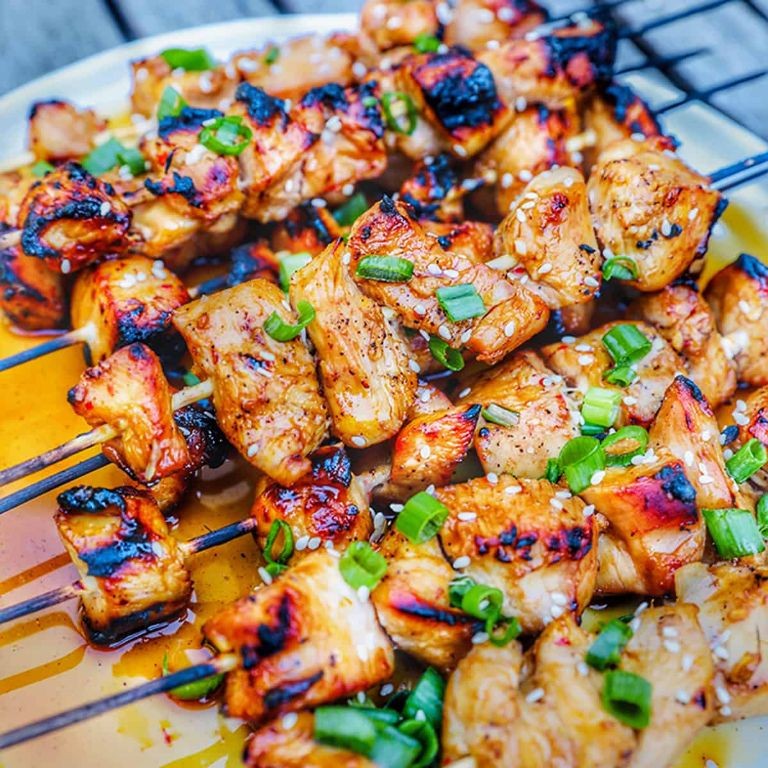
Tangy Coleslaw with Apple Cider Vinegar Dressing
Craving something crisp and refreshing to balance out those hearty holiday meals? This tangy coleslaw with apple cider vinegar dressing is just the ticket. It’s bright, crunchy, and comes together in a flash, making it the perfect last-minute side dish for your festive table.
Serving: 6 | Pre Time: 15 minutes | Cooking Time: 0 minutes
Ingredients
– 1 small head of green cabbage, thinly sliced (I like to use a mandoline for super even shreds)
– 2 large carrots, peeled and grated (the pre-shredded bagged kind works in a pinch, but fresh has better texture)
– 1/2 cup mayonnaise (I always use full-fat for the creamiest dressing)
– 1/4 cup apple cider vinegar (the good, unfiltered kind with the “mother” adds the best tang)
– 2 tablespoons granulated sugar
– 1 teaspoon celery seed (don’t skip this—it gives that classic coleslaw flavor)
– 1/2 teaspoon kosher salt
– 1/4 teaspoon freshly ground black pepper
Instructions
1. Place the thinly sliced green cabbage and grated carrots into a large mixing bowl.
2. In a separate medium bowl, whisk together the mayonnaise, apple cider vinegar, granulated sugar, celery seed, kosher salt, and black pepper until the sugar is fully dissolved and the dressing is smooth. (Tip: Let the dressing sit for 5 minutes after whisking to let the flavors meld before tossing.)
3. Pour the dressing over the cabbage and carrot mixture in the large bowl.
4. Using clean hands or two large spoons, toss everything together until the vegetables are evenly and thoroughly coated with the dressing. (Tip: Tossing by hand, while messy, ensures every shred gets dressed without bruising the cabbage too much.)
5. Cover the bowl tightly with plastic wrap and refrigerate the coleslaw for at least 1 hour before serving. (Tip: This chilling time is crucial—it allows the cabbage to soften slightly and the flavors to develop fully.)
6. After chilling, give the coleslaw one final gentle toss to redistribute any dressing that may have settled at the bottom of the bowl.
Once chilled, this slaw is wonderfully crisp with a perfect balance of sweet and tangy from the dressing. The cabbage retains a great crunch while the carrots add a subtle sweetness. It’s fantastic piled high on pulled pork sandwiches or served as a bright, cool contrast next to rich, smoky barbecue ribs.
Loaded Baked Potato Salad with Bacon and Chives
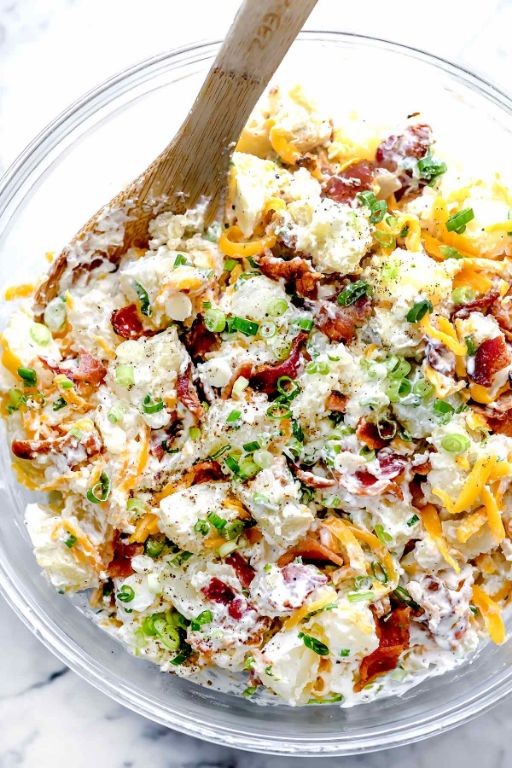
Kick off your next potluck or backyard BBQ with this crowd-pleasing twist on a classic. You get all the cozy comfort of a loaded baked potato—think crispy bacon, tangy sour cream, and sharp cheddar—but in a cool, creamy salad that’s perfect for warm days. It’s seriously easy to throw together and always disappears fast.
Serving: 6 | Pre Time: 20 minutes | Cooking Time: 40 minutes
Ingredients
– 2 pounds russet potatoes, peeled and cut into 1-inch cubes (I like russets for their fluffy texture)
– 6 slices thick-cut bacon, chopped (go for a smoky variety if you can)
– 1 cup sour cream, full-fat for the best richness
– 1/2 cup mayonnaise
– 1 cup shredded sharp cheddar cheese
– 1/4 cup chopped fresh chives, plus extra for garnish
– 1 teaspoon garlic powder
– 1/2 teaspoon smoked paprika
– Salt and black pepper, to taste (I always start with 1/2 teaspoon salt and adjust later)
Instructions
1. Place the cubed potatoes in a large pot and cover with cold water by about an inch. Add 1 tablespoon of salt to the water—this helps season them from the inside out.
2. Bring the pot to a boil over high heat, then reduce to a simmer. Cook the potatoes for 12-15 minutes, until they are fork-tender but not mushy. Tip: Test a piece early to avoid overcooking.
3. While the potatoes cook, heat a large skillet over medium heat. Add the chopped bacon and cook for 8-10 minutes, stirring occasionally, until it’s crispy and browned. Transfer the bacon to a paper towel-lined plate to drain, reserving 1 tablespoon of the bacon fat in the skillet.
4. Drain the cooked potatoes in a colander and let them cool for 10 minutes to room temperature—this prevents the sour cream from curdling when mixed.
5. In a large mixing bowl, combine the sour cream, mayonnaise, shredded cheddar cheese, chopped chives, garlic powder, smoked paprika, and the reserved bacon fat. Stir until smooth and well blended.
6. Add the cooled potatoes and crispy bacon to the bowl. Gently fold everything together until the potatoes are evenly coated. Tip: Use a spatula to keep the potato cubes intact for better texture.
7. Taste the salad and season with salt and black pepper as needed. Cover the bowl and refrigerate for at least 1 hour to let the flavors meld. Tip: Chilling it overnight makes it even tastier!
8. Before serving, give the salad a quick stir and sprinkle with extra chopped chives for a fresh pop of color.
Yep, this salad is a total winner with its creamy, tangy dressing clinging to those tender potato chunks and crispy bacon bits. The smoked paprika adds a subtle warmth that pairs perfectly with the sharp cheddar. Try scooping it into lettuce cups for a low-carb option or piling it onto grilled burgers for an epic twist.
Sweet and Spicy Baked Beans with Brown Sugar
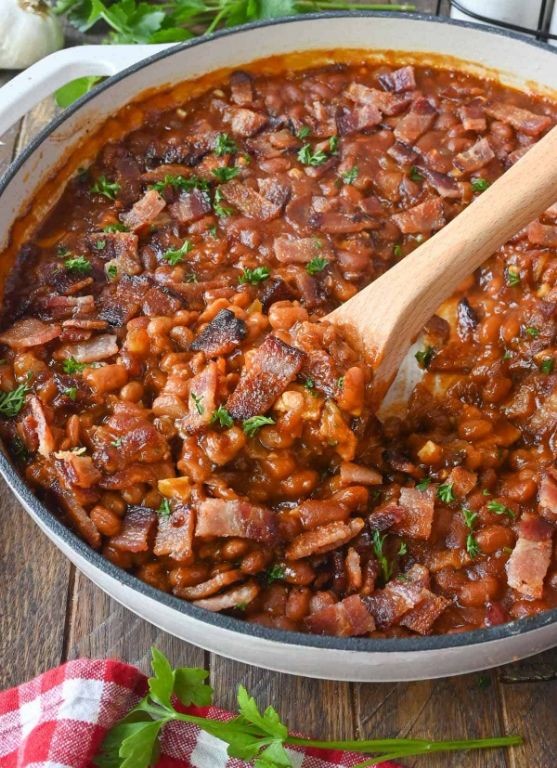
Nothing says comfort food like a big pot of baked beans, and this sweet and spicy version is about to become your new favorite. You get that classic molasses and brown sugar sweetness, but with a kick from chili powder and cayenne that keeps things interesting. It’s the perfect side dish for your next barbecue or a cozy weeknight dinner.
Serving: 6 | Pre Time: 15 minutes | Cooking Time: 60 minutes
Ingredients
– 1 lb dried navy beans (I always soak these overnight for the best texture)
– 1 large yellow onion, finely diced
– 4 cloves garlic, minced (fresh is best here for maximum flavor)
– 1/2 cup ketchup
– 1/3 cup molasses
– 1/2 cup packed dark brown sugar (this gives a richer flavor than light brown)
– 2 tbsp apple cider vinegar
– 1 tbsp chili powder
– 1/2 tsp cayenne pepper (adjust this if you’re sensitive to heat)
– 1 tsp salt
– 1/2 tsp black pepper
– 4 cups water
– 2 tbsp olive oil (extra virgin is my go-to for sautéing)
Instructions
1. Rinse the 1 lb dried navy beans under cold water and drain them in a colander.
2. In a large Dutch oven or oven-safe pot, heat 2 tbsp olive oil over medium heat on the stovetop.
3. Add the diced onion and cook for 5-7 minutes, stirring occasionally, until it becomes soft and translucent.
4. Stir in the minced garlic and cook for 1 more minute, just until fragrant.
5. Add the rinsed beans, 4 cups water, 1/2 cup ketchup, 1/3 cup molasses, 1/2 cup brown sugar, 2 tbsp apple cider vinegar, 1 tbsp chili powder, 1/2 tsp cayenne pepper, 1 tsp salt, and 1/2 tsp black pepper to the pot.
6. Bring the mixture to a boil over high heat, then reduce the heat to low, cover the pot, and let it simmer for 45 minutes, stirring every 15 minutes to prevent sticking. Tip: If the liquid reduces too much, add a splash more water.
7. Preheat your oven to 350°F while the beans simmer.
8. After simmering, transfer the covered pot to the preheated oven and bake for 60 minutes. Tip: Check halfway through; the beans should be tender but not mushy, and the sauce will thicken.
9. Remove the pot from the oven and let it sit uncovered for 10 minutes to allow the flavors to meld. Tip: This resting time helps the sauce cling to the beans better.
10. Stir the beans gently before serving.
What you end up with is a hearty dish where the beans are perfectly tender, soaking up that sticky, glossy sauce. The sweetness from the brown sugar balances beautifully with the warm spice kick, making it irresistible. Try serving it over cornbread or alongside grilled sausages for a meal that’ll have everyone asking for seconds.
Cheesy Garlic Bread on the Grill
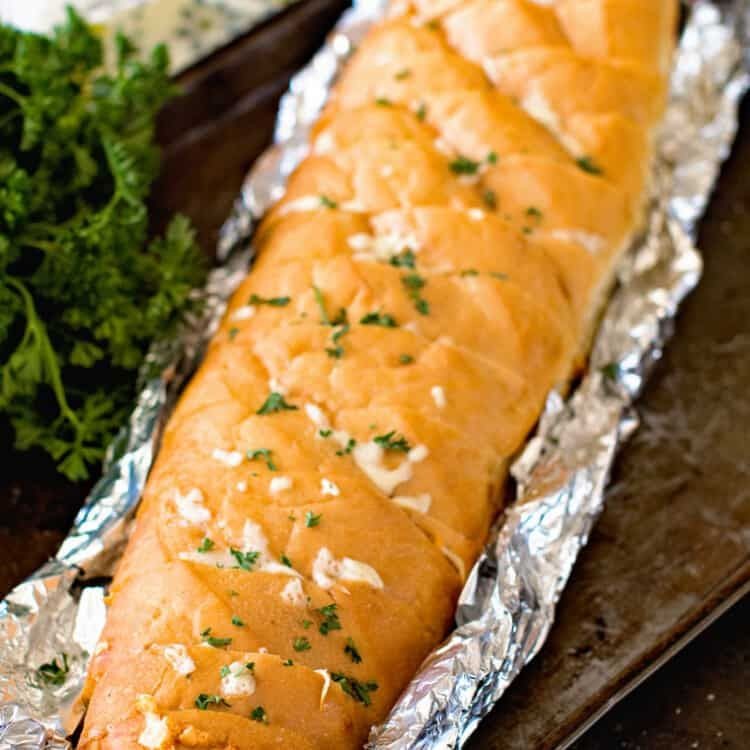
Craving that perfect crispy-on-the-outside, gooey-on-the-inside garlic bread? You’ve gotta try making it on the grill—it adds a smoky char that’s just unbeatable. It’s super simple and perfect for summer cookouts or even a cozy weeknight treat.
Serving: 4 | Pre Time: 10 minutes | Cooking Time: 10 minutes
Ingredients
– 1 loaf of Italian bread (I like a crusty baguette for maximum crunch)
– ½ cup unsalted butter, softened (room temp blends smoother with the garlic)
– 4 cloves garlic, minced (fresh is best for that punchy flavor)
– ¼ cup grated Parmesan cheese (the pre-grated kind works fine in a pinch)
– 1 cup shredded mozzarella cheese (I go for whole-milk mozzarella for extra meltiness)
– 2 tbsp chopped fresh parsley (dried works too, but fresh adds a bright pop)
– ½ tsp salt (kosher salt is my go-to for even seasoning)
Instructions
1. Preheat your grill to medium heat, around 350°F, and lightly oil the grates to prevent sticking.
2. Slice the Italian bread in half lengthwise and place it cut-side up on a baking sheet.
3. In a small bowl, mix the softened butter, minced garlic, and salt until well combined.
4. Spread the garlic butter mixture evenly over the cut sides of the bread, covering all the way to the edges.
5. Sprinkle the grated Parmesan cheese over the buttered bread, followed by the shredded mozzarella cheese.
6. Carefully transfer the bread to the preheated grill, placing it cut-side up to avoid dripping.
7. Close the grill lid and cook for 8-10 minutes, checking at 5 minutes to ensure it doesn’t burn—the cheese should be fully melted and bubbly.
8. Remove the bread from the grill using tongs and sprinkle with chopped parsley immediately.
9. Let the bread cool for 2-3 minutes before slicing into pieces to serve.
Heavenly right? That smoky char from the grill pairs perfectly with the rich, garlicky butter and stretchy melted cheese. Serve it alongside a big salad or dunk it into marinara sauce for an extra indulgent twist—it’s always a crowd-pleaser!
Fresh Watermelon Feta Salad with Mint
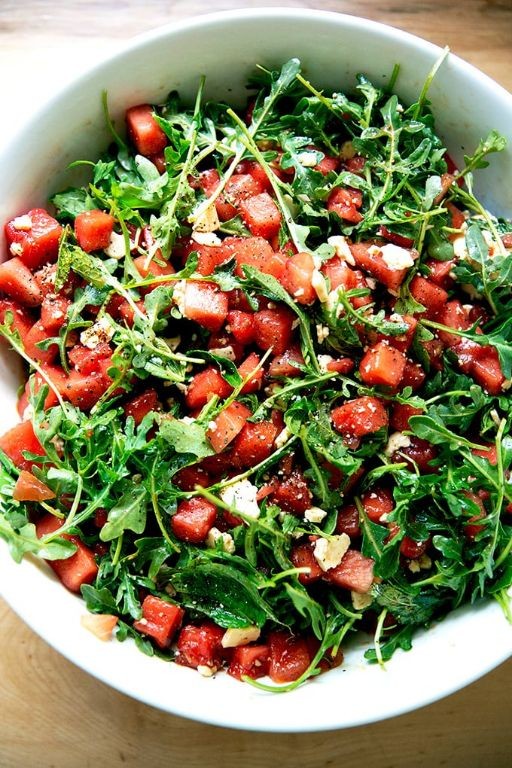
Let’s be real—when the heat hits, you want something refreshing, easy, and a little fancy without the fuss. This watermelon feta salad is exactly that: a sweet, salty, and herby combo that feels like a cool breeze on a hot day. It’s my go-to for summer potlucks or a quick lunch that actually excites you.
Serving: 4 | Pre Time: 15 minutes | Cooking Time: 0 minutes
Ingredients
– 4 cups of cubed seedless watermelon (about half a medium melon—I like it cold from the fridge for extra crunch)
– 1 cup of crumbled feta cheese (the block kind you crumble yourself tastes so much creamier)
– 1/4 cup of fresh mint leaves, roughly chopped (don’t skimp—this brightens everything up)
– 2 tablespoons of extra virgin olive oil (my go-to for its fruity kick)
– 1 tablespoon of fresh lime juice (squeezed right before using to keep it zesty)
– 1/4 teaspoon of flaky sea salt (like Maldon—it adds a nice texture)
– 1/4 teaspoon of freshly ground black pepper
Instructions
1. Place the 4 cups of cubed watermelon in a large mixing bowl.
2. Add the 1 cup of crumbled feta cheese to the bowl with the watermelon.
3. Sprinkle the 1/4 cup of chopped mint leaves over the watermelon and feta.
4. In a small bowl, whisk together the 2 tablespoons of olive oil and 1 tablespoon of lime juice until well combined—tip: if the lime juice is too tart, you can add a tiny pinch of sugar, but I love it as-is.
5. Drizzle the olive oil and lime mixture evenly over the salad in the large bowl.
6. Toss the salad gently with clean hands or a spoon to coat everything without crushing the watermelon—tip: be quick to keep the feta from getting too soggy.
7. Season the salad with the 1/4 teaspoon of flaky sea salt and 1/4 teaspoon of black pepper, tossing once more to distribute evenly.
8. Let the salad sit at room temperature for 5 minutes to allow the flavors to meld—tip: don’t skip this step; it makes the mint and lime pop!
9. Serve immediately in a shallow bowl or on a platter.
Just imagine the juicy crunch of watermelon against the creamy, salty feta, all brightened up by that mint and lime zing. It’s perfect as a light side, but I love scooping it onto grilled chicken or even serving it in hollowed-out watermelon halves for a fun summer presentation.
Homemade Lemonade with Fresh Berries
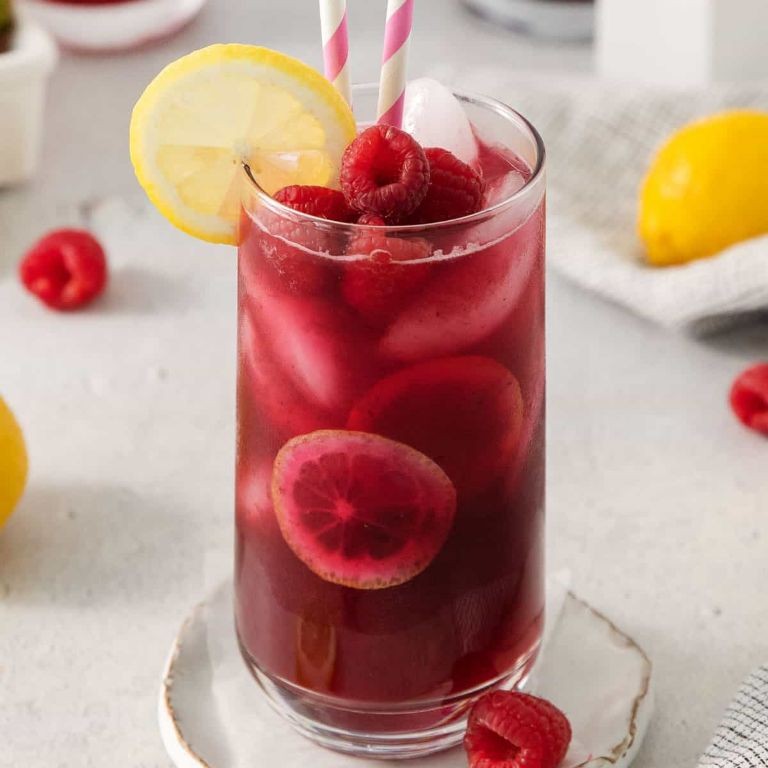
Beat the summer heat with this refreshing homemade lemonade that’s bursting with berry goodness. It’s the perfect drink to whip up when you need something cool, vibrant, and totally customizable. You’ll love how the fresh berries add a sweet-tart pop to the classic lemon base.
Serving: 4 | Pre Time: 10 minutes | Cooking Time: 0 minutes
Ingredients
– 1 cup fresh lemon juice (from about 4–6 lemons—I like to roll them on the counter first to get more juice out)
– 1 cup granulated sugar (you can swap in honey if you prefer, but sugar dissolves best in cold drinks)
– 4 cups cold water (filtered water makes it taste extra crisp)
– 1 cup mixed fresh berries, like strawberries, blueberries, and raspberries (I always grab whatever looks plumpest at the market)
– Ice cubes (plenty for serving—crushed ice chills it faster)
Instructions
1. In a small saucepan, combine 1 cup of granulated sugar with 1 cup of water.
2. Heat the mixture over medium heat, stirring constantly with a spoon, until the sugar fully dissolves, about 3–5 minutes—this creates a simple syrup so your lemonade isn’t grainy.
3. Remove the saucepan from the heat and let the simple syrup cool to room temperature for 10 minutes.
4. While the syrup cools, juice 4–6 lemons until you have 1 cup of fresh lemon juice, straining out any seeds.
5. In a large pitcher, pour in the cooled simple syrup, 1 cup of lemon juice, and the remaining 3 cups of cold water.
6. Stir everything together with a long spoon until well combined.
7. Gently rinse 1 cup of mixed fresh berries under cold water and pat them dry with a paper towel—this keeps them from watering down the drink.
8. Add the berries to the pitcher and stir lightly to distribute them.
9. Fill serving glasses with ice cubes, then pour the lemonade over the ice.
10. Garnish each glass with a few extra berries or a lemon slice if desired.
This lemonade has a bright, tangy flavor with sweet berry bursts in every sip—the berries soften slightly as they steep, adding a lovely texture. Serve it in mason jars for a rustic look, or blend it with more ice for a slushy twist on hot days.
Grilled Shrimp Tacos with Avocado Crema

Grilled shrimp tacos are the perfect summer meal—they’re light, flavorful, and come together in no time. You’ll love the smoky shrimp paired with that creamy avocado sauce, and they’re totally customizable with your favorite toppings. Let’s get cooking!
Serving: 4 | Pre Time: 15 minutes | Cooking Time: 10 minutes
Ingredients
– 1 lb large raw shrimp, peeled and deveined (I like to leave the tails on for easier grilling)
– 2 tbsp olive oil (extra virgin is my go-to for that fruity flavor)
– 1 tsp chili powder
– 1/2 tsp ground cumin
– 1/2 tsp garlic powder
– 1/4 tsp smoked paprika
– 1/4 tsp salt
– 8 small corn tortillas (warmed up, they’re so much better)
– 1 ripe avocado, pitted and peeled
– 1/4 cup sour cream
– 2 tbsp fresh lime juice (about 1 lime, freshly squeezed makes all the difference)
– 1/4 cup chopped fresh cilantro
– 1/4 cup diced red onion
– 1 jalapeño, seeded and minced (optional, but I love the kick)
Instructions
1. In a medium bowl, combine the shrimp, olive oil, chili powder, cumin, garlic powder, smoked paprika, and salt. Toss until the shrimp are evenly coated.
2. Preheat your grill or grill pan to medium-high heat (about 400°F). Tip: Make sure the grill grates are clean and lightly oiled to prevent sticking.
3. Place the shrimp on the grill in a single layer. Cook for 2-3 minutes per side, until they turn pink and opaque with light grill marks.
4. While the shrimp cook, warm the corn tortillas on the grill for about 30 seconds per side, or wrap them in a damp towel and microwave for 20 seconds. Tip: Keep them covered to stay soft.
5. In a blender or food processor, combine the avocado, sour cream, lime juice, cilantro, red onion, and jalapeño (if using). Blend until smooth and creamy.
6. Remove the shrimp from the grill and let them rest for 1 minute. Tip: Don’t overcook the shrimp—they’ll get rubbery if left on too long.
7. Assemble the tacos by placing a few shrimp on each warmed tortilla.
8. Drizzle the avocado crema generously over the shrimp.
9. Serve immediately with extra lime wedges on the side if desired.
You’ll love how the smoky, tender shrimp contrasts with the cool, zesty avocado crema. These tacos are perfect for a quick weeknight dinner or a fun weekend gathering—try topping them with shredded cabbage or a squeeze of extra lime for a fresh twist.
Smoked Sausage and Veggie Foil Packets
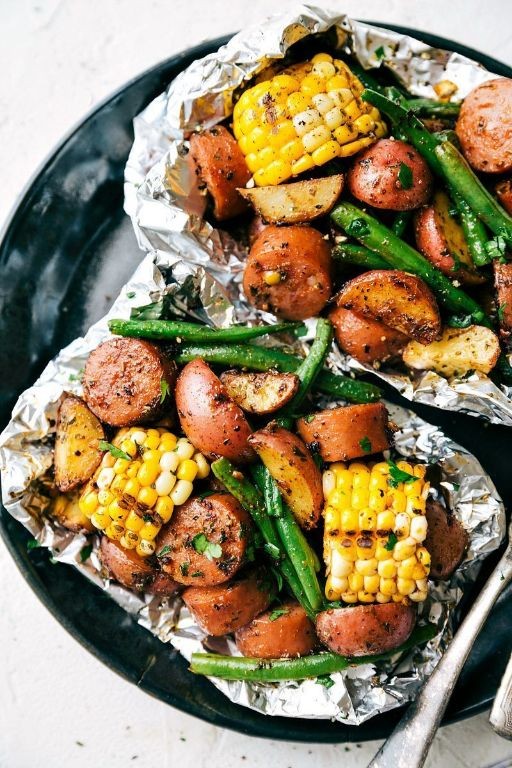
Gather around the grill or oven, friends—this is one of those effortless meals that feels like a treat without the fuss. You’ll love how the smoky sausage mingles with tender veggies, all cooked together in a handy foil packet for easy cleanup. It’s perfect for busy weeknights or lazy weekends when you want something hearty and hands-off.
Serving: 4 | Pre Time: 15 minutes | Cooking Time: 25 minutes
Ingredients
– 1 lb smoked sausage, sliced into ½-inch rounds (I like using a smoky kielbasa for that rich flavor)
– 1 large bell pepper, any color, cut into 1-inch chunks (I often mix red and green for a pop of color)
– 1 medium zucchini, sliced into ½-inch half-moons
– 1 small red onion, cut into 1-inch wedges
– 2 tbsp extra virgin olive oil (my go-to for a light, fruity base)
– 1 tsp garlic powder
– ½ tsp smoked paprika (this adds a subtle depth that pairs perfectly with the sausage)
– ¼ tsp black pepper
– ¼ tsp salt
– Fresh parsley, chopped, for garnish (optional, but it brightens everything up)
Instructions
1. Preheat your grill to medium-high heat (about 400°F) or your oven to 400°F.
2. In a large bowl, combine the sliced sausage, bell pepper, zucchini, and red onion.
3. Drizzle the olive oil over the mixture, then sprinkle with garlic powder, smoked paprika, black pepper, and salt.
4. Toss everything together until the ingredients are evenly coated with the oil and spices.
5. Tear off four large sheets of heavy-duty aluminum foil, each about 12×12 inches.
6. Divide the sausage and veggie mixture evenly among the foil sheets, placing it in the center of each.
7. Fold the foil over the mixture and crimp the edges tightly to create sealed packets, leaving a little room inside for steam to circulate.
8. Place the foil packets on the preheated grill or on a baking sheet in the oven.
9. Cook for 20-25 minutes, until the veggies are tender and the sausage is heated through—you can carefully open one packet to check doneness.
10. Let the packets rest for 2-3 minutes after cooking to allow the flavors to meld and avoid steam burns when opening.
11. Open the packets carefully, garnish with fresh parsley if using, and serve immediately.
Perfectly tender veggies soak up the smoky paprika and garlic, while the sausage adds a savory punch that makes every bite satisfying. Try serving these packets right on the foil for a fun, rustic presentation, or pair them with a side of crusty bread to mop up the delicious juices.
Pineapple Teriyaki Grilled Chicken Thighs
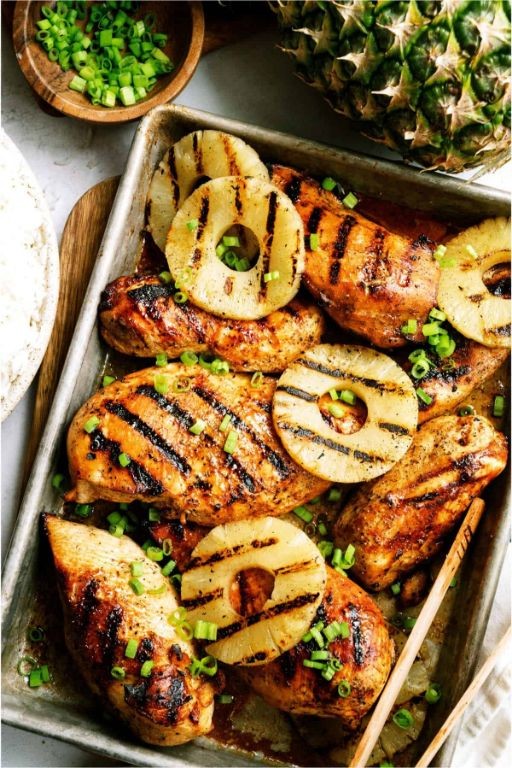
Haven’t you been craving something that’s both sweet and savory, with that perfect char from the grill? This pineapple teriyaki grilled chicken thighs recipe hits all those notes. It’s seriously easy to make and always a crowd-pleaser at summer cookouts.
Serving: 4 | Pre Time: 15 minutes | Cooking Time: 20 minutes
Ingredients
– 1.5 lbs boneless, skinless chicken thighs (I find these stay juicier on the grill than breasts)
– 1 cup pineapple juice (freshly squeezed is amazing, but bottled works perfectly too)
– 1/2 cup low-sodium soy sauce (this gives you control over the saltiness)
– 1/4 cup honey (local honey adds a lovely floral note if you have it)
– 2 tbsp rice vinegar
– 2 tbsp avocado oil (my go-to for high-heat grilling)
– 3 garlic cloves, minced
– 1 tbsp fresh ginger, grated (don’t skip the fresh ginger—it makes all the difference)
– 1/2 tsp black pepper
– 1 tbsp cornstarch
– 1 tbsp water
– 1 tbsp sesame seeds, for garnish
– 2 green onions, thinly sliced, for garnish
Instructions
1. In a medium saucepan, combine the pineapple juice, soy sauce, honey, rice vinegar, minced garlic, grated ginger, and black pepper.
2. Bring the mixture to a simmer over medium heat, stirring occasionally with a whisk to dissolve the honey completely.
3. In a small bowl, whisk together the cornstarch and water to create a smooth slurry.
4. While the sauce is simmering, slowly whisk in the cornstarch slurry until fully incorporated.
5. Continue to simmer the sauce for 3-5 minutes, stirring frequently, until it thickens enough to coat the back of a spoon. Tip: Keep an eye on it to prevent burning.
6. Remove the saucepan from the heat and let the teriyaki sauce cool slightly. Reserve 1/2 cup of sauce in a separate bowl for basting.
7. Place the chicken thighs in a large bowl or resealable plastic bag.
8. Pour the remaining teriyaki sauce over the chicken, ensuring all pieces are well coated. Marinate in the refrigerator for at least 30 minutes, or up to 4 hours for deeper flavor.
9. Preheat your grill to medium-high heat, about 400°F. Tip: Clean and oil the grates well to prevent sticking.
10. Remove the chicken from the marinade, letting any excess drip off. Discard the used marinade.
11. Brush the chicken thighs lightly with the avocado oil on both sides.
12. Place the chicken thighs on the preheated grill. Grill for 6-8 minutes on the first side.
13. Flip the chicken thighs and brush the cooked side generously with the reserved 1/2 cup of teriyaki sauce.
14. Continue grilling for another 6-8 minutes, or until the internal temperature reaches 165°F when checked with an instant-read thermometer. Tip: Avoid pressing down on the chicken while grilling to keep it juicy.
15. Transfer the grilled chicken to a clean plate and let it rest for 5 minutes.
16. Garnish the chicken with sesame seeds and sliced green onions before serving.
What you get are tender, juicy chicken thighs with a gorgeous caramelized glaze and a perfect balance of sweet pineapple and savory soy. The char from the grill adds a smoky depth that’s irresistible. Serve it over a bed of fluffy jasmine rice with some grilled pineapple slices on the side for a complete tropical meal.
Firecracker Hot Dogs with Spicy Relish

Mmm, picture this: it’s game day, you’ve got friends coming over, and you want something that’ll make everyone’s eyes light up. These firecracker hot dogs with spicy relish are exactly that—a fun twist on a classic that packs serious flavor without being fussy to make.
Serving: 4 | Pre Time: 15 minutes | Cooking Time: 20 minutes
Ingredients
– 4 all-beef hot dogs (I like the snap of natural casing ones)
– 4 hot dog buns (brioche buns add a nice sweetness)
– 1/2 cup ketchup
– 1/4 cup yellow mustard
– 2 tbsp honey
– 1 tbsp Sriracha sauce (adjust if you’re sensitive to heat)
– 1/2 cup finely chopped dill pickles
– 1/4 cup finely chopped red onion
– 1 jalapeño, seeded and minced (wear gloves if your skin is sensitive)
– 1 tbsp apple cider vinegar
– 1/2 tsp smoked paprika
– 2 tbsp unsalted butter, softened (room temp spreads easier)
Instructions
1. Preheat your oven to 400°F and line a baking sheet with aluminum foil for easy cleanup.
2. In a small bowl, whisk together the ketchup, yellow mustard, honey, Sriracha, and smoked paprika until smooth to make the firecracker sauce.
3. Place the hot dogs on the prepared baking sheet and brush them generously with half of the firecracker sauce, coating all sides evenly.
4. Bake the hot dogs in the preheated oven for 15–18 minutes, turning them halfway through, until they’re plump and slightly charred at the edges.
5. While the hot dogs bake, combine the chopped dill pickles, red onion, jalapeño, and apple cider vinegar in another bowl to create the spicy relish; let it sit to meld the flavors.
6. Spread the softened butter on the insides of the hot dog buns and toast them in a skillet over medium heat for 2–3 minutes per side until golden brown.
7. Remove the hot dogs from the oven and brush them with the remaining firecracker sauce for an extra glossy finish.
8. Place each hot dog in a toasted bun and top with a heaping spoonful of the spicy relish.
Crunchy, tangy, and just spicy enough to keep things interesting, these hot dogs are perfect for piling high with extra relish or serving alongside crispy fries. They’re messy in the best way—guaranteed to disappear fast at any gathering!
Grilled Veggie Platter with Balsamic Glaze
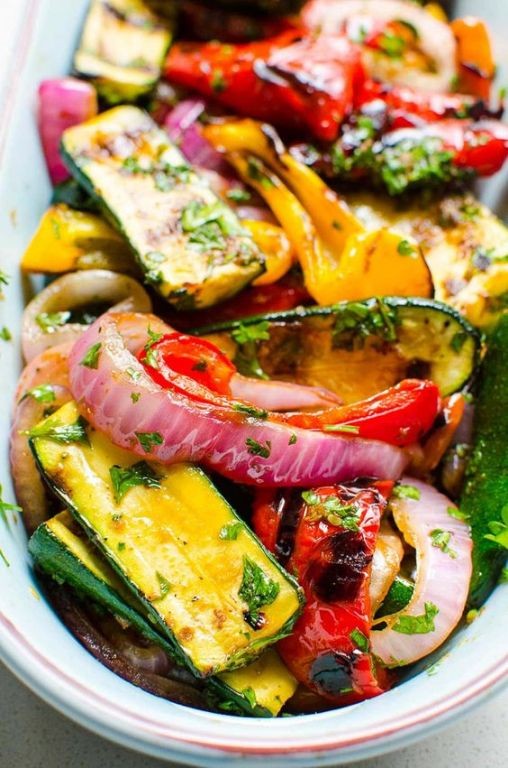
Zesty grilled vegetables are the ultimate summer side dish, and this platter with balsamic glaze is my go-to for gatherings. You get smoky charred veggies with a sweet-tangy finish that everyone loves—it’s simple but always impressive.
Serving: 4 | Pre Time: 15 minutes | Cooking Time: 20 minutes
Ingredients
– 2 medium zucchinis, sliced into ½-inch rounds (I like them thick so they hold up on the grill)
– 1 large red bell pepper, cut into 1-inch strips
– 1 large yellow bell pepper, cut into 1-inch strips
– 1 medium red onion, sliced into ½-inch rings
– 8 oz cremini mushrooms, stems trimmed (baby bellas work great too)
– ¼ cup extra virgin olive oil (my go-to for its fruity flavor)
– 2 tbsp balsamic vinegar
– 1 tbsp honey (local honey adds a nice floral note)
– 2 cloves garlic, minced (fresh is best here)
– 1 tsp dried oregano
– Salt and freshly ground black pepper, to season
Instructions
1. Preheat your grill to medium-high heat, about 400°F.
2. In a small bowl, whisk together the olive oil, balsamic vinegar, honey, minced garlic, and dried oregano until well combined.
3. Place the zucchini rounds, bell pepper strips, red onion rings, and cremini mushrooms in a large mixing bowl.
4. Pour half of the balsamic mixture over the vegetables and toss gently to coat them evenly.
5. Arrange the vegetables in a single layer on the preheated grill grates.
6. Grill the vegetables for 8-10 minutes, flipping them once halfway through with tongs, until they have visible grill marks and are tender-crisp.
7. Transfer the grilled vegetables to a serving platter.
8. Drizzle the remaining balsamic mixture over the warm vegetables.
9. Season the platter with salt and freshly ground black pepper to taste.
And that’s it—you’ve got a vibrant, smoky-sweet dish that’s perfect as is or piled onto crusty bread. The veggies stay juicy with a slight crunch, while the glaze caramelizes into a sticky, flavorful coating. Try serving it alongside grilled chicken or as a topping for quinoa bowls to mix things up!
Peach Cobbler with Vanilla Ice Cream
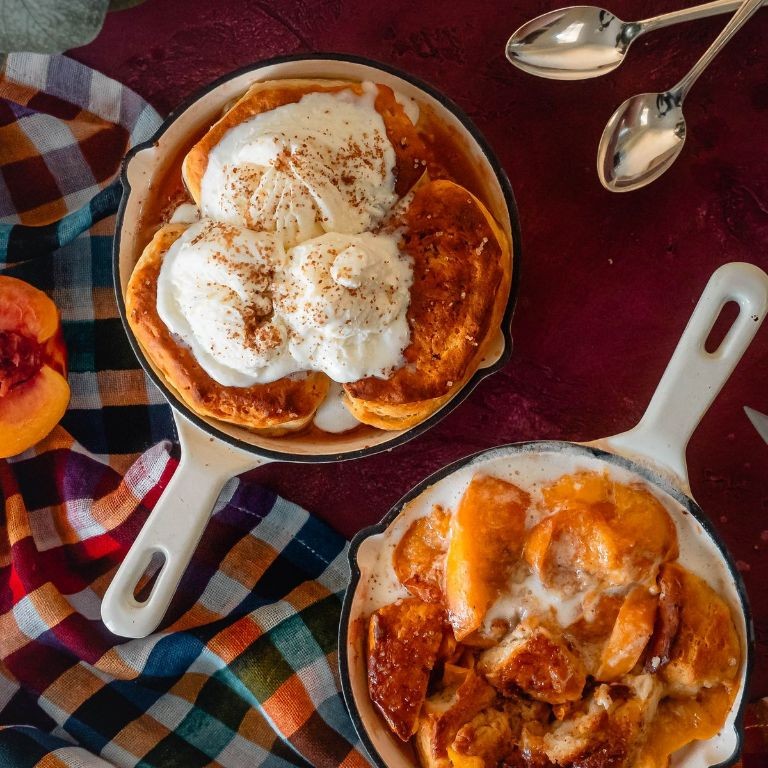
Nothing says summer like a warm, bubbly peach cobbler topped with a scoop of cold vanilla ice cream. You get that perfect mix of sweet, juicy peaches and buttery, crisp topping that just melts together. It’s the kind of dessert that makes any day feel special.
Serving: 8 | Pre Time: 20 minutes | Cooking Time: 45 minutes
Ingredients
– 6 cups of sliced fresh peaches (about 6-7 medium peaches—I like to leave the skins on for extra color and fiber, but you can peel them if you prefer)
– 1 cup granulated sugar (divided—we’ll use ¾ cup for the peaches and ¼ cup for the topping)
– 1 tablespoon fresh lemon juice (a squeeze from half a lemon brightens up the peaches nicely)
– 1 cup all-purpose flour (I always spoon and level it into the measuring cup to avoid packing it down)
– 2 teaspoons baking powder (make sure it’s fresh so your cobbler rises well)
– ½ teaspoon salt (a pinch balances all that sweetness)
– 1 cup whole milk (room temp works best here to blend smoothly with the other ingredients)
– ½ cup unsalted butter (1 stick, melted—I use salted butter sometimes for a hint of savory contrast)
– 1 teaspoon vanilla extract (pure vanilla is my go-to for that rich, aromatic flavor)
– Vanilla ice cream for serving (go for a high-quality brand—it makes all the difference!)
Instructions
1. Preheat your oven to 375°F (190°C) and grease a 9×13-inch baking dish with a little butter or non-stick spray.
2. In a large bowl, toss the sliced peaches with ¾ cup of granulated sugar and the lemon juice until evenly coated. Tip: Let this sit for 10 minutes to draw out the peach juices, which will create a saucier filling.
3. Spread the peach mixture evenly into the prepared baking dish.
4. In a medium bowl, whisk together the flour, baking powder, salt, and the remaining ¼ cup of sugar until no lumps remain.
5. Pour the milk and vanilla extract into the dry ingredients, and stir gently with a spatula until just combined—don’t overmix, as a few lumps are okay for a tender topping.
6. Pour the batter evenly over the peaches in the baking dish; it will spread as it bakes.
7. Drizzle the melted butter evenly over the top of the batter. Tip: This helps create a golden, crispy crust as it bakes.
8. Place the baking dish in the preheated oven and bake for 45 minutes, or until the topping is golden brown and a toothpick inserted into the center comes out clean. Tip: If the top browns too quickly, loosely tent it with aluminum foil for the last 10 minutes.
9. Remove the cobbler from the oven and let it cool on a wire rack for at least 15 minutes to set slightly.
10. Serve warm scoops of the cobbler in bowls, topped with a generous scoop of vanilla ice cream.
Ultimate comfort in a bowl! The cobbler comes out with a soft, cake-like topping that soaks up the syrupy peach juices, while the ice cream adds a cool, creamy contrast. Try it with a drizzle of caramel sauce or a sprinkle of cinnamon for an extra cozy twist.
Blueberry Peach Sangria for a Crowd
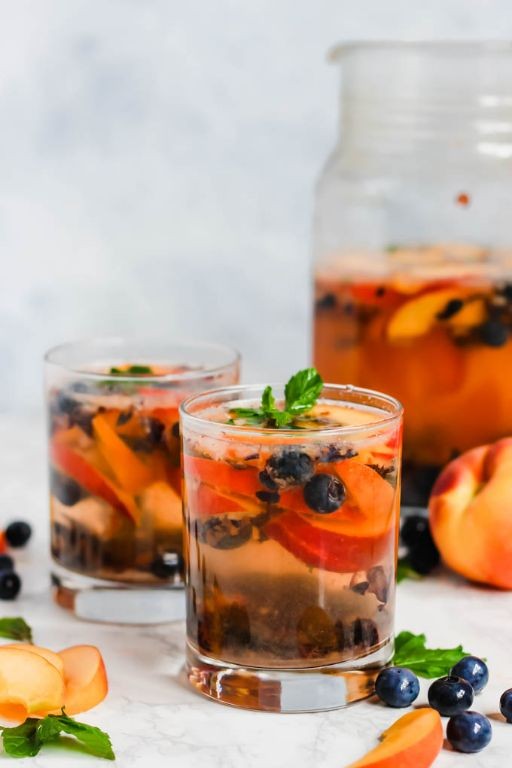
Gathering friends for a summer bash? This refreshing sangria is your new go-to crowd-pleaser. It’s bursting with juicy blueberries and sweet peaches, and it comes together with almost no effort—perfect for when you’d rather chat than fuss in the kitchen.
Serving: 12 | Pre Time: 15 minutes | Cooking Time: 0 minutes
Ingredients
– 2 (750ml) bottles of dry white wine, like a crisp Pinot Grigio—it balances the fruit without being too sweet.
– 1 cup peach schnapps, which really amps up that peachy flavor I love.
– 1/2 cup fresh lemon juice, squeezed from about 3 lemons for the brightest zing.
– 1/4 cup granulated sugar, though I sometimes use honey if I want a more floral note.
– 3 ripe peaches, pitted and sliced into thin wedges—freestone peaches are easier to work with.
– 1 pint fresh blueberries, rinsed and patted dry; frozen work in a pinch, but fresh have better texture.
– 1 liter club soda, chilled right before adding to keep the fizz lively.
– Ice cubes, for serving—I like using a big block to prevent quick dilution.
Instructions
1. In a large pitcher or drink dispenser, pour in both bottles of dry white wine.
2. Add 1 cup of peach schnapps to the pitcher.
3. Squeeze the lemons to get 1/2 cup of fresh lemon juice and pour it into the pitcher.
4. Stir in 1/4 cup of granulated sugar until it fully dissolves, which takes about 1 minute of mixing.
5. Tip: Let the mixture sit for 5 minutes to help the sugar blend seamlessly—no gritty texture!
6. Pit the 3 ripe peaches and slice them into thin wedges, then add them to the pitcher.
7. Rinse 1 pint of fresh blueberries, pat them dry with a towel, and gently stir them into the mixture.
8. Cover the pitcher and refrigerate it for at least 4 hours, or up to overnight, to let the flavors meld.
9. Tip: Give it a gentle stir halfway through chilling to ensure even fruit infusion.
10. Just before serving, pour in 1 liter of chilled club soda and stir it lightly to combine.
11. Fill glasses with ice cubes and ladle the sangria over, making sure to include plenty of fruit in each serving.
12. Tip: Garnish with extra peach slices or a few blueberries on top for a pretty presentation.
Zesty and vibrant, this sangria has a bubbly effervescence from the club soda that lifts the sweet-tart fruit flavors. The peaches soften into juicy bites, while the blueberries add a pop of color and slight crunch—serve it in a clear punch bowl with a ladle so everyone can admire the gorgeous hues as they help themselves.
Homemade Ice Cream Sandwiches with Cookies

Picture this: a hot summer day, and you’re craving something sweet but refreshing. These homemade ice cream sandwiches are the perfect solution—they’re nostalgic, customizable, and surprisingly easy to make. You’ll love how the chewy cookies hug the creamy ice cream.
Serving: 8 | Pre Time: 20 minutes | Cooking Time: 10 minutes
Ingredients
- 2 cups all-purpose flour (I like to sift it first for fluffier cookies)
- 1 cup unsalted butter, softened at room temperature (this makes creaming easier)
- 1 cup granulated sugar (white sugar gives a nice crisp edge)
- 2 large eggs, at room temperature (they blend better with the butter)
- 1 tsp vanilla extract (pure vanilla adds a warm, cozy flavor)
- 1/2 tsp baking soda
- 1/4 tsp salt (a pinch balances the sweetness perfectly)
- 1 quart vanilla ice cream, slightly softened (I prefer full-fat for creamier sandwiches)
Instructions
- Preheat your oven to 350°F and line two baking sheets with parchment paper.
- In a large bowl, cream together the softened butter and granulated sugar with a hand mixer for 2-3 minutes until light and fluffy. Tip: Don’t rush this step—it creates air pockets for tender cookies.
- Add the room temperature eggs one at a time, beating well after each addition to incorporate fully.
- Stir in the vanilla extract until the mixture is smooth and fragrant.
- In a separate bowl, whisk together the all-purpose flour, baking soda, and salt to combine evenly.
- Gradually add the dry ingredients to the wet mixture, mixing on low speed just until a dough forms. Tip: Overmixing can make cookies tough, so stop as soon as it comes together.
- Scoop the dough into 16 equal portions (about 2 tablespoons each) and roll into balls.
- Place the dough balls on the prepared baking sheets, spacing them 2 inches apart to allow for spreading.
- Bake in the preheated oven for 8-10 minutes, until the edges are lightly golden but centers are still soft. Tip: They’ll firm up as they cool, so pull them out when they look just set.
- Let the cookies cool completely on the baking sheets for 15 minutes, then transfer to a wire rack.
- Once cooled, scoop about 1/4 cup of slightly softened vanilla ice cream onto the flat side of one cookie.
- Press another cookie on top gently to form a sandwich, squeezing lightly to spread the ice cream to the edges.
- Wrap each sandwich individually in plastic wrap and freeze for at least 2 hours until firm.
Here’s the best part: biting into these gives you that satisfying crunch from the cookie followed by the smooth, cold creaminess inside. They’re fantastic served straight from the freezer with a drizzle of chocolate sauce or crumbled nuts for extra texture—perfect for sharing at a backyard BBQ or enjoying solo on the porch.
Campfire S’mores Dip with Graham Crackers
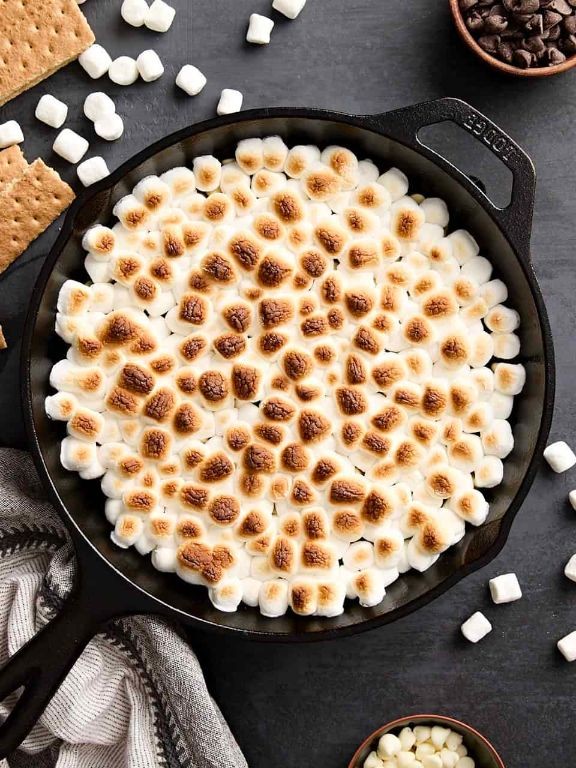
Kick off your cozy night with this gooey, shareable treat that brings all the campfire vibes indoors—no actual fire required! You’ll love how simple it is to whip up this nostalgic dessert, perfect for movie nights or casual gatherings. Just grab your graham crackers and get ready to dip into something seriously delicious.
Serving: 6 | Pre Time: 10 minutes | Cooking Time: 5 minutes
Ingredients
– 1 cup (about 6 oz) of semi-sweet chocolate chips—I like the classic Nestlé ones for that authentic s’mores flavor.
– 1 cup (about 4 oz) of mini marshmallows—go for the fresh, fluffy kind; they melt so much better!
– 1 tablespoon of unsalted butter, softened—room temp helps it blend smoothly without clumps.
– 1 teaspoon of pure vanilla extract—my secret for a hint of warmth in every bite.
– A big box of graham crackers for dipping—I prefer the honey-flavored ones; they add a nice sweetness.
Instructions
1. Preheat your oven to 350°F (175°C) to get it nice and toasty for baking.
2. In a small, oven-safe skillet or baking dish, spread the softened butter evenly across the bottom—this prevents sticking and adds richness.
3. Sprinkle the chocolate chips in a single layer over the butter, covering it completely for even melting.
4. Top the chocolate chips with the mini marshmallows, scattering them evenly so every scoop gets some gooey goodness.
5. Place the skillet in the preheated oven and bake for 5 minutes exactly—watch closely to avoid burning; the marshmallows should puff and turn golden.
6. Carefully remove the skillet from the oven using oven mitts—tip: let it cool for 2 minutes to set slightly, making it easier to handle.
7. Drizzle the vanilla extract over the warm dip for that aromatic boost, stirring gently once if you like it mixed.
8. Serve immediately with graham crackers for dipping, breaking them into pieces for easy scooping.
Grab a cracker and dive in—this dip is all about that warm, melty chocolate paired with toasted marshmallow fluff, creating a creamy texture that’s irresistible. For a fun twist, try adding a sprinkle of sea salt on top or serving it with fruit like strawberries for a fresh contrast. It’s the ultimate crowd-pleaser that’ll have everyone coming back for more!
Summary
Bringing together these 20 delicious Labor Day recipes ensures your BBQ will be a hit with any crowd! We hope this roundup inspires you to fire up the grill and celebrate. Don’t forget to leave a comment telling us which recipe is your favorite, and please share this article on Pinterest to help other home cooks plan their perfect holiday feast.