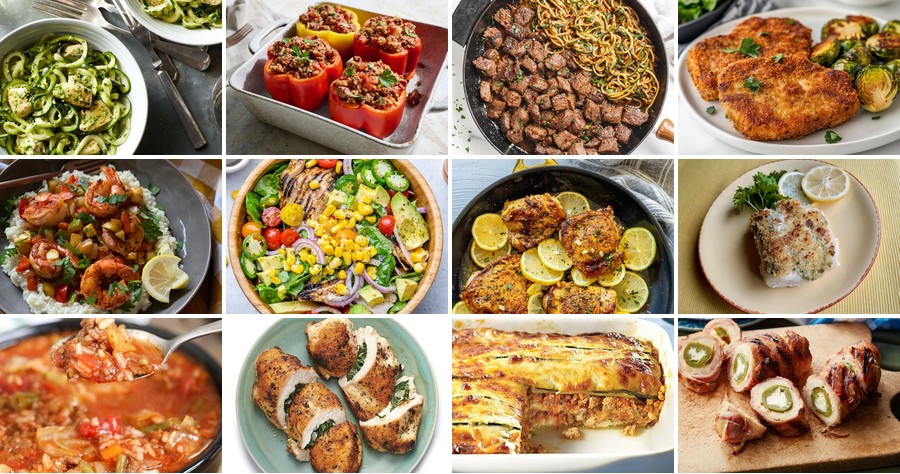
Bored with bland diet food? You’re not alone! We’ve gathered 20 delicious low-carb dinners that prove healthy eating can be full of flavor. From quick skillet meals to cozy comfort foods, these recipes make sustainable weight loss feel effortless and enjoyable. Get ready to rediscover your love for dinner—let’s dive into these mouthwatering options!
Garlic Butter Steak with Zucchini Noodles
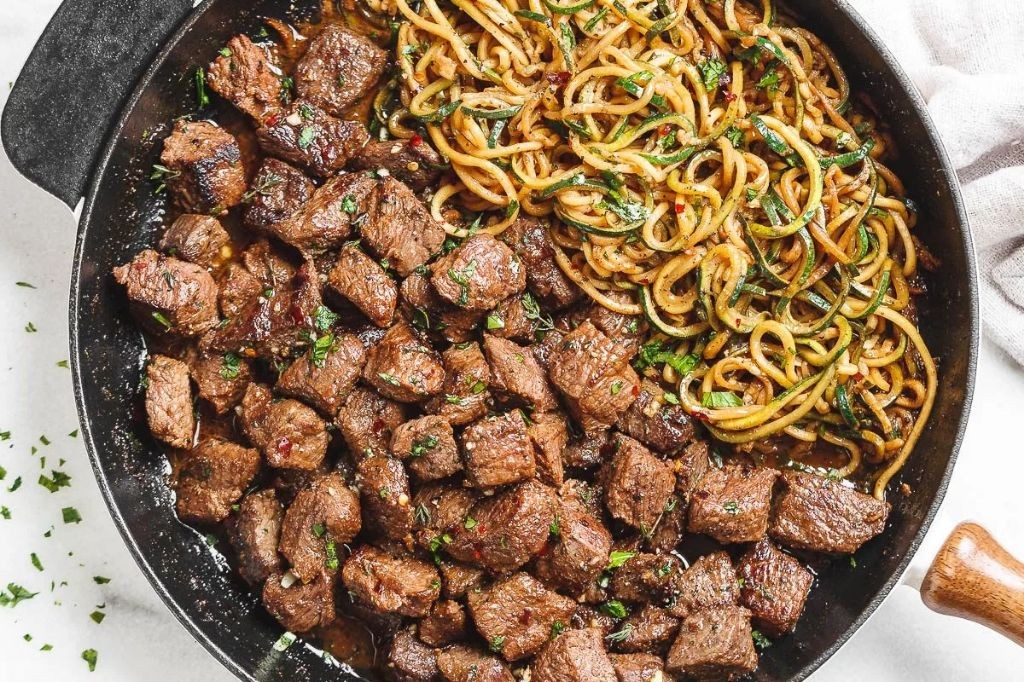
Every home cook needs a quick, impressive dinner in their arsenal—this garlic butter steak with zucchini noodles delivers. It’s a low-carb, flavor-packed meal that comes together in under 30 minutes, perfect for busy weeknights or a casual date night.
Serving: 2 | Pre Time: 10 minutes | Cooking Time: 15 minutes
Ingredients
– A couple of 6-ounce ribeye steaks, about 1-inch thick
– A couple of medium zucchinis, spiralized into noodles
– 4 tablespoons of unsalted butter, divided
– 4 cloves of garlic, minced
– A splash of olive oil
– A pinch of salt and black pepper
– A small handful of fresh parsley, chopped
Instructions
1. Pat the steaks completely dry with paper towels and season generously on both sides with salt and pepper.
2. Heat a large skillet over medium-high heat and add a splash of olive oil.
3. Once the oil shimmers, carefully add the steaks to the hot skillet. Cook for 4–5 minutes per side for medium-rare, or until an instant-read thermometer inserted into the thickest part reads 135°F.
4. Transfer the steaks to a plate, tent loosely with foil, and let them rest for 5 minutes—this keeps them juicy.
5. Reduce the skillet heat to medium and add 2 tablespoons of butter. Once melted, add the minced garlic and cook for 30–45 seconds until fragrant but not browned.
6. Add the zucchini noodles to the skillet and toss to coat in the garlic butter. Cook for 2–3 minutes, stirring occasionally, until just tender but still with a slight bite.
7. Remove the skillet from the heat and stir in the remaining 2 tablespoons of butter and the chopped parsley until the butter melts and coats the noodles.
8. Slice the rested steaks against the grain into thin strips.
9. Divide the zucchini noodles between two plates and top with the sliced steak. Drizzle any remaining garlic butter from the skillet over the top.
Creating this dish yields tender, buttery steak paired with light, garlicky zucchini noodles that soak up all the flavorful juices. The contrast between the rich, savory steak and the fresh, slightly crisp noodles makes every bite satisfying. For a fun twist, try topping it with a sprinkle of grated Parmesan or a squeeze of fresh lemon juice just before serving.
Baked Lemon Pepper Chicken with Asparagus
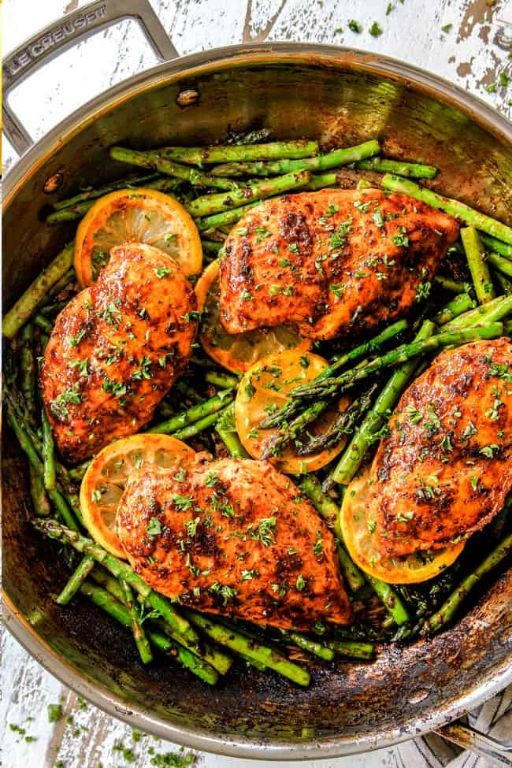
Kick off your weeknight dinner with this zesty one-pan wonder that’s both bright and satisfying. It’s a simple, hands-off meal that delivers big flavor with minimal cleanup. Perfect for those evenings when you want something wholesome without the fuss.
Serving: 4 | Pre Time: 10 minutes | Cooking Time: 25 minutes
Ingredients
– 4 boneless, skinless chicken breasts
– A couple of bunches of fresh asparagus, tough ends snapped off
– 3 tablespoons of olive oil
– 2 lemons, one juiced and one sliced thin
– 2 tablespoons of lemon pepper seasoning
– 1 teaspoon of garlic powder
– A pinch of salt
– A splash of water or chicken broth (about ¼ cup)
Instructions
1. Preheat your oven to 400°F.
2. Pat the chicken breasts dry with paper towels—this helps the seasoning stick and promotes browning.
3. In a small bowl, mix the olive oil, juice from one lemon, lemon pepper seasoning, garlic powder, and salt.
4. Place the chicken breasts and asparagus in a large baking dish.
5. Pour the seasoning mixture over the chicken and asparagus, tossing to coat everything evenly.
6. Arrange the thin lemon slices on top of the chicken.
7. Pour the splash of water or broth into the bottom of the dish to prevent drying and create a light sauce.
8. Bake at 400°F for 20-25 minutes, or until the chicken reaches an internal temperature of 165°F and the asparagus is tender-crisp. Tip: For extra color, broil for the last 2-3 minutes.
9. Let the chicken rest for 5 minutes before slicing to keep the juices locked in.
What you get is tender, juicy chicken with a vibrant, peppery crust and asparagus that’s perfectly caramelized at the tips. The lemon slices soften and mellow, adding a subtle sweetness to the dish. Serve it over a bed of fluffy rice or quinoa to soak up the pan juices, or slice the chicken for a bright salad topping the next day.
Creamy Tuscan Garlic Shrimp with Spinach
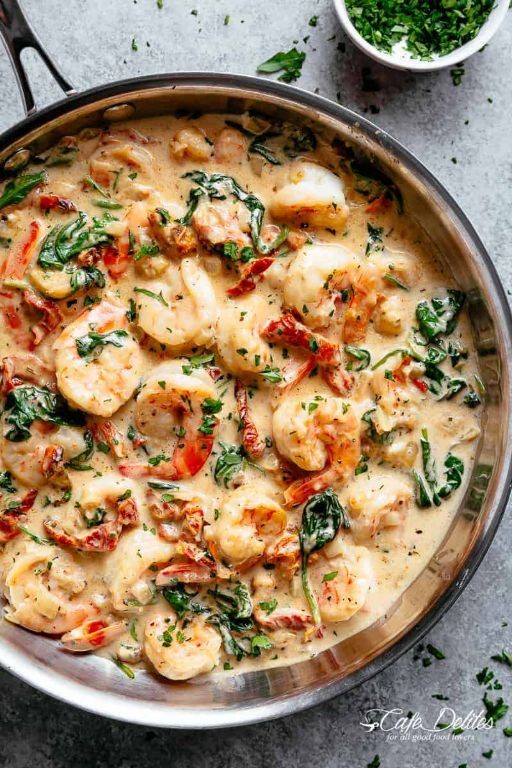
Kick off your weeknight dinner with this restaurant-worthy dish that comes together in under 30 minutes. Creamy Tuscan Garlic Shrimp with Spinach delivers rich flavor with minimal effort, perfect for a quick yet impressive meal.
Serving: 4 | Pre Time: 10 minutes | Cooking Time: 15 minutes
Ingredients
– 1.5 pounds of large shrimp, peeled and deveined
– A generous pinch of salt and black pepper
– 2 tablespoons of olive oil
– 5 cloves of garlic, minced
– 1 cup of heavy cream
– 1/2 cup of grated Parmesan cheese
– A couple of handfuls of fresh spinach
– 1/2 cup of sun-dried tomatoes, chopped
– 1 teaspoon of Italian seasoning
Instructions
1. Pat the shrimp dry with paper towels and season them evenly with salt and black pepper.
2. Heat the olive oil in a large skillet over medium-high heat until it shimmers, about 1 minute.
3. Add the shrimp to the skillet in a single layer and cook for 2 minutes per side, until they turn pink and opaque. Remove the shrimp from the skillet and set aside on a plate.
4. Reduce the heat to medium and add the minced garlic to the same skillet. Sauté for 30 seconds, until fragrant but not browned.
5. Pour in the heavy cream and bring it to a gentle simmer, stirring occasionally.
6. Stir in the grated Parmesan cheese until it melts completely and the sauce thickens slightly, about 2 minutes.
7. Add the fresh spinach, sun-dried tomatoes, and Italian seasoning to the skillet. Cook for 2 minutes, stirring until the spinach wilts.
8. Return the cooked shrimp to the skillet and toss everything together to coat in the sauce. Heat for 1 more minute to warm through.
Vibrant and velvety, this dish boasts a creamy sauce that clings to tender shrimp and wilted spinach. Serve it over a bed of pasta or with crusty bread to soak up every last drop—it’s a crowd-pleaser that feels indulgent yet simple.
Cheesy Cauliflower Crust Pizza

Zesty and satisfying, this cauliflower crust pizza delivers cheesy goodness without the carb overload. It’s surprisingly sturdy and packed with flavor, making it a perfect guilt-free indulgence for pizza night. You’ll love how the crispy edges contrast with the melty cheese topping.
Serving: 4 | Pre Time: 20 minutes | Cooking Time: 30 minutes
Ingredients
– A medium head of cauliflower, riced (about 4 cups)
– A couple of eggs
– A cup of shredded mozzarella cheese
– A quarter cup of grated Parmesan cheese
– A teaspoon of dried oregano
– Half a teaspoon of garlic powder
– A pinch of salt
– A splash of olive oil
– Half a cup of pizza sauce
– A cup of your favorite pizza toppings (like pepperoni or veggies)
– Another cup of shredded mozzarella for topping
Instructions
1. Preheat your oven to 400°F and line a baking sheet with parchment paper.
2. Rice the cauliflower by pulsing florets in a food processor until fine, like grains of rice.
3. Steam the riced cauliflower in a microwave-safe bowl for 5 minutes, then let it cool slightly.
4. Tip: Squeeze the steamed cauliflower in a clean kitchen towel to remove as much moisture as possible—this prevents a soggy crust.
5. In a large bowl, mix the squeezed cauliflower with eggs, 1 cup mozzarella, Parmesan, oregano, garlic powder, and salt until well combined.
6. Press the mixture into a 12-inch circle on the prepared baking sheet, about 1/4-inch thick.
7. Bake the crust for 20 minutes at 400°F until golden brown and firm to the touch.
8. Tip: Rotate the baking sheet halfway through baking for even browning.
9. Remove the crust from the oven and brush lightly with olive oil.
10. Spread pizza sauce evenly over the crust, leaving a small border around the edges.
11. Sprinkle 1 cup mozzarella cheese over the sauce, then add your pizza toppings.
12. Bake for another 10 minutes at 400°F until the cheese is bubbly and melted.
13. Tip: Let the pizza cool for 5 minutes before slicing to help the crust set and hold its shape.
14. Slice into wedges and serve immediately.
Keen on texture? This pizza boasts a crispy, golden crust with a tender interior that holds up well to toppings. The cheesy blend adds a savory depth, making it a crowd-pleaser even for picky eaters. Try serving it with a side salad for a balanced meal or cut into smaller pieces as a fun appetizer at gatherings.
Sheet Pan Garlic Butter Salmon and Broccoli

Perfect for busy weeknights, this sheet pan dinner delivers restaurant-quality flavor with minimal cleanup. Parchment paper makes everything slide right off the pan.
Serving: 4 | Pre Time: 10 minutes | Cooking Time: 15 minutes
Ingredients
– 4 salmon fillets (about 6 oz each)
– A big head of broccoli, cut into florets
– 4 tbsp of butter, melted
– 4 cloves of garlic, minced
– A good squeeze of lemon juice (about 2 tbsp)
– A couple of tbsp of olive oil
– A pinch of salt and black pepper
Instructions
1. Preheat your oven to 400°F and line a large sheet pan with parchment paper.
2. Pat the salmon fillets completely dry with paper towels—this helps the skin get crispy.
3. Toss the broccoli florets in a bowl with 1 tbsp of olive oil, a pinch of salt, and black pepper.
4. Arrange the broccoli in a single layer on one half of the prepared sheet pan.
5. Place the salmon fillets skin-side down on the other half of the pan.
6. In a small bowl, whisk together the melted butter, minced garlic, and lemon juice.
7. Spoon the garlic butter mixture evenly over the top of each salmon fillet.
8. Drizzle the remaining 1 tbsp of olive oil over the broccoli.
9. Roast the sheet pan in the preheated oven for 12-15 minutes. The salmon should flake easily with a fork, and the broccoli should be tender with crispy edges.
10. Let the salmon rest on the pan for 2 minutes before serving to allow the juices to redistribute.
Unbelievably tender salmon flakes apart with a buttery, garlicky crust, while the broccoli roasts up crispy and caramelized. Serve it straight from the pan over a bed of rice or quinoa to soak up the delicious juices, or flake the salmon into tacos for a fun twist.
Avocado and Lime Grilled Chicken Salad
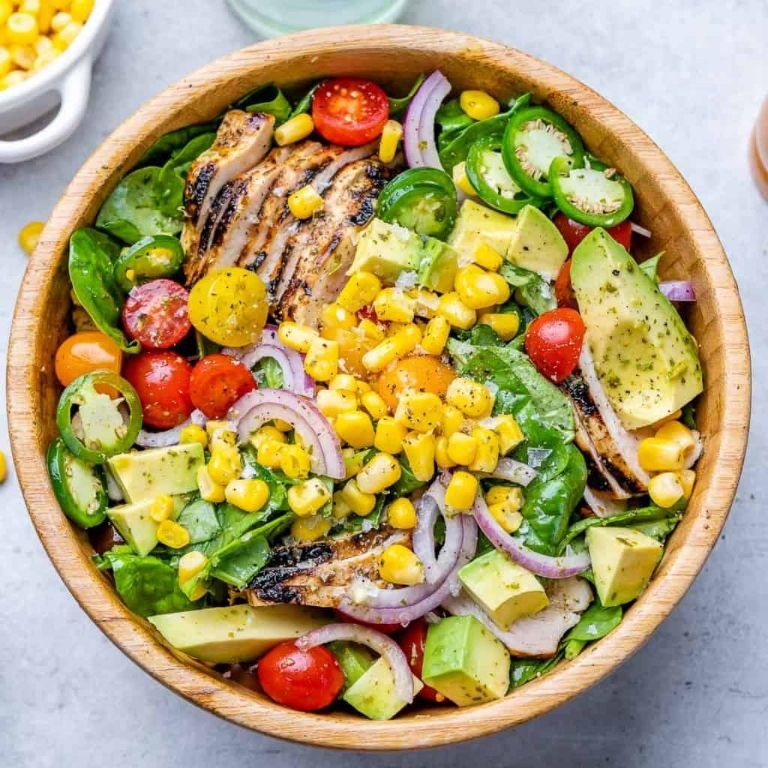
Craving something fresh and zesty that’s perfect for a quick lunch or light dinner? This grilled chicken salad combines creamy avocado and bright lime for a satisfying, no-fuss meal. It’s ready in under 30 minutes, making it ideal for busy weeknights.
Serving: 4 | Pre Time: 15 minutes | Cooking Time: 10 minutes
Ingredients
– 1.5 lbs of boneless, skinless chicken breasts
– A couple of ripe avocados, pitted and sliced
– The juice of 2 limes (about 1/4 cup)
– 1/4 cup of olive oil
– A big handful of mixed greens (about 6 cups)
– A small red onion, thinly sliced
– A handful of cherry tomatoes, halved
– A splash of honey (about 1 tbsp)
– A pinch of salt and black pepper
Instructions
1. Preheat your grill or grill pan to medium-high heat (about 400°F).
2. Pat the chicken breasts dry with paper towels to ensure a good sear.
3. Drizzle the chicken with 2 tbsp of olive oil and season generously with salt and pepper on both sides.
4. Grill the chicken for 5-6 minutes per side, or until the internal temperature reaches 165°F. Tip: Let it rest for 5 minutes before slicing to keep it juicy.
5. While the chicken cooks, whisk together the lime juice, remaining 2 tbsp of olive oil, honey, salt, and pepper in a small bowl to make the dressing.
6. In a large bowl, toss the mixed greens, sliced red onion, and halved cherry tomatoes.
7. Slice the rested chicken into thin strips against the grain for tenderness.
8. Add the sliced chicken and avocado to the salad bowl.
9. Pour the lime dressing over everything and toss gently to coat. Tip: Add the avocado last to prevent it from getting mushy.
10. Serve immediately on plates or in bowls. Tip: For extra crunch, top with toasted tortilla strips or pepitas.
Here’s why this salad shines: the grilled chicken stays tender and smoky, while the creamy avocado and zesty lime dressing create a bright, refreshing contrast. Try it stuffed into a wrap or served over quinoa for a heartier twist—it’s versatile enough to make any meal feel special.
Parmesan Crusted Pork Chops with Roasted Brussels Sprouts
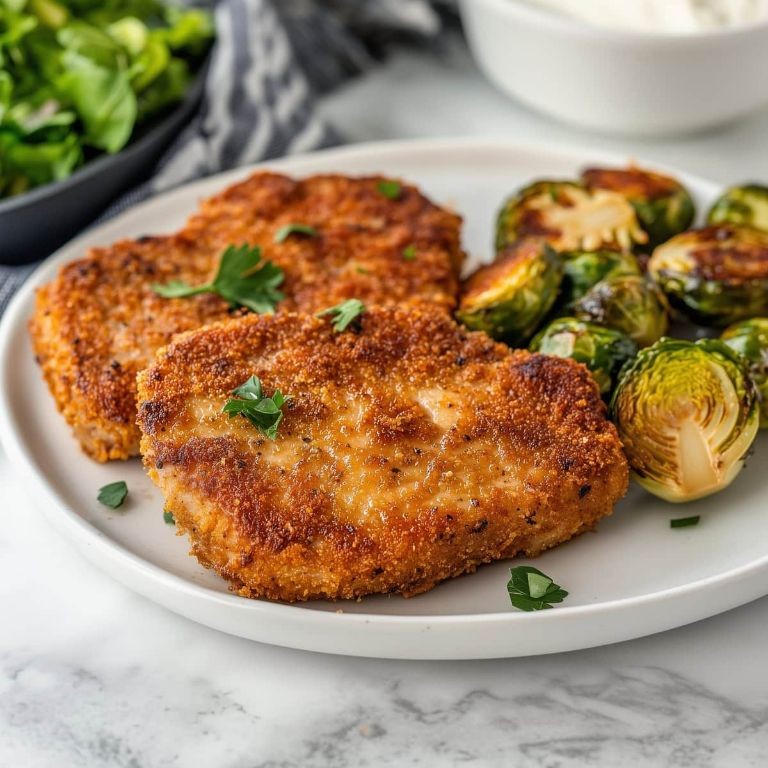
Make weeknight dinners exciting again with this crispy, savory pork chop dish. It’s a simple one-pan meal that delivers restaurant-quality flavor with minimal effort. You’ll have a golden, cheesy crust and perfectly roasted veggies on the table in no time.
Serving: 4 | Pre Time: 15 minutes | Cooking Time: 25 minutes
Ingredients
– 4 boneless pork chops, about 1-inch thick
– A cup of grated Parmesan cheese
– A couple of tablespoons of olive oil
– A pound of Brussels sprouts, trimmed and halved
– A splash of balsamic vinegar
– A teaspoon of garlic powder
– A pinch of salt and black pepper
Instructions
1. Preheat your oven to 400°F and line a large baking sheet with parchment paper.
2. Pat the pork chops completely dry with paper towels—this helps the crust stick better.
3. In a shallow dish, mix the Parmesan cheese, garlic powder, salt, and pepper.
4. Press each pork chop firmly into the cheese mixture, coating both sides evenly.
5. Arrange the coated pork chops on one side of the prepared baking sheet.
6. Toss the Brussels sprouts with olive oil, balsamic vinegar, salt, and pepper in a bowl.
7. Spread the Brussels sprouts in a single layer on the other side of the baking sheet.
8. Roast in the preheated oven for 20-25 minutes, flipping the pork chops halfway through.
9. Check that the pork chops reach an internal temperature of 145°F using a meat thermometer.
10. Remove from the oven when the pork is golden-brown and the sprouts are tender with crispy edges.
11. Let the pork chops rest for 5 minutes before serving to keep them juicy.
Enjoy the satisfying crunch of the Parmesan crust against the tender pork. The roasted Brussels sprouts add a sweet, caramelized contrast that balances the dish beautifully. Try serving it over a bed of creamy polenta or with a squeeze of fresh lemon for extra zest.
Butter Garlic Herb Roasted Turkey Thighs
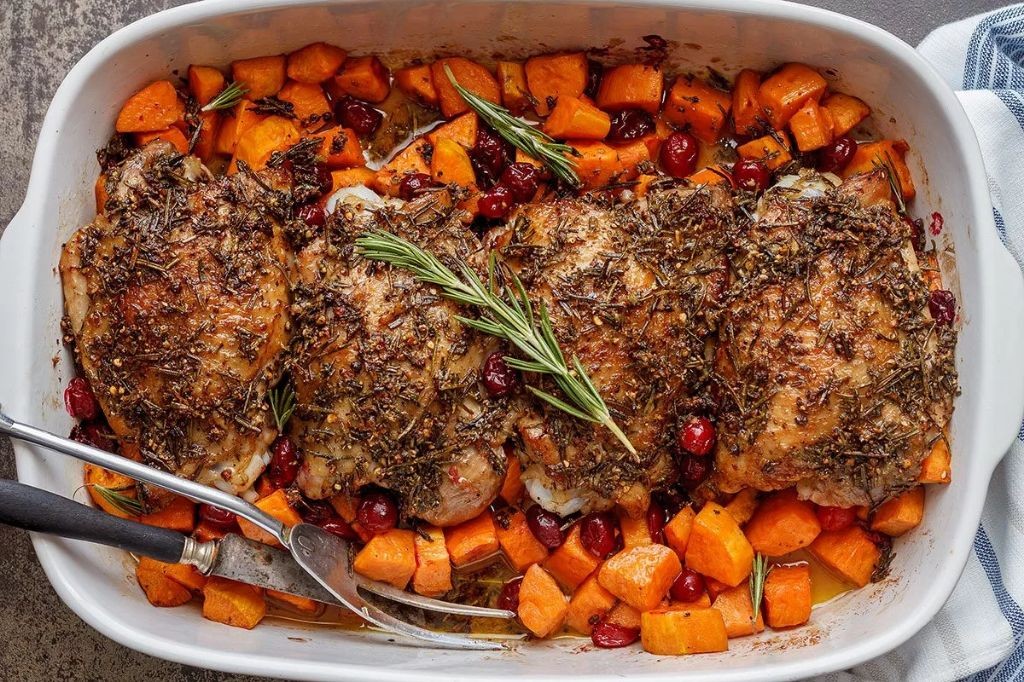
Holiday meals don’t need to be complicated to be impressive. These butter garlic herb roasted turkey thighs deliver rich flavor with minimal effort, making them perfect for busy weeknights or small gatherings.
Serving: 4 | Pre Time: 15 minutes | Cooking Time: 45 minutes
Ingredients
– 4 bone-in, skin-on turkey thighs (about 3 pounds total)
– 1/2 cup (1 stick) of unsalted butter, softened
– 4 garlic cloves, minced
– A couple of tablespoons of fresh chopped rosemary
– A couple of tablespoons of fresh chopped thyme
– A splash of olive oil
– 1 teaspoon of kosher salt
– 1/2 teaspoon of freshly ground black pepper
Instructions
1. Preheat your oven to 400°F.
2. Pat the turkey thighs completely dry with paper towels—this helps the skin get crispy.
3. In a small bowl, mash together the softened butter, minced garlic, chopped rosemary, and chopped thyme until well combined.
4. Gently loosen the skin on each turkey thigh by sliding your fingers underneath it, being careful not to tear it.
5. Spread about half of the butter-herb mixture evenly under the skin of each thigh.
6. Rub the remaining butter mixture all over the outside of the thighs.
7. Drizzle the olive oil over the thighs, then season them all over with the kosher salt and black pepper.
8. Place the thighs skin-side up in a single layer in a large roasting pan or on a rimmed baking sheet.
9. Roast in the preheated oven for 45 minutes, or until the internal temperature reaches 165°F when checked with a meat thermometer inserted into the thickest part, avoiding the bone.
10. Let the turkey thighs rest on a cutting board for 10 minutes before serving to allow the juices to redistribute.
Resting the meat is non-negotiable for juicy results. The skin turns golden and shatteringly crisp, while the garlic-herb butter infuses the meat with savory richness. Serve them over a bed of creamy mashed potatoes to soak up the flavorful pan juices, or shred the meat for tacos the next day.
Zucchini Lasagna with Ground Turkey
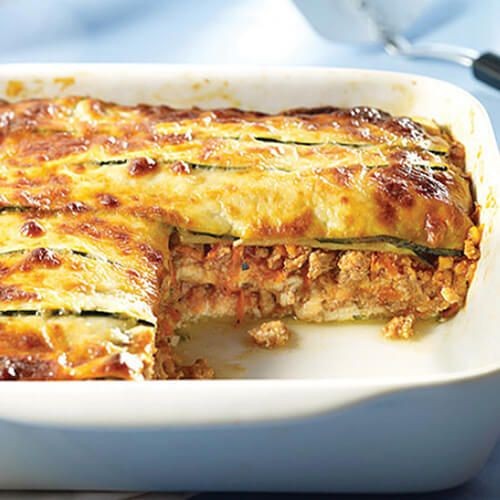
Forget heavy pasta—this zucchini lasagna swaps noodles for fresh veggie slices, keeping things light without sacrificing that cozy, layered comfort. Ground turkey adds lean protein, while a simple tomato sauce ties it all together. You’ll have dinner ready in about an hour, with minimal fuss.
Serving: 6 | Pre Time: 20 minutes | Cooking Time: 40 minutes
Ingredients
– 2 medium zucchinis, sliced lengthwise into 1/4-inch strips
– 1 pound ground turkey
– 1 (24-ounce) jar of marinara sauce
– 1 cup ricotta cheese
– 1 cup shredded mozzarella cheese
– 1/2 cup grated Parmesan cheese
– 1 tablespoon olive oil
– 2 cloves garlic, minced
– A pinch of salt and black pepper
– A couple of fresh basil leaves, chopped (optional for garnish)
Instructions
1. Preheat your oven to 375°F.
2. Slice the zucchinis lengthwise into 1/4-inch strips using a sharp knife or mandoline.
3. Lay the zucchini strips on paper towels, sprinkle with a pinch of salt, and let sit for 10 minutes to draw out excess moisture—this prevents a soggy lasagna.
4. Pat the zucchini dry with paper towels to remove the moisture.
5. Heat 1 tablespoon of olive oil in a large skillet over medium-high heat.
6. Add the ground turkey and cook for 5-7 minutes, breaking it up with a spoon until no pink remains.
7. Stir in the minced garlic and cook for 1 minute until fragrant.
8. Pour in the marinara sauce, reduce heat to low, and simmer for 5 minutes to blend flavors.
9. In a small bowl, mix the ricotta cheese with a pinch of black pepper.
10. Spread a thin layer of the turkey sauce on the bottom of a 9×13-inch baking dish.
11. Arrange a single layer of zucchini strips over the sauce, slightly overlapping them.
12. Spread half of the ricotta mixture evenly over the zucchini.
13. Sprinkle 1/3 cup of mozzarella cheese and 2 tablespoons of Parmesan cheese over the ricotta.
14. Repeat the layers: sauce, zucchini, ricotta, and cheeses, ending with a final layer of sauce on top.
15. Top with the remaining mozzarella and Parmesan cheeses.
16. Cover the dish with aluminum foil and bake at 375°F for 25 minutes.
17. Remove the foil and bake for an additional 15 minutes, or until the cheese is bubbly and golden brown.
18. Let the lasagna rest for 10 minutes before slicing—this helps the layers set for cleaner cuts.
19. Garnish with chopped fresh basil if desired.
This zucchini lasagna bakes up with a firm, sliceable texture that holds together beautifully. The zucchini adds a subtle sweetness that balances the savory turkey and rich cheeses. Try serving it with a crisp green salad for a complete meal, or slice leftovers cold for a tasty lunch the next day.
Spicy Shrimp and Cauliflower Grits
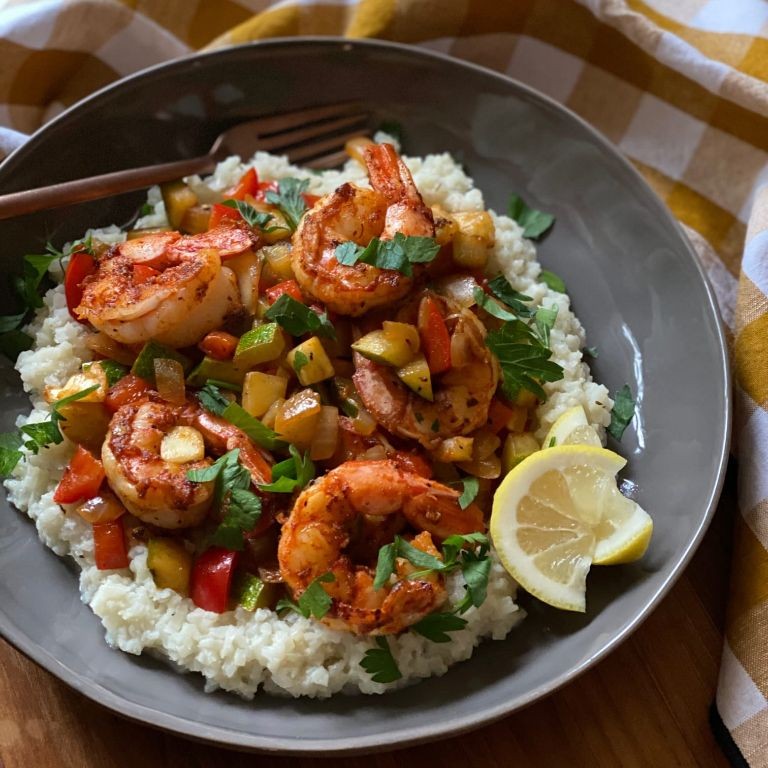
Let’s be real: sometimes you want comfort food that doesn’t weigh you down. This spicy shrimp and cauliflower grits delivers big flavor with a lighter base, perfect for a satisfying weeknight meal.
Serving: 4 | Pre Time: 15 minutes | Cooking Time: 25 minutes
Ingredients
– A head of cauliflower, cut into florets
– A couple of tablespoons of olive oil
– A cup of chicken or vegetable broth
– A splash of heavy cream or milk
– A cup of shredded sharp cheddar cheese
– A pound of large shrimp, peeled and deveined
– A tablespoon of Cajun or Creole seasoning
– A couple of cloves of garlic, minced
– A jalapeño, finely diced (remove seeds for less heat)
– A lime, cut into wedges
– A handful of chopped fresh parsley or green onions
Instructions
1. Place the cauliflower florets in a food processor and pulse until they resemble coarse crumbs or rice.
2. Heat 1 tablespoon of olive oil in a large skillet over medium-high heat.
3. Add the processed cauliflower to the skillet and cook for 5-7 minutes, stirring occasionally, until it starts to soften and lightly brown.
4. Pour in the chicken broth and bring to a simmer. Tip: Let the cauliflower absorb the broth for a richer flavor base.
5. Reduce heat to medium-low, stir in the heavy cream and shredded cheddar, and cook for another 5 minutes until creamy. Season with salt and pepper.
6. In a separate pan, heat the remaining tablespoon of olive oil over medium-high heat.
7. Toss the shrimp with the Cajun seasoning until evenly coated.
8. Add the seasoned shrimp to the hot pan in a single layer and cook for 2-3 minutes per side until pink and opaque. Tip: Don’t overcrowd the pan to get a good sear.
9. Remove the shrimp from the pan and set aside on a plate.
10. In the same pan, add the minced garlic and diced jalapeño. Sauté for 1 minute until fragrant.
11. Return the cooked shrimp to the pan with the garlic and jalapeño, tossing to combine and heat through for 1 minute. Tip: Squeeze a lime wedge over the shrimp at the end for a bright, fresh finish.
12. Serve the creamy cauliflower grits in bowls, topped with the spicy shrimp.
13. Garnish with chopped parsley or green onions and extra lime wedges on the side.
One bite gives you the creamy, comforting texture of traditional grits with a fresh, veggie-forward twist. The spicy, garlicky shrimp adds a punch that cuts through the richness perfectly. Try serving it with a crisp green salad or some crusty bread to soak up every last bit of the sauce.
Bacon-Wrapped Jalapeño Popper Chicken
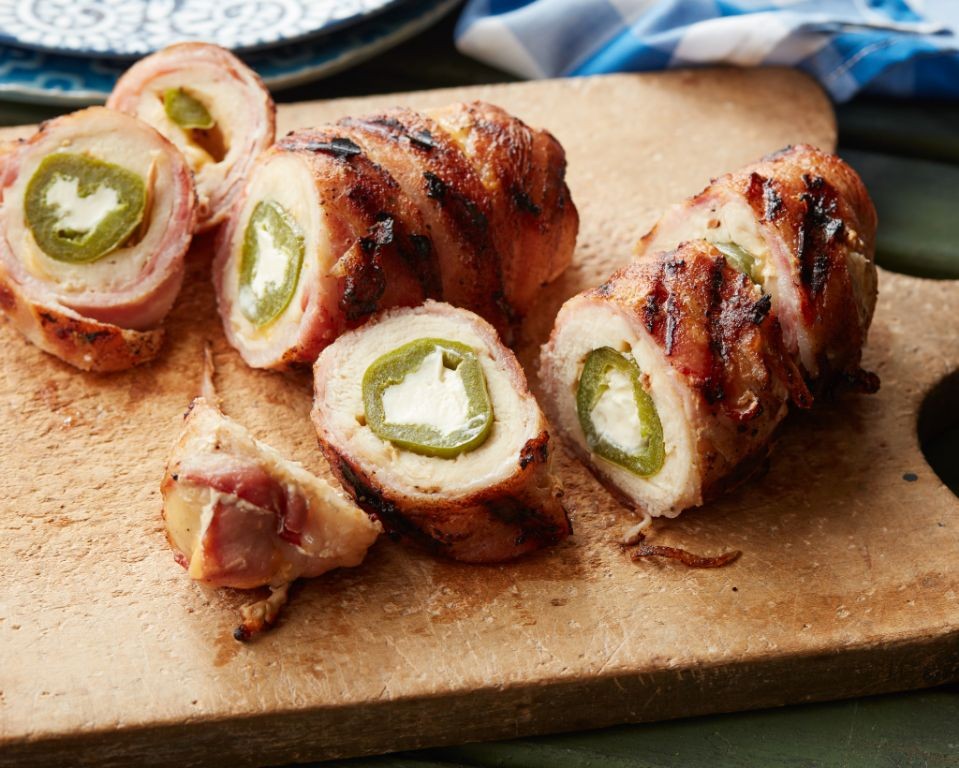
Ditch the boring chicken dinners—this bacon-wrapped jalapeño popper chicken is a flavor-packed upgrade that’s surprisingly easy to pull off. It combines spicy, creamy, and smoky elements into one irresistible main dish. You’ll have it on the table in under an hour.
Serving: 4 | Pre Time: 15 minutes | Cooking Time: 25 minutes
Ingredients
– 4 boneless, skinless chicken breasts
– 8 slices of bacon
– 4 jalapeños, seeded and finely chopped
– 4 ounces of cream cheese, softened
– 1 cup of shredded cheddar cheese
– 2 cloves of garlic, minced
– A splash of olive oil
– A couple of pinches of salt and black pepper
Instructions
1. Preheat your oven to 400°F and line a baking sheet with foil or parchment paper.
2. In a bowl, mix the cream cheese, cheddar cheese, chopped jalapeños, minced garlic, salt, and pepper until well combined.
3. Cut a pocket into each chicken breast by slicing horizontally, being careful not to cut all the way through.
4. Stuff each chicken breast evenly with the cheese mixture, pressing it in firmly.
5. Wrap each stuffed chicken breast with 2 slices of bacon, overlapping slightly to cover the top and sides.
6. Drizzle a splash of olive oil over the wrapped chicken and season lightly with more salt and pepper.
7. Place the chicken on the prepared baking sheet and bake at 400°F for 20-25 minutes, until the bacon is crispy and the chicken reaches an internal temperature of 165°F.
8. Let the chicken rest for 5 minutes before slicing to keep the juices locked in.
9. Serve immediately while hot.
Here’s the payoff: the chicken stays juicy inside, with a crispy bacon exterior and a molten, spicy cheese center. For a fun twist, slice it into medallions and serve over a bed of greens or with a cool ranch drizzle. It’s a crowd-pleaser that balances heat and richness perfectly.
One-Pan Lemon Garlic Butter Chicken Thighs
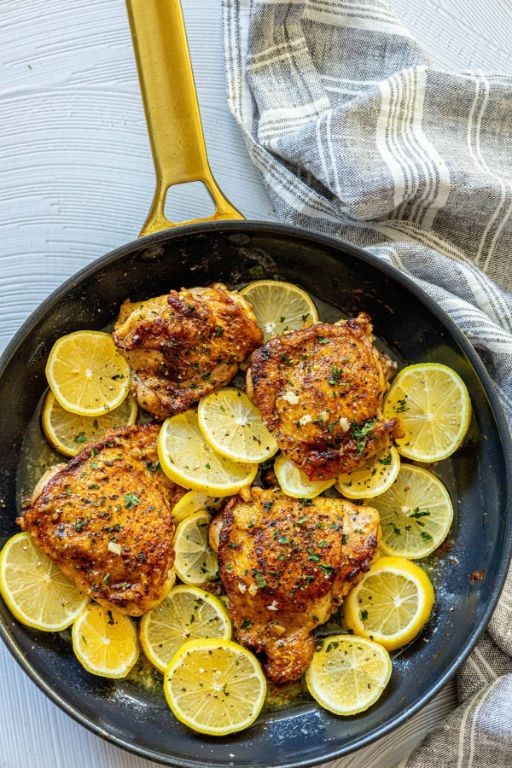
Just when you need a quick, flavorful dinner without the cleanup, this one-pan chicken delivers. Juicy thighs get crispy skin while soaking up bright lemon and savory garlic butter—all in about 30 minutes. Keep it simple and let the ingredients shine.
Serving: 4 | Pre Time: 10 minutes | Cooking Time: 25 minutes
Ingredients
– 4 bone-in, skin-on chicken thighs
– A couple of tablespoons of olive oil
– 4 tablespoons of butter
– 4 cloves of garlic, minced
– Juice from 1 lemon (about ¼ cup)
– A splash of chicken broth (about ½ cup)
– A small handful of fresh parsley, chopped
– Salt and pepper
Instructions
1. Pat the chicken thighs completely dry with paper towels—this helps the skin get extra crispy.
2. Season both sides of the chicken generously with salt and pepper.
3. Heat a large oven-safe skillet over medium-high heat and add the olive oil.
4. Place the chicken thighs skin-side down in the hot skillet and cook without moving for 6–8 minutes, until the skin is golden brown and releases easily.
5. Flip the chicken and cook for another 3 minutes, then transfer to a plate.
6. Reduce the heat to medium and add the butter to the skillet.
7. Once melted, add the minced garlic and cook for 30 seconds until fragrant, being careful not to burn it.
8. Pour in the lemon juice and chicken broth, scraping up any browned bits from the pan for extra flavor.
9. Return the chicken to the skillet, skin-side up, and spoon some of the sauce over the top.
10. Transfer the skillet to a preheated 400°F oven and bake for 12–15 minutes, until the chicken reaches an internal temperature of 165°F.
11. Remove from the oven and let the chicken rest in the skillet for 5 minutes to keep it juicy.
12. Stir the chopped parsley into the sauce and spoon it over the chicken before serving.
The chicken emerges with crackly skin and tender, juicy meat infused with garlicky butter. Tangy lemon cuts through the richness, making it feel light yet satisfying. Try it over mashed potatoes to soak up every drop of that pan sauce, or shred it into a grain bowl for a fresh twist.
Eggplant Parmesan with Almond Flour Coating
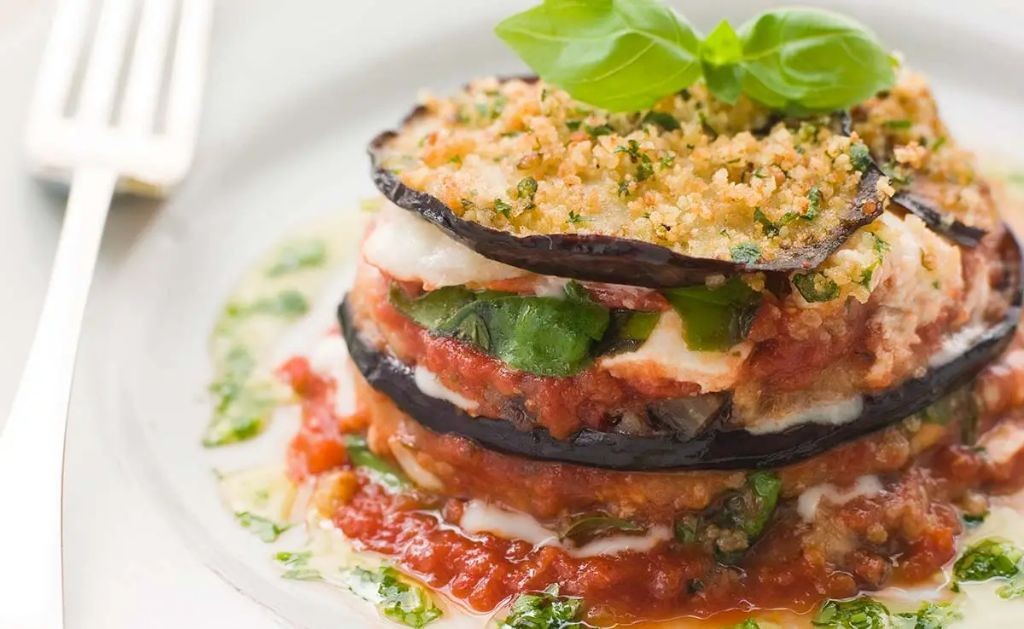
Perfect for a cozy winter dinner, this gluten-free eggplant parmesan delivers crispy texture without traditional breadcrumbs. The almond flour coating creates a nutty crust that pairs beautifully with rich tomato sauce and melted cheese. You’ll get restaurant-quality results with simple pantry ingredients.
Serving: 4 | Pre Time: 20 minutes | Cooking Time: 35 minutes
Ingredients
– 2 medium eggplants, sliced into ½-inch rounds
– A couple of cups of almond flour
– 3 large eggs, beaten
– A generous cup of grated parmesan cheese
– 2 cups of your favorite marinara sauce
– 2 cups of shredded mozzarella cheese
– A splash of olive oil for brushing
– A pinch of salt and pepper
Instructions
1. Preheat your oven to 400°F and line two baking sheets with parchment paper.
2. Arrange eggplant slices in a single layer on paper towels and sprinkle both sides with salt to draw out moisture—let them sit for 10 minutes, then pat dry thoroughly with more paper towels. This prevents sogginess.
3. Set up three shallow bowls: one with beaten eggs, one with almond flour mixed with half the parmesan, and one empty for coating.
4. Dip each eggplant slice first into the egg, letting excess drip off, then coat evenly in the almond flour mixture, pressing gently to adhere.
5. Place coated slices on the prepared baking sheets in a single layer without touching.
6. Lightly brush both sides of each slice with olive oil using a pastry brush for even browning.
7. Bake for 20 minutes, flipping slices halfway through, until golden and crispy at the edges.
8. Spread a thin layer of marinara sauce in the bottom of a 9×13-inch baking dish.
9. Arrange half the baked eggplant slices over the sauce in a single layer.
10. Top with half the remaining marinara sauce, half the mozzarella, and half the remaining parmesan.
11. Repeat layers with remaining eggplant, sauce, and cheeses.
12. Bake uncovered at 375°F for 15 minutes, or until cheese is bubbly and lightly browned. Let it rest for 5 minutes before serving to set the layers.
Kick back and enjoy the contrast between the crunchy almond crust and tender eggplant inside. The nutty flavor from the coating balances the tangy tomato sauce beautifully—try serving it over zucchini noodles for a low-carb twist or alongside a crisp green salad.
Ground Beef Stuffed Bell Peppers

Whip up a hearty, satisfying dinner with these stuffed peppers—they’re packed with savory ground beef and rice, baked until tender and bubbly. Perfect for a cozy weeknight or feeding a crowd, this one-dish wonder delivers big flavor with minimal fuss. You’ll love how the peppers soften and sweeten as they bake, cradling the rich filling inside.
Serving: 6 | Pre Time: 20 minutes | Cooking Time: 45 minutes
Ingredients
– 6 medium bell peppers (any color you like)
– 1 pound of ground beef (I use 85% lean for flavor)
– 1 cup of cooked white rice (leftover works great here)
– 1 small onion, finely chopped
– 2 cloves of garlic, minced
– 1 can (15 ounces) of tomato sauce
– 1 cup of shredded cheddar cheese
– 1 tablespoon of olive oil
– A couple of teaspoons of Italian seasoning
– A splash of Worcestershire sauce
– Salt and pepper to season as you go
Instructions
1. Preheat your oven to 375°F (190°C) and lightly grease a 9×13-inch baking dish.
2. Slice the tops off the bell peppers and remove the seeds and membranes; set them aside.
3. Heat the olive oil in a large skillet over medium-high heat, then add the chopped onion and cook for about 5 minutes until softened.
4. Add the minced garlic and cook for 1 more minute until fragrant.
5. Crumble in the ground beef and cook for 8-10 minutes, breaking it up with a spoon, until browned and no pink remains.
6. Drain any excess grease from the skillet, then stir in the cooked rice, tomato sauce, Italian seasoning, Worcestershire sauce, salt, and pepper; mix well and simmer for 5 minutes to blend flavors.
7. Tip: Let the filling cool slightly before stuffing to prevent the peppers from getting soggy.
8. Spoon the beef mixture evenly into the bell peppers, packing it down gently.
9. Place the stuffed peppers upright in the prepared baking dish and cover tightly with aluminum foil.
10. Bake for 30 minutes, then remove the foil and sprinkle the shredded cheddar cheese on top of each pepper.
11. Tip: For extra browning, broil for 2-3 minutes after baking, but watch closely to avoid burning.
12. Return to the oven, uncovered, and bake for an additional 15 minutes until the cheese is melted and bubbly and the peppers are tender when pierced with a fork.
13. Tip: Let the peppers rest for 5 minutes before serving so the filling sets and they’re easier to handle.
14. Just out of the oven, these peppers offer a delightful contrast: the tender, slightly sweet bell pepper gives way to a savory, cheesy beef filling that’s hearty and comforting. Serve them with a simple green salad or crusty bread to soak up any extra sauce—leftovers reheat beautifully for lunch the next day, making this a practical and delicious choice for busy households.
Coconut Curry Chicken with Cauliflower Rice
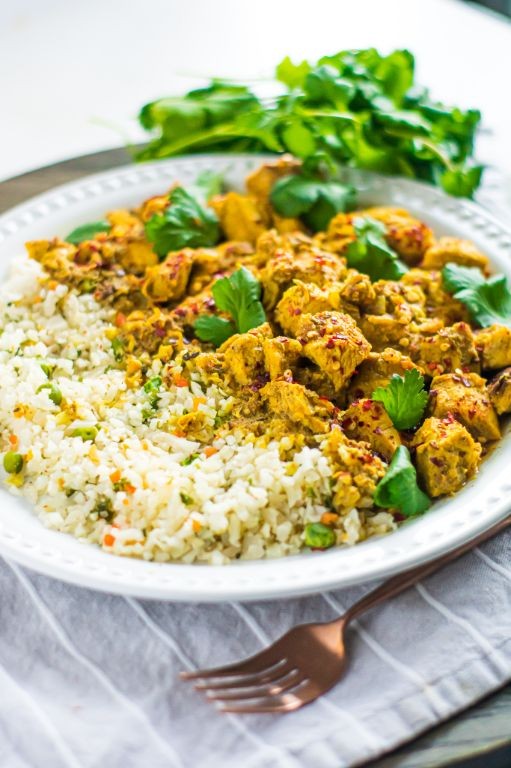
Omit the takeout menus—this coconut curry chicken with cauliflower rice brings restaurant-quality flavor to your kitchen in under an hour. It’s a creamy, aromatic one-pan meal that’s naturally gluten-free and packed with vegetables. You’ll love how the spices bloom in the coconut milk.
Serving: 4 | Pre Time: 15 minutes | Cooking Time: 25 minutes
Ingredients
– 1.5 lbs boneless, skinless chicken thighs, cut into 1-inch chunks
– A large head of cauliflower, riced (about 4 cups)
– 1 can (13.5 oz) full-fat coconut milk
– 1 yellow onion, diced
– 3 cloves garlic, minced
– 1 tbsp fresh ginger, grated
– 2 tbsp red curry paste
– 1 tbsp coconut oil
– A splash of fish sauce (about 1 tbsp)
– A couple of limes, juiced (about 2 tbsp)
– 1 red bell pepper, sliced
– A handful of fresh cilantro, chopped
– Salt to season
Instructions
1. Heat coconut oil in a large skillet over medium-high heat until shimmering, about 1 minute.
2. Add chicken chunks in a single layer—don’t overcrowd—and cook until browned on all sides, 5–6 minutes total. Tip: Pat chicken dry with paper towels first for better browning.
3. Remove chicken to a plate and set aside.
4. In the same skillet, add diced onion and cook until softened, about 3 minutes, scraping up any browned bits.
5. Stir in garlic, ginger, and red curry paste, cooking for 1 minute until fragrant. Tip: Blooming the curry paste in oil deepens the flavor.
6. Pour in coconut milk and fish sauce, stirring to combine.
7. Return chicken to the skillet along with any accumulated juices.
8. Add sliced bell pepper, reduce heat to medium-low, and simmer uncovered for 10 minutes until chicken is cooked through and sauce thickens slightly.
9. While curry simmers, pulse cauliflower florets in a food processor until rice-like, then sauté in a separate pan over medium heat for 5–7 minutes until tender. Tip: Don’t add water to the cauliflower rice—it’ll steam in its own moisture.
10. Stir lime juice into the curry just before serving.
11. Divide cauliflower rice among bowls, top with curry, and garnish with cilantro.
Dig into a bowl where tender chicken swims in a velvety, spice-infused coconut sauce. The cauliflower rice soaks up the curry beautifully without weighing you down. For a fun twist, serve it in hollowed-out bell peppers or with a side of crispy roti for scooping.
Baked Cod with Lemon and Herb Butter
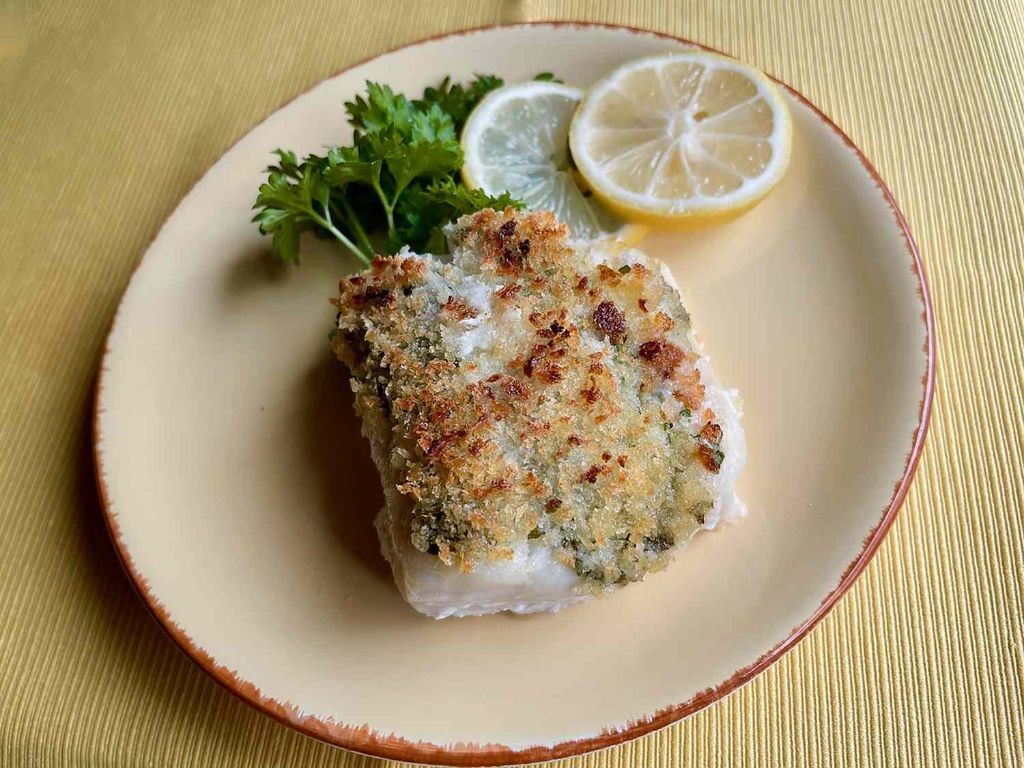
Whip up a simple, elegant dinner that feels fancy without the fuss. This baked cod with lemon and herb butter comes together quickly for a healthy, flavorful meal. You’ll love the bright, buttery sauce that soaks into the flaky fish.
Serving: 4 | Pre Time: 10 minutes | Cooking Time: 15 minutes
Ingredients
– 4 cod fillets, about 6 oz each
– A couple of tablespoons of olive oil
– A big pinch of salt and black pepper
– 4 tablespoons of unsalted butter, softened
– The zest and juice from 1 lemon
– A small handful of fresh parsley, finely chopped
– A couple of cloves of garlic, minced
Instructions
1. Preheat your oven to 400°F and line a baking sheet with parchment paper.
2. Pat the 4 cod fillets completely dry with paper towels—this helps them brown instead of steam.
3. Place the dried fillets on the prepared baking sheet.
4. Drizzle the fillets with a couple of tablespoons of olive oil.
5. Season both sides of the fillets with a big pinch of salt and black pepper.
6. In a small bowl, combine 4 tablespoons of softened unsalted butter, the zest and juice from 1 lemon, a small handful of finely chopped fresh parsley, and a couple of minced garlic cloves.
7. Mix the butter and herb mixture until fully combined.
8. Divide the herb butter evenly, topping each cod fillet with about 1 tablespoon.
9. Bake the cod in the preheated 400°F oven for 12-15 minutes, until the fish is opaque and flakes easily with a fork.
10. Remove the baking sheet from the oven and let the cod rest for 2 minutes before serving—this allows the juices to redistribute.
Just out of the oven, the cod is incredibly tender and flakes apart with a gentle nudge. The lemon and herb butter melts into a bright, savory sauce that’s perfect for spooning over the fish. Serve it over a bed of rice or with roasted asparagus to soak up every last drop.
Pesto Zoodles with Grilled Chicken
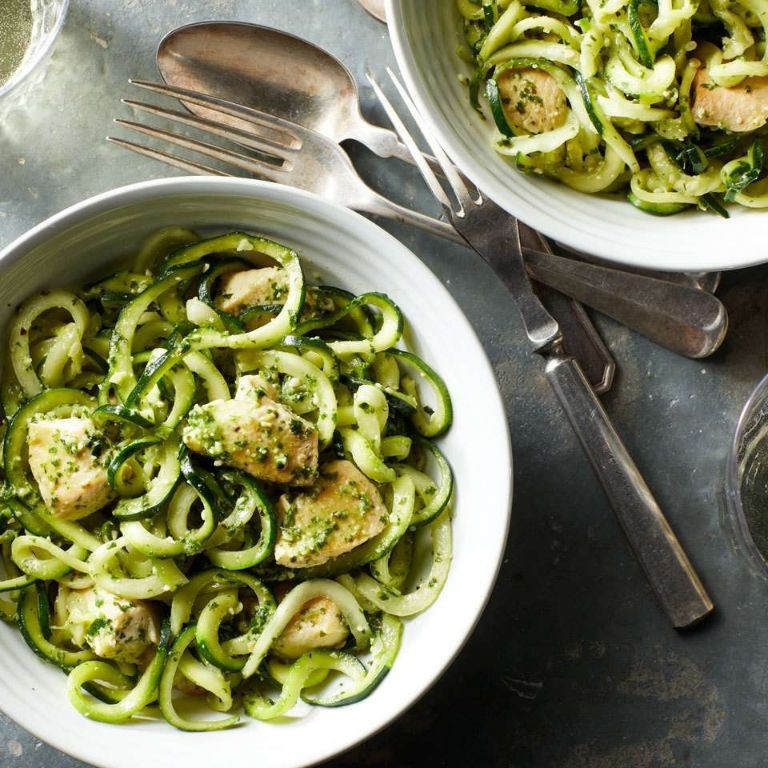
Skip the pasta and spiralize your zucchini for a fresh, low-carb dinner. This pesto zoodles with grilled chicken comes together in under 30 minutes, perfect for a busy weeknight. You’ll get a satisfying meal that’s packed with flavor and feels light.
Serving: 4 | Pre Time: 15 minutes | Cooking Time: 12 minutes
Ingredients
– 4 medium zucchini, spiralized into zoodles
– 2 boneless, skinless chicken breasts
– A generous ½ cup of basil pesto
– A couple of tablespoons of olive oil
– A splash of lemon juice
– A pinch of salt and black pepper
– A handful of cherry tomatoes, halved
– A sprinkle of grated Parmesan cheese
Instructions
1. Preheat your grill or grill pan to medium-high heat, about 400°F.
2. Pat the chicken breasts dry with paper towels to ensure a good sear.
3. Brush both sides of the chicken with 1 tablespoon of olive oil and season with salt and pepper.
4. Grill the chicken for 6-7 minutes per side, until the internal temperature reaches 165°F and juices run clear.
5. While the chicken cooks, spiralize the zucchini into zoodles using a spiralizer or julienne peeler.
6. Let the grilled chicken rest on a cutting board for 5 minutes to retain its juices before slicing.
7. In a large skillet, heat the remaining tablespoon of olive oil over medium heat.
8. Add the zoodles and sauté for 2-3 minutes, just until they soften slightly but remain crisp-tender.
9. Tip: Don’t overcook the zoodles, or they’ll become mushy—they should have a bit of bite.
10. Remove the skillet from heat and stir in the basil pesto and a splash of lemon juice until well combined.
11. Slice the rested chicken into thin strips against the grain for tenderness.
12. Fold the sliced chicken and halved cherry tomatoes into the pesto zoodles.
13. Tip: For extra flavor, toast the zoodles lightly in the skillet before adding pesto to enhance their texture.
14. Divide the mixture among plates and top with a sprinkle of grated Parmesan cheese.
15. Tip: If the pesto seems thick, thin it with a teaspoon of pasta water or more olive oil for a smoother sauce.
You’ll love the crisp-tender zoodles coated in that vibrant pesto, paired with juicy, smoky chicken. Try serving it with a side of garlic bread or over a bed of arugula for a peppery kick. It’s a dish that feels indulgent yet stays refreshingly light.
Slow Cooker Cabbage Roll Soup
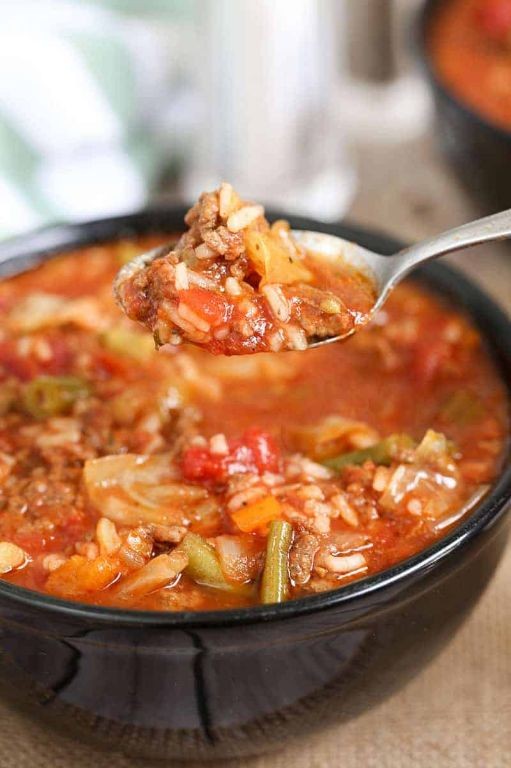
Bypass the tedious rolling and stuffing of traditional cabbage rolls with this hearty soup that captures all the cozy flavors in a fraction of the time. It’s the ultimate set-it-and-forget-it meal for busy weeknights, delivering deep, savory satisfaction straight from your slow cooker.
Serving: 6 | Pre Time: 15 minutes | Cooking Time: 6 hours
Ingredients
– A couple of pounds of lean ground beef
– One large yellow onion, diced
– Three cloves of garlic, minced
– One large head of green cabbage, roughly chopped
– A 28-ounce can of crushed tomatoes
– Four cups of beef broth
– A cup of uncooked long-grain white rice
– A couple of tablespoons of tomato paste
– A splash of Worcestershire sauce
– A teaspoon of dried thyme
– A teaspoon of paprika
– Salt and black pepper
Instructions
1. Brown the ground beef in a large skillet over medium-high heat for 5-7 minutes until no pink remains, breaking it into crumbles with a spoon.
2. Transfer the browned beef to your slow cooker insert.
3. Add the diced onion, minced garlic, and chopped cabbage to the slow cooker.
4. Pour in the crushed tomatoes, beef broth, and Worcestershire sauce.
5. Stir in the tomato paste, dried thyme, paprika, 1 teaspoon of salt, and 1/2 teaspoon of black pepper until well combined.
6. Cover and cook on LOW for 5 hours.
7. Stir in the uncooked rice.
8. Cover and continue cooking on LOW for 1 more hour, or until the rice is tender and has absorbed most of the liquid.
9. Taste and adjust seasoning with additional salt and pepper if needed before serving.
Makes a wonderfully thick and chunky soup where the cabbage becomes meltingly tender and the rice soaks up the rich tomato-beef broth. The flavors deepen beautifully as it sits, making leftovers even better the next day. Serve it with a dollop of sour cream and a sprinkle of fresh parsley for a bright finish.
Summary
Lovingly crafted, these 20 flavorful low-carb dinners prove that healthy eating can be delicious and satisfying, making your weight loss journey enjoyable and sustainable. We hope you find new favorites to add to your weekly rotation! Don’t forget to leave a comment below telling us which recipe you loved most, and please share this roundup on Pinterest to help other home cooks discover these tasty ideas.


