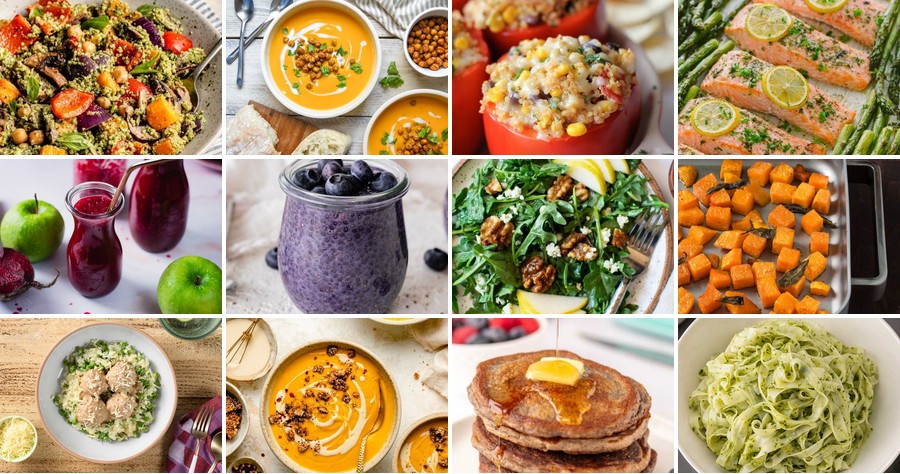
Ready to explore delicious meals that love you back? If you’re managing histamine intolerance, you know how challenging it can be to find tasty, satisfying recipes. But worry no more! We’ve gathered 18 mouthwatering low histamine dishes that are both nourishing and full of flavor. From quick dinners to comforting classics, this roundup is your go-to guide for a healthier, happier kitchen. Let’s dive in and discover your new favorites!
Grilled chicken with zucchini noodles

Hectic weeknights demand quick, satisfying meals. Grilled chicken with zucchini noodles delivers lean protein and fresh vegetables in under 30 minutes. This recipe skips heavy sauces for bright, simple flavors.
Serving: 4 | Pre Time: 10 minutes | Cooking Time: 15 minutes
Ingredients
– Boneless, skinless chicken breasts – 1 lb
– Zucchini – 4 medium
– Olive oil – 2 tbsp
– Garlic – 2 cloves
– Lemon – 1
– Salt – 1 tsp
– Black pepper – ½ tsp
Instructions
1. Preheat a grill or grill pan to 400°F.
2. Pat chicken breasts dry with paper towels to ensure even browning.
3. Rub chicken with 1 tbsp olive oil, ½ tsp salt, and ¼ tsp black pepper.
4. Grill chicken for 6–7 minutes per side, until internal temperature reaches 165°F.
5. While chicken cooks, use a spiralizer to turn zucchini into noodles.
6. Mince garlic cloves finely for even distribution in the dish.
7. Heat remaining 1 tbsp olive oil in a large skillet over medium-high heat.
8. Add minced garlic to the skillet and sauté for 30 seconds, until fragrant but not browned.
9. Add zucchini noodles to the skillet and toss to coat in oil.
10. Cook zucchini noodles for 2–3 minutes, stirring frequently, until just tender but still crisp.
11. Squeeze juice from the lemon over the zucchini noodles and season with remaining ½ tsp salt and ¼ tsp black pepper.
12. Remove chicken from grill and let it rest for 5 minutes to retain juices.
13. Slice chicken against the grain into ½-inch strips.
14. Divide zucchini noodles among plates and top with sliced chicken.
Fresh zucchini noodles provide a light, crisp contrast to the juicy, smoky chicken. For a creamy twist, sprinkle with grated Parmesan or add halved cherry tomatoes to the skillet. This dish pairs perfectly with a simple side salad or crusty bread to soak up the lemony juices.
Basil pesto with rice pasta
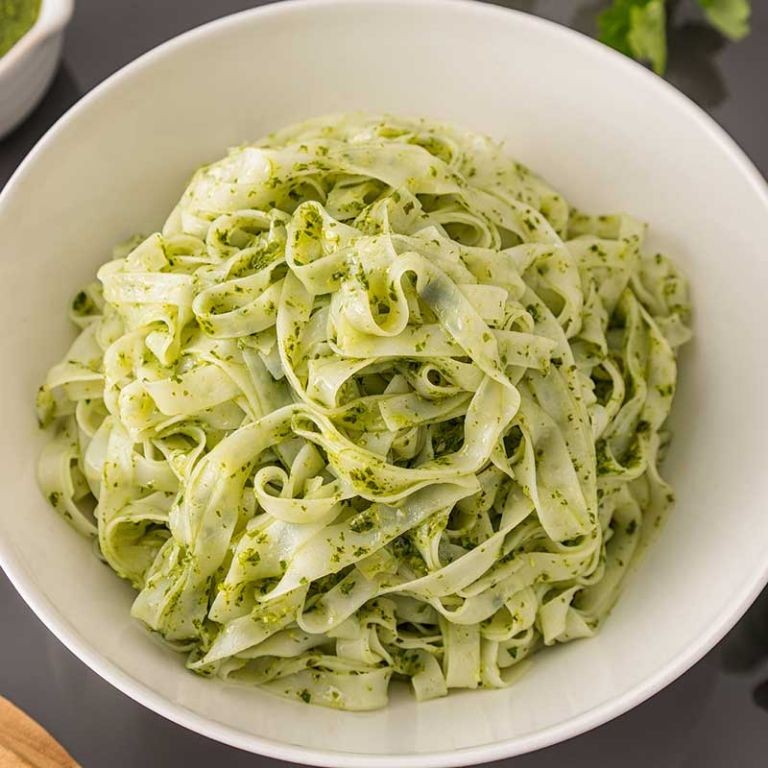
This vibrant pesto pasta comes together in under 30 minutes for a quick, satisfying meal. The fresh basil and garlic create a bright, herby sauce that clings perfectly to rice pasta, offering a delicious gluten-free option.
Serving: 4 | Pre Time: 10 minutes | Cooking Time: 12 minutes
Ingredients
– Rice pasta – 12 oz
– Fresh basil leaves – 2 cups, packed
– Pine nuts – ⅓ cup
– Garlic cloves – 2
– Extra virgin olive oil – ½ cup
– Parmesan cheese – ½ cup, grated
– Salt – 1 tsp
Instructions
1. Bring a large pot of salted water to a rolling boil over high heat.
2. Add the rice pasta to the boiling water and cook for 10–12 minutes, stirring occasionally, until al dente (check package instructions for exact time).
3. While the pasta cooks, toast the pine nuts in a dry skillet over medium heat for 3–4 minutes, shaking the pan frequently, until golden and fragrant—watch closely to prevent burning.
4. Combine the toasted pine nuts, fresh basil leaves, garlic cloves, and salt in a food processor.
5. Pulse the mixture 5–7 times until coarsely chopped.
6. With the food processor running on low, slowly drizzle in the extra virgin olive oil until the pesto is smooth and emulsified.
7. Transfer the pesto to a bowl and stir in the grated Parmesan cheese until fully incorporated.
8. Drain the cooked rice pasta, reserving ½ cup of the pasta water.
9. Return the drained pasta to the pot and immediately toss with the prepared pesto sauce.
10. Add 2–3 tablespoons of the reserved pasta water to the pot and stir vigorously for 1 minute to create a creamy, cohesive sauce that coats every strand.
Creamy and aromatic, this dish delivers a punch of fresh basil with a nutty undertone from the toasted pine nuts. The rice pasta provides a pleasantly chewy texture that holds the sauce well. For a twist, top with grilled chicken or roasted cherry tomatoes for added color and flavor.
Sweet potato and carrot soup

This comforting soup blends sweet potatoes and carrots into a velvety puree. The natural sweetness shines through with just a hint of spice. It’s perfect for chilly evenings and comes together with minimal effort.
Serving: 4 | Pre Time: 10 minutes | Cooking Time: 25 minutes
Ingredients
– Olive oil – 2 tbsp
– Onion – 1 medium, chopped
– Garlic – 2 cloves, minced
– Sweet potatoes – 2 large, peeled and cubed
– Carrots – 3 medium, peeled and sliced
– Vegetable broth – 4 cups
– Ground cumin – 1 tsp
– Salt – 1 tsp
– Black pepper – ½ tsp
– Heavy cream – ¼ cup
Instructions
1. Heat the olive oil in a large pot over medium heat for 1 minute.
2. Add the chopped onion and cook for 5 minutes, stirring occasionally, until softened.
3. Stir in the minced garlic and cook for 1 minute until fragrant.
4. Add the cubed sweet potatoes and sliced carrots to the pot.
5. Pour in the vegetable broth, ensuring it covers the vegetables.
6. Stir in the ground cumin, salt, and black pepper.
7. Bring the mixture to a boil, then reduce heat to low and cover the pot.
8. Simmer for 20 minutes, or until the vegetables are fork-tender.
9. Remove the pot from heat and let it cool slightly for 5 minutes.
10. Use an immersion blender to puree the soup directly in the pot until completely smooth.
11. Stir in the heavy cream until fully incorporated.
12. Return the pot to low heat and warm the soup for 2 minutes, stirring constantly.
Hearty and smooth, this soup has a rich, velvety texture from the pureed vegetables. The sweet potato and carrot base offers a subtly sweet flavor balanced by the warmth of cumin. For a creative twist, top it with a dollop of sour cream and a sprinkle of toasted pumpkin seeds.
Pear and arugula salad with olive oil dressing
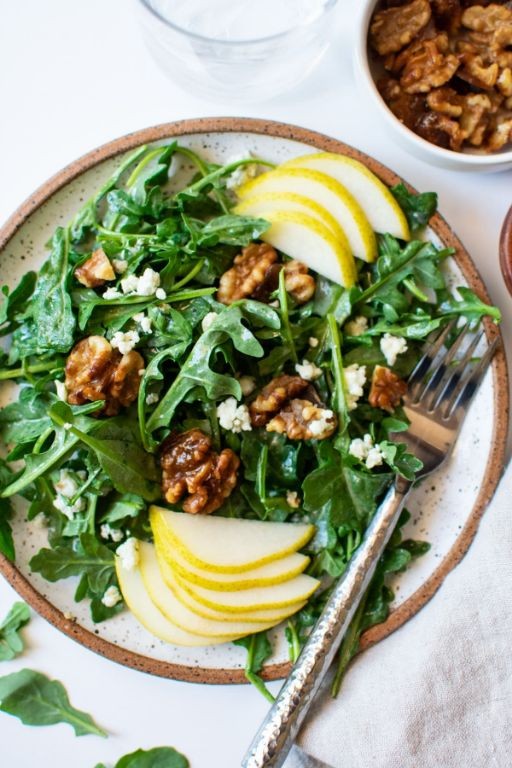
Only a few ingredients create this crisp, refreshing salad. It’s a perfect balance of sweet pears and peppery greens, ideal for a quick lunch or elegant starter.
Serving: 4 | Pre Time: 15 minutes | Cooking Time: 0 minutes
Ingredients
– Arugula – 5 oz
– Pear – 1 large
– Olive oil – ¼ cup
– Lemon juice – 2 tbsp
– Salt – ½ tsp
– Black pepper – ¼ tsp
Instructions
1. Wash the arugula thoroughly in a colander, then spin it dry in a salad spinner or pat it dry with paper towels. Tip: Dry greens well to prevent a watery dressing.
2. Core the pear and slice it thinly into ¼-inch pieces. Tip: Slice the pear just before assembling to keep it from browning.
3. In a small bowl, whisk together the olive oil, lemon juice, salt, and black pepper until fully combined.
4. Place the dried arugula in a large salad bowl.
5. Add the sliced pear to the bowl with the arugula.
6. Pour the dressing over the salad ingredients.
7. Toss everything gently with salad tongs until the arugula and pear are evenly coated. Tip: Toss lightly to avoid bruising the delicate arugula leaves.
8. Serve immediately on plates or in bowls.
Light and crisp, this salad offers a juicy crunch from the pear against the tender arugula. The bright lemon dressing cuts through the richness, making it a versatile side for grilled chicken or a standalone meal with added nuts for extra texture.
Herbed turkey meatballs with mashed cauliflower

Let’s make a lighter holiday classic that doesn’t skimp on flavor. These herbed turkey meatballs with creamy mashed cauliflower are a satisfying, protein-packed meal ready in under an hour.
Serving: 4 | Pre Time: 20 minutes | Cooking Time: 25 minutes
Ingredients
– Ground turkey – 1 lb
– Large egg – 1
– Breadcrumbs – ½ cup
– Fresh parsley – ¼ cup, chopped
– Fresh thyme – 1 tbsp, chopped
– Garlic – 2 cloves, minced
– Salt – 1 tsp
– Black pepper – ½ tsp
– Olive oil – 2 tbsp
– Cauliflower – 1 large head, cut into florets
– Butter – 2 tbsp
– Milk – ¼ cup
Instructions
1. Preheat your oven to 400°F and line a baking sheet with parchment paper.
2. In a large bowl, combine the ground turkey, egg, breadcrumbs, parsley, thyme, minced garlic, ½ tsp salt, and ¼ tsp black pepper.
3. Mix the ingredients with your hands until just combined; overmixing will make the meatballs tough.
4. Form the mixture into 16 evenly sized meatballs, about 1.5 inches in diameter, and place them on the prepared baking sheet.
5. Drizzle the meatballs with 1 tbsp of olive oil and bake for 20-25 minutes, or until the internal temperature reaches 165°F.
6. While the meatballs bake, place the cauliflower florets in a large pot and add enough water to cover them by 1 inch.
7. Bring the water to a boil over high heat, then reduce to a simmer and cook for 10-12 minutes, until the cauliflower is fork-tender.
8. Drain the cauliflower thoroughly in a colander; excess water will make the mash watery.
9. Transfer the drained cauliflower to a food processor or blender.
10. Add the butter, milk, remaining ½ tsp salt, and ¼ tsp black pepper to the processor.
11. Blend the mixture on high until completely smooth and creamy, scraping down the sides as needed.
12. Heat the remaining 1 tbsp of olive oil in a large skillet over medium heat.
13. Add the baked meatballs to the skillet and cook for 2-3 minutes, turning occasionally, to crisp the exteriors.
14. Serve the meatballs immediately over the mashed cauliflower.
Enjoy the tender, herb-packed meatballs against the ultra-smooth, buttery cauliflower mash. For a creative twist, try serving them in a shallow bowl with a ladle of warm turkey gravy or a sprinkle of grated Parmesan cheese.
Roasted butternut squash with sage
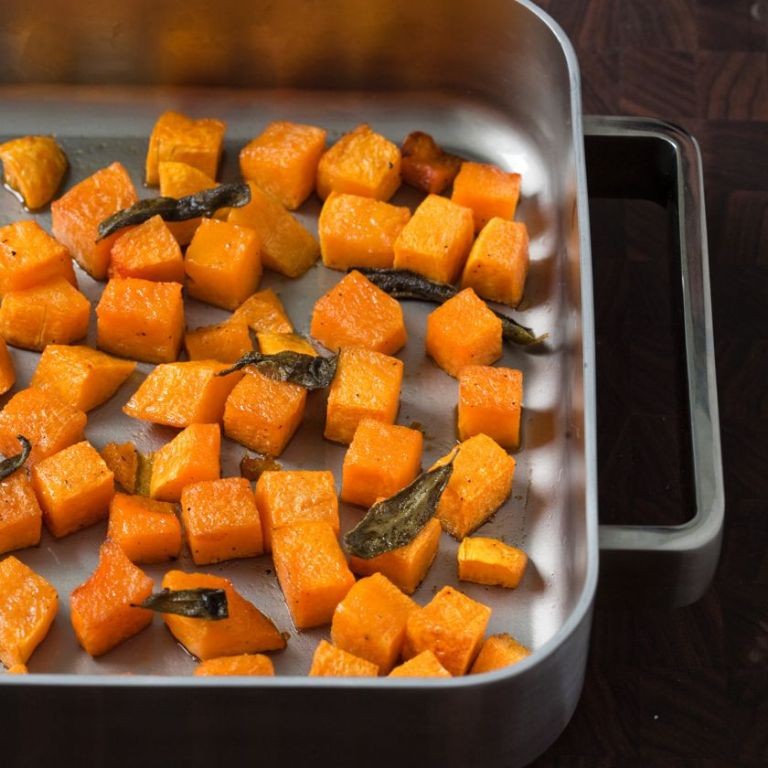
Unwrap the cozy flavors of fall with this simple roasted butternut squash. Using just a handful of ingredients, it transforms into a sweet, caramelized side dish. Sage adds an earthy, aromatic note that perfectly complements the squash’s natural sweetness.
Serving: 4 | Pre Time: 10 minutes | Cooking Time: 30 minutes
Ingredients
– Butternut squash – 1 large (about 2 lbs)
– Olive oil – 2 tbsp
– Fresh sage leaves – 8
– Salt – ½ tsp
– Black pepper – ¼ tsp
Instructions
1. Preheat your oven to 400°F.
2. Peel the butternut squash with a vegetable peeler.
3. Cut the squash in half lengthwise and scoop out the seeds with a spoon.
4. Dice the squash into 1-inch cubes for even roasting.
5. Toss the squash cubes with 2 tbsp olive oil, ½ tsp salt, and ¼ tsp black pepper in a large bowl.
6. Spread the squash in a single layer on a baking sheet lined with parchment paper.
7. Roast the squash at 400°F for 20 minutes, stirring halfway through.
8. While roasting, finely chop 8 fresh sage leaves.
9. After 20 minutes, sprinkle the chopped sage evenly over the squash.
10. Return the baking sheet to the oven and roast for another 10 minutes, until the squash is fork-tender and edges are golden brown.
11. Remove from the oven and let cool for 5 minutes before serving.
Buttery and tender, the roasted squash develops deep caramelized edges that contrast with its soft interior. The sage infuses a warm, savory fragrance without overpowering. Serve it over creamy polenta, toss into a fall salad, or enjoy as a simple, satisfying side.
Lentil and spinach stew
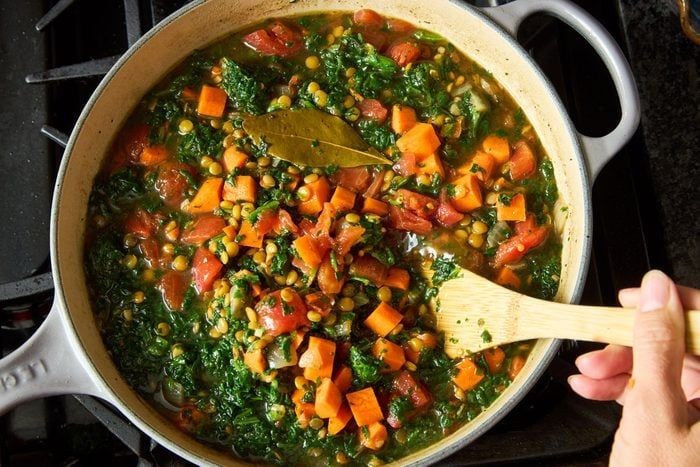
Makes a hearty, one-pot meal that’s perfect for chilly evenings. This lentil and spinach stew comes together quickly with pantry staples. It’s nutritious, filling, and packed with flavor.
Serving: 4 | Pre Time: 10 minutes | Cooking Time: 30 minutes
Ingredients
– Olive oil – 2 tbsp
– Yellow onion – 1, diced
– Garlic – 3 cloves, minced
– Brown lentils – 1 cup
– Vegetable broth – 4 cups
– Canned diced tomatoes – 1 (14.5 oz) can
– Ground cumin – 1 tsp
– Salt – 1 tsp
– Fresh spinach – 5 oz
Instructions
1. Heat olive oil in a large pot over medium heat for 1 minute.
2. Add diced onion and cook for 5 minutes, stirring occasionally, until softened.
3. Stir in minced garlic and cook for 1 minute until fragrant.
4. Add brown lentils, vegetable broth, diced tomatoes with their juices, ground cumin, and salt to the pot.
5. Bring the mixture to a boil over high heat.
6. Reduce heat to low, cover the pot, and simmer for 25 minutes until lentils are tender.
7. Stir in fresh spinach and cook for 2 minutes until wilted.
8. Remove the pot from heat and let it sit for 5 minutes before serving.
Unbelievably creamy and earthy from the lentils, with a bright pop from the tomatoes. The spinach adds a fresh, vibrant finish. Serve it over rice or with crusty bread for a complete meal.
Beet and apple smoothie
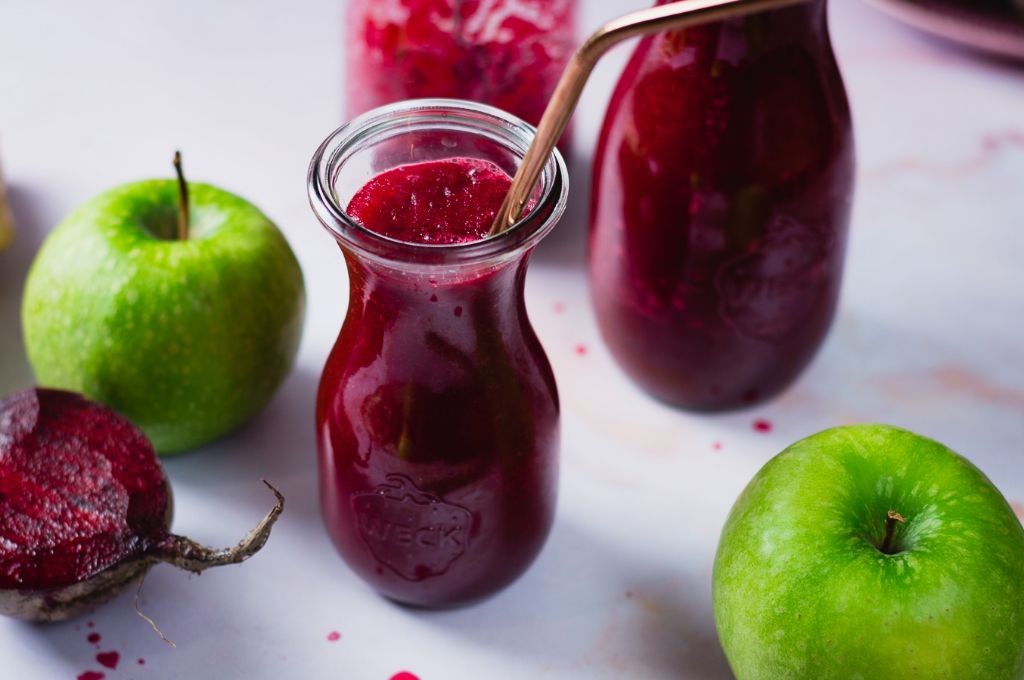
Nourishing and vibrant, this beet and apple smoothie delivers earthy sweetness with a refreshing kick. It’s a quick, nutrient-packed drink perfect for busy mornings or a midday boost. You’ll need just a few simple ingredients and a blender.
Serving: 2 | Pre Time: 5 minutes | Cooking Time: 0 minutes
Ingredients
– Cooked beet – 1 medium, peeled and chopped
– Apple – 1 medium, cored and chopped
– Plain Greek yogurt – ½ cup
– Almond milk – 1 cup
– Honey – 1 tbsp
– Ice cubes – 1 cup
Instructions
1. Place the chopped cooked beet and chopped apple into a blender. Tip: Use pre-cooked beets from the refrigerated section to save time.
2. Add the plain Greek yogurt, almond milk, and honey to the blender.
3. Add the ice cubes to the blender. Tip: For a thicker smoothie, use frozen chopped apple instead of fresh and reduce ice to ½ cup.
4. Secure the blender lid tightly.
5. Blend on high speed for 45–60 seconds until completely smooth and no chunks remain. Tip: Stop and scrape down the sides with a spatula once if needed to ensure even blending.
6. Pour the smoothie immediately into two glasses.
7. Serve right away.
Yielding a velvety, thick texture with a vibrant pink hue, this smoothie balances the earthy depth of beets with the crisp sweetness of apple. For a creative twist, top it with a sprinkle of chia seeds or a drizzle of extra honey, or serve it alongside a handful of nuts for added crunch.
Steamed cod with green beans
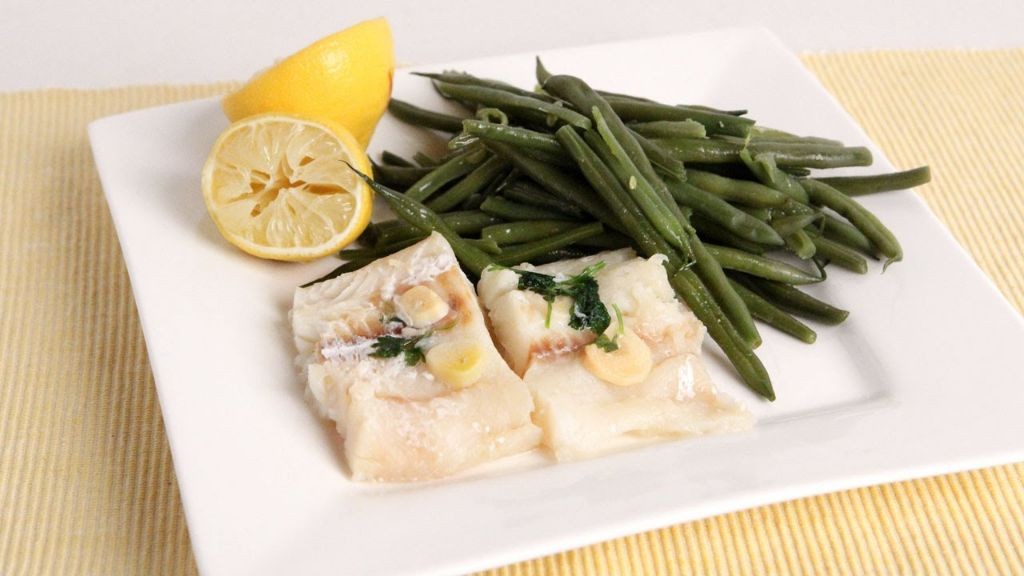
Every home cook needs a reliable, healthy weeknight dinner that comes together quickly. Steamed cod with green beans delivers exactly that—a light, flavorful meal ready in under 30 minutes.
Serving: 2 | Pre Time: 10 minutes | Cooking Time: 15 minutes
Ingredients
– Cod fillets – 2 (6 oz each)
– Green beans – 8 oz
– Olive oil – 1 tbsp
– Lemon – 1
– Garlic – 2 cloves
– Salt – ½ tsp
– Black pepper – ¼ tsp
Instructions
1. Trim the ends from 8 oz of green beans and rinse them under cold water.
2. Mince 2 cloves of garlic finely.
3. Cut 1 lemon in half; juice one half and slice the other half into thin rounds.
4. Pat 2 cod fillets completely dry with paper towels to ensure even steaming.
5. Season both sides of the cod fillets with ½ tsp salt and ¼ tsp black pepper.
6. Arrange the green beans in a single layer in a steamer basket.
7. Place the seasoned cod fillets on top of the green beans in the steamer basket.
8. Scatter the minced garlic and lemon slices evenly over the cod and green beans.
9. Drizzle 1 tbsp of olive oil over everything in the steamer basket.
10. Bring 1 inch of water to a boil in a pot fitted with the steamer basket.
11. Once boiling, place the steamer basket with the lid on over the pot.
12. Steam for 10–12 minutes, or until the cod flakes easily with a fork and the green beans are tender-crisp.
13. Carefully remove the steamer basket from the pot.
14. Transfer the cod and green beans to serving plates.
15. Drizzle the reserved lemon juice over the finished dish before serving.
Moist, flaky cod pairs perfectly with the bright, crisp green beans. The garlic and lemon steam infuses the fish with a clean, aromatic flavor. For a heartier meal, serve it over a bed of quinoa or with crusty bread to soak up the juices.
Roasted Brussels sprouts with garlic

Perfectly caramelized and packed with savory flavor, roasted Brussels sprouts with garlic make an easy, impressive side dish. This simple preparation transforms humble sprouts into crispy, tender bites with minimal effort. You’ll need just a few ingredients for maximum impact.
Serving: 4 | Pre Time: 10 minutes | Cooking Time: 25 minutes
Ingredients
– Brussels sprouts – 1 lb
– Garlic – 4 cloves
– Olive oil – 2 tbsp
– Salt – ½ tsp
– Black pepper – ¼ tsp
Instructions
1. Preheat your oven to 400°F.
2. Trim the stem ends from the Brussels sprouts and remove any loose outer leaves.
3. Cut each Brussels sprout in half lengthwise.
4. Mince the garlic cloves finely.
5. Place the halved Brussels sprouts in a large mixing bowl.
6. Add the minced garlic, olive oil, salt, and black pepper to the bowl.
7. Toss everything together until the Brussels sprouts are evenly coated.
8. Spread the Brussels sprouts in a single layer on a rimmed baking sheet.
9. Arrange them cut-side down for better caramelization.
10. Roast in the preheated oven for 20 minutes.
11. Check for doneness; the sprouts should be fork-tender and deeply browned.
12. If needed, roast for an additional 5 minutes until crispy.
13. Remove the baking sheet from the oven.
14. Transfer the roasted Brussels sprouts to a serving dish immediately.
Simply irresistible, these sprouts offer a delightful contrast of crispy outer leaves and a tender, almost creamy interior. The roasted garlic mellows into a sweet, nutty flavor that complements the sprouts’ natural earthiness. For a creative twist, finish with a squeeze of lemon juice or a sprinkle of grated Parmesan cheese right before serving.
Pumpkin and coconut milk curry

Facing chilly evenings? This pumpkin and coconut milk curry delivers cozy warmth in minutes. It’s a creamy, spiced one-pot meal that’s both simple and satisfying. Perfect for a quick weeknight dinner or a comforting weekend lunch.
Serving: 4 | Pre Time: 10 minutes | Cooking Time: 25 minutes
Ingredients
– Olive oil – 2 tbsp
– Onion – 1, diced
– Garlic – 3 cloves, minced
– Ginger – 1 tbsp, grated
– Curry powder – 2 tbsp
– Pumpkin puree – 2 cups
– Coconut milk – 1 can (13.5 oz)
– Vegetable broth – 1 cup
– Salt – 1 tsp
– Black pepper – ½ tsp
– Lime – 1, juiced
– Fresh cilantro – ¼ cup, chopped
Instructions
1. Heat olive oil in a large pot over medium heat until shimmering, about 2 minutes.
2. Add diced onion and cook until translucent, stirring occasionally for 5 minutes.
3. Stir in minced garlic and grated ginger, cooking for 1 minute until fragrant.
4. Add curry powder and toast for 30 seconds to enhance flavor, stirring constantly.
5. Tip: Toasting spices prevents a raw taste and deepens the curry’s aroma.
6. Pour in pumpkin puree, stirring to combine with the spices for 1 minute.
7. Add coconut milk and vegetable broth, bringing the mixture to a gentle simmer.
8. Reduce heat to low, cover, and simmer for 15 minutes to meld flavors.
9. Tip: Simmering uncovered can thicken the curry if you prefer a richer texture.
10. Season with salt and black pepper, stirring to incorporate evenly.
11. Remove from heat and stir in lime juice for a bright, acidic finish.
12. Tip: Adding lime juice off-heat preserves its fresh, zesty flavor without bitterness.
13. Garnish with chopped cilantro just before serving.
14. Ultimate comfort in a bowl, this curry boasts a velvety texture from the coconut milk and a subtle sweetness from the pumpkin. Serve it over steamed rice or with naan bread for a hearty meal. For a creative twist, top with roasted chickpeas or a dollop of yogurt to add crunch or creaminess.
Baked apples with cinnamon
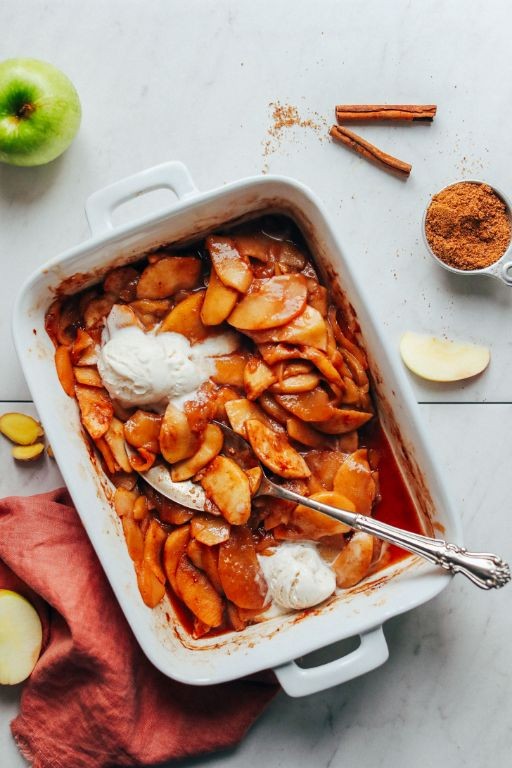
A cozy dessert that transforms simple apples into a warm, spiced treat. Baked apples with cinnamon fill your kitchen with holiday aromas while requiring minimal effort. This recipe delivers tender fruit with a sweet, caramelized filling.
Serving: 4 | Pre Time: 10 minutes | Cooking Time: 30 minutes
Ingredients
– Apples – 4 large
– Butter – 4 tbsp
– Brown sugar – ½ cup
– Cinnamon – 2 tsp
– Water – ¼ cup
Instructions
1. Preheat your oven to 375°F.
2. Core the apples using an apple corer, leaving the bottoms intact to hold the filling.
3. Place the cored apples in a baking dish just large enough to hold them snugly.
4. In a small bowl, combine the brown sugar and cinnamon thoroughly.
5. Fill each apple cavity with the brown sugar-cinnamon mixture, packing it down lightly.
6. Top each filled apple with 1 tbsp of butter, placing it directly on the sugar mixture.
7. Pour the water into the bottom of the baking dish around the apples to prevent sticking and create steam.
8. Bake the apples at 375°F for 30 minutes, or until the skins are wrinkled and the flesh is easily pierced with a fork.
9. Remove the baking dish from the oven and let the apples rest for 5 minutes before serving.
Honey-like juices pool in the dish, perfect for spooning over the tender apples. The cinnamon-sugar filling caramelizes into a sticky, fragrant syrup. Serve them warm with a scoop of vanilla ice cream for a classic pairing, or drizzle with caramel sauce for extra indulgence.
Quinoa-stuffed bell peppers
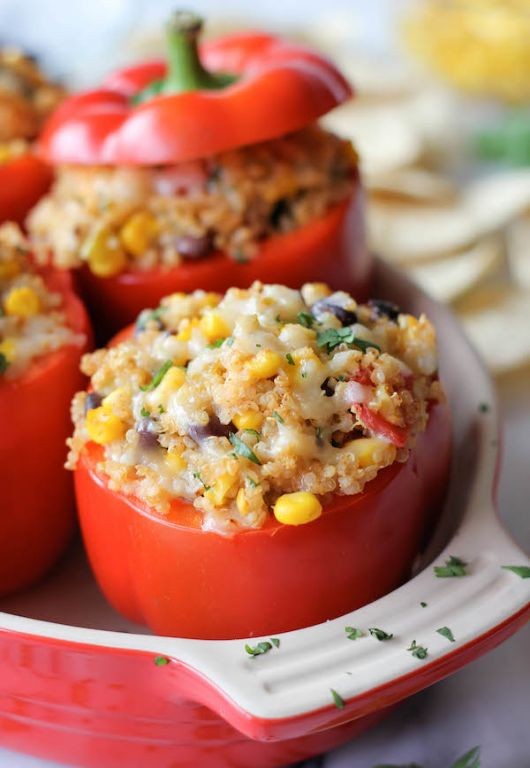
Crafting a wholesome, satisfying meal doesn’t have to be complicated. These quinoa-stuffed bell peppers are a vibrant, protein-packed dinner that comes together with minimal fuss. They’re perfect for a healthy weeknight or a colorful addition to your meal prep lineup.
Serving: 4 | Pre Time: 15 minutes | Cooking Time: 45 minutes
Ingredients
– Bell peppers – 4 large
– Quinoa – 1 cup
– Vegetable broth – 2 cups
– Black beans – 1 (15 oz) can, rinsed
– Corn – 1 cup
– Onion – 1 medium, diced
– Garlic – 2 cloves, minced
– Olive oil – 2 tbsp
– Cumin – 1 tsp
– Chili powder – 1 tsp
– Salt – 1 tsp
– Shredded cheddar cheese – 1 cup
Instructions
1. Preheat your oven to 375°F.
2. Slice the tops off the bell peppers and remove all seeds and membranes.
3. Rinse the quinoa thoroughly in a fine-mesh strainer under cold water.
4. Heat 1 tablespoon of olive oil in a medium saucepan over medium heat.
5. Add the diced onion and cook for 5 minutes, until softened and translucent.
6. Add the minced garlic and cook for 1 more minute, just until fragrant.
7. Pour in the rinsed quinoa and toast it with the onions and garlic for 2 minutes, stirring constantly.
8. Add the vegetable broth, cumin, chili powder, and salt to the saucepan.
9. Bring the mixture to a boil, then reduce the heat to low, cover, and simmer for 15 minutes.
10. Remove the saucepan from the heat and let it sit, covered, for 5 minutes to allow the quinoa to fully absorb the liquid.
11. Fluff the cooked quinoa with a fork, then stir in the rinsed black beans and corn.
12. Brush the outside of the hollowed bell peppers with the remaining 1 tablespoon of olive oil.
13. Stand the peppers upright in a baking dish just large enough to hold them snugly.
14. Spoon the quinoa filling into each pepper, packing it down gently.
15. Top each stuffed pepper evenly with the shredded cheddar cheese.
16. Pour ¼ cup of water into the bottom of the baking dish around the peppers.
17. Cover the dish tightly with aluminum foil and bake for 30 minutes.
18. Remove the foil and bake for an additional 15 minutes, until the peppers are tender and the cheese is golden and bubbly.
The baked peppers become wonderfully tender, offering a sweet contrast to the hearty, spiced quinoa filling. The melted cheese creates a creamy, savory layer that pulls everything together. For a fresh twist, serve them with a dollop of cool sour cream or a sprinkle of chopped cilantro.
Summary
Gathering these 18 low histamine recipes offers a tasty path to feeling your best. We hope this collection inspires your kitchen adventures! Try a few, leave a comment with your favorite, and if you found it helpful, share this roundup on Pinterest to help others discover delicious, healthy meals. Happy cooking!


