
Let’s be honest: healthy eating doesn’t have to mean bland or boring! If you’re looking to lighten up your meals without sacrificing flavor, you’re in the right place. We’ve gathered 19 delicious low-fat recipes that prove nutritious food can be absolutely mouthwatering—from quick weeknight dinners to satisfying comfort classics. Get ready to find your new favorite healthy dish!
Lowfat Greek Yogurt Parfait with Fresh Berries
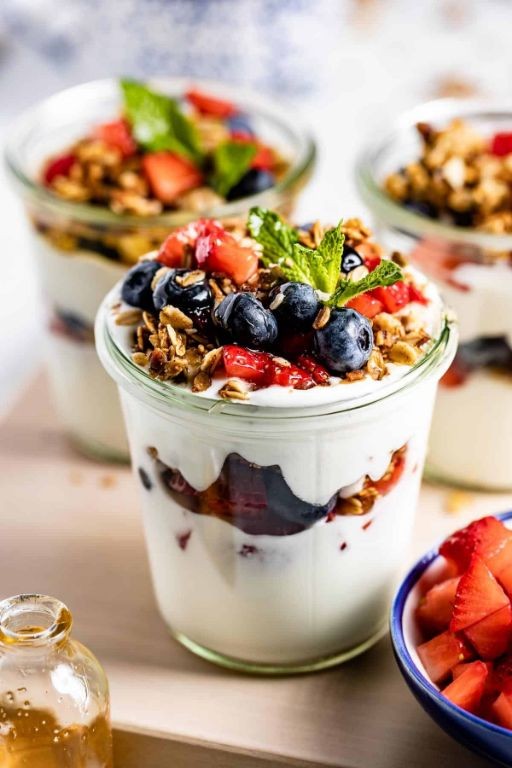
Gather ’round, fellow flavor-seekers, because we’re about to turn your snack-time frown upside down with a creation so simple, it’s almost criminal. This isn’t just a parfait—it’s a creamy, dreamy, berry-packed tower of joy that’ll make you forget it’s actually good for you. Let’s get layering!
Serving: 2 | Pre Time: 10 minutes | Cooking Time: 0 minutes
Ingredients
– 2 cups lowfat Greek yogurt
– 1 cup fresh strawberries, hulled and sliced
– 1 cup fresh blueberries
– 1 cup fresh raspberries
– 1/2 cup granola
– 2 tbsp honey
Instructions
1. Place 2 clear glasses or parfait dishes on your work surface.
2. Spoon 1/4 cup of lowfat Greek yogurt into the bottom of each glass, spreading it evenly with the back of the spoon.
3. Add a layer of 1/4 cup fresh strawberries, arranging the slices neatly against the glass for a visual pop.
4. Sprinkle 2 tablespoons of granola over the strawberry layer in each glass.
5. Spoon another 1/4 cup of lowfat Greek yogurt over the granola, gently pressing down to seal the layers.
6. Add a layer of 1/4 cup fresh blueberries, ensuring they’re distributed evenly.
7. Drizzle 1/2 tablespoon of honey over the blueberries in each glass using a slow, circular motion for even coverage.
8. Spoon the remaining 1/4 cup of lowfat Greek yogurt into each glass, smoothing the top with a spatula.
9. Top each parfait with 1/4 cup fresh raspberries, arranging them in a decorative pattern.
10. Finish by drizzling the remaining 1/2 tablespoon of honey over the raspberries in each glass.
11. Refrigerate the parfaits for at least 5 minutes to allow the flavors to meld and the granola to soften slightly.
12. Serve immediately with a long spoon to dig through all the layers.
Just imagine that first spoonful: the cool, tangy yogurt gives way to bursts of juicy berries, all hugged by a satisfying crunch from the granola. For a fun twist, swap in seasonal fruits like peaches or pomegranate seeds, or add a sprinkle of cinnamon to the honey drizzle for a warm, cozy kick. Honestly, it’s so delicious, you might just start calling it ‘breakfast dessert’—no judgment here!
Lowfat Spinach and Feta Stuffed Mushrooms
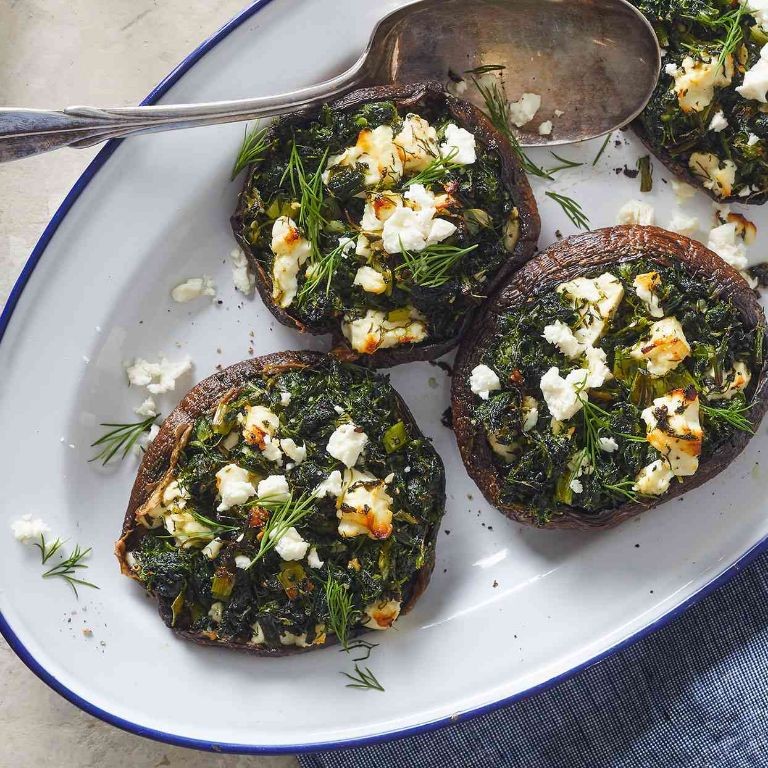
Hear that? It’s your taste buds cheering because we’re about to stuff mushrooms with a low-fat, flavor-packed party of spinach and feta. These bite-sized wonders are the perfect guilt-free appetizer for any gathering, proving that healthy can be downright delicious and fun.
Serving: 12 | Pre Time: 15 minutes | Cooking Time: 20 minutes
Ingredients
– 12 large white mushrooms
– 1 tablespoon olive oil
– 1/2 cup finely chopped onion
– 2 cloves garlic, minced
– 4 cups fresh spinach
– 1/2 cup crumbled low-fat feta cheese
– 1/4 cup plain breadcrumbs
– 1/4 teaspoon black pepper
– 1/4 teaspoon salt
Instructions
1. Preheat your oven to 375°F (190°C) and line a baking sheet with parchment paper.
2. Gently twist the stems from the 12 mushrooms to remove them, then finely chop the stems and set aside.
3. Place the mushroom caps, cavity-side up, on the prepared baking sheet.
4. Heat 1 tablespoon of olive oil in a large skillet over medium heat for about 1 minute until shimmering.
5. Add 1/2 cup of finely chopped onion to the skillet and cook for 3-4 minutes, stirring occasionally, until softened and translucent.
6. Stir in the chopped mushroom stems and 2 cloves of minced garlic, cooking for another 2 minutes until fragrant.
7. Add 4 cups of fresh spinach to the skillet, cooking for 2-3 minutes while stirring constantly until wilted and most liquid has evaporated. (Tip: Wring out any excess spinach moisture with a paper towel to prevent soggy filling.)
8. Transfer the skillet mixture to a medium bowl and let it cool for 5 minutes.
9. To the bowl, add 1/2 cup of crumbled low-fat feta cheese, 1/4 cup of plain breadcrumbs, 1/4 teaspoon of black pepper, and 1/4 teaspoon of salt, then mix until fully combined.
10. Evenly spoon the filling mixture into the mushroom caps, mounding it slightly. (Tip: Use a small spoon or your fingers to pack the filling firmly for a neat presentation.)
11. Bake the stuffed mushrooms in the preheated oven for 18-20 minutes, until the tops are golden brown and the mushrooms are tender when pierced with a fork.
12. Remove from the oven and let cool on the baking sheet for 5 minutes before serving. (Tip: For extra crispiness, broil for the final 1-2 minutes, watching closely to avoid burning.)
Savory and satisfying, these mushrooms offer a delightful contrast of tender caps and a creamy, tangy filling with a subtle crunch. Serve them warm as a crowd-pleasing appetizer, or get creative by pairing them with a light salad for a complete, fuss-free meal that’s sure to impress.
Baked Sweet Potato Fries with Garlic Aioli
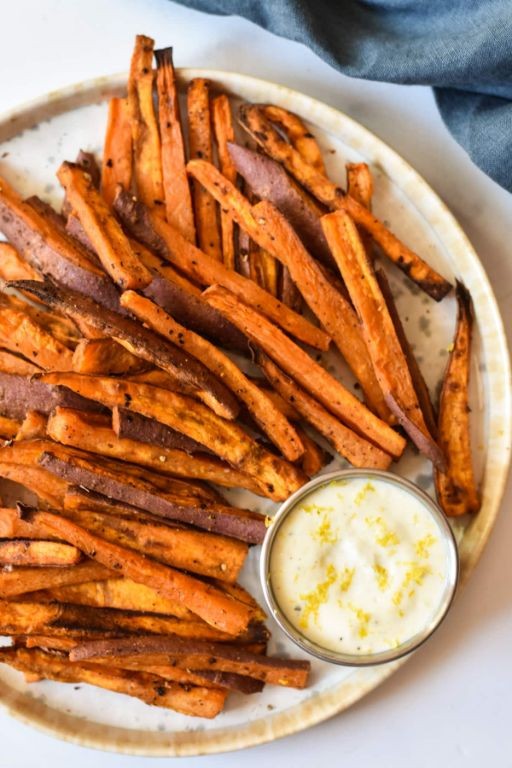
Venture beyond the sad, soggy fry with these crispy, caramelized sweet potato spears that are basically autumn’s answer to French fries, paired with a garlicky aioli that’s so good you might just eat it with a spoon (no judgment). This fuss-free recipe transforms humble sweet potatoes into a crave-worthy side or snack that’s perfect for game day, a weeknight dinner upgrade, or anytime you need a little crispy comfort. Trust me, your oven is about to become your new best fry-cook.
Serving: 4 | Pre Time: 15 minutes | Cooking Time: 25 minutes
Ingredients
– 2 large sweet potatoes (about 1.5 lbs total)
– 2 tbsp olive oil
– 1 tsp kosher salt
– 1/2 tsp smoked paprika
– 1/4 tsp black pepper
– 1/2 cup mayonnaise
– 2 cloves garlic, minced
– 1 tbsp lemon juice
– 1/4 tsp salt
Instructions
1. Preheat your oven to 425°F (218°C) and line a large baking sheet with parchment paper.
2. Scrub the sweet potatoes thoroughly under cold running water to remove any dirt, then pat them completely dry with a clean kitchen towel—this helps achieve maximum crispiness.
3. Trim off the ends of each sweet potato, then slice them lengthwise into 1/4-inch thick planks.
4. Stack a few planks and cut them lengthwise again into 1/4-inch wide fry-shaped spears, aiming for uniform size so they cook evenly.
5. In a large bowl, toss the sweet potato spears with 2 tbsp olive oil, 1 tsp kosher salt, 1/2 tsp smoked paprika, and 1/4 tsp black pepper until evenly coated.
6. Arrange the spears in a single layer on the prepared baking sheet, ensuring they don’t touch or overlap to allow for proper air circulation and browning.
7. Bake at 425°F for 15 minutes, then use a spatula to carefully flip each fry over for even cooking on both sides.
8. Return the baking sheet to the oven and bake for an additional 8–10 minutes, or until the fries are deeply golden brown and crispy at the edges.
9. While the fries bake, prepare the garlic aioli by combining 1/2 cup mayonnaise, 2 minced garlic cloves, 1 tbsp lemon juice, and 1/4 tsp salt in a small bowl, whisking until smooth.
10. Let the aioli sit at room temperature for at least 10 minutes to allow the garlic flavor to mellow and infuse the sauce—this prevents an overly sharp bite.
11. Remove the baked sweet potato fries from the oven and let them cool on the baking sheet for 2–3 minutes; this helps them crisp up further as they set.
12. Serve the fries immediately while hot and crispy, with the garlic aioli on the side for dipping.
Get ready for fries with a perfect contrast: crispy, caramelized edges giving way to a tender, sweet interior, all balanced by the creamy, pungent kick of the aioli. For a fun twist, sprinkle them with fresh chopped parsley or a pinch of chili flakes, or crumble them over a salad for an instant upgrade—they’re so versatile, you might just skip the main course.
Lowfat Turkey and Avocado Wrap
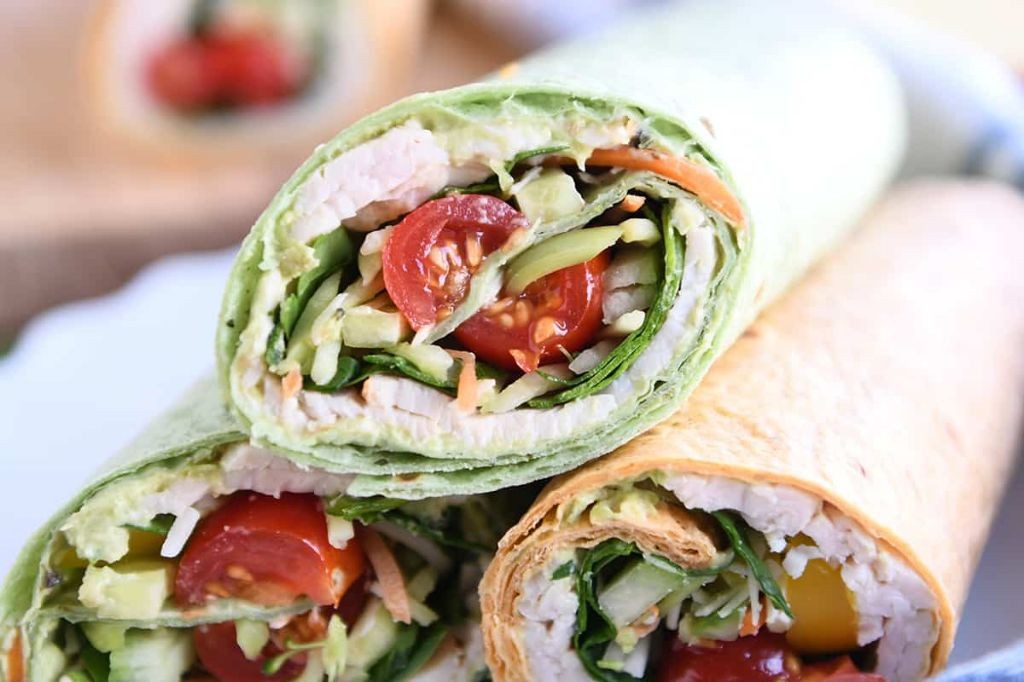
Kick your lunchtime blues to the curb with this lowfat turkey and avocado wrap—it’s the superhero of quick meals that won’t leave you feeling like you’ve swallowed a brick. Packed with lean protein and creamy goodness, it’s the perfect rescue mission for your taste buds on a hectic day. Trust me, your boring sandwich days are officially over!
Serving: 1 | Pre Time: 10 minutes | Cooking Time: 0 minutes
Ingredients
– 1 large whole-wheat tortilla (10-inch diameter)
– 3 oz sliced low-sodium turkey breast
– 1/2 medium avocado, mashed
– 1/4 cup shredded romaine lettuce
– 2 tbsp plain nonfat Greek yogurt
– 1 tsp fresh lime juice
– 1/8 tsp garlic powder
– 1/8 tsp black pepper
Instructions
1. Lay the large whole-wheat tortilla flat on a clean surface.
2. In a small bowl, combine the mashed avocado, plain nonfat Greek yogurt, fresh lime juice, garlic powder, and black pepper until smooth—this creates a creamy spread that prevents sogginess.
3. Spread the avocado mixture evenly over the center of the tortilla, leaving a 1-inch border around the edges.
4. Layer the sliced low-sodium turkey breast evenly on top of the avocado spread.
5. Sprinkle the shredded romaine lettuce over the turkey, distributing it lightly to avoid overstuffing.
6. Fold the bottom edge of the tortilla up over the filling, then fold in the sides tightly to encase the ingredients.
7. Roll the wrap firmly from the bottom to the top, pressing gently to seal it—if it feels loose, use a toothpick to secure it for easier handling.
8. Slice the wrap in half diagonally with a sharp knife for a neat presentation.
Jazz up this wrap with its satisfying crunch from the lettuce and creamy tang from the avocado blend. Serve it immediately to enjoy the fresh flavors, or pack it for a picnic by wrapping it in parchment paper to keep it intact—either way, it’s a guilt-free delight that’s as fun to eat as it is to make!
Lowfat Cauliflower Mashed Potatoes

Zesty and zippy, this lowfat cauliflower mashed potatoes recipe is the sneaky superhero of side dishes—it’ll fool even the most devoted spud-lover with its creamy texture and guilt-free flair. Perfect for holiday feasts or weeknight dinners when you want to indulge without the bulge, it’s a veggie-packed twist that’s as fun to make as it is to devour.
Serving: 4 | Pre Time: 10 minutes | Cooking Time: 20 minutes
Ingredients
– 1 large head cauliflower, cut into florets
– 2 cloves garlic, minced
– 1/2 cup lowfat milk
– 2 tbsp unsalted butter
– 1/4 cup grated Parmesan cheese
– 1/2 tsp salt
– 1/4 tsp black pepper
Instructions
1. Fill a large pot with water and bring it to a boil over high heat.
2. Add the cauliflower florets to the boiling water and cook for 10 minutes, or until fork-tender.
3. Drain the cauliflower thoroughly in a colander to remove excess water—this prevents watery mash.
4. In a small saucepan over medium heat, melt the butter, then add the minced garlic and sauté for 2 minutes until fragrant.
5. Transfer the drained cauliflower to a food processor or blender.
6. Add the melted butter and garlic mixture, lowfat milk, Parmesan cheese, salt, and black pepper to the food processor.
7. Blend on high speed for 1–2 minutes until smooth and creamy, scraping down the sides as needed.
8. Taste and adjust seasoning if desired, but avoid over-blending to keep it fluffy.
9. Serve immediately while warm for the best texture.
Gloriously smooth and rich, this mash boasts a subtle nutty flavor from the cauliflower and a cheesy kick that’ll have everyone asking for seconds. Try topping it with a sprinkle of chives or a drizzle of olive oil for a fancy touch, or pair it with roasted chicken for a comforting meal that’s light on calories but heavy on satisfaction.
Steamed Broccoli with Lemon Zest
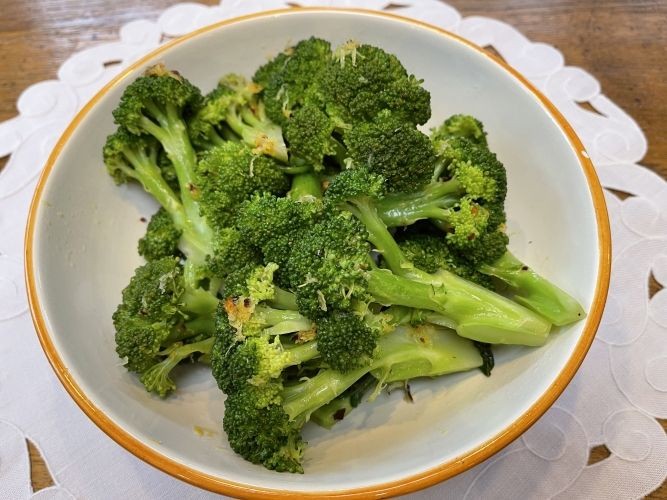
Brace yourselves, veggie skeptics—this isn’t your sad, soggy side dish from childhood cafeterias. We’re giving humble broccoli a zesty glow-up so bright, it might just outshine the holiday lights. Think tender-crisp florets kissed with citrusy sunshine, ready in a flash to save your busy weeknight (or impress your last-minute guests).
Serving: 4 | Pre Time: 5 minutes | Cooking Time: 7 minutes
Ingredients
– 1 large head broccoli (about 1.5 lbs)
– 1 tbsp olive oil
– 1 tsp kosher salt
– 1/2 tsp black pepper
– Zest of 1 large lemon
– 1 tbsp fresh lemon juice
Instructions
1. Rinse the broccoli head under cold running water, then pat it completely dry with paper towels—this helps the steam work its magic without making the florets waterlogged.
2. Use a sharp knife to cut the broccoli into uniform, bite-sized florets, about 1.5 inches wide; if desired, peel and thinly slice the stem for zero waste.
3. Pour 1 inch of water into a large pot or Dutch oven, then place a steamer basket inside, ensuring the water level sits below the basket.
4. Bring the water to a rolling boil over high heat, which should take about 3–4 minutes.
5. Arrange the broccoli florets in a single layer in the steamer basket, cover the pot with a tight-fitting lid, and reduce the heat to medium-high.
6. Steam the broccoli for exactly 5 minutes—set a timer!—until the florets are vibrant green and tender when pierced with a fork, but still slightly crisp.
7. Immediately transfer the steamed broccoli to a large mixing bowl to halt the cooking process and preserve that perfect texture.
8. While the broccoli is still hot, drizzle it with 1 tbsp olive oil and toss gently to coat each floret evenly.
9. Sprinkle 1 tsp kosher salt and 1/2 tsp black pepper over the broccoli, tossing again to distribute the seasoning.
10. Using a microplane or fine grater, zest the entire yellow outer peel of one large lemon directly over the bowl, avoiding the bitter white pith.
11. Squeeze 1 tbsp of fresh lemon juice from the zested lemon over the broccoli, giving one final gentle toss to combine all ingredients.
12. Serve the broccoli warm. For an extra flavor boost, let it sit for 2–3 minutes before serving to allow the lemon zest to infuse the dish.
Mouthwatering doesn’t begin to cover it—each bite delivers a satisfying crunch that gives way to buttery tenderness, all brightened by that sunny lemon zing. Try piling it over creamy polenta for a cozy bowl, or toss it into cold pasta salads tomorrow for a vibrant leftover makeover.
Lowfat Banana Oat Pancakes
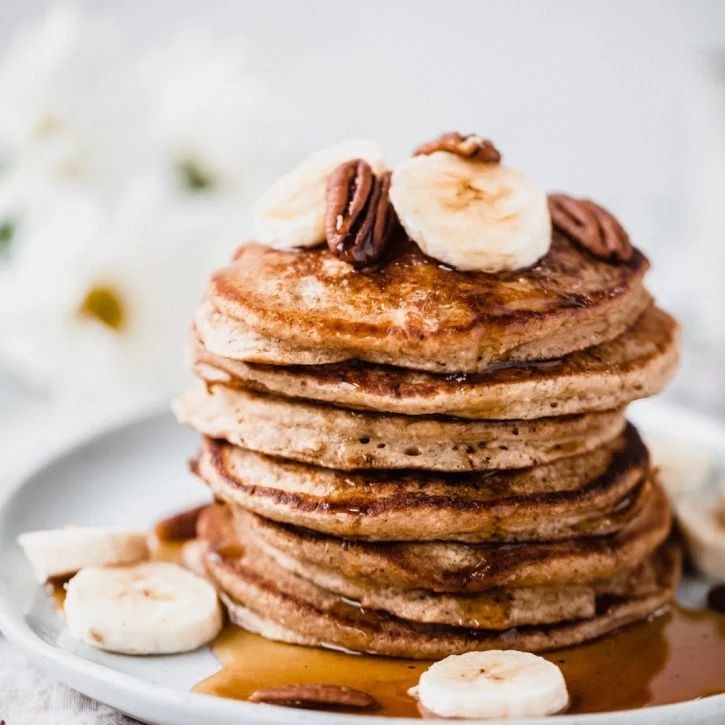
Fancy a breakfast that won’t make your jeans cry? Let’s turn those lonely bananas and pantry staples into fluffy, guilt-free pancakes that are basically a hug for your taste buds—no food-coma required!
Serving: 4 | Pre Time: 10 minutes | Cooking Time: 15 minutes
Ingredients
– 2 ripe bananas
– 1 cup old-fashioned rolled oats
– 1 cup lowfat milk
– 2 large eggs
– 1 tsp baking powder
– 1 tsp vanilla extract
– 1/2 tsp ground cinnamon
– 1/4 tsp salt
– 1 tbsp coconut oil
Instructions
1. Add the bananas, oats, milk, eggs, baking powder, vanilla extract, cinnamon, and salt to a blender.
2. Blend on high speed for 45 seconds until the mixture is completely smooth with no oat pieces visible.
3. Let the batter rest for 5 minutes to allow the oats to absorb liquid and thicken slightly.
4. Heat a large non-stick skillet or griddle over medium heat (about 325°F).
5. Add 1/2 teaspoon of the coconut oil to the skillet and swirl to coat the surface evenly.
6. Pour 1/4 cup of batter onto the skillet for each pancake, leaving space between them.
7. Cook for 2-3 minutes until bubbles form on the surface and the edges look set.
8. Flip each pancake carefully with a spatula and cook for another 1-2 minutes until golden brown on both sides.
9. Transfer the cooked pancakes to a plate and repeat steps 5-8 with the remaining batter, adding more coconut oil as needed to prevent sticking.
10. Serve the pancakes immediately while warm.
Mmm, these pancakes boast a tender, cake-like texture with subtle banana sweetness and a hint of cozy cinnamon. Stack ’em high and drizzle with maple syrup or top with fresh berries for a vibrant, Instagram-worthy breakfast that’ll have everyone asking for seconds!
Grilled Salmon with Dill and Lemon

Crisp winter air got you dreaming of a meal that’s both fancy and fuss-free? Let’s talk about a flaky, flavorful hero that comes together faster than you can say “holiday stress”—grilled salmon with a zesty lemon and dill twist. It’s the perfect centerpiece to impress guests or treat yourself, no culinary degree required.
Serving: 4 | Pre Time: 10 minutes | Cooking Time: 12 minutes
Ingredients
– 4 (6-ounce) salmon fillets, skin-on
– 2 tablespoons olive oil
– 1 teaspoon kosher salt
– 1/2 teaspoon black pepper
– 2 tablespoons fresh dill, chopped
– 1 lemon, sliced into 1/4-inch rounds
– 1 lemon, juiced (about 3 tablespoons)
Instructions
1. Preheat a grill or grill pan to medium-high heat (about 400°F).
2. Pat the salmon fillets dry with paper towels to ensure a crisp sear.
3. Brush both sides of each fillet evenly with the olive oil.
4. Season the fillets on both sides with the kosher salt and black pepper.
5. Place the salmon fillets skin-side down on the preheated grill.
6. Grill for 6 minutes without moving to develop grill marks and prevent sticking.
7. Carefully flip the fillets using a spatula and cook for another 4-6 minutes, until the internal temperature reaches 145°F and the flesh flakes easily with a fork.
8. Remove the salmon from the grill and transfer to a serving platter.
9. Immediately squeeze the fresh lemon juice evenly over the hot fillets.
10. Sprinkle the chopped fresh dill generously over the top.
11. Garnish the platter with the lemon slices for added presentation and flavor.
Buttery and tender, this salmon flakes apart with a gentle nudge, boasting a bright, herbaceous kick from the dill and a tangy lemon finish that cuts through the richness. Serve it over a bed of quinoa for a hearty meal, or flake it into tacos with a crunchy slaw for a fun twist—leftovers (if you’re lucky enough to have any) make a stellar next-day salad topper.
Lowfat Veggie Stir-Fry with Tofu
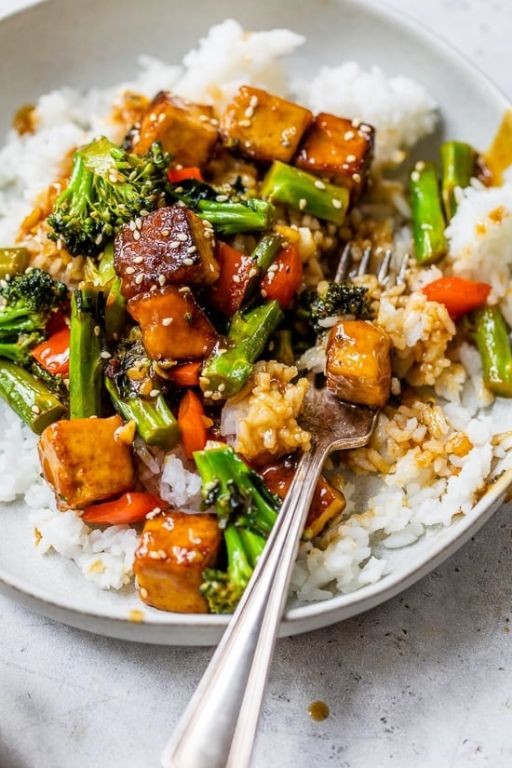
Buckle up, veggie lovers, because we’re about to turn your kitchen into a sizzling, low-fat flavor factory! This tofu-packed stir-fry is the answer to those ‘what’s for dinner?’ blues, delivering a rainbow of crisp-tender veggies and protein without the guilt—perfect for a post-holiday reset or a speedy weeknight win. Let’s get wok-ing!
Serving: 4 | Pre Time: 15 minutes | Cooking Time: 15 minutes
Ingredients
– 1 (14-ounce) block firm tofu
– 2 tablespoons cornstarch
– 2 tablespoons low-sodium soy sauce
– 1 tablespoon sesame oil
– 1 tablespoon olive oil
– 2 cloves garlic, minced
– 1 tablespoon fresh ginger, grated
– 1 red bell pepper, sliced
– 1 cup broccoli florets
– 1 carrot, julienned
– 1 cup snap peas
– 1/4 cup vegetable broth
– 1 tablespoon rice vinegar
– 1 teaspoon honey
– 1/4 teaspoon red pepper flakes
Instructions
1. Press the tofu for 10 minutes using a tofu press or by wrapping it in paper towels and placing a heavy pan on top to remove excess water.
2. Cut the pressed tofu into 1-inch cubes and toss them in a bowl with 2 tablespoons cornstarch until evenly coated.
3. Heat 1 tablespoon olive oil in a large wok or skillet over medium-high heat until shimmering, about 2 minutes.
4. Add the tofu cubes in a single layer and cook for 4–5 minutes, flipping halfway, until golden brown and crispy on all sides.
5. Transfer the tofu to a plate and set aside, leaving any remaining oil in the wok.
6. Add 1 tablespoon sesame oil to the wok and heat for 30 seconds until fragrant.
7. Stir in 2 cloves minced garlic and 1 tablespoon grated ginger, cooking for 1 minute until aromatic but not browned.
8. Add 1 sliced red bell pepper, 1 cup broccoli florets, 1 julienned carrot, and 1 cup snap peas to the wok.
9. Stir-fry the vegetables for 5–6 minutes, tossing frequently, until they are bright in color and crisp-tender.
10. In a small bowl, whisk together 2 tablespoons low-sodium soy sauce, 1/4 cup vegetable broth, 1 tablespoon rice vinegar, 1 teaspoon honey, and 1/4 teaspoon red pepper flakes.
11. Pour the sauce mixture over the vegetables in the wok and bring to a simmer for 2 minutes, stirring to coat evenly.
12. Return the cooked tofu to the wok and toss everything together for 1–2 minutes until heated through and well combined.
13. Remove from heat and serve immediately.
Crunchy, colorful, and packed with savory-sweet notes, this stir-fry offers a delightful contrast between the crispy tofu and tender-crisp veggies. For a fun twist, serve it over cauliflower rice or stuff it into lettuce wraps for a low-carb feast that’ll have everyone reaching for seconds!
Baked Cod with Tomato and Basil
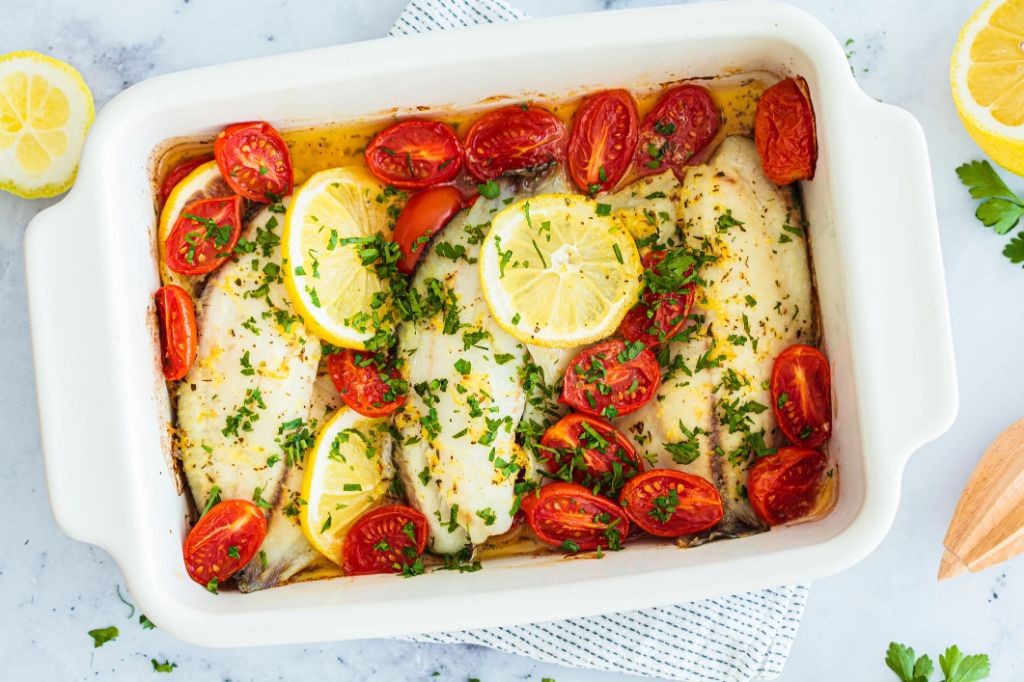
Mmm, let’s be real—some weeknights call for a dinner that’s fancy enough to impress your in-laws but easy enough to pull off while binge-watching your favorite show. Enter this baked cod, a flaky, flavorful hero that’s basically a vacation for your taste buds, wrapped in juicy tomatoes and fresh basil. It’s the kind of dish that makes you feel like a culinary rockstar without requiring a degree from a fancy cooking school.
Serving: 4 | Pre Time: 15 minutes | Cooking Time: 20 minutes
Ingredients
– 4 (6-ounce) cod fillets
– 2 cups cherry tomatoes, halved
– 1/4 cup fresh basil leaves, chopped
– 2 tablespoons olive oil
– 2 cloves garlic, minced
– 1 tablespoon lemon juice
– 1/2 teaspoon salt
– 1/4 teaspoon black pepper
Instructions
1. Preheat your oven to 400°F and lightly grease a 9×13-inch baking dish with olive oil.
2. Pat the cod fillets dry with paper towels to ensure a crispy exterior, then place them in the prepared baking dish.
3. In a medium bowl, combine the cherry tomatoes, basil, olive oil, garlic, lemon juice, salt, and black pepper, tossing gently to coat everything evenly.
4. Spoon the tomato-basil mixture over the cod fillets, covering them completely for maximum flavor infusion.
5. Bake in the preheated oven for 18–20 minutes, until the cod flakes easily with a fork and reaches an internal temperature of 145°F.
6. Remove from the oven and let rest for 3 minutes to allow the juices to redistribute, keeping the fish moist and tender.
7. Serve immediately, garnishing with extra fresh basil if desired.
Here’s the delicious payoff: the cod emerges tender and buttery, perfectly complemented by the burst of sweet tomatoes and aromatic basil. For a creative twist, pile it over a bed of creamy polenta or alongside crusty bread to soak up every last drop of that savory sauce—it’s a meal that’s as comforting as it is elegant.
Lowfat Black Bean and Corn Salad
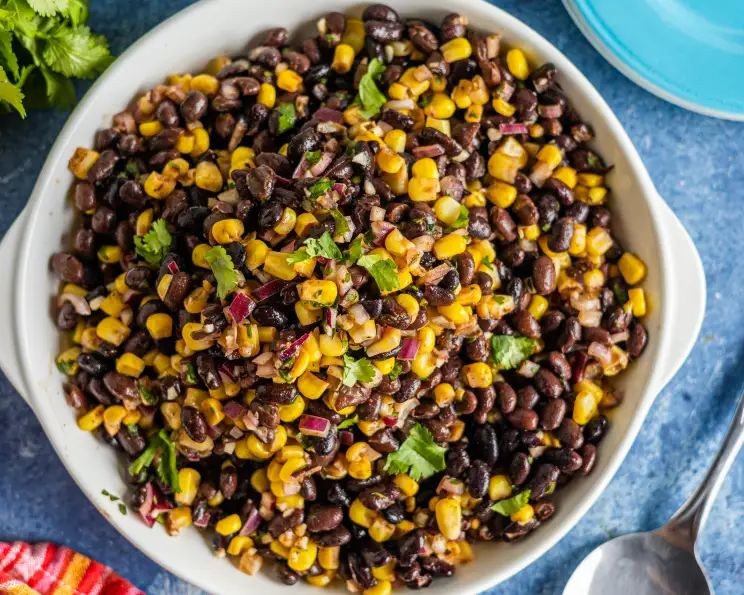
Veggie lovers, rejoice! This lowfat black bean and corn salad is the vibrant, no-fuss hero your weeknight dinners have been desperately craving—it’s so fresh and zippy, even your pickiest eaters might mistake it for a party. Seriously, who knew something so simple could pack such a flavorful punch without weighing you down?
Serving: 6 | Pre Time: 15 minutes | Cooking Time: 0 minutes
Ingredients
– 2 (15-ounce) cans black beans, rinsed and drained
– 2 cups frozen corn kernels, thawed
– 1 large red bell pepper, finely diced
– 1/2 cup red onion, finely diced
– 1/4 cup fresh cilantro, chopped
– 1/4 cup lime juice (from about 2 limes)
– 2 tablespoons extra-virgin olive oil
– 1 teaspoon ground cumin
– 1/2 teaspoon chili powder
– 1/2 teaspoon salt
Instructions
1. In a large mixing bowl, combine the rinsed and drained black beans, thawed corn kernels, finely diced red bell pepper, and finely diced red onion.
2. Add the chopped fresh cilantro to the bowl with the bean and vegetable mixture.
3. In a small separate bowl, whisk together the lime juice, extra-virgin olive oil, ground cumin, chili powder, and salt until fully emulsified. Tip: Whisk vigorously for about 30 seconds to ensure the oil and lime juice blend smoothly, preventing a separated dressing.
4. Pour the dressing over the bean and vegetable mixture in the large bowl.
5. Using a large spoon or spatula, gently toss all ingredients until evenly coated with the dressing. Tip: Fold gently to avoid mashing the black beans, which helps maintain a pleasant, chunky texture.
6. Cover the bowl with plastic wrap or a lid and refrigerate for at least 30 minutes to allow the flavors to meld. Tip: Chilling for up to 2 hours intensifies the taste, so plan ahead if time allows for a more robust salad.
7. After chilling, give the salad a final stir before serving.
What a delight! This salad bursts with a crisp, juicy texture from the corn and bell pepper, balanced by the creamy black beans and a tangy, slightly smoky kick from the cumin and chili powder. Serve it scooped into lettuce cups for a light lunch, or pile it onto grilled chicken for a hearty, colorful dinner that’s sure to impress.
Zucchini Noodles with Pesto Sauce
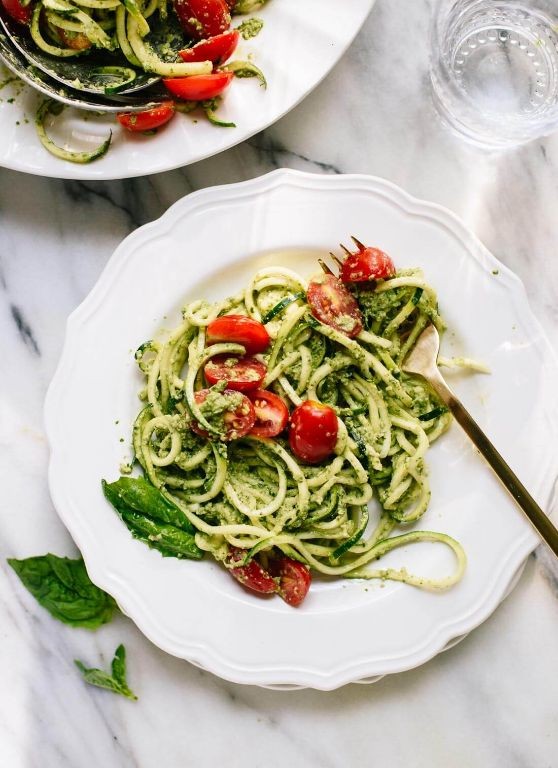
Tired of the same old pasta routine? Let’s spiralize our way to a lighter, brighter meal that’s as fun to make as it is to eat—say hello to zucchini noodles with pesto sauce, your new go-to for a quick, veggie-packed dinner that won’t weigh you down. This dish is a vibrant, no-cook sauce dream that’ll have you wondering why you ever bothered boiling water for regular noodles.
Serving: 2 | Pre Time: 15 minutes | Cooking Time: 5 minutes
Ingredients
– 2 medium zucchini
– 1 cup fresh basil leaves
– 1/4 cup grated Parmesan cheese
– 1/4 cup pine nuts
– 1/4 cup extra-virgin olive oil
– 1 clove garlic
– 1/4 teaspoon salt
– 1/4 teaspoon black pepper
Instructions
1. Wash and dry 2 medium zucchini thoroughly.
2. Use a spiralizer to create zucchini noodles, aiming for uniform thickness to ensure even texture.
3. In a dry skillet over medium heat, toast 1/4 cup pine nuts for 2-3 minutes until golden and fragrant, stirring constantly to prevent burning.
4. In a food processor, combine 1 cup fresh basil leaves, 1/4 cup grated Parmesan cheese, toasted pine nuts, 1 clove garlic, 1/4 teaspoon salt, and 1/4 teaspoon black pepper.
5. Pulse the ingredients 5-7 times until coarsely chopped.
6. With the processor running on low speed, slowly drizzle in 1/4 cup extra-virgin olive oil until the pesto forms a smooth, vibrant green sauce.
7. In a large bowl, toss the zucchini noodles with the pesto sauce until evenly coated, using your hands or tongs for gentle mixing to avoid breaking the noodles.
8. Let the dish sit at room temperature for 5 minutes to allow the flavors to meld and the zucchini to soften slightly.
Zucchini noodles offer a fresh, crisp bite that pairs perfectly with the rich, herby pesto—this combo is a texture lover’s dream. For a creative twist, top it with grilled shrimp or cherry tomatoes, or serve it chilled as a refreshing summer salad.
Lowfat Chia Seed Pudding with Almond Milk
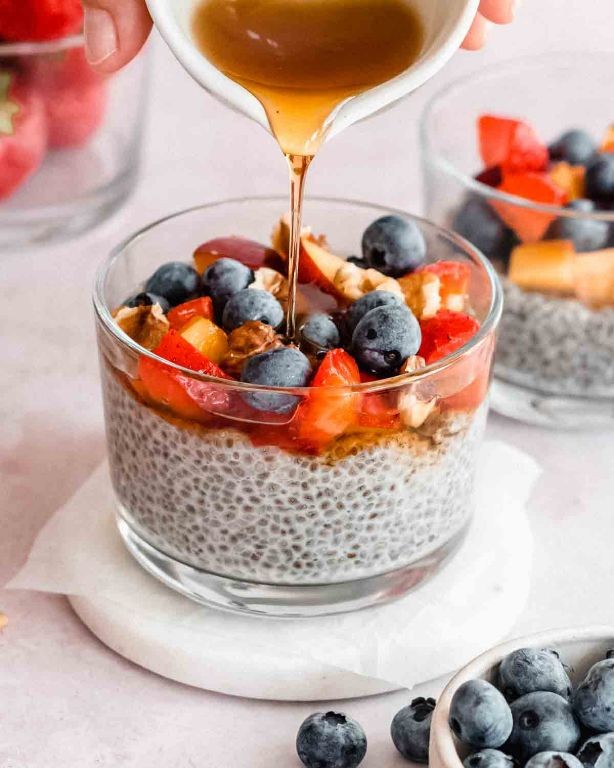
Hear that? It’s your breakfast calling—and it’s begging for a glow-up! This lowfat chia seed pudding with almond milk is the creamy, dreamy answer to your morning (or midnight) snack prayers, delivering all the satisfaction without the guilt. Let’s whip up some magic that’s as easy as it is delicious.
Serving: 2 | Pre Time: 5 minutes | Cooking Time: 0 minutes
Ingredients
– 1/2 cup chia seeds
– 2 cups unsweetened almond milk
– 2 tbsp pure maple syrup
– 1 tsp vanilla extract
– 1/4 tsp ground cinnamon
Instructions
1. In a medium mixing bowl, combine 1/2 cup chia seeds and 2 cups unsweetened almond milk.
2. Add 2 tbsp pure maple syrup, 1 tsp vanilla extract, and 1/4 tsp ground cinnamon to the bowl.
3. Whisk all ingredients vigorously for 1–2 minutes until fully blended and no clumps remain. Tip: Whisking well prevents the chia seeds from sticking together, ensuring a smooth texture.
4. Cover the bowl tightly with plastic wrap or a lid.
5. Place the covered bowl in the refrigerator for at least 4 hours or overnight. Tip: For best results, let it chill for 8 hours—this allows the chia seeds to fully absorb the liquid and thicken properly.
6. After chilling, remove the bowl from the refrigerator and stir the pudding thoroughly to break up any gel-like layers.
7. Divide the pudding evenly between two serving bowls or jars. Tip: For a fun twist, layer it with fresh berries or a dollop of nut butter before serving to add extra flavor and texture.
8. Serve immediately or store covered in the refrigerator for up to 3 days.
Ooh-la-la! This pudding sets into a luscious, tapioca-like texture that’s subtly sweet with a hint of warm cinnamon. Enjoy it straight from the fridge for a cool, refreshing treat, or get fancy by topping it with sliced almonds and a drizzle of honey for a crunchy contrast that’ll make your taste buds dance.
Roasted Carrots with Thyme and Honey
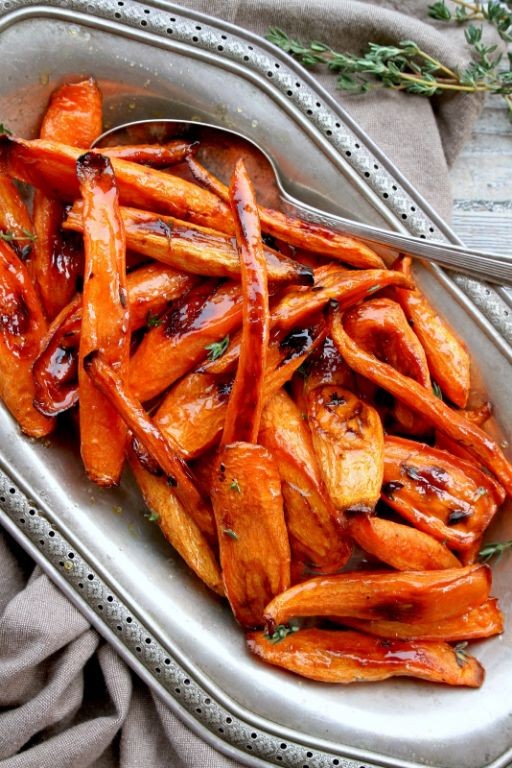
Crisp, colorful, and downright irresistible, these roasted carrots are about to become your new favorite side dish—they’re so good, you might just forget there’s a main course! With a sweet honey glaze and fragrant thyme, they’re like a cozy hug for your taste buds, perfect for holiday feasts or a simple weeknight upgrade. Trust me, even carrot skeptics will be begging for seconds.
Serving: 4 | Pre Time: 10 minutes | Cooking Time: 25 minutes
Ingredients
– 1.5 pounds carrots, peeled and cut into 2-inch pieces
– 2 tablespoons olive oil
– 1 tablespoon honey
– 1 teaspoon fresh thyme leaves
– 1/2 teaspoon salt
– 1/4 teaspoon black pepper
Instructions
1. Preheat your oven to 425°F and line a baking sheet with parchment paper for easy cleanup.
2. In a large bowl, toss the carrot pieces with olive oil, salt, and black pepper until evenly coated.
3. Spread the carrots in a single layer on the prepared baking sheet, ensuring they aren’t crowded to allow for proper roasting.
4. Roast the carrots in the preheated oven for 15 minutes, or until they start to soften and develop light browning.
5. While the carrots roast, mix the honey and thyme leaves in a small bowl until combined.
6. Remove the baking sheet from the oven and drizzle the honey-thyme mixture over the carrots, tossing gently to coat them evenly.
7. Return the carrots to the oven and roast for an additional 10 minutes, or until they are tender and caramelized at the edges.
8. Let the carrots cool for 2-3 minutes on the baking sheet before serving to allow the flavors to meld.
Warm from the oven, these carrots boast a tender-crisp texture with sticky-sweet edges that caramelize beautifully. Their earthy flavor, enhanced by the herbal thyme and golden honey, makes them a versatile star—try serving them over creamy polenta or alongside roasted chicken for a meal that feels effortlessly gourmet.
Lowfat Egg White Omelette with Spinach
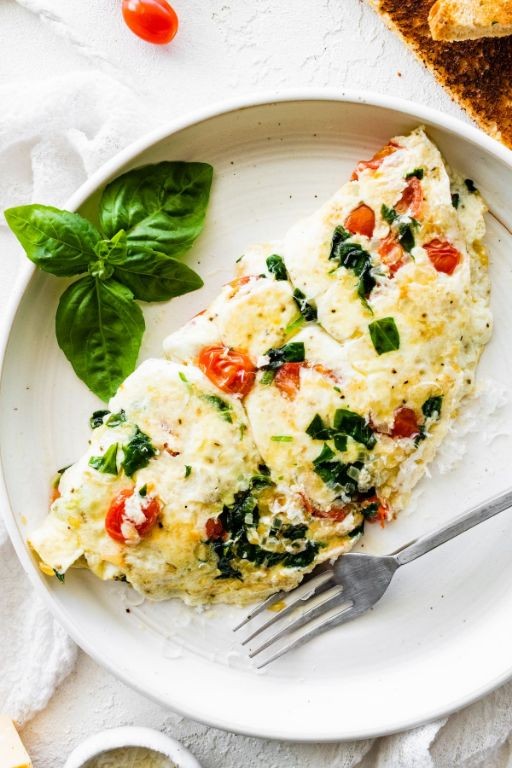
Dreading another bland, virtuous breakfast that tastes like cardboard? Ditch the dreary and dive into this fluffy, flavor-packed egg white omelette that’s so satisfying, you’ll forget it’s actually good for you—spinach included, no sad salads required!
Serving: 1 | Pre Time: 5 minutes | Cooking Time: 5 minutes
Ingredients
– 3 large egg whites
– 1 cup fresh spinach, packed
– 1/4 cup diced onion
– 1/4 cup diced bell pepper
– 1/4 cup shredded low-fat cheddar cheese
– 1 tbsp olive oil
– 1/4 tsp salt
– 1/4 tsp black pepper
Instructions
1. In a medium bowl, whisk 3 large egg whites with 1/4 tsp salt and 1/4 tsp black pepper until frothy, about 30 seconds—this adds air for a fluffier texture.
2. Heat 1 tbsp olive oil in a non-stick skillet over medium heat (about 350°F) until shimmering, about 1 minute.
3. Add 1/4 cup diced onion and 1/4 cup diced bell pepper to the skillet; sauté until softened and slightly golden, 2–3 minutes, stirring occasionally.
4. Stir in 1 cup fresh spinach and cook until just wilted, about 1 minute, then spread the vegetables evenly in the skillet.
5. Pour the whisked egg whites over the vegetables, tilting the skillet to cover them completely.
6. Cook undisturbed for 1–2 minutes until the edges set and the bottom is lightly golden; for even cooking, gently lift the edges with a spatula to let uncooked egg flow underneath.
7. Sprinkle 1/4 cup shredded low-fat cheddar cheese over one half of the omelette.
8. Fold the omelette in half with a spatula and cook for another 1–2 minutes until the cheese melts and the inside is fully set (no runny egg visible).
9. Slide the omelette onto a plate and let it rest for 1 minute before serving to firm up.
Mouthwatering and light, this omelette boasts a tender, airy texture with savory veggies and melty cheese in every bite. Serve it with a side of salsa for a zesty kick or wrap it in a whole-wheat tortilla for an on-the-go breakfast burrito—either way, it’s a delicious win for your morning routine!
Grilled Shrimp Skewers with Pineapple

Kick off your summer shindig with these sizzling skewers that’ll have your taste buds doing a happy dance—grilled shrimp and pineapple, a match made in beachy, breezy heaven! Seriously, it’s like a tropical vacation on a stick, minus the sunscreen smell.
Serving: 4 | Pre Time: 20 minutes | Cooking Time: 10 minutes
Ingredients
– 1.5 lbs large shrimp, peeled and deveined
– 2 cups fresh pineapple chunks (about 1-inch pieces)
– 3 tbsp olive oil
– 2 tbsp honey
– 2 tbsp soy sauce
– 2 cloves garlic, minced
– 1 tsp smoked paprika
– 1/2 tsp black pepper
– 8 wooden skewers, soaked in water for 30 minutes
Instructions
1. In a medium bowl, whisk together 3 tbsp olive oil, 2 tbsp honey, 2 tbsp soy sauce, 2 cloves minced garlic, 1 tsp smoked paprika, and 1/2 tsp black pepper until fully combined.
2. Add 1.5 lbs shrimp to the bowl, tossing to coat evenly in the marinade, and let it sit at room temperature for 15 minutes—this quick soak boosts flavor without making the shrimp mushy.
3. While the shrimp marinates, soak 8 wooden skewers in water for at least 30 minutes to prevent burning on the grill.
4. Preheat a grill or grill pan to medium-high heat, about 400°F, ensuring it’s hot enough for a good sear.
5. Thread the marinated shrimp and 2 cups pineapple chunks alternately onto the soaked skewers, leaving a small gap between pieces for even cooking.
6. Place the skewers on the preheated grill and cook for 3-4 minutes per side, or until the shrimp turn pink and opaque and the pineapple develops light grill marks.
7. Flip the skewers once halfway through cooking, using tongs to avoid piercing the shrimp and losing juices—this keeps them juicy and tender.
8. Remove the skewers from the grill and let them rest for 2 minutes before serving to allow the flavors to settle.
Wow, these skewers deliver a mouthwatering combo of sweet, smoky, and savory with a perfect char! The shrimp stay plump and succulent, while the pineapple caramelizes into juicy bursts of sunshine—serve them over a bed of rice or with a zesty cilantro-lime slaw for a full-on fiesta.
Lowfat Apple Cinnamon Muffins

Now, let’s be honest—who hasn’t dreamed of a muffin that’s both cozy enough for a holiday morning and virtuous enough to justify a second? These lowfat apple cinnamon muffins are here to make that dream a delicious reality, with a batter so forgiving you could probably stir it with a candy cane.
Serving: 12 | Pre Time: 15 minutes | Cooking Time: 20 minutes
Ingredients
– 1 ½ cups all-purpose flour
– ½ cup granulated sugar
– 1 ½ tsp baking powder
– ½ tsp baking soda
– 1 tsp ground cinnamon
– ¼ tsp salt
– 1 cup unsweetened applesauce
– ¼ cup vegetable oil
– 1 large egg
– 1 tsp vanilla extract
– 1 cup finely chopped apple (about 1 medium apple)
Instructions
1. Preheat your oven to 375°F and line a 12-cup muffin tin with paper liners or grease lightly.
2. In a large bowl, whisk together the all-purpose flour, granulated sugar, baking powder, baking soda, ground cinnamon, and salt until fully combined.
3. In a separate medium bowl, whisk the unsweetened applesauce, vegetable oil, large egg, and vanilla extract until smooth and emulsified.
4. Pour the wet ingredients into the dry ingredients and stir gently with a spatula until just combined—a few lumps are fine to avoid tough muffins.
5. Fold in the finely chopped apple until evenly distributed throughout the batter.
6. Divide the batter evenly among the prepared muffin cups, filling each about ⅔ full.
7. Bake in the preheated oven for 18–22 minutes, or until a toothpick inserted into the center of a muffin comes out clean.
8. Let the muffins cool in the tin for 5 minutes, then transfer to a wire rack to cool completely.
9. Store in an airtight container at room temperature for up to 3 days.
Unbelievably moist and tender, these muffins boast a soft crumb speckled with juicy apple bits and a warm cinnamon hug in every bite. Serve them warm with a dollop of Greek yogurt for a protein boost, or crumble one over oatmeal for a festive breakfast upgrade that’ll make your taste buds sing carols.
Summary
A fantastic collection of 19 low-fat recipes that prove healthy eating can be absolutely delicious! We hope these ideas inspire your kitchen adventures. Give a few a try, then drop a comment below to tell us your favorite—and don’t forget to share this roundup on Pinterest so your friends can enjoy it too. Happy cooking!


