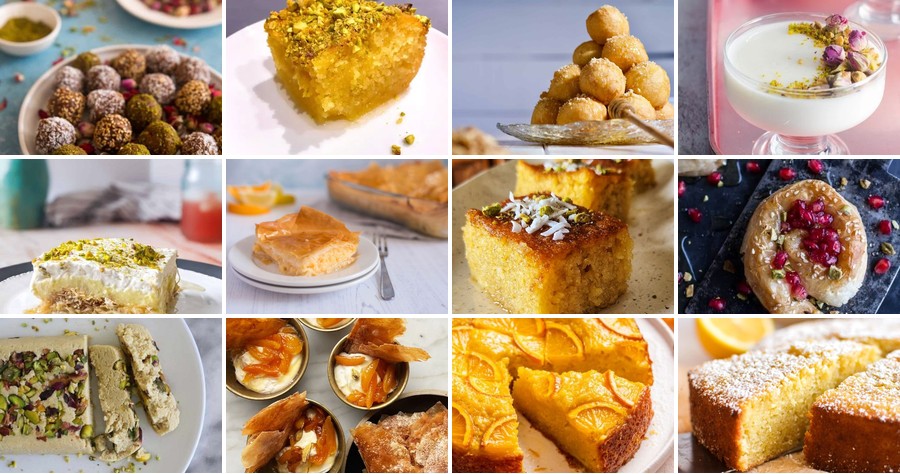
Dessert lovers, rejoice! If you’re craving something sweet but want to skip the heavy, overly rich treats, you’ve come to the right place. Mediterranean desserts are all about fresh ingredients, delicate flavors, and simple elegance. From honey-drenched pastries to citrus-infused delights, these recipes will transport your taste buds to sun-drenched shores. Ready to explore 20 irresistible options? Let’s dive in and satisfy that sweet tooth!
Baklava with Honey and Walnuts
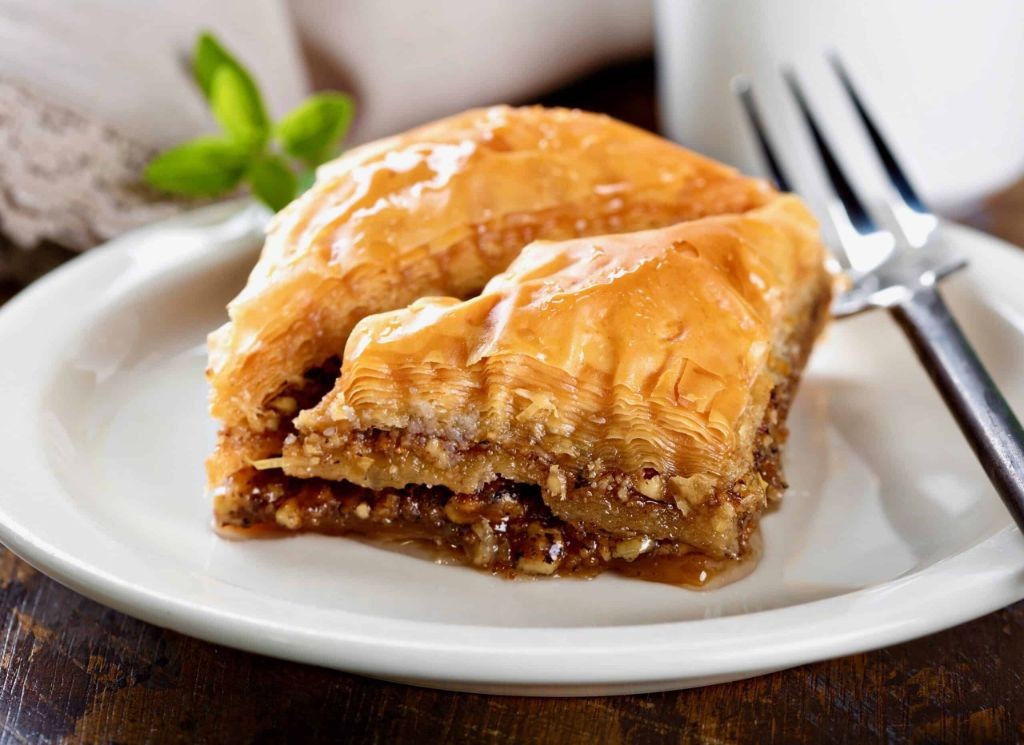
Finally, after years of trying to perfect a homemade version of my favorite Mediterranean dessert, I’ve landed on this baklava recipe that’s surprisingly approachable. It’s become my go-to for holiday gatherings—nothing beats the smell of toasted walnuts and honey wafting through the kitchen on a cozy December afternoon like today.
Serving: 24 pieces | Pre Time: 30 minutes | Cooking Time: 50 minutes
Ingredients
– 1 pound phyllo dough, thawed overnight in the fridge (I keep it wrapped in a damp towel to prevent drying)
– 4 cups walnuts, finely chopped (I pulse them in my food processor for a consistent texture)
– 1 cup unsalted butter, melted and cooled slightly (I always use European-style for its rich flavor)
– 1 teaspoon ground cinnamon
– 1/2 teaspoon ground cloves
– 1 1/2 cups granulated sugar
– 1 cup water
– 1 cup honey (I prefer local wildflower honey for its floral notes)
– 1 teaspoon vanilla extract
– 1/2 teaspoon lemon juice
Instructions
1. Preheat your oven to 350°F and grease a 9×13-inch baking dish with a bit of the melted butter.
2. In a medium bowl, combine the chopped walnuts, cinnamon, and cloves, mixing thoroughly with a spoon.
3. Unroll the phyllo dough and cover it with a damp towel to keep it from cracking as you work.
4. Place one sheet of phyllo in the baking dish, brush it lightly with melted butter, and repeat to layer 8 sheets total, buttering each one.
5. Sprinkle about 1/3 of the walnut mixture evenly over the phyllo layers.
6. Add 4 more phyllo sheets on top, buttering each one as before.
7. Sprinkle another 1/3 of the walnut mixture over the phyllo.
8. Layer 4 more phyllo sheets, buttering each one, and top with the remaining walnut mixture.
9. Finish with 8 final phyllo sheets, buttering each one, and brush the top generously with the remaining butter.
10. Using a sharp knife, cut the baklava into 24 diamond or square pieces, cutting all the way through to the bottom of the dish.
11. Bake in the preheated oven for 45–50 minutes, or until the top is golden brown and crisp.
12. While the baklava bakes, combine the sugar and water in a saucepan over medium heat, stirring until the sugar dissolves completely.
13. Bring the syrup to a boil, then reduce the heat and simmer for 10 minutes without stirring.
14. Remove the syrup from the heat and stir in the honey, vanilla extract, and lemon juice until smooth.
15. As soon as the baklava comes out of the oven, pour the hot syrup evenly over the top, aiming for the cuts to let it soak in.
16. Let the baklava cool completely at room temperature for at least 4 hours to allow the syrup to absorb fully.
Just imagine biting into a piece—the flaky, buttery layers give way to a crunchy walnut filling, all soaked in that sweet, spiced honey syrup. I love serving it slightly warm with a dollop of Greek yogurt or a sprinkle of crushed pistachios for an extra pop of color and flavor.
Greek Yogurt with Figs and Honey
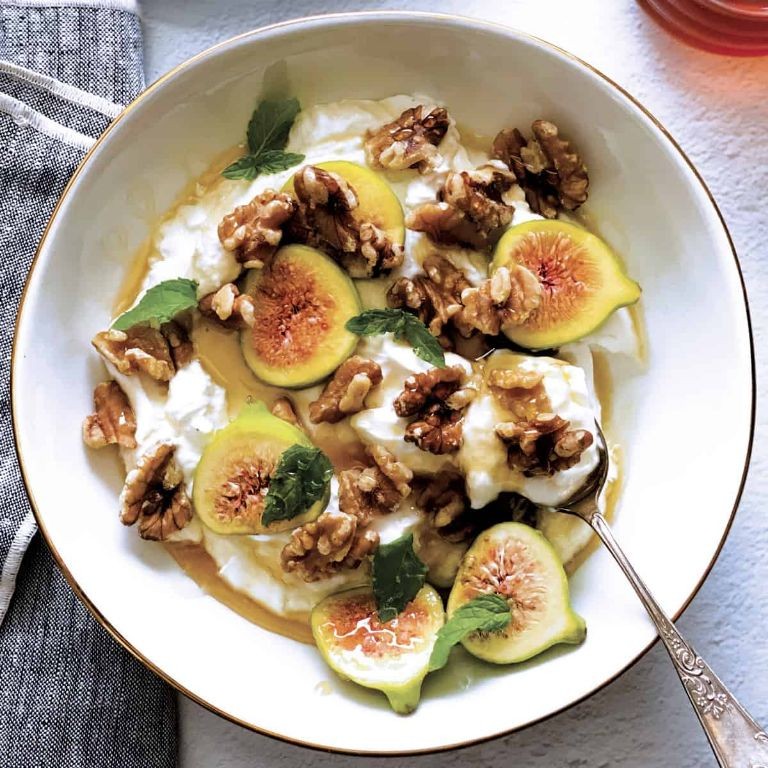
Whenever I’m craving something sweet yet wholesome, this Greek yogurt with figs and honey is my go-to—it’s the perfect balance of creamy, fruity, and just a hint of indulgence, and it always reminds me of lazy weekend brunches with my family.
Serving: 2 | Pre Time: 10 minutes | Cooking Time: 0 minutes
Ingredients
– 2 cups plain Greek yogurt (I always use full-fat for extra creaminess)
– 4 fresh figs, sliced (ripe figs are key for that natural sweetness)
– 2 tablespoons honey (local raw honey adds a lovely floral note)
– ¼ cup chopped walnuts (toasted walnuts give a nice crunch)
– 1 teaspoon vanilla extract (a splash of pure vanilla elevates everything)
Instructions
1. Place 2 cups of plain Greek yogurt into a medium mixing bowl.
2. Add 1 teaspoon of vanilla extract to the yogurt and stir gently until fully combined—this infuses the yogurt with flavor from the start.
3. Divide the yogurt mixture evenly between two serving bowls.
4. Slice 4 fresh figs into thin rounds, arranging them neatly on top of the yogurt in each bowl.
5. Drizzle 1 tablespoon of honey over each bowl, allowing it to pool around the figs for a beautiful presentation.
6. Sprinkle 2 tablespoons of chopped walnuts over each serving, ensuring an even distribution for texture.
7. Let the bowls sit at room temperature for 5 minutes to allow the flavors to meld together—this small wait makes a big difference.
8. Serve immediately while the walnuts are still crisp and the honey is slightly runny.
9. For an extra touch, you can lightly toast the walnuts in a dry skillet over medium heat for 3–4 minutes until fragrant before chopping, which enhances their nutty flavor.
Now, you’ll love how the creamy yogurt contrasts with the juicy figs and crunchy walnuts, while the honey ties it all together with its golden sweetness—try it drizzled with a bit of extra honey or paired with a cup of herbal tea for a cozy treat.
Loukoumades (Greek Honey Puffs)
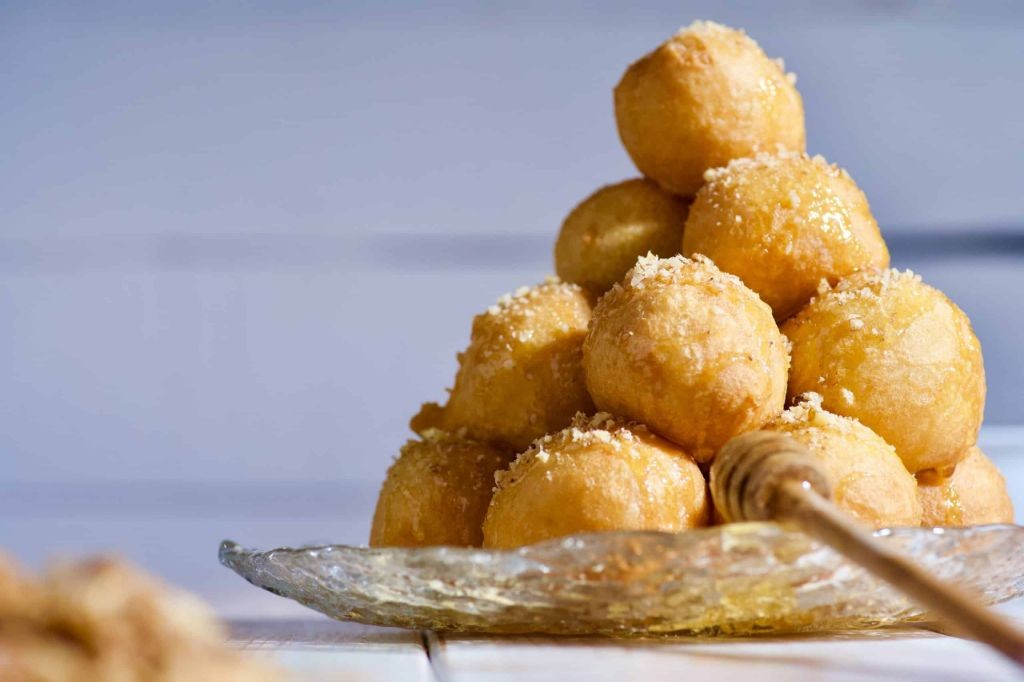
Unbelievably, I first tried these golden, honey-drenched puffs at a Greek festival years ago, and I’ve been hooked ever since—they’re the perfect cozy treat for a chilly December afternoon like today. My family now requests them every holiday season, and I love how the kitchen fills with that warm, sweet aroma while they fry.
Serving: 4 | Pre Time: 15 minutes | Cooking Time: 20 minutes
Ingredients
– 1 cup all-purpose flour (I always sift mine first for fluffier puffs)
– 1 tsp active dry yeast (check the expiration date—fresh yeast makes all the difference)
– 1 tbsp granulated sugar
– ½ cup warm water (around 110°F, just warm to the touch)
– ¼ tsp salt
– Vegetable oil for frying (I use about 2 cups in a deep pot)
– ½ cup honey (local wildflower honey is my favorite for its floral notes)
– 1 tsp ground cinnamon
– ½ cup chopped walnuts (toasted lightly for extra crunch)
Instructions
1. In a large bowl, combine 1 cup all-purpose flour, 1 tsp active dry yeast, 1 tbsp granulated sugar, and ¼ tsp salt.
2. Gradually add ½ cup warm water to the dry ingredients, stirring until a smooth, sticky dough forms. Tip: Let the dough rest for 10 minutes covered with a towel—it helps the yeast activate.
3. Heat vegetable oil in a deep pot over medium heat until it reaches 350°F, using a thermometer for accuracy.
4. Scoop teaspoon-sized portions of the dough and carefully drop them into the hot oil. Tip: Fry in batches to avoid overcrowding, which keeps the oil temperature steady.
5. Fry the puffs for 2-3 minutes, turning occasionally, until they are golden brown and puffed up.
6. Remove the puffs with a slotted spoon and drain them on paper towels. Tip: Let them cool slightly before coating so the honey sticks better.
7. In a small saucepan, warm ½ cup honey over low heat for 1-2 minutes until it’s thin and runny, then stir in 1 tsp ground cinnamon.
8. Drizzle the warm honey mixture over the puffs, tossing gently to coat evenly.
9. Sprinkle ½ cup chopped walnuts over the top for added texture.
Now, these loukoumades are best served warm—the contrast of the crispy exterior with the soft, airy inside is pure bliss. I love pairing them with a strong coffee or even drizzling extra honey for a decadent twist.
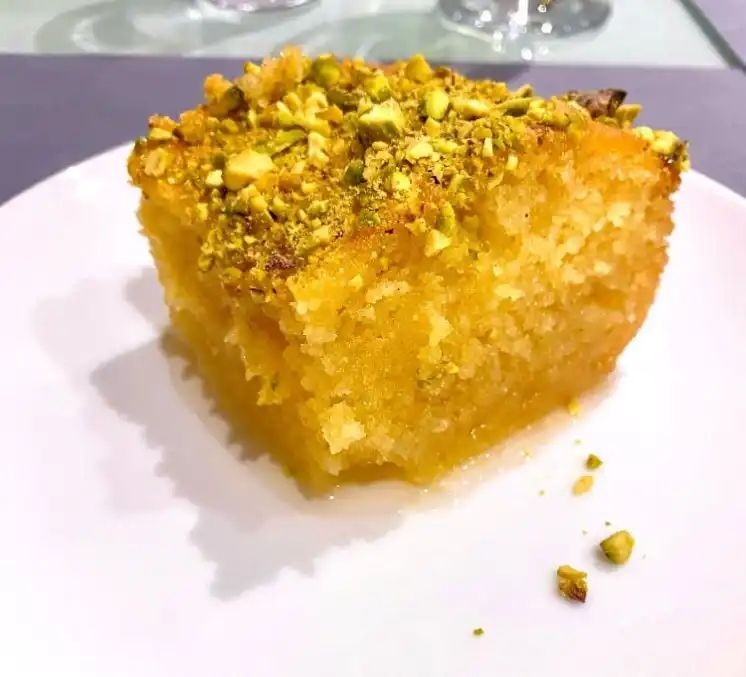
Revani (Semolina Cake with Syrup)

Picture this: it’s a cozy winter afternoon, and the scent of orange blossom and butter fills my kitchen. That’s the magic of Revani, a tender semolina cake soaked in fragrant syrup that’s become my go-to for holiday gatherings—it’s sweet, aromatic, and always a crowd-pleaser.
Serving: 12 | Pre Time: 15 minutes | Cooking Time: 40 minutes
Ingredients
- 1 cup fine semolina (I love Bob’s Red Mill for its consistent texture)
- 1 cup all-purpose flour (I always sift mine to avoid lumps)
- 1 cup granulated sugar (for the cake batter—it gives a lovely golden crust)
- 1 cup plain yogurt (full-fat is my preference for extra moisture)
- 3 large eggs (room temperature helps them blend smoothly)
- ½ cup unsalted butter, melted (I use Kerrygold for its rich flavor)
- 1 tsp baking powder (freshly opened for maximum lift)
- 1 tsp vanilla extract (pure vanilla makes all the difference)
- For the syrup: 2 cups water, 2 cups sugar, 1 tbsp lemon juice, and 1 tsp orange blossom water (my secret for a floral aroma)
Instructions
- Preheat your oven to 350°F and grease a 9×13-inch baking pan with butter.
- In a large bowl, whisk together the semolina, flour, and baking powder until combined.
- In another bowl, beat the eggs and 1 cup sugar with an electric mixer on medium speed for 3 minutes until pale and fluffy.
- Add the yogurt, melted butter, and vanilla extract to the egg mixture, mixing on low until smooth.
- Gradually fold the dry ingredients into the wet mixture with a spatula, mixing just until no streaks remain—overmixing can make the cake dense.
- Pour the batter into the prepared pan and spread it evenly with a spatula.
- Bake for 35–40 minutes, until the top is golden brown and a toothpick inserted in the center comes out clean.
- While the cake bakes, make the syrup: in a saucepan, combine 2 cups water, 2 cups sugar, and lemon juice, then bring to a boil over medium-high heat.
- Reduce the heat to low and simmer the syrup for 10 minutes, stirring occasionally, until it slightly thickens.
- Remove the syrup from heat and stir in the orange blossom water, then let it cool to room temperature.
- As soon as the cake comes out of the oven, use a skewer to poke holes all over the surface.
- Slowly pour the cooled syrup over the hot cake, letting it absorb fully—this keeps the cake moist without becoming soggy.
- Let the cake cool completely in the pan for at least 2 hours before slicing.
You’ll love the tender, slightly spongy texture that soaks up every drop of syrup, with a hint of citrus and floral notes from the orange blossom. I often serve it with a dollop of whipped cream or fresh berries for a bright contrast, and it’s perfect with a cup of tea on a chilly day.
Halva with Tahini and Pistachios
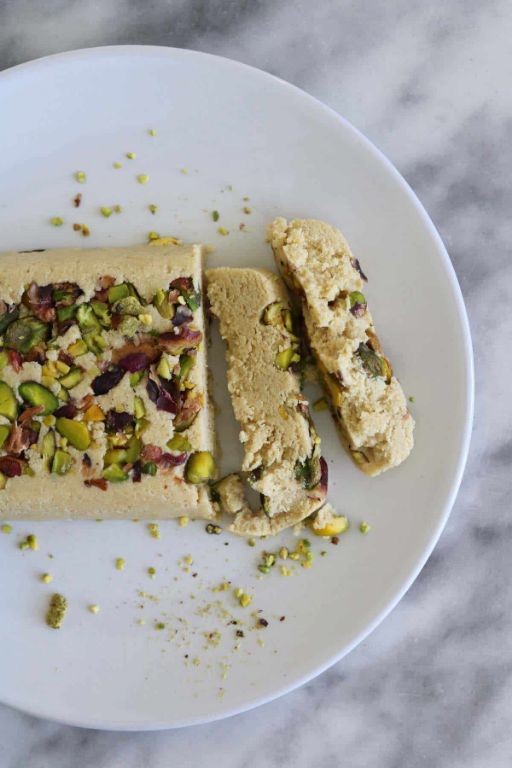
Tis the season for cozy treats, and this Halva with Tahini and Pistachios is my go-to for a quick, satisfying dessert that feels both nostalgic and new—I first tried it at a friend’s holiday party last year and have been tweaking the recipe ever since to get that perfect crumbly-yet-moist texture. Serving: 8 | Pre Time: 10 minutes | Cooking Time: 20 minutes
Ingredients
– 1 cup tahini (I always use a well-stirred, runny tahini for smoother blending)
– 1 cup granulated sugar
– 1/2 cup water
– 1/2 cup shelled pistachios, roughly chopped (I toast mine lightly for extra crunch)
– 1 teaspoon vanilla extract (pure vanilla is my preference for a warm aroma)
Instructions
1. In a medium saucepan over medium heat, combine 1 cup granulated sugar and 1/2 cup water, stirring gently until the sugar dissolves completely.
2. Attach a candy thermometer to the saucepan and cook the syrup without stirring until it reaches 250°F (hard-ball stage), which takes about 10-12 minutes—tip: avoid stirring to prevent crystallization.
3. Remove the saucepan from heat and immediately stir in 1 teaspoon vanilla extract using a heat-resistant spatula.
4. In a large mixing bowl, pour 1 cup tahini and gradually add the hot sugar syrup while whisking continuously to combine evenly.
5. Fold in 1/2 cup chopped pistachios until they are distributed throughout the mixture—tip: work quickly before the mixture sets to ensure a smooth texture.
6. Transfer the mixture to a parchment-lined 8×8-inch baking dish, pressing it down firmly with the back of a spoon to create an even layer.
7. Let the halva cool at room temperature for 30 minutes, then refrigerate for at least 2 hours until firm—tip: chilling helps it slice cleanly without crumbling.
8. Cut the halva into squares or bars and serve immediately. The halva has a rich, nutty flavor from the tahini, with a delightful crunch from the pistachios that pairs perfectly with a cup of coffee or as a sweet snack on its own; try drizzling it with honey or sprinkling with sea salt for a creative twist.
Kataifi (Shredded Phyllo Dessert)
You know, I used to think phyllo dough was intimidating until I discovered kataifi—it’s like the fun, shredded cousin that’s way more forgiving. Years ago, a Greek neighbor brought over a pan of this golden, nutty dessert during the holidays, and I’ve been hooked ever since; now, it’s my go‑to when I want something impressive but surprisingly simple to pull together.
Serving: 12 | Pre Time: 20 minutes | Cooking Time: 35 minutes
Ingredients
– 1 pound kataifi dough (thawed overnight in the fridge—trust me, it handles better cold)
– 1 cup unsalted butter, melted (I always use European‑style for its rich flavor)
– 1 ½ cups walnuts, finely chopped (pecans work too, but walnuts give that classic crunch)
– ½ cup granulated sugar
– 1 teaspoon ground cinnamon
– ½ cup honey (local wildflower honey is my favorite here)
– 1 cup water
– 1 tablespoon fresh lemon juice (a squeeze from half a lemon does the trick)
– ½ teaspoon vanilla extract (pure vanilla makes all the difference)
Instructions
1. Preheat your oven to 350°F and lightly grease a 9×13‑inch baking dish with some of the melted butter.
2. In a medium bowl, combine the chopped walnuts, granulated sugar, and ground cinnamon until evenly mixed.
3. Gently separate the thawed kataifi dough into strands with your fingers, taking care not to compact it—this keeps it light and flaky.
4. Spread half of the kataifi evenly in the prepared baking dish, then drizzle half of the melted butter over it using a spoon for even coverage.
5. Sprinkle all of the walnut‑sugar mixture evenly over the kataifi layer in the dish.
6. Top with the remaining kataifi, spreading it loosely, and drizzle the rest of the melted butter over the top.
7. Bake in the preheated oven for 30–35 minutes, or until the kataifi is deeply golden brown and crisp to the touch.
8. While baking, make the syrup: in a small saucepan over medium heat, combine the honey, water, lemon juice, and vanilla extract.
9. Bring the syrup to a boil, then reduce the heat and simmer for 10 minutes, stirring occasionally, until it slightly thickens—it should coat the back of a spoon.
10. Remove the baked kataifi from the oven and immediately pour the hot syrup evenly over the top, listening for that satisfying sizzle.
11. Let the dessert cool completely in the dish, about 2 hours, to allow the syrup to soak in and the layers to set.
12. Once cooled, cut into squares or diamonds for serving.
A crispy, buttery top gives way to a sweet, nut‑filled center that’s perfectly moist from the honey syrup. I love serving it slightly warm with a dollop of thick Greek yogurt or a scoop of vanilla ice cream to balance the sweetness—it’s always the first dessert to disappear at potlucks!
Galaktoboureko (Custard Pie with Phyllo)
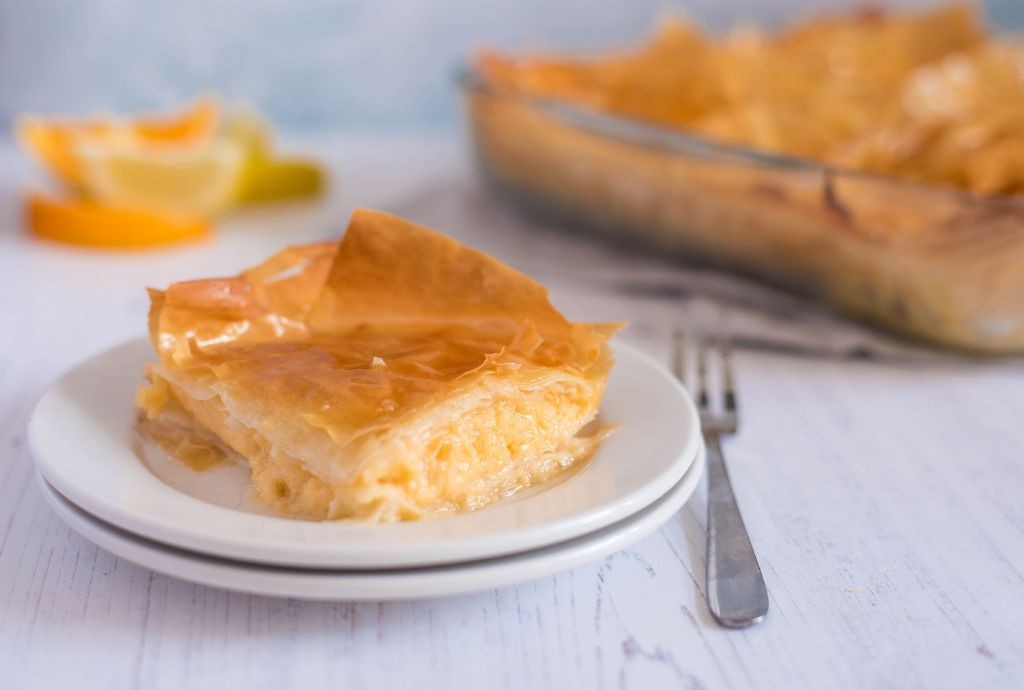
Venturing into Greek desserts always feels like a warm embrace from a yiayia (grandmother) I never had, and this Galaktoboureko—a luscious custard pie wrapped in crisp, buttery phyllo—is my ultimate comfort food. I first fell for its creamy, citrus-kissed filling at a tiny bakery in Astoria, and after many attempts (and a few soggy bottoms), I’ve nailed a home version that’s surprisingly doable, even for phyllo newbies. Trust me, the moment you pull this golden beauty from the oven, your kitchen will smell like a Mediterranean dream.
Serving: 12 | Pre Time: 30 minutes | Cooking Time: 60 minutes
Ingredients
– 1 package (16 oz) phyllo dough, thawed overnight in the fridge—I keep it wrapped in a damp towel to prevent drying.
– 1 cup unsalted butter, melted (I use European-style for its richer flavor).
– 4 cups whole milk, warmed to about 110°F—this helps the custard thicken smoothly.
– 1 cup granulated sugar, plus ½ cup for the syrup.
– 1 cup fine semolina flour, my secret for that perfect, pudding-like texture.
– 4 large eggs, at room temperature so they blend easily without curdling.
– 1 tsp vanilla extract, pure if you have it for that warm aroma.
– Zest of 1 lemon, freshly grated—it brightens the whole dish.
– 1 cup water for the syrup.
– 1 cinnamon stick for steeping in the syrup, which adds a subtle spice.
Instructions
1. Preheat your oven to 350°F and grease a 9×13-inch baking dish lightly with some of the melted butter.
2. In a medium saucepan over medium heat, warm the 4 cups of milk until it reaches 110°F, stirring occasionally to prevent a skin from forming—this takes about 5 minutes.
3. In a large bowl, whisk together 1 cup of granulated sugar, 1 cup of semolina flour, and the zest of 1 lemon until well combined.
4. Slowly pour the warmed milk into the sugar mixture, whisking constantly to avoid lumps, then return it to the saucepan.
5. Cook the mixture over medium-low heat, stirring continuously with a wooden spoon, until it thickens to a pudding consistency, about 10-12 minutes; it should coat the back of the spoon.
6. Remove the saucepan from the heat and let the custard cool for 5 minutes, then whisk in 4 room-temperature eggs one at a time, followed by 1 tsp of vanilla extract.
7. Layer half of the phyllo sheets in the prepared baking dish, brushing each sheet generously with melted butter—I work quickly to keep them from drying out.
8. Spread the custard evenly over the phyllo layers using a spatula.
9. Top with the remaining phyllo sheets, brushing each with butter, then tuck in any overhanging edges and score the top into 12 squares with a sharp knife.
10. Bake in the preheated oven for 45-50 minutes, until the top is golden brown and crisp.
11. While baking, make the syrup: in a small saucepan, combine ½ cup of sugar, 1 cup of water, and 1 cinnamon stick; bring to a boil, then simmer for 10 minutes until slightly thickened.
12. Remove the baked pie from the oven and immediately pour the hot syrup evenly over the top, discarding the cinnamon stick.
13. Let the Galaktoboureko cool completely at room temperature for at least 2 hours to set—this patience pays off with clean slices.
Perfectly balanced between creamy and crisp, each bite of this pie offers a hint of lemon that cuts through the sweetness. I love serving it slightly chilled with a dusting of powdered sugar or a dollop of whipped cream for an extra indulgent touch—it’s a showstopper at holiday gatherings or a cozy treat with afternoon coffee.
Turkish Delight (Rose-Flavored Lokum)
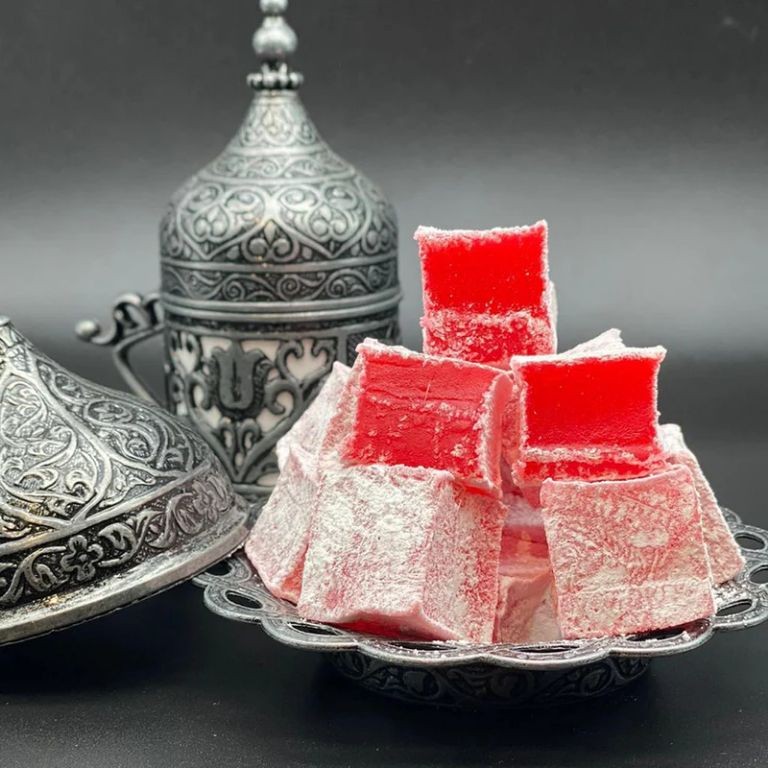
Whenever I think of Turkish delight, I’m transported back to a tiny Istanbul spice market where I first tasted this fragrant confection. Today, I’m sharing my homemade rose-flavored lokum recipe that’s surprisingly simple to make, though it requires a bit of patience—trust me, the payoff is worth every sticky-fingered moment.
Serving: 36 pieces | Pre Time: 15 minutes | Cooking Time: 45 minutes
Ingredients
– 2 cups granulated sugar (I always use organic cane sugar for a cleaner sweetness)
– 1 cup water (filtered water makes a difference in delicate recipes like this)
– 1 cup cornstarch (this creates that signature chewy texture—don’t substitute)
– 1 teaspoon cream of tartar (my secret weapon for perfect texture every time)
– 1 tablespoon rose water (look for food-grade rose water, not the cosmetic kind!)
– 2-3 drops red food coloring (optional, but it gives that beautiful pink hue)
– 1 cup powdered sugar for dusting (I sift mine to avoid lumps)
– 1/2 cup cornstarch for dusting (this prevents sticking better than powdered sugar alone)
Instructions
1. Line an 8×8-inch baking pan with parchment paper, leaving overhang on two sides for easy removal later.
2. In a medium saucepan, combine 2 cups granulated sugar and 1 cup water over medium heat.
3. Stir constantly with a wooden spoon until the sugar completely dissolves, about 3-4 minutes.
4. In a separate bowl, whisk together 1 cup cornstarch and 1 teaspoon cream of tartar until no lumps remain.
5. Slowly pour the cornstarch mixture into the sugar syrup while whisking vigorously to prevent clumping.
6. Reduce heat to low and cook the mixture for 45 minutes, stirring every 5 minutes with a silicone spatula.
7. Watch for the mixture to thicken significantly and turn translucent—it should pull away from the sides of the pan when ready.
8. Remove from heat and stir in 1 tablespoon rose water and 2-3 drops red food coloring until fully incorporated.
9. Immediately pour the hot mixture into your prepared pan, smoothing the top with an offset spatula.
10. Let the Turkish delight cool at room temperature for 4 hours uncovered, then cover with plastic wrap.
11. Refrigerate for 24 hours to fully set—this waiting period is crucial for the proper texture.
12. Mix 1 cup powdered sugar and 1/2 cup cornstarch in a shallow bowl for your dusting mixture.
13. Turn the set Turkish delight onto a cutting board dusted with some of your sugar-cornstarch mixture.
14. Cut into 1-inch squares using a sharp knife wiped clean between cuts for neat edges.
15. Toss each piece in the remaining sugar-cornstarch mixture until completely coated on all sides.
Kneading the finished squares in the coating mixture ensures they won’t stick together. The texture should be firm yet yielding, with a floral aroma that fills the room. I love serving these on a decorative plate with strong Turkish coffee, or gifting them in pretty boxes lined with parchment paper—they make the most thoughtful homemade present.
Basbousa (Semolina and Coconut Cake)
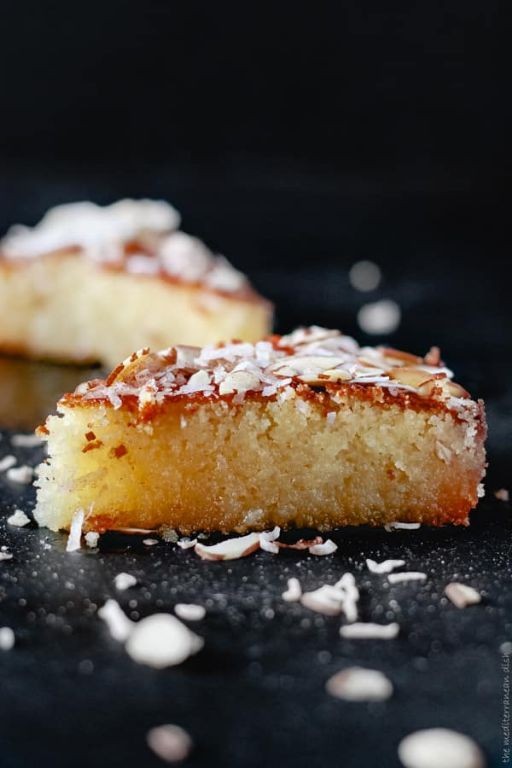
Last weekend, my neighbor brought over a slice of this Middle Eastern gem, and I knew I had to recreate it immediately. There’s something magical about basbousa—its sweet, syrupy soak and tender crumb feel like a warm hug, perfect for holiday gatherings or a cozy afternoon treat. I’ve tweaked it slightly over the years to add a bit more coconut, which gives it an extra tropical flair that my family adores.
Serving: 12 | Pre Time: 15 minutes | Cooking Time: 35 minutes
Ingredients
– 2 cups fine semolina (I like Bob’s Red Mill for its consistent texture)
– 1 cup unsweetened shredded coconut (toasted lightly for a nuttier flavor, if you prefer)
– 1 cup granulated sugar
– 1 cup plain yogurt (full-fat gives the best moisture, in my opinion)
– ½ cup unsalted butter, melted (I always use Kerrygold for its rich taste)
– 1 tsp baking powder
– ½ tsp vanilla extract (pure vanilla makes a difference here)
– For the syrup: 1 cup sugar, ½ cup water, 1 tbsp lemon juice, and 1 tsp rose water (optional, but it adds a lovely floral note)
Instructions
1. Preheat your oven to 350°F (175°C) and grease a 9×13-inch baking pan lightly with butter or cooking spray.
2. In a large mixing bowl, combine 2 cups fine semolina, 1 cup unsweetened shredded coconut, 1 cup granulated sugar, and 1 tsp baking powder, whisking them together until evenly mixed.
3. Add 1 cup plain yogurt, ½ cup melted unsalted butter, and ½ tsp vanilla extract to the dry ingredients, stirring with a spatula until a thick, cohesive batter forms—no dry spots should remain.
4. Tip: Let the batter rest for 10 minutes; this allows the semolina to absorb moisture for a softer texture.
5. Spread the batter evenly into the prepared pan, smoothing the top with the back of a spoon or an offset spatula.
6. Bake in the preheated oven for 30-35 minutes, or until the top turns golden brown and a toothpick inserted into the center comes out clean.
7. While the cake bakes, make the syrup: In a small saucepan over medium heat, combine 1 cup sugar, ½ cup water, and 1 tbsp lemon juice, stirring until the sugar dissolves completely.
8. Bring the syrup to a gentle boil, then reduce the heat and simmer for 10 minutes until it slightly thickens; remove from heat and stir in 1 tsp rose water if using.
9. Tip: Cool the syrup for 5 minutes before pouring—this prevents the cake from becoming soggy.
10. As soon as the cake comes out of the oven, pour the warm syrup evenly over the hot surface, letting it soak in fully.
11. Tip: Score the cake into diamond or square shapes while it’s still warm for easier serving later.
12. Allow the cake to cool completely in the pan, about 1-2 hours, before cutting and serving.
Crunchy on top yet wonderfully moist inside, this basbousa melts in your mouth with every bite, its coconut and semolina pairing beautifully with the sweet, lemony syrup. I love serving it with a dollop of whipped cream or alongside a strong cup of coffee for a delightful contrast—it’s sure to become a favorite in your home too.
Mahalabia (Middle Eastern Milk Pudding)
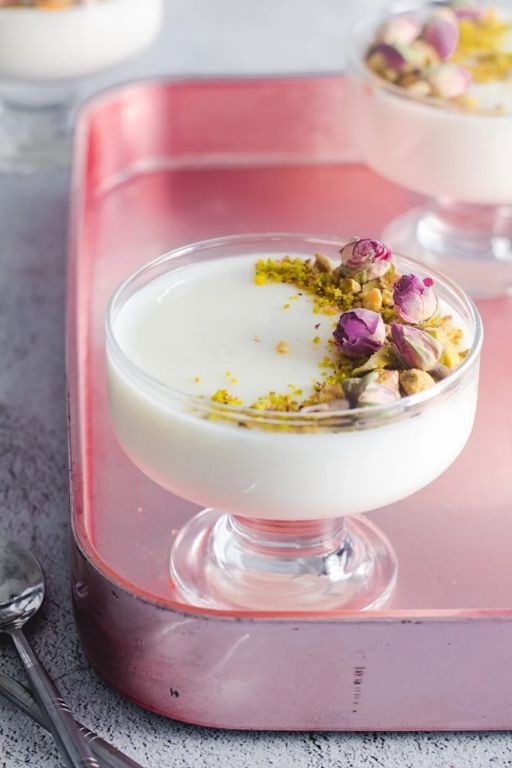
Finally, after years of trying to recreate my Lebanese grandmother’s silky, rose-scented dessert, I’ve nailed the perfect Mahalabia—a Middle Eastern milk pudding that’s become my go-to for easy, elegant gatherings. It’s a nostalgic treat I love making on lazy Sundays, and today, I’m sharing my foolproof version that always reminds me of her cozy kitchen.
Serving: 6 | Pre Time: 10 minutes | Cooking Time: 15 minutes
Ingredients
– 4 cups whole milk (I swear by organic for a richer flavor—it makes all the difference!)- ½ cup granulated sugar (adjust if you like it less sweet, but this is my sweet spot)- ½ cup cornstarch (I always sift mine to avoid lumps)- 1 teaspoon rose water (my secret: a high-quality brand like Cortas for that authentic floral note)- ¼ cup chopped pistachios (for topping; I toast them lightly for extra crunch)- 1 tablespoon orange blossom water (optional, but I add it for a subtle citrusy aroma)
Instructions
1. In a medium saucepan, combine 4 cups whole milk and ½ cup granulated sugar over medium heat, stirring constantly with a whisk until the sugar dissolves completely, about 3–4 minutes. Tip: Keep the heat medium to prevent scorching—I learned this the hard way!
2. In a small bowl, mix ½ cup cornstarch with ¼ cup of the warm milk mixture from the saucepan to form a smooth slurry, ensuring no lumps remain.
3. Slowly pour the cornstarch slurry back into the saucepan while whisking continuously to incorporate it evenly into the milk.
4. Increase the heat to medium-high and cook the mixture, whisking constantly, until it thickens to a pudding-like consistency that coats the back of a spoon, about 8–10 minutes. Tip: Don’t stop whisking—this prevents any clumps from forming and ensures a silky texture.
5. Remove the saucepan from the heat and immediately stir in 1 teaspoon rose water and 1 tablespoon orange blossom water (if using), mixing well to distribute the flavors evenly.
6. Pour the pudding into 6 individual serving bowls or a large dish, smoothing the tops with a spatula. Tip: Let it cool at room temperature for 10 minutes before refrigerating to avoid condensation on top.
7. Cover the bowls with plastic wrap, pressing it directly onto the surface of the pudding to prevent a skin from forming, and refrigerate for at least 4 hours or until fully set and chilled.
8. Just before serving, sprinkle ¼ cup chopped pistachios over the top of each pudding for a crunchy garnish.
Ultimately, this Mahalabia sets into a velvety, jiggly delight with a delicate floral aroma that’s pure comfort. I love serving it chilled with extra pistachios or a drizzle of honey for a touch of sweetness—it’s perfect for ending a meal on a light, dreamy note.
Ekmek Kataifi (Shredded Phyllo with Custard)

Finally, let me share a dessert that’s become my go‑to for holiday gatherings—Ekmek Kataifi, a luscious Greek treat of crisp shredded phyllo layered with velvety custard and a hint of citrus. I first tasted it at a friend’s potluck and spent months tweaking my version to get that perfect balance of crunch and creaminess. Trust me, it’s easier than it looks and always earns rave reviews!
Serving: 12 | Pre Time: 20 minutes | Cooking Time: 45 minutes
Ingredients
– 1 pound kataifi (shredded phyllo dough), thawed overnight in the fridge—I find this prevents it from drying out.
– 1 cup unsalted butter, melted; I use European-style for its rich flavor.
– 4 cups whole milk, warmed slightly to avoid curdling the eggs later.
– 1 cup granulated sugar, divided; I keep half for the syrup and half for the custard.
– 4 large eggs, at room temperature—they blend more smoothly into the custard.
– ½ cup cornstarch, sifted to avoid lumps in the custard.
– 1 teaspoon vanilla extract; pure vanilla is my preference for its depth.
– Zest of 1 orange, finely grated for a bright, aromatic touch.
– 1 cup heavy whipping cream, chilled for the topping.
– ¼ cup chopped pistachios, for garnish—toasted lightly if you have time.
Instructions
1. Preheat your oven to 350°F and grease a 9×13-inch baking dish with a bit of the melted butter.
2. Separate the kataifi strands gently with your fingers and spread them evenly in the prepared dish.
3. Drizzle the remaining melted butter over the kataifi, using a pastry brush to coat every strand for even browning.
4. Bake the kataifi for 25–30 minutes, until golden brown and crisp; rotate the dish halfway through for uniform cooking.
5. While baking, combine ½ cup sugar and ½ cup water in a small saucepan over medium heat, stirring until the sugar dissolves completely.
6. Simmer the syrup for 5 minutes, then remove from heat and stir in the orange zest; let it cool slightly.
7. In a medium bowl, whisk the eggs with the remaining ½ cup sugar until pale and frothy, about 2 minutes.
8. In a separate saucepan, heat the milk over medium-low until it just begins to steam, but do not boil.
9. Gradually whisk the warm milk into the egg mixture, then return everything to the saucepan.
10. Add the cornstarch and cook over medium heat, stirring constantly with a wooden spoon, until the custard thickens and coats the back of the spoon, about 8–10 minutes.
11. Remove the custard from heat and stir in the vanilla extract; let it cool for 5 minutes, stirring occasionally to prevent a skin from forming.
12. Pour the warm syrup evenly over the baked kataifi layer, allowing it to soak in for 10 minutes.
13. Spread the custard over the syrup-soaked kataifi, smoothing the top with a spatula.
14. Refrigerate the dessert for at least 4 hours, or until fully set and chilled.
15. Just before serving, whip the heavy cream to stiff peaks and spread it over the custard layer.
16. Sprinkle the chopped pistachios over the whipped cream for garnish.
Layers of crisp phyllo give way to a silky, citrus-kissed custard that’s not too sweet—it’s a textural dream! I love serving it chilled in squares, maybe with a drizzle of honey or a sprinkle of cinnamon for extra warmth. Leftovers (if there are any!) keep beautifully in the fridge for up to three days.
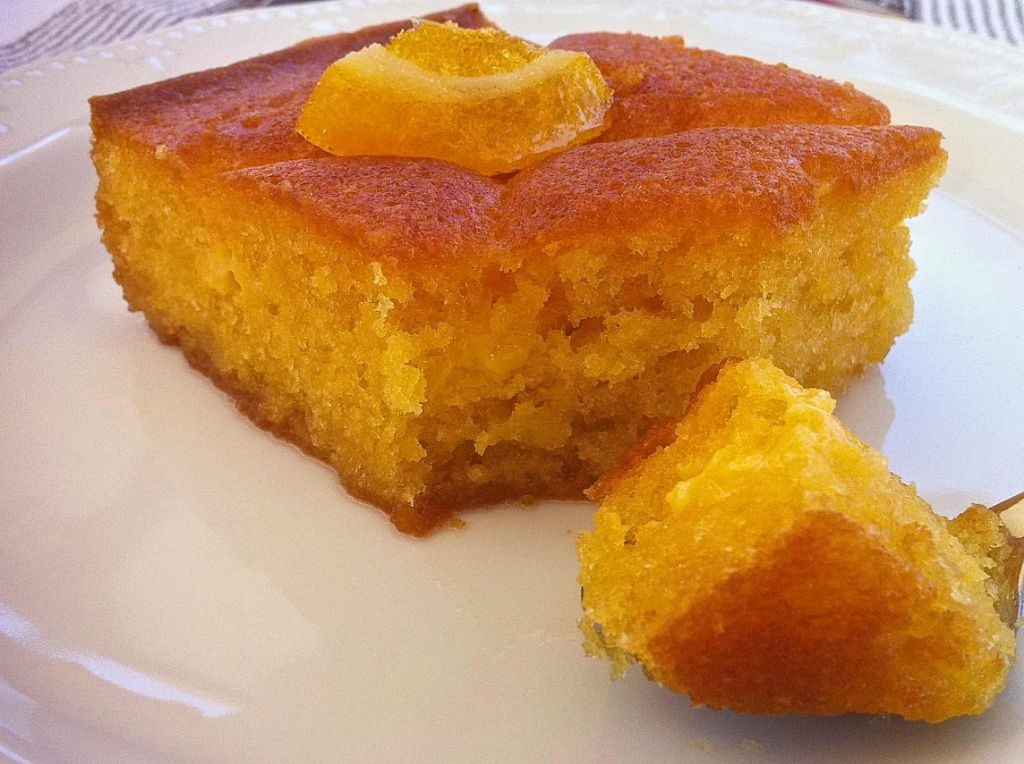
Portokalopita (Orange Phyllo Cake)
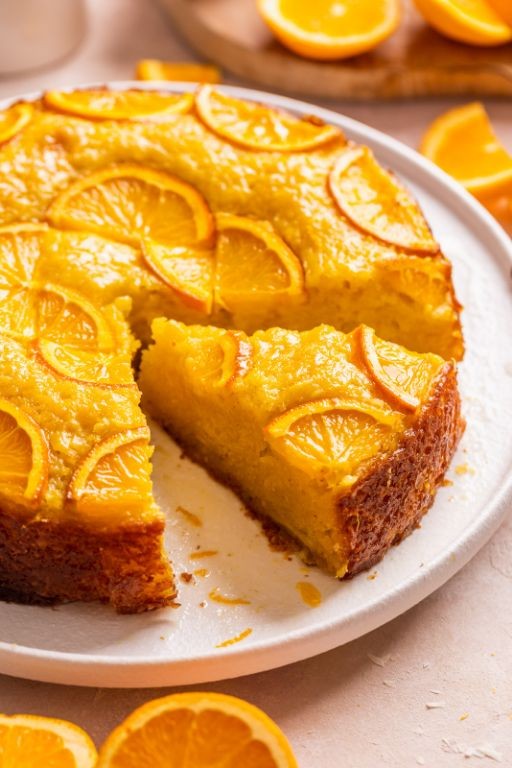
Whenever I need a dessert that feels both festive and comforting, especially around the holidays, I turn to this Greek-inspired Portokalopita. It’s a wonderfully moist orange cake made with shredded phyllo dough that soaks up a sweet citrus syrup, and it always reminds me of the time my friend Maria brought it to a potluck—everyone begged for the recipe! Serving: 12 | Pre Time: 20 minutes | Cooking Time: 45 minutes
Ingredients
– 1 pound phyllo dough, thawed (I find letting it sit at room temp for 2 hours prevents tearing)
– 4 large eggs, at room temperature for better mixing
– 1 cup granulated sugar
– 1 cup plain Greek yogurt (full-fat gives the richest texture)
– 1 cup vegetable oil (I sometimes use a light olive oil for a subtle fruitiness)
– Zest and juice of 2 large oranges (about ¾ cup juice—freshly squeezed is key!)
– 1 teaspoon baking powder
– For the syrup: 1 cup granulated sugar, 1 cup water, and the juice of 1 orange (I add a cinnamon stick while simmering for extra warmth)
Instructions
1. Preheat your oven to 350°F and grease a 9×13-inch baking pan lightly with oil.
2. Unroll the phyllo dough and let it air-dry for 10 minutes to make it easier to handle, then shred it into small pieces with your hands into a large bowl.
3. In a separate bowl, whisk the eggs and 1 cup sugar together for 2-3 minutes until pale and slightly fluffy.
4. Add the Greek yogurt, 1 cup oil, orange zest, and ¾ cup orange juice to the egg mixture, whisking until fully combined.
5. Sprinkle the baking powder over the wet ingredients and whisk for another 30 seconds to incorporate evenly.
6. Pour the wet mixture over the shredded phyllo in the large bowl and use a spatula to fold gently until all pieces are coated—avoid overmixing to keep the texture light.
7. Transfer the batter to the prepared pan, spreading it evenly with the spatula.
8. Bake in the preheated oven for 40-45 minutes, or until the top is golden brown and a toothpick inserted into the center comes out clean.
9. While the cake bakes, make the syrup: in a small saucepan over medium heat, combine 1 cup sugar, 1 cup water, and the juice of 1 orange, stirring until the sugar dissolves.
10. Bring the syrup to a boil, then reduce the heat to low and simmer for 10 minutes until slightly thickened; remove from heat and discard the cinnamon stick if used.
11. As soon as the cake comes out of the oven, pour the warm syrup evenly over the hot cake, letting it soak in for at least 2 hours at room temperature.
12. Slice the cake into squares and serve at room temperature or chilled. Soaking in the syrup, this cake becomes incredibly moist with a bright orange flavor that’s not too sweet. Serve it with a dollop of whipped cream or a sprinkle of powdered sugar for an extra festive touch—it’s perfect for brunches or holiday gatherings!
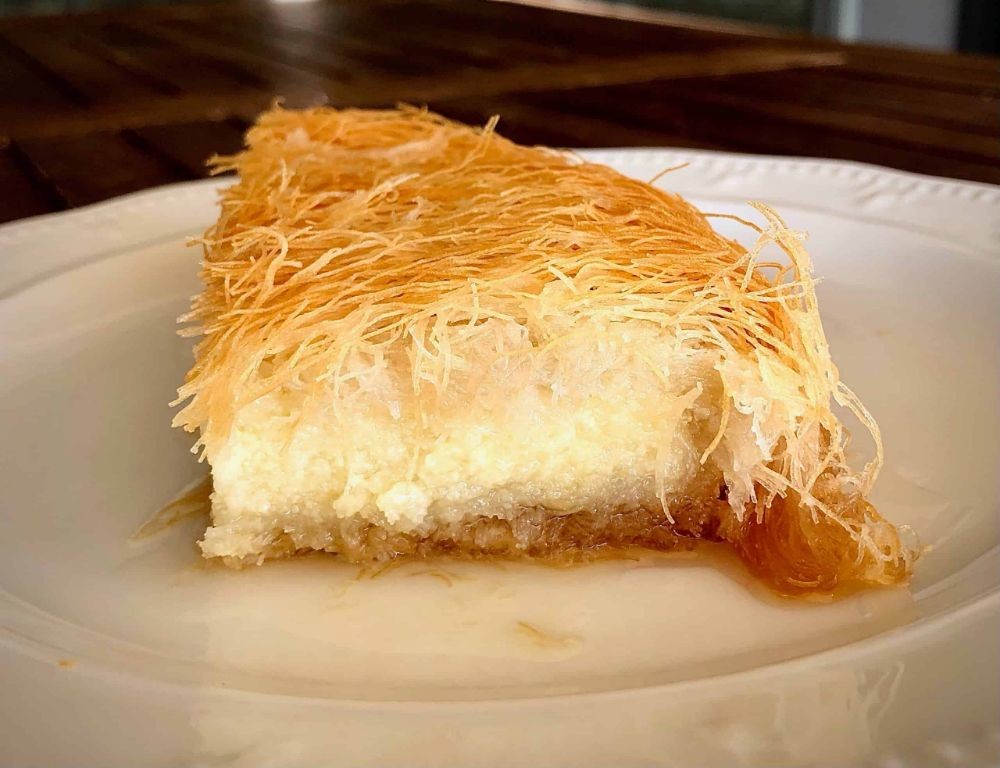
Kunafa with Cheese and Syrup
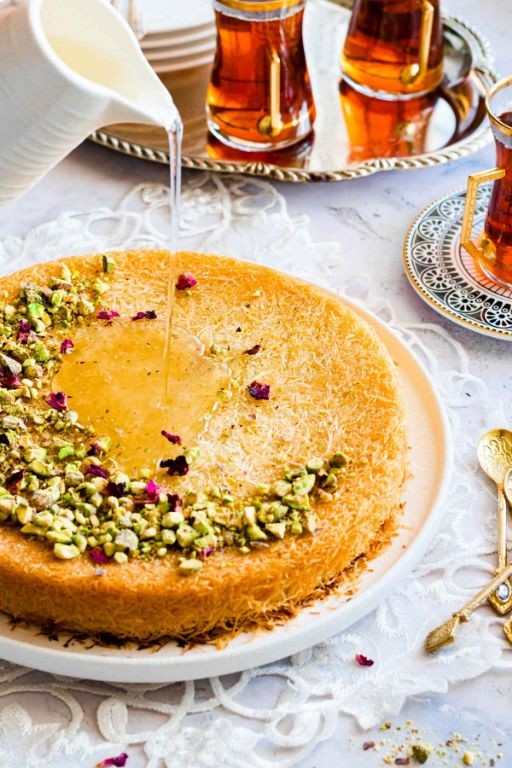
Every time I make this kunafa with cheese and syrup, it takes me right back to my first bite at a Middle Eastern bakery in Dearborn—the perfect balance of crispy, gooey, and sweet that had me hooked instantly. I love how this dessert feels both festive for special occasions and comforting enough for a cozy night in, and trust me, once you try it warm from the oven, you’ll understand why it’s become a staple in my kitchen.
Serving: 8 | Pre Time: 20 minutes | Cooking Time: 40 minutes
Ingredients
- 1 pound shredded kataifi dough (I find it in the freezer section of my local international market—thaw it overnight in the fridge for easier handling)
- 1 cup unsalted butter, melted (I always use high-quality butter here for that rich, nutty flavor)
- 1 pound mozzarella cheese, shredded (full-fat mozzarella gives the best stretchy, creamy texture)
- 1 cup sugar (granulated works perfectly for the syrup)
- 1/2 cup water
- 1 tablespoon lemon juice (freshly squeezed adds a bright note to balance the sweetness)
- 1 teaspoon orange blossom water (this is my secret ingredient—it adds a floral aroma that makes it truly special)
- 1/4 cup chopped pistachios (for garnish; I toast them lightly for extra crunch)
Instructions
- Preheat your oven to 350°F and grease a 9×13-inch baking dish with some of the melted butter.
- In a large bowl, separate the kataifi dough strands with your fingers to loosen them, then pour the remaining melted butter over the dough and toss thoroughly to coat every strand—this ensures maximum crispiness.
- Press half of the buttered kataifi dough evenly into the bottom of the prepared baking dish to form a firm base layer.
- Sprinkle the shredded mozzarella cheese evenly over the kataifi base, making sure to cover it completely for that gooey middle.
- Top the cheese with the remaining buttered kataifi dough, pressing down gently to create an even top layer.
- Bake in the preheated oven for 35-40 minutes, or until the top is golden brown and crispy—keep an eye on it after 30 minutes to avoid burning.
- While the kunafa bakes, combine the sugar and water in a small saucepan over medium heat, stirring until the sugar dissolves completely.
- Bring the syrup to a boil, then reduce the heat to low and simmer for 10 minutes until it thickens slightly—tip: avoid stirring once it boils to prevent crystallization.
- Remove the syrup from the heat and stir in the lemon juice and orange blossom water, then let it cool to room temperature.
- Once the kunafa is out of the oven, immediately pour the cooled syrup evenly over the hot pastry, allowing it to soak in for about 10 minutes.
- Sprinkle the chopped pistachios over the top as a garnish before serving.
Straight from the oven, this kunafa offers a delightful contrast: the top layer shatters with a satisfying crunch, giving way to a molten, stretchy cheese center that’s perfectly sweetened by the floral syrup. I love serving it warm with a scoop of vanilla ice cream on the side for an extra indulgent treat, or simply enjoy it as is with a cup of mint tea—the leftovers (if there are any!) reheat beautifully in the oven to revive that crispy texture.
Ravani (Almond and Yogurt Cake)
Zesty and comforting, this Ravani cake has become my go-to dessert for holiday gatherings—it’s a fragrant almond and yogurt cake that’s surprisingly simple to make, yet always impresses with its moist crumb and delicate sweetness. I first discovered it at a friend’s Greek-themed dinner party, and after tweaking the recipe to my liking, it’s now a staple in my kitchen, especially during festive seasons like this Christmas Eve.
Serving: 8 | Pre Time: 15 minutes | Cooking Time: 45 minutes
Ingredients
– 1 cup all-purpose flour (I always sift mine for a lighter texture)
– 1 cup fine semolina (this gives the cake its signature graininess)
– 1 cup granulated sugar (I use organic cane sugar for a subtle caramel note)
– 1 cup plain whole-milk yogurt (full-fat is key here for richness)
– 3 large eggs, at room temperature (they blend better when not cold)
– ½ cup unsalted butter, melted and cooled slightly (I prefer European-style butter for its creaminess)
– 1 tsp baking powder (make sure it’s fresh for a good rise)
– 1 tsp vanilla extract (pure vanilla is my go-to for depth)
– ½ cup sliced almonds (toasted lightly for extra crunch)
– ¼ cup water (for the syrup)
– ½ cup honey (I use local wildflower honey for floral hints)
– 1 tbsp lemon juice (freshly squeezed brightens everything up)
Instructions
1. Preheat your oven to 350°F and grease a 9-inch round cake pan, lining the bottom with parchment paper for easy removal.
2. In a large mixing bowl, whisk together the all-purpose flour, fine semolina, granulated sugar, and baking powder until well combined.
3. In a separate bowl, beat the room-temperature eggs with a hand mixer on medium speed for about 2 minutes until pale and frothy.
4. Add the plain whole-milk yogurt, melted unsalted butter, and vanilla extract to the eggs, mixing on low until smooth and creamy.
5. Gradually fold the dry ingredients into the wet mixture using a spatula, stirring gently just until no flour streaks remain—overmixing can make the cake tough.
6. Pour the batter into the prepared cake pan, smoothing the top with a spatula, then sprinkle the sliced almonds evenly over the surface.
7. Bake in the preheated oven at 350°F for 40-45 minutes, or until a toothpick inserted into the center comes out clean and the edges are golden brown.
8. While the cake bakes, make the syrup: in a small saucepan over medium heat, combine the water, honey, and lemon juice, stirring until the honey dissolves, then simmer for 5 minutes until slightly thickened.
9. As soon as the cake comes out of the oven, use a skewer to poke holes all over the top, then slowly pour the warm syrup over it, allowing it to soak in completely—this keeps it moist for days.
10. Let the cake cool in the pan for 30 minutes before transferring to a wire rack to cool completely.
11. Slice and serve at room temperature. This cake firms up as it cools, so don’t worry if it seems soft initially.
This Ravani cake boasts a tender, slightly dense texture from the semolina, with a lovely balance of nutty almonds and tangy yogurt. The honey syrup adds a sticky sweetness that melds beautifully with the buttery crumb—try serving it with a dollop of whipped cream or alongside a cup of strong coffee for a cozy treat.
Greek Orange Cake with Syrup
Venturing into Greek baking always feels like a warm hug from the Mediterranean. I first tried this cake on a chilly winter evening, and its bright citrus aroma instantly lifted my spirits—it’s become my go-to for cozy gatherings ever since.
Serving: 8 | Pre Time: 20 minutes | Cooking Time: 45 minutes
Ingredients
– 2 cups all-purpose flour (I always sift mine first for extra fluffiness)
– 1 cup granulated sugar
– 3 large eggs, at room temperature—they blend smoother this way
– 1 cup plain Greek yogurt (full-fat gives the best richness)
– 1/2 cup extra virgin olive oil, my go-to for its fruity notes
– Zest and juice of 2 large oranges (about 1/2 cup juice)
– 1 tsp baking powder
– 1/2 tsp baking soda
– Pinch of salt
– For the syrup: 1 cup water, 1 cup sugar, and 1/2 cup fresh orange juice
Instructions
1. Preheat your oven to 350°F and grease a 9-inch round cake pan.
2. In a large bowl, whisk together the flour, baking powder, baking soda, and salt until combined.
3. In another bowl, beat the eggs and sugar with a mixer on medium speed for 3 minutes, until pale and fluffy.
4. Add the Greek yogurt, olive oil, orange zest, and orange juice to the egg mixture, mixing on low until just incorporated.
5. Gradually fold the dry ingredients into the wet mixture with a spatula, being careful not to overmix—this keeps the cake tender.
6. Pour the batter into the prepared pan and smooth the top with a spatula.
7. Bake for 45 minutes, or until a toothpick inserted into the center comes out clean.
8. While the cake bakes, make the syrup: in a saucepan, combine the water, sugar, and orange juice.
9. Bring the syrup to a boil over medium heat, then reduce to a simmer for 10 minutes, stirring occasionally until slightly thickened.
10. Once the cake is out of the oven, immediately poke holes all over the top with a skewer.
11. Slowly pour the warm syrup over the hot cake, letting it soak in completely—this step is key for that moist texture.
12. Let the cake cool in the pan for 1 hour before serving to allow the flavors to meld.
Mmm, the result is a beautifully moist cake with a sticky-sweet crust and bursts of citrus in every bite. I love serving it slightly warm with a dollop of whipped cream or alongside a strong cup of coffee for a perfect afternoon treat.
Pomegranate and Pistachio Phyllo Rolls
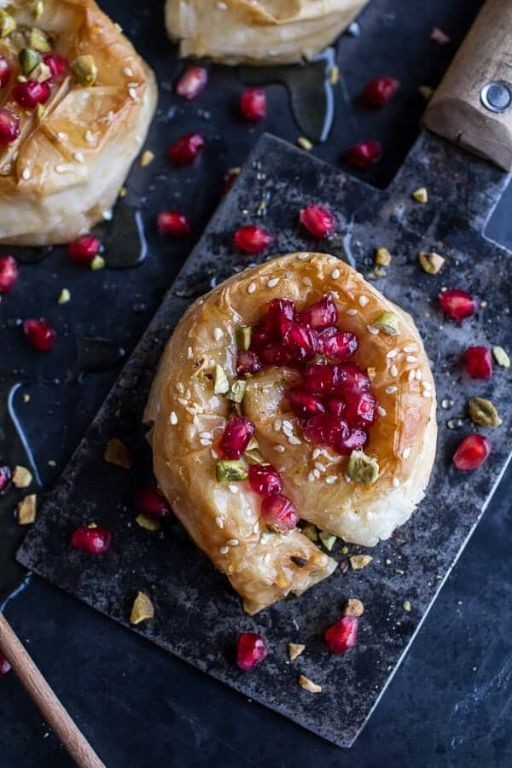
Gathering around the kitchen island with friends during the holidays always sparks inspiration, and these Pomegranate and Pistachio Phyllo Rolls were born from one such cozy evening—they’re the perfect blend of festive crunch and sweet-tart flavor that feels both elegant and approachable. I love how the vibrant colors brighten up any dessert spread, and they’ve become my go-to for impromptu gatherings because they come together faster than you’d think, with a little patience for the phyllo. Trust me, once you try that crispy shell giving way to the juicy pomegranate and nutty pistachio filling, you’ll be hooked just like my crew was.
Serving: 12 | Pre Time: 25 minutes | Cooking Time: 20 minutes
Ingredients
– 1 package (16 ounces) phyllo dough, thawed overnight in the fridge—I keep it wrapped in a damp towel to prevent drying out.
– 1 cup shelled pistachios, finely chopped for a hearty texture that holds up well.
– 1 cup pomegranate arils, fresh if possible for that burst of juicy sweetness.
– 1/2 cup granulated sugar, which I mix in to balance the tartness perfectly.
– 1/4 cup unsalted butter, melted and brushed generously for that golden, flaky finish.
– 1 teaspoon ground cinnamon, my secret touch to add a warm, cozy aroma.
– 1/4 teaspoon salt, just a pinch to enhance all the flavors without overpowering.
Instructions
1. Preheat your oven to 350°F and line a baking sheet with parchment paper to prevent sticking.
2. In a medium bowl, combine the chopped pistachios, pomegranate arils, granulated sugar, ground cinnamon, and salt, stirring until evenly mixed—tip: taste a bit to adjust sweetness if needed, but the sugar usually does the trick.
3. Unroll the phyllo dough on a clean surface, covering it with a damp towel to keep it pliable as you work.
4. Place one sheet of phyllo on your workspace and brush it lightly with melted butter using a pastry brush.
5. Layer a second sheet on top and brush with butter again, repeating until you have 4 layers total for sturdiness.
6. Spoon about 2 tablespoons of the pistachio-pomegranate mixture along one short edge of the phyllo stack, leaving a 1-inch border.
7. Fold in the sides of the phyllo over the filling, then roll it up tightly from the filled end, like a burrito—tip: press gently to seal the edges with butter.
8. Place the roll seam-side down on the prepared baking sheet and brush the top with more melted butter for extra crispiness.
9. Repeat steps 4 through 8 with the remaining phyllo and filling to make 12 rolls total, spacing them about 1 inch apart on the sheet.
10. Bake in the preheated oven for 18–20 minutes, or until the rolls are golden brown and crisp to the touch—tip: rotate the sheet halfway through for even browning.
11. Remove from the oven and let cool on the baking sheet for 5 minutes before serving to set the texture.
Elegantly crisp on the outside with a tender, fruity-nutty core, these rolls offer a delightful contrast that’s both refreshing and indulgent. I love serving them warm with a dusting of powdered sugar or a drizzle of honey for extra sweetness, and they pair beautifully with a cup of hot tea—their vibrant red and green specks make them a showstopper on any holiday table.
Mediterranean Date and Nut Balls

Zipping through holiday prep last year, I discovered these Mediterranean Date and Nut Balls while desperately needing a quick, healthy treat to share—they’ve been a festive staple ever since! I love how they satisfy a sweet craving without any baking, and my kids now request them for after-school snacks. Honestly, keeping a batch in the fridge is my secret weapon for impromptu guests.
Serving: 12 | Pre Time: 15 minutes | Cooking Time: 0 minutes
Ingredients
– 1 cup pitted Medjool dates (I prefer Medjool for their caramel-like sweetness—just make sure to remove the pits!)- 1 cup raw walnuts (toasting them lightly first brings out a deeper flavor, but raw works great too)- 1/4 cup almond flour (this helps bind everything without being too gritty)- 2 tablespoons honey (local honey is my go-to for a floral hint)- 1 teaspoon ground cinnamon (a warm spice that makes these feel cozy)- 1/2 teaspoon vanilla extract (pure extract adds that lovely aroma)- A pinch of sea salt (it balances the sweetness perfectly)
Instructions
1. Place 1 cup pitted Medjool dates in a food processor and pulse for 30 seconds until they form a sticky paste. Tip: If your dates are dry, soak them in warm water for 10 minutes first, then drain well to prevent a soggy texture.2. Add 1 cup raw walnuts to the food processor and pulse for 45 seconds until finely chopped and combined with the dates.3. Pour in 1/4 cup almond flour, 2 tablespoons honey, 1 teaspoon ground cinnamon, 1/2 teaspoon vanilla extract, and a pinch of sea salt.4. Process the mixture for 60 seconds until it comes together into a uniform dough that holds together when pressed. Tip: Stop and scrape down the sides halfway through to ensure even mixing.5. Scoop out tablespoon-sized portions of the dough and roll them between your palms into smooth, round balls, about 1 inch in diameter.6. Arrange the balls on a parchment-lined tray and refrigerate for at least 30 minutes to firm up. Tip: Chilling them makes them easier to handle and enhances the flavors.7. Serve the balls chilled or at room temperature. Best yet, these little gems have a chewy, fudgy texture with a nutty crunch and a warm cinnamon sweetness. I love rolling them in shredded coconut or cocoa powder for a festive twist, or simply enjoy them straight from the fridge as a guilt-free pick-me-up.
Yogurt and Apricot Phyllo Parcels

Last weekend, I was craving something sweet but light after a heavy holiday meal, and these yogurt and apricot phyllo parcels came to the rescue. They’re like little edible gifts—crispy, creamy, and just sweet enough to feel indulgent without the guilt. I love making them ahead for brunch guests; they always disappear fast!
Serving: 12 | Pre Time: 20 minutes | Cooking Time: 15 minutes
Ingredients
– 1 cup plain Greek yogurt (I prefer full-fat for extra creaminess, but low-fat works too)
– 1/2 cup dried apricots, finely chopped (I like to use unsulfured ones for a brighter flavor)
– 1/4 cup honey (local raw honey is my go-to for its floral notes)
– 1 teaspoon vanilla extract (pure vanilla makes all the difference here)
– 8 sheets phyllo dough, thawed (keep them covered with a damp towel to prevent drying out)
– 4 tablespoons unsalted butter, melted (I use European-style butter for a richer taste)
– 1/4 cup powdered sugar, for dusting (optional, but it adds a pretty finish)
Instructions
1. Preheat your oven to 375°F and line a baking sheet with parchment paper.
2. In a medium bowl, combine the Greek yogurt, chopped dried apricots, honey, and vanilla extract until well mixed. Tip: Let this filling sit for 5 minutes to allow the apricots to soften slightly.
3. Lay one sheet of phyllo dough on a clean surface and brush it lightly with melted butter using a pastry brush.
4. Place another sheet of phyllo on top and brush it with butter again, repeating until you have a stack of 4 buttered sheets.
5. Cut the stacked phyllo into 6 equal rectangles, each about 4×3 inches.
6. Spoon about 1 tablespoon of the yogurt-apricot mixture onto the center of each rectangle.
7. Fold the phyllo over the filling to form a parcel, pressing the edges to seal. Tip: Brush the edges with a little extra butter to help them stick together.
8. Repeat steps 3-7 with the remaining 4 sheets of phyllo to make 12 parcels total.
9. Arrange the parcels on the prepared baking sheet, leaving about 1 inch between them.
10. Bake in the preheated oven for 12-15 minutes, or until the phyllo is golden brown and crispy. Tip: Check at 12 minutes to avoid over-browning, as ovens can vary.
11. Remove from the oven and let cool on the baking sheet for 5 minutes.
12. Dust lightly with powdered sugar if desired before serving.
What I adore about these parcels is the contrast between the flaky, buttery phyllo and the tangy-sweet filling—it’s like a mini dessert adventure in every bite. Serve them warm with a drizzle of extra honey or alongside a cup of herbal tea for a cozy treat that feels special without fuss.
Lemon and Olive Oil Cake
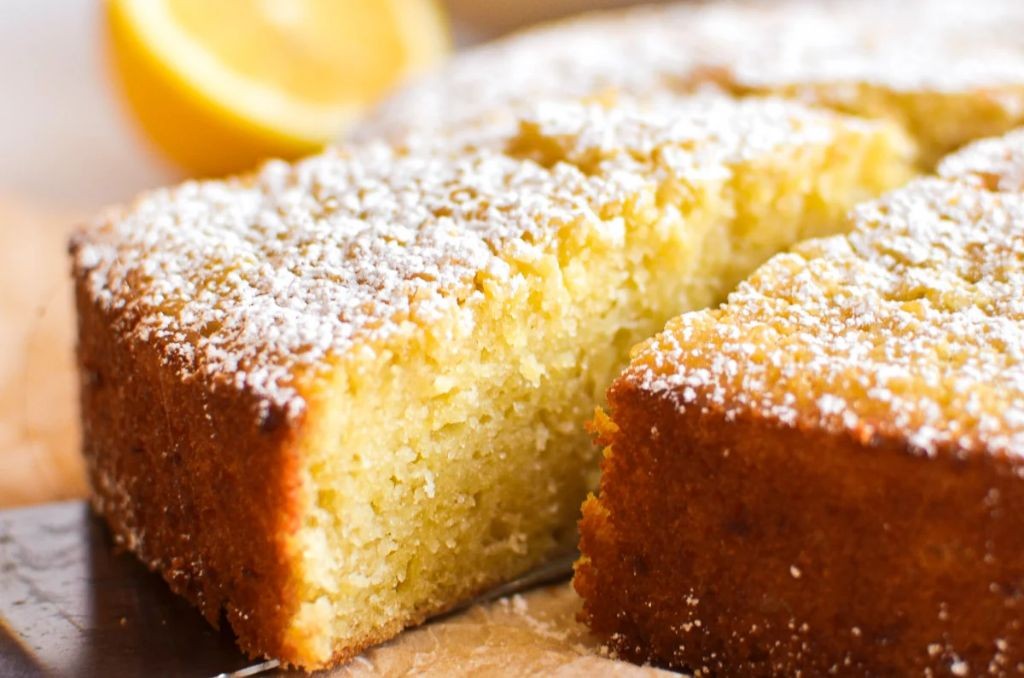
Perfectly simple yet surprisingly elegant, this lemon and olive oil cake is my go-to when I need a dessert that feels special without being fussy. I first made it for a last-minute holiday potluck a few years back, and now it’s a year-round staple in my kitchen—it’s that versatile and reliable. The bright citrus and rich oil create a moist crumb that’s hard to resist, whether you’re a seasoned baker or just starting out.
Serving: 8 | Pre Time: 15 minutes | Cooking Time: 50 minutes
Ingredients
– 1 ½ cups all-purpose flour (I always sift mine first for a lighter texture)
– 1 cup granulated sugar (I use organic cane sugar for a subtle depth)
– 3 large eggs, at room temperature (they blend better with the oil this way)
– ½ cup extra virgin olive oil (my go-to is a fruity California brand for its mild flavor)
– ½ cup whole milk (full-fat gives the cake extra richness)
– Zest and juice of 2 lemons (about ¼ cup juice—I zest them right before mixing to lock in the oils)
– 1 ½ tsp baking powder (check the date to ensure it’s fresh for a good rise)
– ¼ tsp salt (a pinch of sea salt balances the sweetness perfectly)
– Powdered sugar for dusting (optional, but it adds a pretty finish)
Instructions
1. Preheat your oven to 350°F and grease a 9-inch round cake pan, then line the bottom with parchment paper for easy removal.
2. In a medium bowl, whisk together the all-purpose flour, baking powder, and salt until well combined, then set aside.
3. In a large mixing bowl, use an electric mixer on medium speed to beat the granulated sugar and room-temperature eggs for about 3 minutes, until pale and fluffy—this incorporates air for a lighter cake.
4. Slowly drizzle in the extra virgin olive oil while mixing on low speed, then add the whole milk, lemon zest, and lemon juice, mixing just until smooth.
5. Gradually fold the dry ingredients into the wet mixture with a spatula, being careful not to overmix to avoid a tough texture.
6. Pour the batter into the prepared pan and tap it gently on the counter to release any air bubbles.
7. Bake in the preheated oven for 45–50 minutes, or until a toothpick inserted into the center comes out clean and the edges are golden brown.
8. Let the cake cool in the pan on a wire rack for 10 minutes, then invert it onto the rack to cool completely—this prevents sogginess.
9. Once cooled, dust the top lightly with powdered sugar if desired, using a fine-mesh sieve for an even coating.
Here’s why I love this cake: its texture is incredibly moist and tender, with a subtle crunch from the golden crust, while the lemon shines through without being overly tart. Serve it warm with a dollop of whipped cream or alongside afternoon tea for a cozy treat that always impresses.
Fig and Almond Tart with Honey Drizzle
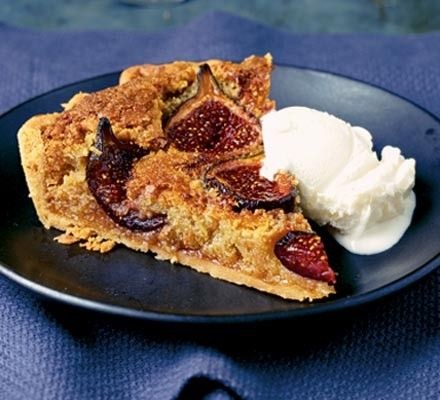
Nothing says holiday magic like a warm, fragrant tart fresh from the oven, and this Fig and Almond Tart with Honey Drizzle is my absolute favorite way to celebrate the season. I first made it for a cozy Christmas Eve gathering a few years back, and now it’s a non-negotiable tradition in my house—the sweet aroma of baking figs and almonds instantly makes any kitchen feel like home.
Serving: 8 | Pre Time: 20 minutes | Cooking Time: 35 minutes
Ingredients
– 1 1/4 cups all-purpose flour (I always sift mine first for a lighter crust)
– 1/2 cup unsalted butter, cold and cubed (straight from the fridge works best)
– 1/4 cup granulated sugar
– 1 large egg, lightly beaten (room temp eggs blend more smoothly, in my experience)
– 1 cup almond flour (I love the nutty depth it adds)
– 1/3 cup honey, plus extra for drizzling (local raw honey is my go-to for richer flavor)
– 8-10 fresh figs, halved (ripe but firm ones hold their shape beautifully)
– 1/4 tsp salt
– 1 tsp vanilla extract (pure vanilla makes all the difference here)
Instructions
1. Preheat your oven to 350°F (175°C) and lightly grease a 9-inch tart pan.
2. In a large bowl, combine 1 1/4 cups all-purpose flour, 1/4 cup granulated sugar, and 1/4 tsp salt.
3. Add 1/2 cup cold, cubed unsalted butter to the flour mixture, and use a pastry cutter or your fingers to work it in until the mixture resembles coarse crumbs. Tip: Keep the butter cold to ensure a flaky crust.
4. Stir in 1 lightly beaten large egg until the dough just comes together, then press it evenly into the prepared tart pan and up the sides.
5. In a separate bowl, mix 1 cup almond flour, 1/3 cup honey, and 1 tsp vanilla extract until well combined to form the filling.
6. Spread the almond filling evenly over the crust in the tart pan.
7. Arrange 8-10 halved fresh figs, cut-side up, in a circular pattern on top of the filling. Tip: Press them gently so they nestle into the filling without sinking too deep.
8. Bake the tart in the preheated oven at 350°F for 30-35 minutes, or until the crust is golden brown and the filling is set. Tip: Check at 30 minutes—if the edges are browning too quickly, cover them loosely with foil.
9. Remove the tart from the oven and let it cool in the pan on a wire rack for at least 15 minutes.
10. Drizzle additional honey over the cooled tart just before serving.
Unbelievably tender and fragrant, this tart boasts a buttery crust that crumbles perfectly against the creamy almond filling and juicy figs. The honey drizzle adds a glossy sweetness that makes each bite sing, and I love serving it slightly warm with a dollop of whipped cream or a scoop of vanilla ice cream for an extra-indulgent treat.
Summary
Lovingly crafted, this collection brings the sun-drenched sweetness of the Mediterranean right to your kitchen. We hope these 20 delightful desserts inspire your next baking adventure. Give a recipe a try, leave a comment with your favorite, and don’t forget to share the deliciousness by pinning this article on Pinterest!


