
Unlock the vibrant flavors of the Mediterranean with these 17 hearty recipes designed for weight loss in 2024! Perfect for home cooks, this roundup features delicious, satisfying meals that make healthy eating feel effortless. From quick weeknight dinners to comforting favorites, each dish brings the sunny essence of the Mediterranean to your table. Dive in and discover how tasty and simple your journey to wellness can be!
Greek Salad with Lemon-Olive Oil Dressing
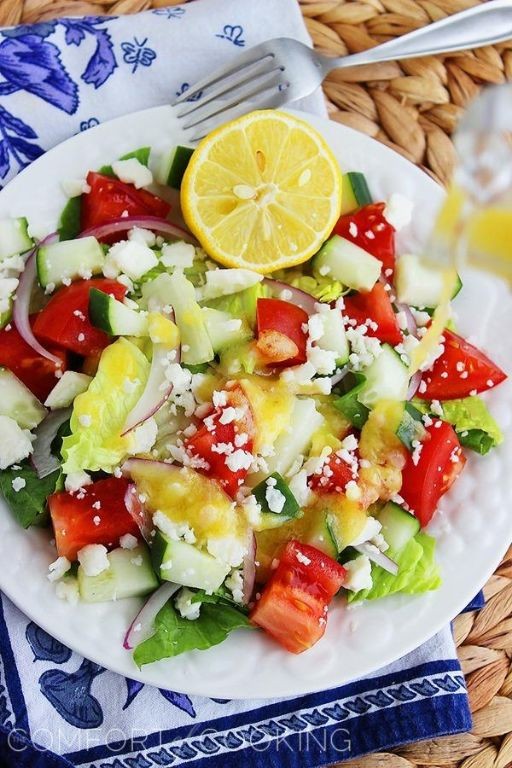
Just now, as the late afternoon light slants through my kitchen window, I find myself craving something bright and simple—a reminder of sunnier days. This Greek salad, with its crisp vegetables and tangy lemon-olive oil dressing, feels like a quiet, refreshing pause in the midst of winter’s hustle. It’s the kind of dish that doesn’t demand much, yet always leaves me feeling nourished and centered.
Serving: 4 | Pre Time: 20 minutes | Cooking Time: 0 minutes
Ingredients
- 1 large English cucumber, peeled and diced into ½-inch pieces (I love its thin skin and fewer seeds)
- 3 medium ripe tomatoes, cored and cut into 1-inch chunks (room temperature brings out their sweetness)
- 1 medium red onion, thinly sliced (soaking in ice water for 5 minutes tames the sharpness)
- 1 green bell pepper, seeded and sliced into thin strips (it adds a lovely crunch)
- ½ cup Kalamata olives, pitted (I always keep a jar in my pantry for moments like this)
- 4 ounces feta cheese, crumbled (I prefer block feta for its creamier texture)
- ¼ cup extra virgin olive oil (my go-to for its fruity notes)
- 3 tablespoons fresh lemon juice (from about 1 large lemon, squeezed just before using)
- 1 teaspoon dried oregano (rubbing it between your palms releases more aroma)
- ½ teaspoon kosher salt
- ¼ teaspoon freshly ground black pepper
Instructions
- Place the diced cucumber, tomato chunks, sliced red onion, bell pepper strips, and Kalamata olives in a large mixing bowl.
- In a small bowl, whisk together the extra virgin olive oil, fresh lemon juice, dried oregano, kosher salt, and black pepper until fully combined—this emulsifies the dressing for a smoother texture.
- Pour the dressing over the vegetables in the large bowl.
- Gently toss the salad with clean hands or salad tongs for about 30 seconds to coat everything evenly, being careful not to crush the tomatoes.
- Transfer the tossed salad to a serving platter or individual plates.
- Sprinkle the crumbled feta cheese evenly over the top of the salad.
- Let the salad sit at room temperature for 10 minutes before serving to allow the flavors to meld.
Kindly, this salad offers a delightful contrast: the crisp vegetables against the creamy feta, all brightened by that zesty lemon dressing. I love serving it alongside grilled chicken or stuffed into pita pockets for a heartier meal—it’s versatile enough to shine on its own or complement other dishes effortlessly.
Grilled Mediterranean Chicken with Herbs
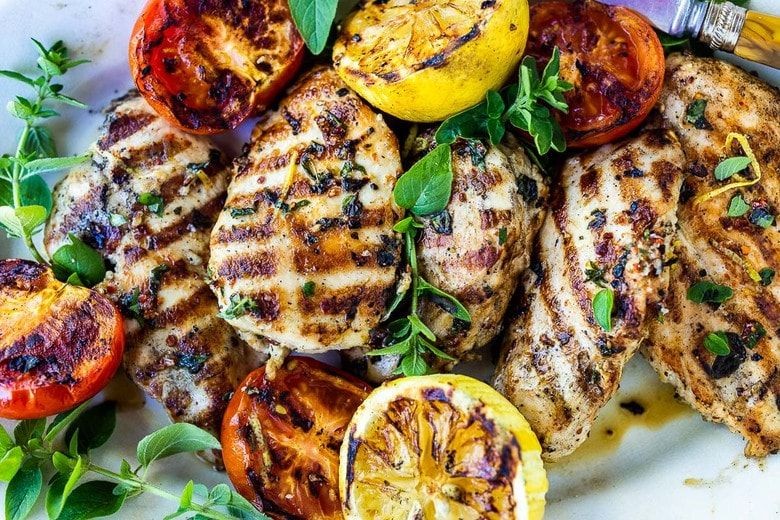
Remembering how the warm summer evenings used to linger, I find myself craving those simple, herb-kissed meals that felt like a gentle embrace. This grilled chicken, with its whispers of the Mediterranean, brings back that quiet comfort—a dish to make slowly, savoring each step as the sun dips low. It’s a recipe that feels like a soft pause in the day, where the sizzle of the grill and the scent of fresh herbs become a small, cherished ritual.
Serving: 4 | Pre Time: 15 minutes | Cooking Time: 20 minutes
Ingredients
– 4 boneless, skinless chicken breasts (I like to pat them dry with a paper towel for better browning)
– 1/4 cup extra virgin olive oil (my go-to for its fruity depth)
– 3 cloves garlic, minced (freshly minced makes all the difference)
– 2 tbsp fresh lemon juice (from about 1 lemon, squeezed just before using)
– 1 tbsp dried oregano (I prefer the earthy Greek variety)
– 1 tsp dried thyme (it adds a subtle, woodsy note)
– 1/2 tsp salt (I use fine sea salt for even seasoning)
– 1/4 tsp black pepper (freshly ground for a brighter kick)
– 1 lemon, sliced into rounds (for grilling—they caramelize beautifully)
Instructions
1. In a medium bowl, whisk together 1/4 cup extra virgin olive oil, 3 cloves minced garlic, 2 tbsp fresh lemon juice, 1 tbsp dried oregano, 1 tsp dried thyme, 1/2 tsp salt, and 1/4 tsp black pepper until well combined.
2. Place 4 boneless, skinless chicken breasts in a shallow dish and pour the marinade over them, turning to coat each piece evenly. Tip: Let the chicken marinate at room temperature for 10 minutes—this helps the flavors penetrate without over-tenderizing.
3. While the chicken marinates, preheat a grill or grill pan to medium-high heat, about 400°F, and lightly oil the grates to prevent sticking.
4. Remove the chicken from the marinade, letting any excess drip off, and place it on the preheated grill. Discard the used marinade for food safety.
5. Grill the chicken for 6-7 minutes per side, or until the internal temperature reaches 165°F when checked with a meat thermometer. Tip: Avoid moving the chicken too early to get those perfect grill marks.
6. During the last 2 minutes of cooking, add 1 lemon, sliced into rounds, to the grill and cook until lightly charred and softened, about 1-2 minutes per side. Tip: The grilled lemon adds a bright, smoky accent—squeeze it over the chicken just before serving.
7. Transfer the grilled chicken and lemon slices to a plate and let rest for 5 minutes to allow the juices to redistribute.
So, as you slice into the tender chicken, notice how the herbs have melded into a fragrant crust, while the grilled lemon whispers a tangy sweetness. Serve it over a bed of fluffy couscous or with roasted vegetables for a meal that feels both rustic and refined, perfect for those quiet evenings when you want something nourishing yet effortless.
Quinoa Tabouli with Fresh Vegetables
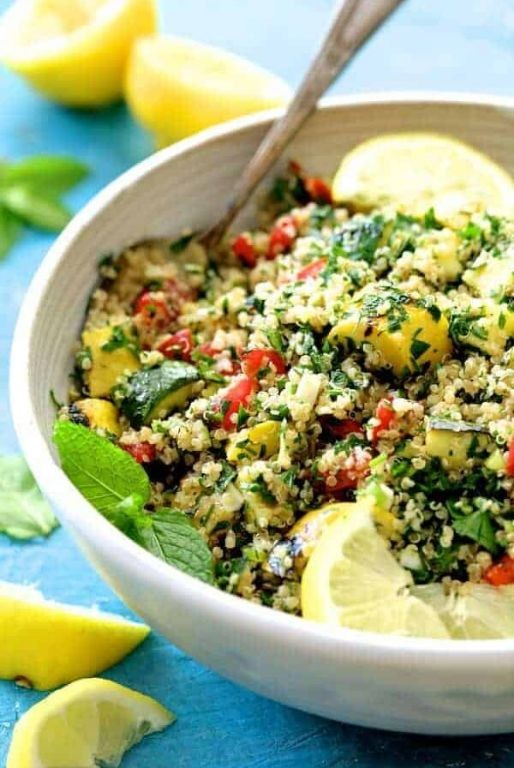
Zigzagging through my thoughts as the afternoon light fades, I find myself craving something that feels both nourishing and light—a dish that bridges the gap between hearty meals and simple, fresh bites. This quinoa tabouli, studded with crisp vegetables, is exactly that kind of quiet comfort, perfect for a reflective evening or a shared moment at the table.
Serving: 4 | Pre Time: 15 minutes | Cooking Time: 15 minutes
Ingredients
– 1 cup quinoa, rinsed well under cold water to remove any bitterness—I like to use a fine-mesh strainer for this.
– 2 cups water
– 1/4 cup extra virgin olive oil, my go-to for its fruity depth that brightens the whole dish.
– 1/4 cup freshly squeezed lemon juice, from about 2 medium lemons, as bottled juice just doesn’t have the same zing.
– 1 teaspoon salt, I prefer fine sea salt for even distribution.
– 1/2 teaspoon black pepper, freshly ground if you can—it makes all the difference.
– 1 cup finely chopped fresh parsley, packed lightly; I always grab a big bunch from the farmer’s market for the best flavor.
– 1/2 cup finely chopped fresh mint, just a handful adds such a refreshing lift.
– 1 cup diced cucumber, about 1 medium cucumber, peeled if the skin is tough—I leave it on for extra crunch.
– 1 cup cherry tomatoes, halved; I love using a mix of colors for visual appeal.
– 1/4 cup finely chopped red onion, soaked in cold water for 5 minutes first to mellow its sharpness, a little trick I picked up from my grandma.
Instructions
1. In a medium saucepan, combine 1 cup rinsed quinoa and 2 cups water. Bring to a boil over high heat, then reduce the heat to low, cover, and simmer for 15 minutes, or until the quinoa is tender and the water is absorbed. Tip: Let it sit covered off the heat for 5 minutes after cooking to fluff up perfectly.
2. While the quinoa cooks, in a large mixing bowl, whisk together 1/4 cup extra virgin olive oil, 1/4 cup lemon juice, 1 teaspoon salt, and 1/2 teaspoon black pepper until well combined.
3. Drain the quinoa if any liquid remains, then transfer it to the bowl with the dressing. Toss gently to coat evenly, allowing it to cool slightly to room temperature, about 10 minutes. Tip: Spreading it on a baking sheet can speed up cooling.
4. Add 1 cup chopped parsley, 1/2 cup chopped mint, 1 cup diced cucumber, 1 cup halved cherry tomatoes, and 1/4 cup chopped red onion to the quinoa mixture.
5. Gently fold all ingredients together until evenly distributed. Tip: Use a rubber spatula to avoid crushing the vegetables and herbs.
6. Taste and adjust seasoning if needed, then cover and refrigerate for at least 30 minutes to let the flavors meld.
Lingering over this tabouli, I’m struck by its lively texture—the quinoa’s slight chew against the juicy tomatoes and crisp cucumber, all brightened by the herbal notes. Serve it chilled as a side, or scoop it into lettuce cups for a light lunch that feels both wholesome and effortlessly elegant.
Roasted Eggplant with Garlic and Tahini
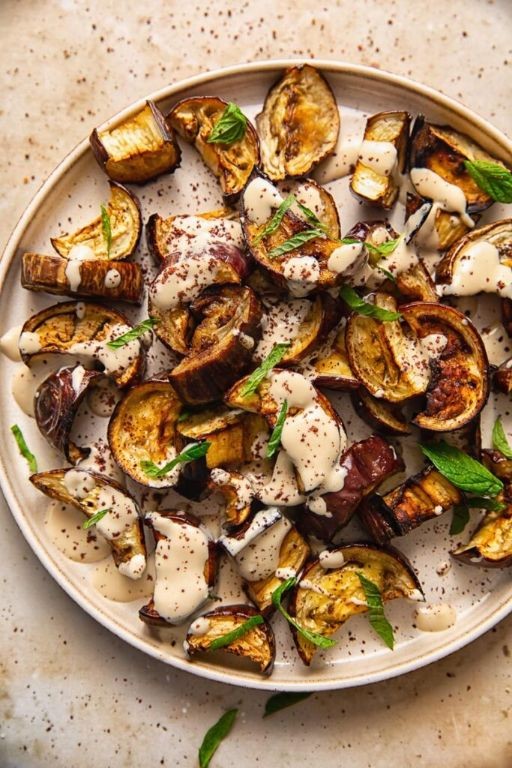
Evenings like this, when the kitchen feels quiet and the world outside slows, I find myself reaching for simple ingredients that transform into something deeply comforting. Roasting eggplant until it collapses into silky tenderness, then dressing it with garlicky tahini, creates a dish that feels both nourishing and celebratory—a humble vegetable turned into a centerpiece.
Serving: 4 | Pre Time: 15 minutes | Cooking Time: 40 minutes
Ingredients
– 2 large eggplants, about 1½ pounds total—I look for ones that feel heavy for their size, with shiny, taut skin.
– ¼ cup extra virgin olive oil, my go-to for its fruity depth that really comes through when roasted.
– 1 teaspoon kosher salt, plus a pinch more for seasoning the tahini.
– 4 cloves garlic, minced—I love using fresh, plump cloves for the brightest flavor.
– ⅓ cup tahini, well-stirred to incorporate any separated oil.
– 3 tablespoons fresh lemon juice, from about 1 large lemon, for a bright, necessary acidity.
– 2 tablespoons warm water, to help achieve that perfect, drizzle-able sauce consistency.
– ¼ teaspoon freshly ground black pepper, for a gentle warmth.
– 2 tablespoons chopped fresh parsley, for a final, vibrant sprinkle.
Instructions
1. Preheat your oven to 425°F (220°C) and line a large, rimmed baking sheet with parchment paper.
2. Trim the stem ends from the eggplants and cut them lengthwise into ¾-inch thick planks.
3. Arrange the eggplant planks in a single layer on the prepared baking sheet.
4. Brush both sides of each eggplant plank generously with the ¼ cup of olive oil.
5. Sprinkle the 1 teaspoon of kosher salt evenly over all the oiled eggplant planks.
6. Roast the eggplant in the preheated oven for 20 minutes. Tip: For even cooking, rotate the baking sheet front-to-back halfway through.
7. After 20 minutes, carefully flip each eggplant plank using tongs.
8. Continue roasting for another 15 to 20 minutes, until the eggplant is deeply golden brown, tender, and slightly caramelized at the edges.
9. While the eggplant roasts, prepare the tahini sauce: in a medium bowl, combine the ⅓ cup of tahini and the 3 tablespoons of lemon juice, whisking vigorously. Tip: The mixture will seize and thicken at first—this is normal.
10. Add the 2 tablespoons of warm water to the tahini-lemon mixture and whisk until the sauce becomes smooth, creamy, and pourable.
11. Whisk the 4 cloves of minced garlic, the ¼ teaspoon of black pepper, and a pinch of salt into the tahini sauce until fully incorporated. Tip: Let the sauce sit for 5 minutes to allow the garlic flavor to mellow and infuse.
12. Once the eggplant is out of the oven, arrange the planks on a serving platter.
13. Drizzle the prepared garlic-tahini sauce evenly over the warm roasted eggplant.
14. Garnish the finished dish with the 2 tablespoons of chopped fresh parsley.
Finally, the roasted eggplant becomes meltingly soft, almost custard-like in the center, with edges that caramelize into sweet, smoky notes. The tahini sauce, pungent with garlic and brightened by lemon, clings to each warm plank, creating a rich, velvety contrast. I love serving it slightly warm, perhaps with a side of crusty bread to scoop up every last bit of sauce, or letting it come to room temperature as part of a sprawling mezze platter.
Lentil Soup with Spinach and Lemon

A quiet evening, with the chill settling in, calls for something simple and nourishing—a pot of soup that simmers slowly, filling the kitchen with a warm, earthy fragrance. This lentil soup, with its bright notes of lemon and tender spinach, feels like a gentle embrace after a long day.
Serving: 4 | Pre Time: 15 minutes | Cooking Time: 40 minutes
Ingredients
– 1 tablespoon extra virgin olive oil (my go-to for its fruity depth)
– 1 medium yellow onion, diced (I like it finely chopped for a smoother base)
– 2 carrots, peeled and diced into ½-inch pieces
– 2 celery stalks, diced (their subtle crunch adds lovely texture)
– 3 cloves garlic, minced (freshly minced, please—it makes all the difference)
– 1 cup brown lentils, rinsed and picked over (rinsing removes any grit)
– 4 cups vegetable broth (I use low-sodium to control the salt)
– 1 teaspoon dried thyme (it whispers of warmth)
– ½ teaspoon ground cumin (just a hint for earthy depth)
– 1 bay leaf (don’t forget to fish it out later!)
– 4 cups fresh spinach, roughly chopped (packed loosely—it wilts down so much)
– Juice of 1 lemon (about 3 tablespoons, freshly squeezed for that bright zing)
– Salt and black pepper (to season as you go)
Instructions
1. In a large pot or Dutch oven, heat the olive oil over medium heat until it shimmers lightly, about 1 minute.
2. Add the onion, carrots, and celery, and cook, stirring occasionally, until the vegetables soften and the onion turns translucent, about 8–10 minutes.
3. Stir in the garlic and cook for 1 minute more, just until fragrant—be careful not to let it burn.
4. Add the rinsed lentils, vegetable broth, thyme, cumin, and bay leaf, and bring to a boil over high heat.
5. Once boiling, reduce the heat to low, cover the pot with a lid, and simmer gently for 25–30 minutes, until the lentils are tender but not mushy. Tip: Check at 25 minutes—lentils should be soft when pressed with a spoon.
6. Remove the bay leaf and discard it.
7. Stir in the chopped spinach and cook for 2–3 minutes, just until the spinach wilts and turns bright green. Tip: Add it in batches if your pot is full—it wilts quickly!
8. Turn off the heat and stir in the fresh lemon juice. Tip: Adding lemon off the heat preserves its vibrant flavor.
9. Season with salt and black pepper to taste, starting with ½ teaspoon of salt and adjusting as needed.
10. Ladle the soup into bowls and serve immediately.
But the true magic lies in the balance—the lentils offer a creamy, hearty base, while the lemon cuts through with a sunny sharpness. For a creative twist, top it with a dollop of Greek yogurt or a sprinkle of red pepper flakes, letting the warmth linger with every spoonful.
Whole Wheat Pasta with Cherry Tomatoes and Basil
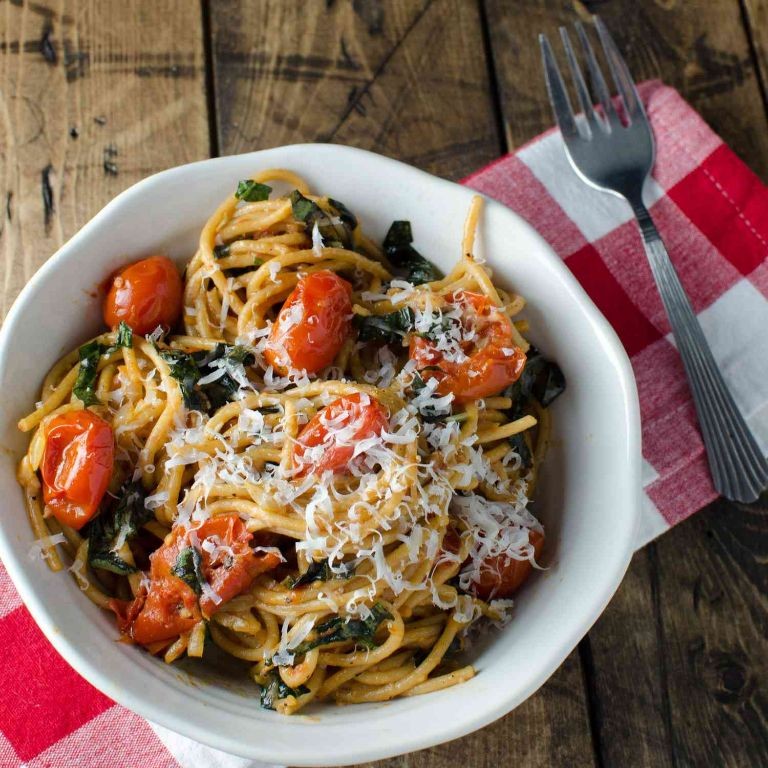
Holding a warm bowl of pasta on a quiet evening feels like a gentle embrace—this simple dish of whole wheat pasta with cherry tomatoes and basil has become my quiet comfort, a reflection of summer’s sweetness even in winter’s chill. It’s a meal that whispers rather than shouts, inviting you to slow down and savor each bite, with the basil’s fragrance lingering like a soft memory.
Serving: 4 | Pre Time: 10 minutes | Cooking Time: 20 minutes
Ingredients
– 12 ounces whole wheat pasta, such as spaghetti or penne—I find the nutty flavor adds a lovely depth.
– 2 pints cherry tomatoes, halved; their burst of juice is the heart of this dish.
– 4 cloves garlic, minced; fresh garlic here makes all the difference for that aromatic base.
– 1/2 cup fresh basil leaves, torn by hand to preserve their delicate oils—I always pick the brightest green leaves.
– 1/4 cup extra virgin olive oil, my go-to for its fruity notes that enhance the tomatoes.
– 1/2 teaspoon red pepper flakes, just a pinch for a subtle warmth without overpowering.
– Salt, to season as you go; I prefer sea salt for its clean taste.
– Freshly grated Parmesan cheese, for serving—a generous sprinkle adds a savory finish.
Instructions
1. Bring a large pot of salted water to a rolling boil over high heat—salting it like the sea ensures the pasta absorbs flavor as it cooks.
2. Add the whole wheat pasta to the boiling water and cook for 8-10 minutes, stirring occasionally, until al dente (tender but with a slight bite).
3. While the pasta cooks, heat the extra virgin olive oil in a large skillet over medium heat until it shimmers lightly, about 2 minutes.
4. Add the minced garlic to the skillet and sauté for 1 minute, stirring constantly, until fragrant but not browned to avoid bitterness.
5. Stir in the halved cherry tomatoes and red pepper flakes, cooking for 5-7 minutes until the tomatoes soften and release their juices, creating a light sauce.
6. Drain the cooked pasta, reserving 1/2 cup of the pasta water to help emulsify the sauce if needed.
7. Toss the drained pasta directly into the skillet with the tomato mixture, stirring gently to coat everything evenly.
8. Remove the skillet from heat and fold in the torn basil leaves, letting the residual warmth wilt them slightly for maximum aroma.
9. Season with salt to taste, adding a splash of reserved pasta water if the sauce seems too thick for a silky consistency.
10. Divide the pasta among serving bowls and top with freshly grated Parmesan cheese.
Unfolding this dish reveals a tender chew from the whole wheat pasta, balanced by the bright acidity of the tomatoes and the herbal freshness of basil. The textures meld into a comforting harmony, with each forkful offering a subtle warmth from the pepper flakes. For a creative twist, try serving it alongside a crisp green salad or with a drizzle of balsamic glaze to deepen the flavors, making it feel both rustic and refined.
Stuffed Bell Peppers with Brown Rice and Feta
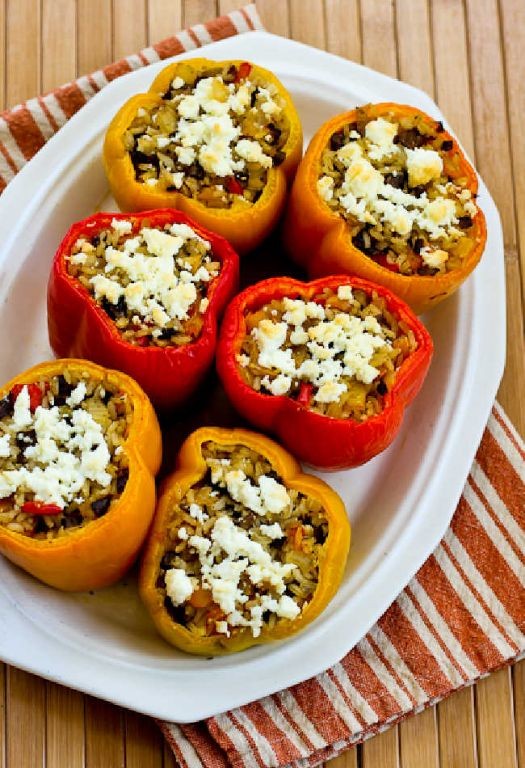
Yesterday, as the afternoon light softened into evening, I found myself craving something that felt both nourishing and comforting—a meal to bridge the gap between the busy week and the quiet weekend ahead. It’s in these moments that I turn to my kitchen, to the simple act of preparing food with intention, letting the rhythm of chopping and stirring slow my thoughts. This recipe for stuffed bell peppers is exactly that kind of gentle, reflective cooking, where humble ingredients come together to create something quietly beautiful.
Serving: 4 | Pre Time: 20 minutes | Cooking Time: 45 minutes
Ingredients
– 4 large bell peppers, any color you love—I often choose a mix of red and yellow for their sweetness.
– 1 cup uncooked brown rice, rinsed well to remove excess starch.
– 1 ½ cups vegetable broth, homemade if you have it, for the deepest flavor.
– 1 tablespoon extra virgin olive oil, my go-to for its fruity notes.
– 1 small yellow onion, finely diced—I find this size perfect for even cooking.
– 2 cloves garlic, minced; fresh is best here for a bright punch.
– 1 (15-ounce) can diced tomatoes, undrained, to add juiciness.
– 1 teaspoon dried oregano, crushed between your fingers to wake up the oils.
– ½ teaspoon salt, to layer the seasoning as you go.
– ¼ teaspoon black pepper, freshly ground if possible.
– 4 ounces feta cheese, crumbled; I prefer block feta for its creamier texture.
– ¼ cup chopped fresh parsley, for a fresh finish right at the end.
Instructions
1. Preheat your oven to 375°F (190°C) to ensure it’s ready for baking.
2. Slice the tops off the bell peppers and remove the seeds and membranes, creating hollow cups; set them aside in a baking dish.
3. In a medium saucepan, combine the rinsed brown rice and vegetable broth, bring to a boil over high heat, then reduce to a low simmer, cover, and cook for 25 minutes until the liquid is absorbed and the rice is tender.
4. While the rice cooks, heat the extra virgin olive oil in a large skillet over medium heat until it shimmers slightly.
5. Add the diced onion to the skillet and sauté for 5 minutes, stirring occasionally, until it becomes translucent and soft.
6. Stir in the minced garlic and cook for 1 more minute, just until fragrant—be careful not to let it brown.
7. Tip: Toasting the garlic briefly enhances its flavor without bitterness.
8. Add the undrained diced tomatoes, dried oregano, salt, and black pepper to the skillet, stir to combine, and let it simmer for 5 minutes to meld the flavors.
9. Remove the skillet from the heat and fold in the cooked brown rice, crumbled feta cheese, and chopped parsley until evenly mixed.
10. Tip: Letting the filling cool slightly before stuffing prevents the peppers from becoming soggy.
11. Spoon the rice mixture evenly into the hollowed bell peppers, packing it gently but firmly.
12. Cover the baking dish with aluminum foil and bake in the preheated oven for 30 minutes.
13. Remove the foil and bake for an additional 15 minutes, until the peppers are tender and the tops are lightly golden.
14. Tip: For extra browning, broil for the last 2-3 minutes, watching closely to avoid burning.
15. Just before serving, let the stuffed peppers rest for 5 minutes to set the filling. Joy comes in the first bite—the peppers soften into a sweet, yielding shell, while the filling offers a hearty mix of chewy rice, tangy feta, and savory herbs. Serve them warm, perhaps with a simple green salad on the side, and savor how such simple elements can create a meal that feels both wholesome and deeply satisfying.
Mediterranean Chickpea and Avocado Salad
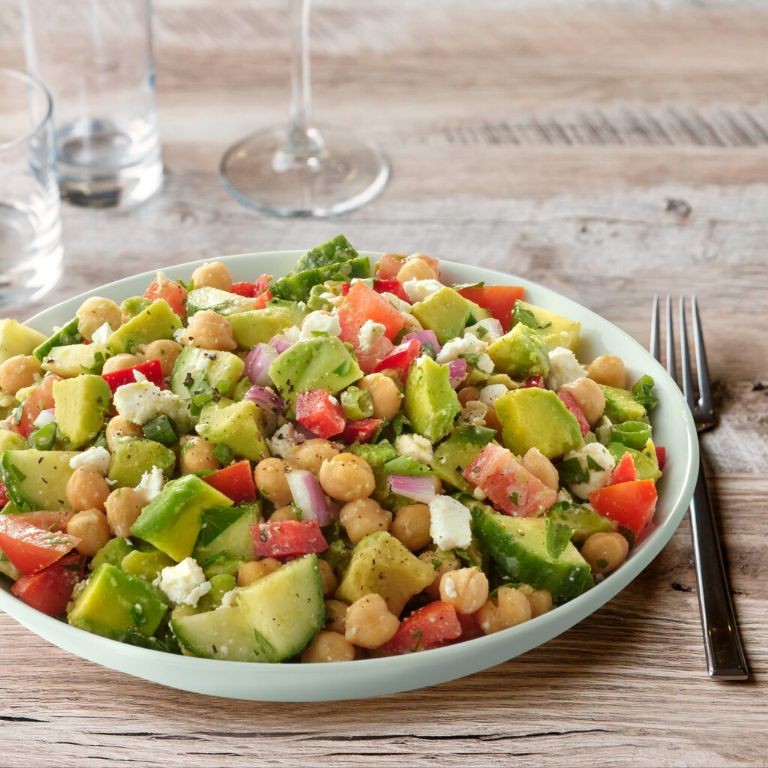
Just now, as the winter light fades outside my kitchen window, I find myself craving something bright and nourishing—a salad that feels like a gentle embrace. This Mediterranean chickpea and avocado combination has become my quiet refuge on busy evenings, where each ingredient tells a simple, satisfying story.
Serving: 4 | Pre Time: 15 minutes | Cooking Time: 0 minutes
Ingredients
– 2 (15-ounce) cans chickpeas, drained and rinsed—I love how their creamy texture holds the dressing
– 2 ripe avocados, diced—choose ones that yield slightly to gentle pressure
– 1 cup cherry tomatoes, halved—their burst of sweetness balances everything
– ½ red onion, finely chopped—soaking it in ice water for 5 minutes tames the sharpness
– ¼ cup extra virgin olive oil, my go-to for its fruity notes
– 2 tablespoons fresh lemon juice, about 1 lemon squeezed right before using
– 1 teaspoon dried oregano, crushed between your palms to wake up the aroma
– ½ teaspoon kosher salt, which dissolves evenly into the mix
– ¼ teaspoon freshly ground black pepper, for a subtle warmth
Instructions
1. Drain and rinse 2 cans of chickpeas in a colander under cool running water for 30 seconds to remove excess sodium, then pat them dry gently with a paper towel to help the dressing cling better.
2. Halve 1 cup of cherry tomatoes with a sharp knife, catching any juices in your mixing bowl.
3. Finely chop ½ red onion, then soak the pieces in a bowl of ice water for exactly 5 minutes to mellow their bite before draining.
4. Dice 2 ripe avocados into ½-inch cubes, adding them immediately to the bowl to minimize browning.
5. In a small jar, combine ¼ cup extra virgin olive oil, 2 tablespoons fresh lemon juice, 1 teaspoon dried oregano (crushed first), ½ teaspoon kosher salt, and ¼ teaspoon freshly ground black pepper; seal and shake vigorously for 20 seconds until emulsified.
6. Pour the dressing over the chickpea mixture in the large bowl, using a silicone spatula to fold everything together gently to avoid crushing the avocados.
7. Let the salad rest at room temperature for 10 minutes, allowing the flavors to meld while you tidy up.
8. Taste a spoonful and adjust seasoning only if needed—the balance should be bright from the lemon, herbal from the oregano, and rich from the olive oil.
9. Serve immediately or cover and refrigerate for up to 2 hours for a slightly chilled version.
On the tongue, it’s a delightful contrast: the creamy avocados melt against the firm chickpeas, while the tomatoes add juicy pops. I sometimes scoop it into lettuce cups for a handheld lunch, or layer it over toasted sourdough for a heartier bite—each forkful feels like a quiet moment of sunshine.
Grilled Shrimp Skewers with Garlic and Oregano

Lately, I’ve found myself craving the simple, honest flavors of summer, even as the days grow shorter. There’s something deeply comforting about the ritual of threading shrimp onto skewers, the scent of garlic and oregano filling the kitchen, promising a meal that feels both effortless and special. It’s a quiet, meditative process that yields such vibrant, satisfying results.
Serving: 4 | Pre Time: 20 minutes | Cooking Time: 8 minutes
Ingredients
– 1.5 pounds large raw shrimp, peeled and deveined (I find the 16/20 count size works perfectly)
– 3 tablespoons extra virgin olive oil, my go-to for its fruity depth
– 4 large garlic cloves, minced (freshly minced makes all the difference)
– 2 tablespoons fresh oregano leaves, chopped (if you must use dried, reduce to 2 teaspoons)
– 1 teaspoon kosher salt
– ½ teaspoon freshly ground black pepper
– 1 tablespoon fresh lemon juice
– 8 wooden skewers, soaked in water for 30 minutes to prevent burning
Instructions
1. In a medium bowl, whisk together the 3 tablespoons of extra virgin olive oil, 4 minced garlic cloves, 2 tablespoons of chopped fresh oregano, 1 teaspoon of kosher salt, ½ teaspoon of black pepper, and 1 tablespoon of fresh lemon juice until fully combined.
2. Add the 1.5 pounds of peeled and deveined shrimp to the bowl with the marinade. Gently toss until every shrimp is evenly coated. Let the shrimp marinate at room temperature for exactly 15 minutes; marinating longer can start to break down the delicate texture.
3. While the shrimp marinates, soak 8 wooden skewers in a shallow dish of water for a full 30 minutes to ensure they don’t char on the grill.
4. Preheat an outdoor grill or a grill pan over medium-high heat until it reaches approximately 400°F.
5. Thread the marinated shrimp onto the soaked wooden skewers, placing about 4 to 5 shrimp per skewer and leaving a small space between each one for even cooking.
6. Place the shrimp skewers on the preheated grill. Cook for 3 to 4 minutes on the first side, until the shrimp flesh turns opaque and you see light grill marks.
7. Using tongs, carefully flip each skewer. Cook for another 3 to 4 minutes on the second side, until the shrimp are completely opaque and firm to the touch. A pro tip: avoid moving them too much to get those beautiful, defined grill lines.
8. Immediately remove the skewers from the grill and transfer them to a clean serving platter.
Kindly let the skewers rest for just a minute or two before serving—this allows the juices to redistribute. The shrimp emerge with a perfect, slightly springy bite, carrying the warm, aromatic punch of garlic and the earthy whisper of oregano. For a delightful twist, serve them over a bed of lemony orzo or alongside grilled slices of crusty bread to soak up every last bit of the garlicky oil.
White Bean and Kale Stew
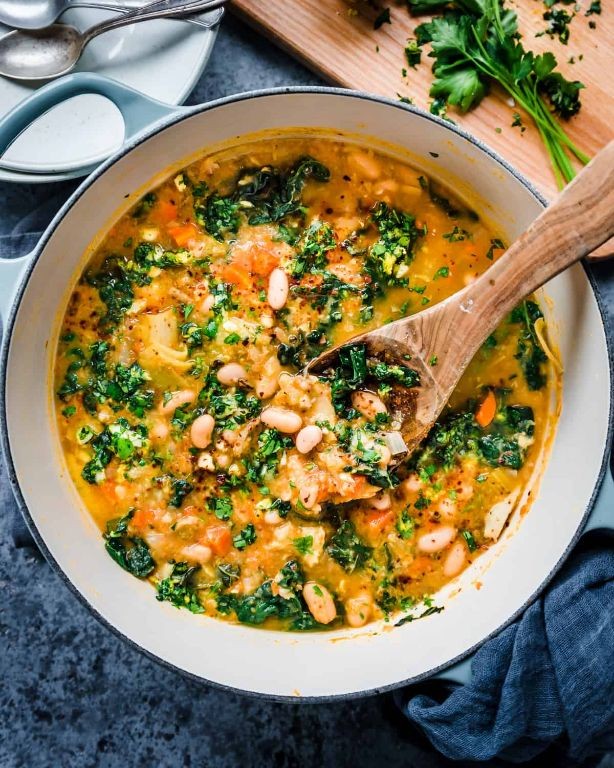
Evenings like this, when the light fades early and the air carries a chill, my thoughts turn to quiet comforts—a simmering pot on the stove, the earthy scent of beans and greens filling the kitchen. This white bean and kale stew is one of those gentle, nourishing anchors for the season, a simple bowl that feels like a slow, deep breath.
Serving: 4 | Pre Time: 15 minutes | Cooking Time: 45 minutes
Ingredients
– 2 tablespoons extra virgin olive oil (my go-to for its fruity depth)
– 1 medium yellow onion, diced
– 3 cloves garlic, minced (I always add an extra clove for good measure)
– 2 medium carrots, peeled and sliced into half-moons
– 4 cups low-sodium vegetable broth
– 2 (15-ounce) cans cannellini beans, rinsed and drained
– 1 large bunch lacinato kale, stems removed and leaves torn into bite-sized pieces (its dark, ruffled leaves are my favorite)
– 1 teaspoon dried thyme
– 1/2 teaspoon crushed red pepper flakes (optional, for a subtle warmth)
– Salt and freshly ground black pepper
Instructions
1. Heat the 2 tablespoons of extra virgin olive oil in a large Dutch oven or heavy-bottomed pot over medium heat for 1 minute until it shimmers lightly.
2. Add the diced yellow onion and cook, stirring occasionally, for 6–8 minutes until softened and translucent.
3. Stir in the minced garlic and cook for 1 minute until fragrant, being careful not to let it brown.
4. Add the sliced carrots and cook for 4 minutes, stirring once or twice, to slightly soften them.
5. Pour in the 4 cups of low-sodium vegetable broth and bring the mixture to a gentle boil over medium-high heat.
6. Reduce the heat to low, cover the pot, and simmer for 15 minutes to allow the flavors to meld.
7. Stir in the rinsed cannellini beans, dried thyme, and crushed red pepper flakes (if using).
8. Simmer uncovered for 10 minutes, stirring occasionally, to heat the beans through.
9. Add the torn lacinato kale leaves in batches, stirring until each batch wilts slightly before adding more.
10. Continue to simmer uncovered for 5–7 minutes until the kale is tender but still vibrant green.
11. Season with salt and freshly ground black pepper, starting with 1/2 teaspoon of salt and adjusting as needed.
12. Remove the pot from the heat and let the stew rest for 5 minutes before serving.
Now, ladle it into bowls while it’s still steaming. Notice how the beans have softened just enough to thicken the broth, while the kale retains a pleasant, slight chew against the sweet carrots. Nothing generic here—this stew welcomes a crusty piece of sourdough for dipping or a sprinkle of nutritional yeast for a savory, cheesy note on cooler nights.
Baked Cod with Olives and Capers
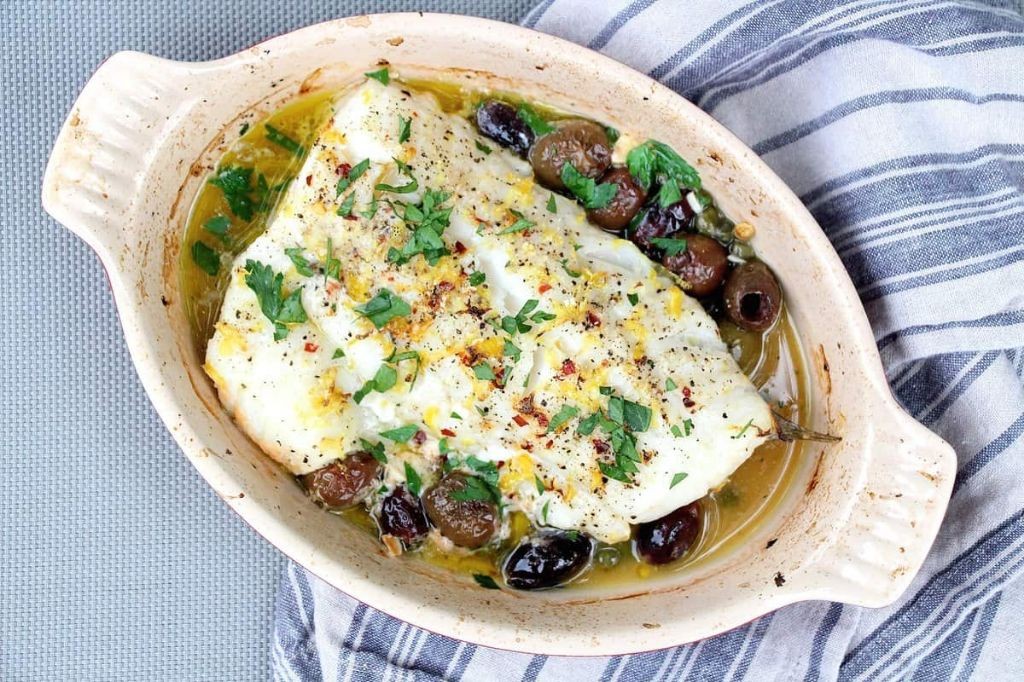
Cooking this dish feels like a quiet conversation with the sea—a simple baked cod that lets briny olives and bright capers sing their coastal song. I love how the oven’s warmth coaxes out their flavors, filling the kitchen with a gentle, savory aroma that promises comfort without fuss. It’s a humble meal that feels both nourishing and deeply satisfying, perfect for a reflective evening.
Serving: 4 | Pre Time: 15 minutes | Cooking Time: 20 minutes
Ingredients
- 1 ½ pounds cod fillets, patted dry with paper towels—I find this helps the seasoning stick better.
- 2 tablespoons extra virgin olive oil, my go-to for its fruity depth.
- ½ cup pitted Kalamata olives, roughly chopped for a burst of salty richness.
- 2 tablespoons capers, drained but not rinsed to keep their tangy punch.
- 3 cloves garlic, minced finely so it melts into the sauce.
- 1 lemon, thinly sliced—I prefer room-temperature lemons for easier juicing later.
- ½ teaspoon dried oregano, crushed between my fingers to wake up its aroma.
- Salt and freshly ground black pepper, used sparingly since the olives add saltiness.
- ¼ cup dry white wine, like a crisp Sauvignon Blanc, to deglaze the pan.
- 2 tablespoons chopped fresh parsley, for a fresh finish right at the end.
Instructions
- Preheat your oven to 400°F (200°C) and lightly grease a baking dish with a bit of the olive oil.
- Place the cod fillets in the dish in a single layer, ensuring they aren’t crowded for even cooking.
- Drizzle the remaining olive oil over the cod, rubbing it gently to coat each fillet.
- Sprinkle the minced garlic, chopped olives, capers, and dried oregano evenly over the fish.
- Arrange the lemon slices on top of the cod, overlapping slightly if needed.
- Season lightly with salt and pepper, remembering the olives are already salty.
- Pour the white wine around the edges of the dish, not directly over the fish, to create steam.
- Bake uncovered for 18–20 minutes, until the cod flakes easily with a fork and reaches an internal temperature of 145°F (63°C).
- Remove from the oven and let rest for 3 minutes to allow the juices to redistribute.
- Sprinkle with chopped parsley just before serving.
The cod emerges tender and flaky, with the olives and capers lending a savory, briny depth that’s balanced by the lemon’s bright acidity. Serve it over a bed of creamy polenta or with crusty bread to soak up the flavorful pan juices—it’s a dish that feels both elegant and effortlessly simple.
Fattoush Salad with Whole Grain Pita

Often, as the afternoon light softens, I find myself craving something that feels both nourishing and nostalgic—a dish that brings together crisp textures and bright flavors in a way that feels like a gentle embrace. This fattoush salad, with its toasted whole grain pita, is just that: a humble, vibrant bowl that celebrates simplicity and the quiet joy of assembling something beautiful from everyday ingredients.
Serving: 4 | Pre Time: 15 minutes | Cooking Time: 10 minutes
Ingredients
– 2 whole grain pita breads, torn into bite-sized pieces—I love the nutty depth they add, and tearing them by hand feels wonderfully rustic.
– 4 cups chopped romaine lettuce, washed and thoroughly dried so the dressing clings perfectly.
– 1 English cucumber, diced into small cubes for a refreshing crunch.
– 2 medium tomatoes, chopped—I prefer ripe, juicy ones that burst with sweetness.
– 1/2 red onion, thinly sliced and soaked in cold water for 5 minutes to mellow its sharpness, a little trick I picked up from my grandmother.
– 1/4 cup chopped fresh parsley, packed for that herbaceous lift.
– 1/4 cup chopped fresh mint, my secret for a bright, aromatic note.
– 3 tbsp extra virgin olive oil, my go-to for its fruity richness.
– 2 tbsp fresh lemon juice, squeezed just before using to keep it zesty.
– 1 tsp sumac, which adds a tangy, earthy depth that makes this salad sing.
– 1/2 tsp salt, to balance the flavors without overpowering.
– 1/4 tsp black pepper, freshly ground for a subtle warmth.
Instructions
1. Preheat your oven to 375°F (190°C) and line a baking sheet with parchment paper.
2. Spread the torn pita pieces evenly on the baking sheet and bake for 8-10 minutes, until golden brown and crisp, checking halfway to avoid burning—this toasting step is key for that satisfying crunch.
3. While the pita toasts, combine the romaine lettuce, diced cucumber, chopped tomatoes, and drained red onion slices in a large mixing bowl.
4. Add the chopped parsley and mint to the bowl, gently tossing to distribute the herbs evenly.
5. In a small bowl, whisk together the extra virgin olive oil, fresh lemon juice, sumac, salt, and black pepper until emulsified—tip: let the dressing sit for a minute to allow the flavors to meld.
6. Pour the dressing over the salad mixture and toss thoroughly to coat every leaf and vegetable piece.
7. Add the toasted pita pieces to the salad just before serving to maintain their crisp texture, tossing lightly to combine—tip: if you prefer a softer pita, you can add them earlier, but I adore the contrast of crisp and tender.
8. Divide the salad among four plates or bowls, ensuring each portion gets a generous mix of ingredients.
Earthy and vibrant, this salad offers a delightful play of textures—from the crisp pita to the juicy tomatoes and cool cucumber—while the sumac and lemon lend a tangy brightness that feels both refreshing and comforting. Serve it as a light lunch on its own, or pair it with grilled chicken or fish for a heartier meal; it’s versatile enough to shine at a casual gathering or as a quiet dinner for one, reminding me that the simplest dishes often hold the most warmth.
Spicy Roasted Cauliflower with Turmeric

Just now, as the winter light fades outside my kitchen window, I find myself craving something that warms from within—a dish that feels both nourishing and gently exciting. This spicy roasted cauliflower with turmeric is exactly that kind of comfort, transforming a simple vegetable into something golden and vibrant with just a handful of spices and a bit of patience.
Serving: 4 | Pre Time: 10 minutes | Cooking Time: 25 minutes
Ingredients
– 1 large head of cauliflower, cut into bite-sized florets (I look for one that feels heavy for its size)
– 3 tablespoons extra virgin olive oil, my go-to for roasting
– 1 tablespoon honey, for a touch of sweetness to balance the heat
– 2 teaspoons ground turmeric, which I buy fresh and store in a dark jar to preserve its color
– 1 teaspoon smoked paprika, my secret for a deep, smoky undertone
– 1/2 teaspoon cayenne pepper, adjust if you’re sensitive to spice—I like it bold
– 1/2 teaspoon garlic powder, for convenience without sacrificing flavor
– 1/2 teaspoon sea salt, I prefer the coarse kind here for texture
– Fresh cilantro leaves, for garnish, torn by hand just before serving
Instructions
1. Preheat your oven to 425°F (218°C) and line a large baking sheet with parchment paper for easy cleanup.
2. In a large mixing bowl, whisk together the extra virgin olive oil, honey, ground turmeric, smoked paprika, cayenne pepper, garlic powder, and sea salt until fully combined—this creates a smooth, vibrant marinade.
3. Add the cauliflower florets to the bowl and toss them gently with your hands or a spoon, ensuring each piece is evenly coated with the spice mixture. Tip: Let the cauliflower sit for 5 minutes after tossing to allow the flavors to penetrate.
4. Spread the coated cauliflower in a single layer on the prepared baking sheet, making sure the florets aren’t crowded to ensure even roasting and crisp edges.
5. Roast in the preheated oven for 20-25 minutes, flipping the florets halfway through with a spatula, until they are tender when pierced with a fork and have golden-brown, slightly charred spots. Tip: Check at the 20-minute mark—ovens vary, and you want them crisp but not burnt.
6. Remove the baking sheet from the oven and let the cauliflower cool for 2-3 minutes on the sheet to firm up slightly. Tip: This resting time helps the spices settle and enhances the texture.
7. Transfer the roasted cauliflower to a serving dish and garnish with fresh cilantro leaves, torn just before adding for maximum aroma.
Kneading the spices into the cauliflower feels almost meditative, and the result is a dish with a tender-crisp bite that gives way to warm, earthy flavors. I love serving it over a bed of quinoa for a complete meal, or as a vibrant side that brightens up any winter table with its golden hue and gentle heat.
Herbed Turkey Meatballs in Tomato Sauce

Perhaps it’s the quiet of a December evening like this that makes me crave something both comforting and nourishing—a dish that simmers gently on the stove, filling the kitchen with the kind of warmth that feels like a slow, deep breath.
Serving: 4 | Pre Time: 15 minutes | Cooking Time: 30 minutes
Ingredients
- 1 lb ground turkey (I find the 93% lean variety holds together nicely without drying out)
- 1/2 cup plain breadcrumbs (I often use panko for a slightly lighter texture)
- 1/4 cup grated Parmesan cheese, plus extra for serving
- 1 large egg, at room temperature—it blends more smoothly into the mixture
- 2 tbsp extra virgin olive oil, my go-to for its fruity notes
- 2 cloves garlic, minced (I press mine for a more even distribution)
- 1 tbsp fresh parsley, finely chopped
- 1 tsp dried oregano
- 1/2 tsp salt
- 1/4 tsp black pepper, freshly ground
- 1 (28 oz) can crushed tomatoes
- 1 small yellow onion, finely diced
- 1/2 tsp red pepper flakes, optional but lovely for a subtle warmth
Instructions
- In a large mixing bowl, combine the ground turkey, breadcrumbs, Parmesan cheese, egg, minced garlic, parsley, oregano, salt, and black pepper.
- Gently mix the ingredients with your hands until just combined, being careful not to overwork the meat, which can make the meatballs tough.
- Shape the mixture into 1-inch meatballs, rolling them lightly between your palms; you should have about 20 meatballs.
- Heat the extra virgin olive oil in a large skillet or Dutch oven over medium heat until it shimmers, about 2 minutes.
- Add the diced onion to the skillet and cook, stirring occasionally, until softened and translucent, about 5 minutes.
- Push the onions to the side of the skillet and add the meatballs in a single layer, working in batches if necessary to avoid crowding.
- Cook the meatballs for 3-4 minutes per side, turning gently with a spoon, until they are golden brown on all sides but not cooked through.
- Pour the crushed tomatoes and red pepper flakes (if using) into the skillet, stirring gently to combine with the onions.
- Bring the sauce to a gentle simmer, then reduce the heat to low and cover the skillet with a lid.
- Let the meatballs simmer in the sauce for 20 minutes, until they are cooked through and the sauce has thickened slightly; a meat thermometer inserted into the center of a meatball should read 165°F.
- Remove the skillet from the heat and let it rest, uncovered, for 5 minutes to allow the flavors to meld.
Serve these meatballs nestled in the rich tomato sauce, perhaps over a bed of creamy polenta or tangled with spaghetti. They emerge tender and juicy, the herbs whispering through each bite, while the sauce clings in a velvety embrace. Sometimes I’ll spoon leftovers into a crusty roll the next day for a sandwich that feels like a quiet gift.
Olive Oil-Roasted Vegetables with Rosemary
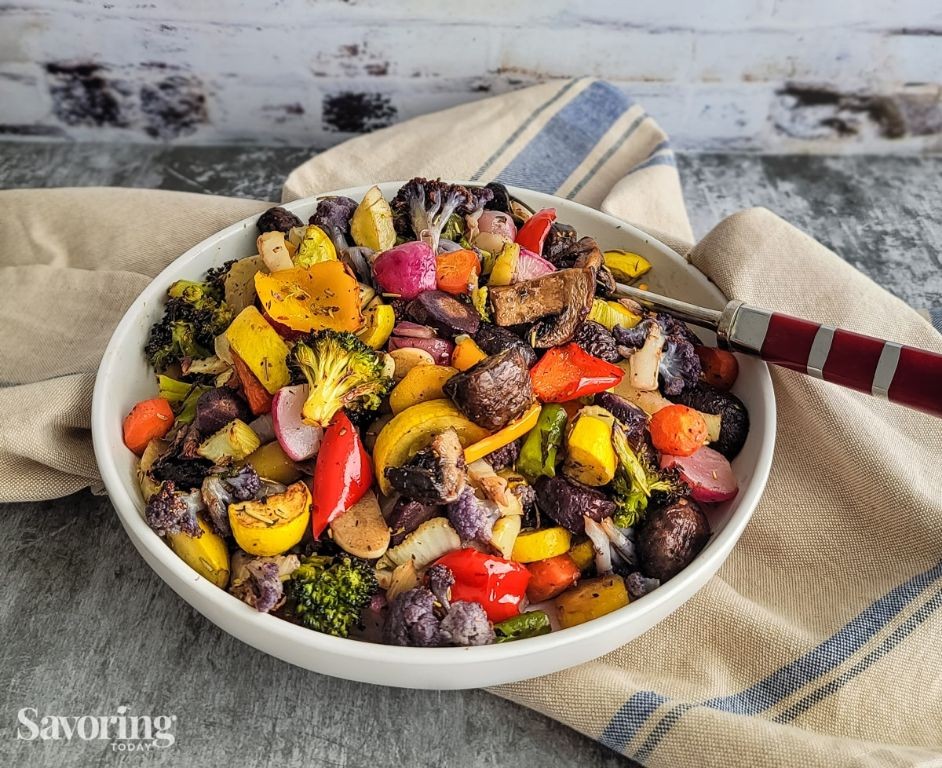
Now, as the winter light fades early outside my kitchen window, I find myself reaching for the simplest of comforts—a tray of vegetables transformed by heat and time. There’s a quiet magic in letting the oven do its slow work, filling the house with the earthy scent of rosemary and the sweet promise of caramelized edges.
Serving: 4 | Pre Time: 15 minutes | Cooking Time: 35 minutes
Ingredients
– 1 large sweet potato, peeled and cut into 1-inch cubes (I leave the skin on for extra texture sometimes)
– 2 medium carrots, sliced into ½-inch rounds (their natural sweetness deepens beautifully)
– 1 large red bell pepper, seeded and chopped into 1-inch pieces
– 1 small red onion, cut into ½-inch wedges (it turns wonderfully jammy)
– 3 tablespoons extra virgin olive oil (my go-to for its fruity notes)
– 1 tablespoon fresh rosemary leaves, finely chopped (from my windowsill herb pot)
– 1 teaspoon kosher salt (I prefer its coarse grains for even seasoning)
– ½ teaspoon freshly ground black pepper
Instructions
1. Preheat your oven to 425°F (218°C) and line a large, rimmed baking sheet with parchment paper for easy cleanup.
2. Place the sweet potato cubes, carrot rounds, bell pepper pieces, and onion wedges in a large mixing bowl.
3. Drizzle the extra virgin olive oil over the vegetables, using your hands to toss until every piece is lightly coated—this ensures even roasting.
4. Sprinkle the chopped rosemary, kosher salt, and black pepper evenly over the vegetables, tossing again to distribute the seasonings.
5. Spread the vegetables in a single, uncrowded layer on the prepared baking sheet; overcrowding steams them instead of roasting.
6. Roast in the preheated oven for 20 minutes, then use a spatula to flip the vegetables gently for even browning.
7. Continue roasting for another 12–15 minutes, until the sweet potatoes are fork-tender and the edges are caramelized and slightly crisp.
8. Remove the baking sheet from the oven and let the vegetables rest for 5 minutes—this allows the flavors to settle.
Unbelievably tender yet with crisp, golden bits, these vegetables offer a melody of sweet and savory notes, heightened by the piney rosemary. I love serving them over a bed of creamy polenta or tossing them into a grain bowl with a drizzle of balsamic glaze for a cozy, complete meal.
Summary
Lovingly crafted, these 17 hearty Mediterranean recipes offer a delicious path to weight loss in 2024. We hope you find joy in cooking these vibrant, satisfying dishes. Give them a try, leave a comment with your favorite, and share this roundup on Pinterest to inspire fellow home cooks!


