Ooh, are you ready to give your metabolism a delicious boost? We’ve gathered 20 mouthwatering recipes that make healthy eating exciting and effortless. From quick weeknight dinners to vibrant salads, these dishes are packed with flavor and nutrients to fuel your body. Get ready to discover your new kitchen favorites—each recipe is a simple step toward a healthier, happier you. Let’s dive in!
Spicy Metaboost Chicken Stir-Fry
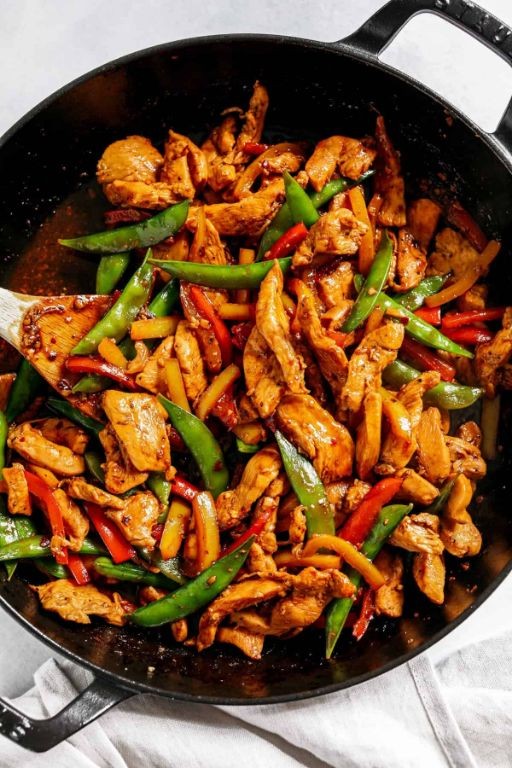
Gather your ingredients and let’s create a flavorful, metabolism-boosting stir-fry that’s perfect for a quick weeknight dinner. This Spicy Metaboost Chicken Stir-Fry combines lean protein with vibrant vegetables and a kick of heat to warm you up from the inside out. Follow these steps carefully for a restaurant-quality meal at home.
Serving: 4 | Pre Time: 15 minutes | Cooking Time: 12 minutes
Ingredients
– 1.5 lbs boneless, skinless chicken breasts, cut into 1-inch cubes (I prefer organic chicken for better flavor)
– 2 tbsp avocado oil, divided (my go-to for high-heat cooking)
– 1 red bell pepper, thinly sliced into strips
– 1 yellow bell pepper, thinly sliced into strips
– 1 medium yellow onion, thinly sliced
– 3 cloves garlic, minced (fresh garlic makes all the difference)
– 1 tbsp fresh ginger, grated
– 2 tbsp low-sodium soy sauce
– 1 tbsp sriracha sauce (adjust if you’re sensitive to heat)
– 1 tsp ground cumin
– ½ tsp cayenne pepper
– ¼ cup fresh cilantro, chopped (for garnish)
– 1 lime, cut into wedges (for serving)
Instructions
1. Pat the chicken cubes completely dry with paper towels to ensure proper browning.
2. Heat 1 tablespoon of avocado oil in a large skillet or wok over medium-high heat until shimmering, about 2 minutes.
3. Add the chicken cubes in a single layer, cooking undisturbed for 3 minutes to develop a golden-brown crust.
4. Flip each chicken piece and cook for another 3 minutes until cooked through (internal temperature should reach 165°F).
5. Transfer the cooked chicken to a clean plate using tongs, leaving any juices in the pan.
6. Add the remaining 1 tablespoon of avocado oil to the same skillet.
7. Add the sliced bell peppers and onion, stirring constantly for 4 minutes until slightly softened but still crisp.
8. Add the minced garlic and grated ginger, cooking for 1 minute until fragrant (be careful not to burn).
9. Return the cooked chicken to the skillet with the vegetables.
10. Pour the soy sauce and sriracha over the mixture, then sprinkle with cumin and cayenne pepper.
11. Toss everything together thoroughly and cook for 1 minute to allow the flavors to meld.
12. Remove the skillet from heat and sprinkle with chopped cilantro.
Just before serving, squeeze fresh lime juice over the stir-fry to brighten all the flavors. The chicken should be tender and juicy, while the vegetables retain a satisfying crunch against the spicy, savory sauce. For a complete meal, serve over cauliflower rice or quinoa, or wrap it in lettuce leaves for a low-carb option.
Metaboost Green Smoothie Bowl

Smoothie bowls have taken over breakfast routines, and this Metaboost Green Smoothie Bowl is my current favorite for starting the day with energy and nutrients. Let me walk you through creating this vibrant, satisfying bowl that’s perfect for a quick yet nourishing meal.
Serving: 1 | Pre Time: 10 minutes | Cooking Time: 0 minutes
Ingredients
– 1 cup frozen spinach (I find frozen works best for that thick, creamy texture without watering it down)
– 1/2 frozen banana (peeled and sliced before freezing—this adds natural sweetness and creaminess)
– 1/2 cup unsweetened almond milk (my go-to for a light base, but any milk works)
– 1 tablespoon chia seeds (these little powerhouses thicken the smoothie and add fiber)
– 1/4 cup plain Greek yogurt (I prefer full-fat for extra richness, but low-fat is fine too)
– 1 teaspoon honey (local honey is my favorite for a touch of sweetness and flavor)
– Toppings: 2 tablespoons granola, 1/4 cup mixed berries, and 1 tablespoon sliced almonds (these add crunch and color, so don’t skip them!)
Instructions
1. Add 1 cup frozen spinach, 1/2 frozen banana, 1/2 cup unsweetened almond milk, 1 tablespoon chia seeds, 1/4 cup plain Greek yogurt, and 1 teaspoon honey to a high-speed blender.
2. Blend the ingredients on high speed for 45-60 seconds until completely smooth and creamy, scraping down the sides with a spatula halfway through if needed. Tip: If the mixture is too thick, add 1 more tablespoon of almond milk and blend for 10 seconds.
3. Pour the smoothie mixture into a medium-sized bowl, using the spatula to get every last bit.
4. Sprinkle 2 tablespoons granola evenly over one side of the smoothie bowl for a crunchy contrast.
5. Arrange 1/4 cup mixed berries on another section of the bowl, scattering them for a burst of color.
6. Finish by scattering 1 tablespoon sliced almonds over the top for extra texture. Tip: Toast the almonds in a dry pan over medium heat for 2-3 minutes until fragrant for enhanced flavor.
7. Serve the bowl immediately to enjoy the best texture. Tip: For a colder bowl, chill the bowl in the freezer for 5 minutes before adding the smoothie.
Perfectly thick and spoonable, this bowl offers a creamy base with pops of sweetness from the berries and a satisfying crunch from the granola and almonds. Try drizzling it with a bit more honey or swapping the berries for sliced kiwi for a tropical twist—it’s versatile enough to make your own!
Grilled Salmon with Metaboost Salsa

Unlock the vibrant flavors of this grilled salmon with Metaboost salsa, a dish that transforms simple ingredients into a restaurant-worthy meal right in your own kitchen. Using a methodical approach, we’ll build layers of flavor from the perfectly seasoned fish to the bright, fresh salsa topping, ensuring success even for first-time cooks.
Serving: 4 | Pre Time: 15 minutes | Cooking Time: 12 minutes
Ingredients
– 4 salmon fillets (6 oz each), skin-on for extra flavor and easier handling—I always pat them dry with paper towels first
– 2 tbsp extra virgin olive oil, my go-to for its fruity notes
– 1 tsp kosher salt, which dissolves evenly compared to table salt
– ½ tsp freshly ground black pepper, freshly cracked for the best aroma
– 1 cup cherry tomatoes, halved—I look for the sweetest ones I can find
– ½ cup finely diced red onion, soaked in cold water for 5 minutes to mellow its bite
– ¼ cup chopped fresh cilantro, stems included for extra herbaceous flavor
– 1 jalapeño, seeded and minced (wear gloves if sensitive to heat)
– 2 tbsp fresh lime juice, about 1 juicy lime squeezed right before using
– 1 avocado, diced just before assembling to prevent browning
Instructions
1. Preheat your grill to medium-high heat, about 400°F, ensuring the grates are clean and lightly oiled to prevent sticking.
2. Pat the salmon fillets completely dry with paper towels on both sides—this helps achieve a crisp exterior.
3. Brush both sides of each fillet evenly with the extra virgin olive oil using a pastry brush or your fingers.
4. Sprinkle the kosher salt and freshly ground black pepper evenly over both sides of the fillets, pressing gently to adhere.
5. Place the salmon fillets skin-side down on the preheated grill, leaving space between them for even cooking.
6. Grill for 6 minutes without moving the fillets to develop grill marks and a crispy skin.
7. Carefully flip each fillet using a spatula and grill for another 4-6 minutes, until the internal temperature reaches 145°F when checked with an instant-read thermometer.
8. While the salmon grills, combine the halved cherry tomatoes, finely diced red onion, chopped fresh cilantro, minced jalapeño, and fresh lime juice in a medium bowl.
9. Gently fold in the diced avocado just before serving to maintain its texture—this prevents it from becoming mushy.
10. Remove the grilled salmon from the grill and let it rest for 3 minutes on a plate to allow juices to redistribute.
11. Top each salmon fillet generously with the Metaboost salsa mixture, using a spoon to distribute it evenly.
Now, savor the contrast between the flaky, moist salmon and the chunky, zesty salsa that bursts with freshness in every bite. For a creative twist, serve it over a bed of quinoa or alongside grilled asparagus to make it a complete, colorful plate that’s as nutritious as it is delicious.
Quinoa and Metaboost Veggie Salad

Kicking off our wholesome meal prep, this quinoa and veggie salad is a vibrant powerhouse that comes together with minimal effort. Keep it simple by preparing the components ahead, then assemble when you’re ready to enjoy a fresh, satisfying lunch or light dinner.
Serving: 4 | Pre Time: 15 minutes | Cooking Time: 20 minutes
Ingredients
– 1 cup quinoa, rinsed well under cold water to remove any bitterness—I always use a fine-mesh strainer for this.
– 2 cups water
– 1/4 cup extra virgin olive oil, my go-to for its fruity flavor that brightens the dressing.
– 2 tbsp fresh lemon juice, squeezed from about 1 medium lemon for a zesty kick.
– 1 tsp honey, to balance the acidity with a touch of sweetness.
– 1/2 tsp salt, I prefer fine sea salt for even distribution.
– 1/4 tsp black pepper, freshly ground if you have it.
– 1 medium cucumber, diced into 1/2-inch pieces for a crisp texture.
– 1 cup cherry tomatoes, halved—I like using multicolored ones for visual appeal.
– 1/2 red onion, finely chopped; soak it in cold water for 5 minutes first to mellow the sharpness.
– 1/4 cup chopped fresh parsley, loosely packed for a herbaceous finish.
Instructions
1. Rinse 1 cup quinoa under cold running water in a fine-mesh strainer for 1 minute to remove saponins, which can taste bitter.
2. Combine the rinsed quinoa and 2 cups water in a medium saucepan over high heat.
3. Bring the mixture to a boil, then reduce the heat to low, cover the saucepan with a tight-fitting lid, and simmer for 15 minutes.
4. After 15 minutes, remove the saucepan from the heat, keep it covered, and let it rest for 5 minutes to allow the quinoa to steam and fluff up.
5. While the quinoa cooks, whisk together 1/4 cup extra virgin olive oil, 2 tbsp fresh lemon juice, 1 tsp honey, 1/2 tsp salt, and 1/4 tsp black pepper in a small bowl until fully emulsified.
6. Dice 1 medium cucumber into 1/2-inch pieces and place them in a large mixing bowl.
7. Halve 1 cup cherry tomatoes and add them to the bowl with the cucumber.
8. Finely chop 1/2 red onion, soak the pieces in a bowl of cold water for 5 minutes to reduce pungency, then drain and pat dry with a paper towel before adding to the bowl.
9. Chop 1/4 cup fresh parsley and set it aside.
10. Once the quinoa has rested, fluff it with a fork to separate the grains, then transfer it to the large mixing bowl with the vegetables.
11. Pour the dressing over the quinoa and vegetable mixture and toss gently with a large spoon until everything is evenly coated.
12. Fold in the chopped parsley just before serving to keep it vibrant and fresh.
13. Serve the salad immediately, or refrigerate it in an airtight container for up to 3 days for meal prep.
Beyond its nutritional benefits, this salad offers a delightful contrast of textures—fluffy quinoa, crunchy cucumber, and juicy tomatoes meld together with a tangy-sweet dressing. For a creative twist, try stuffing it into pita pockets or serving it over a bed of leafy greens to make it a heartier meal.
Metaboost Avocado Toast with Poached Egg
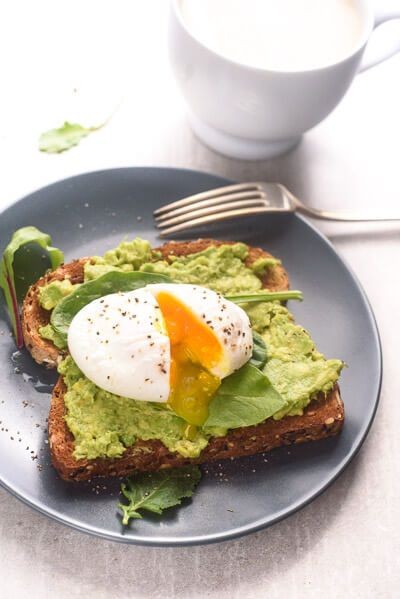
You’ve probably seen avocado toast everywhere, but this Metaboost version with a perfectly poached egg takes it to a whole new level of satisfying, healthy deliciousness. It’s the kind of simple yet impressive breakfast that feels like a treat but fuels your body right, and I’m going to guide you through making it flawlessly.
Serving: 1 | Pre Time: 5 minutes | Cooking Time: 10 minutes
Ingredients
– 1 slice of hearty sourdough bread (I find it holds up best to the toppings)
– 1/2 ripe avocado, pitted and scooped
– 1 large egg (I prefer using room temperature eggs for more consistent poaching)
– 1 tsp white vinegar (this little trick helps the egg white coagulate neatly)
– 1 tbsp extra virgin olive oil (my go-to for its fruity flavor)
– 1/4 tsp red pepper flakes (for a subtle kick, adjust if you like it milder)
– Salt and freshly ground black pepper (I always use coarse sea salt here for texture)
Instructions
1. Fill a small saucepan about two-thirds full with water and bring it to a gentle simmer over medium heat—you should see small bubbles rising, not a rolling boil.
2. While the water heats, toast your slice of sourdough bread in a toaster or under a broiler until it’s golden brown and crisp, about 2-3 minutes.
3. Add 1 tsp of white vinegar to the simmering water; this acid helps the egg whites set quickly for a tidy poach.
4. Crack 1 large egg into a small bowl or ramekin to make it easier to slide into the water without breaking the yolk.
5. Using a spoon, create a gentle whirlpool in the water, then carefully slide the egg from the bowl into the center of the whirlpool.
6. Let the egg poach undisturbed for exactly 3 minutes for a runny yolk—set a timer to avoid overcooking.
7. While the egg poaches, scoop the avocado half into a small bowl and mash it roughly with a fork until creamy but with some chunks left for texture.
8. Drizzle 1 tbsp of extra virgin olive oil over the toasted sourdough bread.
9. Spread the mashed avocado evenly onto the oiled toast.
10. Sprinkle the avocado with 1/4 tsp of red pepper flakes, a pinch of salt, and a few grinds of black pepper.
11. After 3 minutes, use a slotted spoon to lift the poached egg from the water, letting excess water drain off, and place it gently on top of the avocado toast.
12. Season the poached egg lightly with another pinch of salt and pepper.
Just imagine cutting into that soft, runny yolk mingling with the creamy avocado and crunchy toast—it’s a symphony of textures in every bite. For a creative twist, try adding a sprinkle of everything bagel seasoning or serve it alongside a simple arugula salad for a fuller meal.
Turmeric Metaboost Lentil Soup

You’ve probably been searching for a cozy, health-boosting meal that’s both simple to prepare and packed with flavor—this Turmeric Metaboost Lentil Soup is exactly that. Yearning for something nourishing on a chilly day, I developed this recipe to combine anti-inflammatory turmeric with protein-rich lentils, creating a vibrant, golden-hued soup that’s as good for your body as it is delicious. Let’s walk through each step together, just like we’re side-by-side in the kitchen.
Serving: 4 | Pre Time: 15 minutes | Cooking Time: 30 minutes
Ingredients
– 1 tablespoon extra virgin olive oil (my go-to for its fruity aroma)
– 1 medium yellow onion, diced (I like it finely chopped for even cooking)
– 2 cloves garlic, minced (freshly minced releases the best flavor)
– 1 tablespoon fresh ginger, grated (it adds a zesty kick)
– 1 teaspoon ground turmeric (for that golden color and health boost)
– 1 cup dried brown lentils, rinsed (rinsing removes any debris)
– 4 cups vegetable broth (low-sodium lets you control the salt)
– 1 can (14.5 ounces) diced tomatoes, undrained (they add a tangy sweetness)
– 1 teaspoon salt (adjust later if needed)
– 1/2 teaspoon black pepper (freshly ground is my preference)
– 1 cup baby spinach leaves (they wilt beautifully at the end)
– 1 tablespoon lemon juice (freshly squeezed brightens everything up)
Instructions
1. Heat the extra virgin olive oil in a large pot over medium heat until it shimmers, about 2 minutes.
2. Add the diced yellow onion and cook, stirring occasionally, until softened and translucent, about 5 minutes.
3. Stir in the minced garlic and grated ginger, cooking for 1 minute until fragrant—be careful not to burn them.
4. Sprinkle in the ground turmeric, stirring constantly to toast it lightly for 30 seconds, which enhances its flavor.
5. Pour in the rinsed brown lentils and vegetable broth, bringing the mixture to a boil over high heat.
6. Reduce the heat to low, cover the pot, and simmer for 20 minutes until the lentils are tender but not mushy.
7. Add the undrained diced tomatoes, salt, and black pepper, stirring to combine.
8. Simmer uncovered for 5 more minutes to let the flavors meld together.
9. Stir in the baby spinach leaves until they wilt, about 1 minute.
10. Remove the pot from the heat and stir in the lemon juice.
Velvety and rich, this soup has a hearty texture from the lentils and a bright, earthy flavor from the turmeric and ginger. For a creative twist, serve it with a dollop of yogurt or a sprinkle of fresh herbs like cilantro—it’s perfect for meal prep or a quick weeknight dinner.
Metaboost Berry Chia Pudding

Metaboost Berry Chia Pudding is a vibrant, nutrient-packed breakfast or snack that comes together with minimal effort. Making this pudding is like giving your body a gentle morning hug—it’s creamy, satisfying, and loaded with antioxidants from fresh berries and omega-3s from chia seeds. Let’s walk through the simple steps to create this wholesome treat.
Serving: 2 | Pre Time: 5 minutes | Cooking Time: 0 minutes
Ingredients
– 1 cup unsweetened almond milk (I prefer the creamy texture of almond milk, but any plant-based milk works)
– ¼ cup chia seeds (these tiny powerhouses thicken the pudding beautifully)
– 1 tablespoon pure maple syrup (adjust to your sweetness preference, but I find this amount perfect)
– ½ teaspoon pure vanilla extract (a splash adds warmth and depth)
– 1 cup mixed fresh berries, such as strawberries and blueberries (I love using organic berries for their bright flavor)
– Optional: a pinch of cinnamon for extra spice
Instructions
1. Pour 1 cup of unsweetened almond milk into a medium-sized mixing bowl.
2. Add ¼ cup of chia seeds to the almond milk.
3. Stir the mixture vigorously for 30 seconds to prevent the chia seeds from clumping together.
4. Add 1 tablespoon of pure maple syrup and ½ teaspoon of pure vanilla extract to the bowl.
5. Mix all ingredients thoroughly until well combined, about 1 minute.
6. Cover the bowl tightly with plastic wrap or a lid.
7. Place the covered bowl in the refrigerator for at least 4 hours or overnight to allow the chia seeds to absorb the liquid and thicken.
8. After chilling, remove the bowl from the refrigerator and stir the pudding to break up any gel-like consistency.
9. Wash 1 cup of mixed fresh berries under cold running water and pat them dry with a paper towel.
10. Slice the strawberries into thin pieces if using, leaving the blueberries whole.
11. Gently fold the berries into the chia pudding until evenly distributed.
12. Divide the pudding evenly between two serving bowls or jars.
13. Sprinkle a pinch of cinnamon over the top of each serving if desired.
14. Serve immediately or refrigerate for up to 3 days.
Let’s savor the results: this pudding sets into a luscious, gel-like texture that’s both creamy and slightly chewy from the chia seeds. The berries burst with juicy sweetness against the subtle vanilla and maple notes, making every spoonful refreshing. For a creative twist, layer it in a glass with granola or top it with a dollop of coconut whipped cream for an extra-indulgent treat.
Zucchini Noodles with Metaboost Pesto

Getting dinner on the table doesn’t have to be a chore, especially when you can whip up something as fresh and vibrant as zucchini noodles with a special pesto. This recipe is perfect for a light yet satisfying meal that comes together with minimal effort, making it ideal for busy weeknights. Let’s walk through the simple steps to create this delicious dish together.
Serving: 2 | Pre Time: 15 minutes | Cooking Time: 5 minutes
Ingredients
– 2 medium zucchinis, spiralized into noodles (I find this yields the perfect amount for two)
– 1 cup fresh basil leaves, packed (the fresher the better for that vibrant green color)
– 1/3 cup raw walnuts (I love their earthy flavor over pine nuts here)
– 1/3 cup extra virgin olive oil, my go-to for its fruity notes
– 2 cloves garlic, peeled (adjust if you’re sensitive to raw garlic)
– 1/4 cup grated Parmesan cheese, plus extra for serving
– Juice of 1/2 a lemon (about 1 tablespoon)
– 1/4 teaspoon sea salt
– 1/4 teaspoon freshly ground black pepper
Instructions
1. Place the basil leaves, walnuts, garlic, Parmesan cheese, lemon juice, salt, and pepper into a food processor.
2. Pulse the ingredients 5-7 times until they are roughly chopped, which helps release the oils for better flavor.
3. With the food processor running on low speed, slowly drizzle in the extra virgin olive oil through the feed tube until the pesto is smooth and emulsified, about 30 seconds. Tip: Scrape down the sides once to ensure everything is evenly incorporated.
4. Spiralize the two zucchinis into noodle-like strands using a spiralizer, placing them in a large mixing bowl.
5. Pour the prepared pesto over the zucchini noodles in the bowl.
6. Using tongs or two forks, gently toss the zucchini noodles with the pesto until they are evenly coated, about 1 minute. Tip: Be gentle to avoid breaking the delicate noodles.
7. Let the dressed noodles sit at room temperature for 5 minutes to allow the flavors to meld and the zucchini to soften slightly.
8. Divide the zucchini noodles evenly between two serving plates. Tip: For a warm version, you can quickly sauté the noodles in a pan over medium heat for 2-3 minutes before adding the pesto.
9. Sprinkle additional grated Parmesan cheese on top of each serving if desired.
Perfectly al dente with a satisfying crunch, these zucchini noodles are coated in a rich, herbaceous pesto that’s both creamy and bright from the lemon. The walnuts add a delightful nuttiness that complements the fresh zucchini beautifully. Try serving it alongside grilled chicken or shrimp for a complete meal, or enjoy it as is for a refreshing, low-carb lunch that feels indulgent yet light.
Metaboost Detox Tea Infusion
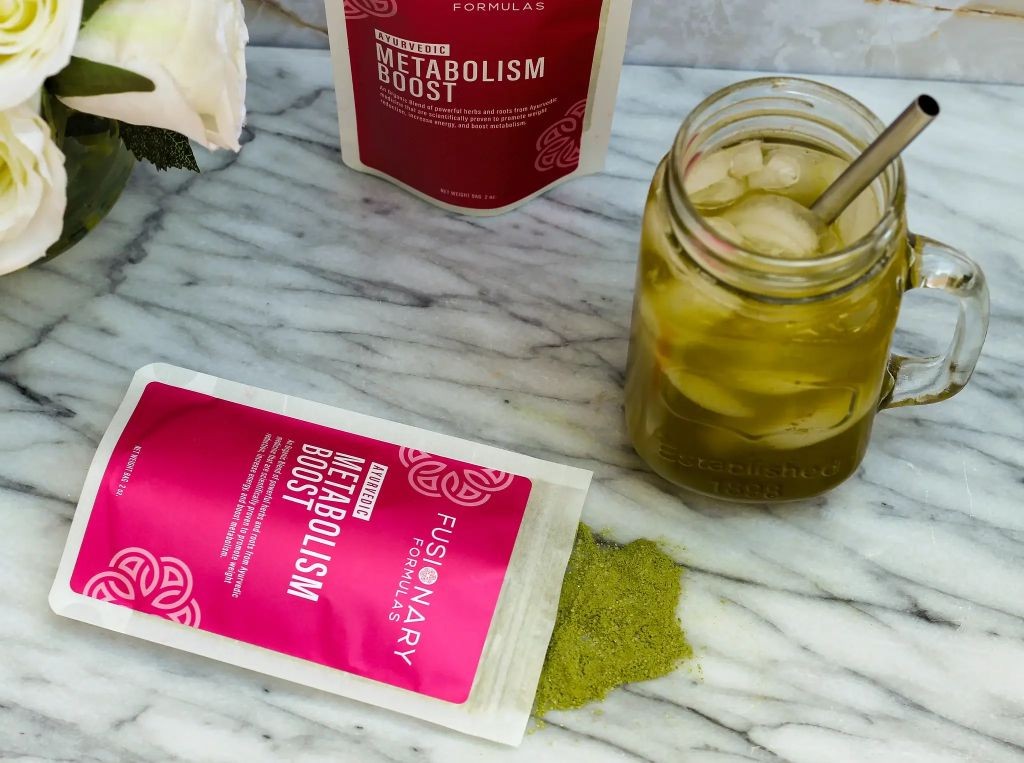
Many of us reach for a comforting cup of tea when we need a moment of calm, and this Metaboost Detox Tea Infusion is designed to be that peaceful ritual with an extra wellness kick. Making it is a simple, mindful process that yields a bright, herbaceous brew perfect for sipping any time of day.
Serving: 1 | Pre Time: 2 minutes | Cooking Time: 8 minutes
Ingredients
- 1 cup of filtered water – I find using filtered water makes for the cleanest-tasting tea.
- 1 tablespoon of fresh lemon juice – Freshly squeezed is always best for that vibrant, tart flavor.
- 1 teaspoon of raw honey – My go-to is local raw honey for its subtle floral notes and natural sweetness.
- 1/2 teaspoon of grated fresh ginger – A little ginger goes a long way for a warm, spicy kick.
- 1/4 teaspoon of ground turmeric – I prefer a high-quality organic turmeric for its deep golden color and earthy flavor.
- 1 small pinch of freshly ground black pepper – This is my secret tip to help activate the turmeric’s benefits.
- 1 fresh mint sprig – For garnish; I love the fresh aroma it adds right at the end.
Instructions
- Pour 1 cup of filtered water into a small saucepan and place it over medium-high heat.
- Bring the water to a gentle boil, which should take about 3-4 minutes; you’ll see small, steady bubbles breaking the surface.
- Once boiling, immediately reduce the heat to low to maintain a bare simmer.
- Add 1/2 teaspoon of grated fresh ginger and 1/4 teaspoon of ground turmeric directly to the simmering water. Tip: Adding spices while the water is hot helps infuse their flavors more effectively.
- Stir the mixture gently with a spoon for 30 seconds to combine the spices evenly.
- Let the infusion simmer uncovered on low heat for exactly 5 minutes to allow the flavors to meld.
- After 5 minutes, remove the saucepan from the heat completely.
- Carefully pour the hot infusion through a fine-mesh strainer into your favorite mug to catch the ginger pieces. Tip: Using a strainer ensures a smooth, grit-free tea.
- While the tea is still very hot in the mug, stir in 1 tablespoon of fresh lemon juice and 1 teaspoon of raw honey until the honey is fully dissolved.
- Add 1 small pinch of freshly ground black pepper to the mug and give it one final stir. Tip: The pepper enhances the bioavailability of the turmeric, so don’t skip it!
- Garnish the tea with 1 fresh mint sprig by gently placing it on the surface of the liquid.
- Allow the tea to cool for 2-3 minutes before serving to let the mint aroma infuse and to reach a comfortable drinking temperature.
Here, you’ll find the tea has a warm, golden hue with a smooth, slightly viscous texture from the honey. Its flavor is a harmonious blend of spicy ginger, earthy turmeric, and bright lemon, finished with a hint of sweetness. For a creative twist, try serving it over ice with an extra squeeze of lemon for a refreshing detox cooler.
Roasted Vegetables with Metaboost Dressing
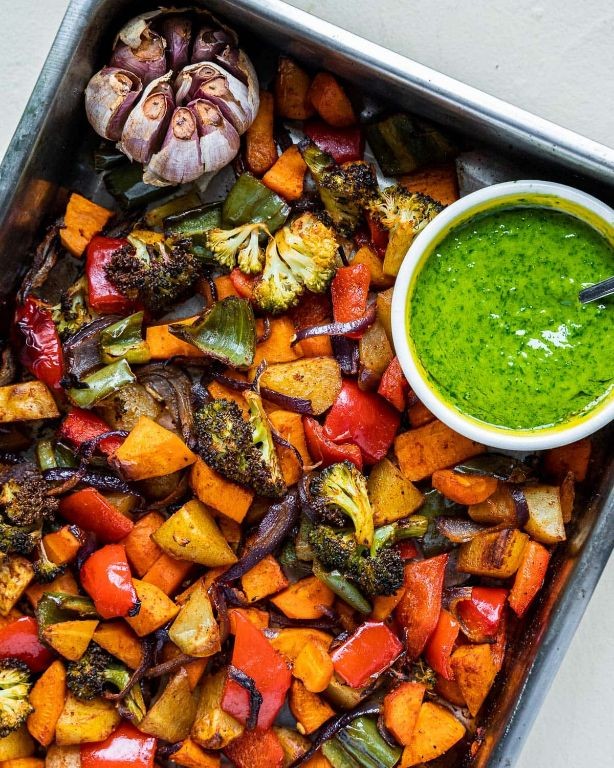
Often, the simplest dishes become the most memorable when a vibrant, healthful dressing ties everything together. Our roasted vegetables with Metaboost dressing is exactly that—a colorful, nutrient-packed meal that feels both grounding and energizing. Let’s walk through each step together to create this beautiful, balanced plate.
Serving: 4 | Pre Time: 15 minutes | Cooking Time: 25 minutes
Ingredients
– 1 large sweet potato, peeled and cut into 1-inch cubes (I find this size roasts evenly without burning)
– 2 medium bell peppers, any color, seeded and cut into 1-inch strips (using a mix of red and yellow adds visual appeal)
– 1 large red onion, cut into 1-inch wedges
– 3 tablespoons extra virgin olive oil, my go‑for for roasting because of its rich flavor
– 1 teaspoon kosher salt
– ½ teaspoon freshly ground black pepper
– ¼ cup plain Greek yogurt (full‑fat gives the dressing a lovely creaminess)
– 2 tablespoons fresh lemon juice (about half a medium lemon, squeezed just before using)
– 1 tablespoon honey
– 1 teaspoon ground cumin
– ½ teaspoon smoked paprika
– 2 tablespoons chopped fresh cilantro, plus extra for garnish
Instructions
1. Preheat your oven to 425°F and line a large, rimmed baking sheet with parchment paper for easy cleanup.
2. In a large bowl, combine the sweet potato cubes, bell pepper strips, and red onion wedges.
3. Drizzle the vegetables with 2 tablespoons of the extra virgin olive oil, then sprinkle with the kosher salt and black pepper.
4. Toss everything with your hands or a spoon until the vegetables are evenly coated with the oil and seasonings.
5. Spread the vegetables in a single layer on the prepared baking sheet, ensuring they aren’t crowded so they roast instead of steam.
6. Roast the vegetables in the preheated oven for 25 minutes, or until the sweet potatoes are tender when pierced with a fork and the edges are lightly caramelized.
7. While the vegetables roast, make the Metaboost dressing: in a small bowl, whisk together the Greek yogurt, remaining 1 tablespoon of olive oil, lemon juice, honey, cumin, and smoked paprika until smooth.
8. Stir the 2 tablespoons of chopped cilantro into the dressing until just combined.
9. Once the vegetables are done roasting, remove the baking sheet from the oven and let them cool for 5 minutes—this helps them absorb the dressing better.
10. Transfer the warm roasted vegetables to a serving platter or individual plates.
11. Drizzle the Metaboost dressing generously over the vegetables.
12. Garnish with the extra chopped cilantro for a fresh, herbal finish.
Naturally, the roasted vegetables develop a sweet, caramelized exterior that contrasts beautifully with the tangy, spiced dressing. Serve this warm as a hearty side dish, or let it cool slightly and toss with quinoa for a complete, protein‑packed lunch bowl that keeps well in the fridge.
Metaboost Overnight Oats with Almond Butter
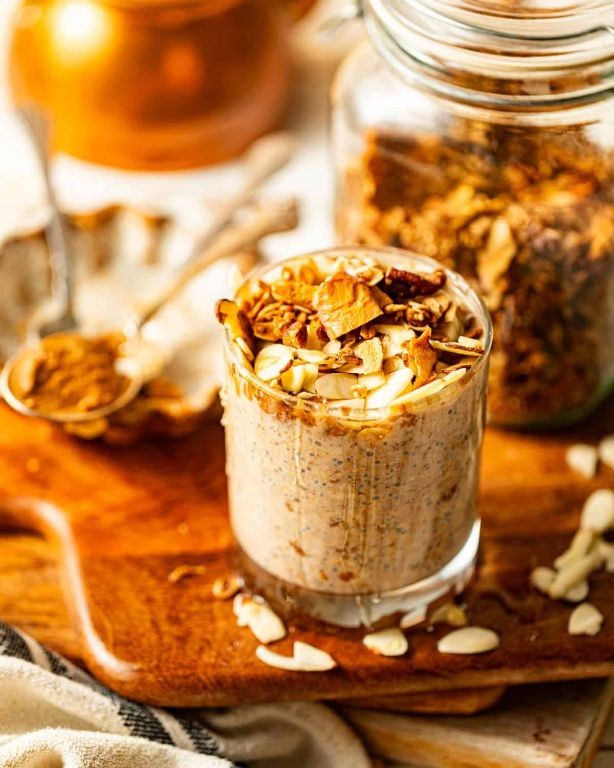
Discover a breakfast that practically makes itself while you sleep—these Metaboost Overnight Oats with Almond Butter are the ultimate grab-and-go fuel. Designed for busy mornings, this no-cook recipe combines wholesome ingredients that meld into a creamy, satisfying meal by morning. Let’s walk through the simple prep together.
Serving: 1 | Pre Time: 5 minutes | Cooking Time: 0 minutes
Ingredients
– 1/2 cup old-fashioned rolled oats (I find these create the perfect chewy texture, unlike quick oats which can get mushy)
– 1/2 cup unsweetened almond milk (my go-to for a light, nutty base—any milk works, but this keeps it dairy-free)
– 1 tablespoon creamy almond butter (I prefer the natural, stirred kind for its pure flavor without added oils)
– 1 teaspoon pure maple syrup (just a hint of sweetness; honey is a fine swap if you prefer)
– 1/4 teaspoon ground cinnamon (a warm spice that really makes the oats sing)
– A pinch of sea salt (this tiny addition balances all the flavors beautifully)
– Optional: fresh berries or sliced banana for topping in the morning
Instructions
1. Grab a 12-ounce mason jar or any airtight container with a lid.
2. Measure 1/2 cup of old-fashioned rolled oats and pour them directly into the jar.
3. Add 1/2 cup of unsweetened almond milk to the jar with the oats.
4. Spoon 1 tablespoon of creamy almond butter into the jar.
5. Drizzle 1 teaspoon of pure maple syrup over the ingredients.
6. Sprinkle 1/4 teaspoon of ground cinnamon evenly into the jar.
7. Add a pinch of sea salt to the mixture.
8. Securely fasten the lid on the jar and shake it vigorously for 15–20 seconds until all ingredients are well combined—this ensures the almond butter fully incorporates without clumping.
9. Place the sealed jar in the refrigerator for at least 8 hours, or overnight, to allow the oats to soften and absorb the liquid.
10. In the morning, remove the jar from the refrigerator and give the oats a good stir with a spoon to check consistency; if they seem too thick, stir in an extra tablespoon of almond milk.
11. Top with fresh berries or sliced banana if desired, and enjoy immediately straight from the jar.
Zesty and creamy, these oats emerge from the fridge with a pudding-like texture that’s both hearty and smooth. The almond butter infuses every bite with a rich, nutty depth, while the cinnamon adds a subtle warmth that makes it feel like a treat. For a fun twist, try layering it in a glass with Greek yogurt and a drizzle of honey for a parfait-style breakfast.
Stuffed Bell Peppers with Metaboost Quinoa
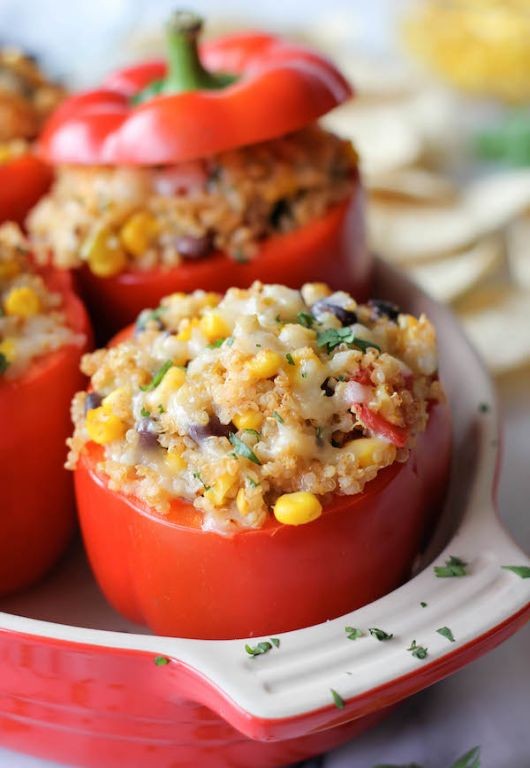
A perfect weeknight dinner that’s both nourishing and satisfying, these stuffed bell peppers combine colorful vegetables with protein-rich Metaboost quinoa for a meal that feels special without requiring hours in the kitchen. Let’s walk through each step together so you can create this wholesome dish with confidence.
Serving: 4 | Pre Time: 20 minutes | Cooking Time: 35 minutes
Ingredients
– 4 large bell peppers (I like using a mix of red, yellow, and orange for visual appeal)
– 1 cup Metaboost quinoa, rinsed well under cold water (this removes any bitterness)
– 2 cups vegetable broth (low-sodium gives you better control over seasoning)
– 1 tablespoon extra virgin olive oil (my go-to for its fruity flavor)
– 1 medium yellow onion, finely diced
– 2 cloves garlic, minced (freshly minced makes a noticeable difference)
– 1 pound lean ground turkey (93/7 works perfectly here)
– 1 teaspoon dried oregano
– ½ teaspoon smoked paprika
– ½ cup shredded part-skim mozzarella cheese
– Fresh parsley for garnish (flat-leaf parsley holds up better than curly)
Instructions
1. Preheat your oven to 375°F (190°C) and lightly grease a 9×13-inch baking dish.
2. Slice the tops off the bell peppers and remove all seeds and membranes, creating hollow cups.
3. Bring the vegetable broth to a boil in a medium saucepan, then add the rinsed quinoa.
4. Reduce heat to low, cover the saucepan, and simmer the quinoa for exactly 15 minutes until all liquid is absorbed.
5. While quinoa cooks, heat olive oil in a large skillet over medium heat for 1 minute.
6. Add diced onion and cook for 4-5 minutes until translucent, stirring occasionally.
7. Add minced garlic and cook for 1 more minute until fragrant (tip: don’t let garlic brown or it turns bitter).
8. Add ground turkey to the skillet, breaking it apart with a wooden spoon as it cooks.
9. Cook turkey for 6-7 minutes until no pink remains, stirring frequently.
10. Stir in cooked quinoa, dried oregano, and smoked paprika until fully combined.
11. Spoon the quinoa-turkey mixture evenly into the hollowed bell peppers, packing it gently.
12. Arrange stuffed peppers upright in the prepared baking dish and cover tightly with aluminum foil.
13. Bake covered for 25 minutes at 375°F (tip: this steaming method keeps peppers tender).
14. Remove foil and sprinkle mozzarella cheese evenly over each pepper.
15. Return to oven uncovered for 8-10 minutes until cheese is melted and slightly golden.
16. Let peppers rest for 5 minutes before serving (tip: this allows filling to set for cleaner slicing).
17. Garnish with fresh parsley just before serving.
Baked until the peppers are tender-crisp and the filling is piping hot, these stuffed peppers offer a delightful contrast in textures. The smoky paprika and oregano create a warm, savory flavor that pairs beautifully with the mild sweetness of the bell peppers. For a creative presentation, serve them alongside a simple arugula salad dressed with lemon vinaigrette to cut through the richness.
Metaboost Coconut Curry with Tofu

Whether you’re looking for a cozy weeknight dinner or a vibrant meal to impress guests, this Metaboost Coconut Curry with Tofu delivers both comfort and nutrition in one pot. With its creamy coconut base and aromatic spices, it’s a dish that feels indulgent yet is surprisingly simple to build layer by layer.
Serving: 4 | Pre Time: 15 minutes | Cooking Time: 25 minutes
Ingredients
– 1 (14-ounce) block extra-firm tofu, pressed for 30 minutes to remove excess water (I find this makes it crispier when sautéed)
– 2 tablespoons coconut oil, my favorite for its subtle tropical flavor
– 1 medium yellow onion, finely diced
– 3 cloves garlic, minced (freshly minced gives the best aroma)
– 1 tablespoon freshly grated ginger
– 2 tablespoons red curry paste, I like the Thai Kitchen brand for its balanced heat
– 1 (13.5-ounce) can full-fat coconut milk, shaken well before opening
– 1 cup vegetable broth, low-sodium so you can control the salt
– 1 red bell pepper, thinly sliced
– 1 cup broccoli florets, cut into bite-sized pieces
– 1 tablespoon soy sauce or tamari
– 1 tablespoon lime juice, freshly squeezed for brightness
– ¼ cup fresh cilantro, chopped for garnish
Instructions
1. Press the tofu block between paper towels with a heavy pan for 30 minutes, then cut into 1-inch cubes.
2. Heat 1 tablespoon coconut oil in a large skillet or Dutch oven over medium-high heat until shimmering, about 2 minutes.
3. Add tofu cubes in a single layer and cook for 4-5 minutes per side until golden brown and crispy, flipping once with a spatula. Tip: Avoid overcrowding the pan to ensure even browning.
4. Transfer tofu to a plate and set aside.
5. In the same skillet, add remaining 1 tablespoon coconut oil and reduce heat to medium.
6. Add diced onion and cook for 5 minutes, stirring occasionally, until softened and translucent.
7. Stir in minced garlic and grated ginger, cooking for 1 minute until fragrant.
8. Add red curry paste and cook for 1 minute, stirring constantly to toast the spices.
9. Pour in coconut milk and vegetable broth, scraping up any browned bits from the bottom of the pan.
10. Bring to a gentle simmer over medium heat, then reduce to low and cook for 5 minutes to let flavors meld.
11. Add sliced red bell pepper and broccoli florets, simmering for 8-10 minutes until vegetables are tender-crisp. Tip: Test doneness by piercing a broccoli floret with a fork—it should be slightly firm.
12. Stir in soy sauce and lime juice.
13. Gently fold in the cooked tofu and heat through for 2 minutes. Tip: Add tofu last to keep it crispy.
14. Remove from heat and garnish with chopped cilantro.
Now, savor the creamy, slightly spicy curry with tender-crisp vegetables and crispy tofu cubes. For a creative twist, serve it over cauliflower rice or with a side of naan bread to soak up every last drop of the fragrant sauce.
Grilled Shrimp and Metaboost Pineapple Skewers
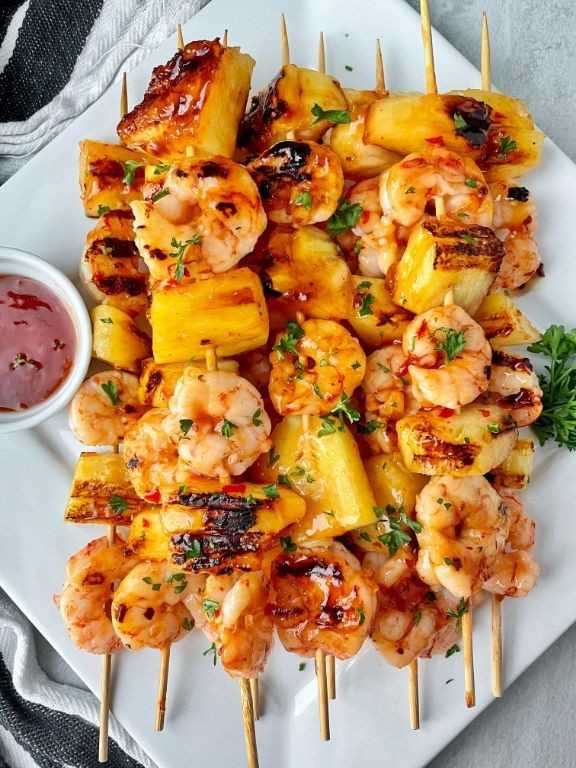
Finally, let’s make a vibrant, healthy dish that’s perfect for summer gatherings or a quick weeknight dinner. These Grilled Shrimp and Metaboost Pineapple Skewers combine sweet, smoky, and savory flavors in a simple, impressive package that cooks in minutes.
Serving: 4 | Pre Time: 15 minutes | Cooking Time: 10 minutes
Ingredients
– 1 pound large raw shrimp, peeled and deveined (I like to keep the tails on for easy handling)
– 2 cups fresh pineapple chunks, about 1-inch pieces (fresh is key for that juicy sweetness)
– 3 tablespoons extra virgin olive oil, my go-to for its fruity flavor
– 2 tablespoons honey
– 2 cloves garlic, minced
– 1 teaspoon smoked paprika
– 1/2 teaspoon salt
– 1/4 teaspoon black pepper
– 8 wooden skewers, soaked in water for 30 minutes to prevent burning
Instructions
1. Soak 8 wooden skewers in a shallow dish of water for 30 minutes to prevent them from burning on the grill.
2. In a medium bowl, whisk together 3 tablespoons extra virgin olive oil, 2 tablespoons honey, 2 minced garlic cloves, 1 teaspoon smoked paprika, 1/2 teaspoon salt, and 1/4 teaspoon black pepper until well combined.
3. Add 1 pound of peeled and deveined shrimp to the bowl with the marinade, tossing gently to coat each piece evenly. Let it marinate at room temperature for 10 minutes—this short time allows the flavors to penetrate without overcooking the shrimp later.
4. While the shrimp marinates, preheat your grill to medium-high heat, aiming for about 400°F, and prepare 2 cups of fresh pineapple chunks by cutting them into 1-inch pieces.
5. Thread the marinated shrimp and pineapple chunks alternately onto the soaked skewers, starting and ending with pineapple to help keep the shrimp secure. Tip: Leave a small gap between pieces to ensure even cooking.
6. Place the skewers on the preheated grill and cook for 3-4 minutes per side, or until the shrimp turn pink and opaque and the pineapple develops light grill marks. Tip: Avoid moving the skewers too much to get those perfect sear lines.
7. Remove the skewers from the grill and let them rest for 2 minutes before serving to allow the juices to redistribute. Tip: This resting time prevents the shrimp from becoming tough.
8. Arrange the skewers on a platter and serve immediately. Absolutely, the result is a delightful contrast of tender, juicy shrimp with caramelized, sweet pineapple—the smoky paprika and garlic add a savory depth that makes every bite irresistible. Try serving these over a bed of quinoa or with a side salad for a complete, colorful meal that’s sure to impress guests or satisfy a quick craving.
Metaboost Kale and Apple Salad
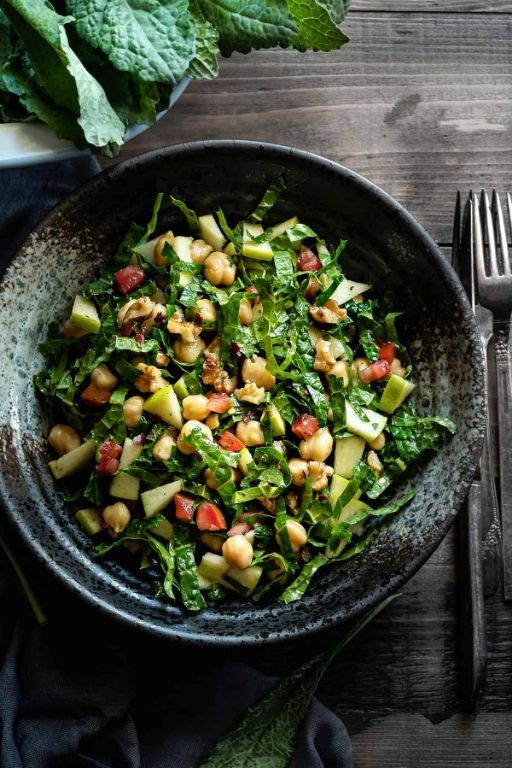
Venturing into a healthier lifestyle doesn’t have to mean bland meals, and this vibrant Metaboost Kale and Apple Salad is the perfect proof. Let’s build it together, step-by-step, for a dish that’s as nourishing as it is delicious. You’ll find it’s wonderfully simple to prepare, even for a kitchen novice.
Serving: 4 | Pre Time: 15 minutes | Cooking Time: 0 minutes
Ingredients
– 1 large bunch of curly kale, stems removed and leaves torn into bite-sized pieces (I find massaging the kale makes it much more tender)
– 1 large crisp apple, such as Honeycrisp or Fuji, cored and thinly sliced (a mandoline makes quick work of this)
– 1/4 cup raw pepitas (pumpkin seeds)
– 1/4 cup dried cranberries
– 1/3 cup crumbled feta cheese (I love the creamy tang it adds)
– For the dressing: 3 tbsp extra virgin olive oil (my go-to for its fruity flavor), 2 tbsp apple cider vinegar, 1 tbsp pure maple syrup, 1 tsp Dijon mustard, and 1/4 tsp each of kosher salt and freshly cracked black pepper.
Instructions
1. Place the torn kale leaves in a large mixing bowl.
2. Drizzle 1 teaspoon of the extra virgin olive oil over the kale.
3. Using your clean hands, massage the kale vigorously for about 90 seconds, or until the leaves darken in color and soften noticeably—this breaks down the fibers for a better texture.
4. In a small bowl or jar, combine the remaining extra virgin olive oil, apple cider vinegar, pure maple syrup, Dijon mustard, kosher salt, and freshly cracked black pepper.
5. Whisk the dressing ingredients vigorously for 30 seconds until the mixture is fully emulsified and slightly thickened.
6. Pour the prepared dressing over the massaged kale in the large bowl.
7. Using salad tongs or two large spoons, toss the kale until every leaf is evenly coated with the dressing.
8. Add the thinly sliced apple, raw pepitas, dried cranberries, and crumbled feta cheese to the bowl with the dressed kale.
9. Gently toss all the ingredients together until they are evenly distributed throughout the salad.
10. Divide the finished salad evenly among four plates or bowls for serving.
Delightfully, the finished salad offers a fantastic mix of textures: the tender, massaged kale, the crisp apple slices, the crunchy pepitas, and the soft, salty feta. The sweet-tart dressing ties all the flavors together beautifully. For a creative twist, try serving it topped with a grilled chicken breast or flaked salmon for a complete, protein-packed meal.
Spicy Metaboost Black Bean Tacos
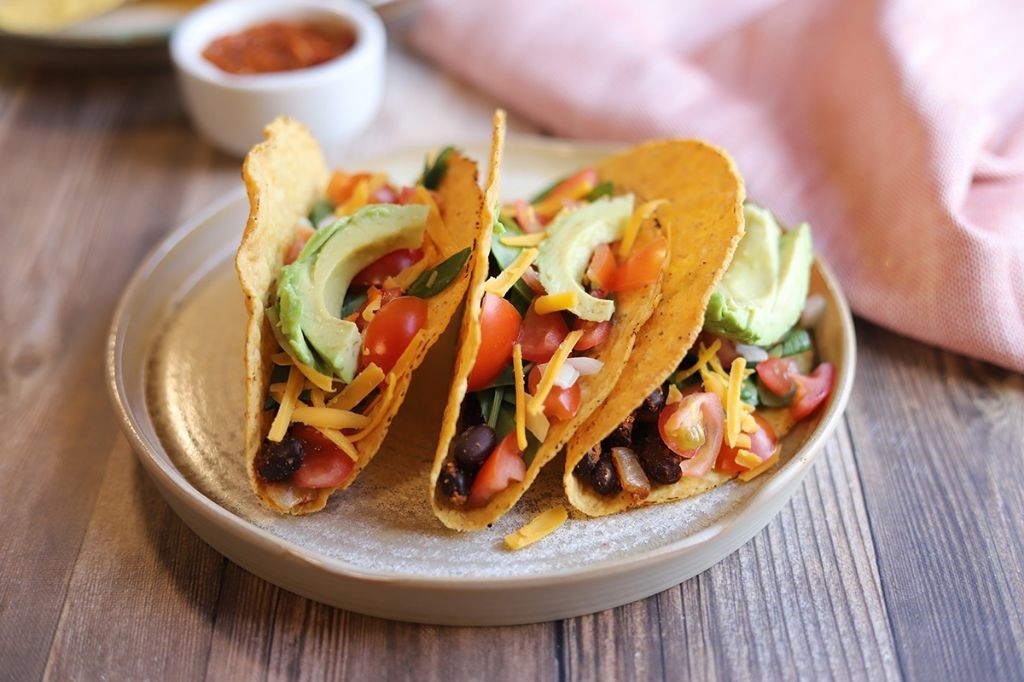
Crafting a satisfying weeknight dinner doesn’t have to be complicated, and these Spicy Metaboost Black Bean Tacos are proof. Let’s walk through the simple, flavorful process together, focusing on one clear step at a time to build your confidence in the kitchen.
Serving: 4 | Pre Time: 15 minutes | Cooking Time: 20 minutes
Ingredients
– 1 tablespoon of extra virgin olive oil (my go-to for its fruity note)
– 1 medium yellow onion, finely diced
– 3 cloves of garlic, minced (fresh is best for pungent flavor)
– 1 (15-ounce) can of black beans, drained and rinsed
– 1 cup of frozen corn kernels
– 1 teaspoon of ground cumin
– 1 teaspoon of chili powder
– 1/2 teaspoon of smoked paprika
– 1/4 teaspoon of cayenne pepper (adjust for your heat preference)
– 1/2 cup of vegetable broth
– 8 small corn tortillas
– 1/2 cup of shredded Monterey Jack cheese
– 1/4 cup of fresh cilantro, chopped
– 1 lime, cut into wedges
Instructions
1. Heat the extra virgin olive oil in a large skillet over medium heat until it shimmers, about 1 minute.
2. Add the finely diced yellow onion to the skillet and cook, stirring occasionally, until translucent and soft, about 5 minutes.
3. Stir in the minced garlic and cook for 1 minute until fragrant, being careful not to let it burn.
4. Add the drained black beans, frozen corn kernels, ground cumin, chili powder, smoked paprika, and cayenne pepper to the skillet, stirring to coat everything evenly.
5. Pour in the vegetable broth and bring the mixture to a simmer, then reduce the heat to low.
6. Let the bean mixture simmer uncovered for 10 minutes, stirring occasionally, until the liquid reduces and thickens slightly.
7. While the beans simmer, warm the corn tortillas in a dry skillet over medium heat for 30 seconds per side until pliable, or wrap them in a damp paper towel and microwave for 20 seconds.
8. Spoon the black bean mixture evenly into the warmed tortillas.
9. Top each taco with shredded Monterey Jack cheese and chopped fresh cilantro.
10. Serve immediately with lime wedges on the side for squeezing over the top.
Ultimately, these tacos deliver a hearty texture from the beans and corn, balanced by a smoky, spicy kick that’s brightened with lime. For a creative twist, try serving them with a dollop of cool avocado crema or over a bed of crisp lettuce for a taco salad variation.
Metaboost Ginger Carrot Soup

Crafting a nourishing soup doesn’t have to be complicated, especially when you’re looking for a gentle metabolic boost. This ginger carrot soup is your perfect weeknight ally, combining simple ingredients into a vibrant, comforting bowl that’s as easy to make as it is delicious to eat.
Serving: 4 | Pre Time: 15 minutes | Cooking Time: 25 minutes
Ingredients
– 1 tablespoon of extra virgin olive oil (my go-to for its fruity flavor)
– 1 medium yellow onion, diced
– 3 cloves of garlic, minced (fresh is best for that pungent kick)
– 1 tablespoon of freshly grated ginger (I keep a knob in the freezer for easy grating)
– 1.5 pounds of carrots, peeled and chopped into 1-inch pieces
– 4 cups of low-sodium vegetable broth
– 1/2 cup of full-fat coconut milk (the canned kind adds wonderful creaminess)
– 1/2 teaspoon of sea salt
– 1/4 teaspoon of freshly ground black pepper
Instructions
1. Heat the extra virgin olive oil in a large pot over medium heat for 1 minute until shimmering.
2. Add the diced onion and cook for 5 minutes, stirring occasionally, until translucent and fragrant.
3. Stir in the minced garlic and grated ginger, cooking for 1 more minute to release their aromas without browning.
4. Add the chopped carrots to the pot, stirring to coat them in the oil and aromatics.
5. Pour in the low-sodium vegetable broth, ensuring the carrots are fully submerged.
6. Increase the heat to high and bring the mixture to a boil, which should take about 3-4 minutes.
7. Once boiling, reduce the heat to low, cover the pot with a lid, and simmer for 20 minutes until the carrots are fork-tender.
8. Carefully transfer the hot soup to a blender in batches, filling it no more than halfway to prevent spills.
9. Blend on high speed for 1-2 minutes until completely smooth and velvety, holding the lid firmly with a towel.
10. Return the blended soup to the pot over low heat.
11. Stir in the full-fat coconut milk until fully incorporated and the soup is warmed through, about 2 minutes.
12. Season with sea salt and freshly ground black pepper, stirring well to combine.
A silky, vibrant orange puree with a warming ginger kick and subtle sweetness from the carrots makes this soup a cozy staple. For a creative twist, top it with a drizzle of coconut milk, toasted pumpkin seeds, or a sprinkle of fresh cilantro to add texture and brightness to each spoonful.
Cauliflower Rice with Metaboost Stir-Fry Sauce
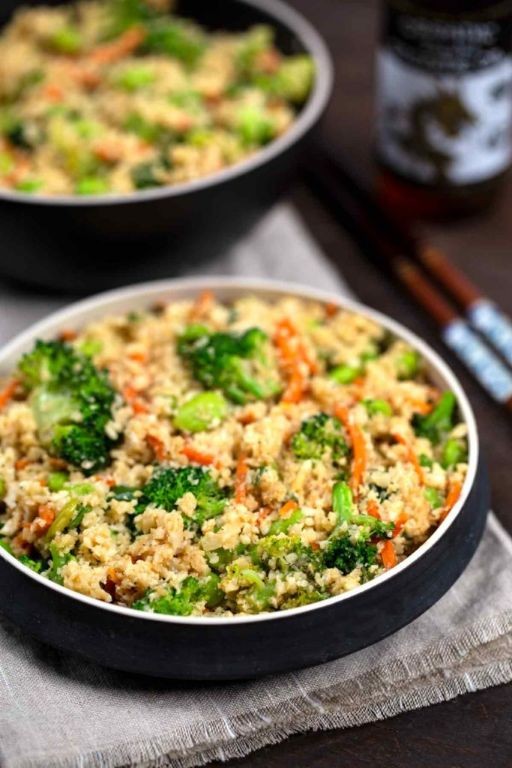
You’ve probably seen cauliflower rice everywhere lately, but this version with a homemade Metaboost stir-fry sauce is the one that’ll make you a true convert. Let’s walk through it step-by-step so you end up with a vibrant, satisfying meal that’s as easy as it is delicious.
Serving: 4 | Pre Time: 15 minutes | Cooking Time: 15 minutes
Ingredients
– 1 large head of cauliflower, riced (I like to pulse it in my food processor until it resembles grains of rice—trust me, it’s faster than grating!)
– 2 tablespoons avocado oil (my go‑for high‑heat cooking; it has a mild flavor that won’t compete)
– 1 red bell pepper, thinly sliced (for a sweet crunch)
– 1 cup snap peas, trimmed (they add a fresh, green pop)
– 3 cloves garlic, minced (fresh is best here—it makes the sauce sing)
– 1 tablespoon freshly grated ginger (I keep a knob in the freezer and grate it frozen—no peeling needed!)
– ¼ cup low‑sodium soy sauce (this balances the sauce without over‑salting)
– 2 tablespoons rice vinegar (for a bright, tangy kick)
– 1 tablespoon honey (just enough to round out the flavors)
– 1 teaspoon sesame oil (a little goes a long way for that nutty aroma)
– ½ teaspoon red pepper flakes (adjust to your heat preference)
– 2 green onions, thinly sliced (for a fresh garnish)
Instructions
1. Rice the cauliflower by cutting the head into florets and pulsing in a food processor until it looks like coarse grains, about 10–15 pulses. Tip: Don’t over‑process, or it’ll turn mushy.
2. Heat 1 tablespoon of avocado oil in a large skillet or wok over medium‑high heat until shimmering, about 1 minute.
3. Add the riced cauliflower and stir‑fry for 5–7 minutes, until tender but still with a slight bite. Transfer to a bowl and set aside.
4. In the same skillet, heat the remaining 1 tablespoon of avocado oil over medium‑high heat.
5. Add the sliced red bell pepper and snap peas, and stir‑fry for 3–4 minutes, until crisp‑tender.
6. Push the vegetables to the side of the skillet and add the minced garlic and grated ginger to the center. Cook for 30 seconds, just until fragrant. Tip: Keep the garlic moving so it doesn’t burn.
7. Pour in the soy sauce, rice vinegar, honey, sesame oil, and red pepper flakes. Stir everything together and let the sauce simmer for 2 minutes, until slightly thickened.
8. Return the cauliflower rice to the skillet and toss with the sauce and vegetables until evenly coated and heated through, about 2 minutes. Tip: If it looks dry, add a splash of water to loosen it up.
9. Remove from heat and garnish with sliced green onions.
Mouthwatering and ready in a flash, this dish delivers a perfect mix of tender cauliflower rice, crisp veggies, and that savory‑tangy sauce clinging to every bite. Try it topped with a fried egg for a hearty breakfast bowl, or fold in some shredded chicken for a complete dinner—it’s endlessly adaptable.
Metaboost Blueberry Almond Muffins
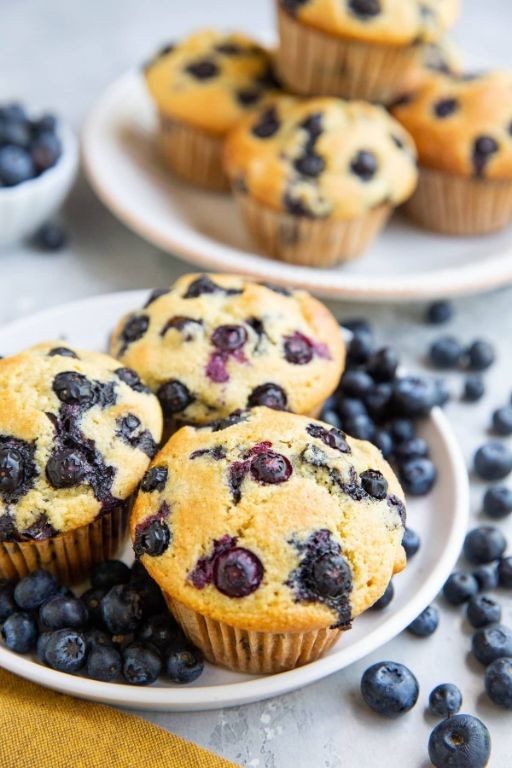
Every baker needs a reliable muffin recipe that feels like a warm hug, and these Metaboost Blueberry Almond Muffins are exactly that—a simple, wholesome treat perfect for busy mornings or cozy afternoons. Let’s walk through the process together, step by step, so you can create these tender, flavorful muffins with confidence.
Serving: 12 | Pre Time: 15 minutes | Cooking Time: 20 minutes
Ingredients
– 2 cups all-purpose flour (I always spoon it into the measuring cup to avoid packing it down)
– 1 cup granulated sugar (for just the right sweetness)
– 2 tsp baking powder (check the date to ensure it’s fresh for maximum rise)
– 1/2 tsp salt (I prefer fine sea salt for even distribution)
– 1 cup buttermilk (room temperature helps it blend smoothly)
– 1/2 cup unsalted butter, melted and cooled slightly (I use this for a rich flavor)
– 2 large eggs (I prefer room temp eggs here for better incorporation)
– 1 tsp vanilla extract (pure vanilla is my go-to for the best aroma)
– 1 1/2 cups fresh blueberries (rinsed and patted dry to prevent sinking)
– 1/2 cup sliced almonds (for a delightful crunch on top)
Instructions
1. Preheat your oven to 375°F and line a 12-cup muffin tin with paper liners or grease it lightly.
2. In a large mixing bowl, whisk together the all-purpose flour, granulated sugar, baking powder, and salt until well combined.
3. In a separate medium bowl, whisk the buttermilk, melted unsalted butter, large eggs, and vanilla extract until smooth and fully blended.
4. Pour the wet ingredients into the dry ingredients and stir gently with a spatula until just combined; avoid overmixing to keep the muffins tender.
5. Gently fold in the fresh blueberries until evenly distributed throughout the batter.
6. Divide the batter evenly among the 12 muffin cups, filling each about 3/4 full.
7. Sprinkle the sliced almonds evenly over the top of each muffin for added texture.
8. Bake in the preheated oven at 375°F for 18-22 minutes, or until a toothpick inserted into the center comes out clean and the tops are golden brown.
9. Remove the muffins from the oven and let them cool in the tin for 5 minutes before transferring to a wire rack to cool completely.
10. Serve warm or at room temperature, storing any leftovers in an airtight container for up to 3 days.
Here’s the best part: these muffins boast a moist, fluffy crumb with bursts of juicy blueberries and a subtle nutty crunch from the almonds. Enjoy them fresh out of the oven with a dollop of Greek yogurt or pack them for a satisfying on-the-go snack that’s sure to brighten your day.
Grilled Chicken with Metaboost Herb Marinade
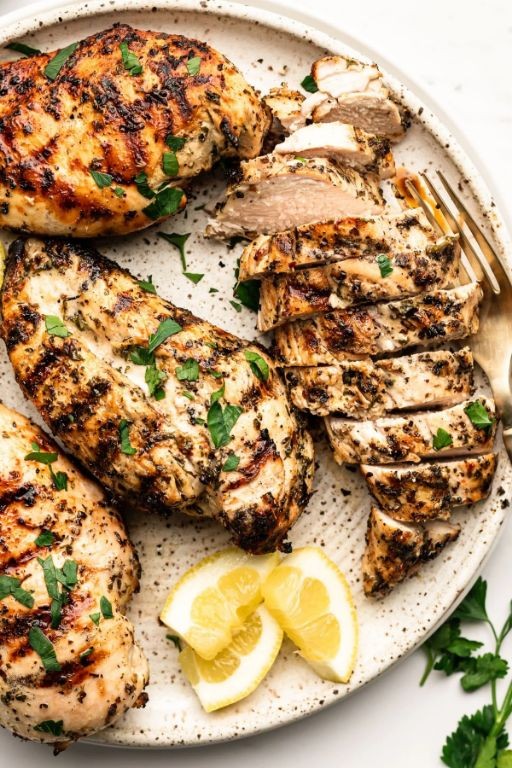
Perfect for a weeknight dinner or weekend gathering, this Grilled Chicken with Metaboost Herb Marinade combines simple ingredients with bold flavors. Preparing it requires just a few steps, and I’ll guide you through each one methodically to ensure juicy, flavorful results every time.
Serving: 4 | Pre Time: 15 minutes | Cooking Time: 15 minutes
Ingredients
- 4 boneless, skinless chicken breasts (about 1.5 pounds total—I like to buy organic for better texture)
- 1/4 cup extra virgin olive oil (my go-to for its fruity notes)
- 2 tbsp fresh lemon juice (squeezed from 1 medium lemon—fresh is key here!)
- 2 cloves garlic, minced (I prefer to mince them finely for even distribution)
- 1 tbsp fresh rosemary, chopped (from my garden if possible, but dried works in a pinch)
- 1 tbsp fresh thyme, chopped (it adds an earthy aroma I love)
- 1 tsp kosher salt (I find it dissolves better than table salt)
- 1/2 tsp black pepper (freshly ground for maximum flavor)
Instructions
- In a medium bowl, combine 1/4 cup extra virgin olive oil, 2 tbsp fresh lemon juice, 2 cloves minced garlic, 1 tbsp chopped fresh rosemary, 1 tbsp chopped fresh thyme, 1 tsp kosher salt, and 1/2 tsp black pepper. Tip: Whisk vigorously for 30 seconds to emulsify the marinade—this helps the flavors meld.
- Place 4 boneless, skinless chicken breasts in a large resealable plastic bag or shallow dish.
- Pour the marinade over the chicken, ensuring each piece is fully coated. Tip: Massage the bag gently to distribute the herbs evenly, which prevents clumping.
- Seal the bag or cover the dish, then refrigerate for at least 30 minutes or up to 4 hours. Tip: Don’t marinate longer than 4 hours, as the acid can toughen the chicken.
- Preheat a grill or grill pan to medium-high heat, about 400°F, and lightly oil the grates to prevent sticking.
- Remove the chicken from the marinade, letting excess drip off, and discard the used marinade.
- Place the chicken on the preheated grill, cooking for 6-7 minutes per side. Check for doneness by inserting a meat thermometer into the thickest part—it should read 165°F.
- Transfer the grilled chicken to a clean plate and let it rest for 5 minutes before slicing. During this time, the juices redistribute, keeping the meat moist.
Delightfully tender with a crisp, herb-infused crust, this chicken pairs beautifully with a fresh salad or roasted vegetables. For a creative twist, slice it thinly and serve over quinoa with a drizzle of the leftover lemon juice for extra zing—the aromatic rosemary and thyme really shine through in every bite.
Summary
Finally, these 20 Metaboost recipes are your tasty ticket to feeling fantastic! We hope you’ll whip up a few, find a new favorite, and let us know which one you love most in the comments. If you enjoyed this roundup, please share it on Pinterest to help other home cooks discover these delicious, healthy ideas. Happy cooking!


