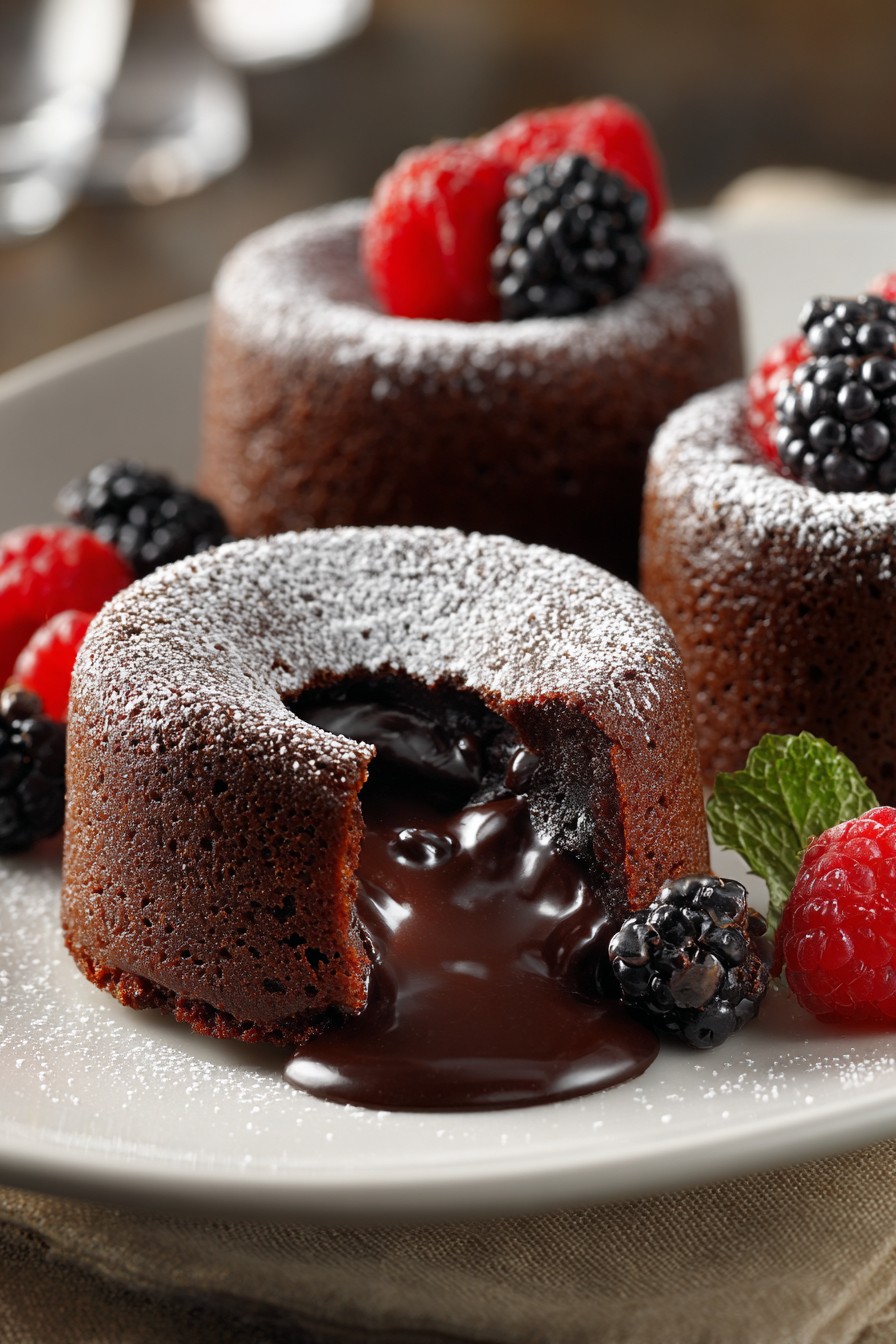
Just like the old recipe card tucked in my grandmother’s tin box, this dessert holds a special kind of magic. It’s the kind of treat that turns an ordinary Tuesday into a celebration, with a warm, chocolatey heart that flows out like a sweet secret the moment your spoon breaks through. Join me in the kitchen, and let’s bake a little bit of that cozy, nostalgic joy.
Why This Recipe Works
- Using both bittersweet chocolate and cocoa powder creates a deep, complex chocolate flavor that’s rich but not overly sweet.
- The precise baking time is key—just 12-14 minutes at 425°F gives you that perfect set exterior with a gloriously molten center.
- Generously buttering and sugaring the ramekins ensures the cakes release cleanly and develop a delicate, slightly crisp crust.
- Letting the batter rest for 15 minutes before baking allows the ingredients to fully meld, resulting in a more consistent texture.
Ingredients
- 1/2 cup (1 stick) unsalted butter, plus extra for greasing the ramekins
- 6 ounces high-quality bittersweet chocolate, finely chopped
- 2 large eggs, at room temperature
- 2 large egg yolks, at room temperature
- 1/4 cup granulated sugar, plus extra for dusting the ramekins
- 1/8 teaspoon fine sea salt
- 2 tablespoons all-purpose flour
- 1 tablespoon unsweetened cocoa powder, for dusting (optional)
- Powdered sugar and fresh berries, for serving
Equipment Needed
- Four 6-ounce ramekins
- Medium heatproof bowl
- Saucepan for a double boiler
- Electric hand mixer or stand mixer
- Rubber spatula
- Whisk
- Small sieve for dusting
Instructions
Prepare Your Ramekins and Melt the Chocolate
First, let’s get our little baking vessels ready. Take your four 6-ounce ramekins and give them a generous coating of softened butter using your fingers or a pastry brush—get into every nook and cranny. Then, spoon about a teaspoon of granulated sugar into each one and tilt and tap them until the sugar coats the bottom and sides evenly. This buttery, sugary layer is what gives our cakes that lovely, delicate crust and ensures they’ll pop right out after baking. Set these aside on a baking sheet. Now, for the chocolate. Place your finely chopped 6 ounces of bittersweet chocolate and that half cup (one stick) of unsalted butter, cut into pieces, into a heatproof bowl. Set this bowl over a saucepan filled with about an inch of simmering water, making sure the bottom of the bowl doesn’t touch the water. Stir gently and patiently with a rubber spatula until everything is melted, smooth, and glossy. Once melted, remove the bowl from the heat and let it cool slightly while you work on the eggs. This gentle melting preserves the chocolate’s silky texture.
Whip the Eggs and Sugar to Ribbon Stage
This next step is where we build the structure and airiness of our cakes. In the bowl of a stand mixer fitted with the whisk attachment, or using a large bowl and a hand mixer, combine your two large whole eggs, the two additional egg yolks, that quarter cup of granulated sugar, and the tiny but mighty one-eighth teaspoon of fine sea salt. Start mixing on medium speed until the mixture is frothy, then crank it up to medium-high. We’re going to whip this for a good 5 to 8 minutes, until it becomes very pale yellow, thick, and has tripled in volume. When you lift the whisk, the mixture should fall back onto itself in a thick ribbon that holds its shape on the surface for a few seconds before dissolving. This “ribbon stage” is crucial—it incorporates air that will help the cakes rise and give them a light, almost soufflé-like texture around that molten center. Be patient here; proper whipping makes all the difference.
Gently Fold in the Chocolate and Flour
Now for the gentle marriage of our components. Take your slightly cooled chocolate and butter mixture—it should be warm but not hot to the touch. Pour about one-third of it over your beautifully whipped egg mixture. Using a large rubber spatula, fold it in gently. We fold by cutting down through the center of the bowl, scraping along the bottom, and lifting up and over the top, rotating the bowl as we go. The goal is to incorporate without deflating all that precious air we just whipped in. Once that first addition is mostly incorporated, add the remaining chocolate mixture and fold until you have a uniform, dark brown batter. Finally, sift the two tablespoons of all-purpose flour directly over the batter. Fold again, just until the last streaks of white flour disappear. Overmixing at this stage will result in a dense cake. The batter will be luxuriously thick and glossy.
Tip: Let the batter rest for 15 minutes at room temperature before dividing it among the ramekins. This allows the flour to hydrate fully and gives you a more consistent bake and a better rise.
Fill, Rest, and Bake to Perfection
Grab your prepared ramekins on their baking sheet. Divide the batter evenly among them; each should be filled about three-quarters of the way full. A cookie scoop or a measuring cup can help keep things neat. Once filled, give the baking sheet a gentle tap on the counter to settle the batter and release any large air bubbles. Here’s another little secret: let the filled ramekins sit at room temperature for about 15 minutes before baking. This short rest helps the cakes bake more evenly. While they rest, preheat your oven to a hot 425°F. When the oven is ready and the timer has dinged, slide the baking sheet onto the middle rack. Bake for exactly 12 to 14 minutes. The tops should be puffed, set, and have a slight dome, and the edges will look firm and pulled slightly away from the sides of the ramekin. The center will still look soft and jiggle just a bit when you gently shake the pan—that’s your molten center! Do not overbake, or the lava will solidify.
Tip: For absolute precision, bake one test cake first to dial in the perfect time for your specific oven and ramekins. Oven temperatures can vary, and those extra minutes make all the difference between molten and fully baked.
The Grand Unveiling and Serving
The moment of truth! As soon as you pull the cakes from the oven, let them rest on the counter for exactly 1 minute—no more, no less. This allows them to pull away from the sides slightly and firm up just enough for handling. While you wait, run a small, thin paring knife around the inside edge of each ramekin to ensure a clean release. Place a small serving plate upside-down over the top of a ramekin. Using oven mitts (the ramekins are hot!), confidently flip the plate and ramekin over together. Give it a gentle shake and lift the ramekin straight up. With any luck, you’ll be greeted by a perfect, domed cake. If one sticks, don’t fret—just scoop it into a bowl; it will taste just as wonderful. Dust the tops generously with powdered sugar using a small sieve. For a final touch, a light dusting of cocoa powder adds depth, and a handful of fresh raspberries or strawberries on the side cuts through the richness beautifully. Serve immediately, while that center is gloriously warm and flowing.
Tip: Have all your garnishes—powdered sugar, berries, maybe even a scoop of vanilla ice cream—ready to go before the cakes come out of the oven. Timing is everything with lava cakes, and you’ll want to serve them the second they’re plated.
Tips and Tricks
For the absolute best flavor, seek out a high-quality bittersweet chocolate bar with a cacao percentage between 60% and 70%. The chocolate is the star here, so it’s worth the splurge. If you find yourself without ramekins, a standard muffin tin can work in a pinch. Just grease and sugar the cups well and reduce the baking time by a minute or two, keeping a very close eye on them. These cakes are meant to be served straight from the oven, but you can prepare the batter up to a day ahead. Simply fill the ramekins, cover them tightly with plastic wrap, and refrigerate. When you’re ready to bake, let them sit on the counter for 20-30 minutes to take the chill off before popping them into the preheated oven. You may need to add a minute to the baking time. Finally, if your molten center isn’t as… well, molten as you’d like, it’s likely due to overbaking. Oven thermostats can be fickle. Invest in an inexpensive oven thermometer to ensure your 425°F is truly 425°F, and trust the visual cues—the puffed, set top with a slight jiggle in the center—over the timer alone.
Recipe Variations
- Peanut Butter Heart: For a surprise inside, place a heaping teaspoon of creamy peanut butter in the center of each filled ramekin before baking. Push it down gently into the batter. As it bakes, the peanut butter will become a warm, gooey core.
- Orange Zest Infusion: Add the finely grated zest of one large orange to the egg and sugar mixture as you whip it. The bright citrus notes cut through the deep chocolate beautifully and add a wonderfully fragrant twist.
- Mint Chocolate Chip: Fold 1/4 cup of finely chopped dark chocolate or mini chocolate chips and 1/2 teaspoon of pure peppermint extract into the batter after folding in the flour. It’s like a grown-up, warm version of your favorite ice cream.
- Espresso Kick: Dissolve 1 1/2 teaspoons of instant espresso powder into the melted chocolate and butter mixture. It won’t make the cakes taste like coffee, but it will deepen and intensify the chocolate flavor in a remarkable way.
- Salt Caramel Drizzle: Skip the powdered sugar dusting. Instead, after unmolding the cakes, drizzle the warm tops with a generous tablespoon of good-quality salted caramel sauce. The combination of sweet, salty, and molten chocolate is simply divine.
Frequently Asked Questions
Q: Can I make these ahead of time for a dinner party?
A: Absolutely! You can prepare the batter, fill the ramekins, cover them tightly, and refrigerate for up to 24 hours. Let them sit at room temperature for 20-30 minutes before baking as directed, adding maybe an extra minute to the bake time. This makes them a perfect, stress-free dessert for entertaining.
Q: My lava cake didn’t have a runny center. What went wrong?
A> The most common culprit is overbaking. Ovens vary, so the 12-14 minute guideline is just that—a guide. The cakes are done when the tops are puffed and set, the edges look firm, but the center still has a slight jiggle. Using an oven thermometer to verify your oven’s true temperature can also help ensure accuracy.
Q: Can I use milk chocolate or semi-sweet chocolate chips instead?
A: I don’t recommend it for this recipe. Milk chocolate will make the cakes overly sweet and may not set properly. Chocolate chips contain stabilizers that prevent them from melting as smoothly. For the best texture and a balanced, rich flavor, a good bittersweet baking bar is the way to go.
Q: What’s the best way to store leftovers?
A> To be honest, leftovers are rare! But if you have one, you can cover it tightly and refrigerate for a day or two. Reheat it gently in the microwave for 20-30 seconds. It will be more of a warm, fudgy cake than a molten one, but still delicious.
Q: Do I really need to use both whole eggs and extra yolks?
A: Yes, this balance is important. The whole eggs provide structure and lift, while the extra yolks add incredible richness, tenderness, and that luxurious, custardy quality to the molten center. It’s a classic technique for decadent desserts.
Summary
With a few simple ingredients and a watchful eye on the oven, you can create a dessert that feels both impressively elegant and wonderfully homespun—a warm, chocolatey celebration in a single ramekin.
Molten Chocolate Lava Cakes
4
servings25
minutes14
minutesIngredients
Instructions
- 1 Preheat oven to 425°F. Generously butter four 6-ounce ramekins and dust with granulated sugar, tapping out excess. Place on a baking sheet.
- 2 Melt the 1/2 cup butter and chopped chocolate in a heatproof bowl set over simmering water, stirring until smooth. Remove from heat and let cool slightly.
- 3 In a separate bowl, use an electric mixer to whip the eggs, egg yolks, 1/4 cup sugar, and salt on medium-high speed for 5-8 minutes until very thick, pale, and ribbon-like.
- 4 Gently fold one-third of the warm chocolate mixture into the egg mixture. Fold in the remaining chocolate until combined. Sift the flour over the batter and fold just until no white streaks remain. Let batter rest 15 minutes.
- 5 Divide batter evenly among prepared ramekins. Bake for 12-14 minutes until tops are puffed and set but centers still jiggle slightly.
- 6 Let cakes cool in ramekins for 1 minute. Run a knife around edges, invert onto serving plates, and dust with powdered sugar. Serve immediately with berries.