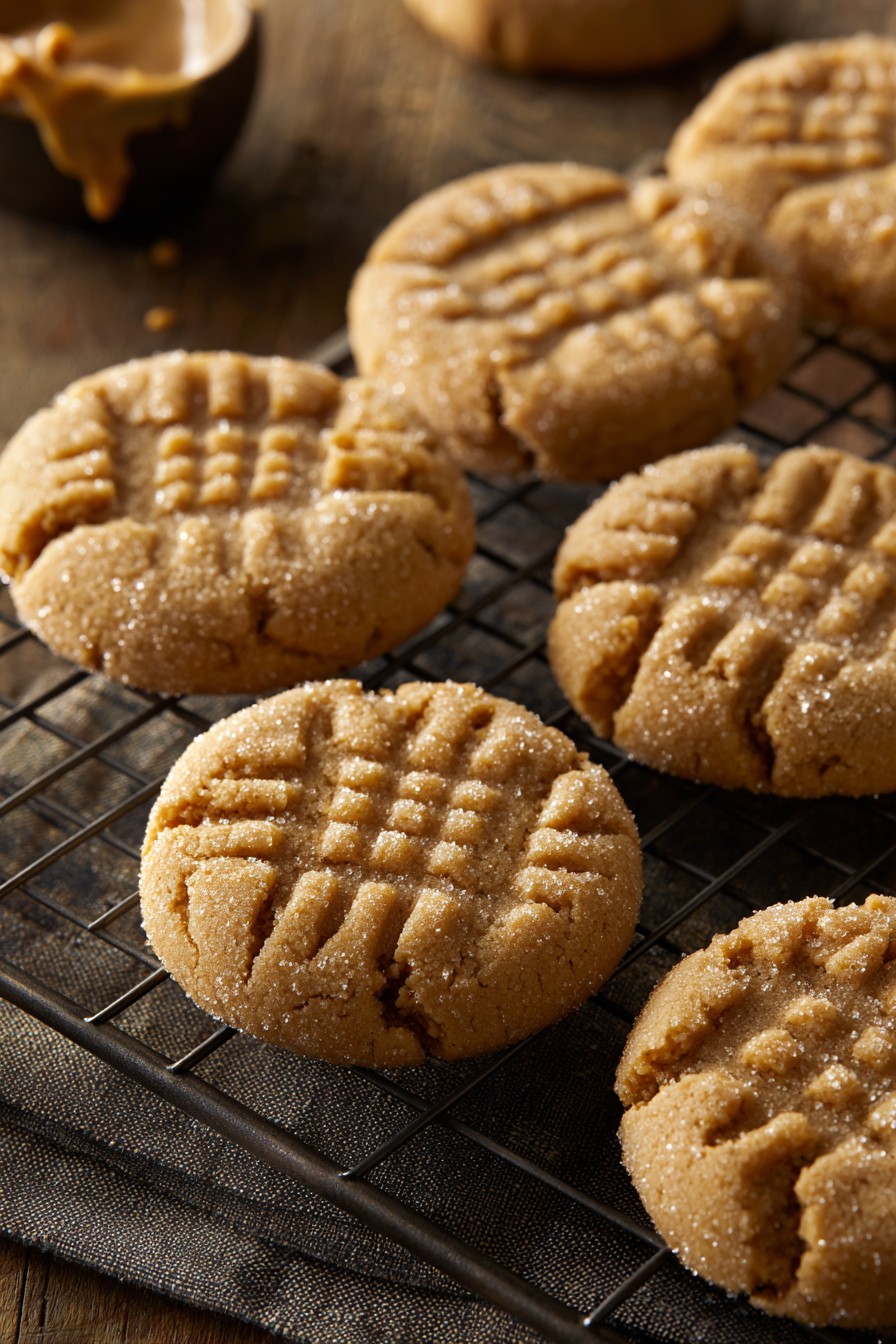
Savor the moment your teeth sink into a cookie so perfect, so utterly divine, it feels like a warm hug for your soul. Seriously, these aren’t just cookies; they’re little golden discs of pure, unadulterated joy that will have your entire family begging for more. Stop scrolling through endless recipes and prepare to meet the peanut butter cookie of your dreams—crispy edges, chewy centers, and a flavor that explodes with every single bite.
Why This Recipe Works
- Brown sugar creates a deep, molasses-rich sweetness and ensures a perfectly soft, chewy texture that stays moist for days.
- Using both baking soda and baking powder gives the cookies a balanced rise with a slight crackle on top and a tender crumb inside.
- Chilling the dough is non-negotiable—it prevents overspreading, intensifies the peanut butter flavor, and guarantees those iconic, thick bakery-style cookies.
- A generous scoop of creamy peanut butter delivers an intense, nutty richness that’s perfectly balanced, not overwhelming, making each cookie utterly irresistible.
Ingredients
- 1 cup (2 sticks) unsalted butter, softened to room temperature
- 1 cup creamy peanut butter (do not use natural or oily varieties)
- 1 cup granulated white sugar
- 1 cup packed light brown sugar
- 2 large eggs, at room temperature
- 2 teaspoons pure vanilla extract
- 2 ½ cups all-purpose flour, spooned and leveled
- 1 teaspoon baking soda
- 1 teaspoon baking powder
- ½ teaspoon fine sea salt
- Additional granulated sugar for rolling (about ¼ cup)
Equipment Needed
- Stand mixer or hand mixer
- Large mixing bowls
- Measuring cups and spoons
- Rubber spatula
- Baking sheets
- Parchment paper or silicone baking mats
- Wire cooling rack
- Cookie scoop (about 1.5 tablespoons)
Instructions
Step 1: Cream the Butter and Sugars to Fluffy Perfection
Grab your stand mixer fitted with the paddle attachment—or a large bowl and your trusty hand mixer—and get ready to create the foundation of cookie magic. Place 1 cup of softened unsalted butter, 1 cup of creamy peanut butter, 1 cup of granulated white sugar, and 1 cup of packed light brown sugar into the bowl. Beat on medium-high speed for a full 3 to 4 minutes. You are not just mixing; you are incorporating air, creating a pale, fluffy, and incredibly light mixture that will give your cookies their dreamy texture. Scrape down the sides of the bowl with a rubber spatula halfway through to ensure everything is perfectly combined. This step is crucial; under-creaming will lead to dense cookies, so don’t rush it. The mixture should look noticeably lighter in color and have a whipped, almost cloud-like consistency. **Pro Tip:** To quickly soften cold butter, cut it into tablespoon-sized pieces and let it sit on the counter for 20-30 minutes. It should indent easily when pressed but not be greasy or melted.
Step 2: Incorporate the Eggs and Vanilla for Richness
With your mixer on low speed, add the 2 large room-temperature eggs, one at a time, allowing each to fully incorporate before adding the next. This prevents the mixture from breaking or curdling. Then, pour in 2 teaspoons of pure vanilla extract. Mix on low just until the eggs and vanilla are fully blended into the creamy base, about 30 seconds. The vanilla will add a warm, aromatic depth that complements the peanut butter beautifully. At this stage, your mixture might look a bit curdled—that’s completely normal and will fix itself once you add the dry ingredients. Resist the urge to overmix here; you just want everything homogenous. The batter should be smooth, glossy, and incredibly fragrant. Using room-temperature eggs is non-negotiable; cold eggs will re-solidify the butter and wreck the airy texture you just worked so hard to create.
Step 3: Whisk and Fold in the Dry Ingredients
In a separate medium bowl, whisk together 2 ½ cups of all-purpose flour (spooned into the cup and leveled off—do not scoop directly from the bag!), 1 teaspoon of baking soda, 1 teaspoon of baking powder, and ½ teaspoon of fine sea salt. This whisking action aerates the flour and ensures the leaveners and salt are evenly distributed, which is key for consistent baking. With your mixer on the lowest possible speed, gradually add the dry ingredients to the wet mixture in about three additions. Mix just until the flour disappears and no dry streaks remain. **Pro Tip:** Overmixing the dough after adding flour develops gluten, which leads to tough, hard cookies. Stop the mixer as soon as you no longer see flour. The dough will be thick, slightly sticky, and hold together easily.
Step 4: Chill the Dough to Transform the Flavor and Texture
This is the step that separates good cookies from legendary, life-changing cookies. Cover the bowl tightly with plastic wrap, pressing it directly onto the surface of the dough to prevent a skin from forming. Refrigerate the dough for a minimum of 2 hours, but ideally for 24 to 48 hours. Yes, you must wait! Chilling solidifies the butter, which prevents the cookies from spreading into sad, flat puddles in the oven. More importantly, it allows the flour to fully hydrate and the flavors to meld and intensify, resulting in a deeper, more complex peanut butter taste and a chewier, more substantial texture. You can also scoop the dough into balls first and then chill them on a tray. **Pro Tip:** For the ultimate flavor development, portion the dough into balls, place them on a parchment-lined baking sheet, and freeze solid. Then transfer to a freezer bag for up to 3 months. Bake frozen, adding 1-2 minutes to the bake time.
Step 5: Shape, Sugar, and Bake to Golden-Brown Glory
Preheat your oven to 350°F (177°C). Line two large baking sheets with parchment paper or silicone baking mats. Place about ¼ cup of granulated sugar in a small bowl. Using a 1.5-tablespoon cookie scoop or a spoon, portion the chilled dough. Roll each portion into a smooth ball between your palms. Roll each ball generously in the granulated sugar until fully coated—this creates that delightful sparkly, crispy exterior. Place the dough balls on the prepared sheets, spacing them at least 2 inches apart to allow for spreading. Using a fork, press down on each ball in a classic crisscross pattern, flattening them to about ½-inch thickness. Bake one sheet at a time on the center rack for 10 to 12 minutes. The cookies are done when the edges are set and lightly golden brown, but the centers still look soft, puffy, and slightly underbaked. They will continue to cook on the hot baking sheet.
Step 6: The Critical Cool-Down for Perfect Texture
As soon as you remove the baking sheet from the oven, let the cookies rest on the hot sheet for exactly 5 minutes. This allows them to finish setting without overcooking. They will deflate slightly and develop those perfect cracks. Then, and only then, use a thin spatula to carefully transfer each cookie to a wire cooling rack. Let them cool completely for about 30 minutes. This final cooling step is what solidifies the texture, giving you that ideal combination of a crisp edge and a fabulously soft, chewy center. Rushing this step means warm, fragile cookies that can fall apart. Patience here is rewarded with cookie perfection.
Tips and Tricks
For cookies with even more dramatic height and chew, replace ¼ cup of the all-purpose flour with bread flour. Its higher protein content creates more structure. If you only have salted butter, simply omit the ½ teaspoon of fine sea salt from the recipe. To achieve a more pronounced crisscross pattern that doesn’t bake out, dip your fork in a bit of extra granulated sugar between each press. For a stunning presentation, immediately after baking, press a few chocolate chips, a peanut butter cup half, or a sprinkle of flaky sea salt into the center of each warm cookie. If your cookies are browning too quickly on the bottom but not setting on top, try baking on the upper third rack of your oven or using an insulated baking sheet. Always bake one test cookie first to gauge your oven’s true temperature and adjust time accordingly.
Recipe Variations
- Chocolate-Stuffed Surprise: Flatten a dough ball, place a Rolo, a square of dark chocolate, or a miniature peanut butter cup in the center, then wrap the dough around it completely before rolling in sugar and baking. The result is a molten, gooey center that will make you swoon.
- Peanut Butter & Jelly Thumbprints: After making the crisscross, use your thumb or the back of a teaspoon to make a deep well in the center of each cookie. Fill each well with about ½ teaspoon of your favorite jam or jelly (grape, strawberry, or raspberry work beautifully) before baking.
- Triple Peanut Power: Add ¾ cup of chopped honey-roasted peanuts to the dough along with the dry ingredients. After baking, while still warm, drizzle with a simple peanut butter glaze made from ¼ cup melted peanut butter, ½ cup powdered sugar, and 1-2 tablespoons of milk.
- Brown Butter Bliss: Elevate the flavor by browning the 1 cup of butter first. Cook it in a saucepan over medium heat until it turns amber and smells nutty, then let it cool and re-solidify before creaming. This adds an incredible, toasty depth.
- Flourless Fudge Wonders: For a gluten-free version, omit the flour entirely. Use 1 cup of peanut butter, 1 cup of sugar, and 1 egg. Mix, scoop, flatten with a fork, and bake at 350°F for 8-10 minutes. They’ll be denser, fudgier, and intensely peanut buttery.
Frequently Asked Questions
Q: Can I use natural or crunchy peanut butter?
A: For best results, stick with standard creamy peanut butter like Jif or Skippy. Natural peanut butter (the kind that separates) often has a different oil content and can make the dough too greasy or cause spreading issues. If you love texture, add ½ cup of chopped peanuts to the dough instead of using crunchy PB.
Q: Why did my cookies spread too much and become flat?
A: The most common culprits are dough that wasn’t chilled long enough, butter that was too soft or melted, an oven that’s too cool, or using a baking sheet that’s still warm from a previous batch. Always ensure your dough is thoroughly chilled and your baking sheets are completely cool before reloading.
Q: How do I store these cookies to keep them soft?
A> Once completely cool, store the cookies in an airtight container at room temperature with a piece of bread tossed in. The bread releases moisture that keeps the cookies soft. They’ll stay perfect for up to 5 days. You can also freeze the baked cookies for up to 3 months.
Q: Can I make the dough ahead of time?
A: Absolutely! This dough actually benefits from a long chill. You can refrigerate it for up to 3 days, or scoop and freeze the dough balls for up to 3 months. Bake frozen dough balls, adding 1-2 extra minutes to the baking time.
Q: My cookies are too cakey or dry. What happened?
A: This usually means the dough was overmixed after the flour was added, or too much flour was used. Always spoon and level your flour—don’t scoop from the bag. Also, be careful not to overbake; pull them out when the centers still look soft.
Summary
These peanut butter cookies deliver everything you crave: crispy sugar-crusted edges, irresistibly soft and chewy centers, and an intense, nostalgic peanut butter flavor that makes them utterly impossible to resist. Follow the steps, respect the chill time, and prepare for pure baking bliss.
Peanut Butter Cookies
36
servings20
minutes12
minutesIngredients
Instructions
- 1 Cream softened butter, peanut butter, white sugar, and brown sugar on medium-high speed for 3-4 minutes until pale and fluffy.
- 2 Beat in eggs one at a time on low speed, then mix in vanilla extract until just combined.
- 3 In a separate bowl, whisk flour, baking soda, baking powder, and salt. Gradually add to wet ingredients, mixing on low just until no dry streaks remain.
- 4 Cover dough and chill for at least 2 hours, preferably 24-48 hours.
- 5 Preheat oven to 350°F. Line baking sheets. Roll dough into 1.5-tablespoon balls, roll in sugar, place 2 inches apart, flatten with a fork in a crisscross.
- 6 Bake for 10-12 minutes until edges are golden and centers are soft. Cool on sheet for 5 minutes, then transfer to a wire rack to cool completely.