Welcome to the sweetest corner of the kitchen! Whether you’re craving a classic chocolate chip cookie or dreaming of a show-stopping layer cake, we’ve gathered 13 of the most decadent and beloved dessert recipes to satisfy every sweet tooth. From simple weeknight treats to special occasion masterpieces, get ready to bake your way to pure bliss. Let’s dive into these irresistible creations!
Homemade Apple Pie
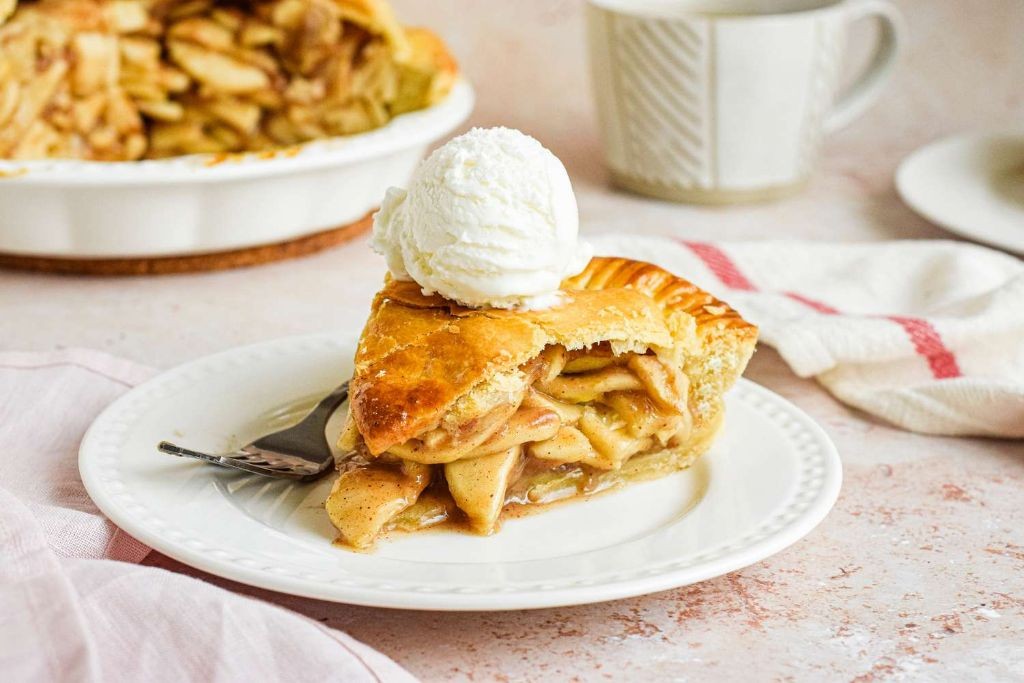
Skip the bakery—this homemade apple pie is your new go-to dessert. Seriously, it’s easier than you think and smells like pure holiday magic. Let’s get baking.
Serving: 8 | Pre Time: 30 minutes | Cooking Time: 50 minutes
Ingredients
- Flour – 2 ½ cups
- Salt – 1 tsp
- Butter – 1 cup (cold, cubed)
- Ice water – ¼ cup
- Apples – 6 medium (peeled, cored, sliced)
- Sugar – ¾ cup
- Cinnamon – 1 tsp
- Cornstarch – 2 tbsp
- Egg – 1 (beaten)
Instructions
- Combine 2 ½ cups flour and 1 tsp salt in a large bowl.
- Cut in 1 cup cold, cubed butter with a pastry cutter until pea-sized crumbs form.
- Tip: Keep the butter cold for a flaky crust—work quickly to prevent melting.
- Gradually add ¼ cup ice water, mixing just until the dough comes together.
- Divide the dough into two discs, wrap in plastic, and chill for 30 minutes.
- Preheat your oven to 375°F (190°C).
- Toss 6 peeled, cored, and sliced apples with ¾ cup sugar, 1 tsp cinnamon, and 2 tbsp cornstarch in a bowl.
- Roll out one dough disc on a floured surface to fit a 9-inch pie dish.
- Transfer the dough to the dish and trim the edges.
- Fill the crust with the apple mixture, mounding it slightly in the center.
- Tip: Use a mix of tart and sweet apples like Granny Smith and Honeycrisp for balanced flavor.
- Roll out the second dough disc and place it over the filling.
- Crimp the edges to seal and cut slits in the top crust for venting.
- Brush the top with 1 beaten egg for a golden finish.
- Bake at 375°F for 50 minutes, or until the crust is golden brown and the filling is bubbling.
- Tip: Place a baking sheet under the pie to catch any drips and prevent a mess.
- Let the pie cool on a wire rack for at least 2 hours before slicing.
Perfectly golden and flaky, this pie delivers warm, spiced apples in every bite. Pair it with a scoop of vanilla ice cream for that classic combo, or get creative by drizzling with caramel sauce for an extra indulgent treat. Seriously, it’s a crowd-pleaser that’ll have everyone asking for seconds.
Velvety Red Velvet Cake
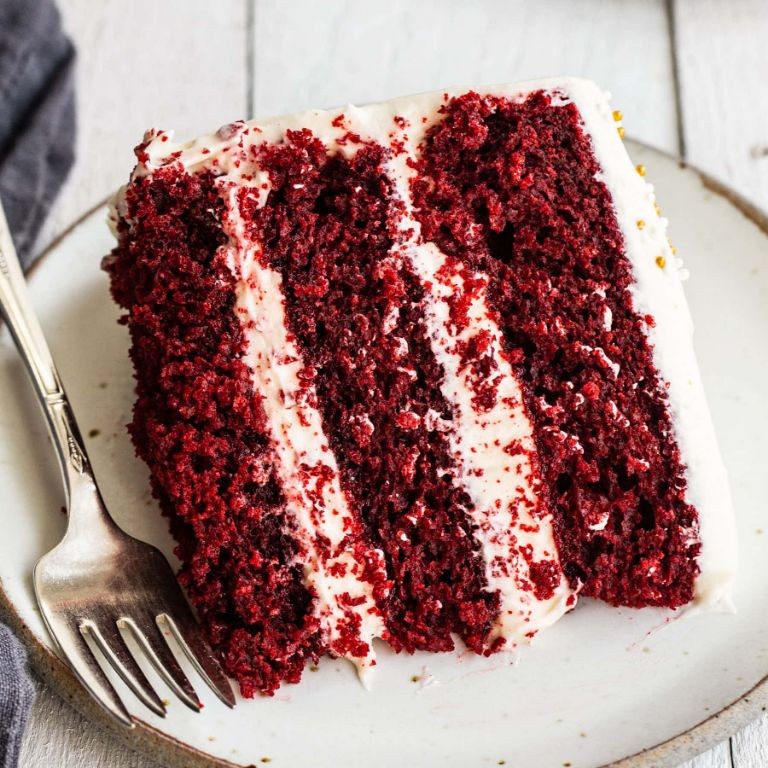
Ditch the box mix—this velvety red velvet cake is a showstopper that’s easier than you think. With its signature crimson hue and tangy cream cheese frosting, it’s the ultimate holiday centerpiece or year-round celebration cake.
Serving: 12 | Pre Time: 20 minutes | Cooking Time: 30 minutes
Ingredients
– All-purpose flour – 2½ cups
– Granulated sugar – 1½ cups
– Unsalted butter – ½ cup
– Buttermilk – 1 cup
– Eggs – 2 large
– Cocoa powder – 2 tbsp
– Baking soda – 1 tsp
– White vinegar – 1 tsp
– Red food coloring – 2 tbsp
– Salt – ½ tsp
– Cream cheese – 8 oz
– Powdered sugar – 4 cups
– Vanilla extract – 1 tsp
Instructions
1. Preheat your oven to 350°F and grease two 9-inch round cake pans.
2. In a large bowl, whisk together the all-purpose flour, granulated sugar, cocoa powder, baking soda, and salt until fully combined.
3. In a separate bowl, beat the unsalted butter until creamy, about 2 minutes.
4. Add the eggs one at a time to the butter, beating well after each addition.
5. Pour in the buttermilk, red food coloring, white vinegar, and vanilla extract, and mix until the batter is smooth and uniformly red.
6. Gradually add the dry ingredients to the wet mixture, folding gently to avoid overmixing—this keeps the cake tender.
7. Divide the batter evenly between the prepared pans and tap them on the counter to remove air bubbles.
8. Bake at 350°F for 25–30 minutes, or until a toothpick inserted into the center comes out clean.
9. Let the cakes cool in the pans for 10 minutes, then transfer to a wire rack to cool completely to prevent the frosting from melting.
10. For the frosting, beat the cream cheese until smooth, then gradually add the powdered sugar and vanilla extract until fluffy, about 3 minutes.
11. Place one cake layer on a plate, spread a thick layer of frosting on top, and stack the second layer.
12. Frost the entire cake with the remaining cream cheese mixture, using a spatula for smooth sides.
13. Chill the frosted cake in the refrigerator for at least 1 hour before slicing for cleaner cuts.
Get ready to slice into layers that are moist and rich with a subtle chocolate tang, balanced by that iconic creamy frosting. Serve it chilled with a sprinkle of extra crumbs on top or alongside a hot coffee for a decadent treat that’s as photogenic as it is delicious.
Decadent Chocolate Mousse
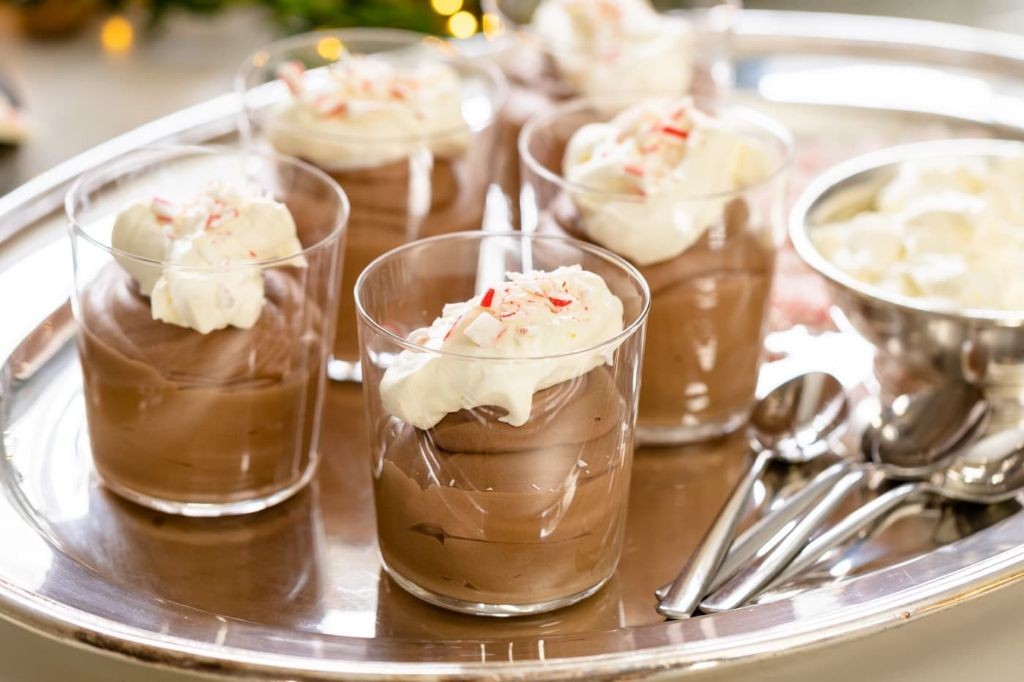
Creamy, dreamy, and dangerously delicious—this chocolate mousse will become your go-to dessert. Whip it up in minutes, chill until set, and watch it disappear. Perfect for impressing guests or treating yourself after a long day.
Serving: 6 | Pre Time: 15 minutes | Cooking Time: 0 minutes
Ingredients
– Heavy cream – 2 cups
– Dark chocolate – 8 oz
– Granulated sugar – ¼ cup
– Vanilla extract – 1 tsp
– Salt – ¼ tsp
Instructions
1. Chop 8 oz of dark chocolate into small pieces and place them in a heatproof bowl.
2. Heat 1 cup of heavy cream in a saucepan over medium heat until it just begins to simmer, about 3–4 minutes.
3. Pour the hot cream over the chopped chocolate and let it sit undisturbed for 2 minutes to melt.
4. Whisk the chocolate and cream mixture until smooth and glossy, ensuring no lumps remain.
5. Stir in ¼ cup granulated sugar, 1 tsp vanilla extract, and ¼ tsp salt until fully combined.
6. In a separate large bowl, whip the remaining 1 cup of heavy cream with an electric mixer on high speed until stiff peaks form, about 3–4 minutes.
7. Gently fold the whipped cream into the chocolate mixture in three additions, using a spatula to maintain airiness.
8. Divide the mousse evenly among 6 serving glasses or ramekins.
9. Cover the glasses with plastic wrap and refrigerate for at least 4 hours, or until fully set.
10. Serve chilled, optionally garnished with fresh berries or a dusting of cocoa powder.
Velvety smooth with a rich, intense chocolate flavor that melts on the tongue. For a fun twist, layer it with crushed cookies or top with a sprinkle of sea salt to balance the sweetness. It’s so light yet indulgent, you’ll want to make it again and again.
Traditional Crème Brûlée
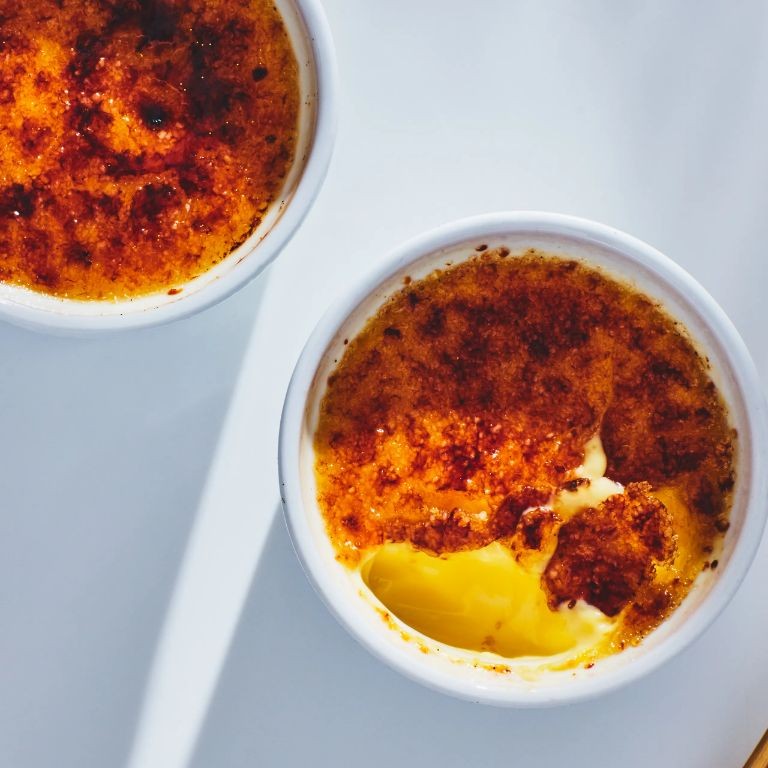
Never thought you could make restaurant-quality crème brûlée at home? Nail this classic dessert with just four ingredients and a blowtorch. Get ready for that perfect crackle and creamy center.
Serving: 6 | Pre Time: 15 minutes | Cooking Time: 40 minutes
Ingredients
– Heavy cream – 2 cups
– Granulated sugar – ½ cup
– Egg yolks – 6
– Vanilla extract – 1 tsp
Instructions
1. Preheat your oven to 325°F.
2. Pour 2 cups of heavy cream into a saucepan.
3. Heat the cream over medium heat until it just begins to simmer, about 5-7 minutes—do not let it boil.
4. While the cream heats, whisk ½ cup of granulated sugar with 6 egg yolks in a bowl until pale and slightly thickened.
5. Slowly pour the hot cream into the egg mixture while whisking constantly to prevent curdling.
6. Stir in 1 tsp of vanilla extract.
7. Strain the mixture through a fine-mesh sieve into a large measuring cup or bowl to remove any lumps.
8. Divide the mixture evenly among six 4-ounce ramekins.
9. Place the ramekins in a large baking dish and fill the dish with hot water until it reaches halfway up the sides of the ramekins.
10. Bake for 30-35 minutes until the edges are set but the centers still jiggle slightly when shaken.
11. Remove the ramekins from the water bath and let them cool to room temperature on a wire rack.
12. Chill the custards in the refrigerator for at least 4 hours, or preferably overnight, to firm up.
13. Just before serving, sprinkle a thin, even layer of extra granulated sugar (about 1 tsp per ramekin) over each custard.
14. Use a kitchen blowtorch to caramelize the sugar by holding it 2-3 inches away and moving in circular motions until golden brown and bubbly.
15. Let the brûlée sit for 1-2 minutes to harden the sugar topping before serving.
Let the contrast of the crisp, caramelized shell and the silky, cool custard delight your senses. Serve it immediately for that signature crack, or garnish with fresh berries for a pop of color and tartness.
Fluffy Japanese Cheesecake
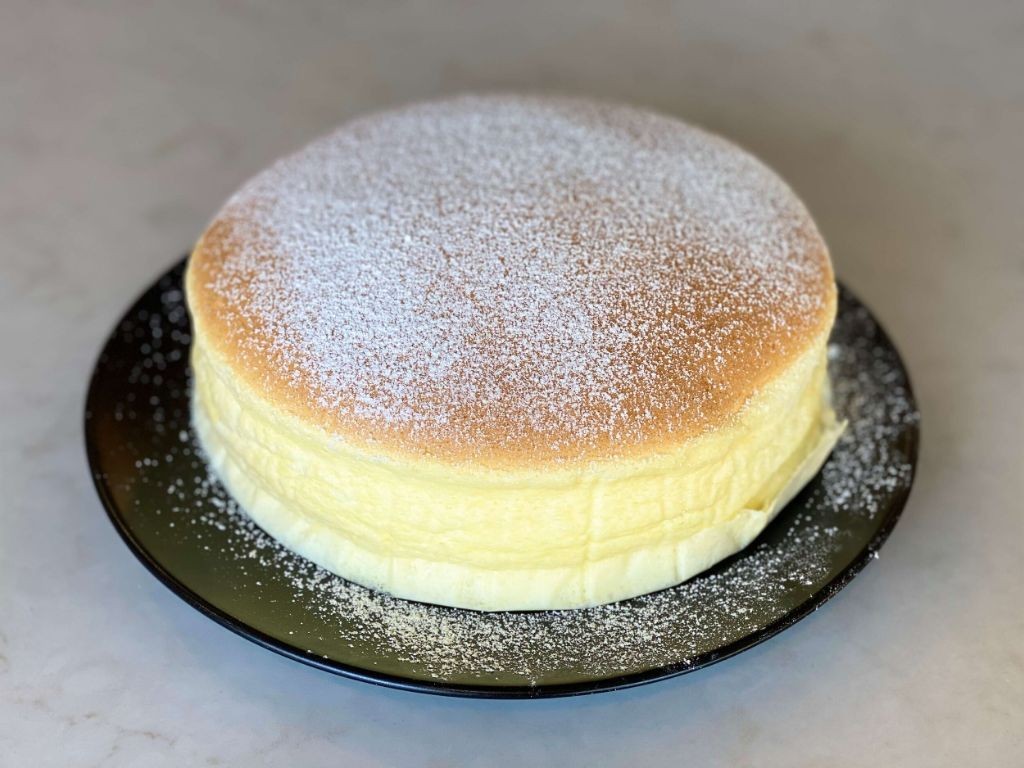
A cloud-like dessert that’s part cheesecake, part soufflé. This Japanese cheesecake bakes up impossibly tall and jiggly. Get ready for the fluffiest bite you’ll ever taste.
Serving: 8 | Pre Time: 25 minutes | Cooking Time: 70 minutes
Ingredients
– Cream cheese – 8 oz
– Milk – ½ cup
– Unsalted butter – ¼ cup
– Egg yolks – 6
– Egg whites – 6
– Granulated sugar – ½ cup
– Cake flour – ¼ cup
– Cornstarch – 2 tbsp
– Lemon juice – 1 tbsp
– Salt – ¼ tsp
Instructions
1. Preheat your oven to 320°F. Place a roasting pan on the bottom rack and fill it halfway with hot water.
2. Line an 8-inch springform pan with parchment paper on the bottom and sides.
3. Combine cream cheese, milk, and butter in a heatproof bowl. Set the bowl over a saucepan of simmering water, making sure the bottom doesn’t touch the water.
4. Whisk the mixture constantly until completely smooth and no lumps remain, about 5 minutes. Remove from heat and let cool slightly.
5. Separate 6 eggs, placing yolks in one bowl and whites in a large, completely clean mixing bowl. Tip: Ensure no yolk gets into the whites, or they won’t whip properly.
6. Whisk the egg yolks into the warm cream cheese mixture one at a time until fully incorporated.
7. Sift cake flour and cornstarch directly into the batter. Whisk until just combined and no dry streaks remain.
8. Stir in lemon juice and salt until evenly distributed.
9. Using an electric mixer with clean beaters, beat the egg whites on medium speed until foamy, about 1 minute.
10. Gradually add the sugar while beating on high speed. Continue beating until stiff, glossy peaks form, about 3-4 minutes. Tip: The meringue is ready when you can turn the bowl upside down without it sliding out.
11. Gently fold one-third of the meringue into the cream cheese batter using a spatula until mostly combined.
12. Fold in the remaining meringue in two additions, using wide, gentle strokes to preserve the air bubbles. Tip: Stop folding as soon as no white streaks remain; overmixing will deflate the batter.
13. Pour the batter into the prepared springform pan. Smooth the top with an offset spatula.
14. Carefully place the pan into the preheated oven on the middle rack, above the water bath.
15. Bake for 70 minutes. Do not open the oven door during baking.
16. Turn off the oven and crack the door open slightly. Let the cheesecake cool in the oven for 1 hour to prevent drastic temperature changes that cause cracking.
17. Remove the cheesecake from the oven and run a thin knife around the edges to loosen it from the pan.
18. Release the springform ring and transfer the cake to a wire rack to cool completely, about 2 hours.
19. Chill the cheesecake in the refrigerator for at least 4 hours, or preferably overnight, before serving.
Melt-in-your-mouth light with a subtle tang from the cream cheese and lemon. The texture is incredibly airy yet moist, collapsing gently with each forkful. Serve chilled slices with a dusting of powdered sugar or fresh berries for a stunning, elegant dessert.
Luscious Lemon Tart

Forget boring desserts—this lemon tart is pure sunshine in a crust. Feel that zesty punch? It’s about to become your go-to showstopper.
Serving: 8 | Pre Time: 20 minutes | Cooking Time: 35 minutes
Ingredients
– All-purpose flour – 1½ cups
– Unsalted butter – ½ cup
– Granulated sugar – ¾ cup
– Eggs – 3
– Lemons – 4
– Heavy cream – ¼ cup
Instructions
1. Preheat your oven to 350°F.
2. Combine 1½ cups all-purpose flour and ¼ cup granulated sugar in a bowl.
3. Cut ½ cup cold unsalted butter into the flour mixture until it resembles coarse crumbs.
4. Press the dough evenly into a 9-inch tart pan with a removable bottom.
5. Bake the crust for 15 minutes at 350°F until lightly golden.
6. Zest and juice all 4 lemons to get ½ cup juice.
7. Whisk together 3 eggs, ½ cup granulated sugar, and ¼ cup heavy cream in a bowl.
8. Slowly pour the lemon juice into the egg mixture while whisking constantly to prevent curdling.
9. Strain the lemon filling through a fine-mesh sieve into the pre-baked crust.
10. Bake the tart at 325°F for 20 minutes until the filling is set but still slightly jiggly in the center.
11. Cool the tart completely on a wire rack for at least 2 hours.
12. Refrigerate the tart for 4 hours before serving to firm up the texture.
Zesty and vibrant, this tart delivers a perfect balance of sweet and tart with a buttery, crisp crust. The creamy filling sets beautifully—slice it cold for clean edges, or top with fresh berries and a dusting of powdered sugar for an elegant presentation.
Classic Banana Pudding

OBSESSED with this nostalgic dessert? Let’s make it viral-worthy. Classic banana pudding gets a modern makeover—creamy, dreamy, and ready to wow your feed. Grab your ingredients and let’s layer up perfection.
Serving: 8 | Pre Time: 20 minutes | Cooking Time: 10 minutes
Ingredients
– Vanilla wafer cookies – 1 box (11 oz)
– Ripe bananas – 4 medium
– Granulated sugar – ¾ cup
– Cornstarch – ¼ cup
– Salt – ¼ tsp
– Egg yolks – 4 large
– Whole milk – 3 cups
– Unsalted butter – 2 tbsp
– Vanilla extract – 2 tsp
– Heavy cream – 1 cup
Instructions
1. Arrange a single layer of vanilla wafer cookies in the bottom of a 9×13-inch baking dish.
2. Slice 2 bananas into ¼-inch rounds and layer them evenly over the cookies.
3. Whisk together ¾ cup granulated sugar, ¼ cup cornstarch, and ¼ tsp salt in a medium saucepan until no lumps remain.
4. Add 4 egg yolks to the saucepan and whisk vigorously for 30 seconds until smooth and pale yellow.
5. Gradually pour in 3 cups whole milk while whisking constantly to prevent clumping.
6. Cook the mixture over medium heat, stirring continuously with a spatula, for 8–10 minutes until it thickens and bubbles slowly.
7. Remove the saucepan from heat and immediately stir in 2 tbsp unsalted butter and 2 tsp vanilla extract until fully melted and incorporated.
8. Pour half of the warm pudding over the banana layer in the baking dish, spreading it evenly with a spatula.
9. Repeat steps 1–2 with another layer of cookies and the remaining 2 sliced bananas.
10. Top with the remaining pudding, smoothing it into an even layer.
11. Chill the assembled pudding in the refrigerator, uncovered, for at least 4 hours until completely set and firm to the touch.
12. Whip 1 cup heavy cream with an electric mixer on high speed for 3–4 minutes until stiff peaks form.
13. Spread the whipped cream over the chilled pudding, creating decorative swirls with a spoon.
14. Crush 5–6 extra vanilla wafer cookies and sprinkle them over the whipped cream for garnish.
15. Refrigerate the finished pudding for 30 more minutes before serving to allow flavors to meld.
Nothing beats the silky-smooth pudding paired with tender bananas and crispy cookies. For a fun twist, layer individual servings in clear mason jars—perfect for grabbing and going. This dessert tastes even better the next day as the cookies soften into cake-like perfection.
Refreshing Mango Sticky Rice
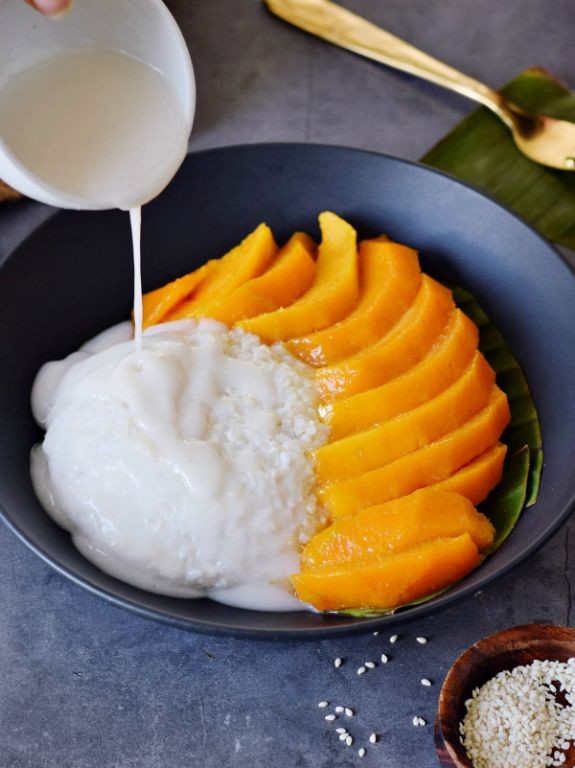
Tired of boring desserts? This Refreshing Mango Sticky Rice is your tropical escape. Bold flavors, creamy texture, and zero fuss—it’s summer in a bowl.
Serving: 4 | Pre Time: 10 minutes | Cooking Time: 20 minutes
Ingredients
– Sticky rice – 1 cup
– Coconut milk – 1 cup
– Sugar – ¼ cup
– Salt – ½ tsp
– Mango – 2 large, ripe
– Toasted sesame seeds – 1 tbsp
Instructions
1. Rinse 1 cup sticky rice under cold water until water runs clear.
2. Soak rinsed rice in water for 30 minutes, then drain completely.
3. Steam soaked rice in a steamer basket over boiling water for 15 minutes.
4. Heat 1 cup coconut milk in a saucepan over medium heat until simmering.
5. Stir ¼ cup sugar and ½ tsp salt into simmering coconut milk until dissolved.
6. Remove saucepan from heat and pour hot coconut mixture over steamed rice.
7. Fold coconut mixture into rice until fully absorbed and creamy.
8. Let rice mixture rest covered for 10 minutes to thicken.
9. Peel and slice 2 ripe mangoes into thin wedges while rice rests.
10. Toast 1 tbsp sesame seeds in a dry pan over medium heat for 2 minutes until golden.
11. Scoop coconut rice onto plates and arrange mango slices alongside.
12. Sprinkle toasted sesame seeds over each serving immediately before eating.
Perfectly chewy rice melts with sweet coconut cream. Juicy mango cuts through the richness—add extra sesame crunch or drizzle with leftover coconut sauce. Serve chilled for maximum refreshment on hot days.
Sweet Strawberry Shortcake

Kick off summer vibes with this sweet strawberry shortcake. Grab fresh berries and fluffy biscuits—it’s a no-fuss dessert that screams sunshine. Layer it up and watch it disappear.
Serving: 6 | Pre Time: 15 minutes | Cooking Time: 15 minutes
Ingredients
– All-purpose flour – 2 cups
– Granulated sugar – ¼ cup
– Baking powder – 1 tbsp
– Salt – ½ tsp
– Unsalted butter – ½ cup
– Heavy cream – ¾ cup
– Strawberries – 1 lb
– Whipped cream – 1 cup
Instructions
1. Preheat your oven to 425°F and line a baking sheet with parchment paper.
2. Hull and slice the strawberries into thin pieces, then set them aside in a bowl.
3. In a large mixing bowl, combine the all-purpose flour, granulated sugar, baking powder, and salt.
4. Cut the unsalted butter into small cubes and add it to the dry ingredients.
5. Use a pastry cutter or your fingers to work the butter into the flour mixture until it resembles coarse crumbs.
6. Pour in the heavy cream and stir gently until a soft dough forms—avoid overmixing to keep the biscuits tender.
7. Turn the dough onto a lightly floured surface and pat it into a 1-inch thick rectangle.
8. Cut the dough into 6 equal squares using a sharp knife or biscuit cutter.
9. Place the dough squares onto the prepared baking sheet, spacing them about 2 inches apart.
10. Bake in the preheated oven for 12–15 minutes, or until the biscuits are golden brown on top.
11. Remove the biscuits from the oven and let them cool completely on a wire rack.
12. Split each cooled biscuit in half horizontally with a serrated knife.
13. Spoon a generous layer of sliced strawberries onto the bottom half of each biscuit.
14. Top the strawberries with a dollop of whipped cream, then place the biscuit top over it.
15. Serve immediately, or chill in the refrigerator for up to 1 hour before serving for a firmer texture.
Zesty berries burst against the flaky, buttery biscuits, while the whipped cream adds a cloud-like finish. For a twist, drizzle with balsamic glaze or sprinkle with fresh mint. It’s a dessert that’s as vibrant as a summer day.
Rich Peanut Butter Pie

Let’s skip the small talk and dive straight into this no-bake dessert that’s about to become your new obsession. Loaded with creamy peanut butter and a chocolatey crust, this pie delivers maximum flavor with minimal effort. Seriously, it’s the ultimate treat for when you’re craving something indulgent but don’t want to turn on the oven.
Serving: 8 | Pre Time: 25 minutes | Cooking Time: 0 minutes
Ingredients
– Chocolate sandwich cookies – 20 cookies
– Unsalted butter – 5 tbsp, melted
– Cream cheese – 8 oz, softened
– Creamy peanut butter – 1 cup
– Powdered sugar – 1 cup
– Heavy cream – 1 cup
– Vanilla extract – 1 tsp
– Semi-sweet chocolate chips – ½ cup
Instructions
1. Place the chocolate sandwich cookies in a food processor and pulse until fine crumbs form.
2. Add the melted unsalted butter to the cookie crumbs and pulse until fully combined.
3. Press the mixture firmly into a 9-inch pie dish, covering the bottom and sides evenly.
4. Chill the crust in the refrigerator for 15 minutes to set.
5. In a large mixing bowl, beat the softened cream cheese with an electric mixer on medium speed for 2 minutes until smooth.
6. Add the creamy peanut butter and powdered sugar to the bowl and beat on medium speed for 3 minutes until fully incorporated and fluffy.
7. In a separate bowl, whip the heavy cream and vanilla extract with an electric mixer on high speed for 4-5 minutes until stiff peaks form. Tip: Chill your bowl and beaters in the freezer for 10 minutes before whipping to help the cream thicken faster.
8. Gently fold the whipped cream into the peanut butter mixture until no white streaks remain.
9. Spoon the filling into the chilled crust and smooth the top with a spatula.
10. Melt the semi-sweet chocolate chips in a microwave-safe bowl in 30-second intervals, stirring between each, until smooth.
11. Drizzle the melted chocolate over the top of the pie in a zigzag pattern.
12. Refrigerate the pie for at least 4 hours, or until fully set. Tip: For the cleanest slices, dip your knife in hot water and wipe it dry before cutting each piece.
13. Serve chilled. Tip: Garnish with crushed peanuts or a sprinkle of sea salt right before serving to add crunch and balance the sweetness.
What you get is a silky, mousse-like filling that’s rich with peanut butter flavor, perfectly contrasted by the crisp chocolate cookie crust. The chocolate drizzle adds a glossy finish that makes it look as good as it tastes. Try serving it with a scoop of vanilla ice cream or a drizzle of caramel sauce for an extra-decadent twist.
Delicious Pumpkin Spice Cake
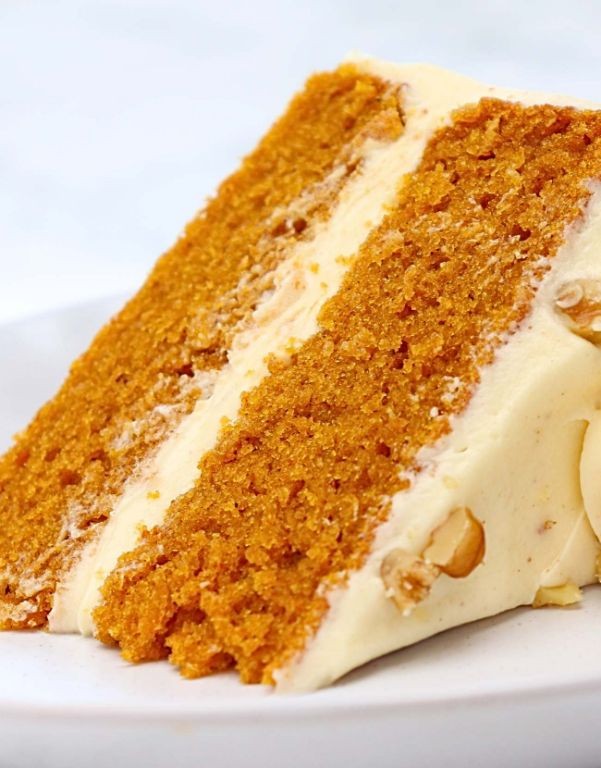
You won’t believe how easy this cozy fall favorite is to whip up. Grab your mixing bowls and let’s get baking—your kitchen will smell like autumn heaven in minutes.
Serving: 8 | Pre Time: 15 minutes | Cooking Time: 35 minutes
Ingredients
– All-purpose flour – 2 cups
– Granulated sugar – 1½ cups
– Pumpkin puree – 1 cup
– Vegetable oil – ½ cup
– Eggs – 2 large
– Baking powder – 2 tsp
– Baking soda – 1 tsp
– Ground cinnamon – 2 tsp
– Ground nutmeg – ½ tsp
– Ground ginger – ½ tsp
– Salt – ½ tsp
– Vanilla extract – 1 tsp
Instructions
1. Preheat your oven to 350°F and grease a 9-inch round cake pan.
2. In a large bowl, whisk together the flour, sugar, baking powder, baking soda, cinnamon, nutmeg, ginger, and salt until fully combined.
3. In a separate bowl, beat the pumpkin puree, vegetable oil, eggs, and vanilla extract with a hand mixer for 2 minutes until smooth.
4. Tip: Scrape down the sides of the bowl halfway through mixing to ensure no lumps remain.
5. Gradually pour the wet ingredients into the dry ingredients, stirring with a spatula just until no flour streaks show—do not overmix.
6. Pour the batter into the prepared pan and smooth the top with the spatula.
7. Bake at 350°F for 30–35 minutes, or until a toothpick inserted into the center comes out clean.
8. Tip: Rotate the pan halfway through baking for even browning.
9. Remove the cake from the oven and let it cool in the pan on a wire rack for 10 minutes.
10. Run a knife around the edges of the pan, then invert the cake onto the rack to cool completely.
11. Tip: For extra moisture, wrap the cooled cake in plastic wrap and let it sit overnight before serving.
This cake emerges incredibly moist with a tender crumb that melts in your mouth. The warm spices blend perfectly with the sweet pumpkin, creating a cozy flavor that’s ideal for chilly evenings. Serve it dusted with powdered sugar or topped with a dollop of whipped cream for an extra indulgent treat.
Perfect Vanilla Panna Cotta
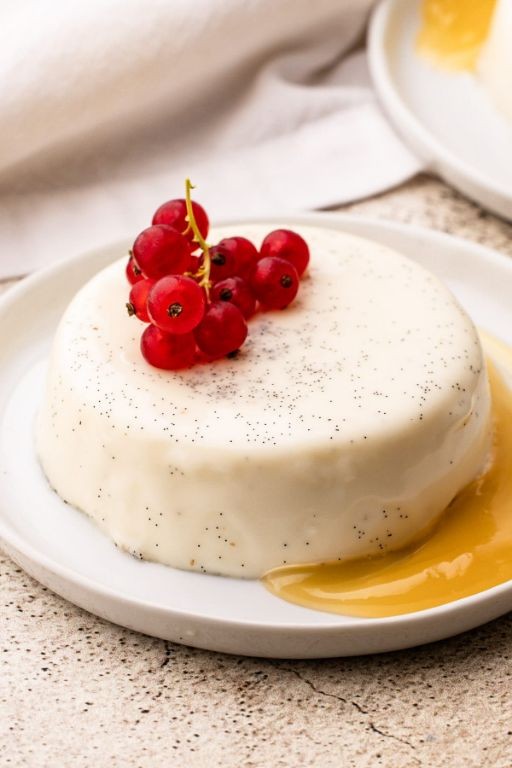
Viral on foodie feeds, this vanilla panna cotta is the silky, no-bake dessert you need. Vanilla bean seeds and cream create a luxurious base that sets perfectly in the fridge—no gelatin wobble here. Get ready to impress with minimal effort and maximum creamy payoff.
Serving: 6 | Pre Time: 15 minutes | Cooking Time: 5 minutes
Ingredients
– Heavy cream – 2 cups
– Granulated sugar – ⅓ cup
– Vanilla bean – 1
– Unflavored gelatin – 2¼ tsp
– Cold water – 3 tbsp
Instructions
1. Pour 3 tbsp of cold water into a small bowl and sprinkle 2¼ tsp of unflavored gelatin evenly over the surface. Let it bloom for 5 minutes until it looks spongy and has absorbed all the water.
2. Split 1 vanilla bean lengthwise with a sharp knife and scrape out the seeds using the back of the knife. Tip: Save the empty pod for infusing sugar later.
3. Combine 2 cups of heavy cream, ⅓ cup of granulated sugar, and the vanilla bean seeds in a medium saucepan over medium heat. Stir constantly with a whisk until the sugar dissolves completely and tiny bubbles form around the edges, about 3–4 minutes; do not let it boil.
4. Remove the saucepan from the heat and immediately whisk in the bloomed gelatin until it dissolves fully and no lumps remain, about 1 minute. Tip: Work quickly while the cream is hot to ensure smooth incorporation.
5. Strain the mixture through a fine-mesh sieve into a large measuring cup or bowl to catch any undissolved gelatin bits or vanilla bean fragments.
6. Divide the strained mixture evenly among 6 ramekins or small glasses. Tip: Lightly grease the ramekins with neutral oil if you plan to unmold later for clean edges.
7. Let the ramekins cool to room temperature on the counter for 20 minutes, then cover them with plastic wrap, pressing it directly onto the surface to prevent a skin from forming.
8. Refrigerate the ramekins for at least 6 hours, or ideally overnight, until the panna cotta is firmly set and jiggles uniformly when gently shaken.
Perfectly set, this panna cotta delivers a velvety texture that melts on the tongue with pure vanilla warmth. Serve it straight from the fridge with a drizzle of berry compote or a sprinkle of toasted nuts for crunch. Its clean, creamy flavor makes it a versatile canvas for seasonal toppings—try it with caramelized figs in fall or fresh citrus in winter.
Homemade Raspberry Cheesecake Bars
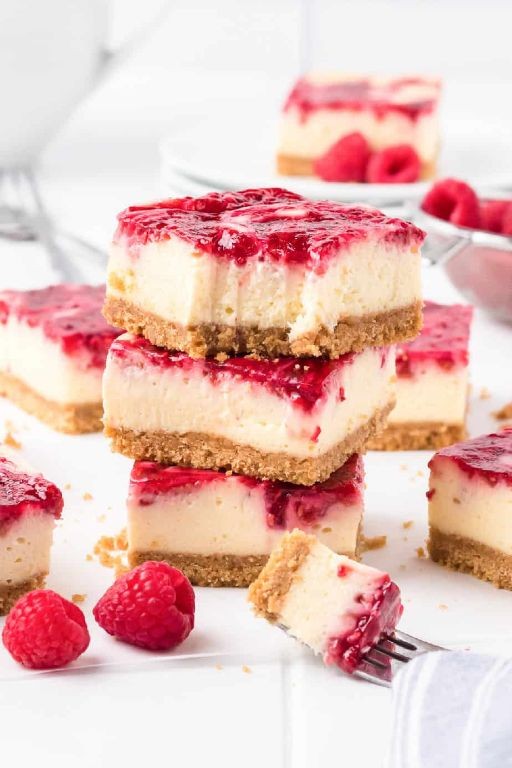
Dreaming of a dessert that’s creamy, fruity, and ridiculously easy? These homemade raspberry cheesecake bars deliver big flavor with minimal fuss. Ditch the bakery—you’ve got this.
Serving: 16 | Pre Time: 20 minutes | Cooking Time: 35 minutes
Ingredients
- Graham cracker crumbs – 1 ½ cups
- Unsalted butter – ½ cup, melted
- Cream cheese – 16 oz, softened to room temperature
- Granulated sugar – ⅔ cup
- Eggs – 2 large
- Sour cream – ½ cup
- Vanilla extract – 1 tsp
- Raspberry jam – ½ cup
Instructions
- Preheat your oven to 350°F and line an 8×8-inch baking pan with parchment paper, leaving overhang on two sides for easy removal.
- In a medium bowl, combine the graham cracker crumbs and melted butter until the mixture resembles wet sand.
- Press the crumb mixture firmly and evenly into the bottom of the prepared pan. Tip: Use the bottom of a measuring cup to compact it for a solid base.
- Bake the crust for 10 minutes at 350°F, then remove and let it cool slightly while you prepare the filling.
- In a large bowl, beat the softened cream cheese with an electric mixer on medium speed until completely smooth, about 2 minutes.
- Add the granulated sugar to the cream cheese and beat for another 1 minute until fully incorporated and creamy.
- Beat in the eggs one at a time, mixing just until each is combined to avoid overbeating.
- Add the sour cream and vanilla extract, and mix on low speed until the filling is uniform. Tip: Scrape down the sides of the bowl with a spatula to ensure no lumps remain.
- Pour the cheesecake filling over the slightly cooled crust and spread it into an even layer with a spatula.
- Drop small spoonfuls of raspberry jam evenly over the top of the filling.
- Use a knife or toothpick to gently swirl the jam into the filling, creating a marbled effect. Tip: Don’t over-swirl, or the pattern will muddy.
- Bake at 350°F for 35 minutes, or until the edges are set and the center jiggles slightly when the pan is gently shaken.
- Turn off the oven, crack the door open, and let the bars cool inside for 1 hour to prevent cracking.
- Transfer the pan to a wire rack to cool completely to room temperature, about 2 hours.
- Refrigerate the bars for at least 4 hours, or preferably overnight, to fully set before slicing.
- Use the parchment overhang to lift the bars from the pan, then slice into 16 squares with a sharp knife wiped clean between cuts.
Here’s the payoff: each bar boasts a buttery crust, a velvety-smooth cheesecake layer, and sweet-tart raspberry swirls. Honestly, they’re even better chilled overnight—the flavors meld into pure bliss. Serve them straight from the fridge for a firm, cool bite, or get creative by topping with fresh raspberries and a drizzle of white chocolate for a next-level dessert platter.
Summary
Feast your eyes and taste buds on these 18 decadent desserts! Whether you’re a baking pro or just starting out, there’s something here to sweeten any occasion. We’d love to hear which recipe you try first—leave a comment with your favorite! Don’t forget to share the deliciousness by pinning this article on Pinterest. Happy baking!


