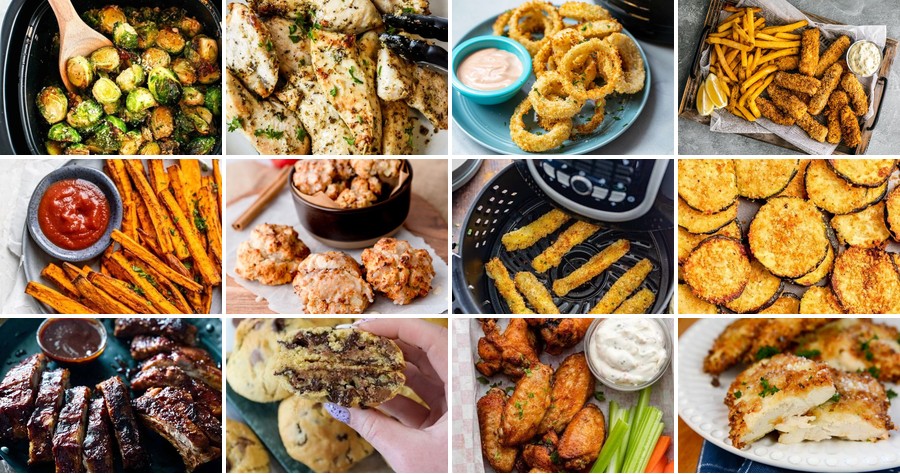
You just unboxed your Power XL Air Fryer and are wondering where to start? You’re in the perfect spot! We’ve gathered 20 crispy, beginner-friendly recipes that turn everyday ingredients into golden, delicious meals—from quick weeknight dinners to irresistible comfort food. Get ready to fall in love with your new kitchen helper. Let’s dive in and make cooking fun and easy!
Air Fryer Crispy Chicken Wings

Revered for their irresistible crunch and succulent interior, air fryer crispy chicken wings offer a modern twist on a beloved classic. This streamlined method delivers restaurant-quality results with minimal effort, making it perfect for impromptu gatherings or a satisfying weeknight treat. The air fryer’s rapid circulation creates a beautifully golden exterior while keeping the meat exceptionally juicy.
Serving: 4 | Pre Time: 15 minutes | Cooking Time: 25 minutes
Ingredients
– 2 pounds chicken wings, patted completely dry with paper towels (crucial for maximum crispiness)
– 1 tablespoon extra virgin olive oil, my go-to for its fruity notes
– 1 teaspoon kosher salt, I prefer its clean, even seasoning
– 1/2 teaspoon freshly ground black pepper
– 1 teaspoon garlic powder
– 1 teaspoon smoked paprika, for a subtle, warm depth
– 1/2 teaspoon baking powder, the secret weapon for an extra-crispy skin
Instructions
1. Pat the 2 pounds of chicken wings completely dry with paper towels to remove all surface moisture.
2. In a large bowl, whisk together 1 tablespoon of extra virgin olive oil, 1 teaspoon of kosher salt, 1/2 teaspoon of black pepper, 1 teaspoon of garlic powder, 1 teaspoon of smoked paprika, and 1/2 teaspoon of baking powder until a cohesive paste forms.
3. Add the dried chicken wings to the bowl and toss vigorously with your hands, ensuring every wing is thoroughly and evenly coated with the seasoning paste.
4. Arrange the coated wings in a single layer in your air fryer basket, ensuring they are not touching or overlapping to allow for proper air circulation.
5. Set your air fryer to 400°F and cook the wings for 12 minutes.
6. After 12 minutes, carefully open the air fryer and use tongs to flip each wing over.
7. Continue cooking at 400°F for an additional 10-13 minutes, until the wings are deeply golden brown, crispy, and the internal temperature reaches 165°F when checked with an instant-read thermometer.
8. Transfer the cooked wings to a serving platter and let them rest for 3-5 minutes before serving.
Unbelievably crisp and shatteringly good, these wings boast a perfectly seasoned, golden-brown crust that gives way to tender, flavorful meat. For a creative twist, serve them alongside a trio of dipping sauces—a classic blue cheese, a spicy buffalo, and a cool herb yogurt—to let everyone customize their perfect bite.
Power XL Air Fryer French Fries
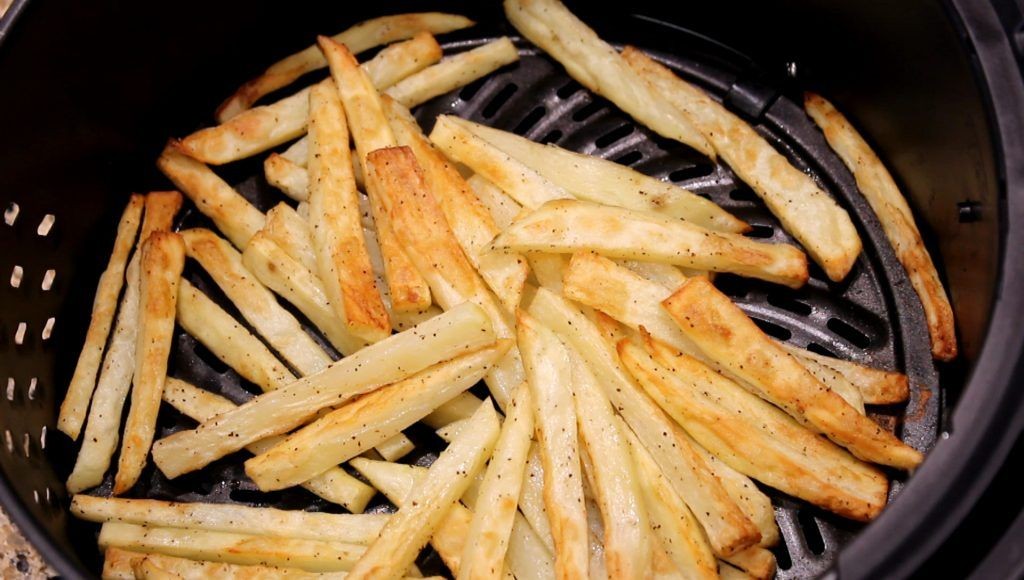
Elevating the humble potato into a golden, crispy delight, the Power XL Air Fryer transforms this classic side into a healthier indulgence. With a fraction of the oil and all the satisfying crunch, these fries emerge perfectly crisp outside and tender within, making them an irresistible treat for any occasion. This method delivers consistently excellent results, whether for a casual weeknight dinner or a festive gathering.
Serving: 4 | Pre Time: 15 minutes | Cooking Time: 20 minutes
Ingredients
– 2 large russet potatoes, scrubbed clean (I find their high starch content yields the crispiest results)
– 2 tablespoons extra virgin olive oil, my go-to for its fruity notes
– 1 teaspoon fine sea salt, plus extra for finishing
– ½ teaspoon freshly ground black pepper, for a subtle kick
– 1 teaspoon smoked paprika, which adds a lovely depth of flavor
– Cooking spray, to lightly coat the air fryer basket
Instructions
1. Cut each potato lengthwise into ½-inch thick planks, then slice each plank into ½-inch wide sticks, aiming for uniform size to ensure even cooking.
2. Place the cut potatoes in a large bowl of cold water and soak for 10 minutes to remove excess starch, which helps achieve maximum crispiness.
3. Drain the potatoes thoroughly and pat them completely dry with paper towels or a clean kitchen towel, as any moisture will steam instead of crisp.
4. In a large mixing bowl, toss the dried potatoes with 2 tablespoons of extra virgin olive oil until evenly coated.
5. Sprinkle 1 teaspoon of fine sea salt, ½ teaspoon of freshly ground black pepper, and 1 teaspoon of smoked paprika over the potatoes, tossing again to distribute the seasonings uniformly.
6. Lightly spray the air fryer basket with cooking spray to prevent sticking, then arrange the seasoned potatoes in a single layer without overcrowding, working in batches if necessary.
7. Set the Power XL Air Fryer to 400°F and cook for 10 minutes, shaking the basket halfway through to promote even browning.
8. After 10 minutes, shake the basket again and continue cooking for an additional 8–10 minutes, until the fries are golden brown and crispy on the edges.
9. Transfer the cooked fries to a serving bowl and immediately sprinkle with a pinch of extra sea salt while still hot, allowing it to adhere beautifully.
Meticulously crafted, these fries boast a shatteringly crisp exterior that gives way to a fluffy, tender interior, with the smoked paprika lending a warm, smoky undertone. Serve them alongside a creamy garlic aioli or simply enjoy them straight from the basket, perhaps garnished with fresh parsley for a vibrant touch.
Crunchy Air Fryer Onion Rings
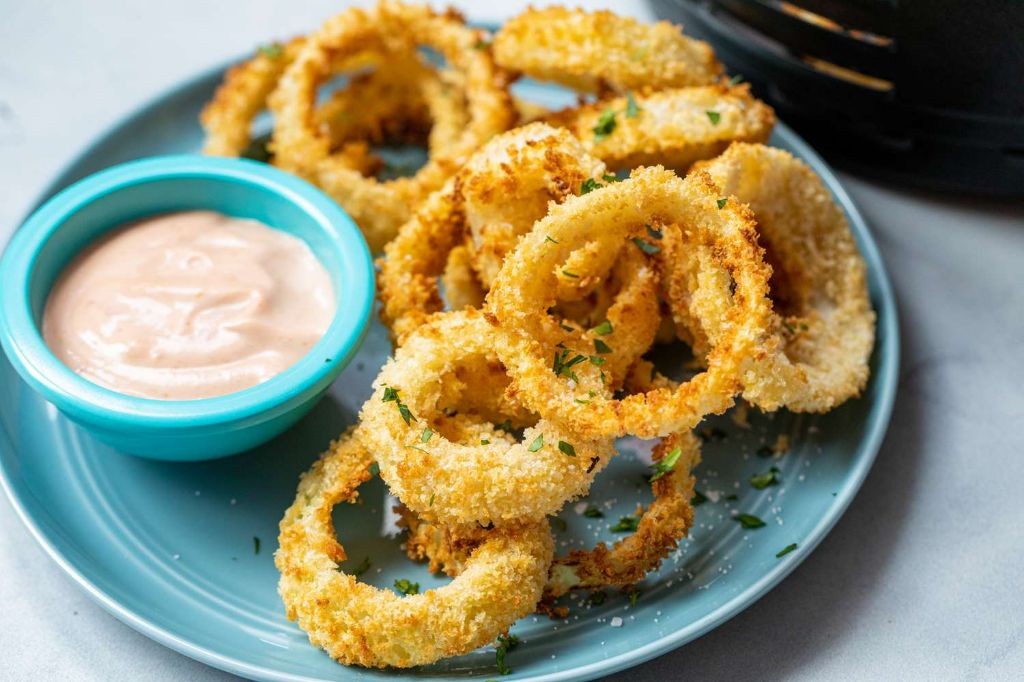
Savory, golden-brown onion rings emerge from the air fryer with a satisfying crunch that rivals any deep-fried version, yet with a fraction of the oil. This recipe transforms humble onions into an elegant appetizer or side dish, perfect for holiday gatherings or casual weeknight dinners. The air fryer’s magic creates a crisp exterior that gives way to tender, sweet onion within, making these rings irresistibly addictive.
Serving: 4 | Pre Time: 15 minutes | Cooking Time: 12 minutes
Ingredients
– 2 large yellow onions, sliced into ½-inch rings (I find these hold their shape better than sweet onions)
– 1 cup all-purpose flour
– 2 large eggs, beaten until frothy (room temperature eggs incorporate more smoothly)
– 1½ cups panko breadcrumbs
– 1 teaspoon garlic powder
– 1 teaspoon smoked paprika
– ½ teaspoon kosher salt
– ¼ teaspoon freshly ground black pepper
– Cooking spray (avocado oil spray is my go-to for its high smoke point)
Instructions
1. Preheat your air fryer to 400°F for 5 minutes.
2. Separate the onion slices into individual rings, discarding the smallest inner pieces.
3. In a shallow bowl, combine the flour, garlic powder, smoked paprika, kosher salt, and black pepper.
4. Place the beaten eggs in a second shallow bowl.
5. Spread the panko breadcrumbs in a third shallow bowl.
6. Dredge one onion ring in the flour mixture, shaking off any excess.
7. Dip the floured ring into the beaten eggs, letting any excess drip back into the bowl.
8. Press the ring into the panko breadcrumbs, coating all sides evenly.
9. Place the coated ring on a parchment-lined baking sheet.
10. Repeat steps 6-8 with all remaining onion rings.
11. Lightly spray the air fryer basket with cooking spray.
12. Arrange the onion rings in a single layer in the air fryer basket, leaving space between them.
13. Lightly spray the tops of the onion rings with cooking spray.
14. Air fry at 400°F for 6 minutes.
15. Flip each onion ring using tongs.
16. Spray the flipped sides lightly with cooking spray.
17. Air fry for another 6 minutes, or until golden brown and crisp.
18. Transfer the cooked onion rings to a wire rack to maintain their crunch.
19. Repeat steps 11-17 with any remaining batches.
Crisp, golden perfection awaits with these air-fried onion rings. The panko breadcrumbs create an exceptionally crunchy exterior that contrasts beautifully with the sweet, tender onion inside. Serve them immediately with your favorite dipping sauce—I love them with a spicy chipotle aioli—or alongside burgers for an elevated twist on classic comfort food.
Air Fryer Garlic Parmesan Brussels Sprouts
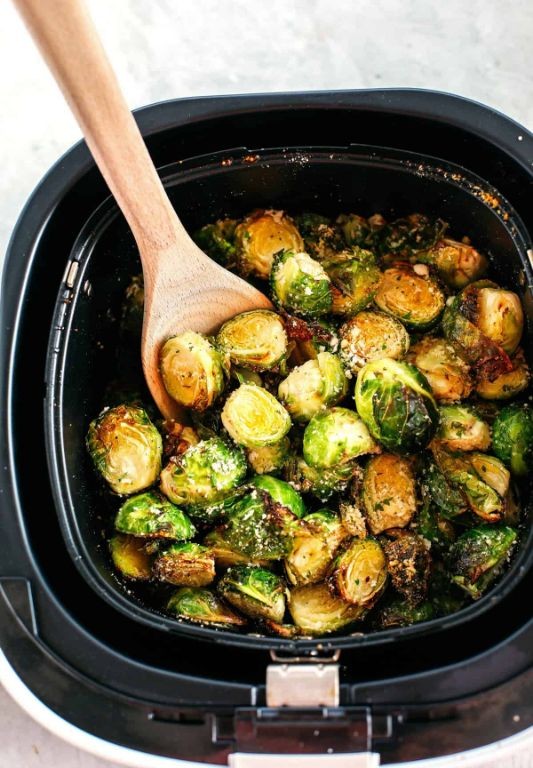
Venture beyond the ordinary with these crispy, golden Brussels sprouts transformed by the magic of air frying. Tossed in a savory garlic-Parmesan coating, they emerge with caramelized edges and tender centers, offering a sophisticated yet approachable side dish that elevates any holiday table or weeknight meal.
Serving: 4 | Pre Time: 10 minutes | Cooking Time: 15 minutes
Ingredients
– 1 pound Brussels sprouts, trimmed and halved (look for firm, bright green ones)
– 2 tablespoons extra virgin olive oil, my go-to for its fruity notes
– 3 cloves garlic, minced (fresh garlic adds the best punch)
– ¼ cup grated Parmesan cheese, plus extra for garnish
– ½ teaspoon kosher salt
– ¼ teaspoon freshly ground black pepper
– ¼ teaspoon red pepper flakes, optional for a subtle kick
– 1 tablespoon chopped fresh parsley, for a bright finish
Instructions
1. Preheat your air fryer to 375°F for 3 minutes to ensure even cooking from the start.
2. In a large bowl, combine the halved Brussels sprouts, olive oil, minced garlic, salt, black pepper, and red pepper flakes if using, tossing thoroughly to coat every piece evenly.
3. Arrange the Brussels sprouts in a single layer in the air fryer basket, ensuring they don’t overlap for maximum crispiness.
4. Air fry at 375°F for 10 minutes, shaking the basket halfway through to promote uniform browning.
5. Sprinkle the grated Parmesan cheese over the Brussels sprouts, then air fry for an additional 3–5 minutes until the cheese is melted and golden, and the sprouts are fork-tender with crispy edges.
6. Transfer the Brussels sprouts to a serving dish and immediately garnish with chopped parsley and extra Parmesan cheese if desired.
Delight in the contrast of textures, from the crunchy exterior to the soft, savory interior infused with garlic and Parmesan. Serve them warm as a standout side with roasted meats or atop a grain bowl for a creative twist, where their rich flavor complements fresh greens beautifully.
Spicy Air Fryer Shrimp Tacos

Yield to the allure of a dish that transforms humble ingredients into a vibrant, restaurant-worthy meal with minimal effort. These Spicy Air Fryer Shrimp Tacos offer a perfect harmony of crispy, succulent shrimp, bright toppings, and a touch of heat, all assembled in under 30 minutes—ideal for a festive weeknight dinner or a casual weekend gathering.
Serving: 4 | Pre Time: 15 minutes | Cooking Time: 10 minutes
Ingredients
– 1 pound large raw shrimp, peeled and deveined (I find fresh, never frozen, yields the best texture)
– 1 tablespoon extra virgin olive oil, my go-to for its clean, fruity notes
– 1 teaspoon smoked paprika
– 1/2 teaspoon garlic powder
– 1/2 teaspoon onion powder
– 1/4 teaspoon cayenne pepper (adjust for your heat preference, but this gives a lovely warmth)
– 1/4 teaspoon fine sea salt
– 8 small corn tortillas (I warm them directly over a gas flame for a charred edge)
– 1 cup shredded green cabbage, for a refreshing crunch
– 1/2 cup pico de gallo, homemade or store-bought
– 1/4 cup crumbled cotija cheese
– 1 lime, cut into wedges
– 1/4 cup fresh cilantro leaves, roughly chopped
Instructions
1. Pat the shrimp completely dry with paper towels to ensure maximum crispiness in the air fryer.
2. In a medium bowl, toss the shrimp with olive oil, smoked paprika, garlic powder, onion powder, cayenne pepper, and sea salt until evenly coated.
3. Preheat your air fryer to 400°F for 3 minutes.
4. Arrange the shrimp in a single layer in the air fryer basket, ensuring they do not touch for proper air circulation.
5. Air fry the shrimp at 400°F for 6-8 minutes, shaking the basket halfway through, until they are pink, opaque, and slightly curled.
6. While the shrimp cook, warm the corn tortillas one by one over a medium gas flame for about 15-20 seconds per side until pliable and lightly charred, or wrap them in a damp paper towel and microwave for 30 seconds.
7. Assemble each taco by placing a warm tortilla on a plate, topping it with a layer of shredded cabbage, then 3-4 shrimp.
8. Garnish each taco generously with pico de gallo, crumbled cotija cheese, and fresh cilantro leaves.
9. Serve immediately with lime wedges on the side for squeezing over the top.
Finally, savor the contrast of the crispy, spice-rubbed shrimp against the cool, crunchy cabbage and tangy pico de gallo. The cotija cheese adds a salty creaminess that balances the heat, while a squeeze of lime brightens every bite. For a creative twist, serve these tacos with a side of creamy avocado crema or pair them with a chilled Mexican beer to elevate your casual dining experience.
Air Fryer Honey Glazed Salmon
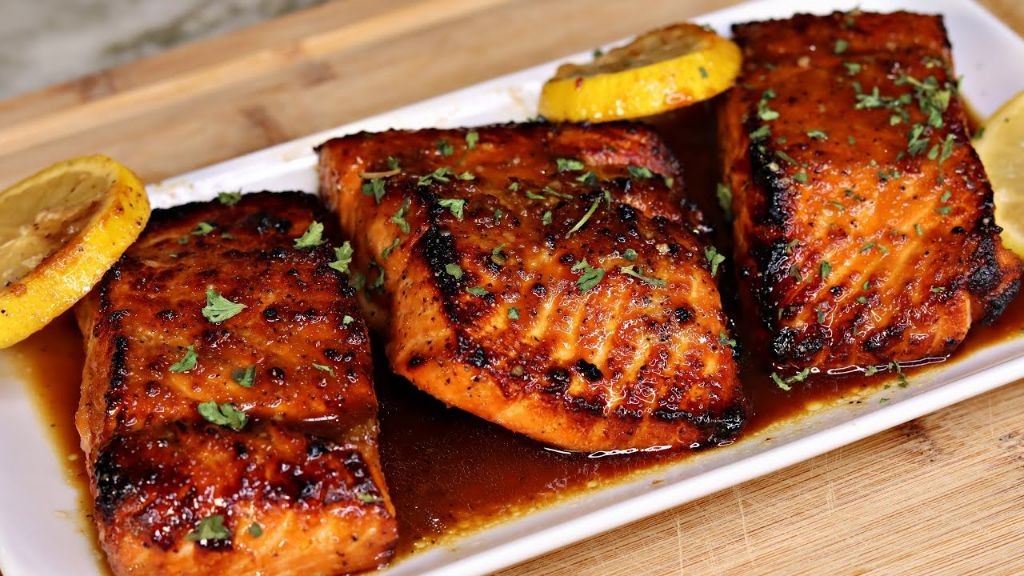
Just as the holiday season reaches its peak, there’s something undeniably special about a dish that feels both celebratory and effortlessly simple. This air fryer honey glazed salmon delivers exactly that—a perfect balance of sweet, savory elegance that comes together in minutes, making it ideal for festive gatherings or a cozy weeknight dinner.
Serving: 4 | Pre Time: 10 minutes | Cooking Time: 12 minutes
Ingredients
– 1.5 lbs salmon fillets, skin-on (I find wild-caught yields the best flavor and texture)
– 3 tbsp honey, preferably local or raw for a richer taste
– 2 tbsp soy sauce, low-sodium to control saltiness
– 1 tbsp olive oil, extra virgin is my go-to for its fruity notes
– 2 cloves garlic, minced (freshly minced makes all the difference)
– 1 tsp grated ginger, I keep a knob in the freezer for easy grating
– 1/2 tsp black pepper, freshly ground for maximum aroma
– 1 tbsp lemon juice, squeezed fresh just before using
– 1 tbsp chopped parsley, for garnish (flat-leaf parsley adds a bright finish)
Instructions
1. Pat the salmon fillets dry with paper towels to ensure a crisp exterior.
2. In a small bowl, whisk together honey, soy sauce, olive oil, minced garlic, grated ginger, black pepper, and lemon juice until fully combined.
3. Place the salmon fillets skin-side down in a single layer in the air fryer basket, leaving space between them for even cooking.
4. Brush half of the honey glaze generously over the top of each salmon fillet, coating them evenly.
5. Preheat the air fryer to 400°F for 3 minutes to ensure consistent heat distribution.
6. Air fry the salmon at 400°F for 10-12 minutes, checking at 10 minutes for doneness—the flesh should flake easily with a fork.
7. Halfway through cooking, at the 5-minute mark, open the air fryer and brush the remaining glaze over the salmon for a double layer of flavor.
8. Remove the salmon from the air fryer using tongs or a spatula to keep the fillets intact.
9. Let the salmon rest for 3 minutes on a plate to allow the juices to redistribute.
10. Garnish with chopped parsley just before serving.
Delightfully tender with a caramelized, sticky-sweet crust, this salmon offers a melt-in-your-mouth texture that pairs beautifully with simple sides. For a creative twist, serve it over a bed of quinoa tossed with roasted vegetables, or flake it into tacos with avocado crema—the versatility makes it a year-round favorite.
Crispy Air Fryer Fish Sticks
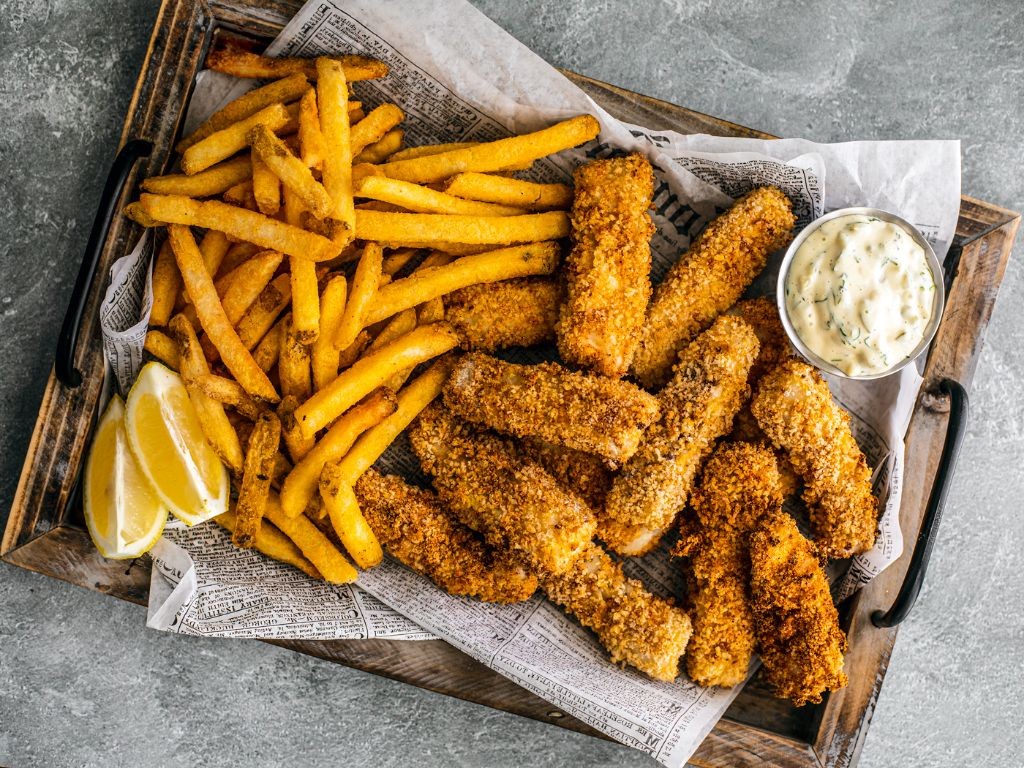
Nestled between holiday feasts and cozy winter evenings, these Crispy Air Fryer Fish Sticks offer a delightful escape—a golden, satisfying crunch that transforms humble white fish into an elegant yet approachable centerpiece, perfect for festive gatherings or a quiet weeknight indulgence. With their light, air-fried coating and tender interior, they bring restaurant-quality crispness to your kitchen with minimal effort and maximum flavor.
Serving: 4 | Pre Time: 15 minutes | Cooking Time: 12 minutes
Ingredients
– 1 lb firm white fish fillets (such as cod or haddock), cut into 1-inch strips—I find fresh, sustainably sourced fish yields the best texture
– 1 cup all-purpose flour, for that essential initial coating
– 2 large eggs, lightly beaten—I prefer room temperature eggs here to help the breading adhere evenly
– 1 cup panko breadcrumbs, which create an irresistibly light, airy crunch
– 1 tsp garlic powder, for a subtle aromatic depth
– 1 tsp paprika, adding a warm, smoky hint
– ½ tsp salt, to enhance the natural flavors
– ¼ tsp black pepper, freshly ground for brightness
– Cooking spray (avocado oil is my go-to for its high smoke point and neutral taste)
– Lemon wedges, for serving—a squeeze of fresh citrus brightens every bite
Instructions
1. Pat the fish strips completely dry with paper towels to ensure the coating sticks properly—this is a key tip for achieving maximum crispiness.
2. In a shallow bowl, combine the flour, garlic powder, paprika, salt, and black pepper, whisking until evenly blended.
3. Place the beaten eggs in a second shallow bowl and the panko breadcrumbs in a third bowl, arranging them in an assembly line.
4. Dredge each fish strip first in the flour mixture, shaking off any excess to avoid clumping.
5. Dip the floured strip into the beaten eggs, coating it fully and letting any drip off.
6. Press the strip into the panko breadcrumbs, turning to coat evenly and gently patting to help the crumbs adhere—this ensures a uniform, golden exterior.
7. Preheat your air fryer to 400°F for 3 minutes, which helps create an immediate sear for extra crispness.
8. Lightly spray the air fryer basket with cooking spray to prevent sticking, then arrange the coated fish strips in a single layer without overcrowding.
9. Spray the tops of the fish sticks lightly with cooking spray for an even golden finish.
10. Air fry at 400°F for 10–12 minutes, flipping halfway through, until the coating is deep golden brown and crispy—check at 10 minutes to avoid overcooking, as air fryers can vary.
11. Remove the fish sticks and let them rest for 2 minutes on a wire rack to maintain their crunch.
12. Serve immediately with lemon wedges on the side.
What emerges is a symphony of textures: a shatteringly crisp panko crust gives way to flaky, moist fish within, with the paprika and garlic whispering warmth in every bite. For a creative twist, tuck them into soft brioche buns with tangy tartar sauce and crisp lettuce, or arrange them over a bed of zesty slaw for a light, elegant meal that feels both indulgent and effortless.
Air Fryer Buffalo Cauliflower Bites
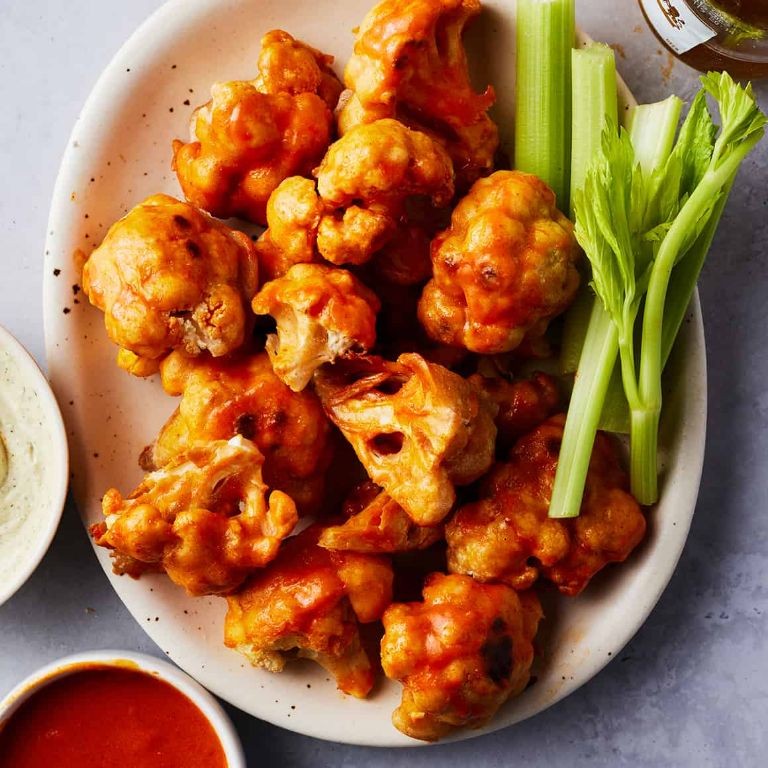
Lusciously crisp yet tender, these Air Fryer Buffalo Cauliflower Bites transform humble florets into a sophisticated, plant-based delight, perfect for holiday gatherings or a refined weeknight appetizer. Their fiery, tangy glaze clings to each golden piece, offering a lighter, equally addictive alternative to traditional wings, ready to impress even the most discerning palates.
Serving: 4 | Pre Time: 15 minutes | Cooking Time: 20 minutes
Ingredients
– 1 large head of cauliflower, cut into 1-inch florets (I find this size ensures the perfect bite)
– 1 cup all-purpose flour
– 1 cup unsweetened almond milk, cold (for a crispier batter)
– 1 tsp garlic powder
– 1 tsp smoked paprika
– 1/2 tsp salt
– 1/2 tsp black pepper
– 1/2 cup Frank’s RedHot Buffalo Sauce, my go-to for authentic tangy heat
– 2 tbsp unsalted butter, melted (use vegan butter for a plant-based version)
– 1 tbsp extra virgin olive oil, for brushing the air fryer basket to prevent sticking
– 1/4 cup crumbled blue cheese, optional for garnish (I love the sharp contrast)
– 2 tbsp chopped fresh chives, for a bright finish
Instructions
1. Preheat your air fryer to 400°F for 5 minutes, ensuring even cooking from the start.
2. In a large bowl, whisk together 1 cup all-purpose flour, 1 cup unsweetened almond milk, 1 tsp garlic powder, 1 tsp smoked paprika, 1/2 tsp salt, and 1/2 tsp black pepper until smooth, creating a thick batter.
3. Add 1 large head of cauliflower florets to the batter, tossing gently with a spatula to coat each piece evenly, which helps achieve a uniform crispness.
4. Lightly brush the air fryer basket with 1 tbsp extra virgin olive oil to prevent sticking and promote browning.
5. Arrange the battered cauliflower in a single layer in the basket, leaving space between pieces for air circulation, and cook at 400°F for 15 minutes, flipping halfway through with tongs until golden brown.
6. While the cauliflower cooks, in a small bowl, whisk 1/2 cup Frank’s RedHot Buffalo Sauce and 2 tbsp melted unsalted butter until combined for a glossy glaze.
7. Transfer the cooked cauliflower to a clean bowl, pour the buffalo sauce mixture over it, and toss gently to coat every piece, a tip to do this while warm for better adhesion.
8. Return the sauced cauliflower to the air fryer basket and cook at 400°F for an additional 5 minutes, until the glaze is slightly caramelized and sticky.
9. Remove from the air fryer and let cool for 2 minutes on a wire rack to maintain crispiness.
10. Garnish with 1/4 cup crumbled blue cheese and 2 tbsp chopped fresh chives before serving.
Delightfully crunchy on the outside with a tender, almost creamy interior, these bites offer a bold, spicy kick balanced by the cooling blue cheese. Serve them immediately with celery sticks and a drizzle of ranch dressing for a classic pairing, or pile them atop a fresh green salad to add a fiery twist to your meal.
Power XL Air Fryer Mozzarella Sticks
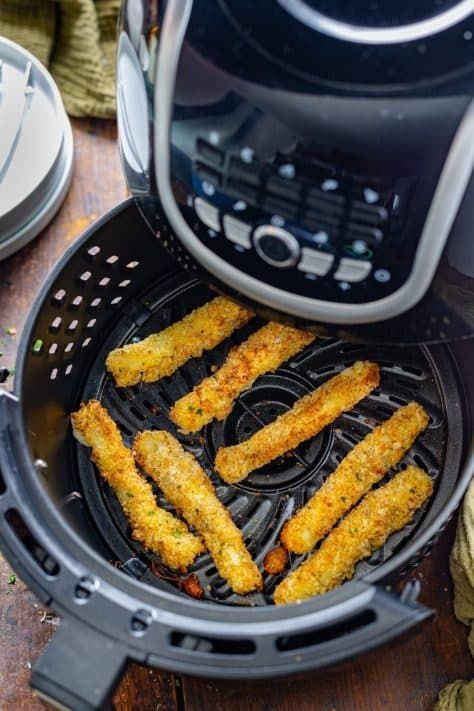
Savor the golden, crispy exterior and oozing, molten mozzarella center of these air-fried delights—a healthier twist on a classic appetizer that delivers all the indulgence without the deep-fryer guilt, perfect for holiday gatherings or cozy nights in.
Serving: 4 | Pre Time: 15 minutes | Cooking Time: 10 minutes
Ingredients
– 8 mozzarella string cheese sticks, cut in half crosswise (I find full-fat mozzarella melts best for that signature stretch)
– ½ cup all-purpose flour
– 2 large eggs, lightly beaten (room temperature eggs help the coating adhere more evenly)
– 1 cup Italian-seasoned breadcrumbs (I prefer panko-style for extra crunch)
– 1 tbsp grated Parmesan cheese (a sharp, aged variety adds a savory depth)
– Cooking spray (avocado oil spray is my go-to for its high smoke point)
– ½ cup marinara sauce, for serving (warmed gently on the stovetop for the best flavor)
Instructions
1. Line a baking sheet with parchment paper and set up a breading station with three shallow bowls: place the all-purpose flour in the first bowl, the lightly beaten eggs in the second, and mix the Italian-seasoned breadcrumbs with the grated Parmesan cheese in the third.
2. Dredge each mozzarella stick half first in the flour, shaking off any excess to ensure a thin, even coating that prevents clumping.
3. Dip the floured stick into the beaten eggs, letting any excess drip back into the bowl to avoid a soggy crust.
4. Roll the egg-coated stick in the breadcrumb-Parmesan mixture, pressing gently to adhere the crumbs fully on all sides for maximum crispiness.
5. Place the breaded sticks on the prepared baking sheet and freeze them for 10 minutes—this crucial step helps the coating set and prevents cheese leakage during cooking.
6. Preheat your Power XL Air Fryer to 400°F for 3 minutes, ensuring it reaches the correct temperature for even browning.
7. Lightly spray the air fryer basket with cooking spray, then arrange the frozen mozzarella sticks in a single layer without overcrowding to allow proper air circulation.
8. Cook the sticks at 400°F for 8–10 minutes, flipping them halfway through with tongs when they turn golden brown, until the exterior is crisp and the cheese is visibly melted inside.
9. Remove the sticks immediately using tongs and let them rest for 2 minutes on a wire rack—this brief cooling period helps the cheese set slightly for easier handling.
Enjoy the irresistible contrast of the crunchy, herb-infused crust against the creamy, stretchy mozzarella center. Elevate your presentation by serving them alongside the warmed marinara sauce in a small ramekin, perhaps garnished with fresh basil for a festive touch that makes these sticks feel gourmet yet approachable.
Air Fryer Sweet Potato Fries

Perfectly crisp yet tender, air fryer sweet potato fries elevate a humble root vegetable into a sophisticated side dish or snack, offering a healthier alternative to traditional frying without sacrificing that irresistible golden exterior. Their natural sweetness caramelizes beautifully in the hot air, creating a delightful contrast with a sprinkle of sea salt and aromatic herbs.
Serving: 4 | Pre Time: 10 minutes | Cooking Time: 20 minutes
Ingredients
– 2 large sweet potatoes, about 1½ pounds total—I always scrub them well but leave the skin on for extra fiber and rustic texture.
– 2 tablespoons extra virgin olive oil, my go-to for its fruity notes that complement the sweetness.
– 1 teaspoon smoked paprika, which adds a subtle warmth without overpowering.
– ½ teaspoon garlic powder, for a savory depth that balances the natural sugars.
– ¼ teaspoon fine sea salt, plus more for sprinkling after cooking—I find this amount perfect for seasoning without making them overly salty.
– Freshly ground black pepper, to taste—I love a few generous twists from my pepper mill.
Instructions
1. Preheat your air fryer to 400°F for 5 minutes to ensure it’s hot and ready for even cooking.
2. Scrub 2 large sweet potatoes thoroughly under cold running water, then pat them completely dry with paper towels to remove excess moisture, which helps achieve crispier fries.
3. Cut each sweet potato into uniform ¼-inch thick sticks, about 3 to 4 inches long, for consistent cooking—a sharp chef’s knife works best here.
4. In a large mixing bowl, toss the sweet potato sticks with 2 tablespoons extra virgin olive oil until evenly coated.
5. Sprinkle in 1 teaspoon smoked paprika, ½ teaspoon garlic powder, ¼ teaspoon fine sea salt, and freshly ground black pepper to taste, then toss again to distribute the seasonings thoroughly.
6. Arrange the seasoned sweet potato sticks in a single layer in the air fryer basket, avoiding overcrowding to allow proper air circulation—you may need to cook in batches.
7. Air fry at 400°F for 10 minutes, then shake the basket gently to flip the fries for even browning.
8. Continue air frying for another 8 to 10 minutes, checking at the 8-minute mark, until the fries are golden brown and crisp on the edges but still tender inside.
9. Transfer the cooked fries to a serving plate and immediately sprinkle with additional fine sea salt to taste while they’re hot.
Zesty and satisfying, these fries emerge with a crisp exterior that gives way to a creamy, soft interior, their smoky-sweet flavor enhanced by the hint of garlic. For a creative twist, serve them alongside a tangy yogurt dip or crumbled feta cheese, making them a versatile addition to any meal or gathering.
Crunchy Air Fryer Coconut Shrimp

Beneath a golden, crispy exterior lies tender, sweet shrimp—a delightful contrast that makes air fryer coconut shrimp an irresistible appetizer or light meal. This streamlined version delivers restaurant-quality results with minimal effort, perfect for holiday gatherings or weeknight dinners when you crave something special. The air fryer creates that satisfying crunch without deep frying, leaving you with a cleaner kitchen and lighter dish.
Serving: 4 | Pre Time: 15 minutes | Cooking Time: 10 minutes
Ingredients
– 1 pound large raw shrimp, peeled and deveined (I leave the tails on for easy handling)
– 1 cup all-purpose flour
– 2 large eggs, lightly beaten (room temperature eggs blend more smoothly)
– 1 cup panko breadcrumbs
– 1 cup sweetened shredded coconut
– 1 teaspoon garlic powder
– 1 teaspoon paprika
– ½ teaspoon salt
– Cooking spray (avocado oil spray is my favorite for high-heat cooking)
– ½ cup sweet chili sauce for dipping
Instructions
1. Pat the shrimp completely dry with paper towels—this helps the coating adhere better.
2. Set up three shallow bowls: place flour in the first, beaten eggs in the second, and mix panko, shredded coconut, garlic powder, paprika, and salt in the third.
3. Dredge each shrimp in flour, shaking off any excess.
4. Dip the floured shrimp into the beaten eggs, letting any drip off.
5. Press the shrimp firmly into the coconut-panko mixture, coating all sides evenly.
6. Place the coated shrimp in a single layer on a plate and lightly spray both sides with cooking spray.
7. Preheat your air fryer to 400°F for 3 minutes.
8. Arrange shrimp in the air fryer basket in a single layer without overcrowding—work in batches if needed.
9. Air fry at 400°F for 8-10 minutes, flipping halfway through, until the coating is golden brown and crispy.
10. Serve immediately with sweet chili sauce for dipping.
Delightfully crunchy with a hint of tropical sweetness, these shrimp offer a satisfying texture that pairs beautifully with the tangy sauce. For a creative twist, serve them over a bed of greens with a citrus vinaigrette or alongside pineapple salsa to enhance the coconut flavor.
Air Fryer BBQ Pork Ribs
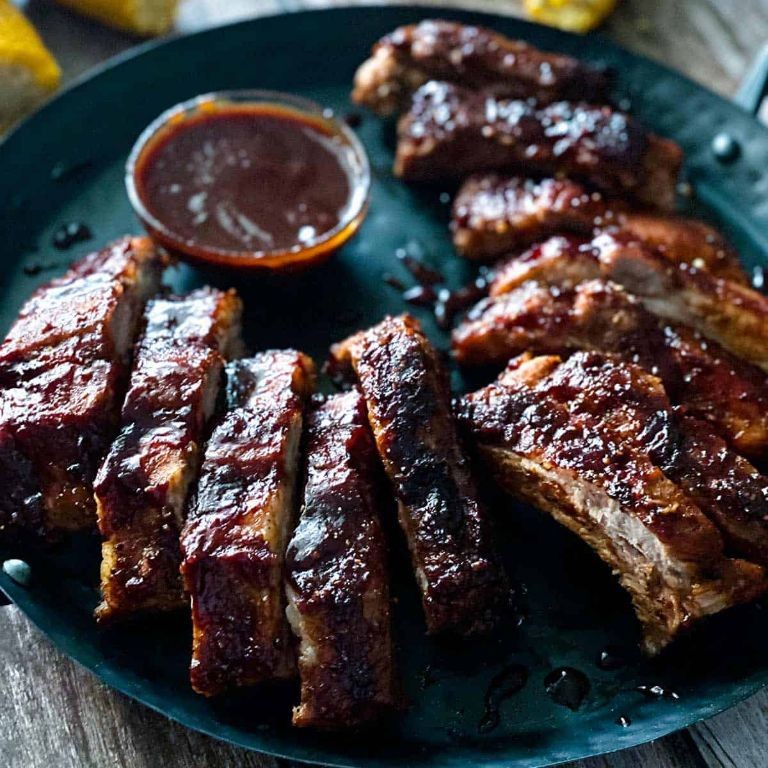
Succulent, fall-off-the-bone pork ribs with a sticky-sweet barbecue glaze are no longer reserved for summer cookouts or slow-smoking sessions—thanks to the modern convenience of the air fryer, this classic comfort food can grace your table in under an hour, delivering that coveted caramelized crust and tender interior with minimal fuss. This method yields ribs that are deceptively simple yet impressively flavorful, perfect for a weeknight dinner that feels indulgent or a last-minute gathering where you want to shine without spending all day in the kitchen. The air fryer’s rapid circulation creates a beautiful bark while keeping the meat incredibly juicy, a trick that will make these ribs a regular in your rotation.
Serving: 4 | Pre Time: 15 minutes | Cooking Time: 35 minutes
Ingredients
– 2 pounds pork baby back ribs (I ask my butcher to remove the membrane for easier eating)
– 1 tablespoon olive oil (extra virgin olive oil is my go-to for its fruity notes)
– 1 tablespoon brown sugar, packed (for a touch of molasses depth)
– 1 teaspoon smoked paprika (this adds a whisper of smokiness without a grill)
– 1 teaspoon garlic powder
– 1 teaspoon onion powder
– 1/2 teaspoon black pepper, freshly ground
– 1/2 teaspoon salt (I use fine sea salt for even distribution)
– 1/2 cup barbecue sauce (choose your favorite brand—I lean toward a sweet and tangy variety)
Instructions
1. Pat the pork baby back ribs completely dry with paper towels to ensure the seasoning adheres well and promotes browning.
2. In a small bowl, whisk together the olive oil, brown sugar, smoked paprika, garlic powder, onion powder, black pepper, and salt until it forms a fragrant paste.
3. Rub the spice paste evenly over all sides of the ribs, massaging it into the meat—this step is key for building layers of flavor.
4. Preheat your air fryer to 380°F for 3 minutes to create a hot environment that will sear the ribs immediately.
5. Place the seasoned ribs in the air fryer basket in a single layer, ensuring they aren’t overlapping for optimal air circulation.
6. Air fry the ribs at 380°F for 25 minutes, flipping them halfway through with tongs to cook evenly on both sides.
7. Tip: After flipping, brush a generous layer of barbecue sauce over the top of the ribs using a pastry brush for a glossy finish.
8. Reduce the air fryer temperature to 350°F and cook for an additional 10 minutes, or until the internal temperature reaches 145°F on a meat thermometer and the sauce is sticky and caramelized.
9. Tip: Let the ribs rest for 5 minutes after cooking to allow the juices to redistribute, keeping them moist when sliced.
10. Tip: For extra crispiness, you can broil the ribs in the air fryer for 1-2 minutes at the end, but watch closely to prevent burning.
11. Slice the ribs between the bones into individual portions using a sharp knife.
Melt-in-your-mouth tender with a sticky, finger-licking glaze, these ribs boast a perfect balance of sweet and savory, with a subtle smokiness from the paprika that mimics traditional barbecue. The exterior offers a satisfying slight chew, while the interior remains succulent and juicy—ideal for serving alongside creamy coleslaw or piled high on a platter with pickled onions for a bright contrast.
Power XL Air Fryer Chicken Tenders
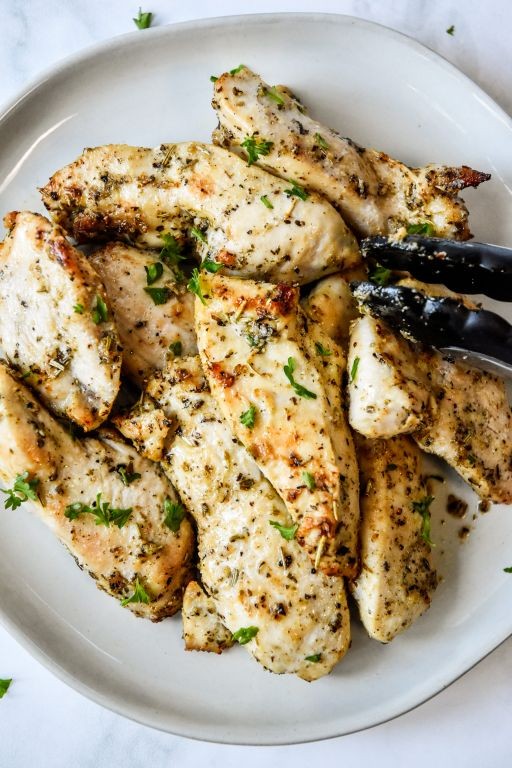
Radiantly crisp yet tender, these Power XL Air Fryer Chicken Tenders elevate a weeknight staple into a dish worthy of any elegant gathering. By harnessing the air fryer’s convection magic, we achieve a golden, shatteringly crisp exterior that gives way to perfectly juicy, seasoned chicken within. This method not only simplifies cleanup but also delivers consistently spectacular results every time.
Serving: 4 | Pre Time: 15 minutes | Cooking Time: 12 minutes
Ingredients
– 1.5 lbs boneless, skinless chicken breasts, cut into 1-inch strips (I find uniform strips ensure even cooking)
– 1 cup all-purpose flour (for that essential initial coating)
– 2 large eggs, lightly beaten (room temperature eggs incorporate more smoothly)
– 1.5 cups panko breadcrumbs (their larger flakes create an exceptionally crisp texture)
– 1 tsp garlic powder
– 1 tsp smoked paprika (my secret for a subtle, smoky depth)
– 1 tsp kosher salt
– ½ tsp freshly ground black pepper
– 2 tbsp extra virgin olive oil (my go-to for its fruity note)
– Cooking spray (avocado oil spray works beautifully for a high-smoke point)
Instructions
1. Pat the 1.5 lbs of chicken strips completely dry with paper towels to ensure the coating adheres properly.
2. In a shallow dish, whisk together 1 cup of all-purpose flour, 1 tsp garlic powder, 1 tsp smoked paprika, 1 tsp kosher salt, and ½ tsp black pepper.
3. Place 2 lightly beaten eggs in a second shallow dish.
4. In a third dish, combine 1.5 cups panko breadcrumbs with 2 tbsp of extra virgin olive oil, mixing until the crumbs are evenly coated and look like damp sand.
5. Dredge each chicken strip first in the seasoned flour mixture, shaking off any excess.
6. Next, dip the floured strip into the beaten eggs, allowing any excess to drip off.
7. Finally, press the strip firmly into the panko mixture, ensuring an even, generous coating on all sides.
8. Preheat your Power XL Air Fryer to 400°F for 3 minutes.
9. Lightly spray the air fryer basket with cooking spray to prevent sticking.
10. Arrange the coated chicken tenders in a single layer in the basket, ensuring they do not touch for optimal air circulation.
11. Lightly spray the tops of the tenders with cooking spray to promote browning.
12. Cook at 400°F for 10-12 minutes, flipping the tenders halfway through the cooking time, until they are golden brown and the internal temperature reaches 165°F.
13. Let the tenders rest in the basket for 2-3 minutes after cooking; this allows the crust to set and the juices to redistribute.
Unbelievably crisp and light, these tenders boast a satisfying crunch that yields to succulent, well-seasoned chicken. Their elegant appearance and robust flavor make them perfect for serving atop a vibrant salad with a lemon-herb vinaigrette or arranged artfully with dipping sauces like a creamy dill remoulade or a spicy honey mustard for a delightful contrast.
Air Fryer Cinnamon Sugar Donuts
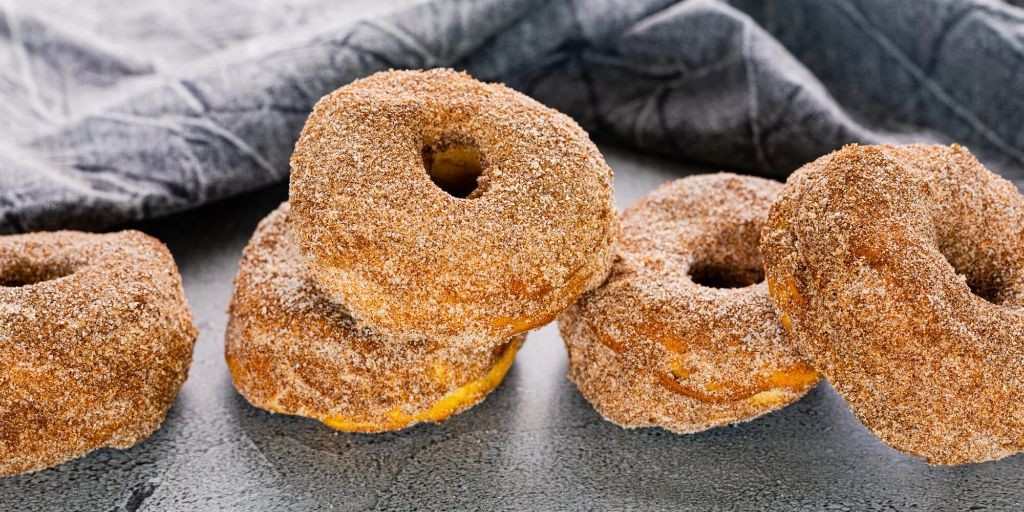
Delightfully crisp on the outside yet impossibly tender within, these air fryer cinnamon sugar donuts transform humble pantry staples into a festive treat worthy of any holiday gathering. Their golden-brown perfection, achieved with minimal oil, offers a lighter indulgence that still delivers the nostalgic warmth of freshly fried dough. Imagine the aroma of cinnamon and sugar wafting through your kitchen—a scent that promises pure comfort in every bite.
Serving: 8 | Pre Time: 15 minutes | Cooking Time: 8 minutes
Ingredients
– 1 cup all-purpose flour, spooned and leveled for accuracy—I find this prevents dense donuts
– 1/4 cup granulated sugar, plus 1/2 cup extra for coating
– 1 teaspoon baking powder, sifted to avoid clumps
– 1/2 teaspoon ground cinnamon, plus 1 tablespoon for the sugar coating
– 1/4 teaspoon fine sea salt, my secret for balancing sweetness
– 1 large egg, at room temperature to ensure smooth mixing
– 1/3 cup whole milk, slightly warmed to activate the ingredients
– 2 tablespoons unsalted butter, melted and cooled
– 1 teaspoon pure vanilla extract, for that warm, aromatic depth
– Nonstick cooking spray, for effortless release in the air fryer
Instructions
1. Preheat your air fryer to 350°F for 5 minutes, ensuring even cooking from the start.
2. In a medium bowl, whisk together 1 cup all-purpose flour, 1/4 cup granulated sugar, 1 teaspoon baking powder, 1/2 teaspoon ground cinnamon, and 1/4 teaspoon fine sea salt until fully combined.
3. In a separate bowl, lightly beat 1 large egg, then whisk in 1/3 cup whole milk, 2 tablespoons melted unsalted butter, and 1 teaspoon pure vanilla extract until smooth.
4. Pour the wet ingredients into the dry ingredients and stir gently with a spatula until just incorporated—overmixing can lead to tough donuts.
5. Lightly spray the air fryer basket with nonstick cooking spray to prevent sticking.
6. Scoop 2-tablespoon portions of dough, roll into balls, and flatten slightly into 1/2-inch-thick discs; arrange them in a single layer in the basket, leaving space between for air circulation.
7. Air fry at 350°F for 6–8 minutes, flipping halfway through, until the donuts are golden brown and spring back when lightly pressed.
8. While the donuts cook, mix 1/2 cup granulated sugar and 1 tablespoon ground cinnamon in a shallow bowl.
9. Immediately transfer the hot donuts to the cinnamon-sugar bowl and toss gently to coat all sides—the warmth helps the sugar adhere beautifully.
10. Let the donuts cool on a wire rack for 5 minutes before serving to set the coating.
Golden and fragrant, these donuts boast a delicate crumb that melts in your mouth, with a crackly sugar shell that adds just the right crunch. Serve them warm alongside a mug of spiced cider for a cozy winter afternoon, or dust with powdered sugar for an elegant brunch presentation that feels effortlessly special.
Crispy Air Fryer Zucchini Chips
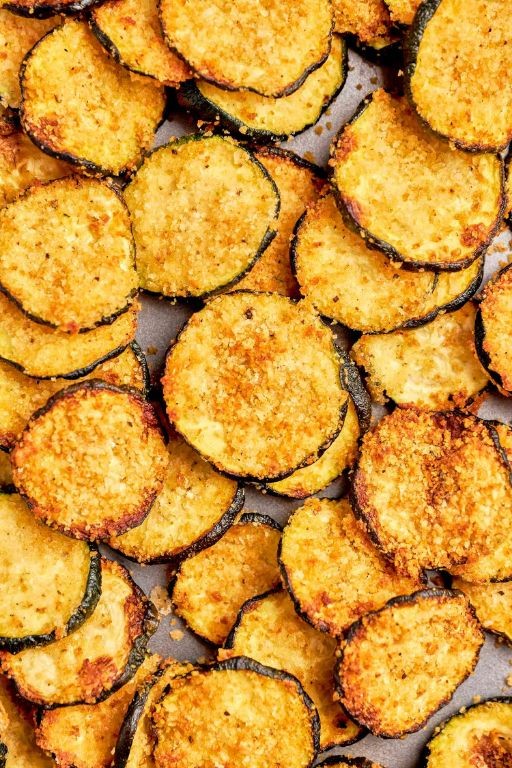
Crisp, golden, and impossibly light, these air fryer zucchini chips transform the humble summer squash into an elegant, guilt-free snack that feels both celebratory and effortlessly chic. With a satisfying crunch that rivals any potato chip and a delicate flavor that sings of fresh herbs, they are the perfect prelude to a holiday meal or a sophisticated accompaniment to cocktails. Their magic lies in the air fryer’s convection currents, which achieve a shatteringly crisp exterior while keeping the interior tender and moist.
Serving: 4 | Pre Time: 15 minutes | Cooking Time: 12 minutes
Ingredients
– 2 medium zucchinis, sliced into ¼-inch rounds (I find this thickness gives the ideal chip-to-crunch ratio)
– ½ cup all-purpose flour
– 2 large eggs, lightly beaten (room temperature eggs incorporate more smoothly)
– 1 cup panko breadcrumbs (their larger flakes create an extra-crispy, shaggy coating)
– ½ cup grated Parmesan cheese, the good stuff from the refrigerated section
– 1 teaspoon garlic powder
– 1 teaspoon dried oregano
– ½ teaspoon kosher salt
– ¼ teaspoon freshly ground black pepper
– Cooking spray, preferably avocado oil for its high smoke point
Instructions
1. Preheat your air fryer to 400°F (204°C) for 5 minutes to ensure it’s hot and ready for immediate crisping.
2. Pat the zucchini rounds completely dry with paper towels; this crucial step prevents steaming and guarantees maximum crispness.
3. In three separate shallow bowls, place the flour, the beaten eggs, and a mixture of the panko, Parmesan, garlic powder, oregano, salt, and pepper.
4. Dredge each zucchini round first in the flour, tapping off any excess, then dip it fully into the egg, letting the excess drip back into the bowl.
5. Press the zucchini round firmly into the panko-Parmesan mixture, coating both sides evenly and pressing the crumbs to adhere.
6. Arrange the coated zucchini in a single layer in the air fryer basket, ensuring they do not touch; work in batches if necessary.
7. Lightly mist the tops of the zucchini chips with cooking spray; this helps the coating achieve a deep, even golden brown.
8. Air fry at 400°F (204°C) for 6 minutes, then carefully flip each chip using tongs.
9. Mist the flipped chips lightly again and continue air frying for another 5 to 6 minutes, until they are uniformly golden brown and crisp to the touch.
10. Transfer the finished chips to a wire rack immediately; letting them rest here prevents sogginess by allowing steam to escape.
Delightfully crisp and savory, these chips offer a symphony of textures with a golden, shattering crust giving way to a soft, warm center. Their herbaceous, cheesy flavor makes them a standout on their own, but for a festive twist, serve them alongside a creamy lemon-dill yogurt dip or scattered over a bright salad for added crunch.
Power XL Air Fryer Apple Fritters

Glistening with a golden-brown crust and filled with tender, spiced apple pieces, these Power XL Air Fryer Apple Fritters transform a classic comfort food into a surprisingly light and modern treat. Perfect for holiday mornings or cozy winter afternoons, they deliver all the nostalgic flavor with a fraction of the oil, making indulgence feel effortless and elegant.
Serving: 8 fritters | Pre Time: 15 minutes | Cooking Time: 10 minutes
Ingredients
– 1 ½ cups all-purpose flour, sifted for a lighter texture
– 2 teaspoons baking powder, the fresh kind that really makes them puff
– ½ teaspoon fine sea salt, my secret for balancing sweetness
– 1 teaspoon ground cinnamon, plus extra for dusting
– ¼ teaspoon ground nutmeg, just a whisper for warmth
– ⅓ cup granulated sugar
– 1 large egg, I always use room temperature for better incorporation
– ½ cup whole milk, slightly warmed
– 2 tablespoons unsalted butter, melted and slightly cooled
– 1 teaspoon pure vanilla extract, the good stuff makes a difference
– 1 ½ cups finely diced Granny Smith apples (about 2 medium), peeled—their tartness is perfect here
– Non-stick cooking spray, for the air fryer basket
Instructions
1. Preheat your Power XL Air Fryer to 370°F for 5 minutes, ensuring it reaches the proper temperature for even cooking.
2. In a large mixing bowl, whisk together the sifted all-purpose flour, baking powder, fine sea salt, 1 teaspoon ground cinnamon, and ground nutmeg until fully combined.
3. In a separate medium bowl, vigorously whisk the granulated sugar and room-temperature egg for about 1 minute until pale and slightly thickened.
4. To the egg mixture, add the warmed whole milk, melted unsalted butter, and pure vanilla extract, whisking until the mixture is smooth and homogenous.
5. Pour the wet ingredients into the dry ingredients and gently fold with a spatula until just combined; a few lumps are fine to avoid tough fritters.
6. Gently fold in the peeled, finely diced Granny Smith apples until they are evenly distributed throughout the batter.
7. Lightly coat the air fryer basket with non-stick cooking spray to prevent sticking.
8. Using a ¼-cup measure or a large spoon, drop 8 portions of batter into the preheated air fryer basket, spacing them about 1 inch apart to allow for expansion.
9. Air fry at 370°F for 8-10 minutes, flipping each fritter carefully with tongs at the 5-minute mark, until they are deeply golden brown and a toothpick inserted comes out clean.
10. Transfer the cooked fritters to a wire rack to cool for 5 minutes; this helps them crisp up without getting soggy.
Melt-in-your-mouth tender with a delightful crunch, these fritters boast a moist interior studded with soft, spiced apples. Serve them warm with a dusting of cinnamon sugar or a drizzle of salted caramel for an extra festive touch, perfect alongside a hot cup of coffee on a chilly December morning.
Air Fryer Parmesan Crusted Chicken
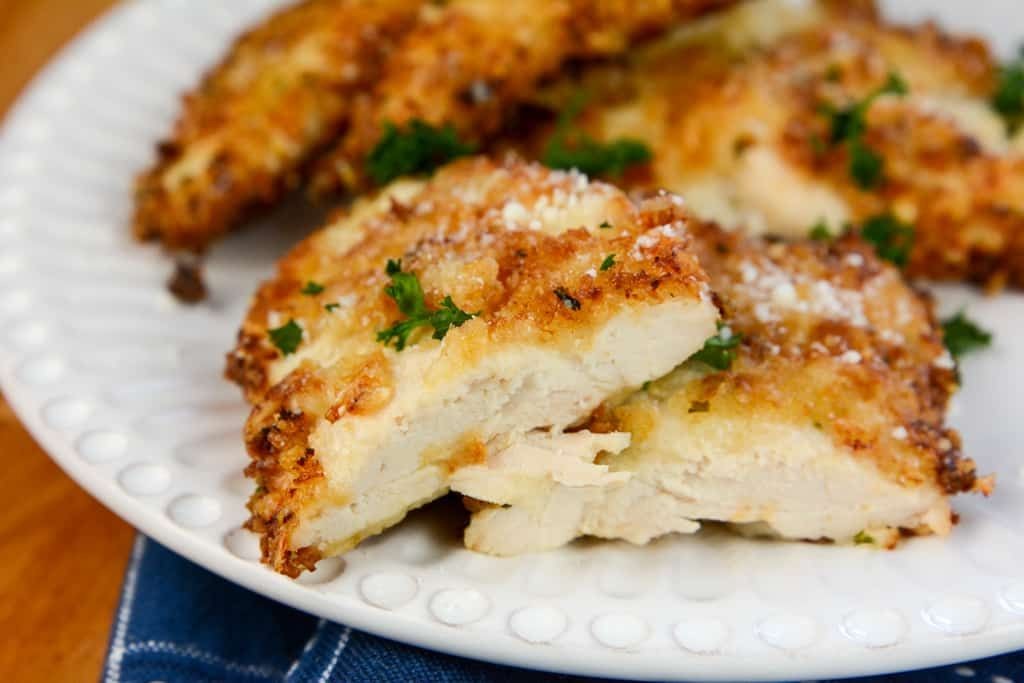
Heralding a new era of effortless elegance in weeknight cooking, this Air Fryer Parmesan Crusted Chicken transforms humble ingredients into a golden, crisp masterpiece. Imagine tender chicken breasts enveloped in a savory, nutty crust that shatters with each bite, all achieved with minimal fuss and maximum flavor. It’s the kind of dish that feels indulgent yet remains surprisingly simple to prepare, perfect for elevating any ordinary evening into a special occasion.
Serving: 4 | Pre Time: 15 minutes | Cooking Time: 12 minutes
Ingredients
– 1 ½ pounds boneless, skinless chicken breasts (I prefer to slice them into even cutlets for uniform cooking)
– ½ cup all-purpose flour (a light dusting is all you need)
– 2 large eggs, lightly beaten (room temperature eggs blend more smoothly)
– 1 cup panko breadcrumbs (for that extra-crispy texture)
– 1 cup finely grated Parmesan cheese (freshly grated melts beautifully)
– 1 teaspoon garlic powder
– 1 teaspoon dried oregano
– ½ teaspoon kosher salt
– ¼ teaspoon freshly ground black pepper
– 2 tablespoons extra virgin olive oil (my go-to for a subtle fruity note)
– Cooking spray (a quick spritz ensures nothing sticks)
Instructions
1. Pat the chicken breasts completely dry with paper towels, then slice them horizontally into ½-inch thick cutlets.
2. In a shallow dish, combine the flour, salt, and pepper.
3. In a second shallow dish, whisk the eggs until uniform.
4. In a third shallow dish, mix the panko, Parmesan, garlic powder, and oregano thoroughly.
5. Dredge each chicken cutlet in the flour mixture, shaking off any excess.
6. Dip the floured chicken into the beaten eggs, allowing any drip-off.
7. Press the chicken firmly into the panko-Parmesan mixture, coating both sides evenly. Tip: Let it rest on a wire rack for 5 minutes to help the coating adhere.
8. Preheat your air fryer to 400°F for 3 minutes.
9. Lightly spray the air fryer basket with cooking spray.
10. Arrange the coated chicken in a single layer in the basket, leaving space between pieces.
11. Lightly brush or spray the tops of the chicken with olive oil.
12. Air fry at 400°F for 10-12 minutes, flipping halfway through, until the crust is deep golden brown and the internal temperature reaches 165°F. Tip: Use an instant-read thermometer for perfect doneness.
13. Let the chicken rest on a clean wire rack for 5 minutes before serving. Tip: This keeps the crust crisp.
Resulting in a symphony of textures, the chicken emerges with a shatteringly crisp exterior that gives way to juicy, tender meat beneath. The Parmesan lends a rich, umami depth that pairs wonderfully with the herbaceous hints of oregano. For a creative twist, slice it over a bed of lemony arugula or serve alongside a bright marinara for dipping.
Crunchy Air Fryer Falafel

Revered for its crisp exterior and tender, herb-flecked interior, this air fryer falafel transforms a beloved street food into an effortlessly elegant weeknight delight. By harnessing the air fryer’s convection magic, we achieve that signature crunch without deep-frying, resulting in a lighter yet equally satisfying bite. It’s a modern twist on a classic that feels both wholesome and indulgent.
Serving: 4 | Pre Time: 15 minutes | Cooking Time: 12 minutes
Ingredients
– 1 (15-ounce) can chickpeas, drained and rinsed (I find canned chickpeas offer perfect consistency for falafel)
– 1/2 cup fresh parsley leaves, packed (flat-leaf parsley is my go-to for its robust flavor)
– 1/4 cup fresh cilantro leaves, packed
– 3 cloves garlic, peeled
– 1/2 small yellow onion, roughly chopped
– 1 tablespoon all-purpose flour
– 1 teaspoon ground cumin
– 1 teaspoon ground coriander
– 1/2 teaspoon baking powder
– 1/2 teaspoon fine sea salt
– 1/4 teaspoon freshly ground black pepper
– 2 tablespoons extra virgin olive oil (for brushing; its fruity notes complement the herbs beautifully)
Instructions
1. Preheat your air fryer to 375°F for 5 minutes to ensure even cooking from the start.
2. In a food processor, combine the drained chickpeas, parsley, cilantro, garlic, and chopped onion.
3. Pulse the mixture 10-12 times until finely chopped but not pureed; you want a coarse, crumbly texture that holds together when pressed.
4. Transfer the mixture to a medium bowl and add the flour, cumin, coriander, baking powder, salt, and pepper.
5. Stir with a fork until all ingredients are fully incorporated, about 1 minute.
6. Using damp hands to prevent sticking, shape the mixture into 12 equal-sized balls, about 1 1/2 inches in diameter, and gently flatten each slightly into a patty.
7. Lightly brush both sides of each falafel patty with the extra virgin olive oil; this promotes a golden, crispy crust.
8. Arrange the patties in a single layer in the air fryer basket, leaving a little space between them for air circulation.
9. Air fry at 375°F for 10-12 minutes, flipping the patties halfway through with tongs, until they are deeply golden brown and firm to the touch.
10. Let the falafel rest in the basket for 2 minutes after cooking to allow the exterior to crisp up further.
The result is a delightful contrast: a shatteringly crisp shell gives way to a moist, fragrant interior bursting with fresh herbs and warm spices. Serve these falafel nestled in warm pita with tangy tahini sauce and pickled vegetables, or crumble them over a vibrant salad for a textural surprise that elevates any meal.
Air Fryer Chocolate Chip Cookies

Savor the delightful simplicity of air-fried chocolate chip cookies, where modern convenience meets classic comfort. These golden-brown treats emerge from the air fryer with a crisp edge and a tender, chewy center, offering a quick yet elegant solution for spontaneous dessert cravings. Perfect for holiday gatherings or a cozy evening treat, they deliver all the nostalgic flavor with a fraction of the fuss.
Serving: 12 | Pre Time: 15 minutes | Cooking Time: 8 minutes
Ingredients
– 1 cup all-purpose flour (I always spoon and level for accuracy)
– ½ teaspoon baking soda
– ¼ teaspoon fine sea salt (a pinch enhances the chocolate)
– ½ cup unsalted butter, softened to room temperature (this creams beautifully)
– ½ cup packed light brown sugar (for that caramel-like depth)
– ¼ cup granulated sugar
– 1 large egg, at room temperature (it blends smoothly into the batter)
– 1 teaspoon pure vanilla extract (my go-to for warm aroma)
– 1 cup semisweet chocolate chips (I prefer these for balanced sweetness)
Instructions
1. Preheat your air fryer to 325°F for 5 minutes to ensure even cooking.
2. In a medium bowl, whisk together 1 cup all-purpose flour, ½ teaspoon baking soda, and ¼ teaspoon fine sea salt until fully combined.
3. In a large mixing bowl, use an electric mixer on medium speed to cream ½ cup softened unsalted butter, ½ cup packed light brown sugar, and ¼ cup granulated sugar for 2–3 minutes until light and fluffy.
4. Add 1 large room-temperature egg and 1 teaspoon pure vanilla extract to the butter mixture, beating on low speed just until incorporated.
5. Gradually add the dry flour mixture to the wet ingredients, mixing on low speed until a soft dough forms, about 1 minute.
6. Gently fold in 1 cup semisweet chocolate chips with a spatula until evenly distributed.
7. Scoop 1-tablespoon portions of dough, roll into balls, and place them 2 inches apart on parchment-lined air fryer baskets, flattening slightly with your palm.
8. Air fry at 325°F for 6–8 minutes, checking at 6 minutes—the cookies should be golden around the edges but soft in the center.
9. Remove the baskets and let the cookies cool on the parchment for 5 minutes to firm up before transferring to a wire rack.
10. Repeat with remaining dough, ensuring the air fryer is preheated between batches for consistent results.
Just out of the air fryer, these cookies boast a delicate crispness that yields to a wonderfully chewy interior, with melted chocolate pockets adding rich bursts of flavor. For an indulgent twist, serve them warm alongside a scoop of vanilla ice cream, or drizzle with a hint of sea salt to elevate their sweet, buttery notes.
Summary
Begin your air frying journey with these 20 easy recipes! From crispy snacks to wholesome meals, this roundup offers delicious inspiration for every beginner. We hope you find a new favorite to whip up in your Power XL. Don’t forget to leave a comment telling us which recipe you loved most, and share this article on Pinterest to spread the crispy joy!


