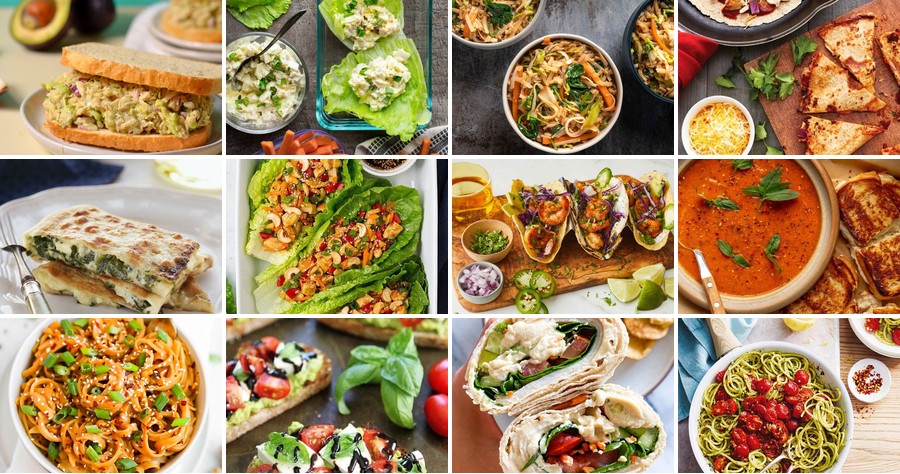
Hey there, busy bees! Hungry for lunch ideas that won’t eat up your precious time? We’ve got you covered with 18 delicious, quick, and easy recipes perfect for those hectic days. From vibrant salads to comforting wraps, these fuss-free meals will have you enjoying a satisfying lunch without the stress. Let’s dive in and make your midday break something to look forward to!
Caprese Avocado Toast
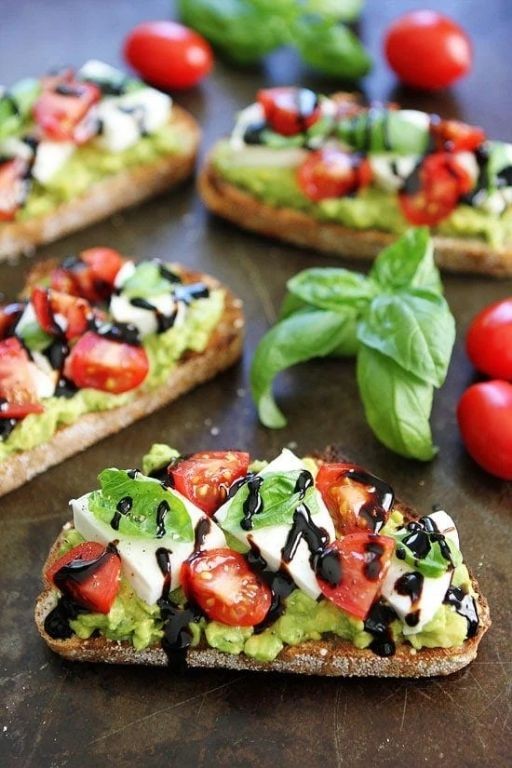
Zesty, zingy, and ready to zap your taste buds awake—this isn’t your average avocado toast. We’re taking the classic Italian Caprese salad and giving it a deliciously crunchy, spreadable makeover that’s perfect for a quick lunch or a fancy brunch showstopper. Get ready to meet your new favorite way to eat your greens (and reds, and whites!).
Serving: 2 | Pre Time: 10 minutes | Cooking Time: 5 minutes
Ingredients
– 4 slices of hearty, crusty artisan bread
– 1 large, perfectly ripe Hass avocado
– 8 ounces of fresh, creamy mozzarella cheese (the kind that comes in water)
– 2 medium, juicy vine-ripened tomatoes
– A generous handful of fragrant fresh basil leaves
– 2 tablespoons of rich, peppery extra virgin olive oil
– 1 tablespoon of syrupy, aged balsamic glaze
– 1/4 teaspoon of flaky sea salt
– 1/4 teaspoon of coarsely ground black pepper
Instructions
1. Preheat your oven’s broiler to high (about 500°F) and position a rack 6 inches from the heat source.
2. Place the 4 slices of hearty, crusty artisan bread on a baking sheet in a single layer.
3. Toast the bread under the broiler for 2-3 minutes, watching closely until the edges are golden brown and crisp. (*Tip: Broilers can burn food fast, so don’t walk away!*)
4. While the bread toasts, slice the 1 large, perfectly ripe Hass avocado in half, remove the pit, and scoop the flesh into a small bowl.
5. Use a fork to mash the avocado until mostly smooth but with a few small chunks for texture.
6. Slice the 8 ounces of fresh, creamy mozzarella cheese and the 2 medium, juicy vine-ripened tomatoes into 1/4-inch thick rounds.
7. Remove the toasted bread from the oven and let it cool for 1 minute on the baking sheet.
8. Evenly spread the mashed avocado onto each slice of toasted bread, covering the surface completely.
9. Layer the sliced mozzarella cheese and tomato rounds alternately on top of the avocado on each toast.
10. Tear the generous handful of fragrant fresh basil leaves and scatter them over the toasts. (*Tip: Tearing basil by hand releases more aromatic oils than cutting with a knife.*)
11. Drizzle the 2 tablespoons of rich, peppery extra virgin olive oil evenly over the four toasts.
12. Drizzle the 1 tablespoon of syrupy, aged balsamic glaze in a zigzag pattern over the toasts.
13. Season the toasts evenly with the 1/4 teaspoon of flaky sea salt and the 1/4 teaspoon of coarsely ground black pepper. (*Tip: Adding salt and pepper at the end ensures every layer is properly seasoned.*)
A creamy avocado base meets the classic, fresh trio of mozzarella, tomato, and basil in every glorious bite. The contrast between the warm, crunchy toast and the cool, creamy toppings is pure magic. For a fun twist, try stacking the ingredients on thick-cut grilled sourdough or serving the toasts open-faced alongside a simple arugula salad drizzled with leftover balsamic glaze.
Spinach and Feta Stuffed Pita

Venture beyond sad desk lunches with this Spinach and Feta Stuffed Pita—a handheld masterpiece that’s basically a warm, flaky hug for your taste buds. It’s the ultimate weeknight hero, transforming a few humble ingredients into a golden, savory pocket of joy faster than you can say “forget takeout.”
Serving: 4 | Pre Time: 15 minutes | Cooking Time: 10 minutes
Ingredients
- 4 whole wheat pita bread rounds
- 1 tablespoon rich extra virgin olive oil
- 1 small yellow onion, finely diced
- 2 cloves garlic, minced
- 5 ounces fresh baby spinach leaves
- 4 ounces creamy feta cheese, crumbled
- 1/4 cup plain Greek yogurt
- 1/2 teaspoon dried oregano
- 1/4 teaspoon finely ground black pepper
- 1/4 teaspoon kosher salt
Instructions
- Preheat your oven to 375°F and line a baking sheet with parchment paper.
- Heat the rich extra virgin olive oil in a large skillet over medium heat for 1 minute.
- Add the finely diced yellow onion and cook, stirring occasionally, for 4-5 minutes until softened and translucent.
- Stir in the minced garlic and cook for 1 more minute until fragrant.
- Add all 5 ounces of fresh baby spinach leaves to the skillet. Tip: Add the spinach in batches if your skillet is small, wilting each handful before adding the next.
- Cook, stirring constantly, for 2-3 minutes until the spinach is fully wilted and any liquid has evaporated.
- Transfer the spinach mixture to a medium bowl and let it cool for 5 minutes.
- To the bowl, add the crumbled creamy feta cheese, plain Greek yogurt, dried oregano, finely ground black pepper, and kosher salt.
- Stir everything together until well combined. Tip: For extra creaminess, let this filling mixture rest for 10 minutes so the flavors meld.
- Carefully slice a 3-inch opening along the top edge of each whole wheat pita bread round to create a pocket.
- Evenly divide the spinach and feta mixture among the 4 pita pockets, gently stuffing it inside.
- Place the stuffed pitas on the prepared baking sheet. Tip: Lightly brush the outside of each pita with a little extra olive oil for a crispier, golden finish.
- Bake in the preheated 375°F oven for 8-10 minutes, until the pitas are warm and slightly crispy.
Out of the oven, you’re greeted with a delightful contrast: the pita is warm and tender with a satisfying crisp edge, while the filling is luxuriously creamy and tangy from the feta, punctuated by the earthy spinach. Serve these beauties immediately with a side of cool tzatziki for dipping, or slice them into wedges for a fun, shareable appetizer that’ll disappear in seconds.
Teriyaki Chicken Lettuce Wraps
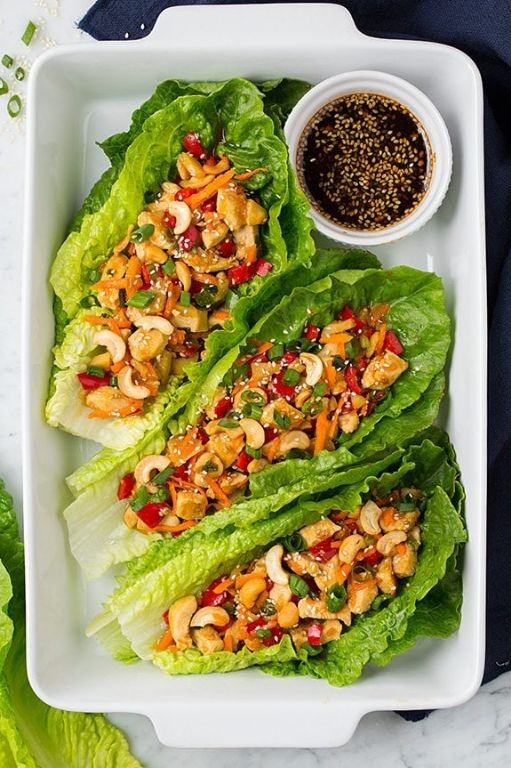
Mmm, get ready to ditch the boring dinner routine because these Teriyaki Chicken Lettuce Wraps are about to become your new weeknight MVP—they’re so good, you might just start a lettuce wrap fan club (no membership fees required, just extra napkins). Seriously, who knew something this delicious could be whipped up faster than you can scroll through your takeout apps?
Serving: 4 | Pre Time: 15 minutes | Cooking Time: 15 minutes
Ingredients
– 1 pound boneless, skinless chicken breasts, cut into bite-sized pieces
– 1/2 cup low-sodium soy sauce
– 1/4 cup honey
– 2 tablespoons rice vinegar
– 1 tablespoon freshly grated ginger
– 2 cloves garlic, minced
– 1 tablespoon cornstarch
– 1 tablespoon water
– 1 tablespoon toasted sesame oil
– 1 large head of crisp butter lettuce, leaves separated
– 2 medium carrots, shredded into thin ribbons
– 4 green onions, thinly sliced
– 1 tablespoon toasted sesame seeds
Instructions
1. In a medium bowl, whisk together the low-sodium soy sauce, honey, rice vinegar, freshly grated ginger, and minced garlic until smooth to create the teriyaki sauce.
2. In a small bowl, stir the cornstarch and water together until no lumps remain to make a slurry—this will thicken your sauce beautifully later.
3. Heat the toasted sesame oil in a large skillet or wok over medium-high heat until it shimmers, about 1 minute.
4. Add the bite-sized chicken pieces to the hot skillet in a single layer, cooking for 5–7 minutes until golden brown on all sides and no longer pink inside.
5. Pour the prepared teriyaki sauce over the cooked chicken, stirring to coat evenly, and bring to a gentle simmer.
6. Stir in the cornstarch slurry and cook for 2–3 minutes, stirring constantly, until the sauce thickens and coats the chicken like a glossy glaze—tip: don’t walk away here, or it might stick!
7. Remove the skillet from the heat and let the chicken rest for 2 minutes to allow the flavors to meld.
8. Arrange the crisp butter lettuce leaves on a serving platter as edible cups.
9. Spoon the saucy teriyaki chicken into each lettuce cup, dividing it evenly among the leaves.
10. Top each wrap with shredded carrot ribbons, thinly sliced green onions, and a sprinkle of toasted sesame seeds for crunch—tip: toast extra sesame seeds in a dry pan for 30 seconds to boost their nutty flavor.
11. Serve immediately while the lettuce is still cool and crunchy, with extra sauce on the side for dipping enthusiasts.
Just imagine that first bite: the cool, crisp lettuce gives way to tender, glazed chicken with a sweet-savory punch, all topped with a confetti of fresh veggies and nutty sesame seeds. These wraps are a textural dream—crunchy, juicy, and downright addictive—so go ahead, stack ’em high or serve them buffet-style for a fun, hands-on meal that’ll have everyone reaching for more.
Buffalo Chicken Wrap

Ever had one of those days where you crave something spicy, satisfying, and shamelessly handheld? Enter the Buffalo Chicken Wrap—your ticket to flavor town without the fork-and-knife formality. It’s the perfect mash-up of zesty, creamy, and crunchy that’ll make your taste buds do a happy dance.
Serving: 2 | Pre Time: 15 minutes | Cooking Time: 10 minutes
Ingredients
– 2 large flour tortillas (burrito-sized)
– 1 cup cooked, shredded chicken breast (juicy and tender)
– 1/4 cup Frank’s RedHot Buffalo sauce (tangy and fiery)
– 2 tbsp unsalted butter (rich and creamy)
– 1/4 cup blue cheese crumbles (bold and pungent)
– 1/4 cup ranch dressing (cool and creamy)
– 1 cup shredded iceberg lettuce (crisp and refreshing)
– 1/2 cup shredded sharp cheddar cheese (melty and savory)
– 1/4 cup finely diced celery (crunchy and fresh)
Instructions
1. In a small saucepan over medium heat, melt 2 tbsp of unsalted butter until it’s fully liquid and bubbling slightly, about 2 minutes.
2. Stir in 1/4 cup of Frank’s RedHot Buffalo sauce into the melted butter, combining them into a smooth, glossy sauce for 1 minute—this step ensures your chicken gets evenly coated without separating.
3. Add 1 cup of cooked, shredded chicken breast to the saucepan, tossing it thoroughly in the Buffalo sauce mixture until every piece is warmly coated and heated through, about 3-4 minutes. Tip: Use a fork to shred the chicken while it’s warm for the best texture.
4. Lay 2 large flour tortillas flat on a clean surface, and evenly spread 2 tbsp of ranch dressing over each tortilla, leaving a 1-inch border around the edges to prevent messy spills.
5. Divide the saucy Buffalo chicken evenly between the tortillas, piling it down the center in a neat horizontal line.
6. Sprinkle 1/4 cup of blue cheese crumbles over the chicken on each tortilla, followed by 1/4 cup of shredded sharp cheddar cheese per tortilla.
7. Top each with 1/2 cup of shredded iceberg lettuce and 2 tbsp of finely diced celery for that essential crunch. Tip: Chill your lettuce and celery in the fridge beforehand to keep everything extra crisp.
8. Fold the bottom edge of each tortilla up over the filling, then tightly roll from one side to the other, tucking in the ingredients as you go to form a secure wrap. Tip: If the tortillas are stiff, warm them in a microwave for 10 seconds to make rolling easier without tearing.
9. Slice each wrap in half diagonally with a sharp knife for a neat presentation, and serve immediately.
Just imagine that first bite: the tender, spicy chicken melds with the cool ranch and bold blue cheese, all hugged by a soft tortilla and punctuated by the fresh crunch of celery and lettuce. For a fun twist, serve these wraps with extra Buffalo sauce for dipping or alongside crispy sweet potato fries—they’re guaranteed to disappear faster than you can say “game day snack.”
Shrimp Tacos with Lime Crema

Get ready to ditch the boring dinner routine because these Shrimp Tacos with Lime Crema are about to become your new weeknight superhero—seriously, they’re faster than ordering takeout and way more delicious. Imagine plump, juicy shrimp kissed with smoky spices, all tucked into warm tortillas and drizzled with a tangy, creamy sauce that’ll make your taste buds do a happy dance. Trust me, this is the kind of meal that turns a regular Tuesday into a fiesta.
Serving: 4 | Pre Time: 15 minutes | Cooking Time: 10 minutes
Ingredients
– 1 pound large raw shrimp, peeled and deveined (look for firm, pinkish-gray ones)
– 2 tablespoons rich extra virgin olive oil
– 1 teaspoon smoked paprika (for that irresistible smoky kick)
– 1/2 teaspoon garlic powder
– 1/2 teaspoon ground cumin
– 1/4 teaspoon fine sea salt
– 8 small flour tortillas (soft and pliable)
– 1/2 cup sour cream (full-fat for maximum creaminess)
– 2 tablespoons fresh lime juice (from about 1 juicy lime)
– 1/4 cup finely chopped fresh cilantro (bright and herbaceous)
– 1 cup shredded green cabbage (crisp and crunchy)
– 1/2 cup diced ripe avocado (creamy and buttery)
Instructions
1. Pat the raw shrimp completely dry with paper towels to ensure a good sear—this prevents steaming.
2. In a medium bowl, toss the shrimp with the extra virgin olive oil, smoked paprika, garlic powder, ground cumin, and fine sea salt until evenly coated.
3. Heat a large skillet over medium-high heat until a drop of water sizzles, about 2 minutes.
4. Add the shrimp to the skillet in a single layer and cook for 2 minutes per side, until they turn opaque and pink with slight char marks.
5. While the shrimp cook, warm the flour tortillas in a dry skillet over medium heat for 30 seconds per side, just until soft and pliable—wrap them in a clean towel to keep warm.
6. In a small bowl, whisk together the sour cream and fresh lime juice until smooth to make the lime crema.
7. Stir the finely chopped fresh cilantro into the lime crema for a burst of fresh flavor.
8. Assemble each taco by placing a warm tortilla on a plate, topping it with shredded green cabbage, cooked shrimp, diced ripe avocado, and a generous drizzle of the lime crema.
9. Serve immediately while everything is warm and fresh.
And there you have it—these tacos boast a perfect crunch from the cabbage against the tender shrimp, all balanced by that zesty lime crema. Amp up the fun by setting out extra toppings like pickled onions or hot sauce for a DIY taco bar, because who doesn’t love a customizable feast?
BBQ Chicken Quesadilla

Let’s be honest: sometimes you want the smoky, tangy thrill of barbecue and the melty, crispy comfort of a quesadilla, and you want them to get together in a deliciously messy mashup. This BBQ Chicken Quesadilla is that dream date—quick, satisfying, and packed with flavor that’ll make your taste buds do a happy dance. It’s the weeknight hero you never knew you needed, ready in a flash and guaranteed to disappear even faster.
Serving: 2 | Pre Time: 10 minutes | Cooking Time: 10 minutes
Ingredients
– 2 cups shredded cooked chicken breast
– 1/2 cup smoky BBQ sauce
– 4 large flour tortillas
– 1 1/2 cups shredded sharp cheddar cheese
– 2 tbsp unsalted butter
– 1/4 cup finely chopped fresh cilantro
– 1/4 cup creamy ranch dressing for dipping
Instructions
1. In a medium bowl, combine 2 cups shredded cooked chicken breast with 1/2 cup smoky BBQ sauce until evenly coated.
2. Heat a large skillet or griddle over medium heat (about 350°F) and melt 1 tbsp unsalted butter, swirling to coat the surface.
3. Place one large flour tortilla in the skillet and sprinkle 1/4 cup shredded sharp cheddar cheese evenly over half of it.
4. Spoon half of the BBQ chicken mixture over the cheese, then top with another 1/4 cup shredded sharp cheddar cheese and 1 tbsp finely chopped fresh cilantro.
5. Fold the empty half of the tortilla over the filling, pressing gently with a spatula.
6. Cook for 2–3 minutes until the bottom is golden brown and crispy, then flip carefully using the spatula.
7. Cook for another 2–3 minutes until the second side is golden brown and the cheese is fully melted.
8. Transfer the quesadilla to a cutting board and repeat steps 2–7 with the remaining ingredients.
9. Slice each quesadilla into 4 wedges using a sharp knife or pizza cutter.
10. Serve immediately with 1/4 cup creamy ranch dressing for dipping on the side.
What you get is a crispy, golden exterior giving way to a gooey, smoky-sweet filling that’s pure comfort in every bite. The fresh cilantro adds a bright pop, while the ranch dressing cools it all down—perfect for dunking or drizzling. Try serving these wedges stacked high on a platter for a fun, shareable appetizer that’ll steal the show at any gathering.
Pesto Pasta with Cherry Tomatoes
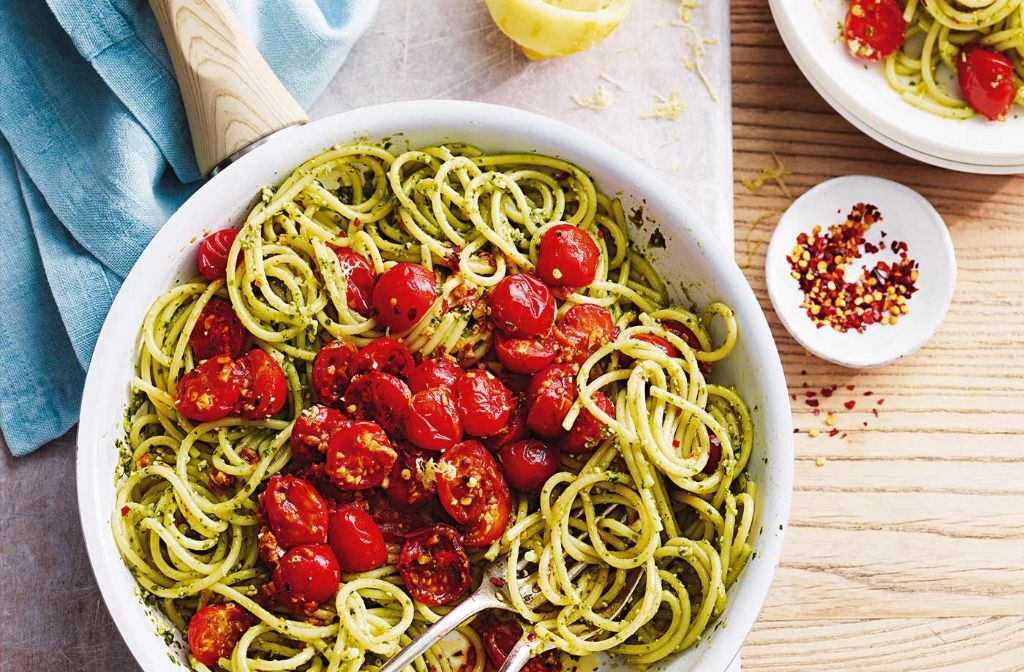
Noodle lovers, rejoice! If you’ve ever stared into your pantry and thought, “I need something that tastes like a sunny Italian afternoon but requires the effort of a lazy Tuesday,” this pesto pasta with cherry tomatoes is your culinary soulmate. It’s the kind of dish that makes you feel fancy without the fuss, perfect for when you want to impress your taste buds (or a dinner date) without breaking a sweat.
Serving: 4 | Pre Time: 10 minutes | Cooking Time: 15 minutes
Ingredients
– 12 ounces of dried spaghetti pasta
– 2 cups of fresh basil leaves, packed
– 1/2 cup of rich extra virgin olive oil
– 1/3 cup of freshly grated Parmesan cheese
– 1/4 cup of toasted pine nuts
– 2 cloves of garlic, minced
– 1 pint of sweet cherry tomatoes, halved
– 1 teaspoon of flaky sea salt
– 1/2 teaspoon of freshly ground black pepper
Instructions
1. Fill a large pot with water, add a pinch of salt, and bring it to a rolling boil over high heat.
2. Add the dried spaghetti pasta to the boiling water and cook for 8–10 minutes, stirring occasionally, until it’s al dente (tender but with a slight bite).
3. While the pasta cooks, combine the fresh basil leaves, rich extra virgin olive oil, freshly grated Parmesan cheese, toasted pine nuts, and minced garlic in a food processor.
4. Pulse the mixture in the food processor for 30–45 seconds until it forms a smooth, vibrant green pesto sauce.
5. Drain the cooked pasta in a colander, reserving 1/4 cup of the starchy pasta water for later use.
6. Heat a large skillet over medium heat and add the halved sweet cherry tomatoes, cooking for 3–4 minutes until they start to soften and release their juices.
7. Pour the pesto sauce into the skillet with the tomatoes, stirring to combine and heat through for 1–2 minutes.
8. Add the drained pasta to the skillet, tossing everything together with the reserved pasta water to create a silky, cohesive sauce.
9. Season the dish with flaky sea salt and freshly ground black pepper, tossing once more to ensure even distribution.
10. Remove the skillet from the heat and let it sit for 1 minute to allow the flavors to meld.
Vibrant and bursting with freshness, this pesto pasta delivers a creamy texture from the emulsified sauce, punctuated by the juicy pop of cherry tomatoes. Serve it immediately in warm bowls, perhaps topped with an extra sprinkle of Parmesan or a drizzle of olive oil for a restaurant-worthy touch that’ll have everyone asking for seconds.
Avocado Tuna Salad Sandwich

Dare we say it? This isn’t your grandma’s tuna salad. We’ve ditched the mayo for something creamier, greener, and frankly, more fabulous. Get ready for a lunchtime revelation that’s as easy to make as it is delicious to devour.
Serving: 2 | Pre Time: 15 minutes | Cooking Time: 0 minutes
Ingredients
- 2 (5-ounce) cans of high-quality solid white albacore tuna in water, drained
- 1 large, perfectly ripe Hass avocado, pitted and scooped
- 1/4 cup of finely diced crisp red onion
- 1/4 cup of finely chopped fresh, aromatic celery
- 2 tablespoons of freshly squeezed zesty lemon juice
- 1 tablespoon of rich extra virgin olive oil
- 1/2 teaspoon of coarse kosher salt
- 1/4 teaspoon of finely ground black pepper
- 4 slices of hearty, artisanal whole-grain bread
- 4 large leaves of crisp, vibrant green butter lettuce
Instructions
- Place the drained solid white albacore tuna into a medium mixing bowl.
- Add the scooped flesh of the perfectly ripe Hass avocado to the bowl with the tuna.
- Using a fork, vigorously mash the avocado and tuna together until the mixture is creamy with some small, pleasant chunks remaining. Tip: A perfectly ripe avocado will mash easily and create a luxuriously smooth base.
- Stir in the finely diced crisp red onion and the finely chopped fresh, aromatic celery.
- Pour in the freshly squeezed zesty lemon juice and the rich extra virgin olive oil.
- Season the mixture with the coarse kosher salt and finely ground black pepper.
- Fold all ingredients together until they are thoroughly and evenly combined. Tip: For the best flavor, let the salad rest for 5 minutes so the lemon juice can mellow the onion’s bite.
- Toast the 4 slices of hearty, artisanal whole-grain bread until golden brown and crisp.
- Place 2 large leaves of crisp, vibrant green butter lettuce onto each of 2 slices of the toasted bread.
- Divide the avocado tuna salad mixture evenly between the two prepared bread slices, piling it high on top of the lettuce.
- Top each with the remaining slices of toasted bread to form sandwiches. Tip: For a neater eat, press down gently on the sandwich before cutting to help the creamy salad adhere.
Unbelievably creamy and packed with bright, fresh flavor, this sandwich is a textural dream. The buttery avocado melds with the flaky tuna, while the celery and onion provide a crucial, satisfying crunch. Serve it open-faced for a fancy brunch or pack it tightly in parchment paper for the ultimate picnic power move.
Vegetable Stir-Fry with Rice Noodles
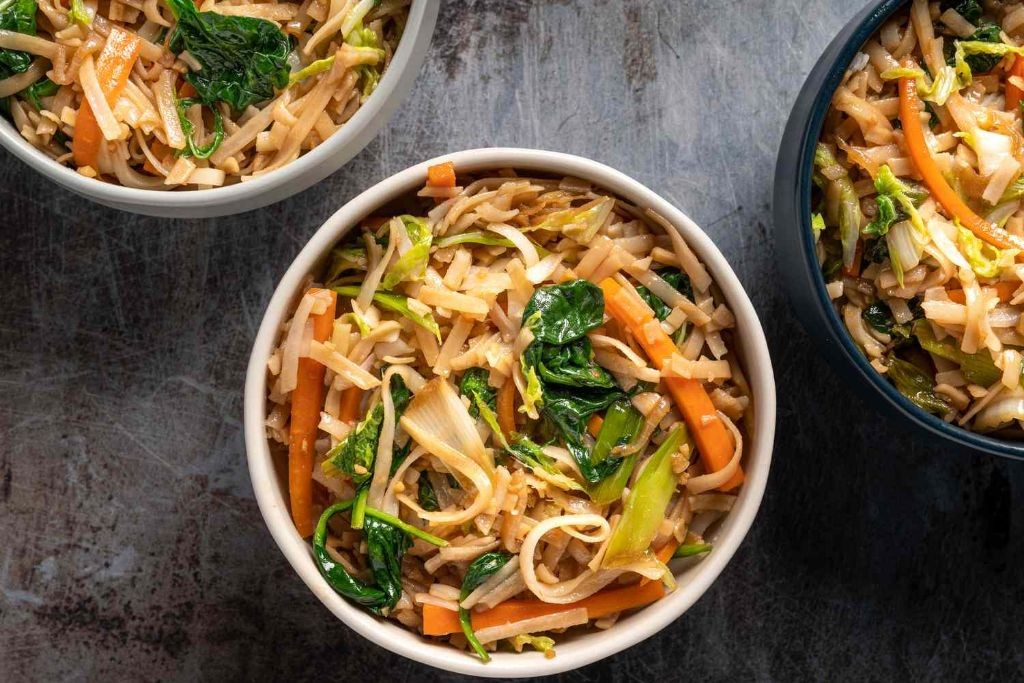
Noodles, rejoice! Your time to shine has arrived in this vibrant, veggie-packed stir-fry that’s so quick and flavorful, you’ll forget takeout exists. Let’s turn that produce drawer into a saucy, slurpable masterpiece that’s ready faster than you can say ‘wok hei.’
Serving: 4 | Pre Time: 15 minutes | Cooking Time: 15 minutes
Ingredients
– 8 ounces of thin rice noodles
– 2 tablespoons of toasted sesame oil
– 1 tablespoon of fragrant minced garlic
– 1 tablespoon of freshly grated ginger
– 1 red bell pepper, thinly sliced into crisp strips
– 1 cup of crunchy snap peas, ends trimmed
– 1 large carrot, julienned into sweet matchsticks
– 3 tablespoons of soy sauce
– 1 tablespoon of rich honey
– 1 teaspoon of sriracha for a gentle kick
– 2 green onions, thinly sliced for garnish
– 1 tablespoon of toasted sesame seeds
Instructions
1. Place 8 ounces of thin rice noodles in a large bowl and cover with hot tap water; let soak for 10 minutes until pliable, then drain thoroughly. (Tip: Don’t overcook the noodles here—they’ll finish in the wok.)
2. Heat 2 tablespoons of toasted sesame oil in a large wok or skillet over medium-high heat until shimmering, about 1 minute.
3. Add 1 tablespoon of fragrant minced garlic and 1 tablespoon of freshly grated ginger; stir-fry for 30 seconds until aromatic but not browned.
4. Toss in 1 red bell pepper (thinly sliced), 1 cup of crunchy snap peas, and 1 large carrot (julienned); stir-fry for 4–5 minutes until veggies are crisp-tender with bright color.
5. Push veggies to the side of the wok and add the drained rice noodles to the center.
6. Pour 3 tablespoons of soy sauce, 1 tablespoon of rich honey, and 1 teaspoon of sriracha over the noodles; toss everything together for 2–3 minutes until sauce coats evenly and noodles are heated through. (Tip: Work quickly here to prevent sticking—a good toss is key!)
7. Remove from heat and garnish with 2 thinly sliced green onions and 1 tablespoon of toasted sesame seeds. (Tip: Toasting sesame seeds in a dry pan for 1–2 minutes until golden boosts their nutty flavor.)
Crunchy veggies meet slurpable noodles in a sweet-spicy soy embrace that’s downright addictive. Serve it straight from the wok for that just-made warmth, or chill leftovers for a killer cold noodle salad tomorrow—either way, those sesame seeds add a perfect nutty finish.
Spicy Peanut Noodles
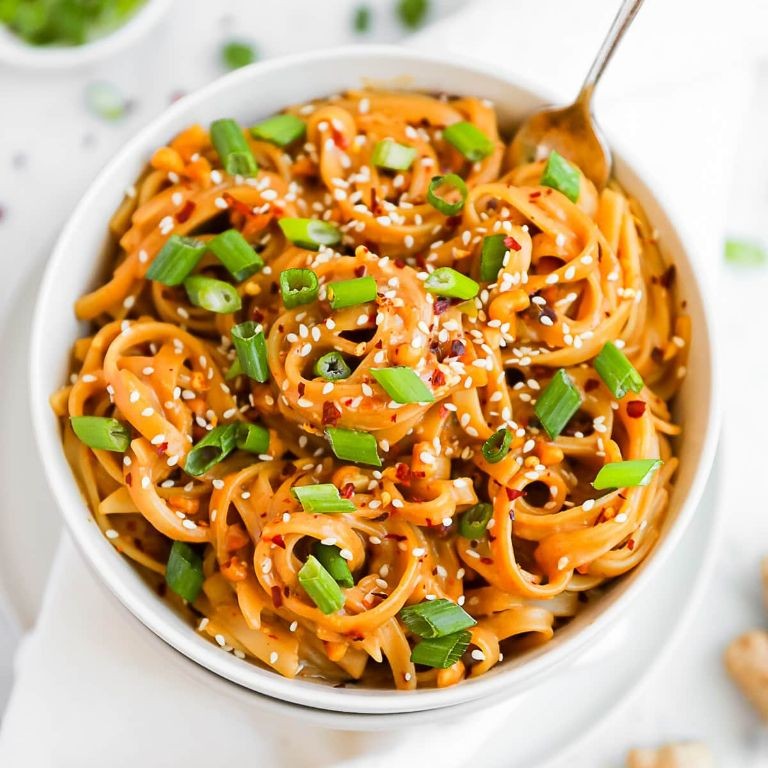
Tired of bland takeout that leaves your taste buds snoozing? These Spicy Peanut Noodles are here to jolt them awake with a party of sweet, savory, and spicy flavors that cling to every slurpable strand. It’s the saucy, satisfying bowl you can whip up faster than you can say ‘pass the chopsticks.’
Serving: 4 | Pre Time: 15 minutes | Cooking Time: 10 minutes
Ingredients
– 12 ounces of dried spaghetti or linguine
– 1/2 cup of creamy, natural peanut butter
– 1/4 cup of low-sodium soy sauce
– 2 tablespoons of rich, toasted sesame oil
– 2 tablespoons of sweet, mild honey
– 2 tablespoons of tangy, unseasoned rice vinegar
– 1 tablespoon of fiery sriracha sauce (adjust for heat)
– 2 cloves of pungent, freshly minced garlic
– 1 tablespoon of finely grated, zesty fresh ginger
– 1/4 cup of warm water
– 2 thinly sliced, crisp green onions for garnish
– 2 tablespoons of crushed, salted roasted peanuts for garnish
– 1 tablespoon of bright, toasted sesame seeds for garnish
Instructions
1. Bring a large pot of generously salted water to a rolling boil over high heat.
2. Add 12 ounces of dried spaghetti to the boiling water and cook according to package directions until al dente, about 8-10 minutes, stirring occasionally to prevent sticking.
3. While the pasta cooks, in a medium mixing bowl, whisk together 1/2 cup of creamy peanut butter, 1/4 cup of low-sodium soy sauce, 2 tablespoons of toasted sesame oil, 2 tablespoons of honey, 2 tablespoons of rice vinegar, and 1 tablespoon of sriracha until smooth and fully combined.
4. Stir in 2 cloves of freshly minced garlic and 1 tablespoon of finely grated fresh ginger until evenly distributed throughout the sauce.
5. Gradually whisk in 1/4 cup of warm water, one tablespoon at a time, until the sauce reaches a smooth, pourable consistency that coats the back of a spoon. (Tip: The warm water helps thin the peanut butter without making the sauce greasy.)
6. Once the pasta is cooked, drain it in a colander, but do not rinse it, as the starchy coating helps the sauce cling better.
7. Immediately transfer the hot, drained pasta to a large serving bowl.
8. Pour the prepared peanut sauce over the hot pasta and use tongs to toss vigorously for 1-2 minutes until every strand is evenly and generously coated. (Tip: Tossing while the pasta is hot helps the sauce meld seamlessly.)
9. Garnish the noodles with 2 thinly sliced green onions, 2 tablespoons of crushed roasted peanuts, and 1 tablespoon of toasted sesame seeds sprinkled evenly over the top. (Tip: For extra crunch, toast the sesame seeds in a dry skillet over medium heat for 1-2 minutes until fragrant before garnishing.)
10. Serve immediately while warm. The noodles boast a luxuriously creamy yet light texture from the silky peanut sauce, with a bold kick of garlic, ginger, and heat that’s balanced by the sweet honey. Try piling them into bowls with extra sriracha on the side for spice lovers, or add shredded chicken or crispy tofu to turn it into a hearty main dish.
Turkey and Hummus Wrap
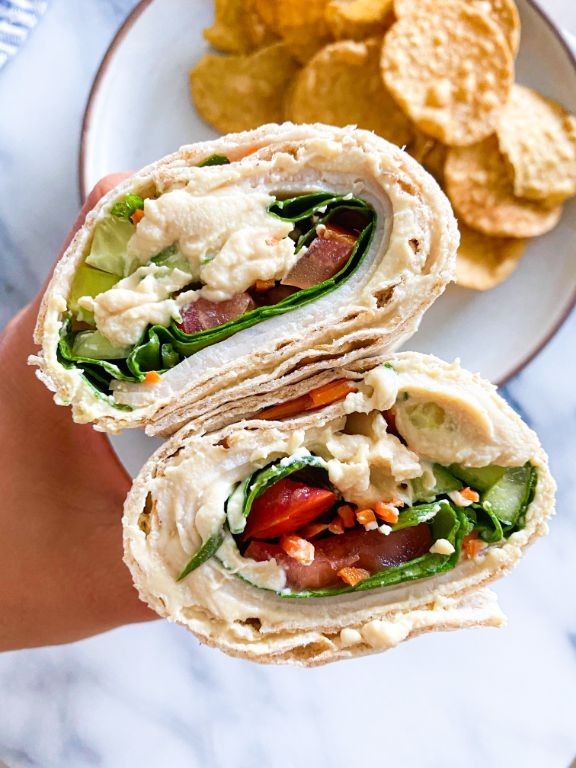
Hear ye, hear ye, food adventurers! If your lunch routine is snoozier than a cat in a sunbeam, this Turkey and Hummus Wrap is here to jolt it awake with a playful, protein-packed punch. It’s the superhero of desk lunches, ready to rescue you from sad sandwich monotony in mere minutes.
Serving: 1 | Pre Time: 10 minutes | Cooking Time: 0 minutes
Ingredients
– 1 large, pliable whole-wheat tortilla
– 1/4 cup of creamy, dreamy classic hummus
– 3 ounces of thinly sliced, savory roasted turkey breast
– 1/2 cup of crisp, shredded romaine lettuce
– 1/4 cup of sweet, crunchy matchstick carrots
– 2 tablespoons of tangy, crumbled feta cheese
– 1 tablespoon of rich extra virgin olive oil
– 1 teaspoon of zesty, freshly squeezed lemon juice
– A pinch of finely ground black pepper
Instructions
1. Lay your large, pliable whole-wheat tortilla flat on a clean work surface.
2. Spread the 1/4 cup of creamy, dreamy classic hummus evenly over the center of the tortilla, leaving a 1-inch border around the edges.
3. Arrange the 3 ounces of thinly sliced, savory roasted turkey breast in a single layer over the hummus.
4. Top the turkey with the 1/2 cup of crisp, shredded romaine lettuce and the 1/4 cup of sweet, crunchy matchstick carrots.
5. Sprinkle the 2 tablespoons of tangy, crumbled feta cheese evenly over the vegetables.
6. In a small bowl, whisk together the 1 tablespoon of rich extra virgin olive oil and the 1 teaspoon of zesty, freshly squeezed lemon juice until emulsified. Tip: Whisking vigorously for 15 seconds creates a smoother dressing that clings better to the fillings.
7. Drizzle the olive oil and lemon juice mixture evenly over the assembled fillings.
8. Season the entire filling with a pinch of finely ground black pepper.
9. Fold the bottom edge of the tortilla up over the fillings, then fold in the left and right sides. Tip: Tuck the sides in snugly to prevent any filling from escaping during the final roll.
10. Roll the wrap tightly away from you, applying gentle pressure to form a secure cylinder. Tip: If the tortilla cracks, warm it in a dry skillet for 10 seconds per side to make it more flexible.
11. Slice the wrapped cylinder in half diagonally with a sharp knife for easier handling.
Zesty, fresh, and utterly satisfying, this wrap delivers a fantastic crunch from the carrots and lettuce against the creamy hummus and savory turkey. For a fun twist, serve it with a side of spicy pickles or swap the feta for pepper jack cheese to turn up the heat!
Garlic Butter Shrimp Skillet

Feast your eyes (and soon, your taste buds) on this one-pan wonder that’ll have you feeling like a seaside chef without the pesky seagulls. This garlic butter shrimp skillet is the ultimate weeknight hero—ready in minutes, packed with flavor, and guaranteed to make your kitchen smell like a fancy bistro (minus the overpriced wine list).
Serving: 4 | Pre Time: 10 minutes | Cooking Time: 15 minutes
Ingredients
– 1.5 pounds large raw shrimp, peeled and deveined
– 4 tablespoons unsalted butter, divided
– 2 tablespoons rich extra virgin olive oil
– 8 cloves fresh garlic, finely minced
– 1/4 cup dry white wine (like Sauvignon Blanc)
– 1/4 cup low-sodium chicken broth
– 1 tablespoon freshly squeezed lemon juice
– 1/4 teaspoon finely ground black pepper
– 1/4 teaspoon crushed red pepper flakes
– 1/4 cup chopped fresh parsley
– 1/4 cup grated Parmesan cheese
Instructions
1. Pat the shrimp completely dry with paper towels to ensure a perfect sear.
2. Heat a large skillet over medium-high heat and add 2 tablespoons of butter with the olive oil.
3. Once the butter melts and foams, add the shrimp in a single layer without overcrowding.
4. Cook the shrimp for 2 minutes per side until they turn pink and opaque, then transfer to a plate.
5. Reduce the heat to medium and add the remaining 2 tablespoons of butter to the same skillet.
6. Add the minced garlic and sauté for 1 minute until fragrant but not browned.
7. Pour in the white wine to deglaze the pan, scraping up any browned bits with a wooden spoon for extra flavor.
8. Simmer the wine for 2 minutes until reduced by half.
9. Stir in the chicken broth, lemon juice, black pepper, and red pepper flakes.
10. Let the sauce simmer for 3 minutes until slightly thickened.
11. Return the cooked shrimp to the skillet and toss to coat evenly in the sauce.
12. Remove from heat and sprinkle with fresh parsley and grated Parmesan cheese.
13. Serve immediately while hot.
That tender, juicy shrimp swimming in a garlicky, buttery sauce is pure comfort with a kick. Try it over creamy polenta or crusty bread to soak up every last drop—your taste buds will thank you!
Loaded Sweet Potato Nachos

Who says nachos need tortilla chips to be legit? Meet your new favorite game-day hero: loaded sweet potato nachos, where crispy roasted sweet potato rounds become the perfect vehicle for melty cheese, zesty toppings, and all the glorious mess you crave. It’s the cozy, colorful upgrade your snack life deserves—no judgment if you eat it straight from the sheet pan.
Serving: 4 | Pre Time: 15 minutes | Cooking Time: 25 minutes
Ingredients
– 2 large, vibrant orange sweet potatoes, scrubbed clean and sliced into ¼-inch rounds
– 2 tablespoons of rich extra virgin olive oil
– 1 teaspoon of fragrant garlic powder
– 1 teaspoon of smoky paprika
– ½ teaspoon of finely ground black pepper
– 1 cup of shredded sharp cheddar cheese, for that gooey melt
– ½ cup of tangy black beans, rinsed and drained
– ½ cup of sweet corn kernels, fresh or thawed from frozen
– ¼ cup of finely diced red onion, for a crisp bite
– ¼ cup of fresh cilantro leaves, roughly chopped
– ½ cup of creamy avocado slices
– ½ cup of cool sour cream, for dolloping
– 1 jalapeño pepper, thinly sliced (seeds removed for less heat)
Instructions
1. Preheat your oven to 425°F and line a large baking sheet with parchment paper.
2. In a large bowl, toss the sweet potato rounds with olive oil, garlic powder, paprika, and black pepper until evenly coated—this ensures every bite is flavorful. Tip: Don’t overcrowd the bowl; toss in batches if needed for even coating.
3. Arrange the sweet potato rounds in a single layer on the prepared baking sheet, avoiding overlap so they crisp up nicely.
4. Roast in the preheated oven for 20 minutes, flipping halfway through, until the edges are golden and the centers are tender when pierced with a fork.
5. Remove the baking sheet from the oven and sprinkle the shredded cheddar cheese evenly over the hot sweet potato rounds.
6. Scatter the black beans and corn kernels over the cheese layer.
7. Return the baking sheet to the oven and bake for an additional 5 minutes, just until the cheese is fully melted and bubbly. Tip: Watch closely to prevent burning—cheese can go from golden to overdone in seconds.
8. Carefully remove the baking sheet from the oven and let it cool for 2 minutes to set slightly.
9. Top the nachos with diced red onion, cilantro leaves, avocado slices, jalapeño slices, and dollops of sour cream. Tip: Add the avocado and sour cream last to keep them fresh and cool against the warm base.
10. Serve immediately while everything is warm and melty.
Yum—dig into a plate where the sweet potatoes offer a caramelized, slightly crisp edge that contrasts with the gooey cheese and creamy toppings. For a fun twist, set up a nacho bar with extra fixings like pickled jalapeños or crumbled cotija cheese, and let everyone build their own masterpiece straight from the pan.
Summary
Zesty, quick, and packed with flavor, these 18 lunch recipes are your secret weapon for busy days. I hope you find some new favorites to make your midday meals a breeze! Give them a try, then drop a comment below telling me which one you loved most. If you enjoyed this roundup, I’d be so grateful if you’d share it on Pinterest to help other busy cooks.


