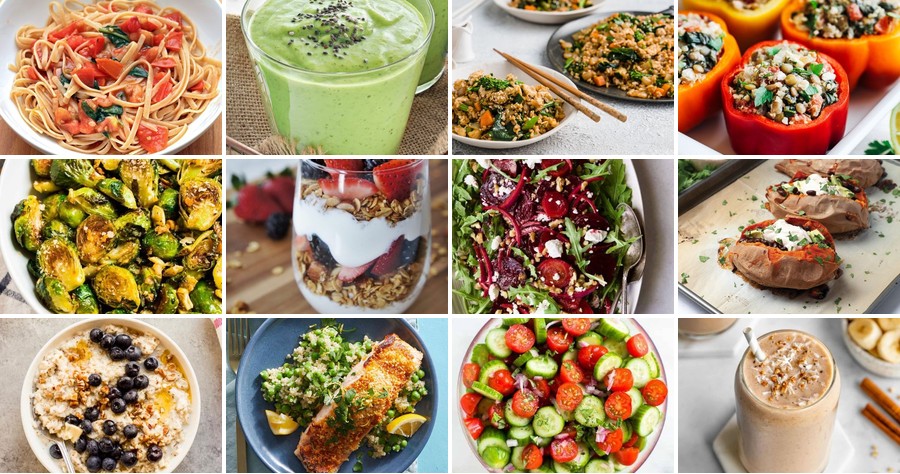
Busy schedules and health goals don’t have to be at odds! We’ve gathered 20 delicious, heart-healthy recipes that make lowering blood pressure feel like a treat, not a chore. From quick weeknight dinners to comforting favorites, these dishes prove that eating well can be simple and satisfying. Let’s dive into flavors that love you back—your kitchen (and heart) will thank you!
Garlic and Herb Roasted Salmon with Quinoa
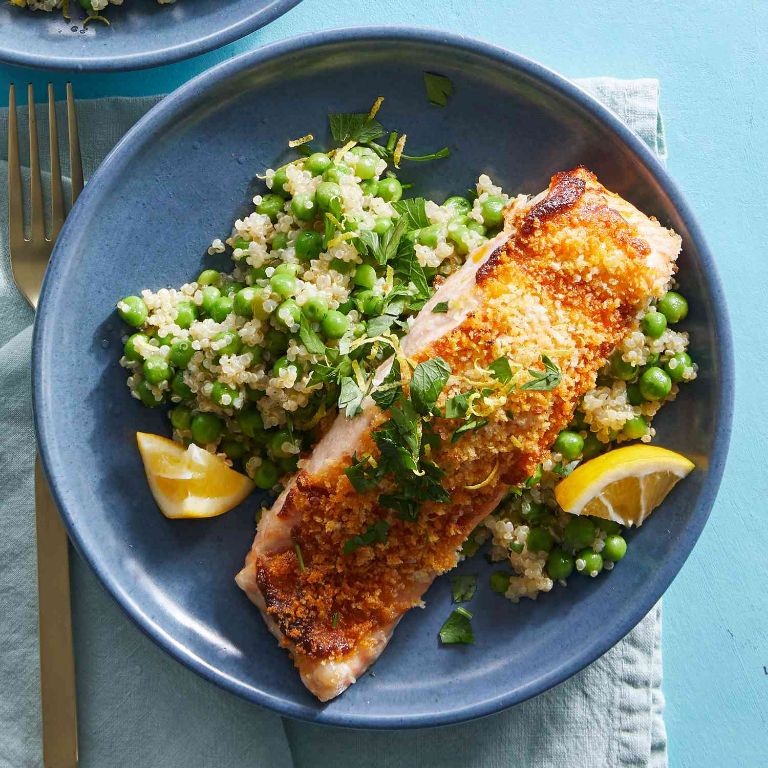
Sometimes, the simplest meals feel like the most profound—a quiet kitchen, the warm scent of garlic and herbs filling the air, and the promise of something nourishing and complete. This roasted salmon with quinoa is that kind of dish, a gentle process that yields a meal both elegant and comforting.
Serving: 4 | Pre Time: 15 minutes | Cooking Time: 25 minutes
Ingredients
– 4 (6-ounce) salmon fillets, skin-on or skinless
– 1 cup uncooked quinoa, rinsed well in a fine-mesh strainer
– 2 cups water or low-sodium vegetable broth for cooking quinoa
– 3 tablespoons olive oil, divided
– 4 cloves garlic, minced
– 2 tablespoons fresh lemon juice (from about 1/2 a lemon)
– 1 tablespoon chopped fresh parsley
– 1 tablespoon chopped fresh dill, or 1 teaspoon dried dill
– 1/2 teaspoon kosher salt, plus more for seasoning
– 1/4 teaspoon freshly ground black pepper
– Lemon wedges, for serving (optional)
Instructions
1. Preheat your oven to 400°F (200°C) and line a rimmed baking sheet with parchment paper.
2. In a medium saucepan, combine the rinsed quinoa and 2 cups of water or broth. Bring to a boil over high heat.
3. Once boiling, reduce the heat to low, cover the saucepan, and simmer the quinoa for 15 minutes, or until all the liquid is absorbed and the grains are tender. Tip: Let the cooked quinoa sit, covered and off the heat, for 5 minutes after cooking to fluff perfectly.
4. While the quinoa cooks, pat the salmon fillets completely dry with paper towels and place them on the prepared baking sheet.
5. In a small bowl, whisk together 2 tablespoons of the olive oil, the minced garlic, lemon juice, chopped parsley, chopped dill, 1/2 teaspoon kosher salt, and 1/4 teaspoon black pepper to create the herb paste.
6. Spoon and spread the herb paste evenly over the top of each salmon fillet, coating them thoroughly.
7. Drizzle the remaining 1 tablespoon of olive oil over the coated fillets.
8. Roast the salmon in the preheated oven for 12-15 minutes, until the fish flakes easily with a fork and the internal temperature reaches 145°F (63°C). Tip: For crispier edges, place the baking sheet on the top oven rack for the last 2-3 minutes of cooking.
9. Fluff the rested quinoa with a fork and divide it among four plates.
10. Carefully place a roasted salmon fillet atop each portion of quinoa. Tip: If using skin-on fillets, the skin should release easily from the parchment after roasting.
11. Serve immediately with lemon wedges on the side, if desired.
Knowing the salmon will be moist and flaky, infused with the bright, aromatic herbs, makes the wait worthwhile. The quinoa provides a delicate, nutty base that soaks up any lemony juices from the plate. For a lovely presentation, scatter a few extra fresh herb leaves over everything just before serving.
Avocado and Spinach Smoothie with Chia Seeds
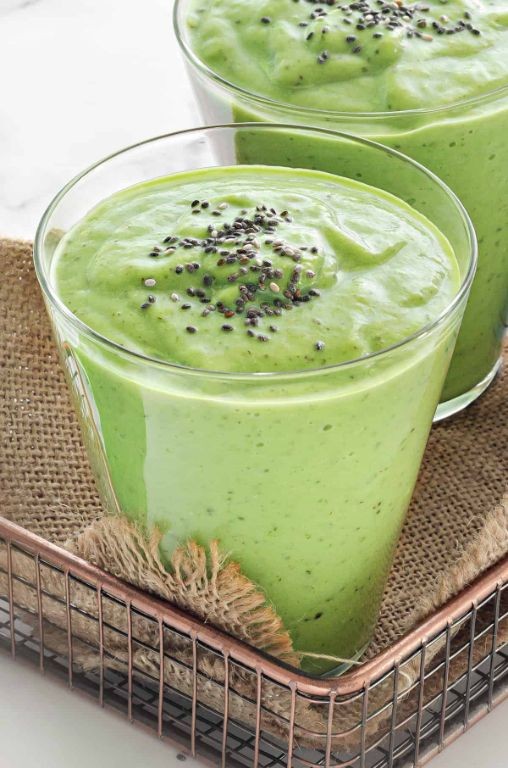
Now, as the afternoon light slants through the kitchen window, I find myself reaching for the quiet comfort of blending. It’s a simple ritual, this gathering of greens and good fats, a gentle pause to nourish from the inside out.
Serving: 2 | Pre Time: 5 minutes | Cooking Time: 0 minutes
Ingredients
– 1 ripe avocado, pitted and scooped (look for slight give when gently pressed)
– 2 cups fresh baby spinach, lightly packed
– 1 cup unsweetened almond milk, chilled (or any plant-based milk you prefer)
– 1 tablespoon chia seeds
– 1 tablespoon pure maple syrup (adjust for sweetness preference)
– 1/2 teaspoon pure vanilla extract
– 1 cup ice cubes
Instructions
1. Add the scooped avocado and baby spinach to a high-speed blender.
2. Pour in the chilled almond milk to help the ingredients blend smoothly from the start.
3. Sprinkle the chia seeds directly into the blender.
4. Drizzle the maple syrup and vanilla extract over the other ingredients.
5. Place the ice cubes on top of the mixture in the blender.
6. Secure the blender lid tightly.
7. Begin blending on low speed for 10 seconds to break down the larger pieces.
8. Increase the speed to high and blend for 45-60 seconds, or until the mixture is completely smooth with no visible spinach flecks. Tip: If the blender struggles, pause and use a spatula to push ingredients toward the blade, then resume.
9. Stop the blender and check the consistency by dipping a spoon into the mixture; it should be thick and creamy. Tip: For a thinner smoothie, add an extra 1/4 cup of almond milk and blend for 10 more seconds.
10. Pour the smoothie evenly into two glasses. Tip: For a layered effect, let the smoothie sit for 2 minutes after blending so the chia seeds can swell slightly, creating a pleasant texture.
Kindly thick and velvety, this smoothie coats the spoon with a rich, creamy texture that’s subtly sweet from the maple and fragrant with vanilla. The chia seeds offer tiny, gelatinous bursts throughout, making each sip interesting. Serve it immediately in a tall glass, perhaps with a sprinkle of extra chia seeds on top or alongside a handful of almonds for a more substantial snack.
Beet and Walnut Salad with Balsamic Dressing
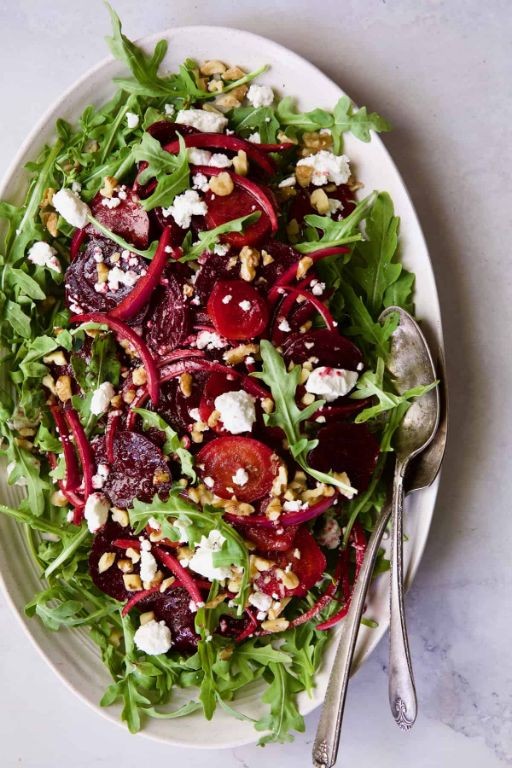
A quiet afternoon like this, with winter light filtering through the kitchen window, calls for something grounding and vibrant—a salad that feels like a gentle pause. This combination of earthy beets and toasty walnuts, brought together with a simple, tangy dressing, is just that kind of quiet, nourishing moment. It’s a dish that feels both rustic and elegant, perfect for a solitary lunch or a simple, shared starter.
Serving: 4 | Pre Time: 15 minutes | Cooking Time: 45 minutes
Ingredients
– 4 medium beets (about 1.5 lbs total), scrubbed
– 1 cup walnut halves
– 6 cups mixed baby greens
– 1/4 cup crumbled goat cheese, or feta for a saltier note
– 1/4 cup extra virgin olive oil, or any neutral oil
– 3 tbsp balsamic vinegar
– 1 tsp Dijon mustard
– 1/2 tsp honey, adjust to taste
– 1/4 tsp salt
– 1/8 tsp black pepper
Instructions
1. Preheat your oven to 400°F (200°C).
2. Wrap each scrubbed beet individually in aluminum foil, creating a tight packet to trap steam for even cooking.
3. Place the foil-wrapped beets directly on the oven rack and roast for 45 minutes, or until a fork pierces the center easily.
4. Remove the beets from the oven and let them cool in their foil packets for 15 minutes—this makes the skins slip off effortlessly.
5. While the beets cool, spread the walnut halves in a single layer on a baking sheet.
6. Toast the walnuts in the still-warm oven (turned off) for 5-7 minutes, watching closely to prevent burning, until fragrant and lightly golden.
7. Once the beets are cool enough to handle, unwrap them and use your fingers or a paper towel to rub off the skins under cool running water.
8. Dice the peeled beets into 1/2-inch cubes and place them in a large mixing bowl.
9. In a small bowl, whisk together the olive oil, balsamic vinegar, Dijon mustard, honey, salt, and black pepper until fully emulsified.
10. Pour half of the dressing over the diced beets and toss gently to coat, which allows the beets to absorb the flavors while you assemble the rest.
11. Arrange the mixed baby greens on a serving platter or individual plates.
12. Spoon the dressed beets over the greens.
13. Scatter the toasted walnuts and crumbled goat cheese evenly over the top.
14. Drizzle the remaining dressing over the assembled salad just before serving.
Rustic and satisfying, this salad offers a delightful contrast: the tender, sweet earthiness of the beets against the crisp, bitter greens and the rich crunch of walnuts. For a creative twist, try serving it alongside grilled chicken or spooned over a bed of warm quinoa to make it a heartier meal, letting the balsamic dressing seep into every component.
Lentil and Vegetable Soup with Turmeric

Perhaps it’s the quiet chill of a December afternoon that makes me crave something both grounding and gentle. This lentil and vegetable soup, brightened with turmeric, feels like a warm embrace for the soul, a simple pot of comfort that simmers patiently on the stove.
Serving: 4 | Pre Time: 15 minutes | Cooking Time: 45 minutes
Ingredients
– 2 tbsp olive oil (or any neutral oil)
– 1 medium yellow onion, diced
– 2 medium carrots, peeled and diced
– 2 celery stalks, diced
– 3 cloves garlic, minced
– 1 tsp ground turmeric
– 1 cup brown lentils, rinsed and drained
– 6 cups vegetable broth
– 1 (14.5 oz) can diced tomatoes, undrained
– 1 tsp salt (adjust to taste)
– 1/2 tsp black pepper
– 2 cups fresh spinach, roughly chopped
– 1 tbsp lemon juice
Instructions
1. Heat the olive oil in a large pot over medium heat until it shimmers, about 1 minute.
2. Add the diced onion, carrots, and celery to the pot and cook, stirring occasionally, until the onions are translucent and the vegetables begin to soften, about 8 minutes.
3. Stir in the minced garlic and ground turmeric, cooking for 1 minute until fragrant to bloom the turmeric’s flavor.
4. Add the rinsed brown lentils, vegetable broth, and the entire can of diced tomatoes with their juices to the pot.
5. Season with salt and black pepper, then bring the mixture to a boil over high heat.
6. Once boiling, immediately reduce the heat to low, cover the pot, and let it simmer gently for 35 minutes until the lentils are tender but not mushy.
7. Stir in the roughly chopped fresh spinach and lemon juice, cooking just until the spinach wilts, about 2 minutes.
8. Remove the pot from the heat and let the soup sit, covered, for 5 minutes to allow the flavors to meld.
Now, the soup settles into a hearty, brothy texture with lentils that hold their shape. Its earthy depth from the turmeric and vegetables is brightened by the fresh lemon finish. Consider serving it with a dollop of plain yogurt or a side of crusty bread for dipping into the golden broth.
Baked Sweet Potato with Black Beans and Greek Yogurt

Fumbling through the pantry on a quiet afternoon, I found myself craving something warm and grounding—a simple meal that felt like a gentle embrace. This baked sweet potato, piled high with black beans and a dollop of Greek yogurt, is exactly that: a humble, nourishing dish that comes together with minimal fuss, perfect for a solo lunch or a cozy weeknight dinner.
Serving: 2 | Pre Time: 10 minutes | Cooking Time: 45 minutes
Ingredients
– 2 medium sweet potatoes (about 1 lb total), scrubbed clean
– 1 tablespoon olive oil (or any neutral oil)
– 1/2 teaspoon kosher salt, divided
– 1 (15-ounce) can black beans, rinsed and drained
– 1/2 teaspoon ground cumin
– 1/4 teaspoon smoked paprika
– 1/2 cup plain Greek yogurt (full-fat for creaminess)
– 2 tablespoons fresh cilantro, chopped (optional, for garnish)
– 1 tablespoon lime juice, freshly squeezed (adjust to taste)
Instructions
1. Preheat your oven to 400°F (200°C) and line a baking sheet with parchment paper for easy cleanup.
2. Pierce each sweet potato several times with a fork to allow steam to escape during baking, preventing bursting.
3. Rub the sweet potatoes all over with olive oil and sprinkle with 1/4 teaspoon of kosher salt.
4. Place the sweet potatoes on the prepared baking sheet and bake for 45 minutes, or until tender when pierced with a fork—the skin will be slightly wrinkled.
5. While the sweet potatoes bake, combine the black beans, cumin, smoked paprika, and remaining 1/4 teaspoon of kosher salt in a small saucepan over medium heat.
6. Cook the bean mixture for 5–7 minutes, stirring occasionally, until warmed through and fragrant; this toasts the spices lightly, enhancing their flavor.
7. Remove the sweet potatoes from the oven and let them cool for 5 minutes to handle safely, then split each one open lengthwise with a knife.
8. Fluff the insides of the sweet potatoes gently with a fork to create a soft, textured base for the toppings.
9. Divide the warm black bean mixture evenly between the sweet potatoes, spooning it over the fluffed flesh.
10. Top each sweet potato with a generous dollop of Greek yogurt, drizzling it over the beans for a creamy contrast.
11. Finish by sprinkling with chopped cilantro, if using, and a squeeze of fresh lime juice to brighten the dish.
Warm from the oven, the sweet potato yields a soft, almost caramelized interior that pairs beautifully with the hearty, spiced beans. The cool tang of the yogurt cuts through the richness, while a hint of lime adds a refreshing zing—try serving it with a side of avocado slices or a simple green salad for a complete, satisfying meal.
Oatmeal with Blueberries and Flaxseeds

Waking up to the quiet of a winter morning, I find myself craving something warm and nourishing—a simple bowl that feels like a gentle embrace. This oatmeal with blueberries and flaxseeds is my go-to, a humble ritual that starts the day with comfort and a touch of sweetness, as if each spoonful holds a quiet promise of coziness.
Serving: 1 | Pre Time: 5 minutes | Cooking Time: 10 minutes
Ingredients
– 1/2 cup old-fashioned rolled oats (for a creamier texture, use quick oats)
– 1 cup water or milk (dairy or plant-based, adjust for desired consistency)
– 1/4 cup fresh or frozen blueberries (frozen berries add a burst of juice when cooked)
– 1 tablespoon ground flaxseeds (store in the fridge to keep fresh)
– 1 teaspoon maple syrup or honey (optional, for a hint of sweetness)
– Pinch of salt (enhances the flavors subtly)
Instructions
1. In a small saucepan, combine 1/2 cup old-fashioned rolled oats, 1 cup water or milk, and a pinch of salt over medium heat.
2. Bring the mixture to a gentle simmer, stirring occasionally to prevent sticking, for about 5 minutes until the oats start to soften and thicken.
3. Tip: If using frozen blueberries, add them now to release their juices and infuse the oatmeal with a vibrant purple hue.
4. Reduce the heat to low and stir in 1/4 cup fresh or frozen blueberries, cooking for an additional 3 minutes until the berries are warm and slightly softened.
5. Tip: For extra creaminess, stir continuously during the last minute to break down some oats into a smoother texture.
6. Remove the saucepan from the heat and mix in 1 tablespoon ground flaxseeds and 1 teaspoon maple syrup or honey if using, ensuring everything is well incorporated.
7. Tip: Let the oatmeal sit for 2 minutes off the heat to allow the flaxseeds to absorb liquid and thicken the mixture slightly.
8. Transfer the oatmeal to a serving bowl, gently pressing down with the back of a spoon to create an even layer.
As you take the first bite, the creamy oats meld with the tart burst of blueberries, while the flaxseeds add a subtle nuttiness and a pleasing texture. Serve it warm with a drizzle of extra maple syrup or a sprinkle of cinnamon for a cozy twist, perfect for savoring slowly by a window as the morning light filters in.
Grilled Chicken with Steamed Broccoli and Lemon

Years of chasing complex flavors sometimes lead me back to this quiet, nourishing plate—a simple grilled chicken with steamed broccoli and lemon that feels like a gentle exhale after a long day. It’s a meal that doesn’t demand much, just a little attention and the warmth of the kitchen.
Serving: 2 | Pre Time: 15 minutes | Cooking Time: 20 minutes
Ingredients
– 2 boneless, skinless chicken breasts (about 6 oz each, patted dry with paper towels)
– 2 cups broccoli florets (from about 1 medium head)
– 1 lemon (half juiced, half sliced into thin rounds)
– 2 tablespoons olive oil (or any neutral oil)
– 2 cloves garlic, minced
– 1 teaspoon dried oregano
– ½ teaspoon kosher salt (adjust to taste)
– ¼ teaspoon black pepper
– ¼ cup water
Instructions
1. In a small bowl, whisk together 1 tablespoon olive oil, lemon juice, minced garlic, dried oregano, kosher salt, and black pepper to create a marinade.
2. Place the chicken breasts in a shallow dish and pour the marinade over them, turning to coat evenly. Let them rest at room temperature for 10 minutes—this brief marination helps infuse flavor without making the chicken tough.
3. While the chicken marinates, rinse the broccoli florets under cold water and set them aside in a steamer basket or colander.
4. Heat a grill pan or skillet over medium-high heat (about 400°F) and lightly grease it with the remaining 1 tablespoon olive oil.
5. Remove the chicken from the marinade, letting any excess drip off, and place it on the hot pan. Grill for 6-7 minutes on the first side until you see clear grill marks and the edges turn opaque.
6. Flip the chicken and add the lemon slices to the pan around it. Cook for another 6-7 minutes, or until the internal temperature reaches 165°F when checked with a meat thermometer—this ensures it’s safely cooked yet still juicy.
7. Transfer the chicken and lemon slices to a plate, tent loosely with foil, and let them rest for 5 minutes to allow the juices to redistribute.
8. In the same pan, reduce the heat to medium, add the broccoli florets and ¼ cup water, and cover immediately to steam for 4-5 minutes until the broccoli is bright green and tender-crisp when pierced with a fork.
9. Uncover the pan and let any remaining water evaporate for about 1 minute, stirring the broccoli gently to pick up any flavorful bits from the pan.
10. Slice the rested chicken against the grain into ½-inch thick pieces.
Perhaps the best part is how the tender, lightly charred chicken yields to a knife, its herbs mingling with the bright steam from the broccoli. Serve it all warm, with the softened lemon slices squeezed over for a zesty finish that cuts through the richness—it’s a humble dish that feels both comforting and alive on the plate.
Kale and Apple Salad with Pumpkin Seeds
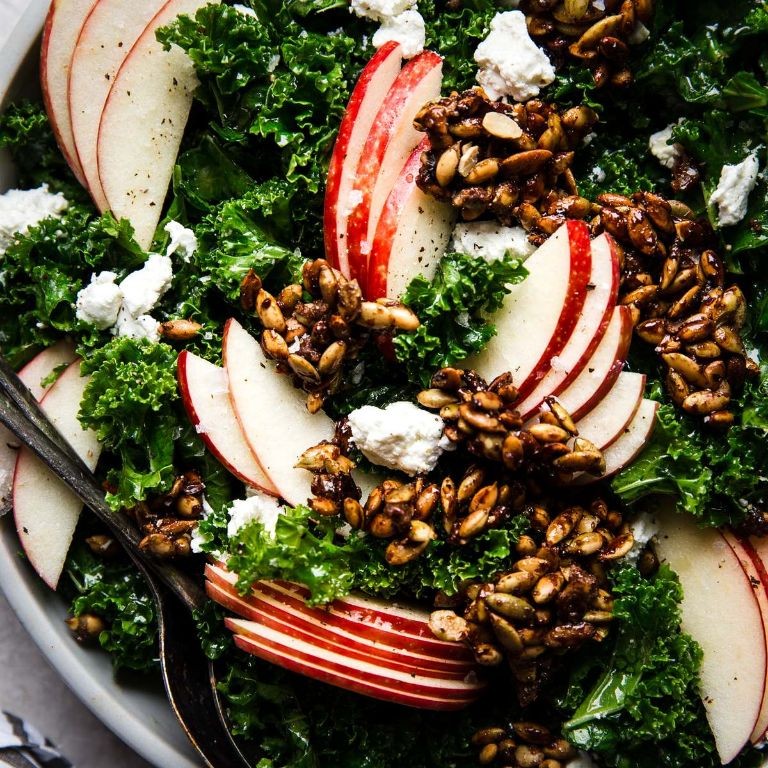
Gently, as the afternoon light softens across the kitchen counter, I find myself reaching for the crisp, earthy greens and a tart, sweet apple—a quiet craving for something both nourishing and bright. This simple assembly feels like a small, deliberate pause, a way to gather the season’s gifts into one refreshing bowl.
Serving: 4 | Pre Time: 15 minutes | Cooking Time: 0 minutes
Ingredients
– 1 large bunch curly kale, stems removed and leaves torn into bite-sized pieces (about 8 cups packed)
– 1 large crisp apple (like Honeycrisp or Fuji), cored and thinly sliced
– 1/4 cup raw pumpkin seeds (pepitas)
– 3 tablespoons extra-virgin olive oil, or any neutral oil
– 2 tablespoons apple cider vinegar
– 1 tablespoon pure maple syrup
– 1/4 teaspoon fine sea salt
– 1/8 teaspoon freshly ground black pepper
Instructions
1. Place the torn kale leaves in a large mixing bowl. Drizzle with 1 tablespoon of the olive oil and sprinkle with the sea salt.
2. Using your clean hands, massage the kale firmly for about 2 full minutes, until the leaves darken in color, soften, and reduce slightly in volume.
3. In a small bowl or jar, combine the remaining 2 tablespoons of olive oil, apple cider vinegar, maple syrup, and black pepper. Whisk or shake vigorously for 30 seconds until the dressing is fully emulsified.
4. Pour the dressing over the massaged kale in the large bowl. Use tongs or your hands to toss thoroughly, ensuring every leaf is lightly coated.
5. Add the thinly sliced apple and raw pumpkin seeds to the bowl with the dressed kale.
6. Gently fold all ingredients together until the apple and seeds are evenly distributed throughout the salad.
7. Divide the salad evenly among four plates or bowls for serving.
Now, the salad rests ready—a tapestry of textures where the velvety, massaged kale cradles the snap of apple and the gentle crunch of seeds. The maple-vinegar dressing clings softly, balancing the earthy greens with a sweet-tart brightness that makes it feel like a complete, light meal on its own, especially when enjoyed immediately while the apples are still crisp.
Tomato and Cucumber Salad with Olive Oil and Basil
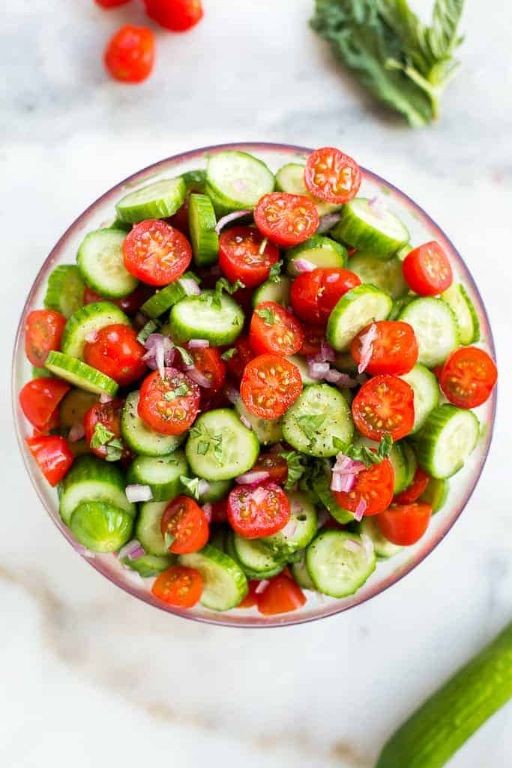
Gently, as the afternoon light softens on this December day, I find myself drawn to the quiet simplicity of a salad that tastes like summer’s gentle whisper. It’s a humble assembly of garden-fresh ingredients, a moment of calm reflection in a bowl. This tomato and cucumber salad, dressed only in olive oil and basil, feels like a pause, a breath of warmth remembered.
Serving: 4 | Pre Time: 15 minutes | Cooking Time: 0 minutes
Ingredients
– 4 medium ripe tomatoes (about 1.5 lbs), cored and cut into 1-inch chunks
– 2 medium cucumbers (about 1 lb), peeled and sliced into 1/4-inch thick rounds
– 1/4 cup extra virgin olive oil, or a good-quality fruity variety for best flavor
– 1/4 cup fresh basil leaves, loosely packed, plus a few extra for garnish
– 1 tsp kosher salt, adjust based on tomato sweetness
– 1/2 tsp freshly ground black pepper, for a subtle warmth
Instructions
1. Place the tomato chunks and cucumber rounds in a large mixing bowl.
2. Sprinkle the kosher salt and black pepper evenly over the vegetables.
3. Gently toss the vegetables with your hands or a spoon for about 30 seconds to coat them lightly with the seasonings.
4. Stack the basil leaves, roll them tightly into a cigar shape, and thinly slice crosswise to create ribbons (chiffonade).
5. Add the basil ribbons to the bowl with the vegetables.
6. Pour the extra virgin olive oil over the salad ingredients.
7. Toss everything together gently but thoroughly for 1-2 minutes until the oil coats every piece and the basil is evenly distributed.
8. Let the salad sit at room temperature for 10 minutes to allow the flavors to meld and the salt to draw out the tomatoes’ juices.
9. Transfer the salad to a serving platter or individual bowls, drizzling any remaining dressing from the bowl over the top.
10. Garnish with the reserved whole basil leaves for a fresh, aromatic finish.
During this brief rest, the tomatoes soften just enough to release their sweet juices, mingling with the olive oil to create a light, shimmering dressing that clings to the crisp cucumbers. The basil infuses every bite with a fragrant, herbal note, making it perfect for a quiet lunch or as a bright side to grilled dishes on a warm evening.
Brown Rice with Stir-Fried Vegetables and Ginger
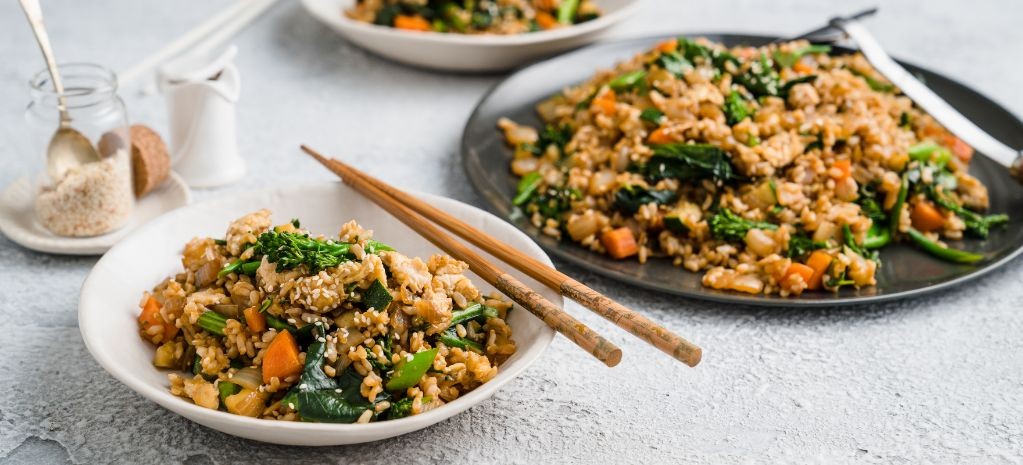
Beneath the soft hum of the kitchen light, there’s a quiet comfort in the simplicity of a meal that feels both nourishing and grounding. This brown rice with stir-fried vegetables and ginger is just that—a gentle, wholesome dish where each ingredient has its moment to shine, coming together in a warm, satisfying embrace.
Serving: 4 | Pre Time: 15 minutes | Cooking Time: 40 minutes
Ingredients
– 1 cup brown rice, rinsed under cold water until it runs clear
– 2 cups water
– 2 tbsp vegetable oil (or any neutral oil)
– 1 tbsp fresh ginger, finely minced
– 2 cloves garlic, minced
– 1 medium onion, thinly sliced
– 1 large carrot, julienned into thin matchsticks
– 1 red bell pepper, thinly sliced
– 2 cups broccoli florets, cut into bite-sized pieces
– 3 tbsp soy sauce (use low-sodium if preferred)
– 1 tsp sesame oil
– 2 green onions, thinly sliced for garnish
Instructions
1. In a medium saucepan, combine the rinsed brown rice and 2 cups of water. Bring to a boil over high heat, then reduce the heat to low, cover, and simmer for 35 minutes until the water is fully absorbed and the rice is tender. Remove from heat and let it sit, covered, for 5 minutes to steam.
2. While the rice cooks, heat 1 tablespoon of vegetable oil in a large skillet or wok over medium-high heat until it shimmers, about 1 minute.
3. Add the minced ginger and garlic to the hot oil and stir-fry for 30 seconds until fragrant, being careful not to let them burn.
4. Add the sliced onion to the skillet and stir-fry for 3 minutes until it begins to soften and turn translucent.
5. Add the julienned carrot and stir-fry for 2 minutes to slightly tenderize it.
6. Add the sliced red bell pepper and broccoli florets to the skillet and stir-fry for 4 minutes until the vegetables are crisp-tender and bright in color.
7. Pour in the soy sauce and sesame oil, stirring to coat all the vegetables evenly, and cook for 1 more minute to let the flavors meld.
8. Fluff the cooked brown rice with a fork and add it to the skillet with the vegetables, gently folding everything together until well combined and heated through, about 2 minutes.
9. Transfer the mixture to serving bowls and garnish with the sliced green onions.
Kindly, the finished dish offers a delightful contrast of textures—the chewy, nutty brown rice cradles the crisp-tender vegetables, while the ginger and garlic lend a warm, aromatic depth. For a creative twist, top it with a soft-boiled egg or a sprinkle of toasted sesame seeds to add richness and crunch, making each bite a quiet celebration of simple, wholesome flavors.
Baked Cod with Garlic and Lemon Zest

Remembering how the kitchen window frames the afternoon light, I find myself drawn to simple, honest meals that feel like a quiet conversation with the ingredients. This baked cod, with its bright notes of lemon and the warm hum of garlic, is one of those gentle, nourishing dishes that seems to slow the day down just a little.
Serving: 4 | Pre Time: 15 minutes | Cooking Time: 15 minutes
Ingredients
– 4 (6-ounce) cod fillets, patted dry with paper towels
– 3 tablespoons olive oil, or any neutral oil
– 4 cloves garlic, minced
– Zest of 1 large lemon
– 2 tablespoons fresh lemon juice
– 1 teaspoon kosher salt
– ½ teaspoon freshly ground black pepper
– 1 tablespoon chopped fresh parsley, for garnish
Instructions
1. Preheat your oven to 400°F (200°C) and lightly coat a 9×13-inch baking dish with 1 tablespoon of the olive oil.
2. Place the patted-dry cod fillets in the prepared baking dish in a single layer, ensuring they do not touch.
3. In a small bowl, combine the remaining 2 tablespoons of olive oil, minced garlic, lemon zest, lemon juice, kosher salt, and black pepper.
4. Spoon the garlic-lemon mixture evenly over the top of each cod fillet, coating them completely.
5. Bake the cod in the preheated oven for 12 to 15 minutes, until the fish flakes easily with a fork and reaches an internal temperature of 145°F. A tip: the fish is done when it turns opaque and separates into large, moist flakes.
6. Remove the baking dish from the oven and let the cod rest for 3 minutes; this allows the juices to redistribute for a more tender texture.
7. Garnish the baked cod with the chopped fresh parsley just before serving.
Usually, the flesh is so tender it nearly melts, with the lemon zest cutting through the richness in the most delightful way. For a creative twist, serve it over a bed of wilted spinach or with roasted cherry tomatoes that burst with sweetness against the savory garlic.
Chickpea and Spinach Curry with Coconut Milk

Gently, as the afternoon light fades on this quiet December day, I find myself drawn to the kitchen, to the simple, grounding ritual of preparing a meal that feels like a warm embrace. This chickpea and spinach curry, simmered with rich coconut milk, is a dish that unfolds slowly, offering comfort in its creamy depths and the earthy promise of nourishment. It’s a quiet celebration of humble ingredients, perfect for a reflective evening at home.
Serving: 4 | Pre Time: 15 minutes | Cooking Time: 25 minutes
Ingredients
– 2 tablespoons coconut oil (or any neutral oil)
– 1 medium yellow onion, finely diced
– 3 cloves garlic, minced
– 1 tablespoon freshly grated ginger
– 1 tablespoon curry powder
– 1 (15-ounce) can chickpeas, drained and rinsed
– 1 (14-ounce) can full-fat coconut milk
– 5 ounces fresh spinach leaves (about 5 loosely packed cups)
– 1 teaspoon salt
– 1/2 teaspoon ground black pepper
– Cooked basmati rice, for serving (optional)
Instructions
1. Heat the coconut oil in a large, heavy-bottomed pot or Dutch oven over medium heat until it shimmers, about 2 minutes.
2. Add the diced onion and cook, stirring occasionally, until it becomes soft and translucent, about 5-7 minutes.
3. Stir in the minced garlic and grated ginger, cooking for just 1 minute until fragrant to prevent burning.
4. Sprinkle the curry powder over the onion mixture and stir constantly for 30 seconds to toast the spices and deepen their flavor.
5. Add the drained chickpeas to the pot and stir to coat them evenly with the spiced onion mixture.
6. Pour in the full-fat coconut milk and stir gently to combine all ingredients.
7. Bring the mixture to a gentle simmer, then reduce the heat to low.
8. Cover the pot and let the curry simmer for 15 minutes, allowing the flavors to meld and the chickpeas to become tender.
9. Uncover the pot and stir in the fresh spinach leaves in two batches, letting the first batch wilt slightly before adding the second.
10. Continue cooking uncovered for 3-4 minutes, stirring occasionally, until all the spinach has fully wilted and is incorporated into the curry.
11. Season the curry with salt and black pepper, stirring to distribute evenly.
12. Remove the pot from the heat.
Here, the curry rests, its texture a beautiful contrast of creamy coconut broth, tender chickpeas, and silky spinach. The flavor is warmly spiced yet gentle, with a subtle sweetness from the coconut milk. For a complete meal, spoon it over a bed of fluffy basmati rice, or enjoy it simply with a piece of warm naan to soak up every last bit of the fragrant sauce.
Banana and Almond Butter Smoothie with Cinnamon

Wandering through the kitchen this morning, I found myself craving something simple yet deeply comforting—a smoothie that feels like a warm embrace in a glass. It’s the kind of quiet moment where a few humble ingredients come together to create something nourishing and sweet, perfect for a slow start or a gentle pause in the day.
Serving: 1 | Pre Time: 5 minutes | Cooking Time: 0 minutes
Ingredients
– 1 ripe banana, peeled and sliced (use a frozen banana for a thicker texture)
– 2 tablespoons almond butter (creamy or crunchy, depending on your preference)
– 1/2 teaspoon ground cinnamon (adjust for a stronger or milder spice note)
– 1 cup unsweetened almond milk (or any plant-based milk you have on hand)
– 1/2 cup ice cubes (omit if using a frozen banana)
Instructions
1. Place the sliced banana into a high-speed blender.
2. Add the almond butter directly on top of the banana to help it blend smoothly.
3. Sprinkle the ground cinnamon evenly over the ingredients in the blender.
4. Pour the unsweetened almond milk into the blender, ensuring it covers the solid ingredients.
5. Add the ice cubes to the blender if you are using a fresh banana; skip this step if using a frozen banana.
6. Secure the blender lid tightly and blend on high speed for 45 to 60 seconds, or until the mixture is completely smooth and no ice chunks remain.
7. Pause blending after 30 seconds to scrape down the sides of the blender with a spatula, ensuring all ingredients are incorporated evenly.
8. Pour the smoothie immediately into a tall glass, using a spoon to guide it if needed to prevent spills.
9. Serve right away for the best texture and flavor.
Frothy and velvety, this smoothie swirls with the earthy richness of almond butter and the warm whisper of cinnamon. For a creative twist, drizzle a little extra almond butter on top or sprinkle with a pinch of cinnamon before sipping slowly.
Roasted Brussels Sprouts with Garlic and Olive Oil
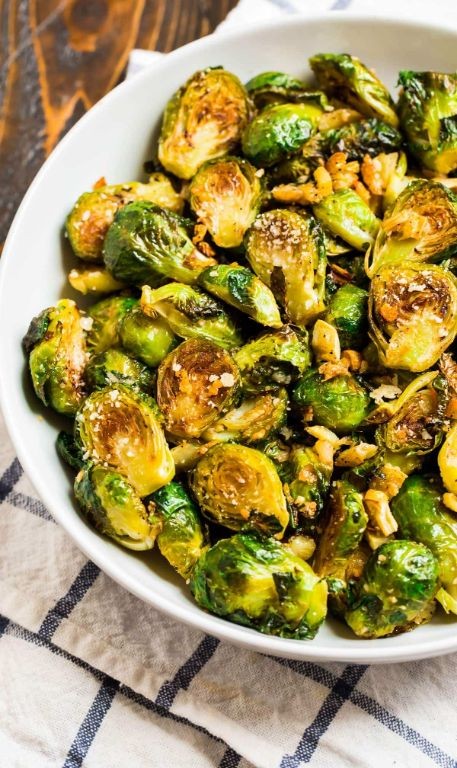
A quiet afternoon in the kitchen, with the oven humming softly, feels like the perfect moment to transform something humble into something truly special. These little green orbs, often overlooked, become caramelized and tender with just a few simple touches, filling the air with a nutty, comforting aroma that makes the whole process feel like a gentle ritual.
Serving: 4 | Pre Time: 10 minutes | Cooking Time: 25 minutes
Ingredients
– 1 ½ pounds Brussels sprouts, trimmed and halved
– 3 tablespoons extra virgin olive oil, or any good-quality oil you prefer
– 4 cloves garlic, minced
– ¾ teaspoon kosher salt
– ½ teaspoon freshly ground black pepper
– 1 tablespoon fresh lemon juice, for brightness at the end
Instructions
1. Preheat your oven to 400°F (200°C) and line a large, rimmed baking sheet with parchment paper for easy cleanup.
2. Place the halved Brussels sprouts in a large mixing bowl.
3. Drizzle the olive oil over the sprouts, using your hands or a spoon to toss until each piece is lightly and evenly coated.
4. Sprinkle the minced garlic, kosher salt, and black pepper over the oiled sprouts, tossing again to distribute the seasonings thoroughly. A tip: mincing the garlic finely helps it toast without burning in the oven.
5. Spread the seasoned Brussels sprouts in a single layer on the prepared baking sheet, ensuring they are not crowded so they roast instead of steam.
6. Roast in the preheated oven for 20-25 minutes, checking at the 15-minute mark. They are ready when the outer leaves are deeply browned and crispy, and a knife slides easily into the thickest part of a sprout.
7. Remove the baking sheet from the oven and immediately drizzle the fresh lemon juice over the hot sprouts, tossing gently to combine. The acid will brighten the rich, roasted flavors beautifully.
8. Transfer the roasted Brussels sprouts to a serving dish.
Nestled on the plate, they offer a wonderful contrast: crispy, almost chip-like leaves giving way to a soft, sweet interior. The garlic mellows into a gentle warmth, perfectly balanced by that final hint of lemon. Try serving them alongside a creamy pasta or topping them with shaved Parmesan for a simple, elegant twist.
Quinoa Stuffed Bell Peppers with Feta Cheese
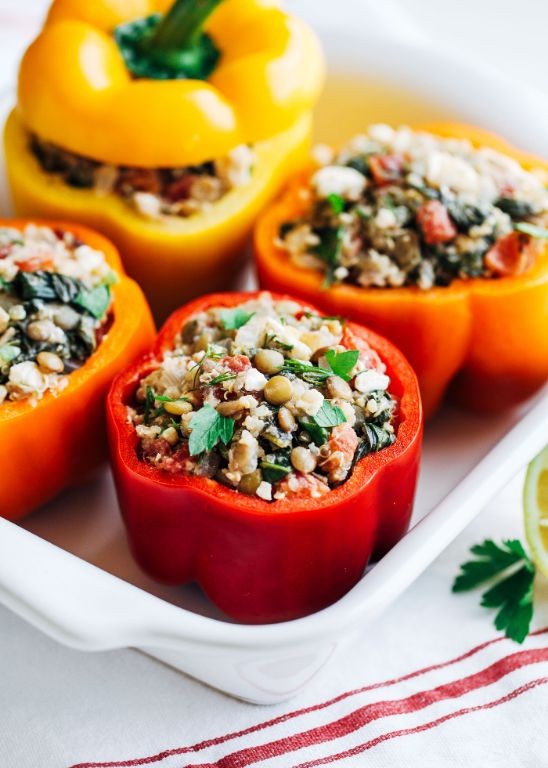
Dusk settles softly outside my kitchen window, and I find myself reaching for the familiar comfort of bell peppers and quinoa, a quiet ritual that feels like stitching warmth into the evening. There’s something grounding about the methodical prep, the way the kitchen fills with earthy scents, and the promise of a meal that’s both nourishing and deeply satisfying.
Serving: 4 | Pre Time: 15 minutes | Cooking Time: 40 minutes
Ingredients
– 4 large bell peppers, any color (choose firm ones with flat bottoms for stability)
– 1 cup quinoa, rinsed well under cold water to remove bitterness
– 2 cups vegetable broth or water
– 1 tablespoon olive oil (or any neutral oil)
– 1 small yellow onion, finely diced
– 2 cloves garlic, minced
– 1 cup crumbled feta cheese (about 4 ounces)
– 1 teaspoon dried oregano
– ½ teaspoon salt
– ¼ teaspoon black pepper
Instructions
1. Preheat your oven to 375°F (190°C) and lightly grease a baking dish just large enough to hold the peppers upright.
2. Slice the tops off the bell peppers, about ½ inch down, and remove all seeds and membranes from the insides; set the peppers aside in the prepared dish.
3. In a medium saucepan, combine the rinsed quinoa and vegetable broth, bring to a boil over high heat, then reduce to a simmer, cover, and cook for 15 minutes until the liquid is absorbed and quinoa is fluffy.
4. While the quinoa cooks, heat the olive oil in a skillet over medium heat, add the diced onion, and sauté for 5 minutes until translucent and soft.
5. Add the minced garlic to the skillet and cook for 1 minute more, just until fragrant, being careful not to let it burn.
6. Fluff the cooked quinoa with a fork and transfer it to a large mixing bowl.
7. Stir in the sautéed onion and garlic, crumbled feta cheese, dried oregano, salt, and black pepper until everything is evenly combined.
8. Spoon the quinoa mixture into the hollowed bell peppers, packing it gently but firmly to fill them to the top.
9. Place the stuffed peppers in the preheated oven and bake for 25 minutes, until the peppers are tender and the filling is heated through.
10. Remove from the oven and let the peppers rest for 5 minutes before serving to allow the flavors to meld.
Carefully lifting a pepper from the dish, you’ll notice the tender-crisp shell giving way to a fluffy, savory filling where the tangy feta melts into the nutty quinoa. Consider drizzling with a little extra olive oil or serving alongside a simple green salad for a bright contrast to the hearty warmth.
Grilled Turkey Burgers with Avocado Slices
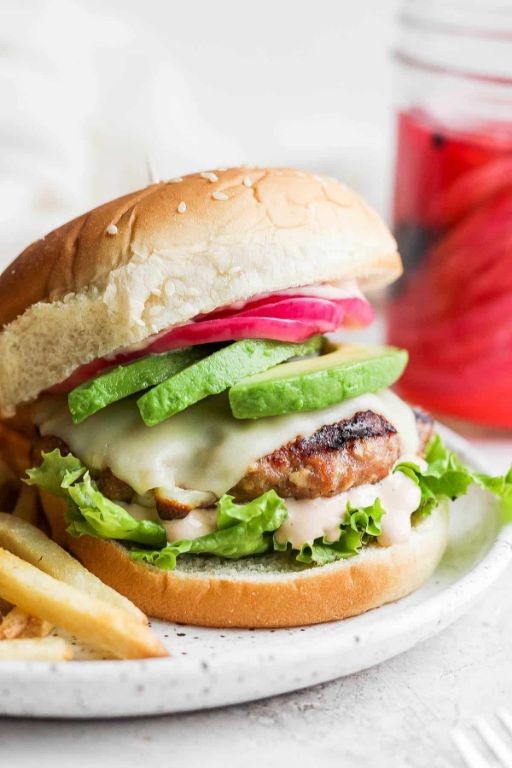
Kind of like a quiet afternoon, when the grill whispers and the kitchen feels still, these turkey burgers come together with a gentle simplicity that feels like a small, comforting ritual. They’re lighter than beef, yet still satisfying, with creamy avocado slices that melt softly into each bite, making the whole meal feel like a slow, deliberate pause in the day.
Serving: 4 | Pre Time: 15 minutes | Cooking Time: 12 minutes
Ingredients
– 1 lb ground turkey (preferably 93% lean for juiciness)
– 1/4 cup finely chopped yellow onion
– 1 large egg, lightly beaten
– 1/4 cup breadcrumbs (plain, or panko for extra crunch)
– 1 tbsp olive oil (or any neutral oil)
– 1 tsp garlic powder
– 1/2 tsp salt
– 1/4 tsp black pepper
– 4 burger buns (brioche or whole wheat)
– 1 ripe avocado, sliced just before serving
– 4 lettuce leaves (butter lettuce works well)
– 4 slices tomato
Instructions
1. In a large bowl, gently combine the ground turkey, chopped onion, beaten egg, breadcrumbs, garlic powder, salt, and black pepper with your hands until just mixed—overworking can make the burgers tough.
2. Divide the mixture into 4 equal portions and shape each into a 3/4-inch thick patty, pressing a slight indentation in the center with your thumb to prevent puffing during cooking.
3. Preheat a grill or grill pan to medium-high heat (about 400°F) and lightly brush the grates with olive oil to prevent sticking.
4. Place the patties on the grill and cook for 5–6 minutes, until the bottoms are firm and have clear grill marks.
5. Flip the patties carefully with a spatula and cook for another 5–6 minutes, until the internal temperature reaches 165°F on an instant-read thermometer for food safety.
6. While the burgers cook, lightly toast the burger buns on the grill for 1–2 minutes until warm and slightly crisp.
7. Remove the burgers from the grill and let them rest for 3 minutes on a plate to allow the juices to redistribute.
8. Assemble the burgers: place a lettuce leaf on the bottom half of each bun, add a turkey patty, top with a tomato slice and avocado slices, and cover with the top bun.
But the real joy is in that first bite—the turkey stays moist and tender, with a subtle savory note from the garlic, while the cool, creamy avocado slices blend seamlessly with the crisp lettuce and juicy tomato. Try serving them open-faced on a platter with a side of sweet potato fries or a simple green salad for a relaxed, shareable meal that feels both wholesome and indulgent.
Berry and Yogurt Parfait with Granola

Under the soft morning light, I find myself reaching for simple comforts—a quiet moment, a familiar bowl, and the gentle layers of a berry and yogurt parfait. It’s a dish that feels like a slow, deliberate breath, where each spoonful carries the sweetness of berries and the crunch of granola, a small ritual to start the day with intention.
Serving: 2 | Pre Time: 10 minutes | Cooking Time: 0 minutes
Ingredients
– 2 cups plain Greek yogurt (full-fat for creaminess, or low-fat if preferred)
– 1 cup mixed fresh berries, such as strawberries, blueberries, and raspberries (rinsed and patted dry)
– 1 cup granola (homemade or store-bought, adjust to desired crunch)
– 2 tablespoons honey (or maple syrup for a vegan option)
– 1 teaspoon vanilla extract (optional, for added warmth)
Instructions
1. Gather all ingredients: Greek yogurt, mixed berries, granola, honey, and vanilla extract if using.
2. Rinse the mixed berries under cool water for 30 seconds, then gently pat them dry with a paper towel to prevent sogginess.
3. Hull and slice any large strawberries into bite-sized pieces, about 1/4-inch thick, to ensure even layering.
4. In a small bowl, combine the Greek yogurt with the honey and vanilla extract, stirring for 1 minute until fully blended and smooth.
5. Select two serving glasses or bowls, each holding at least 12 ounces, to allow for visible layers.
6. Spoon 1/4 cup of the yogurt mixture into the bottom of each glass, spreading it evenly with the back of the spoon.
7. Add a layer of 1/4 cup mixed berries on top of the yogurt, arranging them gently to avoid crushing.
8. Sprinkle 1/4 cup granola over the berries, pressing lightly to create a firm base for the next layer.
9. Repeat the layering process: add another 1/4 cup yogurt, 1/4 cup berries, and 1/4 cup granola to each glass.
10. Finish with a final dollop of the remaining yogurt on top, about 2 tablespoons per glass.
11. Garnish with a few extra berries and a drizzle of honey, if desired, for visual appeal.
12. Serve immediately to maintain the granola’s crunch, or refrigerate for up to 30 minutes if preparing ahead.
Just as the layers settle, the parfait offers a delightful contrast—creamy yogurt melds with juicy berries, while the granola adds a satisfying crispness that holds up against the moisture. For a creative twist, try swapping in seasonal fruits like peaches or pomegranate seeds, or layer it in a mason jar for a portable breakfast that feels both nourishing and indulgent.
Steamed Asparagus with Lemon and Almonds

Under the soft glow of the kitchen light, there’s a quiet simplicity in preparing vegetables that feels almost meditative. This steamed asparagus, brightened with lemon and toasted almonds, is one of those gentle dishes that turns a few humble ingredients into something quietly special.
Serving: 4 | Pre Time: 10 minutes | Cooking Time: 8 minutes
Ingredients
– 1 bunch asparagus (about 1 lb), woody ends trimmed
– 2 tablespoons sliced almonds
– 1 tablespoon extra-virgin olive oil, or any neutral oil
– 1 lemon, zested and juiced (about 2 tbsp juice)
– ¼ teaspoon kosher salt, adjust to taste
– ⅛ teaspoon freshly ground black pepper
Instructions
1. Place a steamer basket in a large pot and add 1 inch of water, then bring the water to a boil over high heat.
2. Arrange the trimmed asparagus in a single layer in the steamer basket, cover the pot, and steam for 4–6 minutes until the spears are tender but still bright green and slightly crisp.
3. While the asparagus steams, toast the sliced almonds in a small dry skillet over medium heat for 2–3 minutes, stirring frequently, until they are fragrant and lightly golden.
4. Transfer the steamed asparagus to a serving platter and drizzle it evenly with the olive oil.
5. Sprinkle the toasted almonds, lemon zest, lemon juice, kosher salt, and black pepper over the asparagus.
6. Gently toss everything together using tongs to coat the spears evenly with the seasonings.
7. Let the dish rest for 1–2 minutes to allow the flavors to meld before serving.
Perhaps the best part is the contrast: the asparagus remains tender yet crisp, while the almonds add a delicate crunch. The lemon brightens each bite without overpowering, making it a lovely side for grilled fish or a simple pasta, or even enjoyed on its own as a light, refreshing lunch.
Whole Wheat Pasta with Fresh Tomato Sauce and Basil
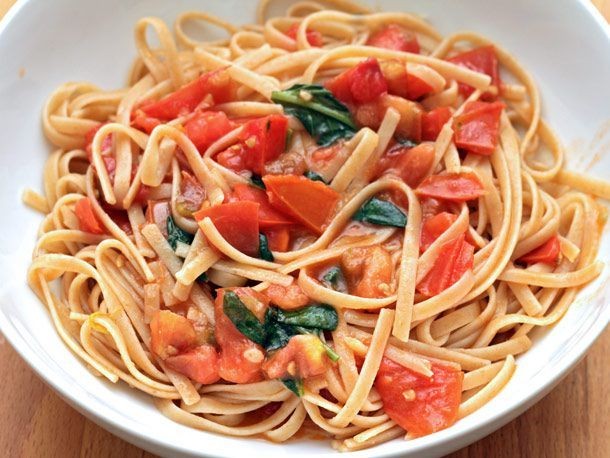
Unwinding into the quiet of the kitchen, I find comfort in the simplicity of a meal that feels both nourishing and honest. This whole wheat pasta with a sauce of fresh tomatoes and basil is a gentle reminder of how a few good ingredients can come together with such ease and grace.
Serving: 4 | Pre Time: 15 minutes | Cooking Time: 25 minutes
Ingredients
– 1 lb whole wheat spaghetti
– 3 tbsp extra virgin olive oil, or any good-quality olive oil
– 4 cloves garlic, minced
– 2 lbs ripe Roma tomatoes, diced (about 4 cups)
– 1 tsp kosher salt
– 1/4 tsp red pepper flakes, optional for a subtle heat
– 1/2 cup fresh basil leaves, loosely packed and torn
– 1/4 cup grated Parmesan cheese, plus more for serving
Instructions
1. Bring a large pot of generously salted water to a rolling boil over high heat.
2. Add the whole wheat spaghetti to the boiling water and cook according to package directions, typically 8-10 minutes, until al dente.
3. While the pasta cooks, heat the olive oil in a large skillet over medium-low heat.
4. Add the minced garlic to the skillet and cook for 1-2 minutes, stirring constantly, until fragrant but not browned—this gentle cooking prevents bitterness.
5. Increase the heat to medium and add the diced tomatoes, kosher salt, and red pepper flakes (if using) to the skillet.
6. Cook the tomato mixture, stirring occasionally, for 10-12 minutes until the tomatoes have broken down into a chunky sauce and most of the liquid has evaporated.
7. Reserve 1/2 cup of the starchy pasta cooking water, then drain the cooked spaghetti.
8. Add the drained spaghetti directly to the skillet with the tomato sauce.
9. Pour in 1/4 cup of the reserved pasta water and toss everything together for 1-2 minutes over low heat, allowing the pasta to absorb the sauce—the starchy water helps create a silky, cohesive texture.
10. Remove the skillet from the heat and stir in the torn basil leaves and grated Parmesan cheese until just combined; adding cheese off the heat prevents it from clumping.
11. Serve immediately in warm bowls, offering extra Parmesan at the table.
Freshly made, the pasta has a satisfying, nutty chew from the whole wheat, cradled by a sauce that is bright and lightly sweet from the tomatoes. For a lovely variation, try topping each bowl with a soft-poached egg or a handful of toasted pine nuts for added richness and crunch.
Dark Chocolate and Walnut Energy Bites

Perhaps, on a quiet afternoon like this, when the light slants low and the world feels still, we crave something simple yet deeply satisfying—a small, wholesome treat that feels like a gentle pause. These dark chocolate and walnut energy bites are just that: no-bake morsels of rich cocoa, earthy nuts, and sweet dates, rolled into little spheres of comfort you can tuck away for a moment of calm indulgence.
Serving: 12 | Pre Time: 15 minutes | Cooking Time: 0 minutes
Ingredients
- 1 cup pitted Medjool dates (soak in warm water for 10 minutes if they feel dry)
- 1 cup raw walnuts (toasting them lightly first enhances their flavor)
- 1/4 cup unsweetened cocoa powder (use dark cocoa for a deeper taste)
- 2 tbsp pure maple syrup (or honey, for a slightly different sweetness)
- 1 tsp vanilla extract
- 1/4 tsp sea salt
- 1/4 cup shredded coconut, for rolling (optional, but adds a nice texture)
Instructions
- Place the pitted dates, raw walnuts, unsweetened cocoa powder, pure maple syrup, vanilla extract, and sea salt into a food processor.
- Pulse the mixture on high speed for 45–60 seconds, stopping to scrape down the sides with a spatula once halfway through, until it forms a sticky, crumbly dough that holds together when pinched.
- Tip: If the mixture seems too dry and isn’t sticking, add 1 teaspoon of water at a time and pulse again until it reaches the right consistency.
- Scoop out about 1 tablespoon of the dough and roll it firmly between your palms into a smooth, round ball about 1 inch in diameter.
- Tip: Lightly wet your hands with water to prevent the dough from sticking as you roll.
- If using shredded coconut, spread it on a small plate and gently roll each ball in the coconut until evenly coated.
- Place the finished energy bites on a parchment-lined baking sheet or plate.
- Transfer the baking sheet to the refrigerator and chill the bites for at least 30 minutes, or until firm to the touch.
- Tip: For longer storage, keep them in an airtight container in the fridge for up to 2 weeks, where they’ll stay chewy and fresh.
Remember, these bites emerge from the fridge with a fudgy, dense texture that melts softly with each bite, releasing waves of bittersweet chocolate and toasty walnut. Enjoy them straight from the chill as a quick snack, or crumble one over a bowl of yogurt in the morning for a decadent twist—they’re little pockets of quiet joy, ready whenever you need a moment of sweetness.
Summary
Featuring 20 delicious, doctor-approved recipes, this roundup makes eating for your heart simple and satisfying. We hope you find new favorites to add to your weekly rotation! Give a few a try, then drop a comment below to tell us which one you loved most. Don’t forget to share this helpful collection on Pinterest so others can discover these heart-healthy meals too. Happy cooking!


