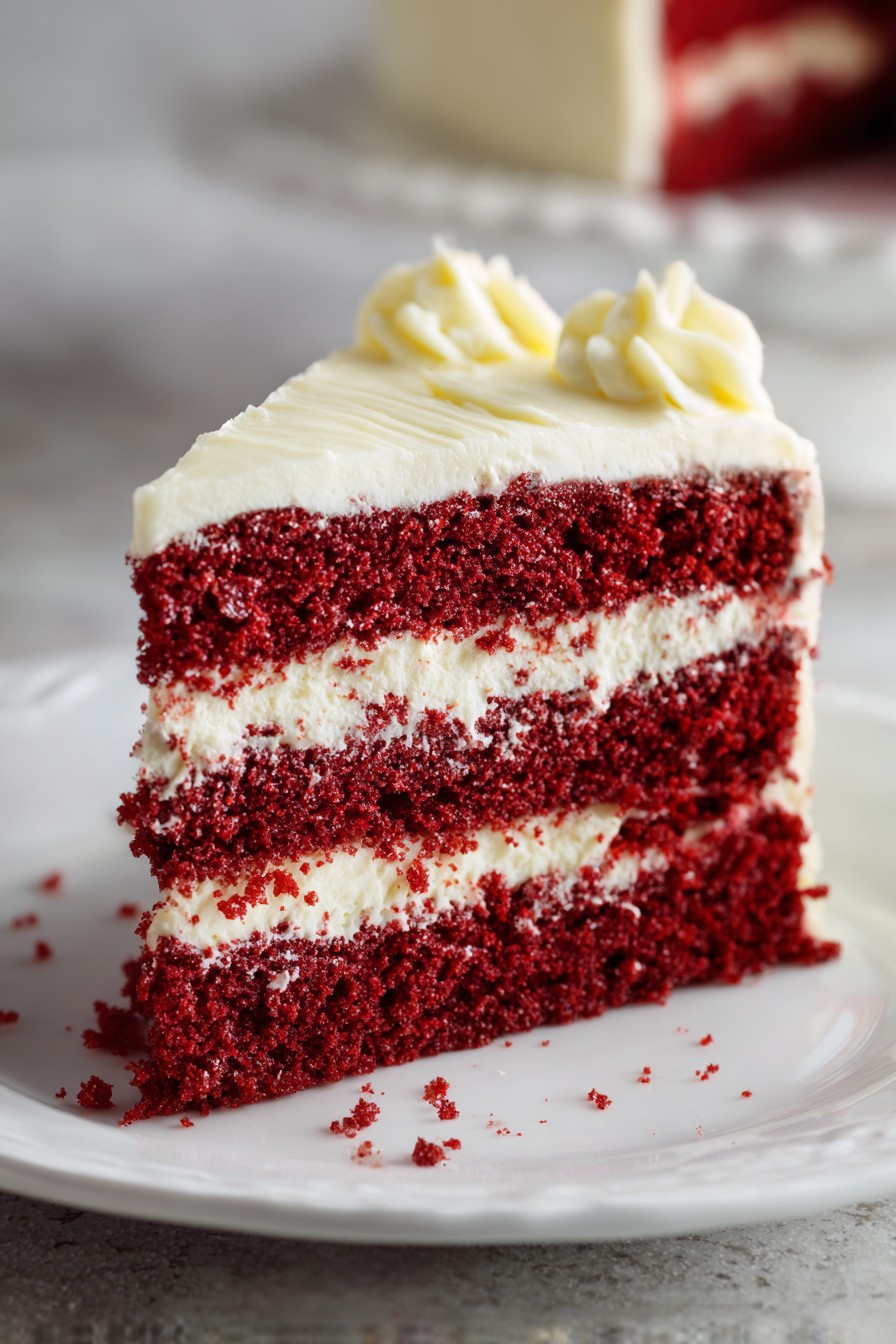
Miraculously, there exists a cake that wears its heart on its sleeve—or rather, its vibrant crimson hue on its crumb. My dear reader, prepare to meet the red velvet cake, the diva of the dessert world that doesn’t just arrive at the party; it makes an entrance with a flourish of cream cheese frosting and a backstory involving vinegar and cocoa. This isn’t just baking; it’s staging a deliciously theatrical production in your very own kitchen.
Why This Recipe Works
- The Tangy Tango: Buttermilk and vinegar perform a delicate chemical ballet with the baking soda, creating a tender, fine crumb that’s moist without being dense.
- Cocoa’s Secret Role: We use just enough Dutch-processed cocoa to whisper ‘chocolate’ and deepen the red color, without turning this into a chocolate cake in a fancy red dress.
- Butter’s Best Behavior: Creaming the butter and sugar until it’s pale and fluffy isn’t just busywork; it’s building tiny air pockets that become the cake’s luxurious, cloud-like texture.
- The Frosting Finale: A generous slathering of tangy cream cheese frosting provides the perfect creamy, slightly sharp counterpoint to the cake’s subtle sweetness, making each bite a harmonious duet.
Ingredients
- 2 ½ cups (300g) all-purpose flour, spooned and leveled
- 2 tablespoons (10g) Dutch-processed cocoa powder
- 1 teaspoon baking soda
- ½ teaspoon fine sea salt
- 1 cup (2 sticks / 227g) unsalted butter, softened to room temperature
- 1 ½ cups (300g) granulated sugar
- 2 large eggs, at room temperature
- 2 teaspoons pure vanilla extract
- 1 cup (240ml) buttermilk, at room temperature
- 2 tablespoons (30ml) liquid red food coloring (yes, the whole bottle, don’t be shy)
- 1 teaspoon distilled white vinegar
- For the Cream Cheese Frosting: 16 ounces (452g) full-fat brick cream cheese, softened, ½ cup (1 stick / 113g) unsalted butter, softened, 4 cups (480g) confectioners’ sugar, sifted, 2 teaspoons pure vanilla extract, and a pinch of salt.
Equipment Needed
- Two 9-inch round cake pans
- Parchment paper
- Electric hand mixer or stand mixer
- Large mixing bowls
- Whisk and rubber spatula
- Wire cooling racks
- Offset spatula for frosting
Instructions
Step 1: Assemble Your Cast and Preheat the Stage
Before our star ingredients can perform, we must set the scene. Preheat your oven to a precise 350°F (175°C). This is non-negotiable—think of it as turning on the stage lights. While it warms, grease your two 9-inch round cake pans with butter or non-stick spray, then line the bottoms with circles of parchment paper. This parchment is the safety net for your cakes, ensuring they release without a dramatic, crumbly tragedy. In a medium bowl, whisk together the flour, cocoa powder, baking soda, and salt. This dry team is the supporting cast that provides structure. In a liquid measuring cup, combine the buttermilk, red food coloring, and vinegar. This vibrant, tangy mixture is the secret sauce—literally—that gives red velvet its signature color and subtle tang. Let these ingredients sit at room temperature; cold ingredients are like grumpy understudies and won’t blend properly. Tip: To quickly bring eggs to room temperature, place them in a bowl of warm (not hot) water for about 10 minutes.
Step 2: The Creaming Concerto
Now for the main event. In the bowl of your stand mixer fitted with the paddle attachment (or a large bowl if using a hand mixer), place the softened butter and granulated sugar. Beat them together on medium-high speed for a full 3 to 5 minutes. You’re not just mixing; you’re conducting a symphony of aeration. The mixture should transform from yellow and gritty to exceptionally pale, fluffy, and almost white. This process incorporates air, which is the leavening agent’s best friend. Stop the mixer and scrape down the sides of the bowl with a rubber spatula to ensure no sugary-buttery rebels are hiding. With the mixer on medium speed, add the room-temperature eggs one at a time, beating for a full 30 seconds after each addition until fully incorporated. Then beat in the vanilla extract. The mixture should be gloriously light and creamy—if it looks curdled, your eggs were likely too cold, but don’t panic, it will come together with the dry ingredients.
Step 3: The Grand, Crimson Unification
Lower your mixer speed to low. This is the delicate part where we combine our teams without overworking the batter. Add about one-third of the dry flour mixture to the butter mixture and mix until just combined—a few streaks of flour are okay. Next, pour in half of the buttermilk-red food coloring mixture and mix until just blended. Repeat with another third of the dry ingredients, the remaining wet ingredients, and finally the last of the dry ingredients. Mix each addition only until the last streak of flour disappears. The batter will be a stunning, deep red and relatively thick. Use a spatula to give the bowl one final fold, ensuring everything at the bottom is incorporated. Tip: For the most even layers, use a kitchen scale to divide the batter equally between the two prepared pans—aim for about 600 grams of batter per pan.
Step 4: The Oven’s Hot Spotlight
Divide the batter evenly between your prepared pans. Smooth the tops with your spatula. Carefully place the pans on the center rack of your preheated 350°F oven. Bake for 25 to 30 minutes. Do not open the oven door before the 25-minute mark—it’s like yelling ‘action!’ in the middle of a crucial scene and ruins the rise. The cakes are done when a toothpick inserted into the center comes out clean or with a few moist crumbs (not wet batter), and the tops spring back lightly when touched. The edges will also just begin to pull away from the sides of the pan. Once done, transfer the pans to wire cooling racks and let the cakes cool in the pans for exactly 10 minutes. Then, run a knife around the edges, invert the cakes onto the racks, peel off the parchment paper, and let them cool completely, about 2 hours. Cooling is mandatory; frosting a warm cake is a slippery, melty disaster.
Step 5: Frosting, the Velvety Final Act
Tip: For super sharp edges, use a bench scraper dipped in hot water and dried.
Tips and Tricks
For the reddest red, use gel food coloring instead of liquid—you’ll need about 1-2 teaspoons. It’s more concentrated, so you avoid adding extra liquid to the batter. If you’re out of buttermilk, make your own ‘sour milk’ by adding 1 tablespoon of white vinegar or lemon juice to a cup of whole milk and letting it sit for 5 minutes. When measuring flour, always spoon it into the measuring cup and level it off with a knife. Scooping directly packs the flour down and can lead to a dry cake. For ultimate smoothness, sift your confectioners’ sugar for the frosting. If your kitchen is warm and the frosting seems soft, pop the bowl in the fridge for 15 minutes before using it to crumb coat. To slice cleanly, run your knife under hot water and wipe it dry between each cut.
Recipe Variations
- Cupcake Commandos: Turn this into 24 show-stopping cupcakes. Line muffin tins, fill cups 2/3 full, and bake at 350°F for 18-22 minutes. Frost with a piping bag for a professional look.
- Layer Cake Luminary: Go for a towering 4-layer cake by baking the batter in four 6-inch pans for 20-25 minutes. You’ll get more frosting-per-bite ratio, which is never a bad thing.
- Flavor Infusion: Add 1/2 teaspoon of almond extract to the frosting for a subtle marzipan note, or fold 1/2 cup of finely chopped toasted pecans into the batter for a southern crunch.
- Frosting Flip: Swap the cream cheese for a classic Ermine frosting (cooked flour frosting) for a less tangy, more historical take that’s silky and light.
- Holiday Hue: For Christmas, use green food coloring for a ‘green velvet’ version, or divide the batter and color half red and half green for a festive marble effect.
Frequently Asked Questions
Q: Can I use natural cocoa powder instead of Dutch-processed?
A: You can, but it will change the chemistry. Natural cocoa is acidic and reacts with baking soda, potentially affecting the rise and color. Dutch-processed is neutral and lets the vinegar and buttermilk do their thing, giving a truer red and tender crumb.
Q: Why does my red velvet cake taste bland or like flour?
A: This is often a sign of undermixing the butter and sugar (not creaming long enough) or overmixing once the flour is added. Cream for a full 5 minutes, and mix the final batter only until just combined. Also, ensure your baking soda is fresh!
Q: How do I store this cake, and how long does it last?
A: Due to the cream cheese frosting, it must be refrigerated. Cover it with a cake dome or inverted bowl. It’s best enjoyed within 3-4 days. Let slices come to room temperature for 20 minutes before serving for the best texture and flavor.
Q: Can I make this cake ahead of time?
A: Absolutely! Bake the cake layers up to 2 days ahead. Let them cool completely, then wrap tightly in plastic wrap and store at room temperature. Frost the day you plan to serve. The frosting can also be made 1-2 days ahead and stored covered in the fridge; just re-whip it before using.
Q: My cake layers domed in the middle. What happened?
A> Your oven might run hot, causing the edges to set too fast while the center rises. Try lowering the temperature by 25°F next time. You can also use cake strips—fabric strips soaked in water and wrapped around the pans—to insulate them for even baking.
Summary
This red velvet cake recipe delivers a moist, tender crumb with a perfect tangy-sweet balance, crowned by lush cream cheese frosting. It’s a classic made foolproof with precise techniques and a dash of baking science.
Red Velvet Cake
12
servings45
minutes30
minutesIngredients
Instructions
- 1 Preheat oven to 350°F (175°C). Grease two 9-inch round cake pans and line bottoms with parchment paper. Whisk flour, cocoa, baking soda, and salt in a bowl. In a measuring cup, combine buttermilk, food coloring, and vinegar.
- 2 In a large bowl, beat butter and sugar on medium-high speed for 3-5 minutes until pale and fluffy. Scrape bowl. Add eggs one at a time, beating 30 seconds after each. Beat in vanilla.
- 3 With mixer on low, add dry ingredients in three parts, alternating with the buttermilk mixture in two parts, beginning and ending with dry ingredients. Mix each addition until just combined.
- 4 Divide batter evenly between pans. Bake for 25-30 minutes until a toothpick inserted comes out clean. Cool in pans for 10 minutes, then invert onto wire racks to cool completely (about 2 hours).
- 5 For frosting, beat cream cheese and butter until smooth. On low, gradually add confectioners' sugar, then vanilla and salt. Beat on medium-high until fluffy. Frost cooled cake layers.