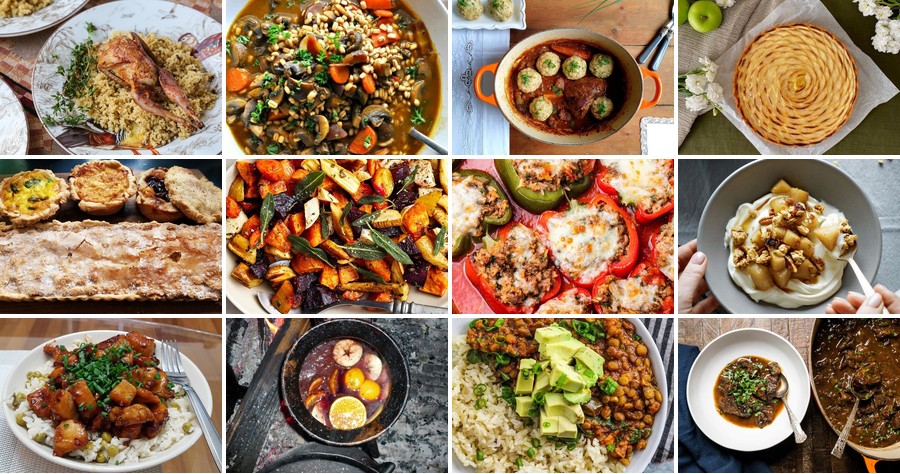
Travel back in time with your taste buds! This collection of 18 authentic Renaissance recipes brings history to your kitchen. From hearty feasts to delicate pastries, discover the surprisingly delicious flavors that fueled an era of art and innovation. Perfect for adventurous home cooks looking to add a dash of history to their dinner table. Let’s explore these timeless dishes together!
Medieval Roast Pork with Apple Sauce
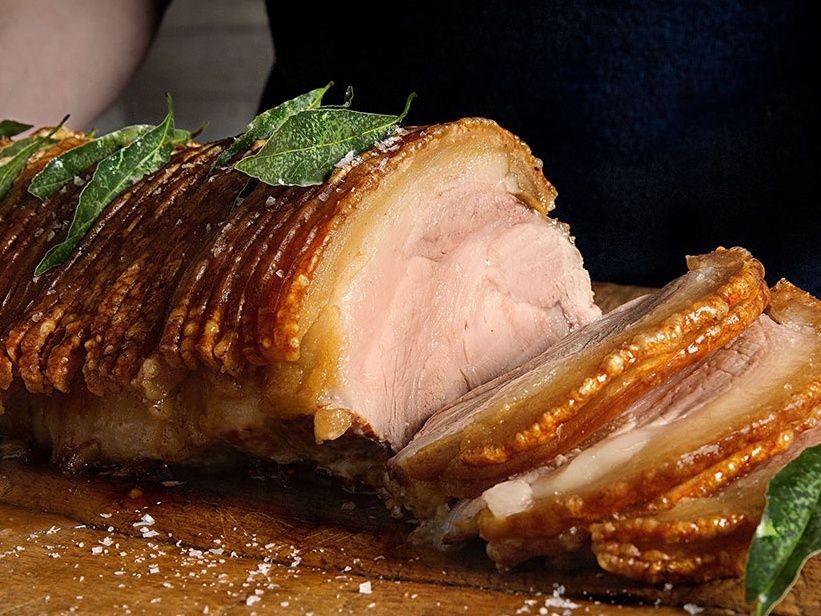
Feast your eyes, food adventurers! If you’re tired of the same old holiday hams and want to taste a piece of history that’s actually delicious, you’ve time-traveled to the right recipe. This isn’t your grandma’s pork roast—it’s your great-great-great-great-great-great grandma’s, and it’s packed with flavor that will have your modern taste buds doing a medieval jig.
Serving: 6 | Pre Time: 20 minutes | Cooking Time: 90 minutes
Ingredients
– 3 lb pork loin roast
– 2 tbsp olive oil
– 1 tsp salt
– 1/2 tsp black pepper
– 1 tsp dried thyme
– 2 apples, cored and chopped
– 1/2 cup apple cider
– 1 tbsp honey
– 1/4 tsp ground cinnamon
Instructions
1. Preheat your oven to 375°F.
2. Pat the 3 lb pork loin roast completely dry with paper towels.
3. Rub the roast all over with 2 tbsp olive oil.
4. In a small bowl, combine 1 tsp salt, 1/2 tsp black pepper, and 1 tsp dried thyme.
5. Massage the spice mixture evenly onto the entire surface of the pork roast.
6. Place the seasoned roast on a rack inside a roasting pan.
7. Roast in the preheated oven at 375°F for 60 minutes.
8. While the pork roasts, core and chop 2 apples into 1/2-inch pieces.
9. In a medium saucepan, combine the chopped apples, 1/2 cup apple cider, 1 tbsp honey, and 1/4 tsp ground cinnamon.
10. Bring the apple mixture to a simmer over medium heat, then reduce heat to low.
11. Cook the sauce, stirring occasionally, for 20 minutes until the apples are very soft.
12. After the pork has roasted for 60 minutes, insert a meat thermometer into the thickest part.
13. Continue roasting until the internal temperature reaches 145°F, which should take about 15-30 more minutes.
14. Remove the pork from the oven and transfer it to a cutting board.
15. Let the pork rest, loosely tented with foil, for 10 minutes.
16. While the pork rests, use a potato masher or fork to mash the cooked apples in the saucepan into a chunky sauce.
17. Slice the rested pork roast against the grain into 1/2-inch thick pieces.
18. Serve the sliced pork immediately, topped with the warm apple sauce.
Kick back and enjoy the glorious contrast: the pork is juicy and herbaceous, while the apple sauce adds a sweet, tangy, and warmly spiced punch that cuts through the richness perfectly. For a truly regal presentation, serve it on a wooden board with some crusty bread to soak up every last drop of those medieval juices.
Renaissance Spiced Wine

Mmm, nothing says “holiday cheer” like a warm mug of spiced wine that tastes like it was stolen from a Renaissance Faire’s secret stash—this cozy, aromatic sipper is basically a hug for your insides. With its bold spices and fruity undertones, it’s the perfect way to pretend you’re a festive medieval monarch while binge-watching your favorite shows. Let’s brew up some magic that’ll make your kitchen smell like a yuletide dream!
Serving: 6 | Pre Time: 10 minutes | Cooking Time: 25 minutes
Ingredients
– 1 bottle (750 ml) dry red wine
– 1 cup apple cider
– 1/4 cup honey
– 1 orange, sliced into rounds
– 1 apple, cored and sliced
– 3 cinnamon sticks
– 5 whole cloves
– 3 star anise pods
– 1/2 tsp ground nutmeg
Instructions
1. Pour 1 bottle (750 ml) dry red wine and 1 cup apple cider into a large pot over medium heat.
2. Add 1/4 cup honey, 3 cinnamon sticks, 5 whole cloves, 3 star anise pods, and 1/2 tsp ground nutmeg to the pot.
3. Stir the mixture gently with a wooden spoon until the honey dissolves completely, about 2 minutes.
4. Slice 1 orange into rounds and 1 apple into slices, then add them to the pot.
5. Bring the mixture to a simmer over medium heat, watching for small bubbles around the edges—do not let it boil to preserve the alcohol content.
6. Reduce the heat to low and let it simmer uncovered for 20 minutes, stirring occasionally to infuse the flavors evenly.
7. Remove the pot from the heat and let it cool for 5 minutes to allow the spices to settle.
8. Strain the wine through a fine-mesh sieve into a heatproof pitcher, discarding the solids.
9. Serve the spiced wine immediately in mugs while warm. For a fun twist, garnish each mug with a fresh cinnamon stick or an extra orange slice. The result is a velvety, aromatic brew with a smooth texture and a sweet-spicy kick—perfect for sipping by the fireplace or pairing with gingerbread cookies for a festive treat!
Herb-Crusted Venison Stew
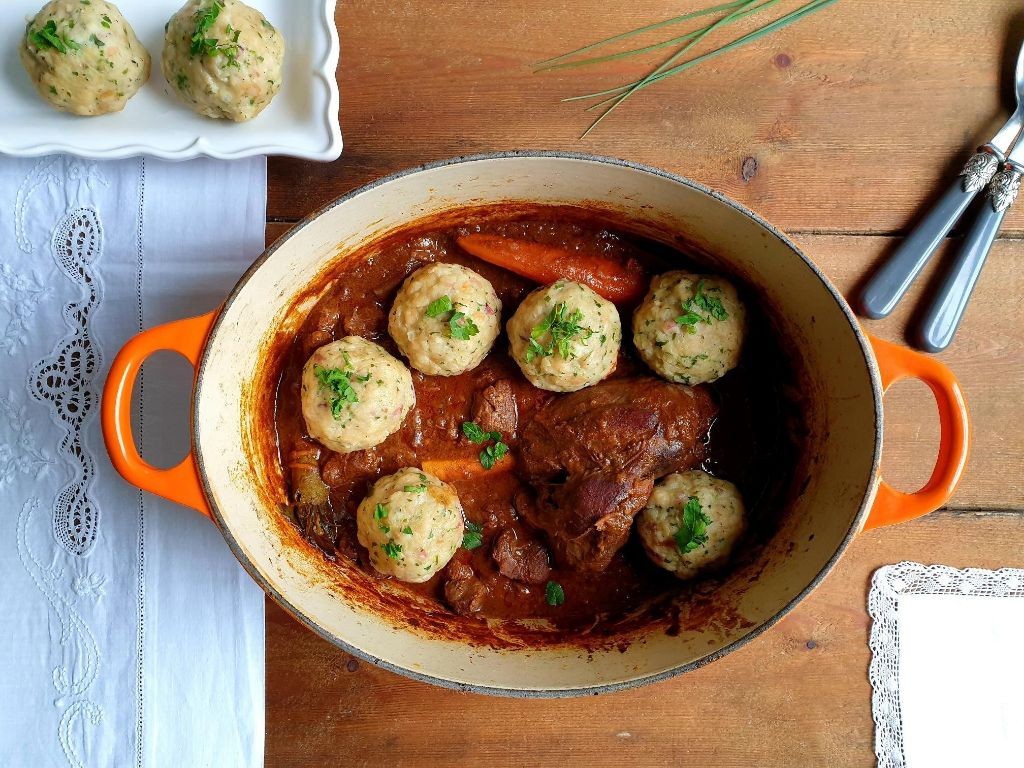
Unbelievably, just when you thought stew couldn’t get any cozier, along comes this herb-crusted venison number to prove you wrong—it’s basically a warm, savory hug in a bowl, perfect for those chilly evenings when you want to feel fancy without the fuss. Think of it as your favorite comfort food, but dressed up for a holiday party (or just a really good Tuesday).
Serving: 6 | Pre Time: 20 minutes | Cooking Time: 2 hours 30 minutes
Ingredients
– 2 lbs venison stew meat, cut into 1-inch cubes
– 1/4 cup all-purpose flour
– 2 tbsp olive oil
– 1 large onion, chopped
– 3 cloves garlic, minced
– 4 carrots, peeled and sliced into 1/2-inch rounds
– 3 celery stalks, chopped
– 4 cups beef broth
– 1 cup red wine
– 2 tbsp tomato paste
– 1 tsp dried thyme
– 1 tsp dried rosemary
– 1 bay leaf
– Salt and pepper to taste
– 1/4 cup fresh parsley, chopped
Instructions
1. Preheat your oven to 325°F.
2. In a large bowl, toss the venison cubes with the all-purpose flour until evenly coated.
3. Heat the olive oil in a large Dutch oven over medium-high heat until shimmering.
4. Add the floured venison in a single layer and sear for 3-4 minutes per side until browned on all sides, then remove and set aside.
5. In the same pot, add the chopped onion and sauté for 5 minutes until softened.
6. Add the minced garlic and cook for 1 minute until fragrant.
7. Stir in the carrots and celery, cooking for another 5 minutes to soften slightly.
8. Pour in the beef broth and red wine, scraping the bottom of the pot to release any browned bits.
9. Whisk in the tomato paste until fully dissolved.
10. Add the dried thyme, dried rosemary, bay leaf, salt, and pepper, stirring to combine.
11. Return the seared venison to the pot, ensuring it’s submerged in the liquid.
12. Bring the mixture to a simmer, then cover and transfer to the preheated oven.
13. Bake for 2 hours, checking halfway to stir and ensure the meat is tender.
14. Remove from the oven, discard the bay leaf, and stir in the fresh parsley.
15. Let the stew rest for 10 minutes before serving to allow flavors to meld.
Zesty and rich, this stew boasts tender venison that falls apart with a fork, enveloped in a deeply savory broth infused with herbs. The herb crust adds a subtle, aromatic crunch that elevates every bite—try serving it over creamy mashed potatoes or with crusty bread for dipping to soak up every last drop.
Traditional Honey Glazed Chicken

Now, let’s talk about a dish that’s basically a hug for your taste buds—Traditional Honey Glazed Chicken, the sweet-and-savory superstar that’ll have you ditching takeout menus faster than you can say “seconds, please!” It’s the perfect centerpiece for any gathering, from cozy family dinners to “I forgot it’s potluck day” emergencies, guaranteed to make you look like a culinary rockstar with minimal fuss. Trust me, your oven will thank you for the workout, and your guests will be too busy licking their plates to notice you used store-bought honey.
Serving: 4 | Pre Time: 15 minutes | Cooking Time: 45 minutes
Ingredients
– 4 boneless, skinless chicken breasts
– 1/2 cup honey
– 1/4 cup soy sauce
– 2 tbsp olive oil
– 2 cloves garlic, minced
– 1 tsp ground black pepper
– 1/2 tsp salt
– 1 tbsp fresh lemon juice
– 1 tsp dried thyme
Instructions
1. Preheat your oven to 375°F (190°C) and lightly grease a 9×13-inch baking dish with olive oil from the measured amount.
2. Pat the 4 boneless, skinless chicken breasts completely dry with paper towels to ensure a crispy exterior.
3. In a medium bowl, whisk together 1/2 cup honey, 1/4 cup soy sauce, 2 tbsp olive oil, 2 cloves minced garlic, 1 tsp ground black pepper, 1/2 tsp salt, 1 tbsp fresh lemon juice, and 1 tsp dried thyme until smooth.
4. Place the dried chicken breasts in the prepared baking dish in a single layer, not touching.
5. Pour the honey mixture evenly over the chicken breasts, coating each piece thoroughly.
6. Bake the chicken in the preheated oven at 375°F (190°C) for 25 minutes.
7. Remove the baking dish from the oven and carefully flip each chicken breast using tongs to coat the other side with glaze.
8. Return the dish to the oven and bake for an additional 20 minutes, or until the internal temperature of the chicken reaches 165°F (74°C) on a meat thermometer.
9. Transfer the chicken to a serving platter and let it rest for 5 minutes before slicing to retain juices.
10. While the chicken rests, simmer the remaining glaze in the baking dish on the stovetop over medium heat for 3-5 minutes until slightly thickened, then drizzle it over the sliced chicken.
Here’s the delicious payoff: you’ll be rewarded with tender, juicy chicken boasting a sticky-sweet glaze that caramelizes into a glossy sheen, with hints of garlic and thyme balancing the honey’s richness. Serve it over fluffy rice to soak up every last drop of sauce, or chop it up for a killer salad topping—either way, it’s a flavor explosion that’ll have everyone asking for the recipe (and maybe your secret chef skills).
Barley and Mushroom Pottage
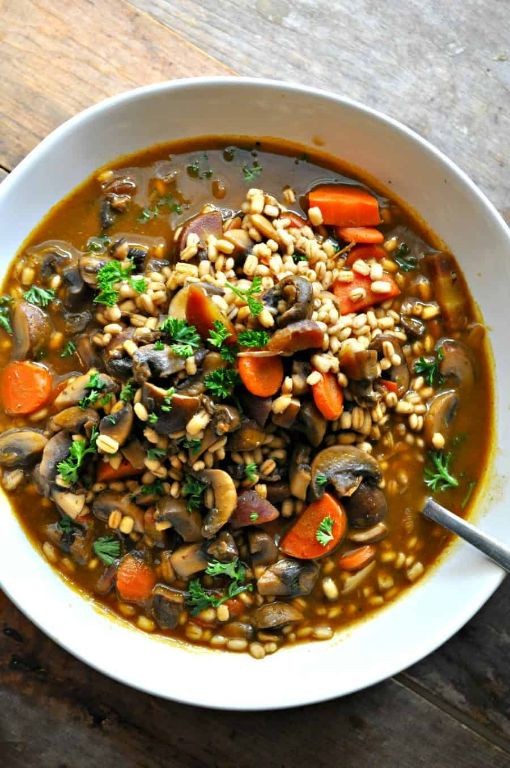
Ready to ditch the holiday stress and dive into a bowl of cozy comfort? This barley and mushroom pottage is your culinary hug in a mug—a hearty, earthy delight that’ll make you forget you’re eating something actually good for you. Think of it as the lovechild of a stew and a soup, with enough umami to power through a winter afternoon.
Serving: 4 | Pre Time: 15 minutes | Cooking Time: 45 minutes
Ingredients
– 1 tbsp olive oil
– 1 medium yellow onion, diced
– 2 cloves garlic, minced
– 8 oz cremini mushrooms, sliced
– 1 cup pearled barley
– 4 cups vegetable broth
– 1 tsp dried thyme
– 1/2 tsp salt
– 1/4 tsp black pepper
– 1/2 cup heavy cream
Instructions
1. Heat 1 tbsp olive oil in a large pot over medium heat until shimmering, about 2 minutes.
2. Add 1 medium diced yellow onion and cook, stirring occasionally, until translucent, about 5 minutes.
3. Stir in 2 cloves minced garlic and cook until fragrant, about 30 seconds—don’t let it brown!
4. Add 8 oz sliced cremini mushrooms and cook, stirring occasionally, until they release their liquid and brown slightly, about 8 minutes.
5. Pour in 1 cup pearled barley and toast it with the vegetables for 1 minute to enhance its nutty flavor.
6. Add 4 cups vegetable broth, 1 tsp dried thyme, 1/2 tsp salt, and 1/4 tsp black pepper, then bring to a boil.
7. Reduce heat to low, cover the pot, and simmer until the barley is tender, about 30 minutes, stirring halfway through to prevent sticking.
8. Stir in 1/2 cup heavy cream and heat for 2 more minutes until warmed through—avoid boiling to keep it smooth.
Grab a spoon and savor the creamy, chewy texture with earthy mushroom notes that’ll warm you from the inside out. Serve it in a rustic bowl topped with a sprinkle of fresh parsley or alongside crusty bread for dipping into that rich, velvety broth.
Renaissance-Style Saffron Rice

Just when you thought rice couldn’t get more glamorous, along comes this Renaissance-style saffron number to prove you wrong—it’s basically the edible equivalent of a velvet doublet, minus the itchy collar. Picture golden grains infused with warm spices and a hint of citrus, all coming together in a dish that’s as festive as a Medici banquet but way easier to pull off in your modern kitchen. Trust me, your dinner guests will be bowing in admiration before they even take a bite.
Serving: 6 | Pre Time: 15 minutes | Cooking Time: 25 minutes
Ingredients
– 2 cups basmati rice
– 4 cups water
– 1/2 tsp saffron threads
– 2 tbsp unsalted butter
– 1 medium yellow onion, finely chopped
– 2 cloves garlic, minced
– 1 tsp ground cinnamon
– 1/2 tsp ground cardamom
– 1/4 cup slivered almonds
– 1/4 cup dried currants
– 1 tbsp lemon juice
– 1 tsp salt
Instructions
1. Rinse 2 cups basmati rice under cold water in a fine-mesh strainer until the water runs clear, which removes excess starch for fluffier rice.
2. In a small bowl, soak 1/2 tsp saffron threads in 2 tbsp warm water for 10 minutes to release their vibrant color and aroma.
3. Melt 2 tbsp unsalted butter in a large saucepan over medium heat.
4. Add 1 medium yellow onion, finely chopped, and sauté for 5 minutes until translucent and soft.
5. Stir in 2 cloves garlic, minced, and cook for 1 minute until fragrant.
6. Add 1 tsp ground cinnamon and 1/2 tsp ground cardamom, toasting for 30 seconds to bloom the spices.
7. Pour in the rinsed rice and stir to coat evenly with the butter and spice mixture.
8. Add 4 cups water, the soaked saffron with its liquid, 1 tsp salt, and 1 tbsp lemon juice, then bring to a boil over high heat.
9. Reduce heat to low, cover the saucepan tightly, and simmer for 15 minutes without lifting the lid—this ensures even cooking and prevents steam escape.
10. Remove from heat and let the rice rest, covered, for 5 minutes to allow the grains to firm up.
11. While the rice rests, toast 1/4 cup slivered almonds in a dry skillet over medium heat for 3–4 minutes, shaking frequently until golden and fragrant, then set aside.
12. Fluff the rice gently with a fork to separate the grains without mashing them.
13. Fold in 1/4 cup dried currants and the toasted almonds until evenly distributed.
14. Serve immediately while warm.
Rich with aromatic spices and a subtle citrus zing, this rice boasts a tender, separate-grain texture that’s perfect for soaking up sauces or pairing with roasted meats. For a creative twist, mound it into a ring mold for a stunning presentation, or toss in some fresh herbs like parsley just before serving to brighten the flavors even more.
Savory Meat Pies with Raisins

Mmm, imagine if your favorite cozy sweater and a holiday feast had a delicious baby—that’s basically what these savory meat pies with raisins are all about. They’re the ultimate hug-in-a-crust, perfect for when you want to impress without the stress, and yes, the raisins are there to party, not just for show. Trust me, your taste buds will send you a thank-you note.
Serving: 6 | Pre Time: 30 minutes | Cooking Time: 25 minutes
Ingredients
– 1 lb ground beef
– 1/2 cup raisins
– 1 medium onion, diced
– 2 cloves garlic, minced
– 1 cup beef broth
– 2 tbsp tomato paste
– 1 tsp dried thyme
– 1/2 tsp salt
– 1/4 tsp black pepper
– 2 tbsp all-purpose flour
– 2 tbsp unsalted butter
– 1 package (14 oz) refrigerated pie crusts
– 1 large egg, beaten
Instructions
1. Preheat your oven to 400°F and line a baking sheet with parchment paper.
2. In a large skillet over medium heat, melt 2 tbsp unsalted butter until it sizzles lightly.
3. Add 1 medium onion, diced, and cook for 5 minutes, stirring occasionally, until softened and translucent.
4. Stir in 2 cloves garlic, minced, and cook for 1 minute until fragrant.
5. Add 1 lb ground beef to the skillet, breaking it up with a spoon, and cook for 8 minutes until browned and no pink remains.
6. Sprinkle 2 tbsp all-purpose flour over the beef mixture and stir for 1 minute to coat evenly.
7. Pour in 1 cup beef broth and 2 tbsp tomato paste, stirring constantly until the mixture thickens, about 3 minutes.
8. Mix in 1/2 cup raisins, 1 tsp dried thyme, 1/2 tsp salt, and 1/4 tsp black pepper, then remove from heat and let cool slightly.
9. Unroll 1 package refrigerated pie crusts on a floured surface and cut into 6 circles using a 4-inch round cutter.
10. Spoon the meat mixture onto half of each circle, leaving a 1/2-inch border around the edges.
11. Fold the dough over the filling to form half-moons, press the edges with a fork to seal, and place on the prepared baking sheet.
12. Brush the tops with 1 large egg, beaten, using a pastry brush for an even coat.
13. Cut 3 small slits in the top of each pie with a sharp knife to allow steam to escape.
14. Bake at 400°F for 20-25 minutes, until the crust is golden brown and flaky.
15. Let the pies cool on a wire rack for 5 minutes before serving. Crunch into that golden crust to reveal a juicy, savory filling where the raisins add a sweet pop that’ll make you do a happy dance. Serve these warm with a side of tangy coleslaw or dunk them in a rich gravy for an extra cozy twist—either way, they’re guaranteed to disappear faster than holiday cookies.
Spiced Lentil and Vegetable Stew
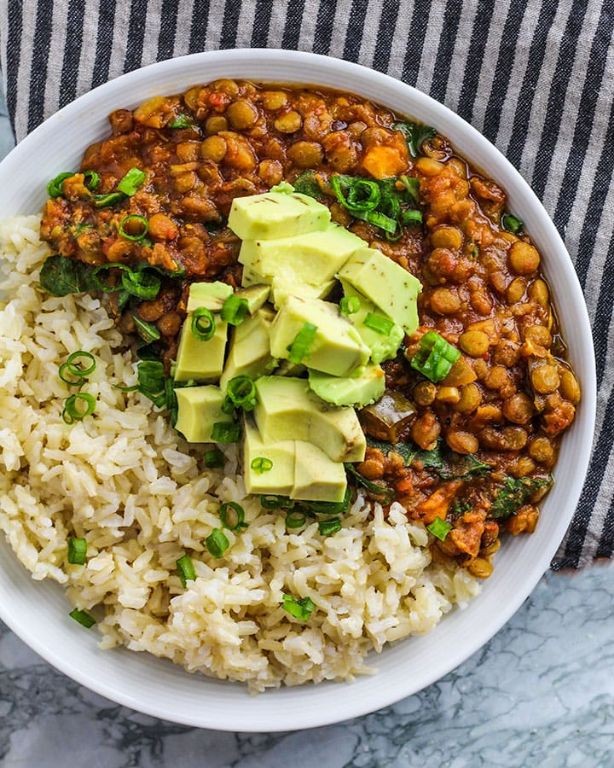
Mmm, is there anything cozier than a bubbling pot of stew on a chilly December day? This Spiced Lentil and Vegetable Stew is like a warm hug for your taste buds—packed with earthy lentils, vibrant veggies, and a kick of spice that’ll make you forget you’re eating something actually good for you. Trust me, it’s the kind of dish that turns ‘healthy’ into ‘heck yes!’
Serving: 6 | Pre Time: 15 minutes | Cooking Time: 45 minutes
Ingredients
– 2 tbsp olive oil
– 1 large onion, diced
– 3 cloves garlic, minced
– 1 tbsp ground cumin
– 1 tsp smoked paprika
– 1/2 tsp cayenne pepper
– 4 cups vegetable broth
– 1 1/2 cups dried brown lentils, rinsed
– 2 large carrots, chopped
– 2 stalks celery, chopped
– 1 red bell pepper, diced
– 1 (14.5 oz) can diced tomatoes
– 1 tsp salt
– 1/2 tsp black pepper
– 2 cups fresh spinach
– 2 tbsp lemon juice
Instructions
1. Heat 2 tbsp olive oil in a large pot over medium heat until shimmering, about 2 minutes.
2. Add 1 large diced onion and cook, stirring occasionally, until softened and translucent, about 5 minutes.
3. Stir in 3 minced garlic cloves and cook for 1 minute until fragrant—don’t let it burn!
4. Add 1 tbsp ground cumin, 1 tsp smoked paprika, and 1/2 tsp cayenne pepper, toasting the spices for 30 seconds to deepen their flavor.
5. Pour in 4 cups vegetable broth and 1 1/2 cups rinsed brown lentils, scraping the bottom of the pot to lift any browned bits.
6. Bring the mixture to a boil, then reduce heat to low, cover, and simmer for 20 minutes.
7. Add 2 chopped carrots, 2 chopped celery stalks, 1 diced red bell pepper, and 1 can diced tomatoes with their juices.
8. Stir in 1 tsp salt and 1/2 tsp black pepper, then cover and simmer for another 15 minutes until the lentils are tender but not mushy.
9. Fold in 2 cups fresh spinach and 2 tbsp lemon juice, cooking just until the spinach wilts, about 2 minutes.
10. Remove from heat and let the stew rest for 5 minutes to allow the flavors to meld.
Zesty and hearty, this stew boasts a thick, spoon-coating texture with lentils that hold their shape beautifully. The smoky paprika and cayenne add a gentle warmth, while the lemon juice brightens every bite. Serve it over a bed of fluffy rice or with crusty bread for dipping—leftovers taste even better the next day, if you can resist eating it all at once!
Renaissance Gingerbread Cookies

Pardon me while I interrupt your holiday chaos with a cookie so delightfully old-school, it practically needs a ruffled collar. These Renaissance Gingerbread Cookies are the festive throwback you didn’t know your kitchen was missing—think less “stale holiday staple” and more “spiced masterpiece worthy of a royal decree.” They’re the perfect project for when you want to feel both historically significant and supremely snack-ready.
Serving: 24 cookies | Pre Time: 30 minutes | Cooking Time: 10 minutes
Ingredients
– 3 cups all-purpose flour
– 2 tsp ground ginger
– 1 tsp ground cinnamon
– 1/2 tsp ground cloves
– 1/2 tsp baking soda
– 1/4 tsp salt
– 3/4 cup unsalted butter, softened
– 3/4 cup packed dark brown sugar
– 1/2 cup molasses
– 1 large egg
– 1 tsp vanilla extract
– 1 cup powdered sugar
– 2 tbsp milk
Instructions
1. Preheat your oven to 350°F and line two baking sheets with parchment paper.
2. In a medium bowl, whisk together 3 cups all-purpose flour, 2 tsp ground ginger, 1 tsp ground cinnamon, 1/2 tsp ground cloves, 1/2 tsp baking soda, and 1/4 tsp salt until fully combined.
3. In a large bowl, use an electric mixer on medium speed to cream 3/4 cup softened unsalted butter with 3/4 cup packed dark brown sugar for 2 minutes, until light and fluffy. Tip: Properly creaming the butter and sugar is key for a tender cookie—don’t rush this step!
4. Beat in 1/2 cup molasses, 1 large egg, and 1 tsp vanilla extract until the mixture is smooth.
5. Gradually add the dry flour mixture to the wet ingredients, mixing on low speed just until a soft dough forms and no dry streaks remain.
6. Divide the dough in half, shape each half into a disc, wrap tightly in plastic wrap, and chill in the refrigerator for 20 minutes. Tip: Chilling firms up the dough for easier rolling and prevents excessive spreading in the oven.
7. On a lightly floured surface, roll one dough disc to a 1/4-inch thickness.
8. Cut out shapes with cookie cutters and transfer them to the prepared baking sheets, spacing them 2 inches apart.
9. Bake one sheet at a time for 8-10 minutes, until the edges are just set and the centers look slightly puffed. Tip: For even baking, rotate the sheet halfway through—these cookies go from perfect to overdone quickly!
10. Let the cookies cool on the baking sheet for 5 minutes before transferring them to a wire rack to cool completely.
11. In a small bowl, whisk together 1 cup powdered sugar and 2 tbsp milk until you achieve a smooth, drizzle-able icing consistency.
12. Drizzle or pipe the icing over the cooled cookies as desired.
Finally, behold your handiwork: these cookies boast a wonderfully soft, chewy texture with a deep, complex spice flavor that mellows beautifully as they cool. For a truly regal presentation, stack them on a vintage platter or package them in clear bags tied with rustic twine—they’re almost too pretty to eat (but trust me, you’ll manage).
Roasted Root Vegetables with Herbs
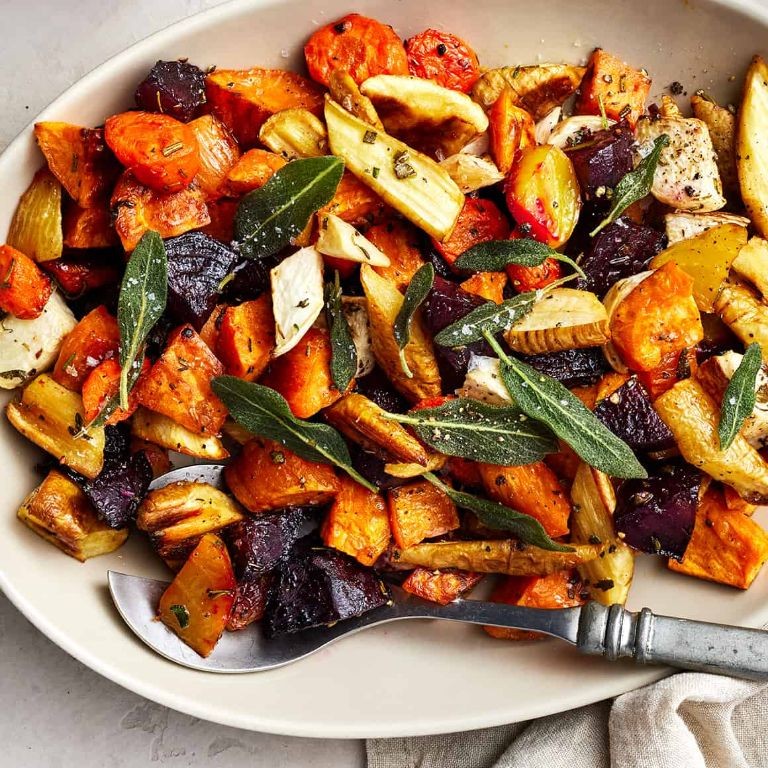
Dreading another bland side dish? Ditch the dullness and dive into these Roasted Root Vegetables with Herbs—a vibrant, flavor-packed medley that turns humble veggies into a show-stopping star, perfect for impressing guests or simply treating yourself to something spectacularly savory.
Serving: 4 | Pre Time: 15 minutes | Cooking Time: 40 minutes
Ingredients
– 1 large sweet potato, peeled and cut into 1-inch cubes
– 2 large carrots, peeled and cut into 1-inch pieces
– 1 large parsnip, peeled and cut into 1-inch pieces
– 1 medium red onion, cut into 1-inch wedges
– 3 tablespoons olive oil
– 1 tablespoon fresh rosemary, finely chopped
– 1 tablespoon fresh thyme leaves
– 1 teaspoon garlic powder
– 1 teaspoon salt
– 1/2 teaspoon black pepper
Instructions
1. Preheat your oven to 425°F and line a large baking sheet with parchment paper for easy cleanup.
2. In a large bowl, combine the sweet potato cubes, carrot pieces, parsnip pieces, and red onion wedges.
3. Drizzle the olive oil over the vegetables and toss thoroughly to coat every piece evenly.
4. Add the finely chopped rosemary, thyme leaves, garlic powder, salt, and black pepper to the bowl.
5. Toss the vegetables again until the herbs and spices are uniformly distributed, ensuring no veggie is left unseasoned.
6. Spread the vegetables in a single layer on the prepared baking sheet, avoiding overcrowding to promote even roasting.
7. Roast in the preheated oven for 20 minutes, then remove the sheet and use a spatula to flip the vegetables for uniform browning.
8. Return the baking sheet to the oven and roast for an additional 20 minutes, or until the vegetables are tender and caramelized at the edges.
9. Remove from the oven and let cool for 5 minutes before serving to allow flavors to meld.
Kick back and savor the crispy, caramelized edges and tender interiors, bursting with earthy sweetness and aromatic herbs. Serve it over creamy polenta for a cozy meal, or toss it into a grain bowl for a hearty lunch—it’s so versatile, you might just forget other sides exist!
Braised Beef with Red Wine and Prunes

Whew, is there anything cozier than a pot of something simmering away while you pretend to be a fancy chef? This braised beef dish is basically a hug in a bowl, with red wine and prunes teaming up to create a sweet, savory, and slightly boozy masterpiece that’ll make your kitchen smell like a Michelin-starred bistro (or at least a very ambitious home cook’s dream).
Serving: 6 | Pre Time: 20 minutes | Cooking Time: 3 hours 30 minutes
Ingredients
– 3 pounds beef chuck roast, cut into 2-inch cubes
– 1 teaspoon kosher salt
– 1/2 teaspoon black pepper
– 2 tablespoons olive oil
– 1 large yellow onion, chopped
– 4 cloves garlic, minced
– 2 cups dry red wine
– 2 cups beef broth
– 1 cup pitted prunes
– 2 sprigs fresh thyme
– 2 bay leaves
Instructions
1. Pat the beef cubes dry with paper towels, then season all over with salt and pepper.
2. Heat olive oil in a large Dutch oven over medium-high heat until shimmering, about 2 minutes.
3. Add beef in a single layer, working in batches to avoid overcrowding, and sear until deeply browned on all sides, about 4–5 minutes per batch.
4. Transfer seared beef to a plate, leaving any drippings in the pot.
5. Reduce heat to medium, add chopped onion to the pot, and cook until softened and translucent, about 5 minutes.
6. Add minced garlic and cook until fragrant, about 30 seconds.
7. Pour in red wine, scraping the bottom of the pot with a wooden spoon to release any browned bits (this adds rich flavor).
8. Bring wine to a simmer and cook until reduced by half, about 5 minutes.
9. Return beef and any accumulated juices to the pot, then add beef broth, prunes, thyme sprigs, and bay leaves.
10. Bring mixture to a gentle boil, then immediately reduce heat to low, cover, and simmer until beef is fork-tender, about 3 hours, checking occasionally to ensure it’s at a bare simmer.
11. Remove and discard thyme sprigs and bay leaves, then skim excess fat from the surface with a spoon.
12. Serve hot directly from the pot.
Perfectly tender beef practically melts in your mouth, while the prunes dissolve into a luscious, sweet-savory sauce that’s begging to be sopped up with crusty bread. Try spooning it over creamy polenta for a cozy twist that’ll have everyone asking for seconds!
Renaissance Cheese and Onion Tart

Venture into a culinary time machine with this Renaissance Cheese and Onion Tart, where flaky pastry meets a rich, savory filling that’s so delicious, it might just inspire a sonnet (or at least a happy dance in your kitchen). Seriously, this tart is the edible equivalent of finding a hidden gem at a flea market—unexpectedly fabulous and guaranteed to impress your taste buds without requiring a royal decree to make.
Serving: 6 | Pre Time: 20 minutes | Cooking Time: 40 minutes
Ingredients
– 1 sheet frozen puff pastry, thawed
– 2 tbsp unsalted butter
– 2 large yellow onions, thinly sliced
– 1 tsp granulated sugar
– 1/2 tsp salt
– 1/4 tsp black pepper
– 1 cup heavy cream
– 2 large eggs
– 1 cup shredded Gruyère cheese
– 1/4 cup grated Parmesan cheese
– 1 tbsp fresh thyme leaves
Instructions
1. Preheat your oven to 400°F and line a 9-inch tart pan with the thawed puff pastry, trimming any excess edges.
2. In a large skillet over medium heat, melt the unsalted butter, then add the thinly sliced yellow onions, cooking for 10 minutes until softened.
3. Stir in the granulated sugar, salt, and black pepper, and continue cooking for another 15 minutes until the onions are caramelized and golden brown, stirring occasionally to prevent burning.
4. In a medium bowl, whisk together the heavy cream and large eggs until smooth and fully combined.
5. Spread the caramelized onion mixture evenly over the puff pastry in the tart pan.
6. Sprinkle the shredded Gruyère cheese and grated Parmesan cheese evenly over the onions.
7. Pour the cream and egg mixture over the cheese and onions, ensuring it covers the filling uniformly.
8. Scatter the fresh thyme leaves on top of the tart for added aroma and flavor.
9. Bake the tart in the preheated oven at 400°F for 25 minutes, or until the crust is golden and the filling is set and slightly puffed.
10. Remove the tart from the oven and let it cool on a wire rack for 10 minutes before slicing and serving.
Just imagine slicing into this golden beauty: the flaky, buttery crust gives way to a creamy, cheesy interior studded with sweet, caramelized onions, creating a texture that’s both crisp and luxuriously smooth. Serve it warm as a show-stopping appetizer at your next gathering, or pair it with a simple green salad for a cozy dinner that feels straight out of a Renaissance feast—no velvet robes required!
Apple and Almond Custard Tart

Tired of the same old holiday desserts? This Apple and Almond Custard Tart is here to rescue your taste buds from boredom with a buttery, nutty, and fruit-forward fiesta that’s easier to pull off than convincing your relatives to skip the political debates. It’s the cozy, elegant treat that says ‘festive’ without requiring a culinary degree.
Serving: 8 | Pre Time: 25 minutes | Cooking Time: 45 minutes
Ingredients
– 1 1/4 cups all-purpose flour
– 1/2 cup unsalted butter, cold and cubed
– 1/4 cup granulated sugar
– 1/4 teaspoon salt
– 2 large eggs
– 1/2 cup almond flour
– 1/4 cup heavy cream
– 1 teaspoon vanilla extract
– 2 medium apples, peeled and thinly sliced
– 2 tablespoons sliced almonds
– 1 tablespoon powdered sugar
Instructions
1. Preheat your oven to 375°F (190°C).
2. In a food processor, combine 1 1/4 cups all-purpose flour, 1/2 cup cold cubed unsalted butter, 1/4 cup granulated sugar, and 1/4 teaspoon salt; pulse until the mixture resembles coarse crumbs.
3. Press the dough evenly into a 9-inch tart pan, covering the bottom and sides; chill it in the refrigerator for 15 minutes to prevent shrinkage during baking.
4. Blind bake the crust by lining it with parchment paper and filling with pie weights or dried beans; bake at 375°F for 12 minutes, then remove the weights and parchment.
5. While the crust bakes, whisk 2 large eggs in a bowl until frothy.
6. Add 1/2 cup almond flour, 1/4 cup heavy cream, and 1 teaspoon vanilla extract to the eggs; whisk until smooth to create the custard base.
7. Arrange 2 thinly sliced peeled apples in a circular pattern over the pre-baked crust.
8. Pour the custard mixture evenly over the apples, ensuring it seeps into the gaps.
9. Sprinkle 2 tablespoons sliced almonds on top for a crunchy texture.
10. Bake the tart at 375°F for 30-35 minutes, or until the custard is set and the edges are golden brown; a toothpick inserted should come out clean.
11. Let the tart cool completely on a wire rack to allow the custard to firm up properly.
12. Dust the cooled tart with 1 tablespoon powdered sugar just before serving.
Zesty apples meld with creamy almond custard in a flaky crust, offering a delightful contrast of textures from crisp to velvety. Serve it warm with a scoop of vanilla ice cream for a decadent twist, or enjoy it at room temperature as a sophisticated afternoon snack that’ll make you feel like a pastry pro.
Medieval Pea and Bacon Soup

Ever wondered what medieval peasants slurped to survive those drafty castle winters? This hearty pea and bacon soup is the answer—a rustic bowl of comfort that’s basically a hug from the 14th century, but with way better bacon. It’s simple, savory, and surprisingly modern, proving that some classics never go out of style (or out of the pot).
Serving: 4 | Pre Time: 10 minutes | Cooking Time: 35 minutes
Ingredients
– 6 slices thick-cut bacon
– 1 medium yellow onion
– 2 cloves garlic
– 4 cups low-sodium chicken broth
– 1 lb dried split peas
– 1 tsp salt
– 1/2 tsp black pepper
– 1 tbsp olive oil
Instructions
1. Heat 1 tbsp olive oil in a large pot over medium-high heat until shimmering, about 1 minute.
2. Add 6 slices thick-cut bacon to the pot and cook until crispy and browned, flipping halfway through, about 8–10 minutes total. Tip: Resist nibbling the bacon now—it’ll add smoky depth later!
3. Transfer the cooked bacon to a paper towel-lined plate, leaving the rendered fat in the pot.
4. Dice 1 medium yellow onion and mince 2 cloves garlic.
5. Add the diced onion to the hot bacon fat and cook over medium heat, stirring occasionally, until translucent and softened, about 5 minutes.
6. Stir in the minced garlic and cook until fragrant, about 30 seconds. Tip: Don’t let the garlic brown, or it might turn bitter.
7. Pour in 4 cups low-sodium chicken broth and 1 lb dried split peas, stirring to combine.
8. Bring the mixture to a boil over high heat, then reduce the heat to low and cover the pot.
9. Simmer gently for 25–30 minutes, stirring occasionally, until the peas are completely tender and broken down. Tip: If the soup gets too thick, add a splash of water or broth to reach your desired consistency.
10. While the soup simmers, crumble the reserved cooked bacon into small pieces.
11. Once the peas are tender, stir in 1 tsp salt and 1/2 tsp black pepper.
12. Remove the pot from the heat and use an immersion blender to puree the soup until smooth, about 1–2 minutes. Alternatively, carefully transfer in batches to a countertop blender.
13. Ladle the soup into bowls and top each serving with the crumbled bacon.
Unbelievably creamy from the blended peas, this soup boasts a rich, smoky flavor thanks to that bacon base, with a subtle sweetness from the onions. Serve it piping hot in a rustic bread bowl for a truly medieval feast—just skip the wooden spoons and enjoy with a modern spoon instead!
Renaissance-Style Stuffed Peppers

Brace yourselves, food adventurers, because we’re about to stuff a pepper so magnificently, even a Renaissance painter would want to capture its glory. This isn’t your average weeknight filler; it’s a vibrant, savory masterpiece that turns humble ingredients into a regal feast. Get ready to impress your court (or just your hungry family) with minimal fuss and maximum flavor.
Serving: 4 | Pre Time: 20 minutes | Cooking Time: 45 minutes
Ingredients
– 4 large bell peppers (any color)
– 1 lb ground beef (85% lean)
– 1 cup long-grain white rice, uncooked
– 1 medium yellow onion, diced
– 2 cloves garlic, minced
– 1 (15 oz) can diced tomatoes, undrained
– 1 cup shredded mozzarella cheese
– 2 tbsp olive oil
– 1 tsp dried oregano
– 1 tsp salt
– 1/2 tsp black pepper
– 2 cups water
Instructions
1. Preheat your oven to 375°F (190°C).
2. Slice the tops off the bell peppers and remove all seeds and membranes from the inside.
3. In a large skillet over medium-high heat, add 1 tbsp of olive oil and the diced onion; sauté for 5 minutes until translucent.
4. Add the minced garlic to the skillet and cook for 1 minute until fragrant.
5. Add the ground beef to the skillet, breaking it apart with a spoon, and cook for 8-10 minutes until no longer pink.
6. Stir in the uncooked rice, diced tomatoes with their juices, oregano, salt, and black pepper into the skillet.
7. Pour 2 cups of water into the skillet, bring to a boil, then reduce heat to low, cover, and simmer for 15 minutes until the rice is tender and liquid is absorbed. (Tip: Don’t peek while simmering to keep the steam in for perfect rice!)
8. Remove the skillet from heat and let the mixture cool slightly for 5 minutes, then stir in 1/2 cup of the shredded mozzarella cheese.
9. Brush the outside of the bell peppers with the remaining 1 tbsp of olive oil and place them upright in a baking dish.
10. Spoon the beef and rice mixture evenly into each pepper, packing it down gently.
11. Sprinkle the remaining 1/2 cup of mozzarella cheese over the top of each stuffed pepper.
12. Cover the baking dish with aluminum foil and bake at 375°F for 30 minutes. (Tip: The foil trap keeps the peppers tender without drying out.)
13. Remove the foil and bake for an additional 15 minutes until the cheese is golden and bubbly. (Tip: For extra crispiness, broil for the last 2-3 minutes, but watch closely to avoid burning!)
14. Carefully remove from the oven and let rest for 5 minutes before serving.
Each bite delivers a delightful contrast: the pepper softens into sweet, juicy walls that cradle the hearty, savory filling, with melted cheese adding a gooey, rich finish. Elevate this Renaissance revival by serving it atop a bed of simple greens for a colorful plate, or pair it with crusty bread to scoop up any escaped bits of that glorious tomato-infused rice—because in this kitchen, we waste no masterpiece.
Roasted Quail with Rosemary
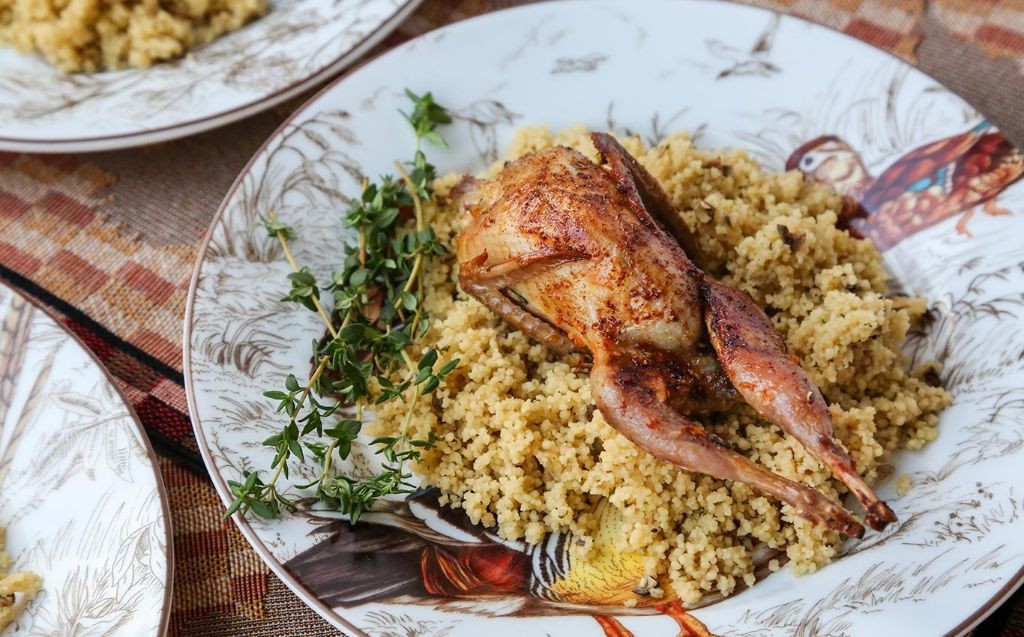
Savor the holidays with a dish that’s delightfully fancy yet secretly simple—these roasted quail are like tiny, elegant turkeys that won’t hog the oven all day. With a crispy, golden skin and fragrant rosemary, they’re a showstopper that’ll have your guests thinking you slaved for hours, while you secretly know it’s a breeze.
Serving: 4 | Pre Time: 15 minutes | Cooking Time: 25 minutes
Ingredients
– 4 whole quail (about 4–5 oz each)
– 2 tbsp olive oil
– 4 sprigs fresh rosemary
– 2 cloves garlic, minced
– 1 tsp kosher salt
– 1/2 tsp black pepper
– 1/2 lemon, juiced
Instructions
1. Preheat your oven to 425°F and place a rack in the middle position.
2. Pat the quail completely dry with paper towels—this helps the skin crisp up beautifully.
3. In a small bowl, mix together the olive oil, minced garlic, kosher salt, and black pepper.
4. Rub the oil mixture evenly all over each quail, including inside the cavities.
5. Place 1 sprig of rosemary inside each quail cavity for aromatic flavor.
6. Arrange the quail breast-side up on a rimmed baking sheet lined with parchment paper or foil.
7. Roast in the preheated oven for 20–25 minutes, until the skin is golden brown and the internal temperature reaches 165°F when checked with a meat thermometer.
8. Remove the quail from the oven and drizzle with fresh lemon juice right before serving.
Velvety and tender, the meat falls off the bone with a hint of garlic and zesty lemon. Serve these little gems over a bed of creamy polenta or alongside roasted root vegetables for a cozy, festive meal that’s as impressive as it is delicious.
Spiced Pear and Walnut Compote
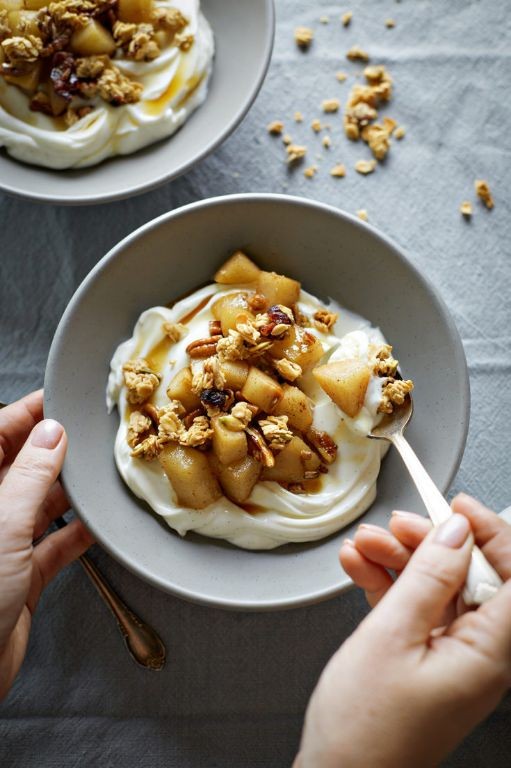
Zesty, warm, and wonderfully aromatic, this spiced pear and walnut compote is the cozy hug your breakfast or dessert table has been craving—think of it as autumn in a bowl, but with the playful charm of a holiday sweater. It’s the kind of simple, elegant dish that makes you look like a kitchen wizard with minimal effort, perfect for impressing guests or treating yourself on a chilly day. Let’s dive into this sweet, spiced delight that’s as versatile as it is delicious!
Serving: 4 | Pre Time: 10 minutes | Cooking Time: 20 minutes
Ingredients
– 4 medium pears, peeled, cored, and diced
– 1 cup walnuts, chopped
– 1/2 cup granulated sugar
– 1/4 cup water
– 2 tbsp unsalted butter
– 1 tsp ground cinnamon
– 1/2 tsp ground nutmeg
– 1/4 tsp ground cloves
– 1 tbsp lemon juice
Instructions
1. In a medium saucepan over medium heat, melt 2 tbsp unsalted butter until it bubbles slightly, about 1 minute.
2. Add 4 medium pears, peeled, cored, and diced, and sauté for 5 minutes, stirring occasionally, until they start to soften—tip: use firm pears like Bosc or Anjou to hold their shape better.
3. Stir in 1/2 cup granulated sugar, 1/4 cup water, 1 tsp ground cinnamon, 1/2 tsp ground nutmeg, and 1/4 tsp ground cloves until well combined.
4. Bring the mixture to a gentle boil, then reduce heat to low and simmer uncovered for 15 minutes, stirring every 5 minutes to prevent sticking—tip: the compote is ready when the pears are tender but not mushy and the liquid has thickened slightly.
5. Remove the saucepan from heat and stir in 1 tbsp lemon juice and 1 cup walnuts, chopped, mixing thoroughly to coat everything evenly.
6. Let the compote cool for 10 minutes to allow the flavors to meld—tip: for a richer taste, you can toast the walnuts in a dry skillet over medium heat for 3-5 minutes before adding them, but watch closely to avoid burning.
7. Transfer the compote to a serving bowl or storage container.
8. Serve warm or at room temperature as desired.
Aromatic and luscious, this compote boasts a tender, chunky texture with a delightful crunch from the walnuts, all wrapped in a warm, spiced syrup that’s not too sweet. Its deep, cozy flavors make it a star spooned over vanilla ice cream, swirled into oatmeal, or even as a fancy topping for pancakes—get creative and let it shine in your favorite dishes!
Renaissance-Style Fish Pie with Saffron
Zesty, bold, and fit for a king’s feast, this Renaissance-style fish pie brings a splash of saffron-scented luxury to your modern table—because why should Henry VIII have all the fun? Imagine flaky fish, creamy sauce, and golden pastry, all whispering tales of Tudor banquets while making your kitchen smell like a gourmet time machine. It’s history you can eat, minus the questionable hygiene standards of the 1500s!
Serving: 6 | Pre Time: 25 minutes | Cooking Time: 45 minutes
Ingredients
– 1.5 lbs cod fillets
– 1 cup heavy cream
– 1/2 cup dry white wine
– 1/4 tsp saffron threads
– 1 sheet puff pastry (thawed)
– 1 egg (beaten)
– 2 tbsp unsalted butter
– 1 small onion (diced)
– 2 cloves garlic (minced)
– 1 tbsp all-purpose flour
– 1/2 tsp salt
– 1/4 tsp black pepper
Instructions
1. Preheat your oven to 400°F and lightly grease a 9-inch pie dish.
2. Pat the cod fillets dry with paper towels to ensure a crispier bake later.
3. In a small bowl, soak the saffron threads in 2 tablespoons of warm water for 10 minutes to release their vibrant color and aroma.
4. Melt the unsalted butter in a skillet over medium heat, then add the diced onion and cook for 5 minutes until translucent.
5. Stir in the minced garlic and cook for 1 more minute until fragrant.
6. Sprinkle the all-purpose flour over the onion mixture and cook for 2 minutes, stirring constantly to form a roux.
7. Gradually whisk in the heavy cream and dry white wine until the sauce is smooth and thickened, about 3-4 minutes.
8. Add the soaked saffron with its liquid, salt, and black pepper to the sauce, stirring to combine evenly.
9. Arrange the cod fillets in the prepared pie dish and pour the saffron sauce over them, coating the fish completely.
10. Roll out the puff pastry sheet to fit the top of the pie dish, then place it over the filling, trimming any excess edges.
11. Brush the beaten egg over the pastry crust to create a shiny, golden finish when baked.
12. Cut a few small slits in the pastry to allow steam to escape during baking.
13. Bake the pie in the preheated oven for 30-35 minutes, until the pastry is puffed and golden brown and the filling is bubbling at the edges.
14. Remove the pie from the oven and let it rest for 10 minutes before serving to allow the flavors to meld and the filling to set.
Rich and creamy, this pie boasts a velvety saffron sauce that hugs tender cod, all tucked under a flaky, buttery crust that shatters with every bite. Serve it warm with a crisp green salad to cut through the richness, or channel your inner royal and pair it with a glass of that leftover white wine for a truly decadent meal.
Summary
Zesty flavors from the past await in these 18 authentic Renaissance recipes! They’re a delicious way to connect with history right in your own kitchen. We’d love to hear which dish becomes your favorite—please leave a comment below. If you enjoyed this culinary journey, help others discover it by sharing this article on Pinterest. Happy cooking!


