Many home cooks overlook rice pilaf, assuming it’s just plain rice, but this classic dish transforms simple grains into a fragrant, fluffy masterpiece with distinct, separate grains. Mastering this technique unlocks a versatile side that pairs beautifully with proteins and vegetables while offering a wholesome base for countless variations. My health-conscious version emphasizes whole grains and aromatic spices to create a dish that’s as nourishing as it is delicious.
Why This Recipe Works
- Toasting the rice in olive oil before simmering creates a protective coating that prevents the grains from becoming gummy, ensuring each one remains separate and fluffy.
- Using low-sodium vegetable broth instead of water infuses the rice with deep, savory flavor while controlling sodium intake for a heart-healthier option.
- Incorporating aromatic vegetables like onion and garlic provides natural sweetness and complexity without relying on excessive salt or fat.
- The resting period after cooking allows steam to finish the process gently, resulting in perfectly tender grains that hold their structure when served.
Ingredients
- 1 ½ cups long-grain brown rice (rinsed and drained)
- 2 tablespoons extra-virgin olive oil
- 1 medium yellow onion (finely diced)
- 3 cloves garlic (minced)
- 3 cups low-sodium vegetable broth
- ½ teaspoon sea salt
- ¼ teaspoon freshly ground black pepper
- 2 bay leaves
- ¼ cup fresh parsley (chopped, for garnish)
Equipment Needed
- Medium saucepan with tight-fitting lid
- Wooden spoon or spatula
- Cutting board and chef’s knife
- Measuring cups and spoons
- Fine-mesh strainer (for rinsing rice)
Instructions
Step 1: Prepare and Toast the Rice
Begin by thoroughly rinsing 1 ½ cups of long-grain brown rice under cold running water in a fine-mesh strainer for about 60 seconds, or until the water runs mostly clear. This crucial step removes excess surface starch that can cause the grains to clump together during cooking. Allow the rice to drain completely while you heat 2 tablespoons of extra-virgin olive oil in your medium saucepan over medium heat for approximately 2 minutes, until the oil shimmers but does not smoke. Add the drained rice to the hot oil and toast it, stirring constantly with a wooden spoon, for 3 to 4 minutes. The grains will become fragrant and turn a light golden color, which develops a nutty flavor and creates that essential protective coating. Tip: For an even deeper flavor profile, consider toasting the rice for an additional minute, but watch closely to prevent burning, as brown rice can go from toasted to bitter quickly.
Step 2: Sauté the Aromatics
Add 1 finely diced medium yellow onion to the toasted rice in the saucepan. Cook the mixture, stirring frequently, for 5 to 7 minutes over medium heat until the onion becomes translucent and softens, releasing its natural sugars. You’ll notice the edges of the onion pieces may just begin to take on a very light golden hue, which indicates proper caramelization without burning. Next, stir in 3 minced cloves of garlic and cook for exactly 1 minute more, until the garlic becomes fragrant. This brief cooking time is critical to mellow the raw bite of garlic while preserving its health-promoting allicin compounds, which can degrade with prolonged high heat. The combination of toasted rice and softened aromatics forms the flavor foundation of your pilaf.
Step 3: Simmer the Rice
Carefully pour in 3 cups of low-sodium vegetable broth, which should come to an immediate simmer when it hits the hot pan. Add ½ teaspoon of sea salt, ¼ teaspoon of freshly ground black pepper, and 2 whole bay leaves to the mixture. Give everything one thorough stir to combine, then immediately reduce the heat to the lowest possible setting that maintains a gentle simmer. Cover the saucepan tightly with its lid and set a timer for 45 minutes. Do not lift the lid during this cooking time, as each peek releases valuable steam and can disrupt the even cooking process. The liquid should be absorbed completely when the timer sounds, with small steam holes visible across the surface of the rice.
Step 4: Rest and Fluff the Pilaf
Once the 45-minute timer completes, turn off the heat completely but leave the covered saucepan on the warm burner. Allow the rice pilaf to rest undisturbed for exactly 10 minutes; this resting period is non-negotiable for perfect texture. During this time, residual heat and steam continue to cook the grains gently from the inside out, ensuring they become fully tender without becoming mushy. After the resting period, remove the lid and discard the bay leaves, which have now imparted their subtle herbal notes. Use a fork to fluff the rice gently, lifting from the bottom upward to separate the grains without crushing them. Tip: For exceptionally fluffy results, let the pilaf rest for up to 15 minutes if your schedule allows, as the extra time only improves the texture.
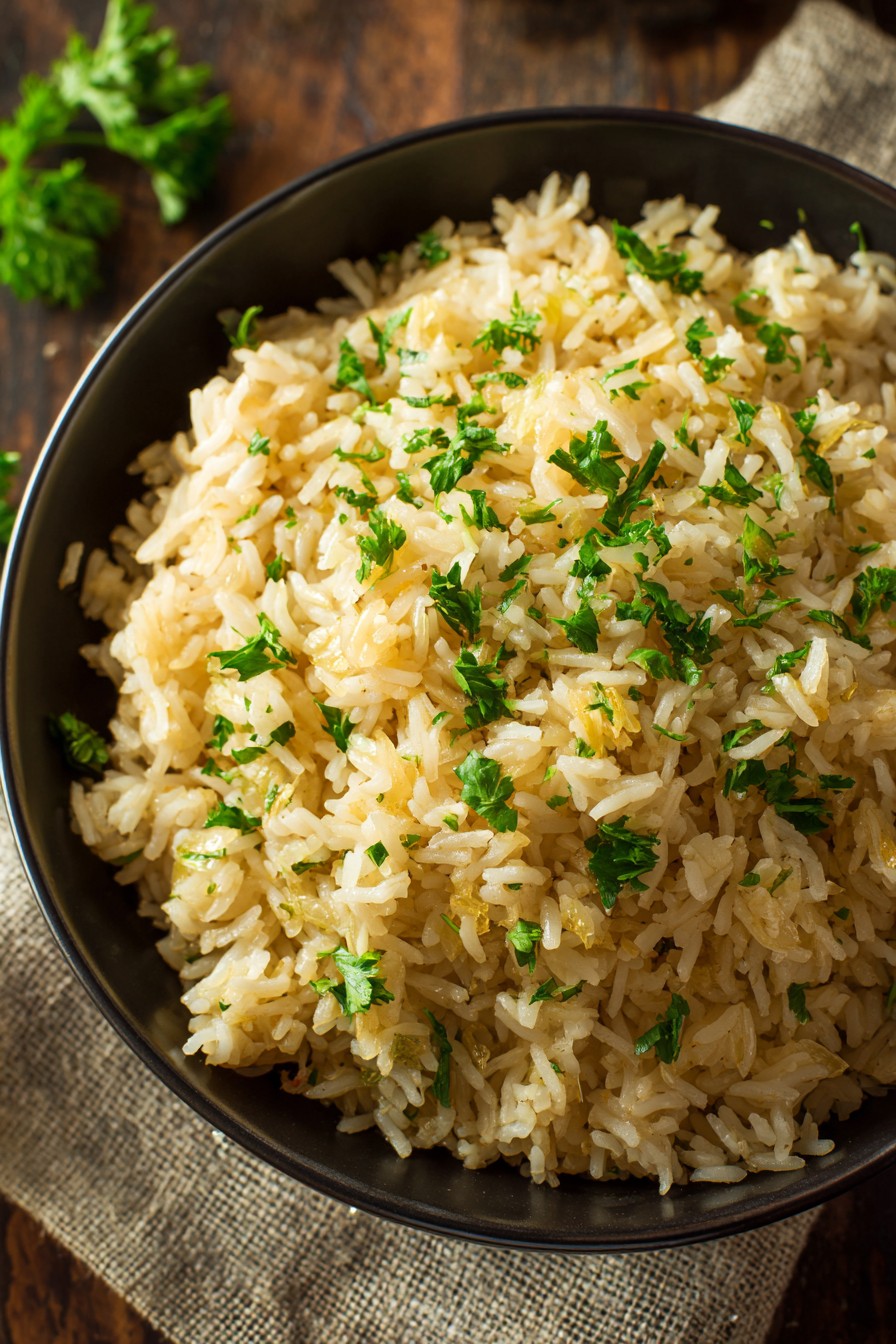
Step 5: Garnish and Serve
Transfer the fluffed rice pilaf to a serving bowl and sprinkle ¼ cup of freshly chopped parsley evenly over the top. The vibrant green parsley not only adds visual appeal but also contributes fresh flavor and additional nutrients like vitamin K and antioxidants. Serve the pilaf immediately while it’s warm, as rice dishes tend to firm up as they cool. If you need to hold the dish before serving, cover it loosely with a clean kitchen towel rather than plastic wrap, which can create condensation that makes the rice soggy. Tip: For added nutrition and texture, stir in ½ cup of toasted slivered almonds or pine nuts along with the parsley, providing healthy fats, protein, and satisfying crunch.
Tips and Tricks
For optimal results, use a saucepan with a heavy bottom, such as stainless steel or enameled cast iron, which distributes heat evenly and prevents hot spots that could scorch the rice. If you prefer white rice, reduce the cooking time to 18-20 minutes and use only 2 ¼ cups of broth, as white rice absorbs less liquid. To make this dish ahead, prepare through Step 4, then spread the fluffed rice on a baking sheet to cool completely before transferring to an airtight container; it will keep refrigerated for up to 4 days. Reheat gently in a covered saucepan with 1-2 tablespoons of broth or water over low heat, fluffing again before serving. For a richer flavor without adding meat, sauté 8 ounces of sliced mushrooms with the onions, or add a Parmesan rind to the broth while simmering (remove before serving).
Recipe Variations
- Mediterranean Pilaf: Stir in ½ cup each of chopped sun-dried tomatoes, Kalamata olives, and crumbled feta cheese after fluffing, along with 1 teaspoon of dried oregano added with the broth.
- Curried Coconut Pilaf: Replace 1 cup of vegetable broth with light coconut milk, add 2 teaspoons of curry powder when toasting the rice, and garnish with cilantro and toasted coconut flakes.
- Spring Vegetable Pilaf: During the last 5 minutes of cooking, add 1 cup of frozen peas and ½ cup of diced asparagus; after resting, stir in 2 tablespoons of lemon zest and ¼ cup of chopped mint.
- Protein-Powered Pilaf: Cook 1 cup of lentils separately according to package directions, then fold them into the finished pilaf along with 2 tablespoons of nutritional yeast for a complete plant-based protein source.
- Citrus-Herb Pilaf: Add 2 teaspoons of orange zest and 1 tablespoon of fresh thyme leaves with the garlic, then use orange juice to replace ½ cup of the vegetable broth for bright, aromatic notes.
Frequently Asked Questions
Q: Can I use white rice instead of brown rice in this recipe?
A: Absolutely. Substitute an equal amount of long-grain white rice like basmati or jasmine, but reduce the cooking time to 18-20 minutes and use only 2 ¼ cups of broth. The toasting and resting steps remain identical for perfect results.
Q: Is rice pilaf gluten-free?
A: Yes, this recipe is naturally gluten-free when made with certified gluten-free broth. Always check broth labels if you have celiac disease or severe sensitivity, as some brands may include gluten-containing additives.
Q: How can I make this recipe vegan?
A: This version is already vegan when made with vegetable broth. For added richness without dairy, stir in 2 tablespoons of nutritional yeast after fluffing, which provides a cheesy flavor along with B vitamins.
Q: What’s the difference between pilaf and regular steamed rice?
A: Pilaf involves toasting rice in fat before simmering in broth, creating separate, flavorful grains. Steamed rice is simply boiled in water, often resulting in stickier texture and milder flavor without the aromatic foundation.
Q: Can I freeze leftover rice pilaf?
A: Yes, freeze cooled pilaf in airtight containers for up to 3 months. Thaw overnight in the refrigerator, then reheat in a saucepan with a splash of broth, fluffing frequently until heated through.
Summary
This wholesome rice pilaf transforms simple ingredients into a nutritious, flavorful side dish through careful technique. Toasting the rice, simmering in broth, and allowing proper resting time creates perfectly separate, fluffy grains every time.
Perfect Rice Pilaf
6
servings10
minutes45
minutesIngredients
Instructions
- 1 Rinse rice under cold water until water runs mostly clear. Drain well.
- 2 Heat olive oil in medium saucepan over medium heat. Add rice and toast, stirring constantly, for 3-4 minutes until fragrant and lightly golden.
- 3 Add onion and cook 5-7 minutes until translucent. Add garlic and cook 1 minute more until fragrant.
- 4 Pour in vegetable broth, add salt, pepper, and bay leaves. Bring to simmer, then reduce heat to low, cover, and simmer 45 minutes.
- 5 Remove from heat and let rest, covered, for 10 minutes. Discard bay leaves, fluff with fork, and garnish with parsley before serving.