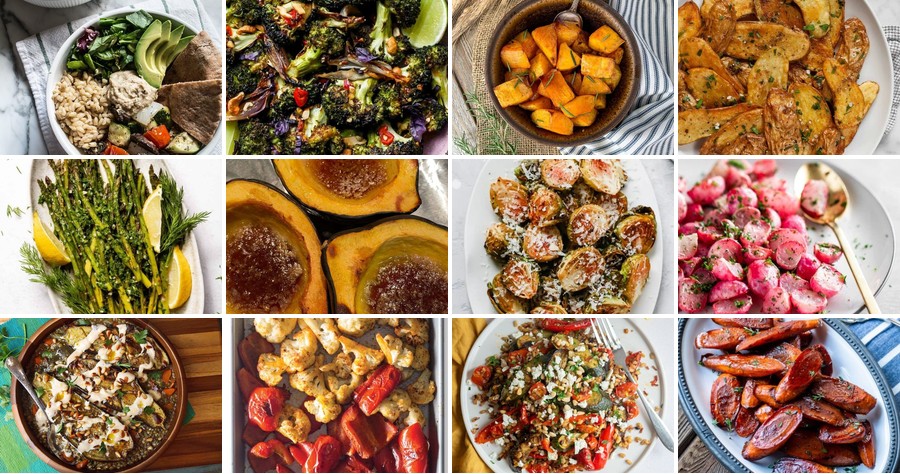
Let’s transform those humble veggies into something spectacular! Whether you’re craving quick weeknight dinners or seasonal comfort food, roasting brings out incredible flavor in every vegetable. From spring asparagus to winter squash, these 20 delicious recipes will inspire you all year round. Get ready to make your taste buds dance—keep reading for mouthwatering ideas!
Garlic Parmesan Roasted Brussels Sprouts
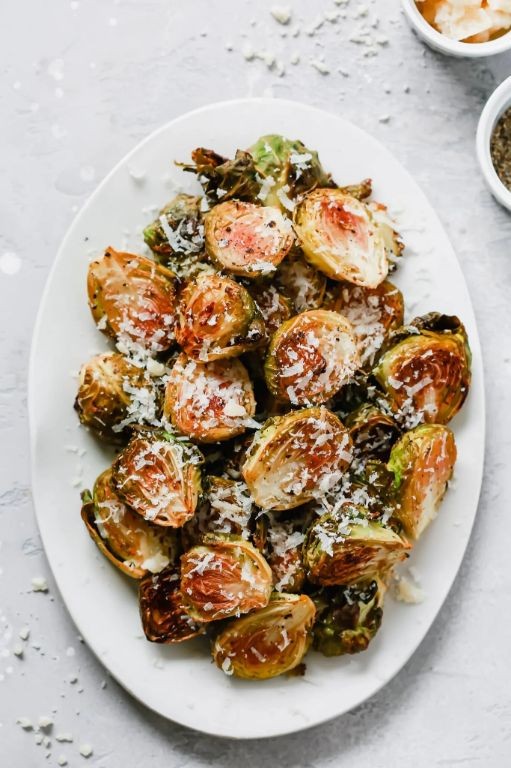
Finally, a holiday side dish that steals the spotlight! I used to be the person who pushed Brussels sprouts around my plate, but roasting them with garlic and Parmesan completely changed my mind. Now, this crispy, cheesy version is my go-to for Christmas Eve dinner—it’s so simple that I can whip it up while chatting with family in the kitchen.
Serving: 4 | Pre Time: 10 minutes | Cooking Time: 25 minutes
Ingredients
– A pound and a half of fresh Brussels sprouts, trimmed and halved
– A good glug of olive oil (about 3 tablespoons)
– 4 cloves of garlic, minced
– A generous half cup of freshly grated Parmesan cheese
– A couple of tablespoons of melted butter
– A pinch of salt and a few cracks of black pepper
Instructions
1. Preheat your oven to 400°F (200°C) and line a large baking sheet with parchment paper for easy cleanup.
2. In a large bowl, toss the halved Brussels sprouts with the olive oil, minced garlic, salt, and black pepper until evenly coated. Tip: Make sure the sprouts are dry before tossing to help them crisp up nicely in the oven.
3. Spread the sprouts in a single layer on the prepared baking sheet, cut-side down, to maximize browning.
4. Roast in the preheated oven for 20 minutes, or until the edges are golden brown and crispy.
5. While the sprouts roast, mix the grated Parmesan cheese with the melted butter in a small bowl. Tip: Use freshly grated Parmesan instead of pre-shredded—it melts better and has a richer flavor.
6. Remove the baking sheet from the oven and sprinkle the Parmesan-butter mixture evenly over the hot sprouts.
7. Return the sheet to the oven and roast for another 5 minutes, just until the cheese is melted and lightly golden. Tip: Keep an eye on it to prevent burning—the cheese can go from perfect to overdone quickly!
8. Transfer the roasted Brussels sprouts to a serving dish immediately.
Absolutely irresistible! These sprouts come out with crispy, caramelized edges and a tender center, all wrapped in a savory, garlicky Parmesan crust. I love serving them straight from the oven as a festive side, or even tossing them into a salad the next day for a delicious leftover twist.
Balsamic Glazed Roasted Carrots
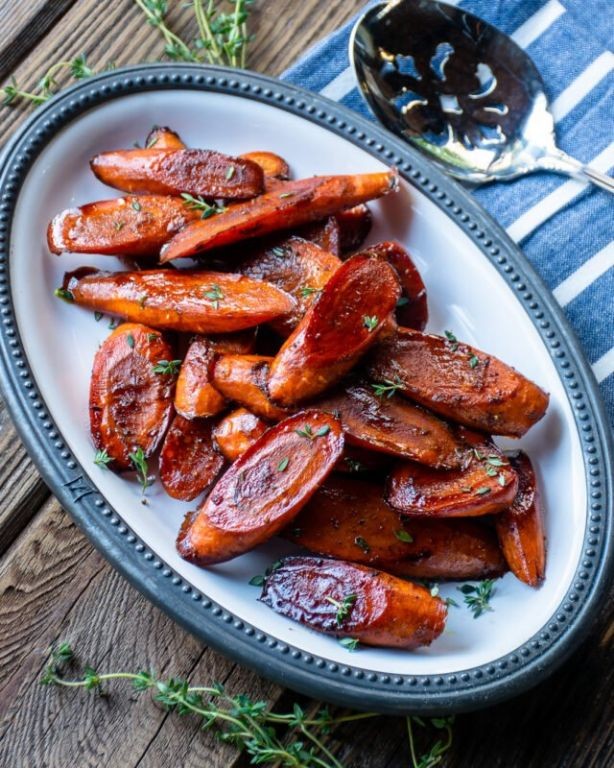
Cooking for a holiday crowd always makes me think of simple sides that feel special, and these balsamic glazed carrots are my go-to for adding a sweet, tangy pop of color to the table. I love how the glaze caramelizes into a sticky, shiny coat that makes even the veggie skeptics ask for seconds.
Serving: 4 | Pre Time: 10 minutes | Cooking Time: 25 minutes
Ingredients
– A pound of fresh carrots, peeled and sliced into sticks
– A couple of tablespoons of olive oil
– A generous pinch of salt and black pepper
– A quarter cup of balsamic vinegar
– Two tablespoons of honey
– A clove of garlic, minced
– A sprinkle of fresh thyme leaves (optional, but so good!)
Instructions
1. Preheat your oven to 425°F and line a baking sheet with parchment paper for easy cleanup.
2. Toss the carrot sticks with the olive oil, salt, and pepper on the baking sheet until evenly coated.
3. Roast the carrots in the preheated oven for 15 minutes, or until they start to soften and get a little golden at the edges.
4. While the carrots roast, whisk together the balsamic vinegar, honey, and minced garlic in a small bowl.
5. Tip: Use a good-quality balsamic vinegar here—it makes the glaze richer and less acidic.
6. After 15 minutes, remove the baking sheet from the oven and drizzle the balsamic mixture over the carrots, tossing gently to coat.
7. Return the carrots to the oven and roast for another 8–10 minutes, until the glaze is bubbly and thickens slightly.
8. Tip: Keep an eye on them toward the end to prevent burning—the sugars in the honey can caramelize quickly.
9. Remove from the oven and sprinkle with fresh thyme leaves if using.
10. Tip: Let the carrots sit for 5 minutes before serving; this helps the glaze set and intensifies the flavors.
Glazed to perfection, these carrots come out tender with a slight bite, and that balsamic-honey combo gives them a deep, savory-sweet flavor that’s irresistible. I love serving them warm alongside a roast chicken or tossing them into a grain bowl for a vibrant lunch—they’re so versatile, you might just make them a weekly staple!
Honey Roasted Sweet Potatoes with Thyme
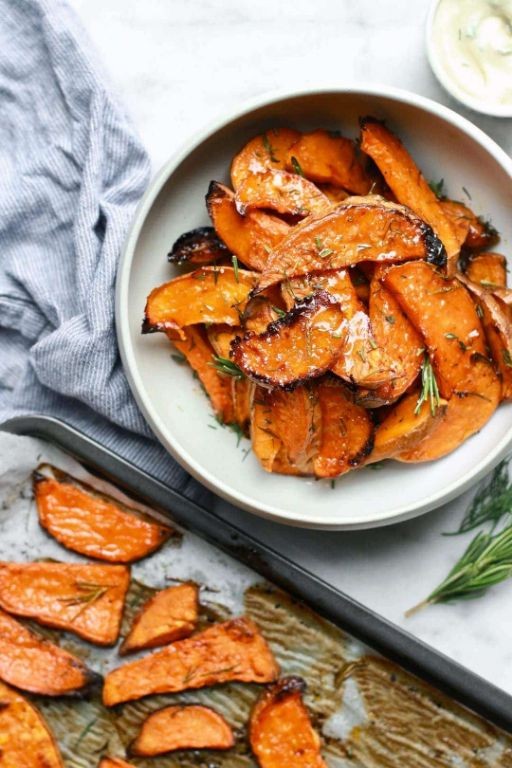
Kind of like a cozy hug in food form, these honey roasted sweet potatoes have become my go-to side dish for everything from holiday dinners to lazy Sunday meals. I started making them years ago when I needed something simple yet impressive for a last-minute potluck, and now they’re a staple in my kitchen—I even prep them on busy weeknights because they’re that easy and satisfying.
Serving: 4 | Pre Time: 10 minutes | Cooking Time: 30 minutes
Ingredients
– A couple of large sweet potatoes (about 2 pounds)
– A good drizzle of olive oil (about 2 tablespoons)
– A generous pour of honey (about 1/4 cup)
– A handful of fresh thyme sprigs
– A pinch of salt and black pepper
Instructions
1. Preheat your oven to 400°F and line a baking sheet with parchment paper.
2. Peel the sweet potatoes and cut them into 1-inch cubes for even roasting.
3. In a large bowl, toss the sweet potato cubes with the olive oil, honey, salt, and black pepper until they’re well coated.
4. Tip: Use your hands to mix—it helps distribute the honey evenly and prevents clumping.
5. Spread the coated sweet potatoes in a single layer on the prepared baking sheet.
6. Scatter the fresh thyme sprigs over the top for aromatic flavor.
7. Roast in the preheated oven for 30 minutes, or until the edges are caramelized and crispy.
8. Tip: Rotate the baking sheet halfway through cooking to ensure all sides brown uniformly.
9. Remove the baking sheet from the oven and let the sweet potatoes cool for 5 minutes.
10. Discard the thyme sprigs before serving, as they can be woody.
11. Tip: For extra crispiness, broil for the last 2-3 minutes, but watch closely to avoid burning.
Out of the oven, these sweet potatoes boast a perfect balance of tender insides and crispy, honey-glazed edges that melt in your mouth. I love serving them warm alongside roasted chicken or tossing them into a salad for a sweet-savory twist—they’re so versatile, they might just steal the show at your next meal!
Rosemary Roasted Root Vegetables
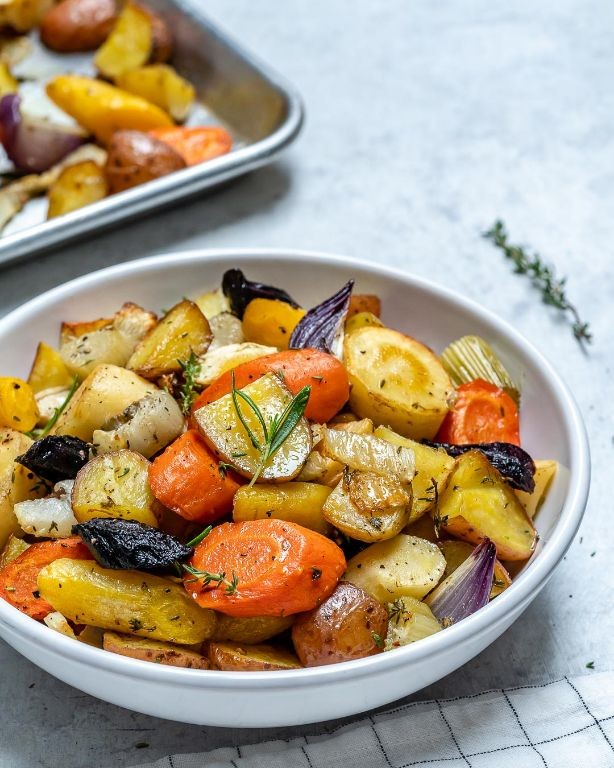
Zesty winter evenings call for something hearty and comforting, and nothing hits the spot quite like a tray of beautifully caramelized root vegetables. I love making this on a chilly Sunday afternoon—the aroma of rosemary and garlic fills my whole kitchen and makes the house feel instantly cozy. It’s become my go-to side dish for holiday dinners and casual weeknights alike.
Serving: 4 | Pre Time: 15 minutes | Cooking Time: 40 minutes
Ingredients
– A couple of large carrots, peeled and chopped into 1-inch chunks
– Two medium parsnips, peeled and chopped into 1-inch chunks
– One large sweet potato, peeled and chopped into 1-inch cubes
– A good glug of olive oil (about 3 tablespoons)
– Three fresh rosemary sprigs, leaves stripped and roughly chopped
– Three garlic cloves, minced
– A generous pinch of kosher salt
– A few cracks of freshly ground black pepper
Instructions
1. Preheat your oven to 425°F and line a large baking sheet with parchment paper for easy cleanup.
2. Place all the chopped carrots, parsnips, and sweet potato into a large mixing bowl.
3. Drizzle the olive oil over the vegetables, then add the chopped rosemary, minced garlic, salt, and pepper.
4. Toss everything together with your hands until every vegetable piece is evenly coated with the oil and seasonings. (Tip: Using your hands helps distribute the oil more evenly than a spoon.)
5. Spread the vegetables out in a single layer on the prepared baking sheet, making sure they aren’t crowded so they roast instead of steam.
6. Roast in the preheated oven for 20 minutes, then remove the tray and use a spatula to flip the vegetables over.
7. Return the tray to the oven and roast for another 15–20 minutes, until the vegetables are tender when pierced with a fork and have deep golden-brown edges. (Tip: Check at 15 minutes—if they’re not caramelized enough, give them another 5 minutes.)
8. Let the vegetables rest on the tray for 5 minutes before serving to allow them to firm up slightly. (Tip: This resting time helps prevent them from becoming mushy.)
Unbelievably tender with crispy, caramelized edges, these vegetables have a wonderful sweet-and-savory balance from the roasted garlic and rosemary. I love serving them over a bed of creamy polenta or alongside a simple roast chicken—the leftovers are fantastic tossed into a grain bowl the next day.
Maple Dijon Roasted Butternut Squash
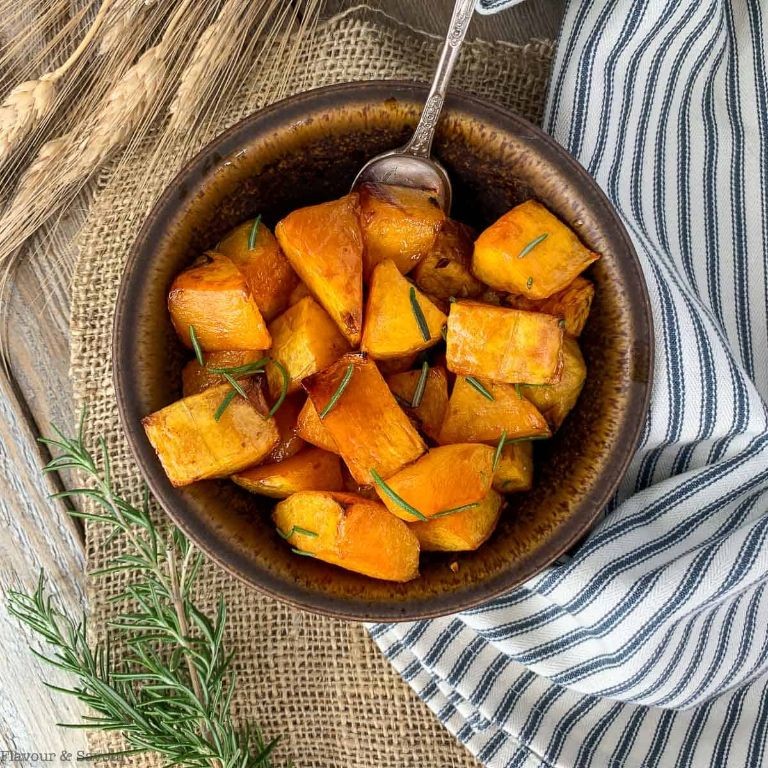
Gathering around the table during the holiday season always makes me crave something warm, sweet, and savory all at once. That’s why I’ve been making this Maple Dijon Roasted Butternut Squash for years—it’s my go‑to side dish that feels both festive and comforting, and it’s so simple that even my most kitchen‑shy friends can pull it off.
Serving: 4 | Pre Time: 15 minutes | Cooking Time: 35 minutes
Ingredients
– One medium butternut squash, peeled and cubed into 1‑inch pieces
– A couple of tablespoons of olive oil
– Two tablespoons of pure maple syrup
– A big spoonful of Dijon mustard (about 1 tablespoon)
– A pinch of salt and a few cracks of black pepper
– A sprinkle of dried thyme (about ½ teaspoon)
Instructions
1. Preheat your oven to 400°F and line a large baking sheet with parchment paper for easy cleanup.
2. In a large bowl, whisk together the olive oil, maple syrup, Dijon mustard, salt, pepper, and dried thyme until smooth.
3. Add the cubed butternut squash to the bowl and toss everything together until each piece is evenly coated with the maple‑Dijon mixture.
4. Spread the squash in a single layer on the prepared baking sheet, making sure the pieces aren’t crowded so they roast instead of steam.
5. Roast in the preheated oven for 20 minutes, then use a spatula to flip each piece—this helps them caramelize evenly on all sides.
6. Return the baking sheet to the oven and roast for another 15 minutes, or until the squash is fork‑tender and the edges are golden brown and slightly crispy.
7. Remove from the oven and let it cool for a minute before serving.
Delightfully tender with crispy caramelized edges, this squash has a perfect balance of sweet maple and tangy Dijon. I love serving it over a bed of quinoa for a hearty vegetarian meal or alongside roasted chicken for a cozy dinner—it’s versatile enough to shine on any table.
Lemon Herb Roasted Asparagus

Perfectly crisp-tender asparagus with bright lemon and earthy herbs is my go-to side dish for everything from holiday dinners to quick weeknight meals. I discovered this recipe years ago when I needed something elegant but easy for a last-minute dinner party, and now it’s a staple in my kitchen—I even make it for myself on lazy Sundays when I want something healthy that feels special.
Serving: 4 | Pre Time: 10 minutes | Cooking Time: 15 minutes
Ingredients
- A big bunch of fresh asparagus (about 1 pound), woody ends trimmed
- A couple of tablespoons of good olive oil
- A generous squeeze of fresh lemon juice (about 2 tablespoons)
- A sprinkle of dried oregano (about 1 teaspoon)
- A pinch of garlic powder (about ½ teaspoon)
- A dash of salt and freshly ground black pepper
Instructions
- Preheat your oven to 425°F and line a baking sheet with parchment paper for easy cleanup.
- Wash the asparagus spears thoroughly under cold water and pat them completely dry with a clean kitchen towel—this helps them roast instead of steam. Tip: To trim the woody ends, just bend each spear near the bottom; it’ll naturally snap where the tough part begins.
- Place the dried asparagus in a single layer on the prepared baking sheet, making sure they aren’t crowded so they crisp up nicely.
- Drizzle the olive oil evenly over the asparagus, then use your hands to toss them until each spear is lightly coated.
- Sprinkle the dried oregano, garlic powder, salt, and black pepper over the asparagus, tossing again to distribute the seasonings.
- Roast in the preheated oven for 12-15 minutes, checking at the 10-minute mark. Tip: They’re done when tender but still have a slight bite and the tips are starting to get crispy and browned.
- Remove the baking sheet from the oven and immediately squeeze the fresh lemon juice over the hot asparagus. Tip: Adding the lemon juice after roasting keeps the flavor bright and fresh instead of bitter.
- Give everything a gentle toss right on the baking sheet to let the lemon juice soak in.
Buttery and tender with a satisfying snap, these asparagus spears are infused with zesty lemon and aromatic herbs that make them irresistible. I love serving them alongside grilled chicken or tossing them into pasta for a quick, veggie-packed meal—they even shine as a simple appetizer with a dollop of garlic aioli for dipping.
Crispy Roasted Broccoli with Chili Flakes
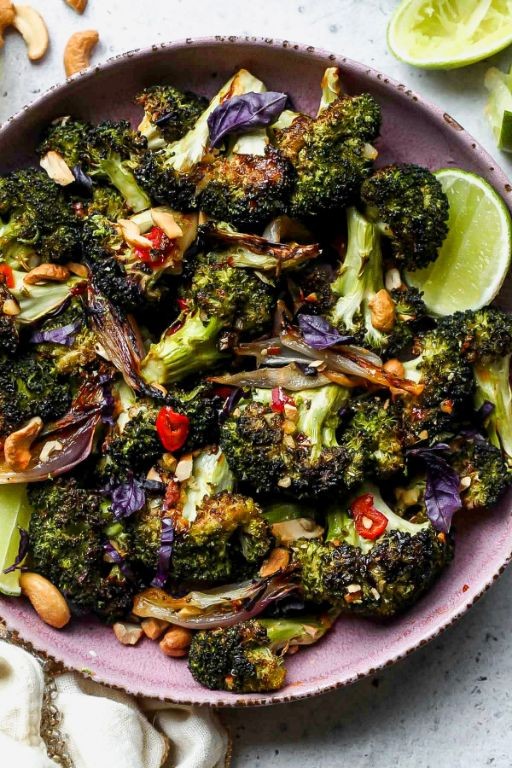
Sometimes, the simplest side dishes become the stars of the dinner table, and that’s exactly what happened with this crispy roasted broccoli. I started making it on busy weeknights when I needed something fast and flavorful, and now it’s a non-negotiable part of my meal prep. The magic is in getting those edges perfectly charred and crunchy.
Serving: 4 | Pre Time: 10 minutes | Cooking Time: 25 minutes
Ingredients
– A couple of heads of fresh broccoli, cut into florets
– A good glug of olive oil (about 3 tablespoons)
– A big pinch of kosher salt
– A couple of hefty pinches of freshly ground black pepper
– A teaspoon of chili flakes (or more if you like heat!)
– A squeeze of fresh lemon juice (from about half a lemon)
– A sprinkle of grated Parmesan cheese (optional, but highly recommended)
Instructions
1. Preheat your oven to 425°F (220°C) and line a large baking sheet with parchment paper for easy cleanup.
2. In a large bowl, toss the broccoli florets with the olive oil, kosher salt, and black pepper until they’re evenly coated. Tip: Make sure the florets are completely dry before tossing to help them crisp up better.
3. Spread the broccoli in a single layer on the prepared baking sheet, ensuring the pieces aren’t crowded so they roast instead of steam.
4. Roast in the preheated oven for 20 minutes, then remove the sheet. Tip: Don’t stir yet—letting them sit helps develop those delicious crispy bits.
5. Sprinkle the chili flakes evenly over the broccoli and return the sheet to the oven.
6. Roast for another 5 minutes, or until the edges are deeply browned and crispy when you peek at them. Tip: Ovens vary, so keep an eye out for that perfect char in the last few minutes.
7. Remove the baking sheet from the oven and immediately transfer the broccoli to a serving bowl.
8. Drizzle the fresh lemon juice over the hot broccoli and toss gently to combine.
9. If using, sprinkle the grated Parmesan cheese over the top while it’s still warm so it melts slightly.
Zesty and vibrant, this broccoli transforms with a texture that’s irresistibly crunchy on the outside yet tender inside. The chili flakes add a gentle warmth that pairs beautifully with the bright lemon, making it a standout side for grilled chicken or even tossed into pasta. I love serving it straight from the baking sheet for a casual family dinner—it always disappears fast!
Roasted Mediterranean Vegetables with Feta
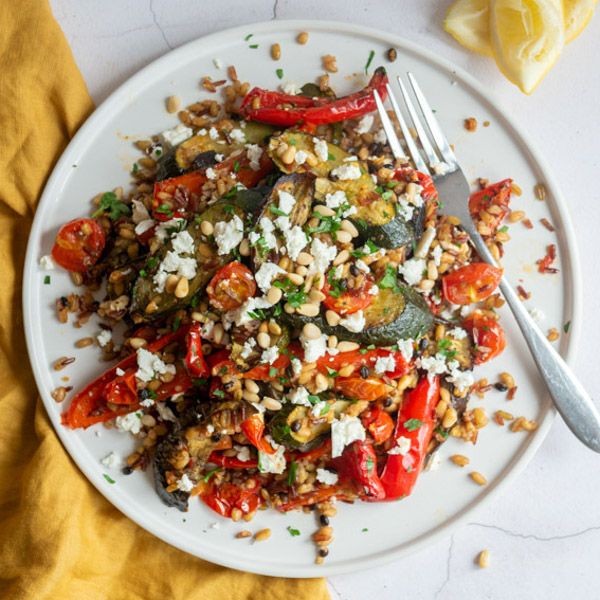
Whenever I’m craving something vibrant and satisfying without spending hours in the kitchen, this roasted veggie and feta combo is my go-to. It reminds me of a sunny afternoon at a farmers’ market, where the colors alone make you hungry. I love how the feta gets all melty and golden in the oven—it’s pure comfort food magic.
Serving: 4 | Pre Time: 15 minutes | Cooking Time: 30 minutes
Ingredients
– 2 medium zucchinis, sliced into half-moons about 1/2-inch thick
– 1 large red bell pepper, chopped into 1-inch pieces
– 1 pint of cherry tomatoes
– 1 red onion, sliced into wedges
– 3 tablespoons of olive oil
– 3 cloves of garlic, minced
– A big pinch of dried oregano
– A generous sprinkle of salt and black pepper
– 4 ounces of feta cheese, crumbled
– A handful of fresh parsley, chopped
Instructions
1. Preheat your oven to 425°F and line a large baking sheet with parchment paper.
2. In a big bowl, toss the sliced zucchini, chopped red bell pepper, cherry tomatoes, and red onion wedges with the olive oil, minced garlic, dried oregano, salt, and black pepper until everything is evenly coated. Tip: Don’t overcrowd the bowl—mix in batches if needed to ensure each veggie gets a good coating.
3. Spread the vegetables in a single layer on the prepared baking sheet, making sure they aren’t piled on top of each other. Tip: This helps them roast instead of steam, giving you those delicious caramelized edges.
4. Roast in the preheated oven for 20 minutes, then remove the sheet and sprinkle the crumbled feta cheese evenly over the vegetables.
5. Return the baking sheet to the oven and roast for another 10 minutes, or until the feta is lightly golden and the vegetables are tender with browned spots.
6. Take the baking sheet out of the oven and immediately sprinkle the chopped fresh parsley over the top. Tip: Adding the parsley right after baking keeps it bright and fresh, adding a pop of color and flavor.
7. Let the dish sit for 5 minutes before serving to allow the flavors to meld together.
Enjoy this warm, straight from the oven—the feta gets wonderfully creamy, and the veggies have a sweet, smoky depth that pairs perfectly with crusty bread or over a bed of quinoa. I often serve it as a hearty side or even as a main with a fried egg on top for extra protein.
Smoky Paprika Roasted Bell Peppers

Holiday cooking always makes me crave something vibrant and simple, and these smoky paprika roasted bell peppers are my go-to when I want to impress without the stress—they’re like a little burst of sunshine on a plate, perfect for those busy December days when you need a side that feels special but comes together in a flash. I love making a big batch to have on hand; they’re fantastic tossed into salads, piled on sandwiches, or just enjoyed straight from the baking sheet while they’re still warm.
Serving: 4 | Pre Time: 10 minutes | Cooking Time: 25 minutes
Ingredients
– 4 large bell peppers (I use a mix of red, yellow, and orange for color)
– 2 tablespoons of olive oil
– 1 tablespoon of smoked paprika
– A couple of cloves of garlic, minced
– A pinch of salt
– A splash of balsamic vinegar
Instructions
1. Preheat your oven to 425°F and line a baking sheet with parchment paper.
2. Slice the bell peppers into 1-inch-wide strips, removing the seeds and membranes.
3. In a large bowl, toss the pepper strips with the olive oil, smoked paprika, minced garlic, and salt until evenly coated.
4. Spread the peppers in a single layer on the prepared baking sheet, ensuring they aren’t crowded to help them roast evenly.
5. Roast in the preheated oven for 20-25 minutes, checking halfway through to stir them for even browning—they’re done when the edges are slightly charred and the peppers are tender.
6. Remove the baking sheet from the oven and immediately drizzle the roasted peppers with balsamic vinegar, tossing gently to combine.
7. Let the peppers cool for about 5 minutes on the baking sheet to allow the flavors to meld.
Ooh, the result is pure magic—these peppers turn out wonderfully soft with a hint of caramelized sweetness, balanced by that deep, smoky paprika and a tangy balsamic finish. I love serving them warm over creamy polenta or folding them into scrambled eggs for a quick, flavorful breakfast that feels like a treat.
Roasted Zucchini and Cherry Tomatoes

Gathering around the table with friends always reminds me how simple roasted vegetables can steal the show—this Roasted Zucchini and Cherry Tomatoes dish is my go-to when I want something vibrant and fuss-free. I love how the zucchini gets tender while the tomatoes burst with sweetness, and it all comes together in about the time it takes to pour a glass of wine. Honestly, I make this almost weekly because it’s that easy and versatile, whether I’m pairing it with grilled chicken or just scooping it straight from the pan.
Serving: 4 | Pre Time: 10 minutes | Cooking Time: 25 minutes
Ingredients
– A couple of medium zucchinis, sliced into half-moons about 1/2-inch thick
– About 2 cups of cherry tomatoes
– 2 tablespoons of olive oil
– 1 tablespoon of balsamic vinegar
– 2 cloves of garlic, minced
– A pinch of salt and black pepper
– A sprinkle of dried oregano (around 1 teaspoon)
Instructions
1. Preheat your oven to 425°F and line a baking sheet with parchment paper for easy cleanup—trust me, this saves so much scrubbing later!
2. In a large bowl, toss the sliced zucchini and cherry tomatoes with the olive oil, balsamic vinegar, minced garlic, salt, black pepper, and dried oregano until everything is evenly coated; I like to use my hands to really massage the flavors in.
3. Spread the vegetables in a single layer on the prepared baking sheet, making sure they aren’t crowded so they roast instead of steam, which helps them caramelize nicely.
4. Roast in the preheated oven for 20-25 minutes, checking halfway through to give them a quick stir for even browning—you’ll know they’re done when the zucchini is fork-tender and the tomatoes have started to burst open.
5. Remove from the oven and let cool for a minute or two before serving; this brief rest allows the juices to settle and intensifies the flavors.
Absolutely delightful in its simplicity, this dish offers a wonderful contrast of textures with the soft zucchini and juicy tomatoes, all infused with a tangy garlicky note from the balsamic. I often toss it with cooked pasta or quinoa for a hearty meal, or serve it alongside crusty bread to soak up every last bit of that delicious pan sauce—it’s a crowd-pleaser that never fails to impress!
Garlic Butter Roasted Mushrooms

Craving something savory, earthy, and ridiculously easy? I whipped up these garlic butter roasted mushrooms last night when I wanted a cozy side without the fuss—they’re my go‑to when the fridge looks bare but I still want to feel fancy. Honestly, they’re so good I almost ate the whole tray myself before my partner got home!
Serving: 4 | Pre Time: 10 minutes | Cooking Time: 20 minutes
Ingredients
– About 1 pound of cremini mushrooms, cleaned and halved (I just give them a quick rinse and pat dry—no need to be perfect!)
– 3 tablespoons of unsalted butter, melted (if you only have salted, just skip the extra salt later)
– 4 cloves of garlic, minced (I always use my garlic press—saves so much time!)
– A splash of olive oil, maybe 1 tablespoon
– A couple of sprigs of fresh thyme, leaves stripped (or ½ teaspoon dried if that’s all you have)
– A pinch of salt and a few cracks of black pepper
Instructions
1. Preheat your oven to 400°F (200°C) and line a baking sheet with parchment paper or foil for easy cleanup.
2. In a large bowl, toss the halved mushrooms with the melted butter, minced garlic, olive oil, thyme leaves, salt, and pepper until everything is evenly coated. Tip: Let the mixture sit for 5 minutes so the mushrooms soak up all that garlicky goodness.
3. Spread the mushrooms in a single layer on the prepared baking sheet, making sure they aren’t crowded—this helps them roast instead of steam.
4. Roast in the preheated oven for 15–20 minutes, stirring halfway through, until the mushrooms are tender and golden brown with crispy edges. Tip: Check at 15 minutes; if they aren’t browned enough, give them another 5 minutes.
5. Remove from the oven and let them cool for a minute or two—they’ll be piping hot! Tip: If you want them extra glossy, drizzle with a little more melted butter right after baking.
Now, these mushrooms come out with a wonderful meaty texture and a rich, buttery flavor that’s packed with garlic and herbs. I love serving them over creamy polenta or tossing them into pasta for a quick weeknight dinner—they’re so versatile and always disappear fast!
Cumin Roasted Carrots with Yogurt Sauce
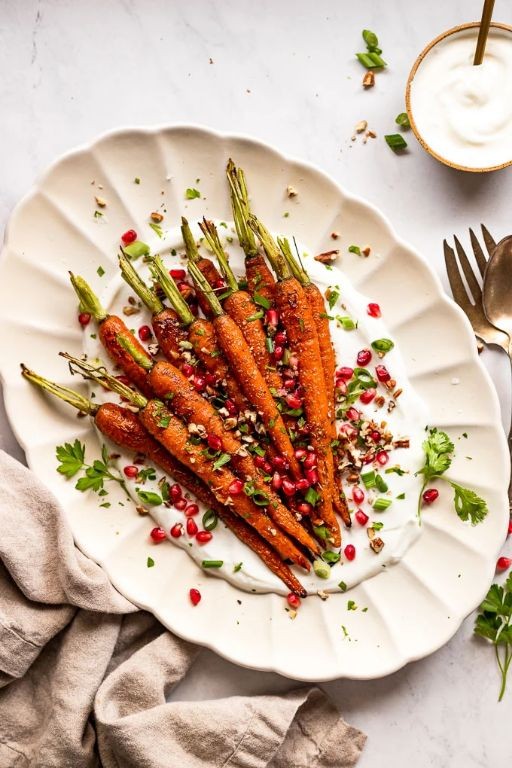
Tis the season for cozy, hands-off roasting, and these cumin-roasted carrots have become my go-to side dish for everything from weeknight dinners to holiday gatherings. I love how the earthy cumin transforms humble carrots into something special, especially when paired with a cool, tangy yogurt sauce that balances everything out. It’s the kind of recipe I scribble on a notecard because I make it so often—simple, reliable, and always a hit.
Serving: 4 | Pre Time: 10 minutes | Cooking Time: 25 minutes
Ingredients
– A couple of pounds of fresh carrots, peeled and trimmed
– A good glug of olive oil (about 2 tablespoons)
– A heaping tablespoon of ground cumin
– A generous pinch of salt and a few cracks of black pepper
– A cup of plain whole-milk yogurt
– A small handful of fresh mint leaves, chopped
– A squeeze of lemon juice (about 1 tablespoon)
– A tiny clove of garlic, minced
Instructions
1. Preheat your oven to 425°F and line a baking sheet with parchment paper for easy cleanup—this is my favorite trick to avoid scrubbing later.
2. Toss the peeled carrots with the olive oil, cumin, salt, and pepper in a large bowl until they’re evenly coated.
3. Spread the carrots in a single layer on the prepared baking sheet, making sure they aren’t crowded so they roast instead of steam.
4. Roast the carrots in the preheated oven for 20-25 minutes, flipping them halfway through, until they’re tender and caramelized at the edges.
5. While the carrots roast, whisk together the yogurt, chopped mint, lemon juice, and minced garlic in a small bowl until smooth.
6. Let the roasted carrots cool for about 5 minutes after removing them from the oven—this helps them firm up slightly for better texture.
7. Serve the carrots warm, drizzled with the yogurt sauce.
Unbelievably tender with crispy, spiced edges, these carrots pair beautifully with the creamy, herby sauce for a contrast that’s both comforting and bright. I love crumbling a little feta on top for extra tang or serving them alongside grilled chicken for a complete meal.
Roasted Acorn Squash with Brown Sugar
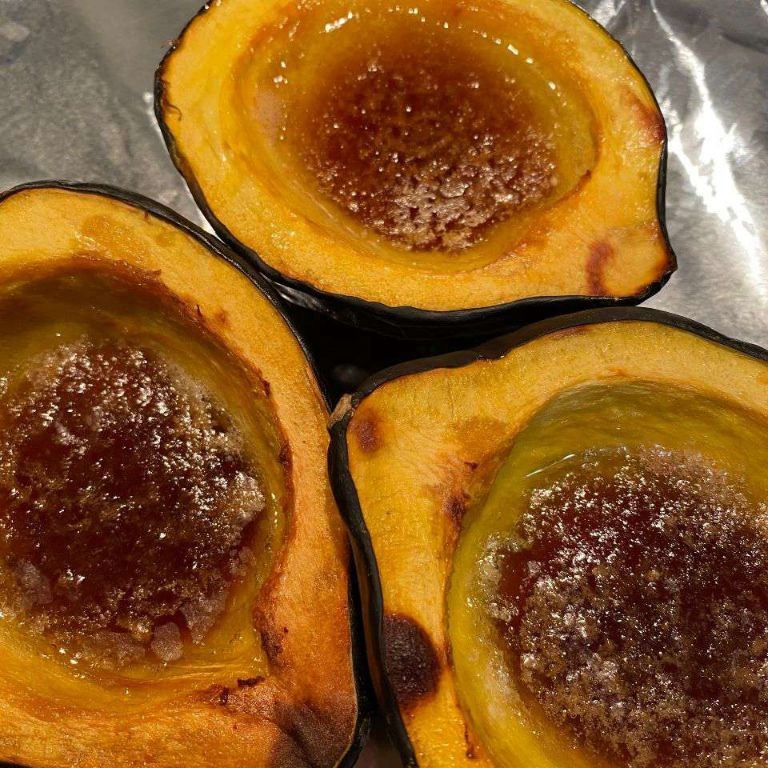
Just when the air turns crisp and I’m craving something cozy, I always reach for this simple roasted acorn squash—it’s my go‑to side that feels like a warm hug on a chilly evening. I love how the brown sugar caramelizes into a sweet, sticky glaze that makes even the pickiest eaters ask for seconds. Honestly, it’s become a non‑negotiable on my holiday table, and I bet it’ll become one of your favorites too.
Serving: 4 | Pre Time: 10 minutes | Cooking Time: 40 minutes
Ingredients
– 2 medium acorn squashes (about 1½ pounds each)
– 3 tablespoons of olive oil
– ¼ cup of packed brown sugar
– 1 teaspoon of ground cinnamon
– A good pinch of salt
– A couple of tablespoons of melted butter
– A splash of water (about 2 tablespoons)
Instructions
1. Preheat your oven to 400°F and line a baking sheet with parchment paper.
2. Carefully slice each acorn squash in half lengthwise using a sharp chef’s knife—tip: place a damp towel under the cutting board to keep it steady.
3. Scoop out all the seeds and stringy bits from each squash half with a spoon.
4. Brush the cut sides of the squash halves evenly with 3 tablespoons of olive oil.
5. In a small bowl, mix together ¼ cup of packed brown sugar, 1 teaspoon of ground cinnamon, and a good pinch of salt.
6. Sprinkle the brown sugar mixture generously over the oiled squash halves, pressing it lightly so it sticks.
7. Drizzle a couple of tablespoons of melted butter evenly over the top of each squash half.
8. Pour a splash of water (about 2 tablespoons) onto the baking sheet around the squash—this creates steam to keep them moist.
9. Roast the squash in the preheated oven at 400°F for 35–40 minutes, until the flesh is tender when pierced with a fork and the tops are caramelized and bubbly.
10. Let the squash cool for 5 minutes before serving—tip: this allows the sugars to set slightly so they don’t burn your mouth.
Glazed to perfection, each bite offers a tender, almost buttery texture with a sweet‑spicy crust that crackles slightly. I love serving it straight from the oven with a dollop of Greek yogurt or crumbled goat cheese for a tangy contrast—it’s a simple upgrade that always impresses guests.
Herbed Roasted Fingerling Potatoes

Just last week, I was scrambling for a simple yet impressive side dish for our holiday potluck, and these herbed roasted fingerling potatoes saved the day—they’re my go-to when I want something fuss-free but full of flavor, and I love how their natural sweetness shines through.
Serving: 4 | Pre Time: 10 minutes | Cooking Time: 30 minutes
Ingredients
– About 1.5 pounds of fingerling potatoes, halved lengthwise
– A good glug of olive oil (around 3 tablespoons)
– A couple of cloves of garlic, minced
– A handful of fresh rosemary, finely chopped
– A splash of fresh lemon juice (about 1 tablespoon)
– A pinch of salt and freshly ground black pepper
Instructions
1. Preheat your oven to 425°F and line a baking sheet with parchment paper for easy cleanup—trust me, this tip saves scrubbing later!
2. In a large bowl, toss the halved fingerling potatoes with the olive oil, minced garlic, chopped rosemary, lemon juice, salt, and pepper until evenly coated.
3. Spread the potatoes in a single layer on the prepared baking sheet, cut-side down, to help them crisp up nicely; overcrowding can steam them instead.
4. Roast in the preheated oven for 25-30 minutes, flipping halfway through, until the potatoes are golden brown and fork-tender—check at 25 minutes to avoid over-browning.
5. Remove from the oven and let them rest for 5 minutes on the sheet; this allows the flavors to meld and prevents burning your mouth!
Out of the oven, these potatoes boast a crispy exterior with a creamy, tender inside, infused with aromatic rosemary and a zesty lemon kick. I often serve them alongside grilled chicken or crumble a bit of feta on top for a tangy twist—they disappear fast at any gathering!
Roasted Radishes with Sea Salt
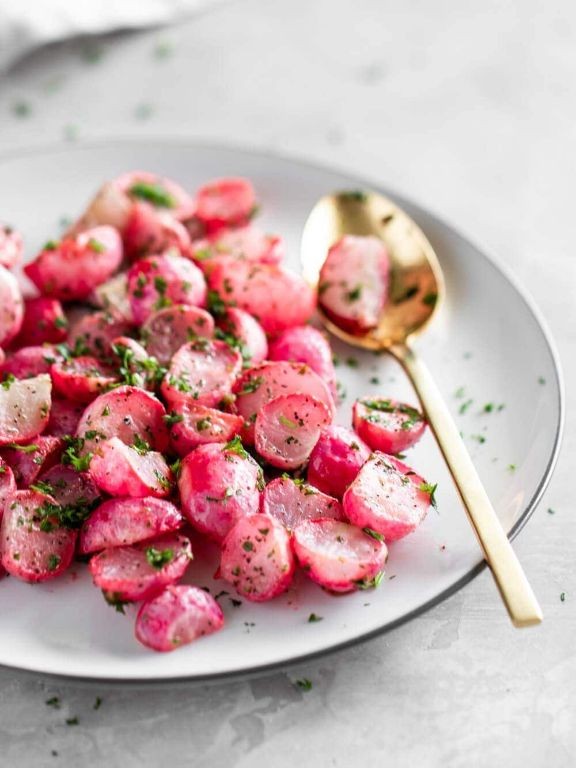
Browsing the farmers market last weekend, I spotted these vibrant radishes and remembered how roasting transforms their peppery bite into something sweet and tender—a trick I learned from my grandma who swore by roasting any veggie that seemed too sharp. It’s become my go‑for side dish when I want something simple yet impressive, and honestly, it’s way easier than you’d think.
Serving: 4 | Pre Time: 10 minutes | Cooking Time: 25 minutes
Ingredients
– A couple of bunches of fresh radishes (about 1 pound total), trimmed and halved
– 2 tablespoons of olive oil
– 1 teaspoon of fine sea salt
– A splash of fresh lemon juice (about 1 tablespoon)
– A small handful of chopped fresh parsley (about 2 tablespoons)
Instructions
1. Preheat your oven to 425°F and line a baking sheet with parchment paper for easy cleanup—this is my favorite trick to avoid scrubbing later.
2. Place the halved radishes in a large bowl and drizzle them with the 2 tablespoons of olive oil, tossing until they’re evenly coated.
3. Sprinkle the 1 teaspoon of fine sea salt over the radishes and toss again to distribute it evenly.
4. Spread the radishes in a single layer on the prepared baking sheet, making sure they aren’t crowded so they roast instead of steam.
5. Roast in the preheated oven for 20–25 minutes, checking halfway through to stir them for even browning—they’re done when fork‑tender and lightly caramelized at the edges.
6. Remove the baking sheet from the oven and immediately drizzle the roasted radishes with the 1 tablespoon of fresh lemon juice, which brightens the flavor beautifully.
7. Transfer the radishes to a serving dish and sprinkle them with the 2 tablespoons of chopped fresh parsley for a fresh, colorful finish.
Zesty and slightly sweet, these radishes turn wonderfully tender with a crisp edge, making them a surprising hit even for veggie‑skeptics. I love tossing them into grain bowls or serving them alongside grilled chicken for a quick, vibrant meal that feels special without any fuss.
Pesto Roasted Green Beans
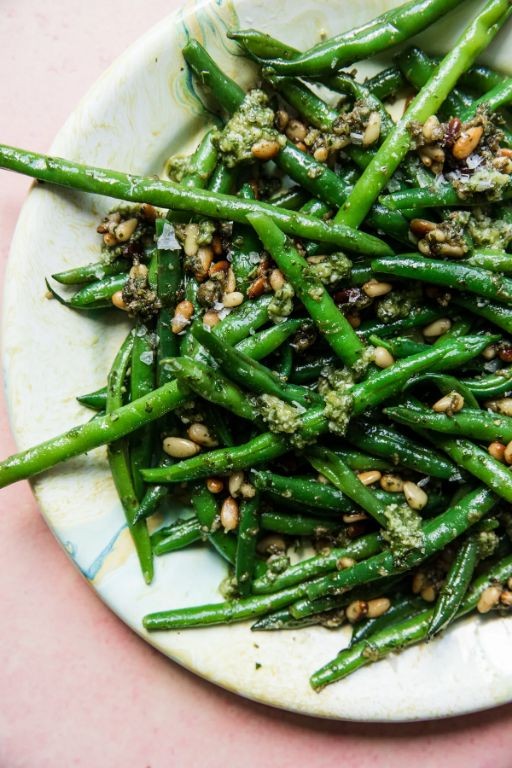
Kicking off my holiday menu planning, I realized I needed a vibrant side dish that could hold its own next to the main event—enter these pesto roasted green beans, which have become my go-to for adding a pop of color and flavor without fuss. I first whipped them up during a chaotic Friendsgiving a few years back when I forgot to buy a salad, and they were such a hit that now my crew requests them year-round. Honestly, there’s something magical about how roasting transforms humble green beans into crispy, caramelized bites, especially when tossed with that herby pesto.
Serving: 4 | Pre Time: 10 minutes | Cooking Time: 20 minutes
Ingredients
– A pound of fresh green beans, ends trimmed
– A generous ¼ cup of store-bought or homemade basil pesto (I always keep a jar in my fridge for emergencies!)
– A couple of tablespoons of olive oil
– A pinch of kosher salt
– A sprinkle of freshly ground black pepper
– A handful of grated Parmesan cheese (optional, but it adds a nice savory kick)
Instructions
1. Preheat your oven to 425°F and line a baking sheet with parchment paper for easy cleanup—trust me, this saves so much scrubbing later.
2. In a large bowl, toss the trimmed green beans with the olive oil, kosher salt, and black pepper until they’re evenly coated.
3. Spread the green beans in a single layer on the prepared baking sheet, making sure they aren’t crowded to help them crisp up nicely.
4. Roast in the preheated oven for 15 minutes, then pull them out and give the tray a good shake to flip the beans for even browning.
5. Drizzle the pesto over the green beans and toss gently to coat every bean—this is my favorite tip: adding pesto halfway through prevents it from burning and keeps that fresh herb flavor vibrant.
6. Return the tray to the oven and roast for another 5 minutes, until the beans are tender with slightly charred edges.
7. Remove from the oven and, if using, sprinkle with the grated Parmesan cheese while still hot so it melts slightly.
8. Let the beans cool for a minute before serving to avoid burning your tongue—I’ve learned this the hard way after too many impatient taste tests!
Ultimately, these beans come out with a delightful crunch on the outside and a tender bite inside, all infused with that garlicky, nutty pesto goodness. I love serving them straight from the baking sheet at potlucks or pairing them with grilled chicken for a quick weeknight dinner—they’re so versatile and always disappear fast!
Roasted Vegetable Grain Bowl with Avocado
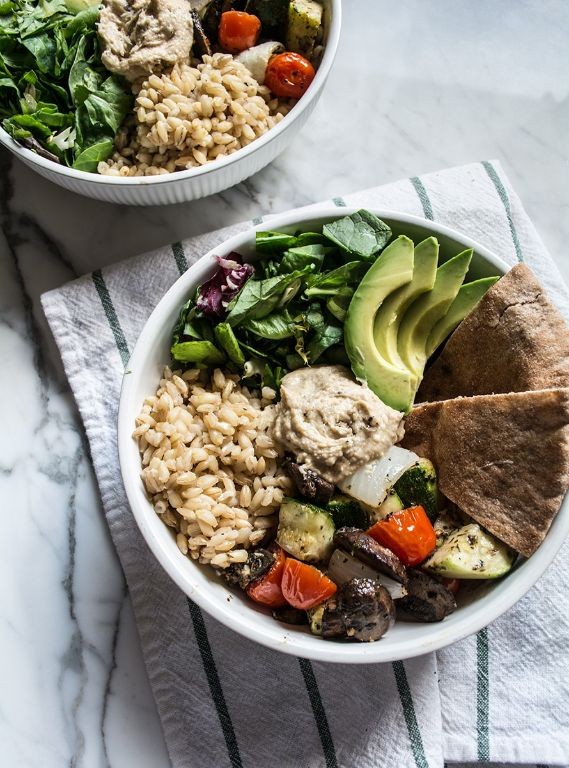
Holiday chaos got you craving something wholesome and easy? I whipped up these roasted vegetable grain bowls last week when my fridge was overflowing with seasonal produce, and they’ve become my go-to for a satisfying, no-fuss meal. Honestly, there’s nothing better than a bowl that’s both nourishing and deliciously simple to pull together.
Serving: 2 | Pre Time: 15 minutes | Cooking Time: 30 minutes
Ingredients
– A couple of cups of cooked quinoa or farro (about 1 cup uncooked)
– 1 medium sweet potato, peeled and cubed into 1-inch pieces
– 1 bell pepper (any color), sliced into strips
– 1 small red onion, sliced into wedges
– A big handful of broccoli florets
– 2 tablespoons of olive oil
– A generous pinch of salt and black pepper
– 1 ripe avocado, sliced
– A splash of lemon juice (about 1 tablespoon)
– Optional: a sprinkle of everything bagel seasoning or red pepper flakes for a kick
Instructions
1. Preheat your oven to 425°F and line a baking sheet with parchment paper for easy cleanup—trust me, it’s a lifesaver!
2. In a large bowl, toss the sweet potato cubes, bell pepper strips, red onion wedges, and broccoli florets with the olive oil, salt, and black pepper until everything is evenly coated.
3. Spread the vegetables in a single layer on the prepared baking sheet to ensure they roast evenly and get nicely caramelized, not steamed.
4. Roast in the preheated oven for 25-30 minutes, flipping halfway through, until the sweet potatoes are fork-tender and the edges are slightly crispy.
5. While the vegetables roast, cook 1 cup of quinoa or farro according to package directions until fluffy; I like to let it sit covered for 5 minutes off the heat to absorb any extra moisture.
6. Slice the avocado and drizzle it with lemon juice right away to prevent browning—this little trick keeps it looking fresh!
7. Divide the cooked grains between two bowls, then top with the roasted vegetables and avocado slices.
8. Garnish with everything bagel seasoning or red pepper flakes if using, and serve immediately.
This bowl is a textural dream with creamy avocado against the hearty grains and crispy roasted veggies. Try it with a dollop of tahini or a fried egg on top for extra richness, or pack it cold for a next-day lunch that still tastes amazing.
Summary
You’ll find endless inspiration in these 20 delicious roasted vegetable recipes for every season. From cozy winter roots to vibrant summer squash, there’s a perfect dish for any occasion. We hope you try a few, leave a comment with your favorite, and share this roundup on Pinterest to spread the veggie love!