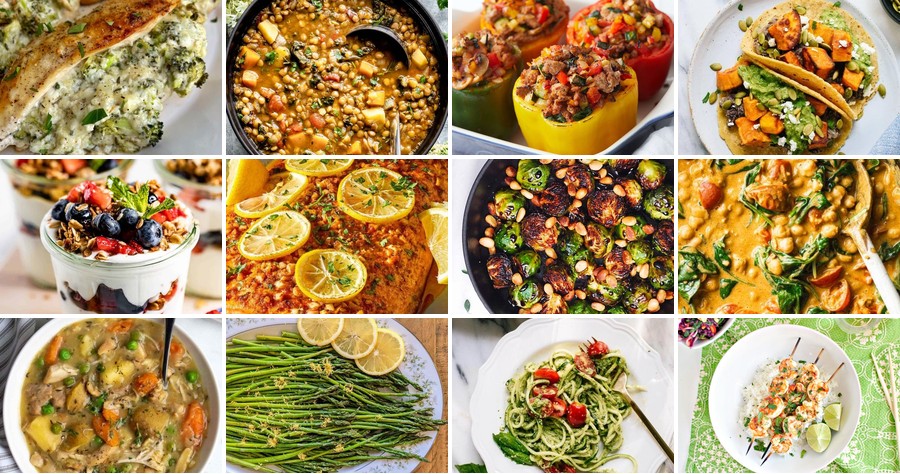
Hey there, home cooks! Managing diabetes doesn’t mean sacrificing flavor or spending hours in the kitchen. We’ve gathered 20 simple, delicious recipes that fit perfectly into a diabetic-friendly lifestyle—think quick dinners, satisfying comfort foods, and fresh seasonal favorites. Ready to make healthy eating easy and enjoyable? Let’s dive into these tasty ideas that’ll keep you excited about cooking!
Baked Lemon Garlic Salmon

Zestful moments in the kitchen often arrive quietly, like the gentle aroma of lemon and garlic beginning to mingle in the warm air. This baked salmon feels like a small, comforting ritual—a simple preparation that yields something deeply satisfying and nourishing for the soul. It’s the kind of dish that turns an ordinary evening into something softly special.
Serving: 4 | Pre Time: 15 minutes | Cooking Time: 15 minutes
Ingredients
– 1.5 lbs salmon fillet
– 2 tbsp olive oil
– 3 cloves garlic, minced
– 1 lemon
– 1 tsp dried oregano
– 1/2 tsp salt
– 1/4 tsp black pepper
– 2 tbsp fresh parsley, chopped
Instructions
1. Preheat your oven to 400°F and line a baking sheet with parchment paper.
2. Pat the salmon fillet completely dry with paper towels to ensure a crispier skin.
3. Place the salmon skin-side down on the prepared baking sheet.
4. In a small bowl, whisk together the olive oil, minced garlic, juice from half the lemon, oregano, salt, and black pepper.
5. Brush the olive oil mixture evenly over the top and sides of the salmon fillet.
6. Thinly slice the remaining lemon half and arrange the slices on top of the salmon.
7. Bake the salmon in the preheated oven for 12-15 minutes, until the flesh flakes easily with a fork and reaches an internal temperature of 145°F.
8. Remove the salmon from the oven and let it rest for 5 minutes to allow the juices to redistribute.
9. Sprinkle the chopped fresh parsley over the salmon just before serving.
What emerges from the oven is a fillet with a tender, flaky interior and a subtly crisp edge, infused with the bright, aromatic notes of lemon and garlic. The fresh parsley adds a final touch of color and a clean, herbal finish. For a creative twist, serve it over a bed of wilted spinach or alongside roasted asparagus to soak up the flavorful juices.
Slow Cooker Chicken and Vegetable Stew

Lingering in the quiet kitchen on this winter afternoon, I find comfort in the gentle rhythm of preparing a meal that asks for little but gives so much warmth. This slow cooker chicken and vegetable stew is a humble embrace of simple ingredients, transforming slowly into a nourishing bowl that feels like a soft exhale at the end of the day.
Serving: 6 | Pre Time: 15 minutes | Cooking Time: 480 minutes
Ingredients
– 2 lbs boneless, skinless chicken thighs
– 1 tbsp olive oil
– 1 large yellow onion, diced
– 3 cloves garlic, minced
– 4 medium carrots, peeled and sliced into 1-inch rounds
– 3 medium russet potatoes, peeled and cubed into 1-inch pieces
– 2 stalks celery, sliced
– 4 cups low-sodium chicken broth
– 1 cup dry white wine
– 2 tbsp tomato paste
– 1 tsp dried thyme
– 1 tsp dried rosemary
– 1 bay leaf
– 1 tsp salt
– 1/2 tsp black pepper
– 1 cup frozen peas
– 2 tbsp cornstarch
– 2 tbsp cold water
Instructions
1. Pat the 2 lbs boneless, skinless chicken thighs dry with paper towels to ensure even browning.
2. Heat 1 tbsp olive oil in a large skillet over medium-high heat until shimmering, about 2 minutes.
3. Sear the chicken thighs for 3-4 minutes per side until golden brown, working in batches to avoid overcrowding the pan.
4. Transfer the seared chicken to the slow cooker insert.
5. In the same skillet, add 1 large yellow onion, diced, and cook over medium heat for 5 minutes until softened.
6. Add 3 cloves garlic, minced, and cook for 1 minute until fragrant.
7. Stir in 2 tbsp tomato paste and cook for 2 minutes to deepen its flavor.
8. Deglaze the skillet with 1 cup dry white wine, scraping up any browned bits from the bottom.
9. Pour the onion mixture into the slow cooker over the chicken.
10. Add 4 medium carrots, peeled and sliced, 3 medium russet potatoes, peeled and cubed, and 2 stalks celery, sliced, to the slow cooker.
11. Pour in 4 cups low-sodium chicken broth.
12. Sprinkle in 1 tsp dried thyme, 1 tsp dried rosemary, 1 bay leaf, 1 tsp salt, and 1/2 tsp black pepper.
13. Gently stir all ingredients in the slow cooker to combine.
14. Cover and cook on low heat for 8 hours until the chicken is tender and easily shreds with a fork.
15. Remove the chicken thighs from the slow cooker and shred them using two forks.
16. Return the shredded chicken to the slow cooker.
17. Stir in 1 cup frozen peas and cook for 10 minutes on high heat until heated through.
18. In a small bowl, whisk together 2 tbsp cornstarch and 2 tbsp cold water until smooth to create a slurry.
19. Stir the slurry into the stew and cook for 15 minutes on high heat until the broth has thickened to a gravy-like consistency.
20. Discard the bay leaf before serving.
Placing a steaming bowl on the table, the stew reveals a rich, velvety broth that clings to the tender shreds of chicken and soft vegetables. Each spoonful carries the earthy depth of herbs and the sweet brightness of peas, making it perfect ladled over a slice of crusty bread or served alongside buttery mashed potatoes for a heartier meal.
Grilled Turkey and Avocado Wrap

Gently, as the afternoon light begins to soften, I find myself craving something both comforting and fresh, a quiet meal that feels like a thoughtful pause. This wrap, with its warm, smoky turkey and cool, creamy avocado, is exactly that—a simple assembly of textures meant to be savored slowly, without rush.
Serving: 2 | Pre Time: 15 minutes | Cooking Time: 10 minutes
Ingredients
– 1 lb turkey breast cutlets
– 2 large flour tortillas (10-inch)
– 1 ripe avocado
– 1/2 cup shredded Monterey Jack cheese
– 1/4 cup mayonnaise
– 1 tbsp olive oil
– 1 tsp smoked paprika
– 1/2 tsp garlic powder
– 1/4 tsp black pepper
Instructions
1. Pat the 1 lb turkey breast cutlets completely dry with paper towels to ensure a good sear.
2. In a small bowl, combine 1 tsp smoked paprika, 1/2 tsp garlic powder, and 1/4 tsp black pepper, then rub this mixture evenly onto both sides of each turkey cutlet.
3. Heat 1 tbsp olive oil in a grill pan or skillet over medium-high heat until it shimmers, about 2 minutes.
4. Place the seasoned turkey cutlets in the hot pan and cook for 4-5 minutes per side, or until the internal temperature reaches 165°F and the exterior has distinct grill marks.
5. Transfer the cooked turkey to a cutting board, tent loosely with foil, and let it rest for 5 minutes to allow the juices to redistribute, then slice thinly against the grain.
6. While the turkey rests, warm the 2 large flour tortillas in a dry skillet over medium heat for 30 seconds per side just to make them pliable.
7. Spread 2 tbsp of the 1/4 cup mayonnaise evenly onto the center of each warmed tortilla.
8. Halve and pit the 1 ripe avocado, then scoop the flesh into a bowl and mash lightly with a fork, leaving some small chunks for texture.
9. Divide the mashed avocado evenly between the two tortillas, spreading it over the mayonnaise layer.
10. Arrange the sliced turkey evenly over the avocado on each tortilla.
11. Sprinkle 1/4 cup of the shredded Monterey Jack cheese over the turkey on each wrap.
12. Fold the bottom edge of a tortilla up over the filling, then fold in the sides and roll tightly away from you to form a secure wrap; repeat with the second tortilla.
13. Place each wrap seam-side down on a plate and slice in half diagonally with a sharp knife for clean cuts.
Just unwrapped, the contrast is delightful: the tender, smoky turkey against the cool, rich avocado, all bound by the soft, warm tortilla. For a different take, try serving it open-faced on a plate, drizzled lightly with a lime crema, letting each component stand alone for a moment before being gathered back together.
Spinach and Mushroom Omelet

Yesterday, as the morning light filtered through my kitchen window, I found myself craving something simple yet nourishing—a quiet moment to fold comfort into a pan. This spinach and mushroom omelet is that gentle pause, a warm embrace of earthy flavors that feels both familiar and deeply satisfying.
Serving: 1 | Pre Time: 5 minutes | Cooking Time: 8 minutes
Ingredients
– 2 large eggs
– 1/4 cup fresh spinach, chopped
– 1/4 cup cremini mushrooms, sliced
– 1 tablespoon unsalted butter
– 1 tablespoon whole milk
– 1/4 teaspoon salt
– 1/8 teaspoon black pepper
– 1/8 teaspoon garlic powder
Instructions
1. Crack 2 large eggs into a small bowl and whisk them with 1 tablespoon whole milk until fully combined and slightly frothy.
2. Add 1/4 teaspoon salt, 1/8 teaspoon black pepper, and 1/8 teaspoon garlic powder to the egg mixture, whisking again to incorporate evenly.
3. Heat a nonstick skillet over medium-low heat for 1 minute, then melt 1 tablespoon unsalted butter, swirling to coat the pan completely.
4. Add 1/4 cup sliced cremini mushrooms to the skillet and sauté for 3–4 minutes, stirring occasionally, until they soften and release their moisture.
5. Stir in 1/4 cup chopped fresh spinach and cook for 1 minute, just until it wilts slightly and turns bright green.
6. Pour the egg mixture over the vegetables in the skillet, tilting the pan to spread it evenly into a thin layer.
7. Cook the omelet undisturbed for 2–3 minutes, until the edges set and the center appears mostly cooked but still slightly runny.
8. Use a spatula to gently fold one half of the omelet over the other, then slide it onto a plate immediately.
9. Let the omelet rest for 1 minute before serving to allow the residual heat to finish cooking the center without overcooking.
Every bite offers a tender, fluffy texture with pockets of earthy mushrooms and vibrant spinach, creating a cozy balance. Enjoy it warm with a sprinkle of fresh herbs or a side of toasted whole-grain bread for a complete, comforting meal.
Greek Yogurt Parfait with Berries

Beneath the quiet hum of the morning, there’s a simple ritual waiting in the kitchen, a gentle layering of cool, creamy yogurt and bright, bursting berries that feels less like making breakfast and more like composing a quiet, edible poem. It’s a pause, a moment of calm assembly before the day unfolds, where each spoonful is a reminder of sweetness found in simplicity.
Serving: 1 | Pre Time: 10 minutes | Cooking Time: 0 minutes
Ingredients
– 1 cup plain Greek yogurt
– 1/2 cup mixed fresh berries (such as strawberries, blueberries, and raspberries)
– 2 tablespoons honey
– 1/4 cup granola
– 1 teaspoon fresh lemon juice
Instructions
1. Rinse 1/2 cup of mixed fresh berries under cool running water and pat them completely dry with a clean kitchen towel to prevent the granola from becoming soggy.
2. Hull and slice any large strawberries into quarters, leaving smaller berries like blueberries and raspberries whole.
3. In a small bowl, gently toss the prepared berries with 1 teaspoon of fresh lemon juice to enhance their natural brightness and prevent browning.
4. Select a clear glass or jar to showcase the layers, ensuring it is clean and dry.
5. Spoon half of the 1 cup of plain Greek yogurt into the bottom of the glass, spreading it into an even layer with the back of the spoon.
6. Drizzle 1 tablespoon of honey evenly over the yogurt layer for a touch of floral sweetness.
7. Sprinkle half of the 1/4 cup of granola over the honey to add a satisfying crunch.
8. Arrange half of the lemon-tossed berries in a single layer over the granola, distributing them evenly.
9. Repeat the layering process: add the remaining yogurt, drizzle with the final 1 tablespoon of honey, sprinkle the rest of the granola, and top with the remaining berries.
10. Let the parfait rest at room temperature for 5 minutes before serving to allow the flavors to meld slightly.
Each spoonful delivers a delightful contrast—the thick, tangy yogurt against the juicy pop of berries, all anchored by the granola’s hearty crunch. For a festive twist, layer in a sprinkle of cinnamon or a few dark chocolate shavings between the berries, turning this quiet morning ritual into a miniature celebration.
Turkey Meatballs with Marinara Sauce

Musing on this quiet December afternoon, I find myself drawn to the comforting simplicity of homemade meatballs simmering in rich marinara—a dish that feels like a warm embrace on a chilly day. There’s something deeply satisfying about shaping each meatball by hand, watching them brown gently, and letting them soak up the vibrant flavors of tomatoes and herbs as they cook slowly together.
Serving: 4 | Pre Time: 15 minutes | Cooking Time: 30 minutes
Ingredients
– 1 pound ground turkey
– 1/2 cup breadcrumbs
– 1/4 cup grated Parmesan cheese
– 1 large egg
– 2 cloves garlic, minced
– 1 teaspoon dried oregano
– 1/2 teaspoon salt
– 1/4 teaspoon black pepper
– 2 tablespoons olive oil
– 1 (28-ounce) can crushed tomatoes
– 1/4 cup chopped fresh basil
Instructions
1. In a large bowl, combine 1 pound ground turkey, 1/2 cup breadcrumbs, 1/4 cup grated Parmesan cheese, 1 large egg, 2 cloves minced garlic, 1 teaspoon dried oregano, 1/2 teaspoon salt, and 1/4 teaspoon black pepper.
2. Mix the ingredients gently with your hands until just combined to avoid tough meatballs.
3. Shape the mixture into 16 equal-sized meatballs, each about 1 1/2 inches in diameter.
4. Heat 2 tablespoons olive oil in a large skillet over medium heat until shimmering, about 2 minutes.
5. Add the meatballs to the skillet in a single layer, leaving space between them to ensure even browning.
6. Cook the meatballs for 8–10 minutes, turning occasionally, until golden brown on all sides.
7. Pour 1 (28-ounce) can crushed tomatoes into the skillet, scraping up any browned bits from the bottom for added flavor.
8. Reduce the heat to low, cover the skillet, and simmer for 20 minutes until the meatballs are cooked through and the sauce has thickened slightly.
9. Stir in 1/4 cup chopped fresh basil just before serving to preserve its bright aroma.
10. Remove the skillet from the heat and let it rest for 5 minutes to allow the flavors to meld.
Each meatball emerges tender and juicy, with a subtle herbaceous note from the oregano and a savory depth from the Parmesan. The marinara clings to them in a velvety embrace, its acidity balanced by the sweetness of the tomatoes. Enjoy them nestled over a bed of spaghetti or tucked into a crusty roll for a hearty sandwich—either way, they’re sure to bring a moment of quiet contentment to your table.
Baked Cod with Herbs and Lemon
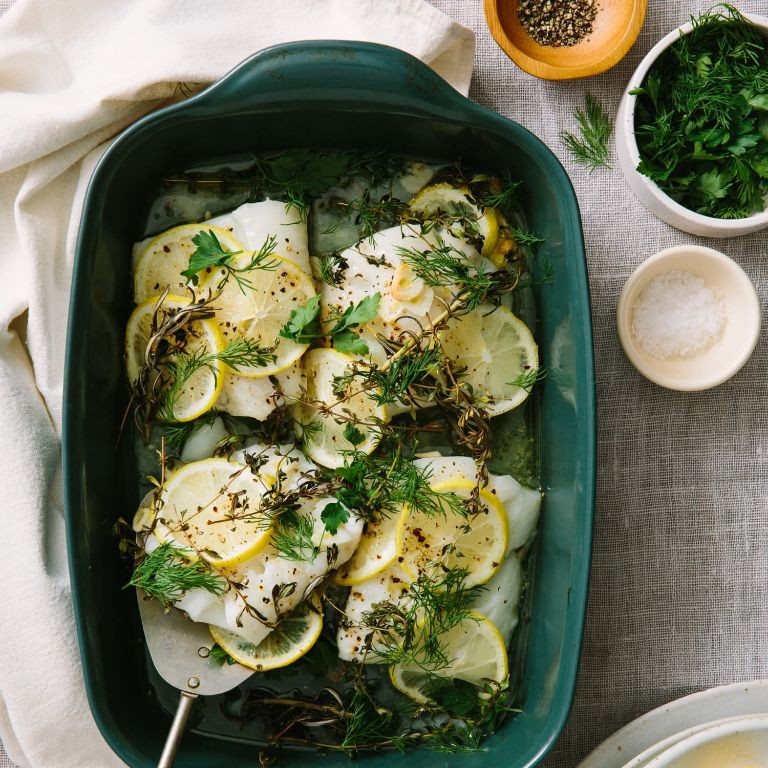
Crisp winter light filters through the kitchen window, casting long shadows across the counter as I gather the simple, honest ingredients for tonight’s quiet supper. There’s a gentle rhythm to preparing baked cod, a dish that asks for little but offers the deep comfort of flaky fish, bright lemon, and fragrant herbs. It feels like a warm embrace on a cold evening, a reminder that the most satisfying meals are often the simplest.
Serving: 4 | Pre Time: 15 minutes | Cooking Time: 15 minutes
Ingredients
– 4 (6-ounce) cod fillets, about 1-inch thick
– 2 tablespoons olive oil
– 1 lemon
– 2 tablespoons fresh parsley, finely chopped
– 1 tablespoon fresh dill, finely chopped
– 2 cloves garlic, minced
– 1/2 teaspoon kosher salt
– 1/4 teaspoon black pepper
Instructions
1. Preheat your oven to 400°F and position a rack in the center.
2. Pat the 4 cod fillets completely dry with paper towels to ensure a crisp exterior.
3. In a small bowl, combine 2 tablespoons olive oil, the juice and zest from 1 lemon, 2 tablespoons chopped parsley, 1 tablespoon chopped dill, 2 minced garlic cloves, 1/2 teaspoon kosher salt, and 1/4 teaspoon black pepper.
4. Place the dried cod fillets in a single layer in a baking dish just large enough to hold them.
5. Spoon the herb and lemon mixture evenly over the top of each fillet, coating them thoroughly.
6. Transfer the baking dish to the preheated oven and bake for 12-15 minutes, until the fish is opaque and flakes easily with a fork.
7. Remove the baking dish from the oven and let the cod rest for 3 minutes before serving to allow the juices to redistribute.
Delicate and moist, the cod flakes apart at the gentlest touch, each bite carrying the bright, clean notes of lemon and the subtle earthiness of fresh herbs. For a beautiful presentation, serve it over a bed of creamy polenta or alongside roasted fingerling potatoes to soak up the fragrant pan juices.
Berry Smoothie with Almond Milk
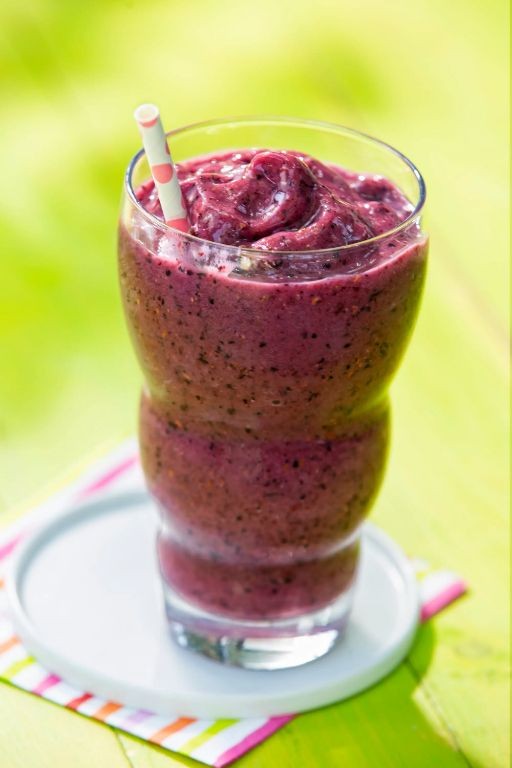
Zigzagging through the morning light, I find myself craving something simple yet nourishing, a quiet moment with a glass that holds both comfort and clarity. This berry smoothie with almond milk feels like a gentle pause, a way to start the day softly without rushing, blending seasonal sweetness with creamy lightness. It’s a recipe I return to when the world feels too loud, a reminder that sometimes the simplest sips are the most soothing.
Serving: 2 | Pre Time: 5 minutes | Cooking Time: 0 minutes
Ingredients
– 1 cup frozen mixed berries
– 1 cup unsweetened almond milk
– 1 tablespoon honey
– 1/2 teaspoon vanilla extract
– 1/4 cup plain Greek yogurt
Instructions
1. Measure 1 cup of frozen mixed berries and place them into a high-speed blender.
2. Add 1 cup of unsweetened almond milk to the blender with the berries.
3. Pour 1 tablespoon of honey into the blender for natural sweetness.
4. Spoon 1/2 teaspoon of vanilla extract into the mixture to enhance the flavor.
5. Add 1/4 cup of plain Greek yogurt to the blender for creaminess and protein.
6. Secure the blender lid tightly to prevent spills during blending.
7. Blend the ingredients on high speed for 45–60 seconds until completely smooth, with no visible berry chunks.
8. Stop the blender and check the consistency; if it’s too thick, add 1–2 tablespoons more almond milk and blend for 10 seconds.
9. Pour the smoothie evenly into two glasses, using a spatula to scrape out any remaining mixture from the blender.
10. Serve immediately for the best texture and flavor.
Upon first sip, the smoothie reveals a velvety texture that’s both cooling and indulgent, with the tart berries balanced by the honey’s gentle sweetness. I love how the almond milk adds a subtle nuttiness that doesn’t overpower, making it perfect for a slow morning or an afternoon refresher. For a creative twist, try topping it with a sprinkle of chia seeds or a few fresh berry slices to add a bit of crunch and visual appeal.
Grilled Shrimp Skewers with Garlic and Lime

Drifting through the afternoon light, I find myself craving something simple yet vibrant, a dish that feels like summer even in winter’s chill. Grilled shrimp skewers with garlic and lime offer just that—a quick escape to coastal breezes and sun-warmed patios, where each bite is a gentle reminder of simplicity’s joy. Let’s gather what we need and begin.
Serving: 4 | Pre Time: 20 minutes | Cooking Time: 10 minutes
Ingredients
– 1.5 pounds large shrimp, peeled and deveined
– 3 cloves garlic, minced
– 1/4 cup fresh lime juice
– 2 tablespoons olive oil
– 1 teaspoon salt
– 1/2 teaspoon black pepper
– 8 wooden skewers, soaked in water for 30 minutes
Instructions
1. In a medium bowl, combine 1.5 pounds large shrimp, 3 cloves minced garlic, 1/4 cup fresh lime juice, 2 tablespoons olive oil, 1 teaspoon salt, and 1/2 teaspoon black pepper.
2. Gently toss the shrimp in the marinade until evenly coated, then cover the bowl and refrigerate for 15 minutes to allow the flavors to meld.
3. While the shrimp marinates, soak 8 wooden skewers in water for 30 minutes to prevent burning on the grill.
4. Preheat a grill or grill pan to medium-high heat, aiming for a surface temperature of 400°F.
5. Thread the marinated shrimp onto the soaked skewers, placing 4-5 shrimp per skewer for even cooking.
6. Place the skewers on the preheated grill and cook for 2-3 minutes per side, until the shrimp turn pink and opaque with slight char marks.
7. Remove the skewers from the grill and let them rest for 2 minutes before serving to allow the juices to redistribute.
8. Serve the grilled shrimp skewers immediately, optionally garnishing with extra lime wedges or chopped herbs.
These skewers emerge with a tender, juicy texture that yields easily to the bite, infused with the bright tang of lime and the warm, aromatic notes of garlic. Try pairing them with a crisp salad or over a bed of rice for a complete meal, or simply enjoy them straight off the grill as a light, flavorful appetizer that captures the essence of effortless cooking.
Oven-Roasted Asparagus with Olive Oil
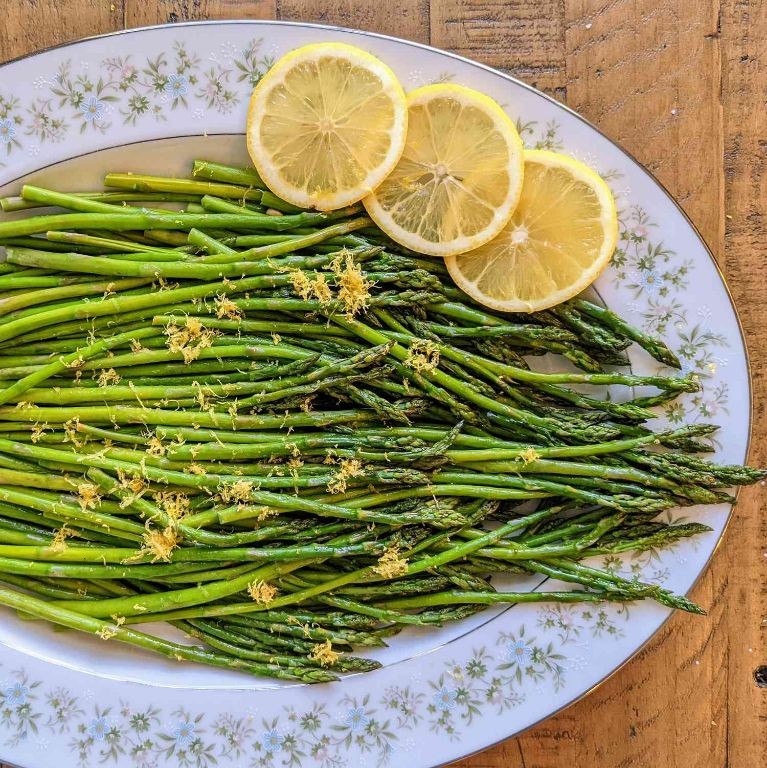
As the winter light filters through the kitchen window, I find myself reaching for the simple, earthy comfort of vegetables that require little more than patience and warmth to transform. Oven-roasted asparagus, with its tender-crisp texture and subtle sweetness, feels like a quiet gift to the season—a humble dish that speaks of care and simplicity.
Serving: 4 | Pre Time: 10 minutes | Cooking Time: 15 minutes
Ingredients
– 1 pound fresh asparagus
– 2 tablespoons extra virgin olive oil
– 1/2 teaspoon kosher salt
– 1/4 teaspoon freshly ground black pepper
– 1 tablespoon freshly squeezed lemon juice
– 1/4 cup grated Parmesan cheese
Instructions
1. Preheat your oven to 400°F and line a baking sheet with parchment paper for easy cleanup.
2. Rinse 1 pound of fresh asparagus under cold water and pat dry thoroughly with a clean kitchen towel to ensure even roasting.
3. Trim the tough, woody ends from the asparagus spears by gently bending each spear until it snaps naturally at the tender point.
4. Place the trimmed asparagus in a single layer on the prepared baking sheet, arranging them so they do not overlap.
5. Drizzle 2 tablespoons of extra virgin olive oil evenly over the asparagus, using your hands to coat each spear lightly.
6. Sprinkle 1/2 teaspoon of kosher salt and 1/4 teaspoon of freshly ground black pepper over the asparagus, tossing gently to distribute the seasonings.
7. Roast the asparagus in the preheated oven for 12-15 minutes, or until the spears are tender when pierced with a fork and the tips are lightly browned.
8. Remove the baking sheet from the oven and immediately drizzle 1 tablespoon of freshly squeezed lemon juice over the hot asparagus to brighten the flavors.
9. Sprinkle 1/4 cup of grated Parmesan cheese evenly over the asparagus while it is still warm, allowing the cheese to melt slightly from the residual heat.
Once out of the oven, the asparagus offers a delightful contrast—crisp-tender stalks with caramelized edges that give way to a soft, juicy interior. Its flavor is subtly sweet and nutty, enhanced by the bright acidity of lemon and the savory richness of Parmesan. For a creative twist, try serving it alongside grilled salmon or tossing it into a spring pasta salad for a vibrant, seasonal touch.
Summary
Deliciously simple! This roundup proves that diabetic-friendly meals can be both easy and incredibly tasty. We hope these 20 healthy recipes inspire your next kitchen adventure. Give them a try, leave a comment with your favorite, and don’t forget to share this article on Pinterest to help other home cooks discover these wonderful dishes. Happy cooking!


