Discover the magic of sorghum flour, a gluten-free powerhouse that transforms baking into a nutritious delight. Whether you’re craving fluffy pancakes, hearty breads, or sweet treats, this versatile grain brings wholesome goodness to your kitchen. Dive into our roundup of 20 creative recipes that make gluten-free living both easy and delicious—you’ll be inspired to start baking in no time!
Sorghum Flour Pancakes with Maple Syrup

You’ve probably tried countless pancake recipes, but sorghum flour offers a uniquely nutty flavor and tender crumb that’s worth exploring. This gluten-free alternative creates light, fluffy pancakes that pair perfectly with classic maple syrup. Let’s walk through the simple process together.
Serving: 4 | Pre Time: 10 minutes | Cooking Time: 15 minutes
Ingredients
– Sorghum flour – 1 cup
– Baking powder – 2 tsp
– Salt – ½ tsp
– Egg – 1 large
– Milk – ¾ cup
– Vegetable oil – 2 tbsp
– Maple syrup – ¼ cup
Instructions
1. Whisk together 1 cup sorghum flour, 2 tsp baking powder, and ½ tsp salt in a medium bowl until fully combined.
2. In a separate bowl, beat 1 large egg with a fork until uniform in color.
3. Pour ¾ cup milk and 2 tbsp vegetable oil into the egg mixture and whisk until smooth.
4. Tip: Let the wet ingredients sit for 2 minutes to allow the sorghum flour to hydrate slightly, which prevents grittiness.
5. Gently fold the wet ingredients into the dry ingredients with a spatula until just combined; do not overmix.
6. Heat a nonstick skillet or griddle over medium heat (350°F) for 3 minutes.
7. Lightly grease the skillet with a paper towel dipped in vegetable oil.
8. Pour ¼ cup batter per pancake onto the skillet, leaving space between them.
9. Cook until bubbles form on the surface and edges look set, about 2–3 minutes.
10. Tip: Wait for the bubbles to pop and leave small holes before flipping for even cooking.
11. Flip each pancake carefully with a spatula and cook for another 1–2 minutes until golden brown.
12. Transfer cooked pancakes to a plate and cover loosely with foil to keep warm.
13. Repeat steps 8–12 with remaining batter, regreasing the skillet as needed.
14. Tip: Adjust heat to medium-low if pancakes brown too quickly to ensure they cook through.
15. Drizzle ¼ cup maple syrup over the stacked pancakes just before serving.
Perfectly cooked sorghum flour pancakes have a delicate, cake-like texture with subtle earthy notes that complement the sweet maple syrup. For a creative twist, try topping them with toasted nuts or a dollop of Greek yogurt to balance the flavors.
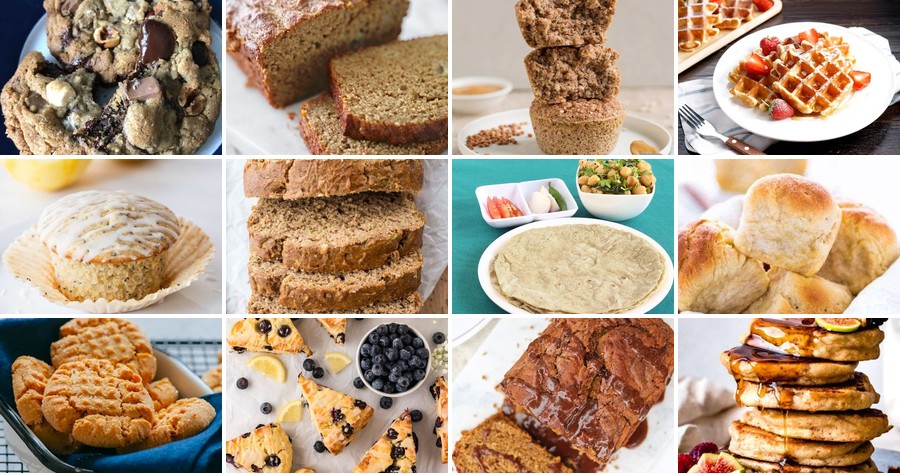
Gluten-Free Sorghum Banana Bread
Kicking off your gluten-free baking journey can feel daunting, but this sorghum banana bread is a forgiving and delicious place to start. Let’s walk through the simple, methodical process together to ensure perfect results every time.
Serving: 8 | Pre Time: 15 minutes | Cooking Time: 55 minutes
Ingredients
– Sorghum flour – 1 ½ cups
– Baking soda – 1 tsp
– Salt – ½ tsp
– Ripe bananas – 3 medium
– Eggs – 2 large
– Honey – ½ cup
– Melted coconut oil – ⅓ cup
– Vanilla extract – 1 tsp
Instructions
1. Preheat your oven to 350°F (175°C) and grease a standard 9×5-inch loaf pan.
2. In a medium bowl, whisk together 1 ½ cups of sorghum flour, 1 teaspoon of baking soda, and ½ teaspoon of salt until fully combined.
3. In a large mixing bowl, mash 3 medium ripe bananas with a fork until mostly smooth, leaving a few small chunks for texture.
4. Add 2 large eggs, ½ cup of honey, ⅓ cup of melted coconut oil, and 1 teaspoon of vanilla extract to the mashed bananas, then whisk vigorously for about 1 minute until the mixture is well blended and slightly frothy.
5. Tip: Ensure your coconut oil is melted but cooled slightly to avoid cooking the eggs when mixed.
6. Gradually add the dry flour mixture to the wet banana mixture, folding gently with a spatula just until no dry streaks remain; overmixing can make the bread dense.
7. Pour the batter into the prepared loaf pan and use the spatula to spread it evenly into the corners.
8. Bake on the center rack for 50 to 55 minutes, or until a toothpick inserted into the center comes out clean with just a few moist crumbs.
9. Tip: If the top browns too quickly, loosely tent it with aluminum foil halfway through baking to prevent burning.
10. Remove the pan from the oven and let the bread cool in the pan for 10 minutes to set.
11. Carefully turn the bread out onto a wire rack to cool completely for at least 1 hour before slicing.
12. Tip: For clean slices, use a serrated knife and wipe it clean between cuts.
You’ll find this banana bread delightfully moist with a tender crumb and a subtle, nutty sweetness from the sorghum. It’s perfect toasted with a smear of almond butter or served warm as a comforting breakfast treat.
Sorghum Flour Chocolate Chip Cookies

Often overlooked in the world of gluten-free baking, sorghum flour offers a uniquely tender and slightly sweet base that makes these chocolate chip cookies a delightful surprise. Our methodical recipe ensures success, even for beginners, by breaking down each step clearly. Let’s create a batch that’s perfect for holiday gatherings or a simple afternoon treat.
Serving: 24 cookies | Pre Time: 15 minutes | Cooking Time: 12 minutes
Ingredients
– Sorghum flour – 2 cups
– Baking soda – 1 tsp
– Salt – ½ tsp
– Unsalted butter – 1 cup (2 sticks), softened
– Brown sugar – ¾ cup, packed
– Granulated sugar – ½ cup
– Eggs – 2 large
– Vanilla extract – 2 tsp
– Semi-sweet chocolate chips – 1 ½ cups
Instructions
1. Preheat your oven to 350°F (175°C) and line two baking sheets with parchment paper.
2. In a medium bowl, whisk together the sorghum flour, baking soda, and salt until fully combined.
3. In a large mixing bowl, use an electric mixer on medium speed to cream the softened butter, brown sugar, and granulated sugar for 3 minutes, until light and fluffy.
4. Add the eggs one at a time to the butter mixture, beating on low speed for 30 seconds after each addition until incorporated.
5. Mix in the vanilla extract on low speed for 15 seconds.
6. Gradually add the dry ingredients to the wet mixture, mixing on low speed just until no flour streaks remain, about 1 minute.
7. Fold in the chocolate chips with a spatula until evenly distributed throughout the dough.
8. Scoop rounded tablespoons of dough onto the prepared baking sheets, spacing them 2 inches apart to allow for spreading.
9. Bake one sheet at a time in the preheated oven for 10–12 minutes, until the edges are lightly golden and the centers look set but soft.
10. Remove the baking sheet from the oven and let the cookies cool on the sheet for 5 minutes to firm up.
11. Transfer the cookies to a wire rack to cool completely for 15 minutes.
Ultimately, these cookies boast a chewy texture with crisp edges and a rich, buttery flavor enhanced by the subtle sweetness of sorghum. The chocolate chips melt into gooey pockets, making each bite irresistible. For a festive twist, serve them warm with a sprinkle of sea salt or alongside a glass of cold milk for a classic treat.
Vegan Sorghum Flour Waffles

Haven’t you ever wanted a waffle that’s both hearty and light, with a subtle nutty flavor that stands up to your favorite toppings? These vegan sorghum flour waffles deliver exactly that, using simple pantry staples for a fuss-free breakfast. Let’s walk through the process together, step by step, so you can master this recipe on your first try.
Serving: 4 | Pre Time: 10 minutes | Cooking Time: 15 minutes
Ingredients
– Sorghum flour – 1 ½ cups
– Baking powder – 2 tsp
– Salt – ½ tsp
– Unsweetened almond milk – 1 ¼ cups
– Maple syrup – 2 tbsp
– Vegetable oil – 2 tbsp
Instructions
1. Preheat your waffle iron to 375°F, which ensures even cooking and a crisp exterior.
2. In a large mixing bowl, whisk together 1 ½ cups sorghum flour, 2 tsp baking powder, and ½ tsp salt until fully combined.
3. In a separate medium bowl, pour 1 ¼ cups unsweetened almond milk, 2 tbsp maple syrup, and 2 tbsp vegetable oil, then whisk vigorously for 30 seconds to emulsify the liquids.
4. Tip: Pour the wet ingredients into the dry ingredients all at once to prevent overmixing, which can lead to tough waffles.
5. Gently stir the batter with a spatula until just combined, stopping as soon as no dry flour remains; a few small lumps are fine.
6. Lightly grease the preheated waffle iron with a brush or oil spray to prevent sticking.
7. Spoon about ½ cup of batter onto the center of the iron, spreading it slightly with the back of the spoon for even coverage.
8. Close the lid and cook for 4–5 minutes, until steam stops escaping and the waffle is golden brown and crisp.
9. Tip: Avoid opening the iron early, as this can cause the waffle to tear or cook unevenly.
10. Carefully remove the waffle with a fork and place it on a wire rack to keep it crisp while you repeat with the remaining batter.
11. Tip: For extra crispness, place cooked waffles in a single layer on the rack instead of stacking them, which traps steam and makes them soggy.
12. Serve the waffles immediately while warm for the best texture and flavor.
Soft yet sturdy with a delightful chew, these waffles have a mild, earthy sweetness from the sorghum that pairs beautifully with fresh berries or a drizzle of nut butter. Serve them stacked high with a dollop of coconut yogurt for a creamy contrast, or crumble them over a fruit salad for a crunchy twist—they’re versatile enough to shine in both sweet and savory settings.
Sorghum Flour Pizza Dough

Many home cooks think gluten-free pizza means sacrificing that beloved chewy crust, but sorghum flour offers a surprisingly elastic dough that handles like traditional wheat. Mastering this dough requires attention to hydration and kneading, but the payoff is a crisp-edged, tender-crumbed pizza that even gluten-eaters will crave. Let’s walk through the process step by step to ensure your success.
Serving: 2 | Pre Time: 15 minutes | Cooking Time: 12 minutes
Ingredients
– Sorghum flour – 1 cup
– Warm water – ½ cup
– Olive oil – 1 tbsp
– Active dry yeast – 1 tsp
– Salt – ½ tsp
– Sugar – ½ tsp
Instructions
1. Combine ½ cup warm water (110°F), 1 tsp active dry yeast, and ½ tsp sugar in a small bowl; let sit for 5 minutes until foamy.
2. In a large mixing bowl, whisk together 1 cup sorghum flour and ½ tsp salt until evenly distributed.
3. Pour the yeast mixture and 1 tbsp olive oil into the dry ingredients; stir with a wooden spoon until a shaggy dough forms.
4. Knead the dough on a lightly floured surface for 8–10 minutes until smooth and elastic, adding a sprinkle of sorghum flour if sticky—this develops structure without gluten.
5. Place the dough in a greased bowl, cover with a damp towel, and let rise in a warm spot for 1 hour until doubled in size.
6. Preheat your oven to 475°F with a pizza stone or baking sheet inside for at least 30 minutes to ensure even heat.
7. Punch down the dough, divide it into two balls, and roll each out on parchment paper to ¼-inch thickness, shaping edges slightly thicker to hold toppings.
8. Transfer the parchment with dough to the hot stone or sheet; bake for 10–12 minutes until the crust is golden brown and crisp at the edges.
9. Remove from the oven, let cool for 2 minutes on a wire rack to prevent sogginess, then add toppings as desired.
Zesty and nutty in flavor, this crust achieves a delightful balance of crispiness and chew, thanks to sorghum’s natural sweetness. Try it topped with roasted vegetables and a drizzle of balsamic for a wholesome twist, or keep it classic with fresh mozzarella and basil—the sturdy base holds up beautifully to any combination.
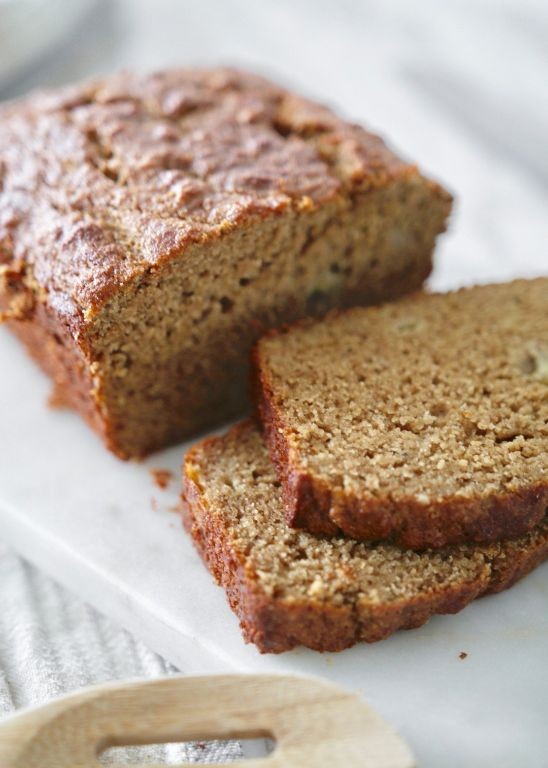
Healthy Sorghum Flour Muffins
Finally, if you’re looking for a wholesome, gluten-free muffin that’s both nutritious and satisfying, these Healthy Sorghum Flour Muffins are your answer. They come together easily with minimal ingredients, making them perfect for a quick breakfast or snack. Let’s walk through the simple steps to bake a batch today.
Serving: 12 | Pre Time: 10 minutes | Cooking Time: 20 minutes
Ingredients
– Sorghum flour – 1½ cups
– Baking powder – 2 tsp
– Salt – ½ tsp
– Eggs – 2 large
– Maple syrup – ½ cup
– Milk – ½ cup
– Vegetable oil – ¼ cup
– Vanilla extract – 1 tsp
Instructions
1. Preheat your oven to 375°F and line a 12-cup muffin tin with paper liners.
2. In a large mixing bowl, whisk together the sorghum flour, baking powder, and salt until well combined.
3. In a separate medium bowl, crack the eggs and beat them lightly with a fork.
4. Add the maple syrup, milk, vegetable oil, and vanilla extract to the beaten eggs, stirring until smooth.
5. Pour the wet ingredients into the dry ingredients, and gently fold them together with a spatula until just combined—avoid overmixing to keep the muffins tender.
6. Divide the batter evenly among the 12 muffin cups, filling each about two-thirds full.
7. Place the muffin tin in the preheated oven and bake for 18–20 minutes, or until a toothpick inserted into the center of a muffin comes out clean.
8. Remove the muffins from the oven and let them cool in the tin for 5 minutes before transferring to a wire rack.
9. Allow the muffins to cool completely on the wire rack for about 15 minutes before serving.
Vibrantly moist and subtly sweet, these muffins have a tender crumb thanks to the sorghum flour, with a hint of vanilla that pairs beautifully with a drizzle of honey or a smear of almond butter. For a creative twist, try adding fresh blueberries or chopped nuts to the batter before baking—they make a delightful addition to any morning routine.
Sorghum Flour Blueberry Scones

Sometimes the simplest baked goods are the most satisfying, especially when they’re made with wholesome ingredients like sorghum flour. These scones are tender, lightly sweet, and packed with juicy blueberries, perfect for a cozy morning or afternoon treat. Let’s walk through the process step by step to ensure success, even if you’re new to baking.
Serving: 8 | Pre Time: 15 minutes | Cooking Time: 20 minutes
Ingredients
– Sorghum flour – 2 cups
– Baking powder – 1 tbsp
– Salt – ½ tsp
– Unsalted butter – ½ cup
– Granulated sugar – ¼ cup
– Egg – 1
– Heavy cream – ½ cup
– Fresh blueberries – 1 cup
Instructions
1. Preheat your oven to 400°F and line a baking sheet with parchment paper.
2. In a large bowl, whisk together the sorghum flour, baking powder, and salt until well combined.
3. Cut the unsalted butter into small cubes and add it to the dry ingredients.
4. Use a pastry cutter or your fingers to work the butter into the flour mixture until it resembles coarse crumbs, which helps create a flaky texture.
5. Stir in the granulated sugar until evenly distributed.
6. In a separate small bowl, whisk the egg and heavy cream together until smooth.
7. Pour the wet ingredients into the dry ingredients and mix gently with a spatula until just combined, being careful not to overmix to keep the scones tender.
8. Gently fold in the fresh blueberries, trying not to crush them to avoid bleeding into the dough.
9. Turn the dough out onto a lightly floured surface and pat it into a 1-inch thick circle.
10. Use a sharp knife to cut the circle into 8 equal wedges, like slicing a pizza.
11. Place the wedges on the prepared baking sheet, spacing them about 2 inches apart to allow for even baking.
12. Bake in the preheated oven for 18-20 minutes, or until the scones are golden brown on top and a toothpick inserted into the center comes out clean.
13. Remove from the oven and let the scones cool on the baking sheet for 5 minutes before transferring to a wire rack.
These scones have a delightful crumbly texture with a subtle nutty flavor from the sorghum flour, complemented by bursts of sweet blueberries. They’re best served warm with a dollop of clotted cream or a drizzle of honey for an extra touch of indulgence.
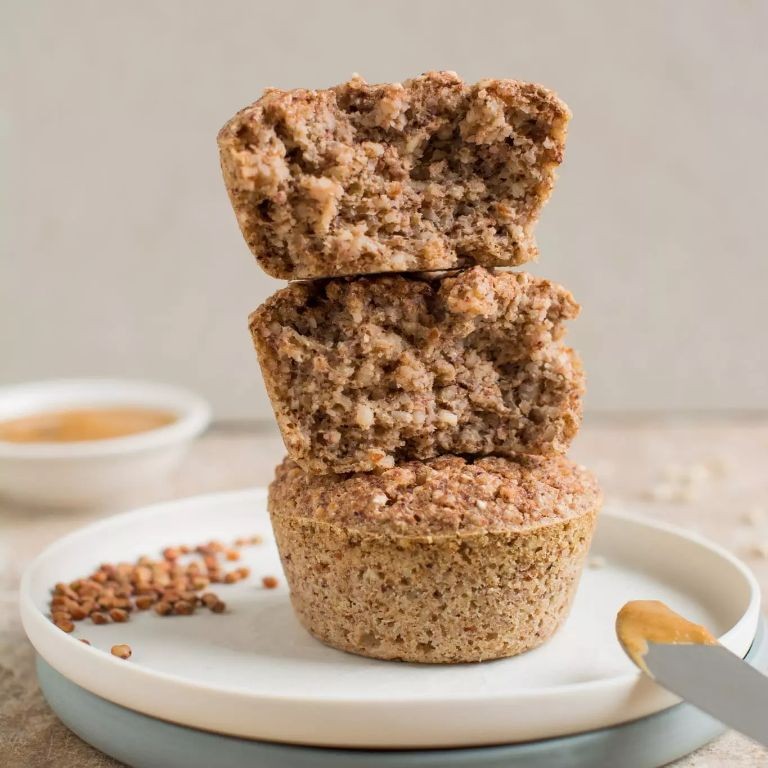
Gluten-Free Sorghum Tortillas
Embracing gluten-free cooking doesn’t mean sacrificing your favorite wraps and tacos. These sorghum tortillas are surprisingly simple to make from scratch, requiring just a few basic ingredients and a bit of patience to master the rolling technique. Let’s walk through the process together, step by step, so you can enjoy fresh, warm tortillas tonight.
Serving: 8 | Pre Time: 15 minutes | Cooking Time: 20 minutes
Ingredients
– Sorghum flour – 1 ½ cups
– Warm water – ¾ cup
– Olive oil – 2 tbsp
– Salt – ½ tsp
Instructions
1. Combine 1 ½ cups sorghum flour and ½ tsp salt in a medium mixing bowl.
2. Make a well in the center of the dry ingredients and pour in ¾ cup warm water and 2 tbsp olive oil.
3. Stir the mixture with a fork until a shaggy dough begins to form, then switch to using your hands.
4. Knead the dough in the bowl for exactly 3 minutes until it becomes smooth and cohesive. (Tip: If the dough feels too dry, add water 1 tsp at a time; if too sticky, sprinkle in a little more flour.)
5. Cover the bowl with a clean kitchen towel and let the dough rest at room temperature for 10 minutes.
6. Divide the rested dough into 8 equal portions and roll each into a smooth ball between your palms.
7. Place one dough ball between two sheets of parchment paper on a flat surface.
8. Using a rolling pin, roll the dough into a thin, 6-inch circle, applying even pressure. (Tip: Rotate the parchment paper 90 degrees after each roll to help maintain a round shape.)
9. Heat a dry cast-iron skillet or non-stick pan over medium-high heat until a drop of water sizzles immediately upon contact.
10. Carefully peel the top parchment sheet off one rolled tortilla and flip it into the hot pan, then remove the bottom parchment.
11. Cook the tortilla for 45-60 seconds until the edges begin to lift and the bottom develops light brown spots.
12. Flip the tortilla using a spatula and cook the other side for another 30-45 seconds. (Tip: Keep cooked tortillas warm by stacking them inside a clean kitchen towel—this makes them more pliable.)
13. Repeat the rolling and cooking process with the remaining dough balls.
These tortillas have a pleasantly nutty flavor from the sorghum and a soft, slightly chewy texture that holds up well to fillings. Serve them immediately with your favorite taco ingredients, or use them as a base for breakfast wraps with scrambled eggs and avocado.
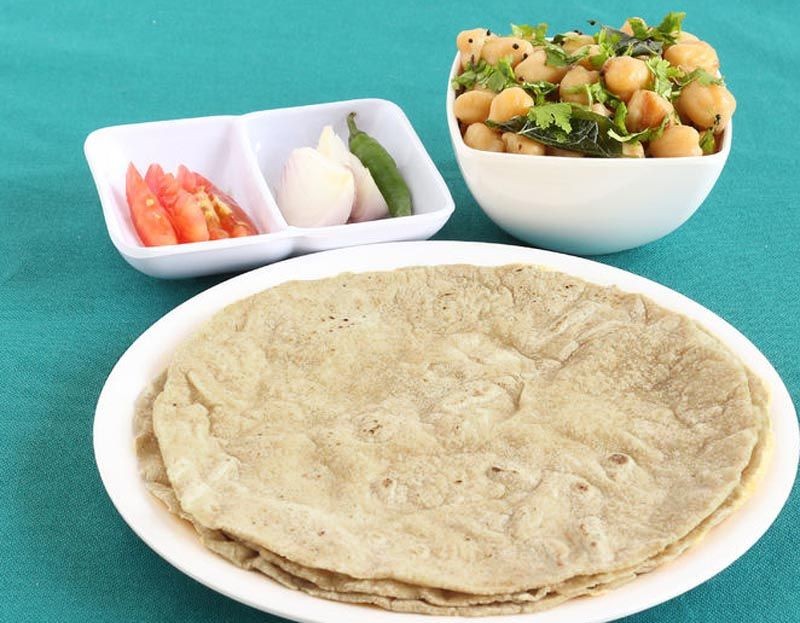
Sorghum Flour Pumpkin Bread
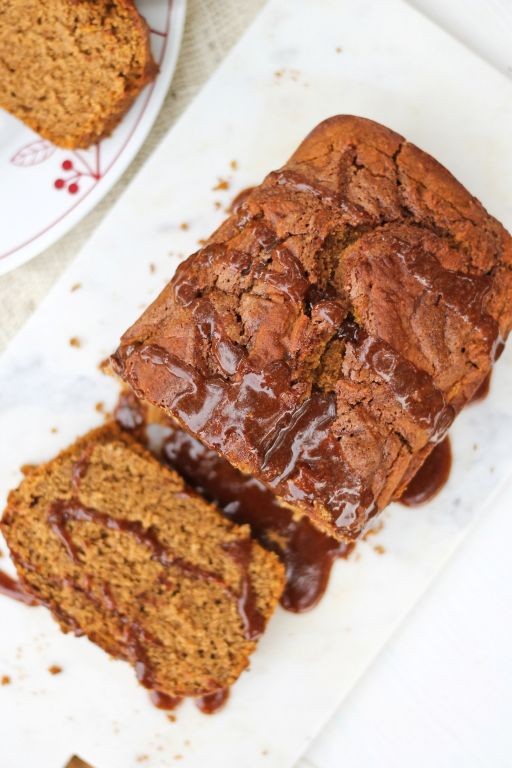
During the holiday season, nothing beats the comforting aroma of freshly baked pumpkin bread, and this sorghum flour version offers a delightful gluten-free twist that’s perfect for sharing with friends and family. Let’s walk through the process together, step by step, to ensure your loaf turns out moist and flavorful every time.
Serving: 8 | Pre Time: 15 minutes | Cooking Time: 60 minutes
Ingredients
– Sorghum flour – 2 cups
– Pumpkin puree – 1 cup
– Eggs – 2
– Maple syrup – ½ cup
– Baking soda – 1 tsp
– Salt – ½ tsp
– Cinnamon – 1 tsp
– Vegetable oil – ¼ cup
Instructions
1. Preheat your oven to 350°F and grease a 9×5-inch loaf pan with a light coating of vegetable oil, using a pastry brush for even coverage.
2. In a large mixing bowl, combine the sorghum flour, baking soda, salt, and cinnamon, whisking them together for about 30 seconds to ensure no clumps remain.
3. In a separate medium bowl, crack the eggs and whisk them vigorously until frothy, which should take roughly 1 minute to incorporate air for a lighter texture.
4. Add the pumpkin puree, maple syrup, and vegetable oil to the eggs, stirring with a spatula until the mixture is smooth and uniformly orange in color.
5. Pour the wet ingredients into the dry ingredients, folding gently with the spatula just until combined, being careful not to overmix to avoid a dense loaf.
6. Transfer the batter to the prepared loaf pan, using the spatula to spread it evenly and tap the pan on the counter to remove any air bubbles.
7. Place the pan in the preheated oven and bake for 55 to 60 minutes, checking at the 55-minute mark by inserting a toothpick into the center—it should come out clean with no wet batter.
8. Remove the pan from the oven and let it cool in the pan on a wire rack for 10 minutes to set, then carefully turn it out to cool completely for another 30 minutes before slicing.
9. Slice the bread with a serrated knife using a gentle sawing motion to prevent crumbling, and serve warm or at room temperature.
You’ll notice this bread has a tender, moist crumb with a subtle sweetness from the maple syrup, complemented by the warm spice of cinnamon. For a creative twist, toast slices lightly and top with a dollop of whipped cream or a drizzle of honey for an extra indulgent treat.
Crunchy Sorghum Flour Crackers

Now, let’s make some wholesome, gluten-free crackers that are surprisingly simple to prepare. These crunchy sorghum flour crackers are a fantastic, nutritious alternative to store-bought snacks, perfect for pairing with dips or enjoying on their own.
Serving: 24 crackers | Pre Time: 10 minutes | Cooking Time: 25 minutes
Ingredients
– Sorghum flour – 1 cup
– Water – ⅓ cup
– Olive oil – 2 tbsp
– Salt – ½ tsp
Instructions
1. Preheat your oven to 350°F (175°C) and line a baking sheet with parchment paper.
2. In a medium mixing bowl, combine 1 cup of sorghum flour and ½ teaspoon of salt.
3. Add 2 tablespoons of olive oil to the dry ingredients and mix with a fork until the mixture resembles coarse crumbs.
4. Gradually pour in ⅓ cup of water while stirring, until a cohesive dough forms. Tip: The dough should hold together when pressed but not be sticky; add an extra teaspoon of water if it’s too crumbly.
5. Place the dough between two sheets of parchment paper and roll it out to a uniform ⅛-inch thickness.
6. Remove the top sheet of parchment and use a pizza cutter or knife to score the dough into 2-inch squares. Tip: Don’t separate the squares yet; this makes them easier to transfer after baking.
7. Carefully transfer the parchment paper with the scored dough onto the prepared baking sheet.
8. Bake in the preheated oven for 20-25 minutes, or until the edges are golden brown and the crackers feel firm to the touch. Tip: Rotate the baking sheet halfway through for even browning.
9. Remove the baking sheet from the oven and let the crackers cool completely on the sheet, which will allow them to crisp up further.
10. Once completely cool, break the crackers along the scored lines.
Meticulously crafted, these crackers offer a delightfully crisp texture and a subtly nutty flavor from the sorghum flour. Their sturdy crunch makes them ideal for scooping up hummus or avocado spread, or simply savoring as a light, wholesome snack on their own.
Sorghum Flour Apple Cinnamon Cake

Every baker needs a cozy, foolproof dessert for chilly days, and this sorghum flour apple cinnamon cake delivers just that with its warm spices and tender crumb. Let’s walk through each step together to create this comforting treat.
Serving: 8 | Pre Time: 15 minutes | Cooking Time: 45 minutes
Ingredients
- Sorghum flour – 1½ cups
- Baking powder – 2 tsp
- Salt – ½ tsp
- Cinnamon – 1 tsp
- Eggs – 2 large
- Granulated sugar – ¾ cup
- Vegetable oil – ½ cup
- Vanilla extract – 1 tsp
- Apples – 2 medium, peeled and diced
Instructions
- Preheat your oven to 350°F and grease an 8-inch square baking pan.
- In a medium bowl, whisk together sorghum flour, baking powder, salt, and cinnamon until fully combined.
- In a large bowl, beat eggs and granulated sugar with a hand mixer on medium speed for 2 minutes until pale and slightly thickened.
- Tip: Room-temperature eggs incorporate more easily for a smoother batter.
- Slowly pour in vegetable oil while mixing on low speed until the mixture is uniform.
- Stir in vanilla extract with a spatula.
- Gradually add the dry ingredients to the wet ingredients, folding gently until just combined; avoid overmixing to keep the cake tender.
- Fold in diced apples until evenly distributed throughout the batter.
- Tip: Use firm apples like Granny Smith for a nice texture that holds up during baking.
- Pour the batter into the prepared pan and spread it evenly with the spatula.
- Bake in the preheated oven for 40–45 minutes, or until a toothpick inserted into the center comes out clean.
- Tip: Check for doneness at 40 minutes to prevent overbaking, as sorghum flour can dry out quickly.
- Remove the cake from the oven and let it cool in the pan on a wire rack for 15 minutes.
- Transfer the cake to the wire rack to cool completely before slicing.
Moist and fragrant, this cake boasts a soft, dense texture with bursts of apple in every bite. Serve it warm with a dollop of whipped cream or enjoy it as a simple snack with a cup of tea for a truly comforting experience.
Savory Sorghum Flour Crepes
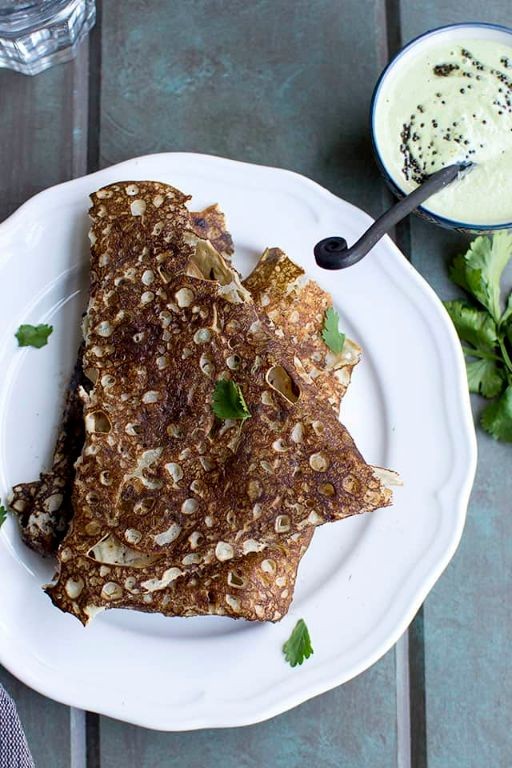
Savory sorghum flour crepes offer a delightful gluten-free alternative that’s surprisingly easy to master, even for first-time cooks. Start by gathering your ingredients and following these methodical steps for perfect, pliable crepes every time.
Serving: 4 | Pre Time: 10 minutes | Cooking Time: 20 minutes
Ingredients
– Sorghum flour – 1 cup
– Eggs – 2 large
– Milk – 1 ¼ cups
– Salt – ½ tsp.
– Unsalted butter – 2 tbsp, melted
Instructions
1. In a medium bowl, whisk together 1 cup of sorghum flour and ½ tsp. of salt until fully combined.
2. Create a well in the center of the dry ingredients and crack 2 large eggs into it.
3. Gradually pour in 1 ¼ cups of milk while whisking continuously to prevent lumps from forming.
4. Whisk in 2 tbsp of melted unsalted butter until the batter is smooth and the consistency of heavy cream.
5. Let the batter rest at room temperature for 10 minutes to allow the sorghum flour to hydrate fully, which improves texture.
6. Heat a 10-inch non-stick skillet or crepe pan over medium heat until a drop of water sizzles and evaporates immediately.
7. Lightly grease the pan with a thin layer of butter, using a paper towel to wipe away any excess for even browning.
8. Pour ¼ cup of batter into the center of the pan, then quickly tilt and swirl to coat the bottom in a thin, even layer.
9. Cook the crepe for 60–90 seconds until the edges lift easily and the surface appears dry with small bubbles.
10. Carefully flip the crepe using a thin spatula and cook for an additional 30–45 seconds until lightly golden on both sides.
11. Transfer the cooked crepe to a plate and repeat with the remaining batter, stacking crepes with parchment paper between to prevent sticking.
12. For optimal flexibility, keep crepes covered with a clean kitchen towel while cooking the batch to retain moisture.
Finished crepes boast a tender, slightly nutty flavor with a flexible texture ideal for rolling or folding. Fill them with sautéed vegetables and cheese for a quick lunch, or layer with ham and béchamel for an elegant brunch dish that highlights their delicate structure.
Sorghum Flour Peanut Butter Cookies

Perfect for holiday baking or a wholesome snack, these sorghum flour peanut butter cookies offer a gluten-free twist on a classic favorite. They come together quickly with just a few simple ingredients, making them ideal for beginner bakers looking for a reliable, delicious treat.
Serving: 12 | Pre Time: 10 minutes | Cooking Time: 12 minutes
Ingredients
- Sorghum flour – 1 cup
- Peanut butter – 1 cup
- Egg – 1 large
- Brown sugar – ½ cup
- Baking soda – ½ tsp
- Salt – ¼ tsp
Instructions
- Preheat your oven to 350°F and line a baking sheet with parchment paper.
- In a medium bowl, combine 1 cup of sorghum flour, ½ teaspoon of baking soda, and ¼ teaspoon of salt.
- In a large bowl, mix 1 cup of peanut butter, ½ cup of brown sugar, and 1 large egg until smooth.
- Gradually add the dry ingredients to the wet ingredients, stirring until a dough forms. Tip: If the dough feels too sticky, chill it in the refrigerator for 10 minutes to make it easier to handle.
- Scoop tablespoon-sized portions of dough and roll them into balls.
- Place the balls on the prepared baking sheet, spacing them about 2 inches apart.
- Flatten each ball slightly with a fork, creating a crisscross pattern. Tip: Dip the fork in water between presses to prevent sticking.
- Bake the cookies for 10–12 minutes, or until the edges are lightly golden. Tip: For chewier cookies, remove them from the oven when the centers still look slightly soft, as they will firm up while cooling.
- Let the cookies cool on the baking sheet for 5 minutes before transferring them to a wire rack to cool completely.
Golden and fragrant, these cookies boast a tender, crumbly texture with a rich, nutty flavor from the peanut butter and sorghum flour. Enjoy them warm with a glass of milk, or crumble them over ice cream for a delightful dessert topping.
Gluten-Free Sorghum Flatbread

Diving into gluten-free baking doesn’t have to be intimidating, and this sorghum flatbread is the perfect place to start. It’s a simple, versatile base that’s ready in under an hour, requiring just a handful of pantry staples. Let’s walk through the process together, step by step.
Serving: 4 | Pre Time: 10 minutes | Cooking Time: 25 minutes
Ingredients
– Sorghum flour – 1 cup
– Water – ¾ cup
– Olive oil – 1 tbsp
– Salt – ½ tsp
– Baking powder – 1 tsp
Instructions
1. Preheat your oven to 400°F and line a baking sheet with parchment paper.
2. In a medium mixing bowl, combine 1 cup of sorghum flour, ½ tsp of salt, and 1 tsp of baking powder, whisking them together thoroughly to ensure even distribution.
3. Create a well in the center of the dry ingredients and pour in ¾ cup of water and 1 tbsp of olive oil.
4. Stir the mixture with a spatula until a sticky, cohesive dough forms, being careful not to overmix, which can make the bread tough.
5. Lightly dust a clean surface with extra sorghum flour and turn the dough out onto it.
6. Gently knead the dough for about 30 seconds, just until it becomes smooth and manageable, adding a sprinkle more flour if it’s too sticky to handle.
7. Shape the dough into a ball, then use your hands to press it into a flat, round disc about ½-inch thick on the prepared baking sheet.
8. Use a sharp knife to score the top of the disc lightly into 8 wedges; this helps it bake evenly and makes it easy to tear apart later.
9. Place the baking sheet in the preheated oven and bake for 20-25 minutes, until the flatbread is golden brown on top and sounds hollow when tapped on the bottom.
10. Remove the flatbread from the oven and let it cool on the baking sheet for 5 minutes before transferring to a wire rack.
This flatbread emerges with a pleasantly chewy texture and a subtly nutty flavor from the sorghum. Serve it warm, torn into pieces for dipping into soups or hummus, or use it as a sturdy base for open-faced sandwiches topped with avocado and sprouts.
Sorghum Flour Carrot Cake
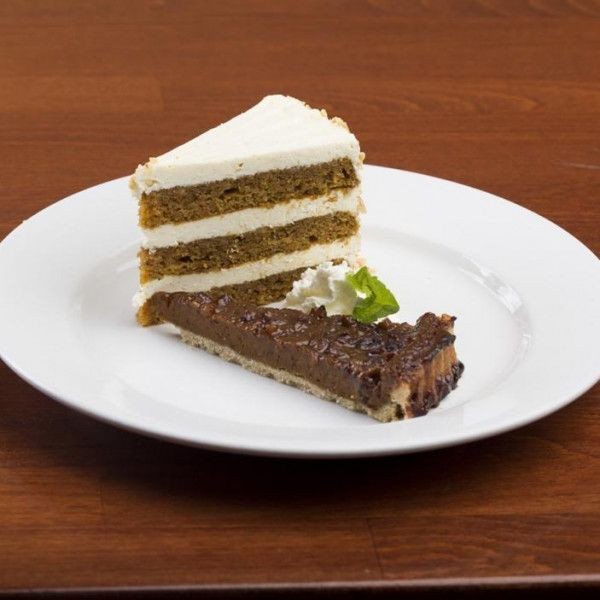
Baking a gluten-free carrot cake doesn’t have to be complicated. This sorghum flour version is surprisingly simple, using just a handful of pantry staples to create a moist, flavorful dessert perfect for any occasion.
Serving: 8 | Pre Time: 15 minutes | Cooking Time: 35 minutes
Ingredients
– Sorghum flour – 1 ½ cups
– Baking soda – 1 tsp
– Salt – ½ tsp
– Ground cinnamon – 1 tsp
– Eggs – 2 large
– Granulated sugar – ¾ cup
– Vegetable oil – ½ cup
– Grated carrots – 1 ½ cups
– Chopped walnuts – ½ cup
Instructions
1. Preheat your oven to 350°F and grease an 8-inch round cake pan.
2. In a medium bowl, whisk together the sorghum flour, baking soda, salt, and ground cinnamon until fully combined.
3. In a large bowl, whisk the eggs for 30 seconds until slightly frothy.
4. Add the granulated sugar to the eggs and whisk vigorously for 1 full minute until the mixture is pale and slightly thickened.
5. Pour the vegetable oil into the egg mixture and whisk for another 30 seconds until fully incorporated.
6. Tip: Fold in the dry ingredients gently with a spatula to avoid overmixing, which can make the cake dense.
7. Add the grated carrots and chopped walnuts to the batter, folding just until evenly distributed.
8. Pour the batter into the prepared pan and use a spatula to spread it evenly.
9. Bake at 350°F for 30-35 minutes. Tip: Check for doneness by inserting a toothpick into the center; it should come out clean with no wet batter.
10. Remove the pan from the oven and let the cake cool in the pan for 10 minutes.
11. Tip: Run a knife around the edge of the pan to loosen the cake before inverting it onto a wire rack to cool completely, which prevents sticking.
12. Once completely cool, slice and serve.
Soft and moist with a tender crumb, this cake boasts a warm cinnamon flavor balanced by the natural sweetness of the carrots. Serve it plain for a simple treat, or get creative by toasting slices and topping them with a dollop of Greek yogurt for breakfast.
Soft Sorghum Flour Dinner Rolls

Venturing into gluten-free baking can feel daunting, but these soft sorghum flour dinner rolls are a foolproof place to start. They require just a handful of pantry staples and yield a batch of tender, slightly sweet rolls perfect for any meal. Let’s walk through the simple process together, step by step.
Serving: 12 | Pre Time: 20 minutes | Cooking Time: 18 minutes
Ingredients
– Sorghum flour – 2 cups
– Active dry yeast – 2 ¼ tsp.
– Granulated sugar – 1 tbsp.
– Warm water (110°F) – ¾ cup
– Olive oil – 2 tbsp.
– Salt – 1 tsp.
– Egg – 1 large
Instructions
1. Combine the warm water (110°F), granulated sugar, and active dry yeast in a large mixing bowl. Let it sit for 5–7 minutes until the mixture becomes frothy.
2. Tip: The water temperature is critical; use a kitchen thermometer to ensure it’s between 105°F and 115°F for proper yeast activation.
3. Add the olive oil, egg, and salt to the yeast mixture. Whisk vigorously until fully combined.
4. Gradually add the sorghum flour to the wet ingredients, stirring with a wooden spoon until a shaggy dough forms.
5. Turn the dough out onto a clean surface lightly dusted with extra sorghum flour.
6. Knead the dough by hand for 8–10 minutes until it becomes smooth and slightly elastic.
7. Tip: Sorghum flour dough is stickier than wheat-based dough; resist adding too much extra flour, as it can make the rolls dense.
8. Shape the dough into a ball and place it back in the mixing bowl. Cover the bowl with a damp kitchen towel.
9. Let the dough rise in a warm, draft-free spot for 1 hour, or until it has doubled in size.
10. Punch down the risen dough to release any air bubbles.
11. Divide the dough into 12 equal portions, rolling each into a smooth ball with your hands.
12. Arrange the dough balls in a greased 9×13-inch baking dish, spacing them about ½ inch apart.
13. Cover the baking dish again with the damp towel and let the rolls rise for 30 minutes.
14. While the rolls rise, preheat your oven to 375°F.
15. Bake the rolls in the preheated oven for 16–18 minutes, or until the tops are golden brown and sound hollow when tapped.
16. Tip: For an extra-soft crust, brush the hot rolls with melted butter immediately after removing them from the oven.
17. Transfer the rolls to a wire rack to cool for at least 10 minutes before serving.
Fresh from the oven, these rolls boast a delightfully soft, pillowy texture with a subtle, nutty sweetness from the sorghum flour. Their tender crumb makes them ideal for sopping up gravy or simply slathering with honey butter. For a creative twist, split them warm and use as mini sliders for pulled pork or shredded chicken.
Sorghum Flour Lemon Poppy Seed Muffins

You’ve probably had lemon poppy seed muffins before, but using sorghum flour gives them a uniquely tender, slightly nutty twist that’s naturally gluten-free. Let’s walk through making these bright, citrusy treats step by step, perfect for a holiday breakfast or afternoon snack.
Serving: 12 | Pre Time: 15 minutes | Cooking Time: 20 minutes
Ingredients
– Sorghum flour – 2 cups
– Baking powder – 2 tsp
– Salt – ½ tsp
– Sugar – ¾ cup
– Eggs – 2 large
– Milk – 1 cup
– Vegetable oil – ⅓ cup
– Lemon zest – 2 tbsp
– Lemon juice – ¼ cup
– Poppy seeds – 2 tbsp
Instructions
1. Preheat your oven to 375°F and line a 12-cup muffin tin with paper liners.
2. In a large bowl, whisk together the sorghum flour, baking powder, and salt until fully combined.
3. In a separate medium bowl, whisk the sugar and eggs together for about 1 minute until slightly frothy.
4. Add the milk, vegetable oil, lemon zest, and lemon juice to the egg mixture, whisking until smooth.
5. Tip: Gently fold the wet ingredients into the dry ingredients with a spatula until just combined—overmixing can make the muffins dense.
6. Stir in the poppy seeds until evenly distributed throughout the batter.
7. Divide the batter evenly among the muffin cups, filling each about ⅔ full.
8. Tip: For even baking, rotate the muffin tin halfway through the cooking time.
9. Bake at 375°F for 18–20 minutes, or until a toothpick inserted into the center of a muffin comes out clean.
10. Remove the muffins from the oven and let them cool in the tin for 5 minutes.
11. Tip: Transfer the muffins to a wire rack to cool completely, which helps prevent sogginess.
12. Serve warm or at room temperature.
Zesty and moist, these muffins have a delicate crumb from the sorghum flour, balanced by the tangy lemon and crunchy poppy seeds. Try serving them with a dollop of lemon curd or a drizzle of honey for an extra burst of flavor, or enjoy them as a light, portable treat any time of day.
Gluten-Free Sorghum Chocolate Cake
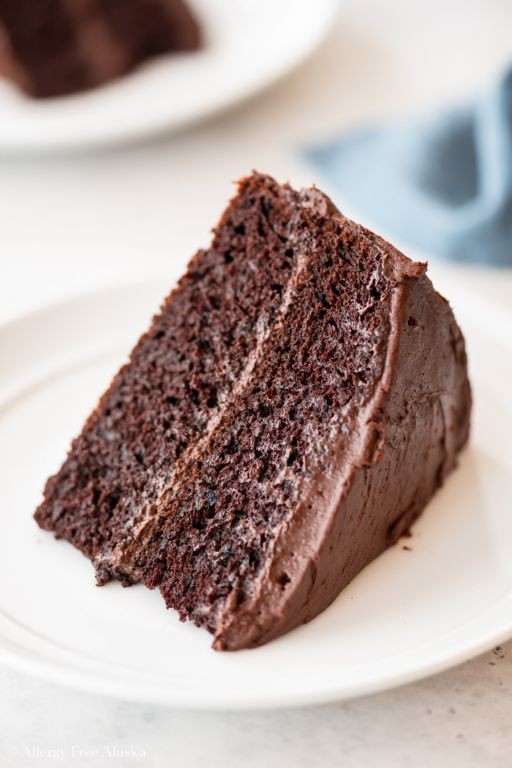
This gluten-free sorghum chocolate cake is surprisingly simple to make, even for beginners. Today, we’ll walk through each step methodically to ensure a moist, rich dessert that everyone can enjoy. Let’s get started with the ingredients and clear instructions.
Serving: 8 | Pre Time: 15 minutes | Cooking Time: 30 minutes
Ingredients
– Sorghum flour – 1 ½ cups
– Cocoa powder – ¾ cup
– Baking soda – 1 tsp
– Salt – ½ tsp
– Eggs – 2
– Sugar – 1 cup
– Vegetable oil – ½ cup
– Milk – ¾ cup
– Vanilla extract – 1 tsp
– Boiling water – 1 cup
Instructions
1. Preheat your oven to 350°F and grease an 8-inch round cake pan.
2. In a medium bowl, whisk together the sorghum flour, cocoa powder, baking soda, and salt until fully combined.
3. In a large bowl, beat the eggs with an electric mixer on medium speed for 1 minute until frothy.
4. Gradually add the sugar to the eggs while beating, continuing for 2 minutes until the mixture is pale and thick.
5. Pour in the vegetable oil, milk, and vanilla extract, and mix on low speed just until incorporated.
6. Tip: Scrape down the sides of the bowl with a spatula to ensure even mixing without overworking the batter.
7. Add the dry ingredients to the wet mixture in two batches, mixing on low speed after each addition until just combined.
8. Carefully pour in the boiling water and stir gently with a spatula until the batter is smooth and thin.
9. Tip: The boiling water helps bloom the cocoa powder, enhancing the chocolate flavor without making the cake dense.
10. Pour the batter into the prepared pan and tap it lightly on the counter to remove any air bubbles.
11. Bake in the preheated oven for 30 minutes, or until a toothpick inserted into the center comes out clean.
12. Tip: Avoid opening the oven door during the first 20 minutes of baking to prevent the cake from collapsing.
13. Remove the cake from the oven and let it cool in the pan on a wire rack for 10 minutes.
14. Run a knife around the edges of the pan, then invert the cake onto the rack to cool completely for 1 hour.
15. Keep this cake stored in an airtight container at room temperature for up to 3 days. Known for its tender crumb and deep chocolate notes, it pairs wonderfully with fresh berries or a dusting of powdered sugar for a festive touch.
Sorghum Flour Zucchini Bread
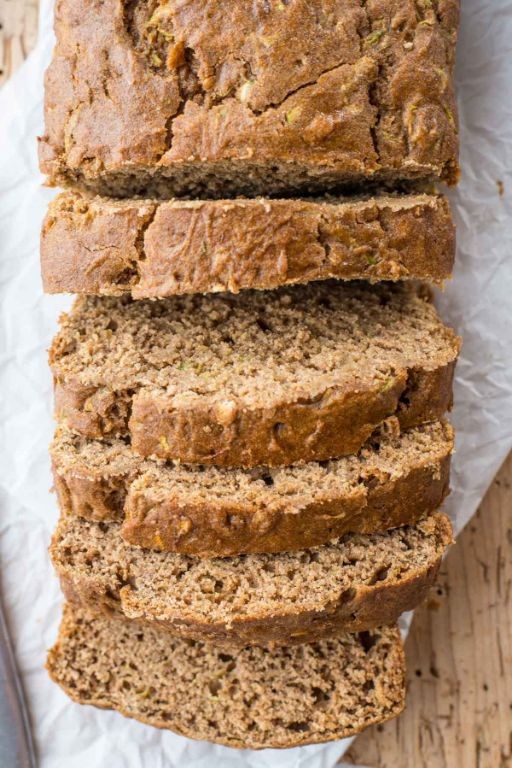
Diving into gluten-free baking doesn’t have to be intimidating, and this wholesome loaf is the perfect place to start. It transforms a summer garden staple into a subtly sweet, satisfying treat that’s ideal for breakfast or an afternoon snack.
Serving: 1 loaf | Pre Time: 15 minutes | Cooking Time: 55 minutes
Ingredients
– Sorghum flour – 1 ½ cups
– Baking soda – 1 tsp
– Salt – ½ tsp
– Ground cinnamon – 1 tsp
– Large eggs – 2
– Granulated sugar – ¾ cup
– Vegetable oil – ½ cup
– Vanilla extract – 1 tsp
– Grated zucchini – 1 ½ cups (packed)
Instructions
1. Preheat your oven to 350°F (175°C) and grease a standard 9×5-inch loaf pan.
2. In a medium bowl, whisk together the sorghum flour, baking soda, salt, and ground cinnamon until fully combined.
3. In a large mixing bowl, beat the 2 large eggs with an electric mixer on medium speed for 30 seconds until frothy.
4. Add the granulated sugar to the eggs and continue beating on medium speed for 1 full minute until the mixture is pale and slightly thickened.
5. Pour in the vegetable oil and vanilla extract, then mix on low speed just until incorporated, about 30 seconds.
6. Using a spatula, fold the dry flour mixture into the wet egg mixture until no dry streaks remain; do not overmix.
7. Gently fold in the 1 ½ cups of packed, grated zucchini until evenly distributed throughout the batter.
8. Pour the batter into the prepared loaf pan and use the spatula to spread it evenly into the corners.
9. Bake on the center rack of the preheated oven for 50 to 55 minutes. To test for doneness, insert a toothpick into the center of the loaf; it should come out clean or with a few moist crumbs attached.
10. Let the bread cool in the pan on a wire rack for 15 minutes, then carefully turn it out onto the rack to cool completely for at least 1 hour before slicing.
Letting the bread cool fully is crucial, as it allows the crumb to set for clean slices. The final texture is wonderfully moist and tender from the zucchini, with a delicate, nutty flavor from the sorghum flour. For a special touch, serve a thick slice lightly toasted and spread with cream cheese or almond butter.
Spiced Sorghum Flour Gingerbread

Let’s bake a cozy, warmly spiced gingerbread using wholesome sorghum flour—a naturally gluten-free alternative that yields a tender, fragrant loaf perfect for the holidays. This recipe walks you through each step methodically, ensuring even beginners achieve delicious results.
Serving: 8 | Pre Time: 15 minutes | Cooking Time: 45 minutes
Ingredients
– Sorghum flour – 1 ½ cups
– Baking soda – 1 tsp
– Ground ginger – 1 tbsp
– Ground cinnamon – 1 tsp
– Salt – ½ tsp
– Molasses – ½ cup
– Vegetable oil – ¼ cup
– Egg – 1 large
– Boiling water – ½ cup
Instructions
1. Preheat your oven to 350°F and grease an 8×4-inch loaf pan.
2. In a medium bowl, whisk together the sorghum flour, baking soda, ground ginger, ground cinnamon, and salt until fully combined.
3. In a large bowl, combine the molasses, vegetable oil, and egg, whisking vigorously for about 1 minute until smooth.
4. Gradually pour the boiling water into the molasses mixture while whisking continuously to temper the ingredients.
5. Add the dry ingredients to the wet ingredients, stirring with a spatula just until no flour streaks remain—overmixing can make the bread dense.
6. Pour the batter into the prepared loaf pan, spreading it evenly with the spatula.
7. Bake at 350°F for 40–45 minutes, or until a toothpick inserted into the center comes out clean.
8. Let the gingerbread cool in the pan on a wire rack for 10 minutes before turning it out to cool completely.
9. Slice the cooled gingerbread into 8 even pieces with a serrated knife for clean cuts.
You’ll find this gingerbread delightfully moist with a deep, spicy aroma from the ginger and cinnamon. Its crumb is tender yet sturdy, making it ideal for serving warm with a dollop of whipped cream or toasted for breakfast with a drizzle of honey.
Summary
Ultimately, this collection unlocks sorghum flour’s potential for delicious, wholesome gluten-free baking. We hope these 20 recipes inspire your kitchen adventures. Give them a try, and let us know your favorites in the comments below! If you enjoyed this roundup, please share it on Pinterest to help other home cooks discover these nutritious ideas. Happy baking!