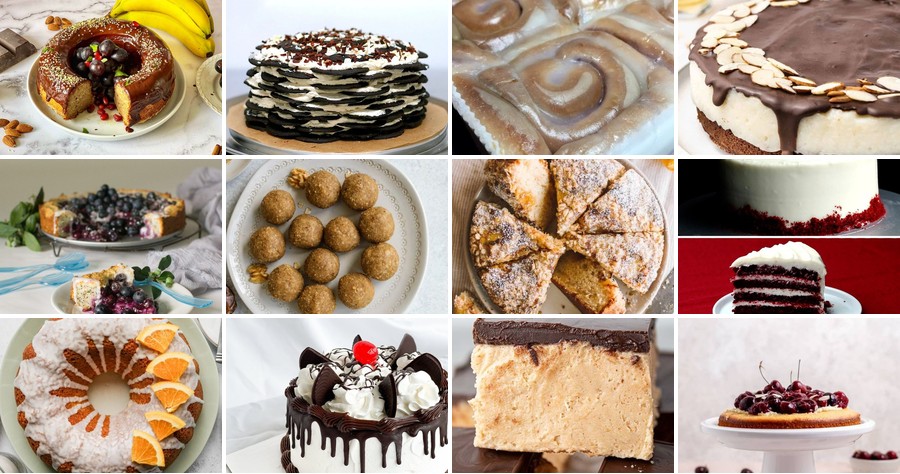
Haven’t you ever craved that perfect slice of Tastykake bliss? We’ve gathered 20 decadent recipes that capture that irresistible, bakery-fresh magic right in your own kitchen. From classic favorites to creative twists, this roundup is your ultimate guide to homemade comfort. Get ready to preheat your oven and dive into a world of sweet, satisfying treats that are sure to become new family favorites!
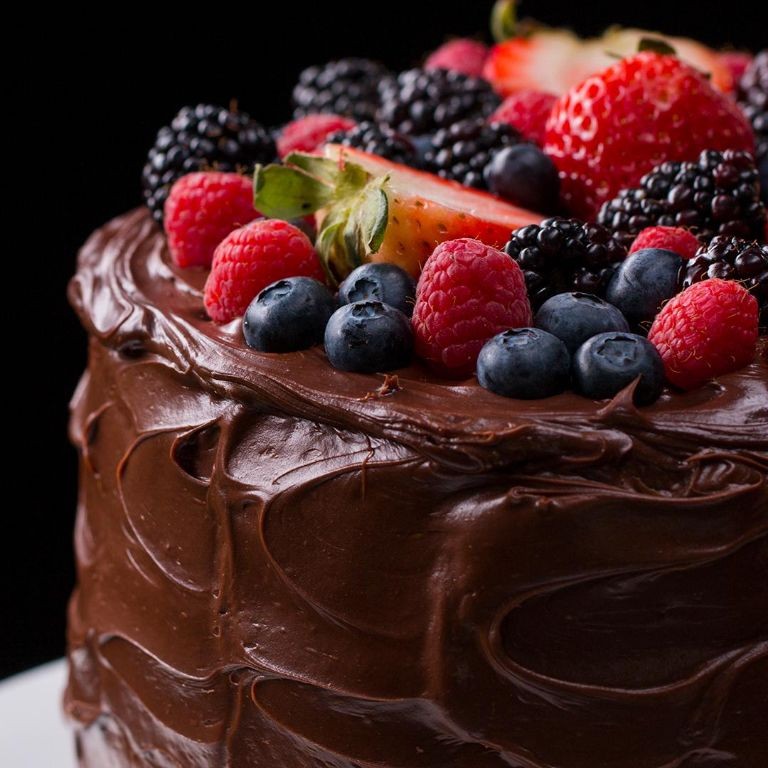
Chocolate Fudge Tastycake Delight
Finally, a dessert that combines the nostalgic charm of a childhood treat with the sophistication of a pastry chef’s secret weapon—welcome to a creation so decadent, it might just convince your oven to preheat itself out of sheer excitement.
Serving: 12 | Pre Time: 25 minutes | Cooking Time: 35 minutes
Ingredients
- 1 ½ cups all-purpose flour, sifted
- ¾ cup Dutch-process cocoa powder
- 1 teaspoon baking soda
- ½ teaspoon fine sea salt
- 1 cup unsalted butter, clarified and cooled to 75°F
- 1 ¼ cups granulated sugar
- 3 pasture-raised eggs, lightly beaten
- 2 teaspoons pure vanilla extract
- 1 cup buttermilk, at room temperature
- 8 ounces semisweet chocolate, finely chopped
- 1 cup heavy cream
- ½ cup unsalted butter, cubed
- 1 cup powdered sugar, sifted
Instructions
- Preheat your oven to 350°F and generously grease a 9×13-inch baking pan, then line it with parchment paper for easy removal.
- In a medium bowl, whisk together the sifted all-purpose flour, Dutch-process cocoa powder, baking soda, and fine sea salt until fully incorporated.
- Using a stand mixer fitted with the paddle attachment, cream the clarified butter and granulated sugar on medium-high speed for 4 minutes, until pale and fluffy.
- With the mixer on low, gradually add the lightly beaten pasture-raised eggs one at a time, mixing for 30 seconds after each addition to emulsify.
- Beat in the pure vanilla extract until just combined, about 15 seconds.
- Alternately add the dry ingredients and buttermilk to the butter mixture in three additions, starting and ending with the dry ingredients, and mix on low speed until a smooth batter forms.
- Pour the batter into the prepared pan and spread it evenly with an offset spatula.
- Bake for 30–35 minutes, or until a toothpick inserted into the center comes out with a few moist crumbs clinging to it.
- Transfer the cake to a wire rack and let it cool completely in the pan for 1 hour.
- While the cake cools, place the finely chopped semisweet chocolate in a heatproof bowl.
- In a small saucepan, heat the heavy cream over medium heat until it just begins to simmer, with small bubbles forming around the edges.
- Pour the hot cream over the chocolate, let it sit undisturbed for 2 minutes, then whisk until smooth and glossy.
- Whisk in the cubed butter one piece at a time until fully melted and incorporated.
- Gradually sift in the powdered sugar while whisking continuously until the fudge frosting is thick and spreadable.
- Spread the fudge frosting evenly over the cooled cake using a bench scraper for a sleek finish.
- Allow the frosting to set at room temperature for 30 minutes before slicing.
This delight boasts a moist, tender crumb that melts against the rich, velvety fudge—a texture so luscious, it’s like a chocolate cloud decided to throw a party. Serve it chilled for a firmer bite that highlights the deep cocoa notes, or garnish with a sprinkle of flaky sea salt to cut through the sweetness with a savory wink.
Vanilla Bean Tastycake Bliss
Y’all, if you’ve ever wanted to hug a cloud that tastes like a bakery’s daydream, you’ve landed in the right recipe. This isn’t just cake; it’s a fluffy, fragrant masterpiece that will have you questioning why you ever settled for boxed mixes.
Serving: 8 | Pre Time: 20 minutes | Cooking Time: 35 minutes
Ingredients
- 1 ¾ cups (210g) cake flour, sifted
- 1 ½ teaspoons baking powder
- ½ teaspoon fine sea salt
- ½ cup (113g) unsalted European-style butter, at room temperature
- 1 cup (200g) granulated sugar
- 3 large pasture-raised eggs, lightly beaten, at room temperature
- 2 teaspoons pure vanilla bean paste
- ¾ cup (180ml) whole milk, at room temperature
- 1 cup (240ml) heavy whipping cream, chilled
- 2 tablespoons confectioners’ sugar
- ½ teaspoon pure vanilla extract
Instructions
- Preheat your oven to 350°F (175°C) and position a rack in the center. Grease and flour an 8-inch round cake pan, then line the bottom with parchment paper for foolproof release.
- In a medium bowl, whisk together the sifted cake flour, baking powder, and fine sea salt until fully aerated.
- In the bowl of a stand mixer fitted with the paddle attachment, cream the room-temperature unsalted European-style butter and granulated sugar on medium-high speed for 4-5 minutes, until pale and fluffy. Tip: Proper creaming incorporates air, which is key for that tender crumb.
- With the mixer on low, gradually add the lightly beaten pasture-raised eggs in three additions, mixing until just incorporated after each and scraping down the bowl as needed.
- Beat in the pure vanilla bean paste until the mixture is homogenous.
- Alternately add the dry ingredients and the whole milk to the butter mixture in three parts, beginning and ending with the dry ingredients. Mix on low speed until the batter is smooth, about 30 seconds total. Tip: This alternating method prevents the batter from becoming tough.
- Pour the batter into the prepared pan and smooth the top with an offset spatula.
- Bake for 32-35 minutes, or until a toothpick inserted into the center comes out clean and the top springs back lightly when touched.
- Transfer the pan to a wire rack and let the cake cool in the pan for 15 minutes. Then, run a knife around the edges, invert it onto the rack, peel off the parchment, and let it cool completely for about 1 hour.
- While the cake cools, make the topping: In a chilled bowl, combine the chilled heavy whipping cream, confectioners’ sugar, and pure vanilla extract. Whip on medium-high speed until stiff peaks form, about 2-3 minutes. Tip: Chilling everything ensures the cream whips up quickly and holds its shape.
- Once the cake is completely cool, spread the whipped cream evenly over the top with a spatula.
The result is a cake with a supremely tender, fine-crumbed texture that melts on the tongue, perfectly balanced by the rich, cool vanilla cream. For a show-stopping twist, serve slices with a drizzle of warm salted caramel or a scattering of fresh raspberries to cut through the sweetness.
Lemon Zest Tastycake Perfection
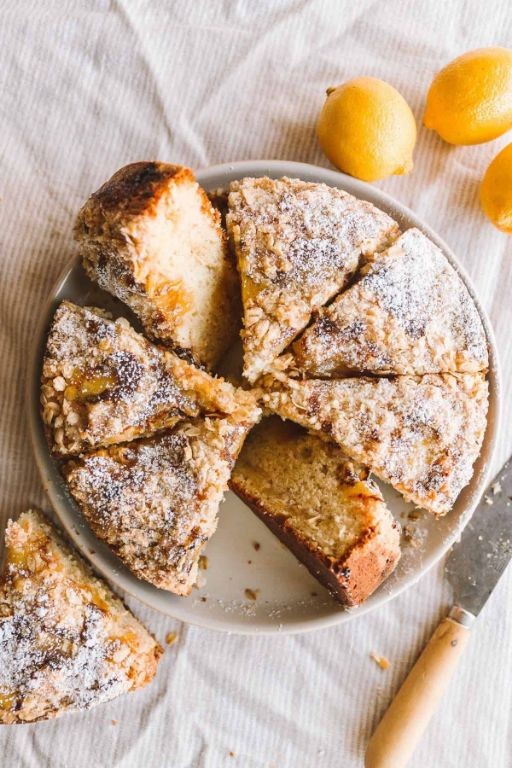
Who knew that a humble lemon could transform a simple cake into a zesty masterpiece that’ll have your taste buds doing a happy dance? This Lemon Zest Tastycake Perfection is the sunshine your dessert table desperately needs, blending bright citrus with buttery bliss in a way that’s almost too good to be true—almost!
Serving: 8 | Pre Time: 20 minutes | Cooking Time: 35 minutes
Ingredients
– 2 cups all-purpose flour, sifted
– 1 cup granulated sugar
– 1/2 cup clarified butter, melted and cooled
– 3 pasture-raised eggs, lightly beaten
– 1 cup whole milk, at room temperature
– 2 tbsp fresh lemon zest, finely grated
– 1/4 cup fresh lemon juice
– 1 tsp pure vanilla extract
– 2 tsp baking powder
– 1/2 tsp fine sea salt
Instructions
1. Preheat your oven to 350°F and grease a 9-inch round cake pan, then line it with parchment paper for easy removal.
2. In a large mixing bowl, whisk together the sifted all-purpose flour, granulated sugar, baking powder, and fine sea salt until fully combined.
3. In a separate bowl, combine the lightly beaten pasture-raised eggs, melted clarified butter, whole milk, fresh lemon juice, and pure vanilla extract, whisking until smooth.
4. Tip: Add the wet ingredients to the dry ingredients gradually to prevent lumps and ensure an even batter consistency.
5. Gently fold in the finely grated fresh lemon zest using a spatula, being careful not to overmix to keep the cake tender.
6. Pour the batter into the prepared cake pan and tap it lightly on the counter to release any air bubbles.
7. Bake in the preheated oven at 350°F for 30-35 minutes, or until a toothpick inserted into the center comes out clean with no wet crumbs.
8. Tip: Avoid opening the oven door during the first 25 minutes of baking to prevent the cake from sinking or becoming dense.
9. Remove the cake from the oven and let it cool in the pan on a wire rack for 10 minutes to set the structure.
10. Carefully invert the cake onto the wire rack, peel off the parchment paper, and allow it to cool completely to room temperature, about 1 hour.
11. Tip: For enhanced flavor, brush the cooled cake with a simple syrup made from equal parts lemon juice and sugar before serving.
So, what’s the final verdict? This cake boasts a moist, tender crumb that practically melts in your mouth, with a vibrant lemon flavor that’s both tangy and sweet—no generic dessert here! Serve it with a dollop of whipped cream or a sprinkle of powdered sugar for an extra touch of elegance, or simply enjoy it as is for a burst of citrusy joy.
Caramel Pecan Tastycake Dream
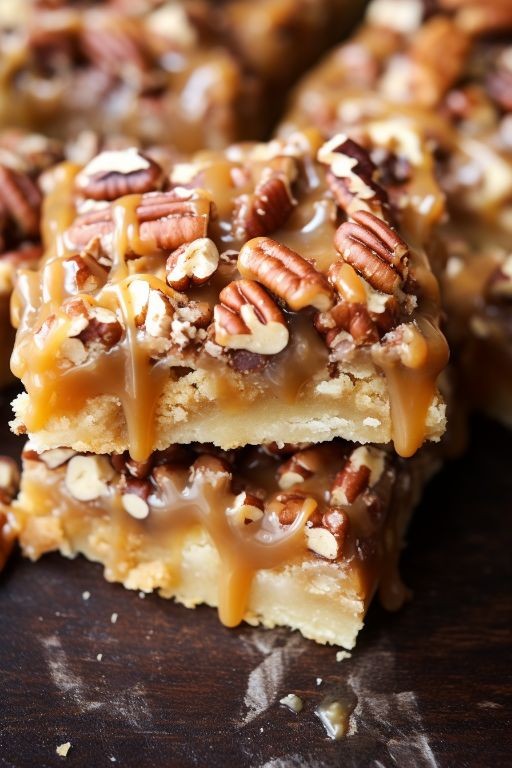
Let’s be honest: sometimes you need a dessert that’s so decadent it feels like a hug for your soul, and this caramel pecan masterpiece is exactly that—a buttery, nutty, gooey dream that’ll make you forget any bad day. Think of it as the lovechild of a sticky bun and a fancy pastry, all wrapped up in a cake that’s dangerously easy to devour in one sitting (no judgment here!).
Serving: 8 | Pre Time: 20 minutes | Cooking Time: 35 minutes
Ingredients
– 1 ½ cups all-purpose flour, sifted
– ¾ cup granulated sugar
– ½ cup unsalted butter, clarified and cooled to room temperature
– 3 pasture-raised eggs, lightly beaten
– 1 teaspoon pure vanilla extract
– 1 teaspoon baking powder
– ¼ teaspoon fine sea salt
– 1 cup heavy cream
– 1 cup dark brown sugar, packed
– ½ cup pure maple syrup
– 1 ½ cups pecan halves, toasted
– ½ teaspoon flaky sea salt
Instructions
1. Preheat your oven to 350°F (175°C) and grease a 9-inch round cake pan, lining the bottom with parchment paper for easy removal.
2. In a medium bowl, whisk together the sifted all-purpose flour, baking powder, and fine sea salt until fully combined.
3. In a large mixing bowl, use an electric mixer on medium speed to cream the clarified butter and granulated sugar for 3–4 minutes until light and fluffy.
4. Gradually add the lightly beaten pasture-raised eggs to the butter mixture, one at a time, beating well after each addition to emulsify and prevent curdling.
5. Stir in the pure vanilla extract until just incorporated.
6. Gently fold the dry flour mixture into the wet ingredients using a spatula, mixing until no streaks remain, but avoid overmixing to keep the cake tender.
7. Pour the batter into the prepared cake pan, smoothing the top with an offset spatula for an even bake.
8. Bake in the preheated oven for 25–30 minutes, or until a toothpick inserted into the center comes out clean and the edges are golden brown.
9. While the cake bakes, prepare the caramel sauce: in a saucepan over medium heat, combine the heavy cream, dark brown sugar, and pure maple syrup, stirring constantly with a wooden spoon until the sugar dissolves completely.
10. Bring the mixture to a gentle boil, then reduce the heat to low and simmer for 5–7 minutes, until it thickens slightly and coats the back of a spoon—watch closely to prevent burning.
11. Remove the caramel from heat and stir in the toasted pecan halves until evenly coated.
12. Once the cake is baked, immediately pour the warm caramel-pecan mixture over the top, spreading it evenly with a spatula.
13. Sprinkle the flaky sea salt over the caramel layer for a savory contrast that enhances the sweetness.
14. Let the cake cool in the pan for at least 15 minutes to allow the caramel to set slightly before serving.
Just imagine slicing into this beauty: the cake stays moist and crumbly, while the caramel seeps in, creating a sticky, rich layer that’s balanced by the crunchy pecans and a hint of salt. Serve it warm with a dollop of whipped cream or alongside a scoop of vanilla ice cream for an extra-indulgent treat that’ll have everyone begging for seconds!
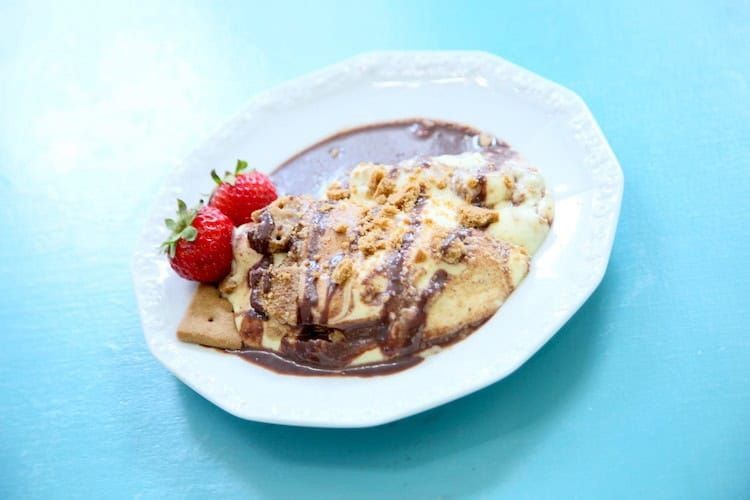
Peanut Butter Tastycake Heaven
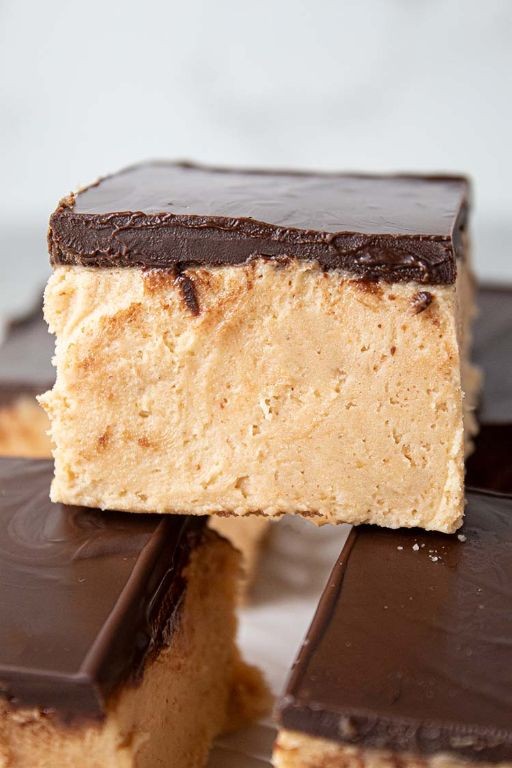
Fellow dessert devotees, brace yourselves for a flavor fusion that’ll make your taste buds do a happy dance—a decadent, no-bake delight that’s as easy to whip up as it is to devour. It’s the ultimate sweet-salty-creamy trifecta, ready to rescue you from any mundane snack attack.
Serving: 12 | Pre Time: 20 minutes | Cooking Time: 0 minutes
Ingredients
– 2 cups creamy peanut butter
– 1 cup unsalted butter, softened to room temperature
– 3 cups confectioners’ sugar, sifted
– 1 teaspoon pure vanilla extract
– 1/4 teaspoon fine sea salt
– 24 chocolate sandwich cookies, finely crushed
– 1 cup semi-sweet chocolate chips
– 1 tablespoon coconut oil
Instructions
1. In a large mixing bowl, combine the creamy peanut butter and softened unsalted butter using a hand mixer on medium speed until fully incorporated and fluffy, about 2 minutes.
2. Gradually add the sifted confectioners’ sugar in three additions, mixing on low speed after each to prevent a sugar cloud, then increase to medium until the mixture is thick and cohesive.
3. Incorporate the pure vanilla extract and fine sea salt, mixing for 30 seconds on medium speed to evenly distribute the flavors.
4. Line an 8×8-inch baking pan with parchment paper, allowing overhang on two sides for easy removal.
5. Press half of the peanut butter mixture evenly into the bottom of the prepared pan using a spatula or your fingertips.
6. Sprinkle the finely crushed chocolate sandwich cookies in an even layer over the peanut butter base, gently pressing them down with the back of a spoon.
7. Spread the remaining peanut butter mixture over the cookie layer, smoothing the top with an offset spatula.
8. In a microwave-safe bowl, combine the semi-sweet chocolate chips and coconut oil, microwaving in 30-second intervals at 50% power, stirring between each, until fully melted and glossy.
9. Pour the melted chocolate mixture over the top layer, tilting the pan to coat it evenly.
10. Refrigerate the pan for at least 4 hours, or until the chocolate topping is completely set and firm to the touch.
11. Using the parchment overhang, lift the dessert from the pan and place it on a cutting board.
12. Slice into 12 equal squares with a sharp knife, wiping the blade clean between cuts for neat edges.
Now, for the grand finale: this treat boasts a rich, fudgy peanut butter center with a satisfying cookie crunch, all enrobed in a sleek chocolate shell. Nothing beats the contrast of the creamy layers against the crisp base—serve these squares chilled with a drizzle of extra peanut butter or crumbled cookies for a textural party.
Pumpkin Spice Tastycake Magic
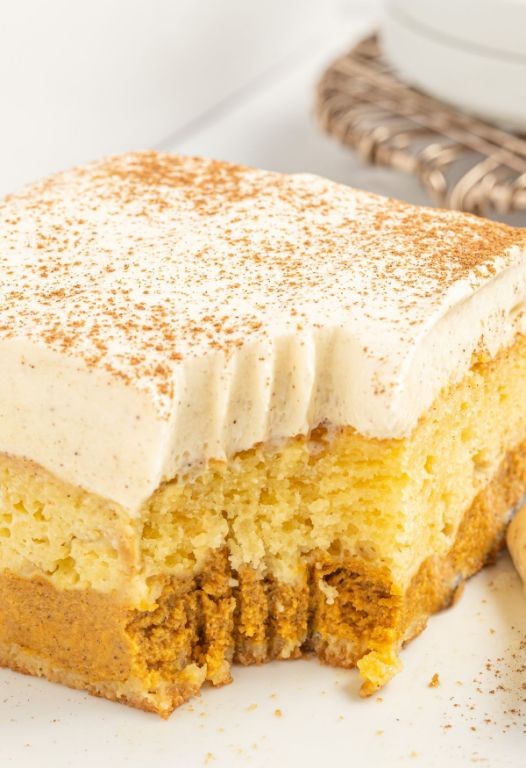
Mmm, can you smell that? It’s the scent of autumn romance and a hint of kitchen wizardry—welcome to the cozy chaos of creating Pumpkin Spice Tastycake Magic, where a humble cake mix gets a gourmet glow-up that’ll make your taste buds do a happy dance. Think of it as your favorite fall flavors wearing a fancy hat, ready to impress at any gathering without requiring a culinary degree.
Serving: 12 | Pre Time: 15 minutes | Cooking Time: 35 minutes
Ingredients
– 1 box (15.25 oz) spice cake mix
– 1 cup canned pumpkin purée
– 3 pasture-raised eggs, lightly beaten
– ½ cup clarified butter, melted and cooled slightly
– 1 cup whole milk
– 2 tsp pure vanilla extract
– 1 tsp ground cinnamon
– ½ tsp ground nutmeg
– ¼ tsp ground cloves
– ½ cup granulated sugar
– 8 oz cream cheese, softened to room temperature
– 1 cup powdered sugar, sifted
Instructions
1. Preheat your oven to 350°F (175°C) and grease a 9×13-inch baking pan with clarified butter, ensuring an even coat to prevent sticking.
2. In a large mixing bowl, combine the spice cake mix, canned pumpkin purée, lightly beaten pasture-raised eggs, melted clarified butter, whole milk, pure vanilla extract, ground cinnamon, ground nutmeg, and ground cloves, whisking until the batter is smooth and free of lumps.
3. Pour the batter into the prepared baking pan, using a spatula to spread it evenly into the corners for uniform baking.
4. Bake for 30–35 minutes, or until a toothpick inserted into the center comes out clean and the edges are golden brown, rotating the pan halfway through for even heat distribution.
5. While the cake bakes, prepare the frosting by beating the softened cream cheese and granulated sugar in a medium bowl with an electric mixer on medium speed for 2–3 minutes until fluffy and pale.
6. Gradually add the sifted powdered sugar to the cream cheese mixture, beating on low speed until fully incorporated and smooth, then increase to high speed for 1 minute to aerate the frosting.
7. Allow the cake to cool completely in the pan on a wire rack for at least 1 hour to prevent the frosting from melting when applied.
8. Spread the cream cheese frosting evenly over the cooled cake using an offset spatula, creating decorative swirls for a polished finish.
9. Chill the frosted cake in the refrigerator for 20 minutes to set the frosting before slicing and serving.
Craving a slice? This Pumpkin Spice Tastycake Magic delivers a moist, tender crumb infused with warm spices, balanced by the tangy cream cheese frosting that adds a luxurious creaminess. Serve it chilled with a drizzle of caramel sauce for an extra indulgent twist, or pair it with a hot cup of coffee to highlight those cozy autumn notes—it’s the perfect treat to savor slowly or share with friends who appreciate a little kitchen magic.
Blueberry Burst Tastycake Joy
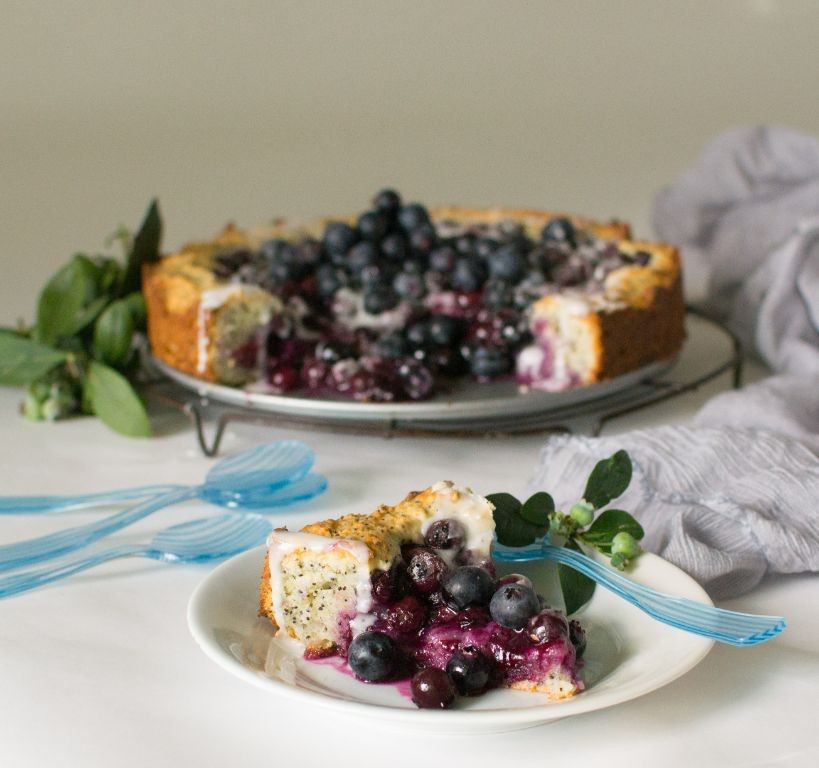
Brace your taste buds for a flavor fiesta that’ll make your kitchen the happiest place on Earth—this isn’t just a cake; it’s a blueberry-packed party in a pan, ready to turn any Tuesday into a celebration. Imagine a tender, buttery crumb cradling juicy bursts of sweet-tart berries, all crowned with a crackly sugar crust that’ll have you sneaking slices straight from the cooling rack. Trust me, this dessert is so good, it might just become your new favorite excuse to skip the gym (we won’t tell!).
Serving: 8 | Pre Time: 20 minutes | Cooking Time: 45 minutes
Ingredients
– 1 ½ cups all-purpose flour, sifted
– 1 cup granulated sugar
– ½ cup unsalted clarified butter, melted and cooled
– 2 pasture-raised eggs, lightly beaten
– ½ cup whole milk, at room temperature
– 1 ½ cups fresh blueberries, rinsed and patted dry
– 1 tsp pure vanilla extract
– 2 tsp baking powder
– ¼ tsp fine sea salt
– 1 tbsp turbinado sugar, for sprinkling
Instructions
1. Preheat your oven to 350°F and generously grease a 9-inch round cake pan with clarified butter, then dust it lightly with flour to prevent sticking.
2. In a large mixing bowl, whisk together the sifted all-purpose flour, granulated sugar, baking powder, and fine sea salt until fully combined and aerated.
3. Create a well in the center of the dry ingredients and pour in the melted clarified butter, lightly beaten pasture-raised eggs, whole milk, and pure vanilla extract.
4. Gently fold the wet ingredients into the dry mixture using a rubber spatula, stirring just until no flour streaks remain—overmixing can lead to a dense texture.
5. Carefully fold in the fresh blueberries, ensuring they are evenly distributed without crushing the berries to maintain their juicy integrity.
6. Pour the batter into the prepared cake pan, smoothing the top with the spatula for an even bake.
7. Sprinkle the turbinado sugar evenly over the batter surface to create a delightful crackly crust as it bakes.
8. Place the pan in the preheated oven and bake for 40–45 minutes, or until a toothpick inserted into the center comes out clean with no wet batter clinging to it.
9. Remove the cake from the oven and let it cool in the pan on a wire rack for 15 minutes to allow the structure to set before attempting to remove it.
10. Run a knife around the edges of the pan to loosen the cake, then invert it onto the wire rack to cool completely for about 1 hour.
11. Slice the cooled cake into 8 even portions using a serrated knife for clean cuts without squishing the tender crumb.
Yes, you’ve just crafted a masterpiece where the moist, buttery cake crumbles delicately with each forkful, punctuated by the pop of warm blueberries that release their sweet-tart essence. Serve it slightly warm with a dollop of whipped cream for a cozy treat, or chill it overnight to let the flavors meld into a firmer, more intense delight—either way, it’s pure joy in every bite!
Raspberry Chocolate Tastycake Extravaganza
Forget everything you thought you knew about dessert—this Raspberry Chocolate Tastycake Extravaganza is about to hijack your taste buds with a one-way ticket to flavor town. Imagine the tart punch of raspberries doing a tango with rich, dark chocolate, all cradled in a cake so moist it practically whispers sweet nothings. It’s the kind of treat that makes you wonder why you ever settled for boring sweets in the first place.
Serving: 8 | Pre Time: 25 minutes | Cooking Time: 35 minutes
Ingredients
– 1 ½ cups all-purpose flour, sifted
– ¾ cup granulated sugar
– ½ cup unsweetened cocoa powder, Dutch-processed
– 1 tsp baking soda
– ½ tsp fine sea salt
– 2 pasture-raised eggs, lightly beaten
– ¾ cup buttermilk, at room temperature
– ½ cup clarified butter, melted and cooled slightly
– 1 tsp pure vanilla extract
– 1 cup fresh raspberries, gently rinsed and patted dry
– ½ cup dark chocolate chips, 70% cacao
– ¼ cup powdered sugar, for dusting
Instructions
1. Preheat your oven to 350°F (175°C) and grease an 8-inch round cake pan, then line the bottom with parchment paper for easy removal.
2. In a large mixing bowl, whisk together the sifted all-purpose flour, granulated sugar, Dutch-processed cocoa powder, baking soda, and fine sea salt until fully combined and lump-free.
3. In a separate bowl, combine the lightly beaten pasture-raised eggs, room-temperature buttermilk, melted clarified butter, and pure vanilla extract, whisking until smooth and emulsified.
4. Tip: Pour the wet ingredients into the dry ingredients gradually to prevent overmixing, which can lead to a tough cake texture.
5. Gently fold the mixture with a spatula just until no dry streaks remain, being careful not to deflate the batter.
6. Fold in the gently rinsed and patted-dry fresh raspberries and dark chocolate chips until evenly distributed throughout the batter.
7. Pour the batter into the prepared cake pan and use a spatula to spread it into an even layer, tapping the pan lightly on the counter to release any air bubbles.
8. Bake in the preheated oven for 30–35 minutes, or until a toothpick inserted into the center comes out clean with a few moist crumbs attached.
9. Tip: Avoid opening the oven door during the first 25 minutes of baking to prevent the cake from collapsing due to sudden temperature changes.
10. Remove the cake from the oven and let it cool in the pan on a wire rack for 15 minutes to set properly.
11. Carefully invert the cake onto the wire rack, peel off the parchment paper, and allow it to cool completely to room temperature, about 1 hour.
12. Tip: For a professional finish, dust the cooled cake with powdered sugar using a fine-mesh sieve just before serving to prevent it from dissolving into the surface.
Unleash this masterpiece and savor the contrast: a tender, fudgy crumb gives way to bursts of tart raspberry and pockets of molten chocolate. Serve it slightly warm with a dollop of whipped cream or crumble it over vanilla ice cream for an indulgent twist that’ll have everyone begging for seconds.
Cookies and Cream Tastycake Fantasy
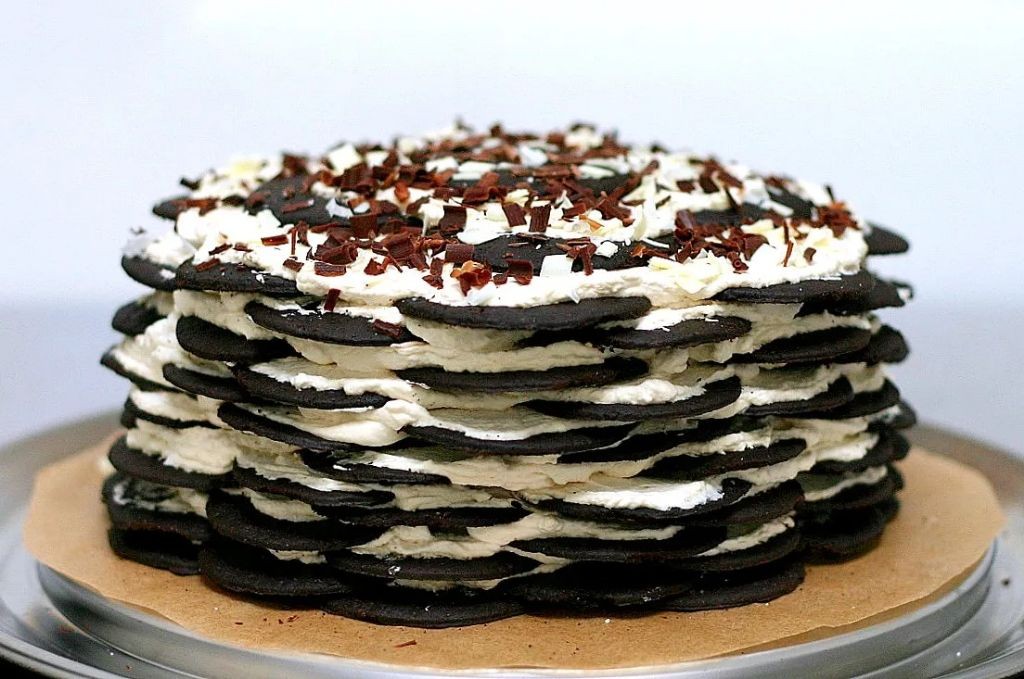
Zesty as a holiday elf on espresso, we’re diving fork-first into a dessert that’s basically a party in a pan—a layered wonder that’ll make your taste buds do the cha-cha. Imagine the nostalgic crunch of cookies meeting the creamy dream of a classic treat, all baked into one showstopping fantasy that’s easier to make than explaining why you ate three slices.
Serving: 12 | Pre Time: 25 minutes | Cooking Time: 35 minutes
Ingredients
- 2 cups finely crushed chocolate sandwich cookies (about 24 cookies)
- 6 tablespoons unsalted butter, melted
- 1 ½ cups granulated sugar
- ¾ cup unsweetened cocoa powder, sifted
- 1 cup all-purpose flour, sifted
- ½ teaspoon fine sea salt
- 3 large pasture-raised eggs, lightly beaten
- ¾ cup whole milk
- ⅓ cup vegetable oil
- 2 teaspoons pure vanilla extract
- ¾ cup boiling water
- 8 ounces cream cheese, softened to room temperature
- 1 cup powdered sugar, sifted
- 1 cup heavy whipping cream, chilled
- 12 whole chocolate sandwich cookies, for garnish
Instructions
- Preheat your oven to 350°F (175°C) and grease a 9×13-inch baking pan with butter or non-stick spray.
- In a medium bowl, combine the finely crushed chocolate sandwich cookies and melted unsalted butter until the mixture resembles wet sand.
- Press the cookie mixture firmly into the bottom of the prepared pan to form an even crust layer.
- In a large mixing bowl, whisk together the granulated sugar, sifted unsweetened cocoa powder, sifted all-purpose flour, and fine sea salt until no lumps remain.
- Add the lightly beaten pasture-raised eggs, whole milk, vegetable oil, and pure vanilla extract to the dry ingredients, stirring just until combined—avoid overmixing to keep the batter tender.
- Carefully pour in the boiling water and stir gently; the batter will be thin, which helps create a moist cake.
- Pour the batter evenly over the cookie crust in the pan.
- Bake in the preheated oven for 30–35 minutes, or until a toothpick inserted into the center comes out clean.
- Remove the pan from the oven and let the cake cool completely on a wire rack for at least 1 hour to prevent the topping from melting.
- While the cake cools, make the frosting: In a stand mixer fitted with the paddle attachment, beat the softened cream cheese on medium speed for 2 minutes until smooth and creamy.
- Gradually add the sifted powdered sugar to the cream cheese, beating on low speed until fully incorporated, then increase to medium-high for 1 minute until fluffy.
- In a separate chilled bowl, whip the heavy whipping cream on high speed for 3–4 minutes until stiff peaks form; fold it gently into the cream cheese mixture to maintain airiness.
- Spread the frosting evenly over the cooled cake with an offset spatula.
- Arrange the whole chocolate sandwich cookies on top as garnish, pressing them lightly into the frosting.
- Chill the assembled dessert in the refrigerator for 2 hours to set before serving.
Now, this beauty boasts a fudgy, moist crumb that melts with the crunchy cookie base, while the frosting adds a cloud-like creaminess. Serve it chilled with a drizzle of chocolate sauce or crumble extra cookies on top for an Instagram-worthy finish that’ll disappear faster than you can say “seconds, please!”
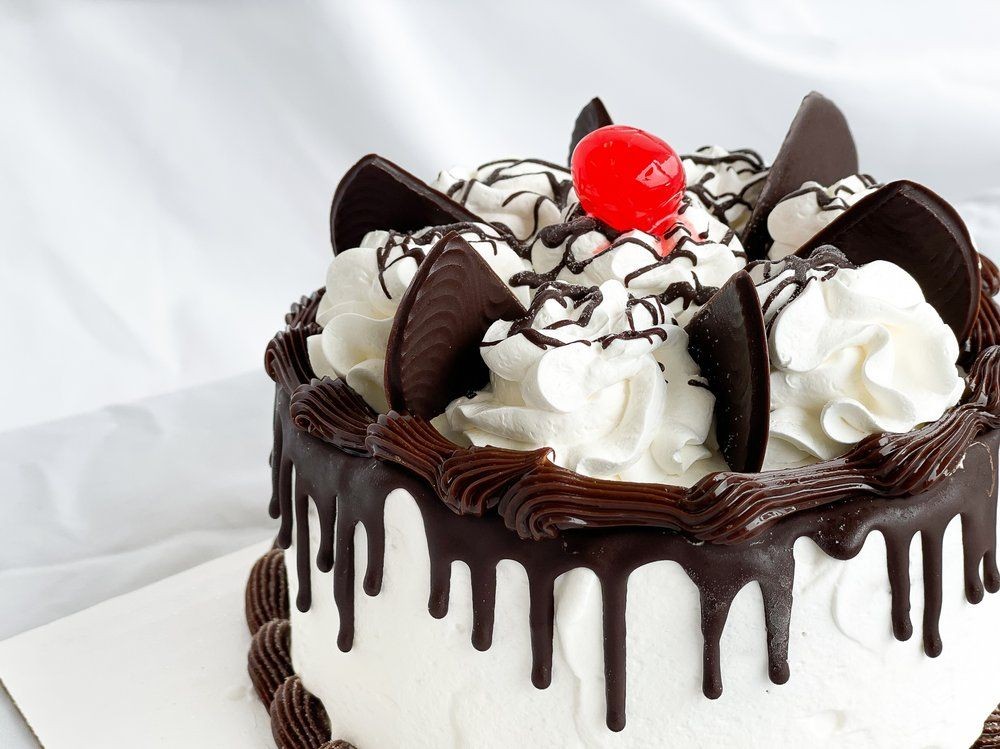
Chocolate Mint Tastycake Marvel

Whew, have you ever had a dessert so decadent it feels like a holiday miracle in your mouth? That’s exactly what you’re in for with this Chocolate Mint Tastycake Marvel—a playful twist on a classic that’s guaranteed to make your taste buds do a happy dance. Let’s dive into this sweet, minty adventure that’s easier to whip up than you might think, perfect for impressing guests or treating yourself after a long day.
Serving: 12 | Pre Time: 25 minutes | Cooking Time: 30 minutes
Ingredients
– 2 cups all-purpose flour, sifted
– 1 ½ cups granulated sugar
– ¾ cup unsweetened cocoa powder, Dutch-processed
– 1 ½ tsp baking powder
– ½ tsp baking soda
– ½ tsp fine sea salt
– 2 large pasture-raised eggs, lightly beaten
– 1 cup whole milk
– ½ cup clarified butter, melted and cooled
– 1 tsp pure vanilla extract
– 1 tsp peppermint extract
– ½ cup heavy cream
– 8 oz semisweet chocolate, finely chopped
– Fresh mint leaves, for garnish
Instructions
1. Preheat your oven to 350°F (175°C) and grease a 9×13-inch baking pan, then line it with parchment paper for easy removal later.
2. In a large mixing bowl, whisk together the sifted all-purpose flour, granulated sugar, Dutch-processed cocoa powder, baking powder, baking soda, and fine sea salt until fully combined and lump-free.
3. In a separate bowl, combine the lightly beaten pasture-raised eggs, whole milk, melted clarified butter, pure vanilla extract, and peppermint extract, whisking vigorously until the mixture is smooth and emulsified.
4. Gradually pour the wet ingredients into the dry ingredients, folding gently with a spatula until just incorporated—avoid overmixing to keep the cake tender.
5. Pour the batter into the prepared pan, spreading it evenly with an offset spatula to ensure uniform baking.
6. Bake in the preheated oven for 25-30 minutes, or until a toothpick inserted into the center comes out clean with a few moist crumbs attached.
7. Remove the cake from the oven and let it cool completely in the pan on a wire rack for about 1 hour to prevent crumbling when sliced.
8. While the cake cools, prepare the ganache by heating the heavy cream in a small saucepan over medium heat until it just begins to simmer, then immediately remove it from the heat.
9. Pour the hot cream over the finely chopped semisweet chocolate in a heatproof bowl, letting it sit undisturbed for 2 minutes to melt the chocolate.
10. Whisk the ganache gently from the center outward until it becomes smooth and glossy, then let it cool slightly to thicken for about 10 minutes.
11. Once the cake is cool, pour the ganache over the top, using a spatula to spread it evenly and allowing some to drip down the sides for a rustic look.
12. Garnish with fresh mint leaves, then refrigerate the cake for at least 30 minutes to set the ganache before serving.
13. Slice into 12 portions using a sharp knife wiped clean between cuts for neat edges.
And just like that, you’ve crafted a dessert masterpiece! This marvel boasts a moist, fudgy crumb with a refreshing mint kick, all wrapped in a silky chocolate ganache that’s pure bliss. Serve it chilled with a dollop of whipped cream or alongside a hot coffee for an indulgent treat that’ll have everyone asking for seconds—trust me, it’s a showstopper that’s as fun to make as it is to devour!
Orange Glazed Tastycake Delicacy

Yikes, have you ever craved something so decadently citrusy that you considered bathing in orange juice? Welcome to the kitchen chaos that yields this glorious treat—a buttery, cakey base drenched in a sticky-sweet orange glaze that’ll make your taste buds do a happy dance. It’s the perfect rescue for when your sweet tooth stages a full-blown rebellion.
Serving: 8 | Pre Time: 20 minutes | Cooking Time: 35 minutes
Ingredients
– 1 ½ cups all-purpose flour, sifted
– ¾ cup granulated sugar
– ½ cup unsalted butter, clarified and cooled to room temperature
– 3 pasture-raised eggs, lightly beaten
– 1 teaspoon pure vanilla extract
– 2 teaspoons baking powder
– ¼ teaspoon fine sea salt
– ½ cup whole milk, at room temperature
– 1 cup confectioners’ sugar, sifted
– ¼ cup freshly squeezed orange juice, strained
– 1 tablespoon orange zest, finely grated
Instructions
1. Preheat your oven to 350°F (175°C) and grease an 8-inch round cake pan, then line it with parchment paper for easy removal.
2. In a large mixing bowl, combine the sifted all-purpose flour, granulated sugar, baking powder, and fine sea salt, whisking until fully incorporated.
3. Add the clarified unsalted butter and pasture-raised eggs to the dry ingredients, mixing on medium speed until the batter is smooth and creamy, about 2 minutes.
4. Pour in the pure vanilla extract and whole milk, blending gently until just combined to avoid overmixing, which can toughen the cake.
5. Transfer the batter to the prepared cake pan, spreading it evenly with a spatula to ensure uniform baking.
6. Bake in the preheated oven for 30–35 minutes, or until a toothpick inserted into the center comes out clean and the edges are golden brown.
7. While the cake bakes, prepare the glaze by whisking together the sifted confectioners’ sugar, freshly squeezed orange juice, and orange zest in a small bowl until smooth and lump-free.
8. Remove the cake from the oven and let it cool in the pan on a wire rack for 10 minutes to set slightly before glazing.
9. Tip: Poke small holes over the top of the warm cake with a skewer to help the glaze seep in for maximum flavor infusion.
10. Slowly pour the orange glaze over the cake, using a spoon to spread it evenly and allowing it to soak in for 5 minutes.
11. Tip: For a glossy finish, apply the glaze while the cake is still warm, but not hot, to prevent it from melting too quickly.
12. Let the glazed cake cool completely on the rack for at least 1 hour to set the glaze and firm up the texture.
13. Tip: Store any leftovers in an airtight container at room temperature for up to 3 days to maintain freshness without refrigeration.
14. Carefully remove the cake from the pan, slice into 8 even portions, and serve immediately.
Fabulously moist and tender, this cake boasts a delicate crumb that melts in your mouth, contrasted by the zesty, sticky-sweet orange glaze that adds a vibrant punch. For a creative twist, serve it warm with a dollop of whipped cream or alongside a scoop of vanilla bean ice cream to balance the citrusy brightness—it’s a dessert that’s as fun to eat as it is to make!
Tiramisu Tastycake Elegance
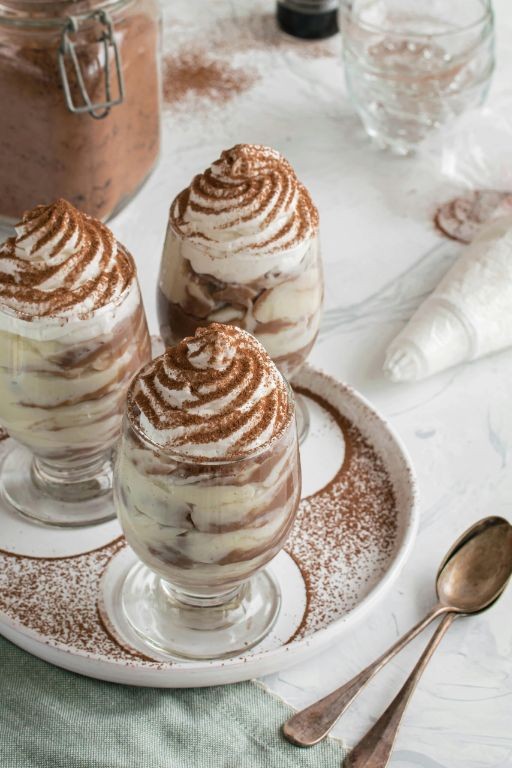
Pardon me while I wipe the drool from my keyboard, because we’re about to dive into a dessert that’s equal parts sophisticated and shamelessly indulgent. This isn’t your nonna’s tiramisu—it’s a layered marvel that brings the classic Italian coffee dessert into a decadent, cake-like form, perfect for when you want to impress but also just really, really want cake.
Serving: 12 | Pre Time: 40 minutes | Cooking Time: 0 minutes
Ingredients
– 1 ½ cups granulated sugar
– 6 large pasture-raised eggs, separated and at room temperature
– 1 ¼ cups all-purpose flour, sifted
– ¼ cup Dutch-process cocoa powder, plus extra for dusting
– 1 ½ cups heavy whipping cream, chilled
– 8 ounces mascarpone cheese, at room temperature
– 1 cup strongly brewed espresso, cooled to room temperature
– 3 tablespoons coffee liqueur
– 24 ladyfinger cookies (savoiardi)
Instructions
1. Preheat your oven to 350°F (175°C) and line a 9×13-inch baking pan with parchment paper, leaving an overhang on the sides for easy removal.
2. In the bowl of a stand mixer fitted with the whisk attachment, beat the 6 egg whites on medium-high speed until soft peaks form, about 3-4 minutes. Tip: Ensure your bowl and whisk are completely grease-free for maximum volume.
3. Gradually add ¾ cup of the granulated sugar while continuing to beat until stiff, glossy peaks form, about 2 more minutes; transfer to a separate bowl.
4. In the same mixer bowl (no need to wash it), beat the 6 egg yolks with the remaining ¾ cup sugar on high speed until pale, thick, and ribbon-like, about 5 minutes.
5. Gently fold the sifted all-purpose flour and ¼ cup Dutch-process cocoa powder into the yolk mixture using a spatula, until just combined.
6. In three additions, carefully fold the whipped egg whites into the batter until no white streaks remain, being careful not to deflate the mixture.
7. Pour the batter into the prepared pan and bake for 18-20 minutes, or until the center springs back when lightly touched. Tip: Avoid opening the oven door during the first 15 minutes to prevent sinking.
8. Let the cake cool completely in the pan on a wire rack, then use the parchment overhang to lift it out.
9. In a clean mixer bowl, whip the chilled heavy cream on medium-high speed until medium-stiff peaks form, about 3-4 minutes.
10. In a separate bowl, whisk the room-temperature mascarpone until smooth, then gently fold it into the whipped cream until uniform.
11. Combine the cooled espresso and coffee liqueur in a shallow dish.
12. Quickly dip each ladyfinger cookie into the espresso mixture for 2-3 seconds per side—just enough to moisten without becoming soggy. Tip: Work in batches to maintain control over saturation.
13. Slice the cooled cake in half horizontally to create two even layers.
14. Place one cake layer on a serving platter, then arrange half of the dipped ladyfingers in a single layer on top.
15. Spread half of the mascarpone cream evenly over the ladyfingers.
16. Repeat with the second cake layer, remaining ladyfingers, and remaining mascarpone cream.
17. Dust the top generously with additional Dutch-process cocoa powder using a fine-mesh sieve.
18. Refrigerate the assembled dessert for at least 4 hours, or preferably overnight, to allow the flavors to meld and the texture to set.
Venture into each forkful to discover a symphony of textures: the airy cake gives way to coffee-kissed, yielding ladyfingers, all enveloped in that luxuriously rich, barely-sweet cream. For a show-stopping twist, serve individual portions in clear glasses to showcase the elegant layers, or garnish with chocolate-covered espresso beans for a caffeinated crunch.
Cherry Almond Tastycake Treat

Savor the moment when sweet meets nutty in this Cherry Almond Tastycake Treat—a dessert that’s basically a party for your taste buds, combining the tart pop of cherries with the cozy crunch of almonds, all wrapped up in a cake so tender it might just ask for a hug. It’s the kind of bake that turns a regular Tuesday into a celebration, no fancy occasion required, just pure, unadulterated deliciousness. Trust me, your kitchen will smell like a bakery dream, and your friends will be begging for the recipe (or at least another slice!).
Serving: 8 | Pre Time: 20 minutes | Cooking Time: 35 minutes
Ingredients
– 1 ½ cups all-purpose flour, sifted
– 1 cup granulated sugar
– ½ cup unsalted butter, clarified and cooled to room temperature
– 2 pasture-raised eggs, lightly beaten
– 1 cup fresh cherries, pitted and halved
– ½ cup almond flour
– 1 tsp pure almond extract
– 1 tsp baking powder
– ½ tsp fine sea salt
– ½ cup whole milk, at room temperature
– ¼ cup sliced almonds, for topping
Instructions
1. Preheat your oven to 350°F (175°C) and grease an 8-inch round cake pan, then line it with parchment paper for easy removal.
2. In a medium bowl, whisk together the sifted all-purpose flour, almond flour, baking powder, and fine sea salt until fully combined.
3. In a large mixing bowl, cream the clarified butter and granulated sugar with an electric mixer on medium speed for 3–4 minutes, until light and fluffy—this aerates the mixture for a tender crumb.
4. Gradually add the lightly beaten pasture-raised eggs to the butter-sugar mixture, one at a time, beating well after each addition to emulsify and prevent curdling.
5. Stir in the pure almond extract until evenly distributed throughout the wet ingredients.
6. Alternately add the dry flour mixture and whole milk to the wet ingredients in three additions, beginning and ending with the dry ingredients, mixing on low speed just until incorporated to avoid overmixing.
7. Gently fold in the pitted and halved fresh cherries using a spatula, ensuring they are evenly dispersed without crushing them.
8. Pour the batter into the prepared cake pan, smoothing the top with a spatula, then sprinkle the sliced almonds evenly over the surface for a decorative, crunchy topping.
9. Bake in the preheated oven for 30–35 minutes, or until a toothpick inserted into the center comes out clean and the edges are golden brown—rotate the pan halfway through for even baking.
10. Allow the cake to cool in the pan on a wire rack for 10 minutes, then carefully invert it onto the rack to cool completely to room temperature, which helps set the texture.
Witness the magic as each bite delivers a moist, buttery crumb studded with juicy cherry bursts, all balanced by the nutty depth of almonds. Serve it warm with a dollop of whipped cream for extra indulgence, or slice it thin for an elegant afternoon tea—it’s versatile enough to shine at any gathering, yet simple enough to become your new go-to sweet escape.
Cinnamon Roll Tastycake Delight
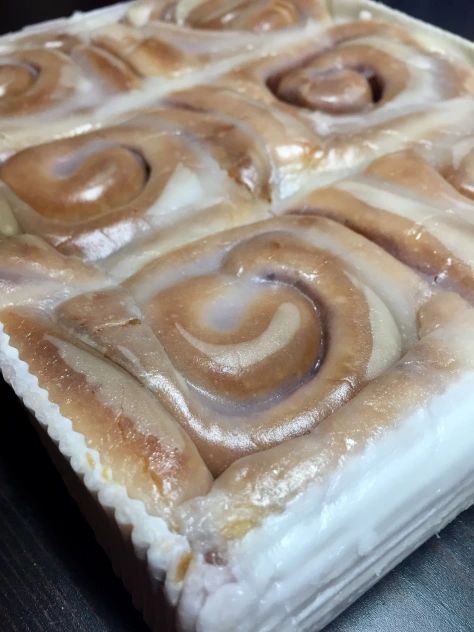
Kicking off the holiday season with a dessert that’s basically a hug in pastry form, this Cinnamon Roll Tastycake Delight is the glorious lovechild of a classic cinnamon roll and a decadent cake. Picture fluffy, spiced layers swirled with a buttery cinnamon-sugar filling, all baked into a single, shareable masterpiece that’ll make your kitchen smell like a festive bakery. It’s the ultimate treat to impress your guests or indulge in a well-deserved solo snack attack—no judgment here!
Serving: 12 | Pre Time: 25 minutes | Cooking Time: 35 minutes
Ingredients
– 2 ¼ cups all-purpose flour, sifted
– 1 cup granulated sugar
– ¾ cup whole milk, warmed to 110°F
– ½ cup unsalted butter, clarified and cooled
– 2 large pasture-raised eggs, lightly beaten
– 2 ¼ teaspoons active dry yeast
– 1 teaspoon pure vanilla extract
– ½ teaspoon fine sea salt
– ¼ cup light brown sugar, packed
– 2 tablespoons ground cinnamon
– 1 cup confectioners’ sugar
– 2 tablespoons heavy cream
Instructions
1. In a large mixing bowl, combine the warmed whole milk and active dry yeast, allowing it to proof for 5 minutes until frothy.
2. Add the granulated sugar, clarified unsalted butter, lightly beaten pasture-raised eggs, and pure vanilla extract to the yeast mixture, whisking vigorously until fully incorporated.
3. Gradually fold in the sifted all-purpose flour and fine sea salt with a spatula until a soft, sticky dough forms. Tip: Avoid overmixing to ensure a tender crumb.
4. Transfer the dough to a lightly floured surface and knead for 5 minutes until smooth and elastic.
5. Place the dough in a greased bowl, cover with a damp cloth, and let it rise in a warm place for 1 hour until doubled in size.
6. While the dough rises, combine the packed light brown sugar and ground cinnamon in a small bowl to create the filling.
7. Punch down the risen dough and roll it out on a floured surface into a 12×18-inch rectangle.
8. Evenly sprinkle the cinnamon-sugar filling over the dough, leaving a ½-inch border on all sides.
9. Tightly roll the dough from the long edge into a log, pinching the seam to seal. Tip: Use a gentle touch to prevent tearing and maintain swirls.
10. Cut the log into 12 equal slices using a sharp serrated knife.
11. Arrange the slices in a greased 9×13-inch baking dish, spacing them slightly apart.
12. Cover the dish and let the rolls rise again for 30 minutes until puffy.
13. Preheat your oven to 350°F and bake the rolls for 30–35 minutes, until golden brown and an internal temperature reaches 190°F. Tip: Rotate the dish halfway through for even browning.
14. While the rolls bake, whisk the confectioners’ sugar and heavy cream in a bowl until smooth to make the glaze.
15. Remove the baked rolls from the oven and let them cool in the dish for 10 minutes.
16. Drizzle the glaze evenly over the warm rolls.
Unbelievably soft and pillowy, each bite delivers a warm burst of cinnamon spice balanced by the sweet, creamy glaze. The texture is irresistibly fluffy with delicate, buttery layers that practically melt in your mouth. For a creative twist, serve it warm with a scoop of vanilla ice cream or alongside a hot cup of coffee to elevate this cozy dessert into a full-blown celebration.
Maple Walnut Tastycake Bliss

Oh, the holiday season is upon us, and your oven is practically begging for something spectacular! Forget the fruitcake—this Maple Walnut Tastycake Bliss is the showstopper that’ll have your guests swooning with its rich, nutty charm and just a hint of maple magic. It’s the dessert that says, ‘I’m festive, but I also know how to have a seriously good time.’
Serving: 8 | Pre Time: 20 minutes | Cooking Time: 35 minutes
Ingredients
– 1 ½ cups all-purpose flour, sifted
– 1 cup granulated sugar
– ½ cup unsalted butter, clarified and cooled to 75°F
– 3 pasture-raised eggs, lightly beaten
– 1 cup pure maple syrup, Grade A
– 1 cup walnuts, toasted and coarsely chopped
– 1 tsp pure vanilla extract
– ½ tsp baking powder
– ¼ tsp fine sea salt
Instructions
1. Preheat your oven to 350°F and grease a 9-inch round cake pan, then line it with parchment paper for easy removal later.
2. In a medium bowl, whisk together the sifted all-purpose flour, baking powder, and fine sea salt until fully combined.
3. In a large mixing bowl, use an electric mixer on medium speed to cream the clarified butter and granulated sugar for 3 minutes, until light and fluffy.
4. Tip: Ensure the clarified butter is at 75°F to prevent the mixture from separating, which guarantees a smoother batter.
5. Gradually add the lightly beaten pasture-raised eggs to the butter-sugar mixture, mixing on low speed after each addition until just incorporated.
6. Pour in the pure maple syrup and pure vanilla extract, then mix on low speed for 1 minute until the liquid is evenly distributed.
7. Tip: Use Grade A maple syrup for its delicate flavor that won’t overpower the walnuts, enhancing the overall balance.
8. Fold the dry ingredients into the wet mixture using a spatula, stirring gently until no flour streaks remain, about 1 minute.
9. Gently fold in the toasted and coarsely chopped walnuts until they are evenly dispersed throughout the batter.
10. Tip: Toast the walnuts at 325°F for 8 minutes beforehand to deepen their nutty aroma and prevent sogginess in the cake.
11. Pour the batter into the prepared cake pan, smoothing the top with the spatula to ensure an even layer.
12. Bake in the preheated oven at 350°F for 35 minutes, or until a toothpick inserted into the center comes out clean with a few moist crumbs.
13. Remove the cake from the oven and let it cool in the pan on a wire rack for 10 minutes before transferring it out to cool completely.
14. Serve the cake at room temperature, optionally dusted with powdered sugar or drizzled with extra maple syrup for added flair.
Zesty and utterly indulgent, this cake boasts a moist, tender crumb that melts in your mouth, punctuated by the satisfying crunch of toasted walnuts and the warm, caramel-like sweetness of maple. For a creative twist, slice it thick and serve with a dollop of bourbon-infused whipped cream or alongside a scoop of vanilla bean ice cream to elevate every bite into pure bliss.
Summary
Savoring these 20 decadent Tastycake recipes is a delightful journey into sweet indulgence. From classic favorites to creative twists, there’s a treat for every craving. We hope you find inspiration to bake something special! Don’t forget to share which recipe you loved most in the comments below and pin your favorites on Pinterest to spread the joy. Happy baking!


