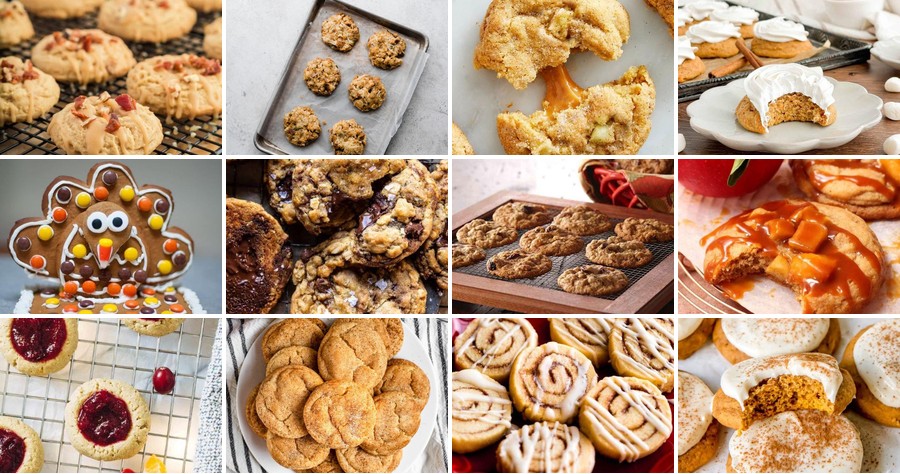
Let the aroma of cinnamon and nutmeg fill your kitchen this holiday season! We’ve gathered 14 festive Thanksgiving cookie recipes that are perfect for sharing with family, creating sweet memories, or simply treating yourself. From classic favorites to creative twists, there’s something here for every baker. Get ready to roll up your sleeves and discover your new go-to holiday treat!
Maple Glazed Pecan Shortbread Cookies

Crisp winter afternoons always have me craving something buttery and sweet, and these Maple Glazed Pecan Shortbread Cookies are my go-to—they’re like a cozy hug in cookie form, with a rich maple glaze that makes them utterly irresistible. I love baking a batch while listening to holiday music, and the smell alone is enough to gather everyone in the kitchen. Honestly, they’re so simple to whip up, yet they feel special enough for any festive gathering or just a quiet treat with coffee.
Serving: 24 cookies | Pre Time: 20 minutes | Cooking Time: 12 minutes
Ingredients
– 2 cups of all-purpose flour
– 1 cup of unsalted butter, softened (I always take it out of the fridge about an hour ahead)
– 1/2 cup of granulated sugar
– A pinch of salt
– 1 cup of chopped pecans (toasting them first adds such a nice depth!)
– 1/4 cup of pure maple syrup for the glaze
– 1 cup of powdered sugar
– A splash of vanilla extract
– A couple of tablespoons of milk, as needed to thin the glaze
Instructions
1. Preheat your oven to 350°F and line two baking sheets with parchment paper.
2. In a large mixing bowl, cream together the softened butter and granulated sugar until light and fluffy, about 2-3 minutes with an electric mixer.
3. Gradually mix in the all-purpose flour and a pinch of salt until just combined—be careful not to overmix, as this can make the cookies tough.
4. Fold in the chopped pecans gently with a spatula until evenly distributed throughout the dough.
5. Roll the dough into 1-inch balls and place them about 2 inches apart on the prepared baking sheets; flatten each ball slightly with the palm of your hand.
6. Bake in the preheated oven for 10-12 minutes, or until the edges are just starting to turn a light golden brown.
7. Remove the cookies from the oven and let them cool on the baking sheets for 5 minutes before transferring to a wire rack to cool completely—this helps them set without crumbling.
8. While the cookies cool, make the glaze by whisking together the pure maple syrup, powdered sugar, vanilla extract, and milk in a small bowl until smooth; add more milk a teaspoon at a time if it’s too thick.
9. Once the cookies are completely cool, drizzle the maple glaze over the top with a spoon or piping bag, letting it drip down the sides.
10. Allow the glaze to set for about 15-20 minutes before serving, so it firms up nicely.
Here’s the best part: these cookies have that perfect shortbread crumble with a subtle nuttiness from the pecans, and the maple glaze adds a sweet, caramel-like finish that’s not overly sugary. I love serving them stacked on a pretty plate with a dusting of extra chopped pecans for crunch, or even crumbling them over vanilla ice cream for an easy dessert upgrade—they’re so versatile and always disappear fast!
Cranberry Orange Thumbprint Cookies
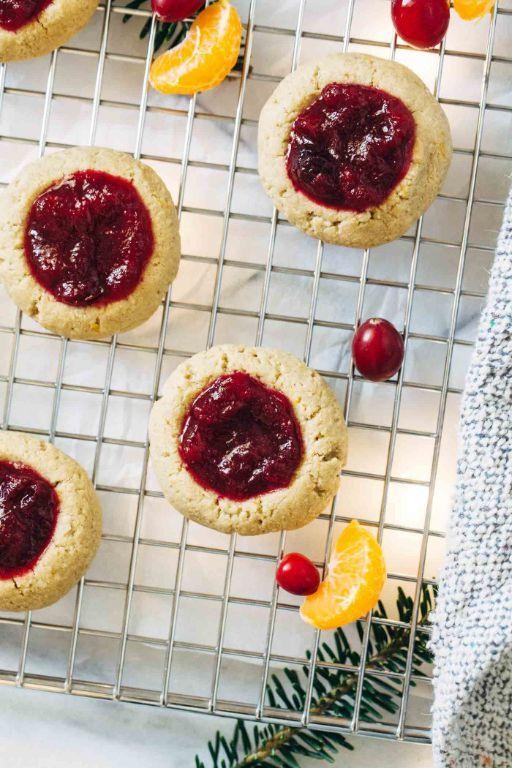
Gathering around the kitchen during the holiday season always reminds me of my grandma’s cookie tins, and these Cranberry Orange Thumbprint Cookies are my modern twist on her classics—they’re festive, zesty, and perfect for sharing with a cup of coffee after a long day of decorating.
Serving: 24 cookies | Pre Time: 20 minutes | Cooking Time: 12 minutes
Ingredients
– 2 cups of all-purpose flour, plus a little extra for dusting
– 1 cup of unsalted butter, softened to room temperature (I always leave mine out for an hour)
– ⅔ cup of granulated sugar
– 1 large egg
– 1 teaspoon of vanilla extract
– Zest from one orange (about 1 tablespoon)
– A pinch of salt
– ½ cup of cranberry jam or preserves (I use store-bought for convenience)
Instructions
1. Preheat your oven to 350°F and line two baking sheets with parchment paper.
2. In a large mixing bowl, cream together the softened butter and granulated sugar with a hand mixer on medium speed for about 2–3 minutes, until light and fluffy.
3. Add the egg, vanilla extract, and orange zest to the butter mixture, and beat on low speed until just combined.
4. In a separate bowl, whisk together the all-purpose flour and a pinch of salt.
5. Gradually add the flour mixture to the wet ingredients, mixing on low speed until a soft dough forms—be careful not to overmix, as it can make the cookies tough.
6. Scoop out tablespoon-sized portions of dough and roll them into balls with your hands, placing them about 2 inches apart on the prepared baking sheets.
7. Use your thumb or the back of a teaspoon to press a small indentation into the center of each dough ball, about ½ inch deep.
8. Fill each indentation with about ½ teaspoon of cranberry jam, being careful not to overfill to prevent spillage during baking.
9. Bake the cookies in the preheated oven for 10–12 minutes, or until the edges are lightly golden brown—they’ll firm up as they cool, so don’t worry if they seem soft.
10. Let the cookies cool on the baking sheets for 5 minutes before transferring them to a wire rack to cool completely.
Zesty and vibrant, these cookies have a buttery, crumbly texture that melts in your mouth, with the tart cranberry jam balancing the sweet orange zest beautifully. I love serving them on a festive platter with a dusting of powdered sugar or alongside a mug of hot cocoa for a cozy winter treat.
Brown Butter Pumpkin Chocolate Chip Cookies
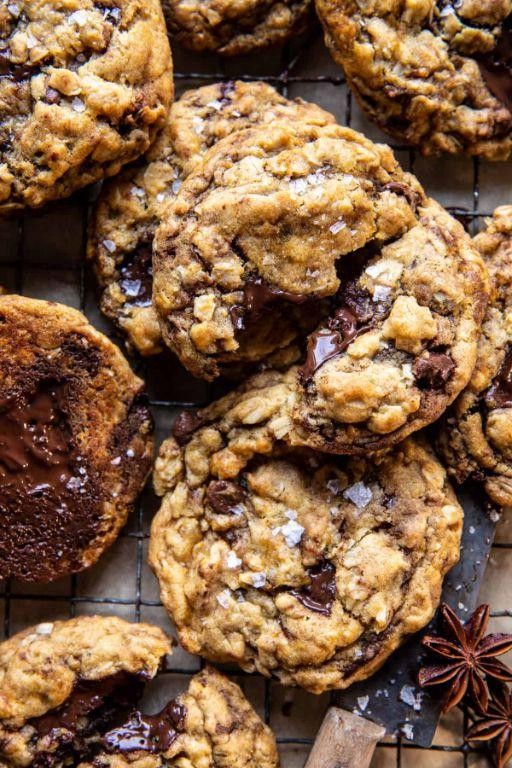
Usually, I’m all about classic chocolate chip cookies, but when pumpkin season rolls around, I can’t resist adding a twist—especially one that involves browning butter for that deep, nutty flavor. It’s become a cozy tradition in my kitchen, where the scent of toasting butter and warm spices makes the whole house feel like autumn, even if I’m baking these in July because, let’s be honest, pumpkin cravings don’t wait for a calendar.
Serving: 24 | Pre Time: 20 minutes | Cooking Time: 12 minutes
Ingredients
- 1 cup (2 sticks) of unsalted butter, for browning—trust me, it’s worth the extra minute
- 1 cup of granulated sugar, because we need that sweetness
- 1/2 cup of packed brown sugar, for a hint of molasses richness
- 1 large egg, at room temperature to blend smoothly
- 1 teaspoon of vanilla extract, a splash for that cozy aroma
- 3/4 cup of pumpkin puree (not pie filling!), straight from the can
- 2 1/4 cups of all-purpose flour, spooned and leveled to avoid dense cookies
- 1 teaspoon of baking soda, to give them a little lift
- 1/2 teaspoon of salt, to balance all that sweetness
- 1 teaspoon of ground cinnamon, plus a pinch more if you’re feeling spicy
- 1/4 teaspoon of ground nutmeg, for that warm, autumnal kick
- 2 cups of semi-sweet chocolate chips, because more is always better
Instructions
- In a medium saucepan over medium heat, melt the unsalted butter, stirring constantly with a wooden spoon until it turns golden brown and smells nutty, about 5-7 minutes—watch closely to prevent burning, then pour it into a large mixing bowl and let it cool for 10 minutes to avoid cooking the egg.
- Add the granulated sugar and packed brown sugar to the browned butter, and whisk vigorously until well combined and slightly fluffy, about 2 minutes.
- Crack in the large egg and pour in the vanilla extract, whisking again until the mixture is smooth and homogeneous.
- Fold in the pumpkin puree gently with a spatula until just incorporated, being careful not to overmix to keep the cookies tender.
- In a separate bowl, whisk together the all-purpose flour, baking soda, salt, ground cinnamon, and ground nutmeg until evenly distributed.
- Gradually add the dry ingredients to the wet mixture, stirring with the spatula until no flour streaks remain, but stop as soon as it’s combined to avoid tough cookies.
- Stir in the semi-sweet chocolate chips until they’re evenly dispersed throughout the dough.
- Cover the bowl with plastic wrap and chill the dough in the refrigerator for at least 30 minutes—this helps prevent spreading and deepens the flavors.
- Preheat your oven to 350°F (175°C) and line two baking sheets with parchment paper.
- Scoop tablespoon-sized portions of dough onto the prepared sheets, spacing them about 2 inches apart to allow for spreading.
- Bake for 10-12 minutes, or until the edges are set and lightly golden but the centers still look soft—they’ll firm up as they cool, so don’t overbake for that chewy texture.
- Let the cookies cool on the baking sheets for 5 minutes before transferring them to a wire rack to cool completely.
Kindly savor these cookies fresh from the oven, where the brown butter adds a toasty depth that pairs perfectly with the earthy pumpkin and melty chocolate chips. They’re delightfully soft and chewy with a slight crisp at the edges, making them ideal for dunking in a glass of cold milk or crumbled over vanilla ice cream for an indulgent fall dessert—my family always fights over the last one!
Cinnamon Roll Sugar Cookies
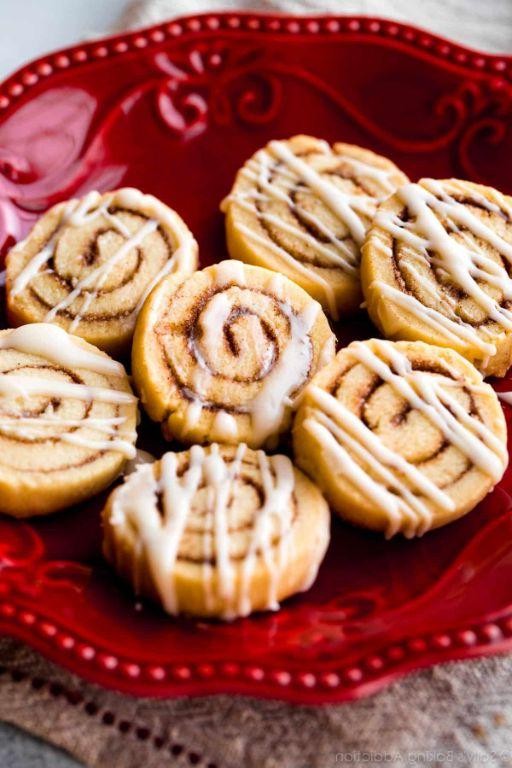
My kitchen always smells like a cozy bakery in December, but these Cinnamon Roll Sugar Cookies are my year-round secret weapon for when I need a quick, comforting treat that feels special. I stumbled on this hybrid recipe after burning a batch of actual cinnamon rolls one hectic morning—sometimes the best discoveries come from happy accidents!
Serving: 24 cookies | Pre Time: 20 minutes | Cooking Time: 10 minutes
Ingredients
– A couple of sticks of unsalted butter, softened to room temperature (that’s 1 cup total)
– A heaping cup of granulated sugar, plus an extra quarter cup for rolling
– One large egg, straight from the fridge
– A generous splash of pure vanilla extract (about 2 teaspoons)
– Two and a half cups of all-purpose flour, spooned and leveled
– A teaspoon of baking powder
– Half a teaspoon of salt
– Two tablespoons of ground cinnamon for that warm, spicy swirl
– Four tablespoons of melted butter for brushing
– A half cup of brown sugar, packed tight
Instructions
1. Preheat your oven to 350°F and line two baking sheets with parchment paper—this prevents sticking and makes cleanup a breeze.
2. In a large mixing bowl, cream together the softened butter and 1 cup of granulated sugar with an electric mixer on medium speed for about 2 minutes, until light and fluffy.
3. Beat in the egg and vanilla extract until fully combined, scraping down the sides of the bowl with a spatula to ensure everything is incorporated.
4. In a separate bowl, whisk together the flour, baking powder, and salt to avoid any lumps in your dough.
5. Gradually add the dry ingredients to the wet mixture, mixing on low speed just until a soft dough forms—overmixing can make cookies tough, so stop as soon as it comes together.
6. In a small bowl, stir together the cinnamon, melted butter, and brown sugar to create a gooey filling.
7. Roll tablespoon-sized portions of dough into balls, then flatten each slightly with your palm on a clean surface.
8. Spoon about half a teaspoon of the cinnamon filling onto the center of each flattened dough round.
9. Fold the edges of the dough over the filling and pinch to seal, then re-roll gently into a ball—this keeps the swirl inside from leaking out during baking.
10. Roll each filled ball in the remaining quarter cup of granulated sugar to coat evenly, which adds a delightful crunch.
11. Place the sugared balls about 2 inches apart on the prepared baking sheets to allow for spreading.
12. Bake for 9–11 minutes, until the edges are just set and lightly golden; the centers might look soft, but they’ll firm up as they cool for perfect chewiness.
13. Let the cookies cool on the baking sheets for 5 minutes before transferring to a wire rack to cool completely—patience here prevents breakage!
Finally, these cookies bake up with a soft, tender crumb and a sweet cinnamon core that oozes slightly when warm. For a fun twist, I love serving them stacked high with a drizzle of cream cheese glaze or crumbled over vanilla ice cream—they’re irresistible any way you enjoy them!
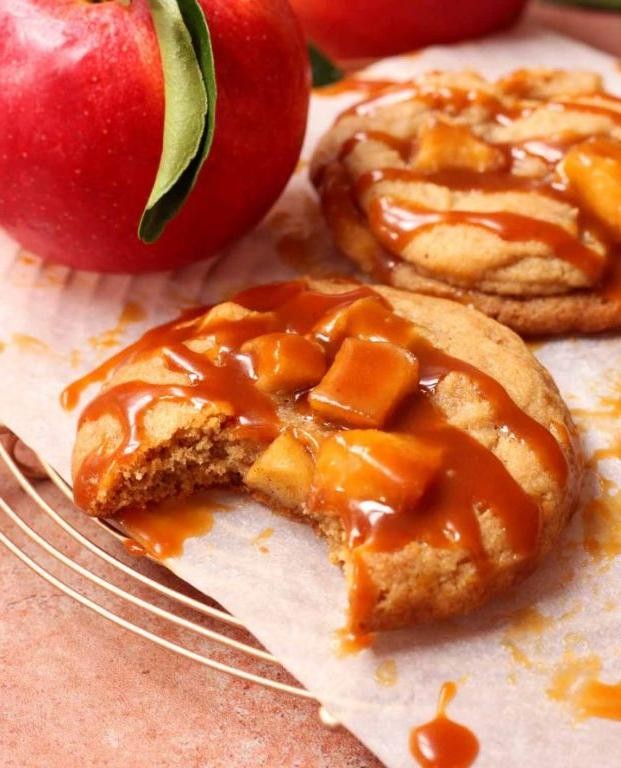
Caramel Stuffed Apple Cookies
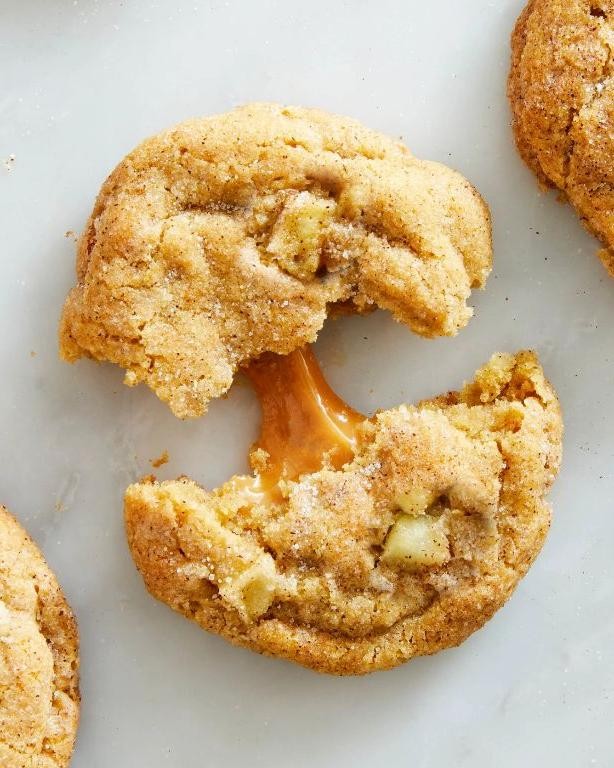
Ooh, it’s that time of year when I start craving cozy, sweet treats that make the house smell amazing. I was just thinking about how my grandma always made the best apple desserts in the fall, and it inspired me to create these cookies that are like a warm hug in your hand. They’re perfect for holiday cookie swaps or just a quiet afternoon with a cup of tea.
Serving: 24 cookies | Pre Time: 20 minutes | Cooking Time: 12 minutes
Ingredients
– 2 cups of all-purpose flour (I always spoon and level it to avoid dense cookies)
– 1 teaspoon of baking soda
– A good pinch of salt
– 1 cup (2 sticks) of unsalted butter, softened at room temperature
– 3/4 cup of granulated sugar
– 3/4 cup of packed brown sugar
– 2 large eggs
– 1 teaspoon of pure vanilla extract
– 1 cup of finely chopped apples (I use Granny Smith for a tart kick)
– 24 soft caramel candies (like the square ones you get in a bag)
– A splash of milk for brushing (optional, but it gives a nice shine)
Instructions
1. Preheat your oven to 350°F (175°C) and line two baking sheets with parchment paper.
2. In a medium bowl, whisk together the flour, baking soda, and salt until well combined.
3. In a large mixing bowl, use an electric mixer to cream the softened butter, granulated sugar, and brown sugar together on medium speed for about 2-3 minutes, until light and fluffy.
4. Add the eggs one at a time to the butter mixture, beating well after each addition, then mix in the vanilla extract.
5. Gradually add the flour mixture to the wet ingredients, mixing on low speed just until no dry streaks remain—be careful not to overmix, as this can make the cookies tough.
6. Gently fold in the chopped apples with a spatula until evenly distributed throughout the dough.
7. Scoop out tablespoon-sized portions of dough and roll them into balls with your hands.
8. Flatten each ball slightly in your palm, place a caramel candy in the center, and wrap the dough around it, sealing it completely to prevent leaks during baking.
9. Arrange the stuffed dough balls on the prepared baking sheets, spacing them about 2 inches apart to allow for spreading.
10. If desired, lightly brush the tops of the cookies with a little milk for a golden finish.
11. Bake in the preheated oven for 10-12 minutes, or until the edges are lightly golden but the centers still look slightly soft—they’ll firm up as they cool.
12. Let the cookies cool on the baking sheets for 5 minutes before transferring them to a wire rack to cool completely.
These cookies come out with a soft, chewy texture and a gooey caramel center that oozes out when you take a bite. The apples add a subtle fruity freshness that balances the sweetness perfectly. Try serving them warm with a scoop of vanilla ice cream for an indulgent dessert, or pack them in a cute tin as a homemade gift that’ll impress everyone.
Pecan Pie Cookies with Butterscotch Chips
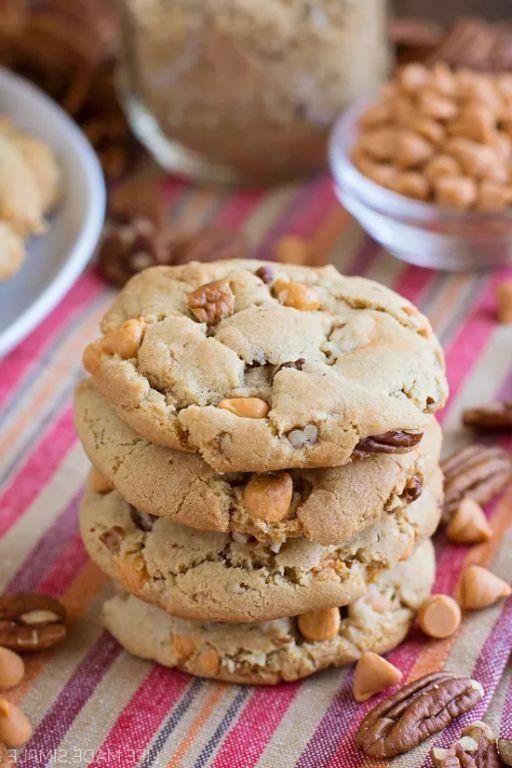
Every year around the holidays, my kitchen becomes a chaotic but joyful cookie factory, and these Pecan Pie Cookies with Butterscotch Chips are always the first batch to disappear. They capture all the cozy, nutty sweetness of a classic pecan pie but in a delightful, handheld form—perfect for when you want that festive flavor without committing to a whole slice. I love how the butterscotch chips melt into little pockets of caramel-like goodness, making each bite a mini celebration.
Serving: 24 cookies | Pre Time: 15 minutes | Cooking Time: 12 minutes
Ingredients
– 1 cup of softened unsalted butter (that’s two sticks, left out for about 30 minutes)
– ¾ cup of packed light brown sugar, plus a couple of extra tablespoons for rolling
– ¼ cup of granulated sugar
– 1 large egg, at room temperature
– 1 teaspoon of pure vanilla extract (a good splash)
– 2 ¼ cups of all-purpose flour
– 1 teaspoon of baking soda
– ½ teaspoon of salt
– 1 cup of chopped pecans (toasted for extra flavor if you have time)
– 1 cup of butterscotch chips
Instructions
1. Preheat your oven to 350°F and line two baking sheets with parchment paper.
2. In a large mixing bowl, cream together the softened butter, ¾ cup of brown sugar, and granulated sugar until light and fluffy, about 2-3 minutes with a hand mixer.
3. Beat in the egg and vanilla extract until fully combined.
4. In a separate bowl, whisk together the flour, baking soda, and salt.
5. Gradually add the dry ingredients to the wet mixture, mixing on low speed just until a dough forms—be careful not to overmix, as this can make the cookies tough.
6. Fold in the chopped pecans and butterscotch chips with a spatula until evenly distributed.
7. Place the extra brown sugar in a small bowl. Scoop out about 1 ½ tablespoons of dough, roll it into a ball, and then roll it in the brown sugar to coat lightly.
8. Place the dough balls on the prepared baking sheets, spacing them about 2 inches apart to allow for spreading.
9. Bake for 10-12 minutes, or until the edges are golden brown but the centers still look slightly soft—they’ll firm up as they cool, so don’t overbake.
10. Let the cookies cool on the baking sheets for 5 minutes before transferring them to a wire rack to cool completely.
11. Keep an eye on them while baking; if they start to brown too quickly, rotate the pans halfway through for even cooking.
12. For extra crunch, toast the pecans in a dry skillet over medium heat for 3-5 minutes before chopping and adding them to the dough.
Keeping these cookies in an airtight container makes them stay soft and chewy for days, with the butterscotch chips adding a gooey, caramel-like swirl that pairs perfectly with the toasted pecans. I love serving them warm with a scoop of vanilla ice cream for an indulgent twist, or just grabbing one with my morning coffee—they’re that irresistible!
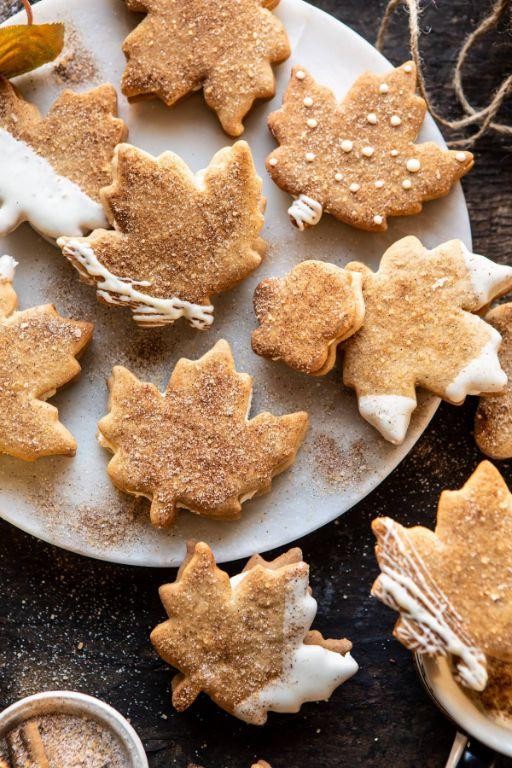
Gingerbread Turkey Cookies

Picture this: it’s Christmas Eve, the house smells like cinnamon and cloves, and I’m trying to convince my skeptical nephew that yes, you can make turkey-shaped cookies that actually taste amazing. These gingerbread turkey cookies are my festive twist on a classic—they’re soft, spicy, and surprisingly easy to decorate, even if you’re all thumbs like me.
Serving: 24 cookies | Pre Time: 20 minutes | Cooking Time: 10 minutes
Ingredients
- 3 cups of all-purpose flour (I usually scoop and level it to keep things light)
- 1 cup of unsalted butter, softened at room temperature for about an hour—trust me, it makes creaming so much easier
- ¾ cup of packed brown sugar (the dark kind gives a richer flavor)
- ½ cup of molasses (a good glug from the bottle)
- 1 large egg, straight from the fridge is fine
- 2 teaspoons of ground ginger (freshly ground if you’re feeling fancy)
- 1 teaspoon of ground cinnamon
- ½ teaspoon of baking soda
- ¼ teaspoon of salt (just a pinch to balance the sweetness)
- A splash of vanilla extract, maybe 1 teaspoon
- For decorating: a couple of cups of powdered sugar, 3 tablespoons of milk, and food coloring in brown, red, and orange
Instructions
- In a large mixing bowl, cream together 1 cup of softened unsalted butter and ¾ cup of packed brown sugar with an electric mixer on medium speed for about 2 minutes, until it’s light and fluffy—this step is key for tender cookies, so don’t rush it.
- Beat in ½ cup of molasses, 1 large egg, and a splash of vanilla extract until well combined, scraping down the sides of the bowl with a spatula to make sure everything’s mixed in evenly.
- In a separate bowl, whisk together 3 cups of all-purpose flour, 2 teaspoons of ground ginger, 1 teaspoon of ground cinnamon, ½ teaspoon of baking soda, and ¼ teaspoon of salt to distribute the spices and leavening evenly.
- Gradually add the dry ingredients to the wet mixture, mixing on low speed just until a dough forms and no flour streaks remain; overmixing can make the cookies tough, so stop as soon as it comes together.
- Divide the dough into two equal portions, wrap each tightly in plastic wrap, and chill in the refrigerator for at least 1 hour—this firms it up for easier rolling and helps the flavors meld.
- Preheat your oven to 350°F and line two baking sheets with parchment paper to prevent sticking.
- On a lightly floured surface, roll out one portion of dough to about ¼-inch thickness; use a turkey-shaped cookie cutter to stamp out shapes, re-rolling scraps as needed.
- Place the cut-out cookies on the prepared baking sheets, spacing them about 1 inch apart to allow for slight spreading.
- Bake in the preheated oven for 8–10 minutes, until the edges are just set and the centers look dry; they’ll firm up as they cool, so avoid overbaking for a soft texture.
- Let the cookies cool on the baking sheets for 5 minutes, then transfer to a wire rack to cool completely before decorating—this prevents the icing from melting.
- For the icing, whisk together a couple of cups of powdered sugar and 3 tablespoons of milk until smooth; divide into small bowls and tint with brown, red, and orange food coloring as desired.
- Pipe or spread the icing onto the cooled cookies to decorate them like turkeys, adding details like feathers and beaks; let the icing set for about 30 minutes before serving.
These cookies come out with a soft, chewy texture that’s packed with warm ginger and cinnamon spice—perfect for nibbling with a cup of hot cocoa. I love setting them out as a playful centerpiece on the holiday table, or packaging them up in little bags as edible favors for guests. They’re so fun to make with kids, who always get a kick out of decorating their own turkey creations!
Harvest Spice Oatmeal Cookies
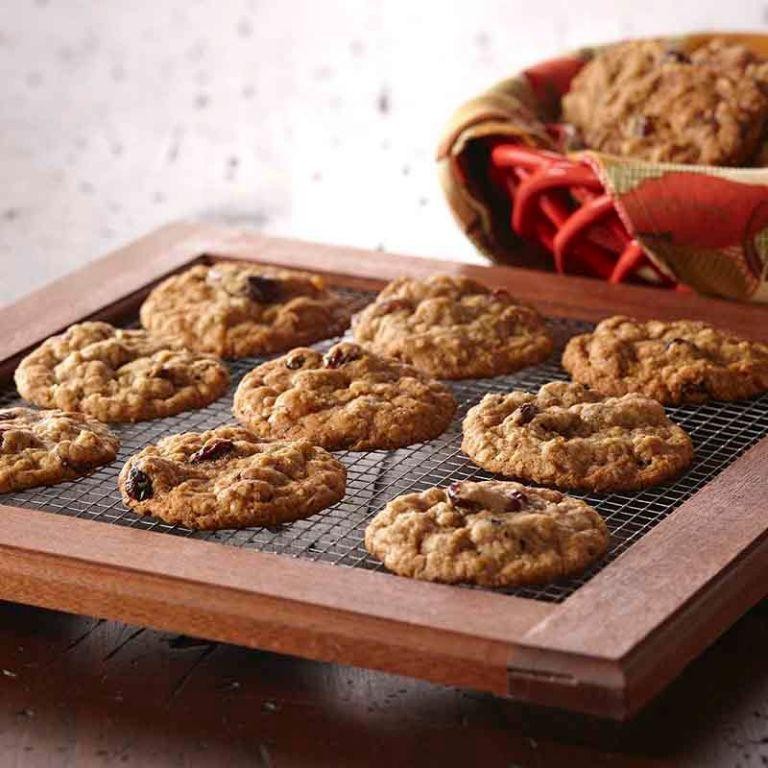
Venturing into my kitchen on this chilly December evening, I was craving something cozy and nostalgic—the kind of treat that fills the house with warmth and reminds me of my grandma’s holiday baking marathons. That’s when I decided to whip up a batch of these Harvest Spice Oatmeal Cookies, a recipe I’ve tweaked over the years to get just the right chewy texture and spice blend. Honestly, there’s nothing better than the smell of cinnamon and nutmeg wafting through the air while I’m wrapped in a fuzzy sweater, waiting for these golden rounds to emerge from the oven.
Serving: 24 cookies | Pre Time: 15 minutes | Cooking Time: 12 minutes
Ingredients
– 1 cup of softened unsalted butter (I always leave mine out on the counter for an hour beforehand)
– 1 cup of packed brown sugar, plus a half-cup of granulated sugar for that extra crispiness
– 2 large eggs, straight from the fridge
– 1 teaspoon of vanilla extract—just a splash for aroma
– 1 and a half cups of all-purpose flour
– 1 teaspoon of baking soda
– A pinch of salt (I use about half a teaspoon from my sea salt grinder)
– 2 teaspoons of ground cinnamon, plus a half-teaspoon of nutmeg for that harvest kick
– 3 cups of old-fashioned rolled oats (not the quick-cook kind, trust me!)
– 1 cup of raisins, plumped up in warm water for 10 minutes beforehand
Instructions
1. Preheat your oven to 350°F and line two baking sheets with parchment paper—this prevents sticking and makes cleanup a breeze.
2. In a large mixing bowl, cream together the softened butter, brown sugar, and granulated sugar using an electric mixer on medium speed for about 2 minutes, until light and fluffy. Tip: Scrape down the sides of the bowl halfway through to ensure everything’s evenly mixed.
3. Beat in the eggs one at a time, waiting until each is fully incorporated before adding the next, then stir in the vanilla extract.
4. In a separate bowl, whisk together the flour, baking soda, salt, cinnamon, and nutmeg until well combined.
5. Gradually add the dry ingredients to the wet mixture, mixing on low speed just until no flour streaks remain—overmixing can lead to tough cookies.
6. Fold in the rolled oats and drained raisins with a spatula until evenly distributed throughout the dough.
7. Scoop rounded tablespoons of dough onto the prepared baking sheets, spacing them about 2 inches apart to allow for spreading.
8. Bake in the preheated oven for 10–12 minutes, or until the edges are golden brown but the centers still look slightly soft. Tip: Rotate the baking sheets halfway through baking for even browning.
9. Remove from the oven and let the cookies cool on the sheets for 5 minutes before transferring them to a wire rack to cool completely. Tip: They’ll firm up as they cool, so resist the urge to move them too soon!
Perfectly chewy with a hint of crunch from the oats, these cookies are bursting with warm spices and sweet raisins. I love serving them slightly warm with a glass of cold milk or crumbling them over vanilla ice cream for an easy dessert—they’re so versatile, they might just become your new go-to cookie jar staple.
White Chocolate Cranberry Cookies
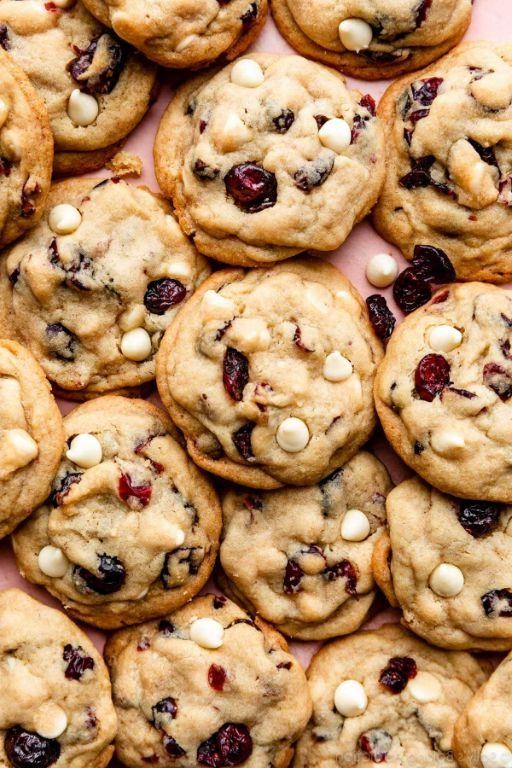
Holiday baking season always sneaks up on me, and this year I found myself craving something festive yet simple—enter these white chocolate cranberry cookies that have become my go-to treat for cookie exchanges and cozy evenings by the tree. They’re sweet, tart, and utterly irresistible with that perfect chewy texture we all love.
Serving: 24 cookies | Pre Time: 15 minutes | Cooking Time: 10 minutes
Ingredients
– 2 sticks of softened unsalted butter (that’s 1 cup)
– 1 cup of packed light brown sugar
– ½ cup of granulated sugar
– 2 large eggs, at room temperature
– 1 teaspoon of pure vanilla extract (a good splash)
– 2 ¼ cups of all-purpose flour
– 1 teaspoon of baking soda
– ½ teaspoon of salt
– 1 cup of dried cranberries
– 1 cup of white chocolate chips (I like the big ones!)
Instructions
1. Preheat your oven to 350°F (175°C) and line two baking sheets with parchment paper.
2. In a large bowl, beat the softened butter, brown sugar, and granulated sugar together with an electric mixer on medium speed for about 2 minutes, until light and fluffy—this creaming step is key for that perfect cookie texture!
3. Add the eggs one at a time, beating well after each addition, then mix in the vanilla extract.
4. In a separate bowl, whisk together the flour, baking soda, and salt until combined.
5. Gradually add the dry ingredients to the wet mixture, mixing on low speed just until no flour streaks remain; overmixing can make the cookies tough, so stop as soon as it’s blended.
6. Fold in the dried cranberries and white chocolate chips with a spatula until evenly distributed throughout the dough.
7. Scoop tablespoon-sized portions of dough onto the prepared baking sheets, spacing them about 2 inches apart to allow for spreading.
8. Bake in the preheated oven for 10–12 minutes, until the edges are lightly golden but the centers still look slightly soft—they’ll firm up as they cool, giving you that ideal chewy middle.
9. Let the cookies cool on the baking sheets for 5 minutes before transferring them to a wire rack to cool completely.
10. For extra indulgence, I sometimes drizzle melted white chocolate over the cooled cookies or serve them warm with a glass of milk. My favorite part is biting into the gooey white chocolate paired with the tart pop of cranberry—they’re a festive twist that always disappears fast!
Pumpkin Snickerdoodle Sandwich Cookies
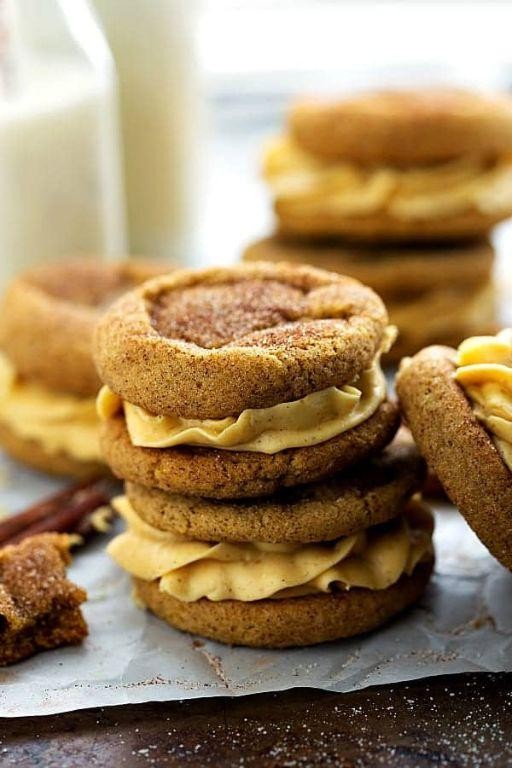
Whew, is there anything cozier than the scent of pumpkin and cinnamon wafting through the kitchen on a crisp December evening? I whipped up these Pumpkin Snickerdoodle Sandwich Cookies last weekend when my sister dropped by unexpectedly—they’re the perfect festive treat to share with loved ones, and honestly, they’re easier than they look!
Serving: 12 sandwiches | Pre Time: 20 minutes | Cooking Time: 10 minutes
Ingredients
– 2 cups of all-purpose flour
– 1 ½ teaspoons of cream of tartar (don’t skip this—it’s the snickerdoodle secret!)
– 1 teaspoon of baking soda
– ½ teaspoon of salt
– 1 cup (2 sticks) of unsalted butter, softened to room temperature
– 1 ½ cups of granulated sugar
– 1 large egg
– 1 teaspoon of vanilla extract
– ¾ cup of pumpkin puree (not pie filling)
– For the cinnamon-sugar coating: ¼ cup of granulated sugar mixed with 2 tablespoons of ground cinnamon
– For the filling: 8 ounces of cream cheese, softened, ½ cup of powdered sugar, and a splash of vanilla extract
Instructions
1. Preheat your oven to 350°F (175°C) and line two baking sheets with parchment paper.
2. In a medium bowl, whisk together the flour, cream of tartar, baking soda, and salt until well combined.
3. In a large mixing bowl, beat the softened butter and 1 ½ cups of granulated sugar with an electric mixer on medium speed for about 2 minutes, until light and fluffy. Tip: If your butter isn’t soft enough, microwave it in 5-second bursts to avoid melting.
4. Add the egg and vanilla extract to the butter mixture, beating until just incorporated.
5. Mix in the pumpkin puree until smooth, scraping down the sides of the bowl as needed.
6. Gradually add the dry ingredients to the wet mixture, mixing on low speed until a soft dough forms. Tip: Don’t overmix—stop as soon as no flour streaks remain to keep the cookies tender.
7. In a small bowl, combine the ¼ cup of granulated sugar and 2 tablespoons of cinnamon for the coating.
8. Scoop tablespoon-sized portions of dough, roll them into balls, and coat each ball thoroughly in the cinnamon-sugar mixture.
9. Place the coated dough balls about 2 inches apart on the prepared baking sheets, then gently flatten each with the bottom of a glass to about ¼-inch thickness.
10. Bake in the preheated oven for 10–12 minutes, until the edges are lightly golden and the centers look set. Tip: Rotate the baking sheets halfway through for even browning.
11. Let the cookies cool on the baking sheets for 5 minutes, then transfer them to a wire rack to cool completely.
12. While the cookies cool, make the filling: In a medium bowl, beat the softened cream cheese, powdered sugar, and vanilla extract until smooth and creamy.
13. Once the cookies are completely cool, spread about 1 tablespoon of the cream cheese filling onto the flat side of one cookie, then top with another cookie to form a sandwich.
14. Repeat with the remaining cookies and filling.
These cookies are delightfully soft with a hint of chew from the pumpkin, and the cinnamon-sugar coating adds a cozy crunch. The cream cheese filling balances the spices perfectly—try serving them with a hot mug of apple cider for an extra-autumnal twist!
Maple Bacon Cookies with Brown Sugar Glaze
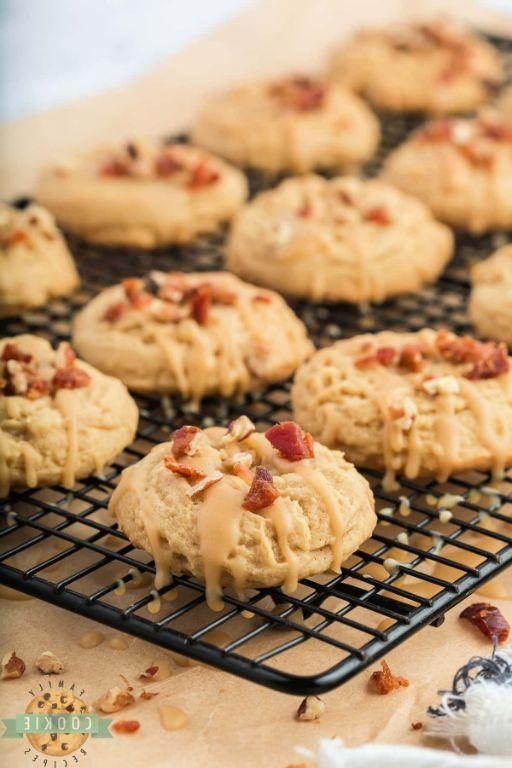
Last weekend, as I was digging through my pantry looking for holiday baking inspiration, I stumbled upon a forgotten bottle of maple syrup and a half-empty bag of brown sugar—and that’s when the idea for these irresistible cookies hit me. I’ve always loved the sweet-salty combo of bacon and maple, so I decided to turn it into a chewy, glazed cookie that’s perfect for Christmas Eve snacking or gifting to neighbors.
Serving: 24 cookies | Pre Time: 20 minutes | Cooking Time: 12 minutes
Ingredients
- 2 cups of all-purpose flour
- 1 teaspoon of baking soda
- A pinch of salt
- 1 cup of unsalted butter, softened (I always leave mine on the counter for an hour)
- 1 cup of packed brown sugar
- ½ cup of granulated sugar
- 2 large eggs
- 1 teaspoon of vanilla extract
- ¾ cup of crispy cooked bacon, chopped into small bits (I bake mine at 400°F for 15 minutes for extra crunch)
- ¼ cup of pure maple syrup
- For the glaze: 1 cup of powdered sugar, 2 tablespoons of milk, and another splash of maple syrup
Instructions
- Preheat your oven to 350°F and line two baking sheets with parchment paper.
- In a medium bowl, whisk together the flour, baking soda, and salt until well combined.
- In a large mixing bowl, use an electric mixer to cream the softened butter, brown sugar, and granulated sugar on medium speed for about 3 minutes, until light and fluffy. Tip: Don’t rush this step—it helps create a tender cookie texture.
- Add the eggs one at a time, beating well after each addition, then mix in the vanilla extract and maple syrup until smooth.
- Gradually add the flour mixture to the wet ingredients, mixing on low speed just until no dry streaks remain.
- Fold in the chopped bacon bits with a spatula until evenly distributed throughout the dough.
- Scoop tablespoon-sized portions of dough onto the prepared baking sheets, spacing them about 2 inches apart to allow for spreading.
- Bake in the preheated oven for 10–12 minutes, or until the edges are lightly golden but the centers still look slightly soft. Tip: Rotate the baking sheets halfway through for even browning.
- Remove the cookies from the oven and let them cool on the baking sheets for 5 minutes before transferring to a wire rack to cool completely.
- While the cookies cool, make the glaze by whisking together the powdered sugar, milk, and maple syrup in a small bowl until smooth and drizzle-able. Tip: If the glaze is too thick, add a teaspoon more milk; if too thin, add a bit more powdered sugar.
- Once the cookies are completely cool, drizzle the glaze over the tops using a spoon or piping bag.
- Let the glaze set for about 15 minutes before serving or storing.
Perfectly chewy with crispy bacon bits in every bite, these cookies have a rich maple flavor balanced by that savory saltiness. I love serving them warm with a glass of cold milk or packaging them in cute tins as holiday gifts—they always disappear fast!
Thanksgiving Leftover Stuffing Cookies
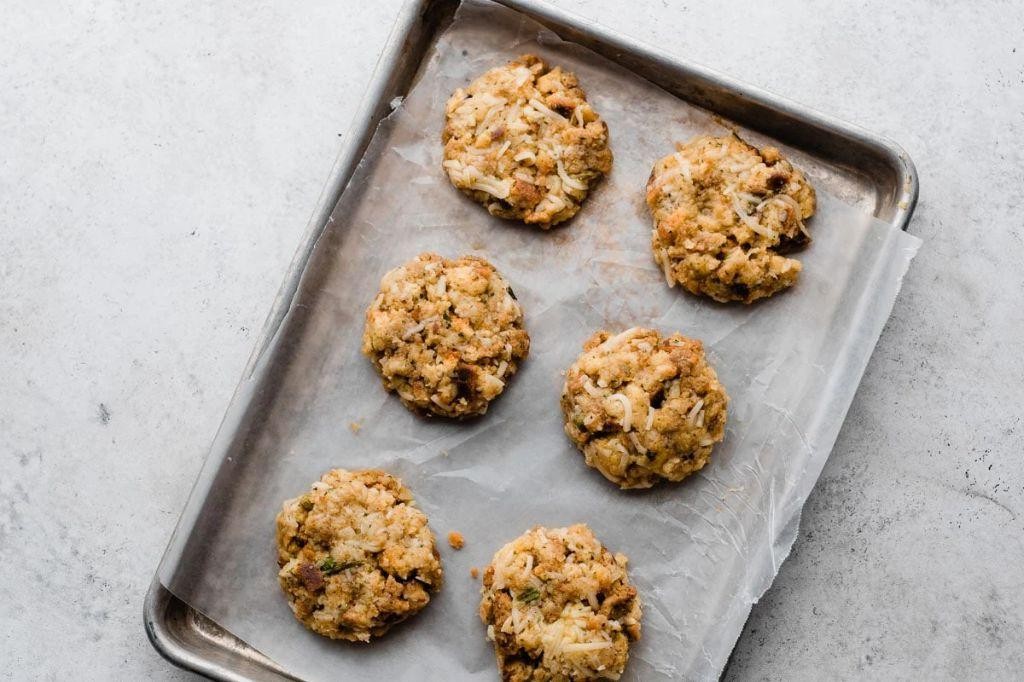
Just when you think the Thanksgiving feast is over, those leftover containers of stuffing stare back at you from the fridge. I’ve been there—staring at the same savory bread for days—until I had a wild idea one lazy post-holiday afternoon: what if we turned that herby, comforting stuffing into a sweet-and-savory cookie? It’s my quirky solution to the ‘what do I do with all this stuffing?’ dilemma, and honestly, it’s become a new favorite tradition in our house.
Serving: 12 cookies | Pre Time: 15 minutes | Cooking Time: 12 minutes
Ingredients
– About 2 cups of your leftover Thanksgiving stuffing (packed)
– 1 cup of all-purpose flour
– 1/2 cup (1 stick) of unsalted butter, softened at room temperature
– 1/2 cup of packed brown sugar
– 1 large egg
– A splash of vanilla extract (about 1 teaspoon)
– A couple of pinches of salt (if your stuffing isn’t already salty)
– 1/2 teaspoon of baking soda
Instructions
1. Preheat your oven to 350°F (175°C) and line a baking sheet with parchment paper.
2. In a large mixing bowl, use a hand mixer or wooden spoon to cream together the softened butter and brown sugar until it’s light and fluffy, which should take about 2-3 minutes. (Tip: Make sure your butter is truly soft—not melted—for the best cookie texture.)
3. Crack in the egg and add the vanilla extract, then mix until just combined.
4. In a separate bowl, whisk together the flour, baking soda, and a pinch of salt if needed.
5. Gradually add the dry ingredients to the wet mixture, stirring gently until a dough forms. (Tip: Don’t overmix here, or the cookies might turn out tough.)
6. Crumble the leftover stuffing into small pieces with your hands and fold it evenly into the dough.
7. Scoop out tablespoon-sized portions of dough and roll them into balls, placing them about 2 inches apart on the prepared baking sheet.
8. Bake in the preheated oven for 10-12 minutes, or until the edges are golden brown but the centers are still slightly soft. (Tip: They’ll firm up as they cool, so pull them out when they look just set.)
9. Let the cookies cool on the baking sheet for 5 minutes before transferring them to a wire rack to cool completely.
Can you believe how these cookies marry the savory herbs from the stuffing with that sweet, buttery cookie base? They come out delightfully crisp on the edges with a soft, almost cake-like center, and the little bits of stuffing add a wonderful savory depth. Try serving them warm with a dollop of cranberry sauce on top for an extra festive twist—it’s like Thanksgiving in every bite!
Chai Spiced Sugar Cookies
Just when I thought sugar cookies couldn’t get any cozier, I discovered the magic of adding chai spices—it’s like wrapping your favorite holiday treat in a warm blanket. I first tried this twist after a chilly afternoon at the farmers’ market, and now my family insists I make them every December. They’re perfect with a mug of hot cocoa while watching the snow fall.
Serving: 24 | Pre Time: 20 minutes | Cooking Time: 10 minutes
Ingredients
– 2 and 1/4 cups of all-purpose flour
– 1 teaspoon of baking soda
– A good pinch of salt
– 1 cup (2 sticks) of unsalted butter, softened at room temperature
– 1 and 1/2 cups of granulated sugar
– 1 large egg
– 2 teaspoons of vanilla extract
– 2 teaspoons of ground cinnamon
– 1 teaspoon of ground ginger
– 1/2 teaspoon of ground cardamom
– 1/4 teaspoon of ground cloves
– A splash of milk if the dough feels too dry
Instructions
1. Preheat your oven to 350°F and line two baking sheets with parchment paper.
2. In a medium bowl, whisk together the flour, baking soda, salt, cinnamon, ginger, cardamom, and cloves until well combined.
3. In a large bowl, use an electric mixer on medium speed to cream the softened butter and granulated sugar for about 2 minutes, until light and fluffy.
4. Beat in the egg and vanilla extract until fully incorporated, scraping down the sides of the bowl as needed.
5. Gradually add the dry ingredients to the wet mixture, mixing on low speed just until a dough forms. Tip: If the dough seems crumbly, add a splash of milk to bring it together without overmixing.
6. Scoop tablespoon-sized portions of dough, roll them into balls, and place them about 2 inches apart on the prepared baking sheets.
7. Flatten each ball slightly with the bottom of a glass or your palm. Tip: For even baking, ensure the cookies are uniform in thickness.
8. Bake in the preheated oven for 8-10 minutes, or until the edges are lightly golden but the centers are still soft. Tip: They’ll firm up as they cool, so don’t overbake.
9. Let the cookies cool on the baking sheets for 5 minutes before transferring them to a wire rack to cool completely.
Vibrant with warm spices, these cookies have a soft, chewy center and a slightly crisp edge that melts in your mouth. I love serving them dusted with a little extra cinnamon sugar or alongside a scoop of vanilla ice cream for an indulgent treat—they’re sure to become a new holiday favorite!
Caramel Apple Cinnamon Cookies
Savoring the cozy aroma of cinnamon and caramel always takes me back to autumn afternoons at my grandma’s house, where she’d bake treats that filled the whole kitchen with warmth. These cookies are my modern twist on those memories, blending tart apples with gooey caramel and a hint of spice for the perfect holiday bite—they’re so good, I have to hide a few from my kids just to save some for myself!
Serving: 24 cookies | Pre Time: 20 minutes | Cooking Time: 12 minutes
Ingredients
– 2 cups of all-purpose flour
– 1 teaspoon of baking soda
– 2 teaspoons of ground cinnamon
– A pinch of salt
– 1 cup of unsalted butter, softened (I always leave mine out on the counter for an hour beforehand)
– ¾ cup of granulated sugar
– ¾ cup of packed brown sugar
– 2 large eggs
– 1 teaspoon of vanilla extract
– 1 cup of finely chopped apples (I use Granny Smith for a nice tart kick)
– ½ cup of caramel bits or chopped soft caramels
Instructions
1. Preheat your oven to 350°F and line two baking sheets with parchment paper.
2. In a medium bowl, whisk together the flour, baking soda, cinnamon, and salt until well combined.
3. In a large bowl, use an electric mixer to beat the softened butter, granulated sugar, and brown sugar on medium speed for about 2 minutes, until light and fluffy.
4. Add the eggs one at a time to the butter mixture, beating well after each addition, then mix in the vanilla extract.
5. Gradually add the dry ingredients to the wet mixture, mixing on low speed just until no flour streaks remain—overmixing can make the cookies tough, so I stop as soon as it’s combined.
6. Gently fold in the chopped apples and caramel bits with a spatula until evenly distributed throughout the dough.
7. Scoop tablespoon-sized portions of dough onto the prepared baking sheets, spacing them about 2 inches apart to allow for spreading.
8. Bake in the preheated oven for 10–12 minutes, until the edges are golden brown but the centers still look slightly soft; they’ll firm up as they cool, so don’t overbake!
9. Let the cookies cool on the baking sheets for 5 minutes, then transfer them to a wire rack to cool completely—this helps them set without getting soggy.
10. For extra flair, I sometimes drizzle melted caramel over the cooled cookies or sprinkle them with a little extra cinnamon before serving.
These cookies come out wonderfully chewy with little pockets of melted caramel and tender apple bits that add a fruity freshness. They’re perfect with a glass of cold milk or crumbled over vanilla ice cream for a decadent dessert twist.
Summary
From classic gingerbread to creative pumpkin spice treats, these 18 festive cookies are sure to sweeten your Thanksgiving table. We hope you find a new favorite to bake and share! Give a recipe a try, then let us know which one you loved in the comments below. If you enjoyed this roundup, please pin it on Pinterest to spread the holiday cheer. Happy baking!