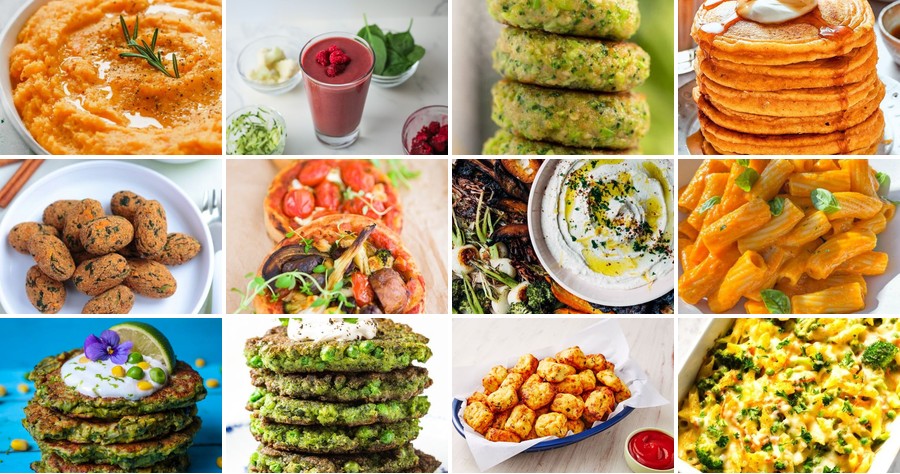
Are you tired of mealtime battles with your little one? We’ve gathered 18 wholesome toddler vegetable recipes that turn picky eating into playful, nutritious adventures. From hidden veggie nuggets to colorful rainbow bowls, these parent-tested ideas make vegetables irresistible. Let’s transform those ‘yucks’ into ‘yums’ and create happy, healthy eaters together!
Cheesy Broccoli Bites

Zesty and comforting, these Cheesy Broccoli Bites are my go-to snack for busy weeknights—they remind me of those cozy evenings when my kids would hover by the oven, eagerly waiting for a batch to cool just enough to grab. I love how simple they are to whip up, and they always disappear faster than I can say “cheese”!
Serving: 24 bites | Pre Time: 15 minutes | Cooking Time: 20 minutes
Ingredients
– Broccoli florets – 2 cups
– Cheddar cheese – 1 cup, shredded
– Eggs – 2 large
– Breadcrumbs – ½ cup
– Garlic powder – 1 tsp
– Salt – ½ tsp
– Black pepper – ¼ tsp
– Olive oil – 2 tbsp
Instructions
1. Preheat your oven to 400°F and line a baking sheet with parchment paper.
2. Steam the broccoli florets in a pot with 1 inch of water for 5 minutes until tender, then drain and pat dry completely with paper towels—this prevents sogginess.
3. Finely chop the steamed broccoli into small pieces using a knife or food processor.
4. In a large bowl, combine the chopped broccoli, shredded cheddar cheese, eggs, breadcrumbs, garlic powder, salt, and black pepper.
5. Mix everything together with your hands or a spoon until well combined and the mixture holds together when pressed.
6. Scoop out about 1 tablespoon of the mixture and roll it into a ball, then flatten slightly into a bite-sized patty; repeat to make 24 bites, placing them on the prepared baking sheet.
7. Brush the tops of the bites lightly with olive oil to help them crisp up in the oven.
8. Bake in the preheated oven for 15–20 minutes, flipping halfway through, until golden brown and firm to the touch.
9. Remove from the oven and let cool on the baking sheet for 5 minutes before serving to set the texture.
Eagerly crispy on the outside with a soft, cheesy center, these bites offer a delightful crunch that pairs perfectly with a tangy dip like ranch or marinara. I often serve them as a fun appetizer at gatherings or pack them in lunchboxes for a wholesome treat—they’re so versatile and always a hit!
Carrot and Zucchini Muffins
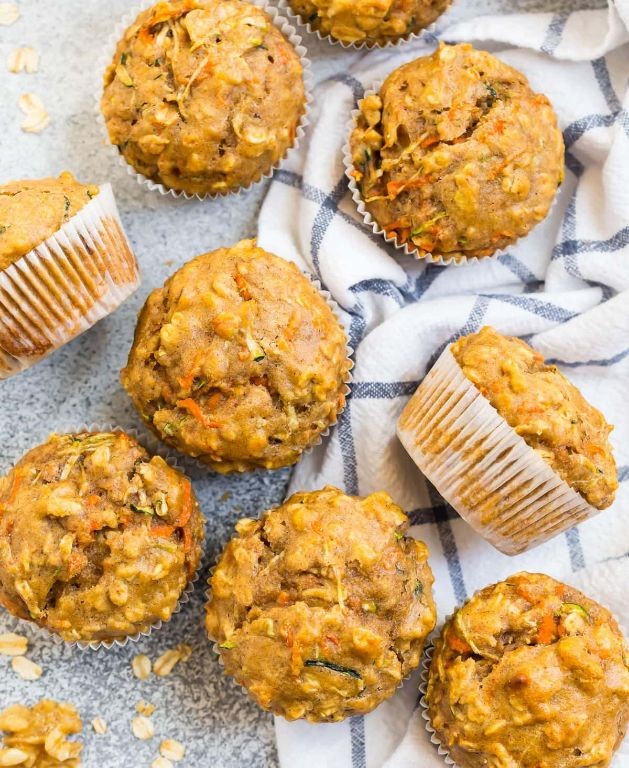
Oftentimes, the best recipes come from trying to use up what’s in the fridge—that’s exactly how these moist, subtly sweet muffins were born. I had a surplus of carrots and zucchini from my weekend farmers’ market haul, and after one too many salads, I decided to bake them into a wholesome treat perfect for busy mornings or an afternoon snack with coffee.
Serving: 12 | Pre Time: 15 minutes | Cooking Time: 25 minutes
Ingredients
– All-purpose flour – 1 ½ cups
– Baking powder – 2 tsp
– Baking soda – ½ tsp
– Salt – ½ tsp
– Ground cinnamon – 1 tsp
– Granulated sugar – ¾ cup
– Vegetable oil – ½ cup
– Large eggs – 2
– Vanilla extract – 1 tsp
– Grated carrots – 1 cup
– Grated zucchini – 1 cup
Instructions
1. Preheat your oven to 375°F (190°C) and line a 12-cup muffin tin with paper liners.
2. In a medium bowl, whisk together the all-purpose flour, baking powder, baking soda, salt, and ground cinnamon until fully combined.
3. In a large bowl, whisk the granulated sugar and vegetable oil for about 1 minute until smooth.
4. Add the large eggs one at a time to the sugar-oil mixture, whisking well after each addition until incorporated.
5. Stir in the vanilla extract until just blended.
6. Gently fold the grated carrots and grated zucchini into the wet ingredients using a spatula.
7. Gradually add the dry flour mixture to the wet ingredients, folding gently until no dry streaks remain—be careful not to overmix, as this keeps the muffins tender.
8. Divide the batter evenly among the 12 prepared muffin cups, filling each about ¾ full.
9. Bake in the preheated oven for 22–25 minutes, or until a toothpick inserted into the center of a muffin comes out clean.
10. Let the muffins cool in the tin for 5 minutes, then transfer them to a wire rack to cool completely—this prevents them from getting soggy.
So, these muffins come out incredibly moist from the veggies, with a hint of warmth from the cinnamon and a lovely golden-brown top. I love serving them warm with a smear of cream cheese or simply grabbing one on the go for a quick, satisfying bite.
Cauliflower Tots

Holiday gatherings always leave me craving something crispy and comforting, but I’m trying to sneak in more veggies—enter these cauliflower tots, a game-changer I whipped up after one too many heavy meals. They’re my go-to for satisfying that crunch without the guilt, and even my picky niece devours them!
Serving: 4 | Pre Time: 15 minutes | Cooking Time: 20 minutes
Ingredients
– Cauliflower – 1 head, riced (about 3 cups)
– Egg – 1 large
– Breadcrumbs – ½ cup
– Parmesan cheese – ¼ cup, grated
– Garlic powder – 1 tsp
– Salt – ½ tsp
– Olive oil – 2 tbsp
Instructions
1. Preheat your oven to 425°F and line a baking sheet with parchment paper.
2. Place the riced cauliflower in a microwave-safe bowl and microwave on high for 5 minutes to soften it, then let it cool slightly—this helps remove excess moisture, which is key for crisp tots.
3. Transfer the cooled cauliflower to a clean kitchen towel and squeeze out as much liquid as possible over the sink; I find twisting it tightly works best to avoid soggy results.
4. In a mixing bowl, combine the squeezed cauliflower, egg, breadcrumbs, Parmesan cheese, garlic powder, and salt, stirring until fully incorporated.
5. Shape the mixture into small tot shapes, about 1 inch long, and place them on the prepared baking sheet, spacing them evenly.
6. Brush each tot lightly with olive oil using a pastry brush—this promotes even browning and adds a nice golden finish.
7. Bake in the preheated oven for 20 minutes, flipping halfway through, until they’re golden brown and crispy on the outside.
8. Remove from the oven and let cool for 5 minutes on the baking sheet before serving to firm up.
Beyond their satisfying crunch, these tots have a subtle cheesy flavor that pairs perfectly with a tangy dipping sauce like ketchup or ranch. I love serving them as a fun appetizer or alongside a salad for a light meal—they’re so versatile and always disappear fast!
Hidden Veggie Pasta Sauce
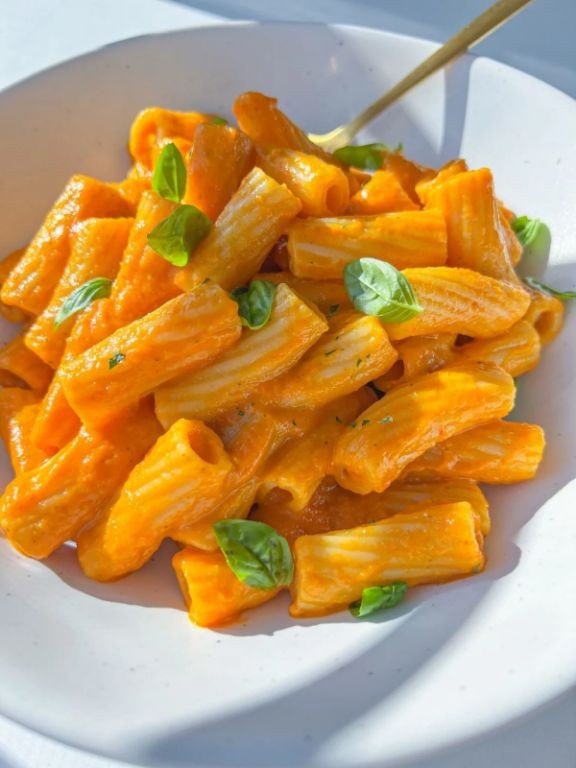
Unbelievably, I used to be the parent who had to sneak vegetables into my kids’ meals, but this Hidden Veggie Pasta Sauce changed everything—it’s so delicious, my family now asks for it by name. I developed this recipe during a hectic week when my fridge was full of random produce, and it’s become our go-to comfort food that feels both wholesome and indulgent. Honestly, it’s the easiest way to pack nutrients into a meal without anyone noticing, and the rich flavor will have you forgetting there’s anything “hidden” at all.
Serving: 4 | Pre Time: 15 minutes | Cooking Time: 25 minutes
Ingredients
– Olive oil – 2 tbsp
– Onion – 1, diced
– Carrots – 2, peeled and chopped
– Zucchini – 1, chopped
– Garlic – 3 cloves, minced
– Crushed tomatoes – 28 oz can
– Dried oregano – 1 tsp
– Salt – ½ tsp
– Black pepper – ¼ tsp
– Pasta – 12 oz
Instructions
1. Heat olive oil in a large pot over medium heat for 1 minute until shimmering.
2. Add diced onion and cook for 5 minutes, stirring occasionally, until translucent.
3. Add chopped carrots and zucchini, cooking for 8 minutes until softened, stirring every 2 minutes to prevent sticking—this slow cooking helps release their natural sweetness.
4. Stir in minced garlic and cook for 1 minute until fragrant, being careful not to burn it.
5. Pour in crushed tomatoes, dried oregano, salt, and black pepper, bringing the mixture to a simmer.
6. Reduce heat to low, cover the pot, and let the sauce simmer for 20 minutes to meld flavors, stirring halfway through.
7. While the sauce simmers, bring a separate pot of salted water to a boil and cook pasta according to package directions until al dente, about 10 minutes, then drain—reserving ½ cup of pasta water can help adjust sauce consistency later if needed.
8. After 20 minutes, use an immersion blender to puree the sauce directly in the pot until completely smooth, which ensures the veggies are fully hidden and creates a velvety texture.
9. Toss the drained pasta with the sauce in the pot over low heat for 2 minutes to coat evenly, adding a splash of reserved pasta water if the sauce seems too thick.
10. Serve immediately. During cleanup, I always let the pot soak with warm water to make washing easier, as tomato-based sauces can stick.
Delightfully smooth and rich, this sauce has a deep, savory flavor with a hint of sweetness from the carrots, making it perfect for coating any pasta. Try serving it over spaghetti with a sprinkle of Parmesan, or use it as a base for lasagna—it’s versatile enough to become a staple in your kitchen, just like it has in mine.
Veggie-Packed Mac and Cheese
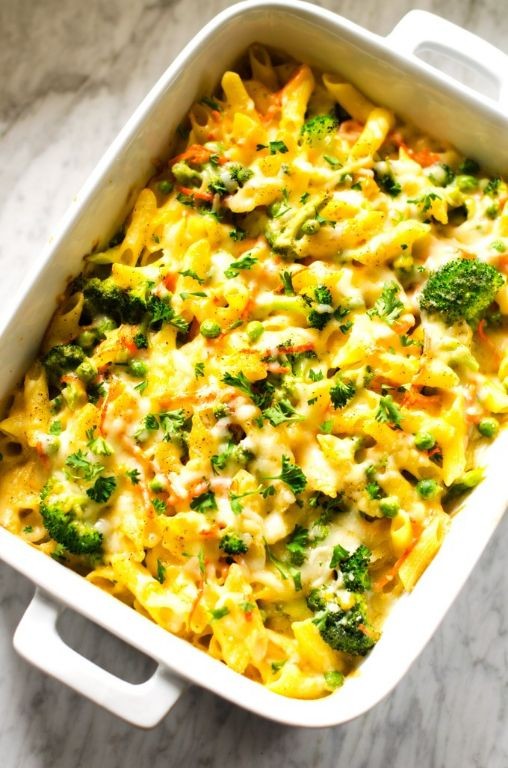
Holiday leftovers or a busy weeknight—this veggie-packed mac and cheese has become my go-to comfort food that doesn’t skimp on nutrition. I started adding extra vegetables after my kids kept picking them out of regular dishes, and now they ask for seconds every time! It’s creamy, cheesy, and packed with hidden goodness that even the pickiest eaters will love.
Serving: 4 | Pre Time: 10 minutes | Cooking Time: 25 minutes
Ingredients
– Elbow macaroni – 8 oz
– Broccoli florets – 1 cup
– Carrots – ½ cup, grated
– Unsalted butter – 2 tbsp
– All-purpose flour – 2 tbsp
– Milk – 2 cups
– Cheddar cheese – 2 cups, shredded
– Salt – ½ tsp
– Black pepper – ¼ tsp
Instructions
1. Bring a large pot of salted water to a boil over high heat. 2. Add the elbow macaroni and cook for 8 minutes, stirring occasionally. 3. Add the broccoli florets and grated carrots to the pot and cook for 2 more minutes. 4. Drain the pasta and vegetables in a colander and set aside. 5. In the same pot, melt the unsalted butter over medium heat. 6. Whisk in the all-purpose flour and cook for 1 minute until golden. 7. Gradually pour in the milk while whisking constantly to prevent lumps. 8. Cook the sauce for 5 minutes, stirring frequently, until it thickens. 9. Reduce the heat to low and stir in the cheddar cheese until melted. 10. Add the salt and black pepper to the cheese sauce. 11. Return the drained pasta and vegetables to the pot and stir to coat evenly. 12. Serve immediately while hot.
Rich and velvety from the cheese sauce, this mac and cheese has a delightful crunch from the broccoli and a subtle sweetness from the carrots. Try topping it with breadcrumbs and baking for 10 minutes at 375°F for a crispy finish, or mix in cooked chicken for extra protein.
Zucchini Fritters
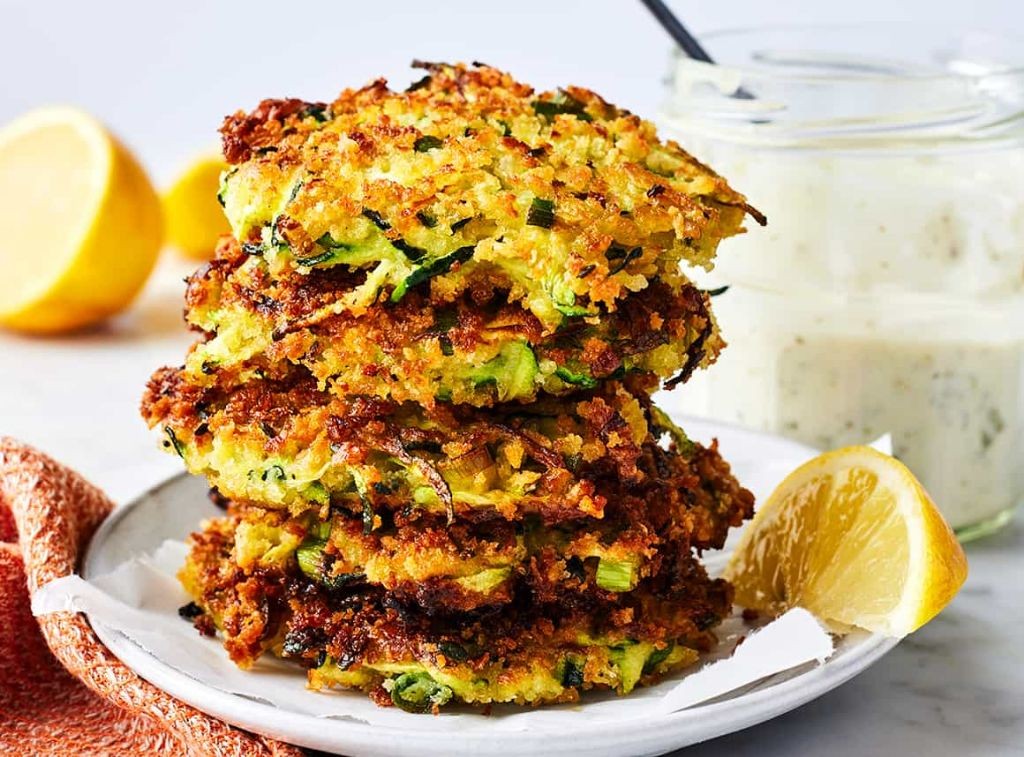
Kicking off the holiday cooking marathon, I always crave something crispy and vegetable-packed to balance out the sweets—these zucchini fritters are my go-to, inspired by my grandma’s knack for turning summer squash into golden bites we’d fight over. They’re quick, forgiving, and perfect for using up that giant zucchini lurking in the fridge, with a texture that’s crisp outside and tender inside every time.
Serving: 4 | Pre Time: 15 minutes | Cooking Time: 20 minutes
Ingredients
– Zucchini – 2 medium
– All-purpose flour – ½ cup
– Large egg – 1
– Salt – ½ tsp
– Black pepper – ¼ tsp
– Vegetable oil – ¼ cup
Instructions
1. Grate the zucchini using the large holes of a box grater into a medium bowl.
2. Squeeze the grated zucchini firmly with your hands over the sink to remove excess moisture, then return it to the bowl.
3. Add the all-purpose flour, large egg, salt, and black pepper to the bowl with the zucchini.
4. Mix all ingredients together with a fork until just combined, being careful not to overmix to keep the fritters light.
5. Heat the vegetable oil in a large skillet over medium heat until it shimmers, about 350°F.
6. Scoop 2 tablespoons of the zucchini mixture per fritter and gently flatten into 3-inch rounds in the hot oil.
7. Cook the fritters for 3–4 minutes per side, or until golden brown and crispy, flipping once with a spatula.
8. Transfer the cooked fritters to a paper towel-lined plate to drain any excess oil.
9. Repeat steps 6–8 with the remaining mixture, adding more oil if needed to maintain a thin layer in the skillet.
10. Serve the fritters immediately while hot. For an extra touch, I love them with a dollop of sour cream or a squeeze of lemon—they’re wonderfully savory with a hint of pepper, and the crispy edges give way to a soft, almost creamy center. Try stacking them with a fried egg on top for a hearty brunch, or pack them cold for a picnic; they’re just as good at room temperature, making leftovers a treat.
Roasted Veggie Sticks with Dip
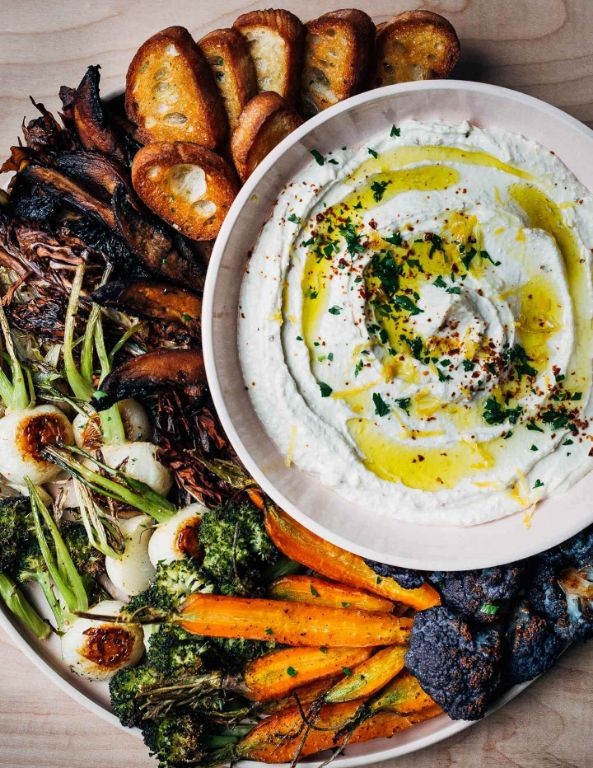
Veggie sticks are one of those snacks I always have in my fridge, but sometimes raw carrots and celery just don’t cut it. That’s why I started roasting them—it brings out a sweet, caramelized flavor that makes you forget you’re eating something healthy. I love making a big batch on Sunday afternoons while I’m prepping other meals; it’s become a little ritual that makes weekday snacking so much easier.
Serving: 4 | Pre Time: 15 minutes | Cooking Time: 25 minutes
Ingredients
– Carrots – 4 large
– Zucchini – 2 medium
– Olive oil – 2 tbsp
– Garlic powder – 1 tsp
– Salt – ½ tsp
– Plain Greek yogurt – 1 cup
– Lemon juice – 1 tbsp
– Fresh dill – 2 tbsp, chopped
Instructions
1. Preheat your oven to 425°F and line a large baking sheet with parchment paper.
2. Wash and peel the carrots, then cut them into sticks about 3 inches long and ½ inch thick.
3. Wash the zucchini, trim the ends, and cut them into sticks of similar size to the carrots.
4. In a large bowl, toss the carrot and zucchini sticks with olive oil, garlic powder, and salt until evenly coated.
5. Spread the veggie sticks in a single layer on the prepared baking sheet, making sure they aren’t touching.
6. Roast in the preheated oven for 20–25 minutes, flipping the sticks halfway through, until they are tender and lightly browned at the edges.
7. While the veggies roast, make the dip by combining Greek yogurt, lemon juice, and chopped dill in a small bowl; stir until smooth.
8. Remove the baking sheet from the oven and let the veggie sticks cool for 5 minutes before serving.
9. Transfer the roasted veggie sticks to a platter and serve immediately with the dill yogurt dip on the side.
Nothing beats the crispy edges and tender centers of these roasted sticks, especially when dipped into that cool, herby yogurt. I sometimes sprinkle them with a pinch of smoked paprika for extra depth, or pack them in lunchboxes for a satisfying midday crunch.
Pea and Corn Fritters
Bursting with sweet pops of corn and tender peas, these fritters are my go-to for a quick, satisfying lunch that feels like a treat. I love whipping them up on lazy weekends when I want something crispy and comforting without a fuss, and they always remind me of summer picnics, even in December. The best part? They come together in one bowl, making cleanup a breeze.
Serving: 4 | Pre Time: 10 minutes | Cooking Time: 15 minutes
Ingredients
– All-purpose flour – 1 cup
– Baking powder – 1 tsp
– Salt – ½ tsp
– Black pepper – ¼ tsp
– Egg – 1 large
– Milk – ½ cup
– Frozen peas – 1 cup, thawed
– Frozen corn – 1 cup, thawed
– Vegetable oil – ¼ cup
Instructions
1. In a large mixing bowl, whisk together 1 cup of all-purpose flour, 1 teaspoon of baking powder, ½ teaspoon of salt, and ¼ teaspoon of black pepper until fully combined.
2. Crack 1 large egg into the dry ingredients, then pour in ½ cup of milk, stirring gently with a spatula to form a thick batter—don’t overmix, as a few lumps are fine for tender fritters.
3. Gently fold in 1 cup of thawed frozen peas and 1 cup of thawed frozen corn until evenly distributed throughout the batter.
4. Heat ¼ cup of vegetable oil in a large skillet over medium-high heat until it shimmers, about 350°F; test by dropping a tiny bit of batter—it should sizzle immediately.
5. Scoop ¼-cup portions of the batter into the hot oil, flattening each slightly with the back of a spoon to ensure even cooking, and fry in batches without crowding the pan.
6. Cook each fritter for 3–4 minutes per side, or until golden brown and crisp, flipping once with a spatula when the edges look set.
7. Transfer the cooked fritters to a paper towel-lined plate to drain any excess oil, repeating until all batter is used, adding more oil if the pan looks dry.
8. Serve the fritters immediately while hot for the best texture. Crispy on the outside with a soft, fluffy interior, these fritters offer a delightful contrast of sweet corn and earthy peas. I love pairing them with a dollop of sour cream or a zesty aioli for dipping, or even stacking them into a sandwich with fresh greens for a hearty twist.
Butternut Squash Mash
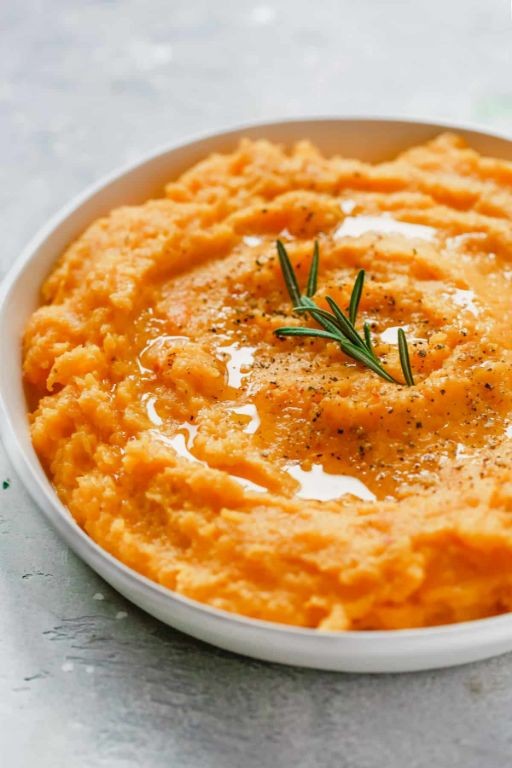
Sometimes the simplest dishes are the most comforting, especially during the holiday rush. I find myself craving this butternut squash mash every December—it’s become my go‑make‑ahead side that always impresses without stressing me out. Honestly, roasting the squash fills my kitchen with the coziest aroma, making even a busy Wednesday feel festive.
Serving: 6 | Pre Time: 15 minutes | Cooking Time: 45 minutes
Ingredients
– Butternut squash – 1 large (about 3 lbs)
– Unsalted butter – 4 tbsp
– Heavy cream – ½ cup
– Maple syrup – 2 tbsp
– Salt – 1 tsp
– Ground nutmeg – ¼ tsp
Instructions
1. Preheat your oven to 400°F and line a baking sheet with parchment paper.
2. Carefully cut the butternut squash in half lengthwise using a sharp chef’s knife, and scoop out all the seeds and stringy pulp with a spoon.
3. Place the squash halves cut‑side down on the prepared baking sheet. Roast in the preheated oven for 45 minutes, or until the flesh is very tender when pierced with a fork.
4. Remove the baking sheet from the oven and let the squash cool for 10 minutes until it’s safe to handle. (Tip: Roasting the squash cut‑side down helps it steam in its own juices, concentrating the flavor and making it easier to scoop later.)
5. Use a spoon to scoop all the soft flesh from the squash skins directly into a large mixing bowl; discard the skins.
6. Add the unsalted butter, heavy cream, maple syrup, salt, and ground nutmeg to the bowl with the squash.
7. Using a potato masher or a sturdy fork, mash all the ingredients together until smooth and fully combined. (Tip: For an ultra‑silky texture, you can transfer the mixture to a food processor and pulse a few times, but I prefer the rustic feel of hand‑mashing.)
8. Taste the mash and adjust the seasoning if needed, then transfer it to a serving dish. (Tip: If making ahead, you can reheat it gently in a saucepan over low heat, stirring in a splash more cream to loosen it up.)
Buttery and subtly sweet from the maple, this mash has a luxuriously smooth yet substantial texture that holds its own on the plate. I love serving it topped with a sprinkle of crispy fried sage or alongside a juicy roast chicken—it’s the kind of simple, satisfying side that makes everyone ask for seconds.
Tomato and Veggie Rice Balls
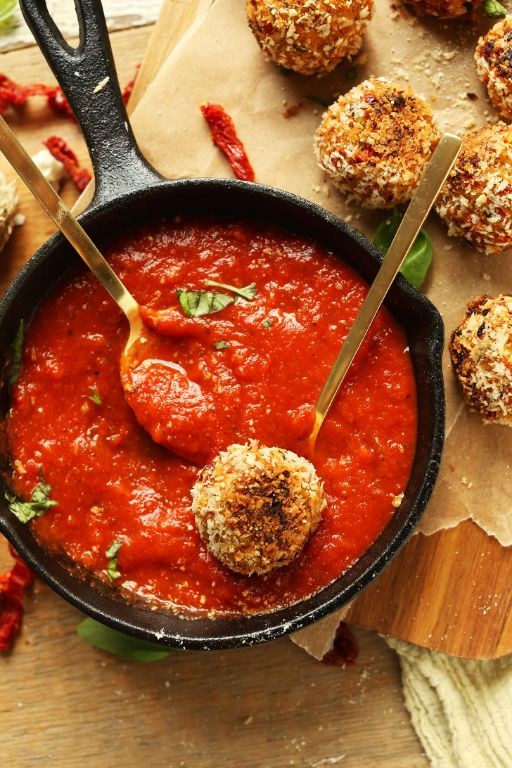
Aren’t we all looking for that perfect lunchbox or picnic snack that’s both delicious and packed with veggies? I’ve been making these tomato and veggie rice balls for years, ever since my kids declared they were tired of sandwiches, and they’ve become my go-to for potlucks and busy weekdays alike. They’re surprisingly simple to throw together and always disappear fast.
Serving: 4 | Pre Time: 20 minutes | Cooking Time: 25 minutes
Ingredients
– Cooked white rice – 2 cups
– Tomato paste – ¼ cup
– Grated carrot – ½ cup
– Finely chopped onion – ¼ cup
– Large egg – 1
– Breadcrumbs – ½ cup
– Olive oil – 2 tbsp
– Salt – ½ tsp
Instructions
1. Combine the cooked white rice, tomato paste, grated carrot, and finely chopped onion in a large mixing bowl until evenly distributed.
2. Crack the large egg into the rice mixture and add the salt, then mix thoroughly with a fork or your hands until the mixture holds together when pressed.
3. Tip: Wet your hands slightly with water to prevent the sticky rice mixture from clinging as you shape the balls.
4. Scoop about 2 tablespoons of the mixture and roll it firmly between your palms to form a compact, golf ball-sized sphere.
5. Place the breadcrumbs in a shallow dish and roll each rice ball in the crumbs until fully coated on all sides.
6. Heat the olive oil in a large non-stick skillet over medium heat until it shimmers, about 2 minutes.
7. Tip: To test if the oil is hot enough, drop a small breadcrumb in; it should sizzle immediately.
8. Carefully place the coated rice balls in the skillet, leaving space between them, and cook for 4-5 minutes.
9. Using tongs, gently turn each ball and cook for another 4-5 minutes until all sides are golden brown and crispy.
10. Tip: Resist the urge to move them too soon—letting them form a crust ensures they don’t fall apart.
11. Transfer the cooked rice balls to a paper towel-lined plate to drain any excess oil for 2 minutes.
The crispy exterior gives way to a soft, savory center with sweet hints from the carrot and tomato. I love serving them warm with a side of marinara for dipping, or packing them cold in lunches where they stay perfectly portable.
Spinach and Sweet Potato Nuggets

M y kids used to turn their noses up at anything green, but these Spinach and Sweet Potato Nuggets changed the game in our house—they’re crispy on the outside, tender inside, and packed with sneaky veggies. I love making a big batch on Sunday afternoons to stash in the freezer for busy weeknights; they reheat beautifully in the toaster oven. Trust me, even the pickiest eaters will come back for seconds.
Serving: 4 | Pre Time: 15 minutes | Cooking Time: 20 minutes
Ingredients
– Sweet potato – 1 large (about 2 cups mashed)
– Spinach – 2 cups fresh
– Breadcrumbs – 1 cup
– Egg – 1 large
– Olive oil – 2 tbsp
– Salt – ½ tsp
Instructions
1. Preheat your oven to 400°F and line a baking sheet with parchment paper.
2. Peel the sweet potato, cut it into 1-inch cubes, and place them in a microwave-safe bowl with 2 tablespoons of water.
3. Cover the bowl and microwave the sweet potato cubes on high for 8–10 minutes, until they are fork-tender. (Tip: Microwaving saves time compared to boiling, and it keeps the potatoes from getting watery.)
4. While the sweet potato cooks, finely chop the fresh spinach until it’s in small pieces.
5. Drain any excess water from the cooked sweet potato, then mash it thoroughly in the bowl until smooth.
6. Stir the chopped spinach, breadcrumbs, egg, and salt into the mashed sweet potato until well combined. (Tip: If the mixture feels too wet to shape, add an extra tablespoon of breadcrumbs to firm it up.)
7. Scoop about 1 tablespoon of the mixture and roll it into a ball, then flatten it slightly into a nugget shape about ½-inch thick.
8. Place each nugget on the prepared baking sheet, leaving about 1 inch of space between them.
9. Brush the tops of the nuggets lightly with olive oil using a pastry brush. (Tip: Brushing with oil instead of drizzling helps them crisp up evenly without becoming greasy.)
10. Bake the nuggets in the preheated oven for 18–20 minutes, flipping them halfway through, until they are golden brown and firm to the touch.
E very bite of these nuggets offers a delightful contrast—crispy edges give way to a soft, savory interior with a hint of natural sweetness from the potatoes. I love serving them with a quick yogurt dip or tucking them into lunchboxes for a healthy twist. They’re so versatile that we often crumble them over salads for added texture, making veggies the star of the meal.
Carrot and Apple Puree
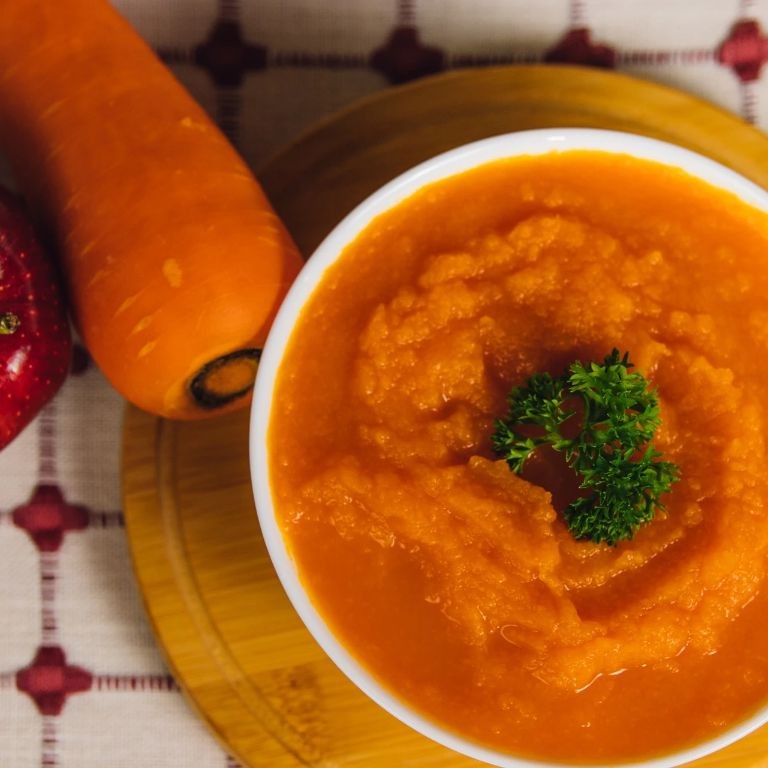
Kind of like a cozy hug in a bowl, this Carrot and Apple Puree is my go-to when I want something simple, sweet, and nourishing. I first made it years ago for a friend’s baby, but honestly, I’ve been sneaking spoonfuls for myself ever since—it’s that good! It’s the perfect blend of earthy and sweet, and it comes together with just a few pantry staples.
Serving: 4 | Pre Time: 10 minutes | Cooking Time: 20 minutes
Ingredients
– Carrots – 4 large
– Apples – 2 medium
– Water – ½ cup
– Unsalted butter – 2 tbsp
Instructions
1. Peel 4 large carrots and 2 medium apples, then cut them into 1-inch chunks.
2. Place the carrot and apple chunks into a medium saucepan.
3. Add ½ cup of water to the saucepan.
4. Bring the mixture to a boil over high heat, then reduce the heat to medium-low.
5. Cover the saucepan and simmer for 15 minutes, or until the carrots are fork-tender.
6. Tip: A tight-fitting lid helps steam the vegetables evenly, so they cook faster without losing flavor.
7. Carefully drain any excess water from the saucepan, reserving about 2 tablespoons of the cooking liquid.
8. Transfer the cooked carrots and apples to a blender or food processor.
9. Add 2 tablespoons of unsalted butter and the reserved 2 tablespoons of cooking liquid to the blender.
10. Blend on high speed for 1-2 minutes, until completely smooth and creamy.
11. Tip: If the puree seems too thick, add more cooking liquid, 1 tablespoon at a time, blending after each addition until it reaches your desired consistency.
12. Taste the puree and adjust if needed; for a sweeter touch, you can blend in a pinch of cinnamon, but I love it as is.
13. Tip: Let the puree cool for 5 minutes before serving to allow the flavors to meld and prevent it from being too hot.
14. Serve the puree warm in small bowls.
Just silky-smooth with a natural sweetness that makes every spoonful delightful. I often swirl in a dollop of Greek yogurt for a creamy contrast or sprinkle it with toasted nuts for a bit of crunch. It’s versatile enough to enjoy as a simple side or even as a base for soups—leftovers never last long in my fridge!
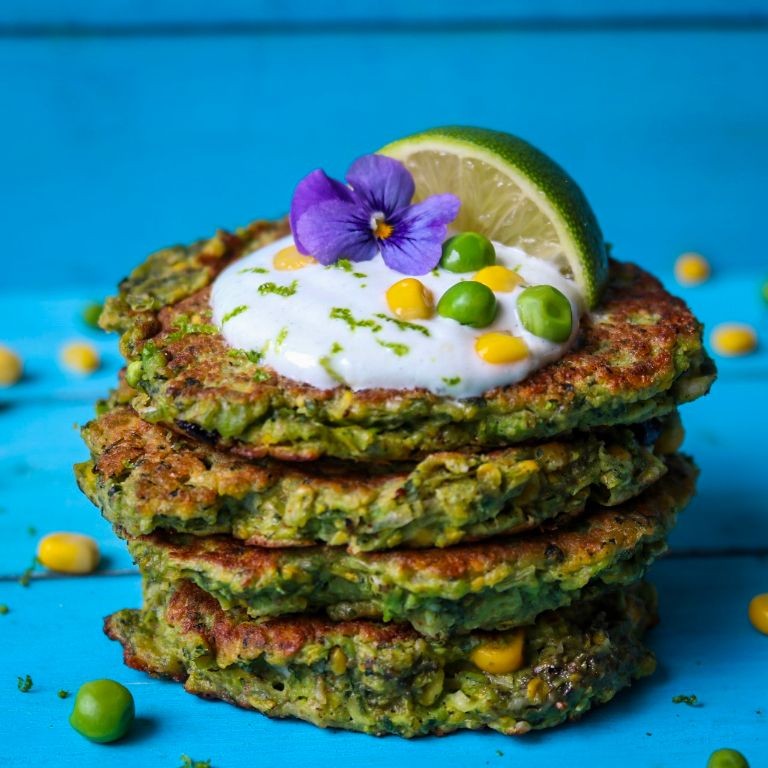
Green Pea Pancakes

Last weekend, I was cleaning out my freezer and discovered a forgotten bag of green peas from last spring’s farmers market haul—instead of letting them languish, I decided to transform them into these vibrant, savory pancakes that have quickly become a weekend staple in my kitchen. They’re surprisingly simple to whip up and pack a delightful pop of color and flavor that even my veggie-skeptical kids adore. Honestly, they’re the perfect way to use up those stray ingredients while feeling like you’re treating yourself to something special.
Serving: 4 | Pre Time: 10 minutes | Cooking Time: 15 minutes
Ingredients
– Frozen green peas – 2 cups
– All-purpose flour – 1 cup
– Baking powder – 1 tsp
– Salt – ½ tsp
– Large egg – 1
– Milk – ¾ cup
– Unsalted butter – 2 tbsp, melted
– Vegetable oil – 2 tbsp
Instructions
1. Place the frozen green peas in a microwave-safe bowl and microwave on high for 2 minutes until thawed and warm, then drain any excess liquid—this helps them blend smoothly without watering down the batter.
2. Transfer the peas to a blender or food processor and pulse for 15–20 seconds until coarsely mashed, leaving some texture for a rustic feel.
3. In a large mixing bowl, whisk together the all-purpose flour, baking powder, and salt until evenly combined.
4. Crack the large egg into a separate small bowl, lightly beat it with a fork, then pour it into the flour mixture.
5. Add the milk and melted unsalted butter to the bowl, stirring gently with a spatula until just incorporated—overmixing can lead to tough pancakes, so stop when a few flour streaks remain.
6. Fold in the mashed green peas until evenly distributed throughout the batter, which should be thick but pourable; if it seems too dry, add a tablespoon of milk.
7. Heat a non-stick skillet or griddle over medium heat (350°F if using an electric griddle) and add 1 tablespoon of vegetable oil, swirling to coat the surface.
8. Pour ¼ cup of batter onto the skillet for each pancake, cooking for 2–3 minutes until bubbles form on the surface and the edges look set—this visual cue ensures they’re ready to flip without sticking.
9. Carefully flip each pancake with a spatula and cook for another 1–2 minutes until golden brown and cooked through; adjust the heat if they’re browning too quickly.
10. Transfer the cooked pancakes to a plate and repeat with the remaining batter, adding the second tablespoon of vegetable oil as needed to prevent sticking.
My favorite part is how these pancakes turn out: tender with a slight crisp edge and bursts of sweet pea flavor that pair wonderfully with a dollop of Greek yogurt or a drizzle of hot honey. They’re fantastic for brunch or even as a light dinner alongside a simple salad—get creative by topping them with smoked salmon or avocado for an extra twist!
Veggie-Loaded Mini Pizzas

Just in time for the holiday rush, I’m sharing my go-to Veggie-Loaded Mini Pizzas—perfect for when you need a quick, customizable bite that pleases everyone. I love making these with my kids on busy evenings; they get to pick their toppings, and I get a wholesome meal on the table fast. It’s a win-win that feels festive without the fuss.
Serving: 12 | Pre Time: 15 minutes | Cooking Time: 10 minutes
Ingredients
– English muffins – 6
– Pizza sauce – ½ cup
– Shredded mozzarella cheese – 1 cup
– Bell pepper – ½, diced
– Mushrooms – ¼ cup, sliced
– Olive oil – 1 tbsp
Instructions
1. Preheat your oven to 400°F and line a baking sheet with parchment paper.
2. Split the 6 English muffins in half horizontally to create 12 bases.
3. Place the muffin halves cut-side up on the prepared baking sheet.
4. Lightly brush the cut sides of the muffins with 1 tbsp of olive oil to help them crisp up in the oven.
5. Spread approximately 2 tsp of pizza sauce evenly onto each muffin half.
6. Sprinkle 1 cup of shredded mozzarella cheese evenly over the sauced muffin halves.
7. Evenly distribute ½ diced bell pepper and ¼ cup sliced mushrooms over the cheese.
8. Bake in the preheated oven at 400°F for 8–10 minutes, or until the cheese is fully melted and bubbly and the muffin edges are golden brown.
9. Remove from the oven and let cool for 2–3 minutes before serving to avoid burns.
Nothing beats the crispy, chewy texture of these mini pizzas, with the veggies adding a fresh crunch and savory depth. For a fun twist, set up a topping bar with extras like olives or pepperoni, or serve them alongside a simple salad for a complete meal.
Beetroot and Potato Patties
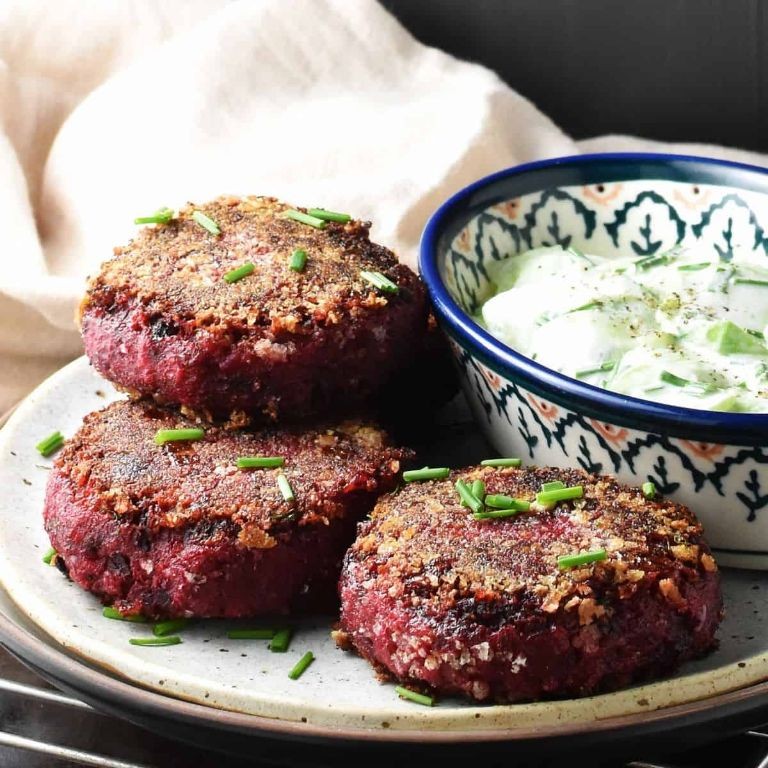
Yesterday, while digging through my fridge to use up leftover roasted beets from a holiday dinner, I stumbled upon the perfect comfort food solution—these vibrant beetroot and potato patties that are crispy on the outside, tender inside, and packed with earthy sweetness. As a busy home cook, I love recipes that transform simple ingredients into something special without fuss, and these patties have become my go-to for quick lunches or appetizers when friends drop by unexpectedly. Trust me, even beet skeptics in my family have been won over by their gorgeous color and satisfying texture.
Serving: 4 | Pre Time: 15 minutes | Cooking Time: 20 minutes
Ingredients
– Potatoes – 2 large
– Beetroot – 1 medium
– Breadcrumbs – ½ cup
– Egg – 1
– Salt – 1 tsp
– Black pepper – ½ tsp
– Olive oil – 2 tbsp
Instructions
1. Peel the potatoes and beetroot, then grate them using a box grater into a large bowl.
2. Squeeze the grated mixture firmly with your hands over the sink to remove excess moisture—this tip ensures the patties hold together better without becoming soggy.
3. Add the breadcrumbs, egg, salt, and black pepper to the bowl, then mix everything until fully combined.
4. Shape the mixture into 8 equal-sized patties, about ½-inch thick, pressing them firmly between your palms.
5. Heat the olive oil in a large skillet over medium heat until it shimmers, which should take about 2 minutes.
6. Carefully place the patties in the skillet, leaving space between them to allow for even browning.
7. Cook the patties for 4–5 minutes per side, flipping once with a spatula when the edges turn golden brown and crispy.
8. Transfer the cooked patties to a paper towel-lined plate to drain any excess oil—this extra step keeps them light and not greasy.
9. Let the patties rest for 2 minutes before serving to help them set and develop a better texture.
Perfectly crisp on the outside with a soft, savory interior, these patties offer a delightful contrast that pairs wonderfully with a dollop of Greek yogurt or a squeeze of lemon. I often serve them stacked high on a platter with fresh herbs for a colorful appetizer, or tuck them into buns with avocado for a hearty vegetarian burger—their versatility makes them a staple in my kitchen year-round.
Hidden Veggie Smoothie
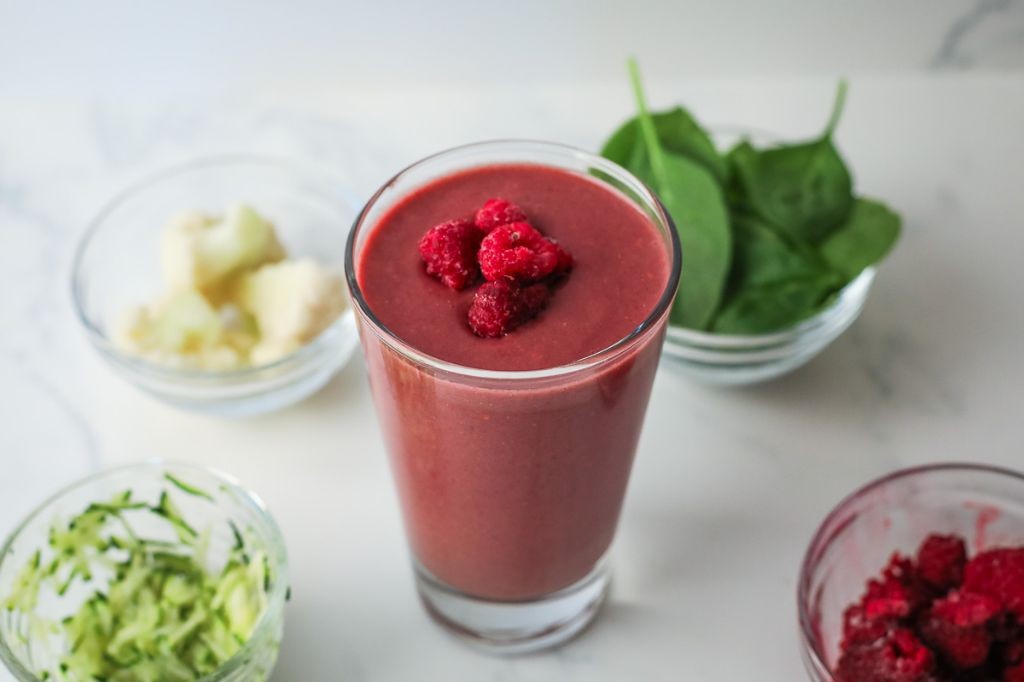
A few years ago, I was desperately trying to get my kids to eat more greens, and after one too many rejected plates of steamed broccoli, I started sneaking vegetables into their favorite smoothies—this hidden veggie version became our family’s secret weapon for a healthy start. It’s so creamy and sweet, they never suspect a thing, and honestly, I love it just as much for my own busy mornings.
Serving: 2 | Pre Time: 5 minutes | Cooking Time: 0 minutes
Ingredients
– Frozen banana – 1 large
– Baby spinach – 1 cup, packed
– Frozen mango chunks – 1 cup
– Plain Greek yogurt – ½ cup
– Milk – ¾ cup
– Honey – 1 tbsp
Instructions
1. Add 1 cup of packed baby spinach to a high-powered blender. (Tip: Packing the spinach tightly helps it blend smoothly without leafy chunks.)
2. Add 1 large frozen banana, broken into chunks, and 1 cup of frozen mango chunks to the blender.
3. Pour in ½ cup of plain Greek yogurt and ¾ cup of milk.
4. Drizzle 1 tablespoon of honey over the other ingredients. (Tip: If your fruit is very ripe, you can reduce the honey slightly to taste.)
5. Secure the blender lid tightly and blend on high speed for 45-60 seconds, or until the mixture is completely smooth and no green flecks of spinach are visible. (Tip: Stop and scrape down the sides with a spatula once during blending if needed to ensure everything incorporates evenly.)
6. Pour the smoothie immediately into two glasses and serve.
Enjoy this smoothie right away for the best creamy texture—the frozen fruit keeps it frosty and thick, almost like a milkshake. Every sip has a bright, tropical sweetness from the mango that perfectly masks any vegetal flavor, making it a genius way to fuel up without fuss.
Summary
Navigating mealtime with a picky toddler just got easier with these 18 wholesome vegetable recipes! We hope this roundup inspires you to try something new and find a dish your little one will love. Give a recipe a whirl, then drop a comment below to tell us your family’s favorite. Don’t forget to share this helpful list on Pinterest for other parents to discover!