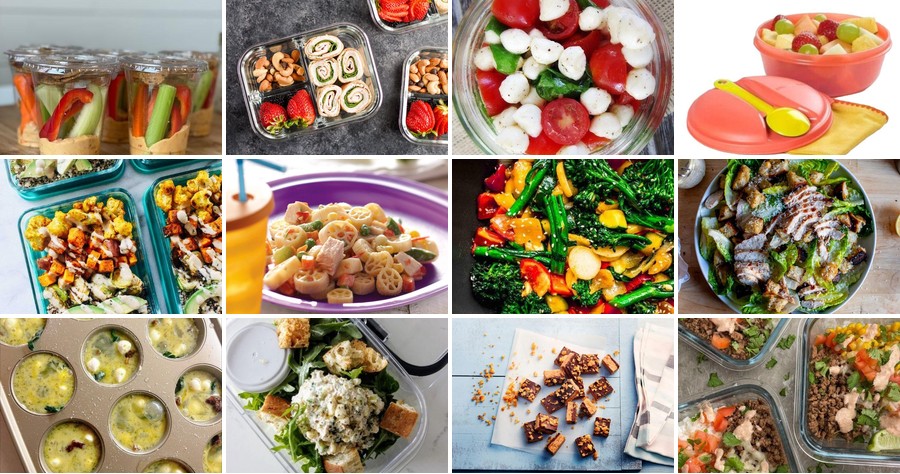
Welcome, meal prep enthusiasts! If you’re tired of the same old lunches and crave delicious, easy-to-make dishes that travel well, you’re in the right place. We’ve gathered 18 fantastic Tupperware-friendly recipes—think quick dinners, make-ahead marvels, and comforting favorites—that will transform your weekly routine. Dive in and discover how simple and satisfying meal prep can truly be!
Tupperware-friendly overnight oats
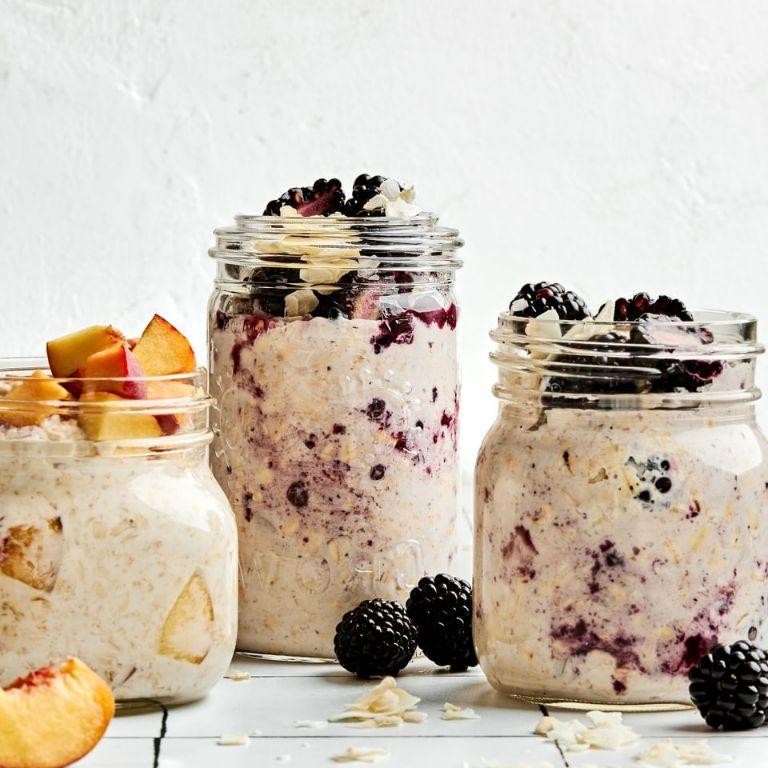
Yesterday’s quiet evening found me in the kitchen, thinking about tomorrow’s breakfast—a simple, nourishing ritual that feels like a gift to my future self. These overnight oats are that gentle promise, a no-fuss assembly that transforms overnight into a creamy, ready-to-go meal, perfect for tucking into a container and carrying into a new day.
Serving: 1 | Pre Time: 5 minutes | Cooking Time: 0 minutes
Ingredients
For the oat base:
– 1/2 cup old-fashioned rolled oats
– 1/2 cup whole milk or unsweetened almond milk
– 1 tablespoon pure maple syrup
– 1/4 teaspoon ground cinnamon
For topping (add in the morning):
– 2 tablespoons plain Greek yogurt
– 1/4 cup fresh blueberries
– 1 tablespoon chopped walnuts
Instructions
1. Take a 12-ounce jar or airtight container with a lid.
2. Pour 1/2 cup of old-fashioned rolled oats into the jar.
3. Add 1/2 cup of whole milk or unsweetened almond milk to the jar. Tip: Using a liquid measuring cup ensures accuracy for the right creamy texture.
4. Drizzle 1 tablespoon of pure maple syrup over the mixture.
5. Sprinkle 1/4 teaspoon of ground cinnamon into the jar.
6. Seal the jar tightly with its lid.
7. Shake the jar vigorously for 15 seconds to combine all ingredients thoroughly. Tip: A good shake prevents clumps and evenly distributes the flavors.
8. Place the jar in the refrigerator for at least 8 hours, or overnight.
9. The next morning, remove the jar from the refrigerator.
10. Open the lid and stir the oats with a spoon to check consistency; they should be thick and creamy.
11. Spoon 2 tablespoons of plain Greek yogurt on top of the oats.
12. Scatter 1/4 cup of fresh blueberries over the yogurt.
13. Sprinkle 1 tablespoon of chopped walnuts over the blueberries. Tip: Adding nuts just before serving keeps them crunchy for a pleasant texture contrast.
Morning brings a velvety, spoonable breakfast where the cinnamon whispers warmth and the maple syrup lends a subtle sweetness. I love how the blueberries burst with juiciness against the cool yogurt, or for a twist, try layering it in a glass with extra fruit for a parfait-style treat.
Portable quinoa salad in Tupperware
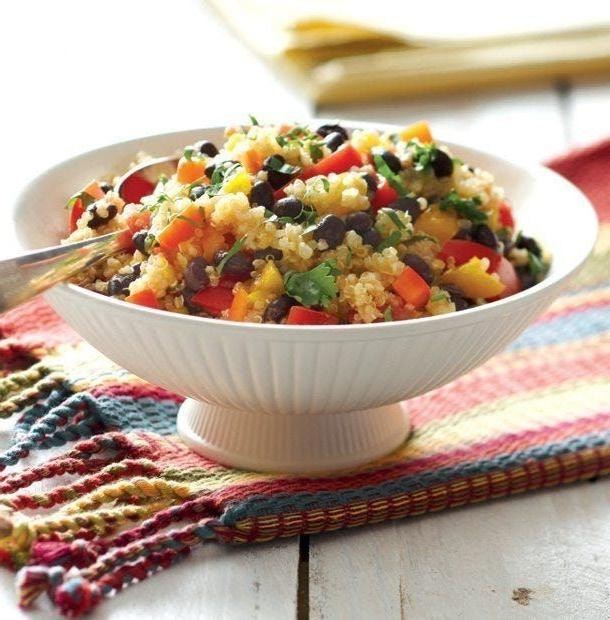
Perhaps it’s the quiet hum of the refrigerator at this hour, or the way the kitchen light casts a soft glow on the counter, but there’s something deeply comforting about assembling a meal meant to travel. This portable quinoa salad, tucked neatly into Tupperware, feels less like a packed lunch and more like a quiet promise to your future self—a nourishing pause waiting in the wings of a busy day.
Serving: 4 | Pre Time: 15 minutes | Cooking Time: 20 minutes
Ingredients
- For the quinoa:
- 1 cup quinoa, rinsed
- 2 cups water
- 1/4 tsp salt
- For the vegetables:
- 1 cup cherry tomatoes, halved
- 1 cup cucumber, diced
- 1/2 cup red onion, finely chopped
- 1/2 cup bell pepper, diced
- For the dressing:
- 1/4 cup olive oil
- 2 tbsp lemon juice
- 1 tbsp red wine vinegar
- 1 tsp Dijon mustard
- 1/2 tsp dried oregano
- 1/4 tsp black pepper
- For finishing:
- 1/4 cup feta cheese, crumbled
- 2 tbsp fresh parsley, chopped
Instructions
- Place the rinsed quinoa, water, and salt in a medium saucepan.
- Bring the mixture to a boil over medium-high heat.
- Once boiling, reduce the heat to low, cover the saucepan, and simmer for 15 minutes. Tip: Avoid lifting the lid during cooking to ensure the quinoa steams properly.
- After 15 minutes, remove the saucepan from the heat and let it sit, covered, for 5 minutes to allow the quinoa to absorb any remaining liquid.
- Fluff the cooked quinoa with a fork and transfer it to a large mixing bowl to cool completely, about 10 minutes.
- While the quinoa cools, prepare the vegetables: halve the cherry tomatoes, dice the cucumber and bell pepper, and finely chop the red onion.
- Add the prepared cherry tomatoes, cucumber, red onion, and bell pepper to the cooled quinoa in the mixing bowl.
- In a small bowl, whisk together the olive oil, lemon juice, red wine vinegar, Dijon mustard, dried oregano, and black pepper until fully combined. Tip: Whisking vigorously for 30 seconds helps emulsify the dressing for a smoother texture.
- Pour the dressing over the quinoa and vegetable mixture in the large bowl.
- Gently toss everything together until the ingredients are evenly coated with the dressing.
- Fold in the crumbled feta cheese and chopped fresh parsley. Tip: Adding the feta and parsley last helps prevent them from becoming soggy.
- Divide the salad evenly among four portable containers, such as Tupperware, and seal the lids.
- Refrigerate the sealed containers for at least 1 hour before serving to allow the flavors to meld.
You’ll find the salad has a delightful contrast—the quinoa is fluffy and slightly nutty, the vegetables offer a crisp, fresh bite, and the dressing brings a bright, tangy note that softens as it chills. Try serving it straight from the container with a side of toasted pita chips for an easy, complete meal on the go, or spoon it over a bed of greens for a heartier lunch.
Tupperware-friendly veggie stir-fry
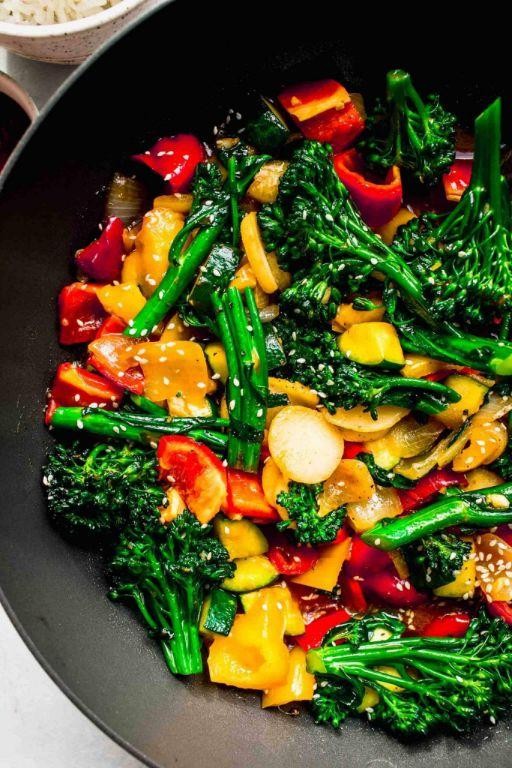
Lately, I’ve been craving something simple and nourishing—a meal that feels like a quiet exhale at the end of a long day, something I can tuck into a container and carry with me. This veggie stir-fry is exactly that: a gentle, colorful tumble of vegetables that comes together quickly and waits patiently in the fridge, ready to comfort you whenever you need it.
Serving: 4 | Pre Time: 15 minutes | Cooking Time: 10 minutes
Ingredients
For the stir-fry:
– 2 tablespoons vegetable oil
– 1 medium yellow onion, thinly sliced
– 2 cloves garlic, minced
– 1 tablespoon fresh ginger, grated
– 1 red bell pepper, thinly sliced
– 1 cup broccoli florets
– 1 medium carrot, julienned
– 1 cup snap peas, trimmed
For the sauce:
– 3 tablespoons low-sodium soy sauce
– 1 tablespoon rice vinegar
– 1 teaspoon sesame oil
– 1 teaspoon cornstarch
– ¼ cup water
Instructions
1. In a small bowl, whisk together the soy sauce, rice vinegar, sesame oil, cornstarch, and water until smooth to make the sauce. Set aside.
2. Heat the vegetable oil in a large skillet or wok over medium-high heat until it shimmers, about 1 minute.
3. Add the sliced onion to the skillet and cook, stirring frequently, until it softens and turns translucent, about 3 minutes.
4. Stir in the minced garlic and grated ginger, cooking for 30 seconds until fragrant to avoid burning.
5. Add the red bell pepper, broccoli florets, and julienned carrot to the skillet, stirring to combine.
6. Cook the vegetables, stirring occasionally, until they begin to soften but remain crisp-tender, about 4 minutes.
7. Tip: For even cooking, cut the vegetables into uniform sizes before starting.
8. Add the snap peas to the skillet and cook for 1 minute, just until they brighten in color.
9. Pour the prepared sauce over the vegetables in the skillet, stirring gently to coat everything evenly.
10. Cook the mixture, stirring constantly, until the sauce thickens and coats the vegetables, about 1 minute.
11. Tip: If the sauce thickens too quickly, add a splash of water to reach your desired consistency.
12. Remove the skillet from the heat and let the stir-fry cool for 5 minutes before transferring to containers.
13. Tip: For best storage, allow the stir-fry to cool completely before sealing it in an airtight container to prevent sogginess.
During the first bite, you’ll notice the vegetables retain a satisfying crunch, mingling with the savory-sweet sauce that clings lightly to each piece. I love serving this over a bed of fluffy rice or tucked into a warm tortilla for a quick wrap, the flavors deepening subtly after a day in the fridge.
Meal-prep chicken and rice in Tupperware

Dusk settles outside my kitchen window, and I find myself reaching for the familiar containers, the quiet ritual of preparing this simple meal a gentle anchor in the week’s rush. It’s a humble act of care, this chicken and rice tucked into Tupperware, promising nourishment with minimal fuss when time feels scarce.
Serving: 4 | Pre Time: 15 minutes | Cooking Time: 30 minutes
Ingredients
For the rice and base:
– 1 cup long-grain white rice
– 2 cups low-sodium chicken broth
– 1 tbsp olive oil
– 1/2 tsp kosher salt
For the chicken and vegetables:
– 1 lb boneless, skinless chicken breasts, cut into 1-inch cubes
– 1 tbsp olive oil
– 1/2 tsp garlic powder
– 1/2 tsp onion powder
– 1/4 tsp black pepper
– 1 cup broccoli florets
– 1 cup diced carrots (1/4-inch pieces)
For finishing:
– 2 tbsp chopped fresh parsley
Instructions
1. Rinse 1 cup of long-grain white rice under cold water in a fine-mesh strainer until the water runs clear to remove excess starch, which helps prevent clumping.
2. In a medium saucepan, combine the rinsed rice, 2 cups of low-sodium chicken broth, 1 tbsp olive oil, and 1/2 tsp kosher salt.
3. Bring the mixture to a boil over high heat, then immediately reduce the heat to low, cover the saucepan with a tight-fitting lid, and simmer for 18 minutes without lifting the lid to ensure even cooking.
4. After 18 minutes, remove the saucepan from the heat and let it stand, covered, for 5 minutes to allow the rice to steam and absorb any remaining liquid.
5. While the rice cooks, pat 1 lb of cubed chicken breasts dry with paper towels to promote better browning.
6. Season the chicken evenly with 1/2 tsp garlic powder, 1/2 tsp onion powder, and 1/4 tsp black pepper.
7. Heat 1 tbsp olive oil in a large skillet over medium-high heat until it shimmers, about 1 minute.
8. Add the seasoned chicken to the skillet in a single layer and cook undisturbed for 4 minutes to develop a golden-brown crust.
9. Flip the chicken pieces and cook for an additional 4 minutes, or until the internal temperature reaches 165°F on an instant-read thermometer.
10. Transfer the cooked chicken to a plate and set aside, covering it loosely with foil to keep warm.
11. In the same skillet, add 1 cup of broccoli florets and 1 cup of diced carrots, cooking over medium heat for 5-6 minutes, stirring occasionally, until the vegetables are tender-crisp and bright in color.
12. Fluff the cooked rice with a fork to separate the grains, then gently fold in the cooked chicken, vegetables, and 2 tbsp chopped fresh parsley until evenly combined.
13. Divide the mixture evenly among four airtight Tupperware containers, pressing it down lightly to minimize air pockets, which helps maintain freshness.
14. Seal the containers and refrigerate immediately for up to 4 days, or freeze for longer storage.
Just out of the fridge, the rice retains a pleasingly separate texture, each grain coated in the savory essence of broth, while the chicken stays tender against the crisp-tender bite of carrots and broccoli. For a bright twist, squeeze fresh lemon over a portion before reheating, or top it with a drizzle of tahini for a nutty depth that transforms the everyday into something quietly special.
Tupperware-style Greek yogurt parfait
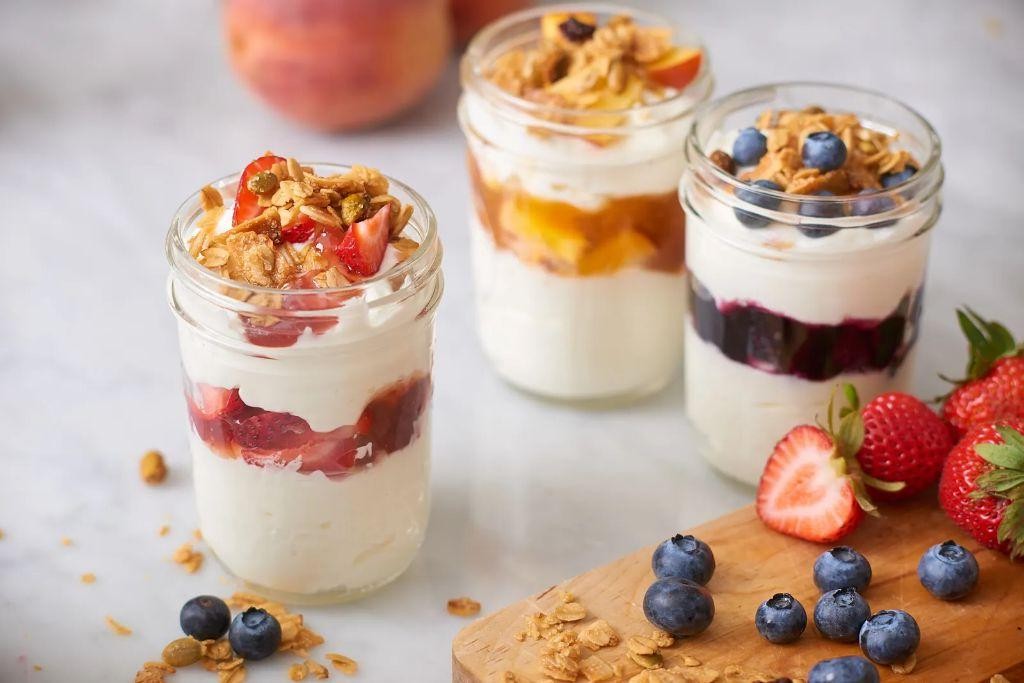
Often, the simplest meals are the ones we return to, the quiet rituals that fit into a lunchbox and feel like a small kindness to oneself. On a busy morning, this layered parfait, assembled in a humble container, becomes a portable promise of something creamy and sweet.
Serving: 1 | Pre Time: 10 minutes | Cooking Time: 0 minutes
Ingredients
For the base and layers:
– 1 cup plain Greek yogurt (full-fat recommended for creaminess)
– 1/4 cup granola
– 1/2 cup mixed fresh berries (such as blueberries and raspberries)
– 1 tablespoon honey
Instructions
1. Select a clean, 16-ounce Tupperware-style container with a tight-fitting lid.
2. Spoon exactly 1/2 cup of the plain Greek yogurt into the bottom of the container, spreading it into an even layer with the back of the spoon.
3. Sprinkle 2 tablespoons of the granola evenly over the yogurt layer to create a crunchy base.
4. Arrange 1/4 cup of the mixed fresh berries in a single layer over the granola, gently pressing them down.
5. Spoon the remaining 1/2 cup of plain Greek yogurt on top of the berries, covering them completely.
6. Drizzle 1 tablespoon of honey in a slow, circular motion over the top yogurt layer.
7. Sprinkle the remaining 2 tablespoons of granola evenly over the honey.
8. Top with the final 1/4 cup of mixed fresh berries, distributing them for visual appeal.
9. Secure the lid tightly on the container and refrigerate for at least 30 minutes before serving to allow the flavors to meld.
But the true joy is in the contrast: the thick, tangy yogurt softens the granola slightly, while the berries burst with juice against the creamy backdrop. For a creative twist, try drizzling with a teaspoon of almond butter instead of honey, or layer in sliced bananas for extra sweetness that holds up well in the fridge.
Tupperware-friendly pasta salad
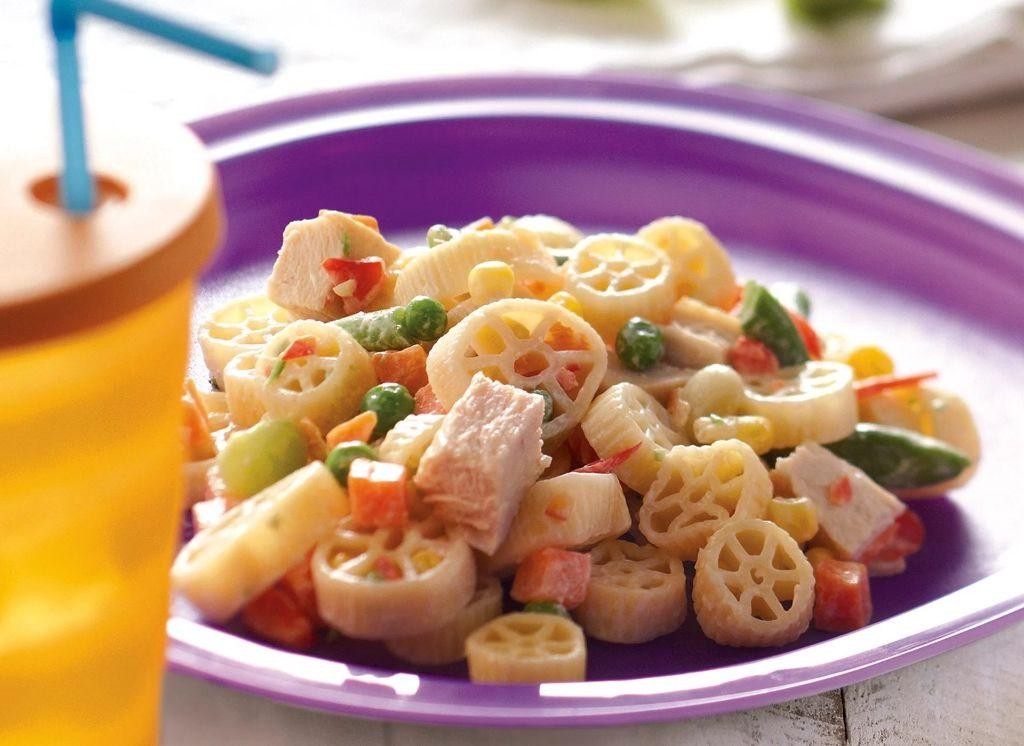
Dusk settles softly outside my window, and I find myself drawn to the kitchen, not for a grand feast but for something simpler—a quiet meal that feels like a gentle pause. This pasta salad, with its humble ingredients and forgiving nature, is the kind of dish that waits patiently in the Tupperware, ready to offer comfort whenever the moment calls.
Serving: 6 | Pre Time: 20 minutes | Cooking Time: 10 minutes
Ingredients
For the pasta and vegetables:
– 12 ounces rotini pasta
– 1 cup cherry tomatoes, halved
– 1 cup cucumber, diced into 1/2-inch pieces
– 1/2 cup red onion, finely chopped
For the dressing:
– 1/2 cup mayonnaise
– 1/4 cup sour cream
– 2 tablespoons red wine vinegar
– 1 teaspoon dried oregano
– 1/2 teaspoon garlic powder
– 1/4 teaspoon black pepper
Instructions
1. Bring a large pot of salted water to a rolling boil over high heat. Tip: Salting the water now enhances the pasta’s flavor from within.
2. Add 12 ounces of rotini pasta to the boiling water and cook for 8–10 minutes, stirring occasionally, until al dente (tender but firm to the bite).
3. Drain the pasta in a colander and rinse immediately under cold running water for 1 minute to stop the cooking process. Tip: Rinsing prevents the pasta from sticking together as it cools.
4. Transfer the cooled pasta to a large mixing bowl.
5. Add 1 cup of halved cherry tomatoes, 1 cup of diced cucumber, and 1/2 cup of finely chopped red onion to the bowl with the pasta.
6. In a small bowl, whisk together 1/2 cup of mayonnaise, 1/4 cup of sour cream, 2 tablespoons of red wine vinegar, 1 teaspoon of dried oregano, 1/2 teaspoon of garlic powder, and 1/4 teaspoon of black pepper until smooth and fully combined.
7. Pour the dressing over the pasta and vegetables in the large mixing bowl.
8. Gently toss everything together with a large spoon or spatula for 2–3 minutes, ensuring all ingredients are evenly coated with the dressing. Tip: Tossing gently helps keep the vegetables intact for a better texture.
9. Cover the bowl with plastic wrap or transfer the salad to an airtight container and refrigerate for at least 1 hour before serving to allow the flavors to meld.
Each bite offers a delightful contrast—the pasta’s tender chew against the crisp vegetables, all bound by a creamy, tangy dressing with subtle herbal notes. Enjoy it straight from the fridge for a cool lunch, or pair it with grilled chicken for a heartier meal on a warm evening.
Portable fruit salad in Tupperware
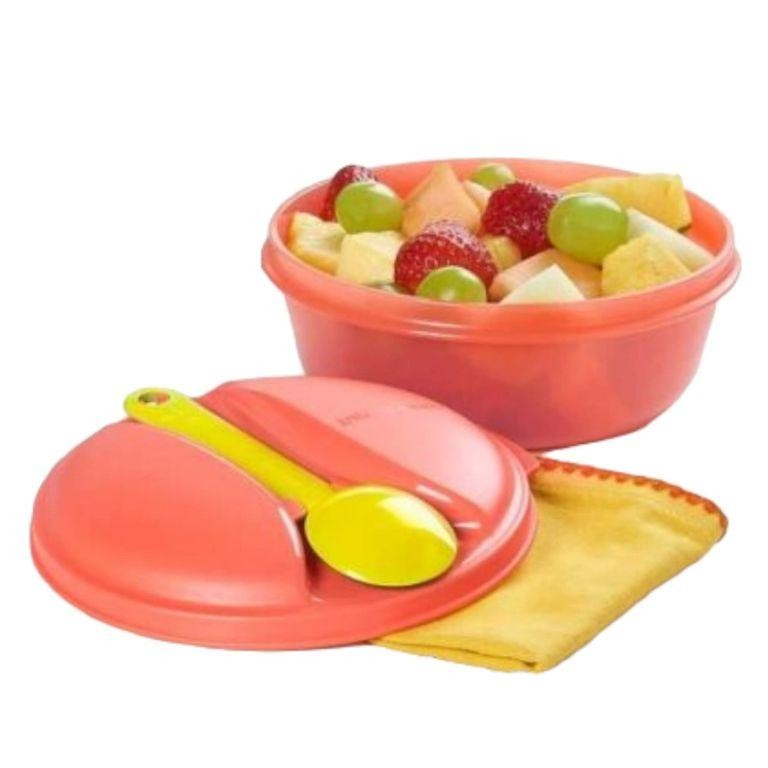
Zipping up my lunch bag this morning, I realized how much I crave something fresh and bright amid the winter gray—a little portable sunshine to carry through the day. This simple fruit salad, tucked into a trusty container, feels like a quiet promise to myself, a small act of care that travels wherever I go. It’s less a recipe and more a gentle reminder to pause and savor the sweetness we can hold in our hands.
Serving: 4 | Pre Time: 15 minutes | Cooking Time: 0 minutes
Ingredients
For the fruit base:
– 1 cup fresh strawberries, hulled and quartered
– 1 cup fresh blueberries
– 1 cup fresh pineapple chunks (about 1/2-inch pieces)
– 1 medium apple, cored and diced (about 1 cup)
– 1 medium banana, sliced into 1/4-inch rounds
For the dressing:
– 2 tbsp fresh lime juice
– 1 tbsp honey
– 1 tsp fresh mint leaves, finely chopped
Instructions
1. Rinse the strawberries, blueberries, and pineapple chunks under cold running water, then pat them completely dry with a clean kitchen towel to prevent sogginess.
2. Hull the strawberries by removing the green stem and leafy top, then slice each strawberry into four equal quarters.
3. Core the apple using an apple corer or a small knife, then dice it into 1/2-inch pieces to ensure even texture in the salad.
4. Slice the banana into 1/4-inch thick rounds just before assembling to minimize browning and maintain freshness.
5. In a small bowl, whisk together the fresh lime juice, honey, and finely chopped mint leaves until the honey is fully dissolved into the mixture.
6. Combine the strawberries, blueberries, pineapple chunks, diced apple, and banana slices in a large mixing bowl.
7. Pour the lime-honey dressing over the fruit mixture, then use a gentle folding motion with a spatula to coat all pieces evenly without crushing the softer fruits.
8. Divide the dressed fruit salad equally among four airtight containers, such as Tupperware, sealing each lid tightly to lock in freshness.
9. Refrigerate the containers for at least 30 minutes before serving to allow the flavors to meld and chill thoroughly.
Now, the salad settles into a medley where the crisp apple and pineapple play against the tender give of banana and berries, all brightened by that zesty lime kiss. I love packing it for a picnic or layering it over yogurt for a quick breakfast—it’s a humble, handheld joy that feels like a little secret sweetness waiting to be discovered.
Tupperware-style egg muffins
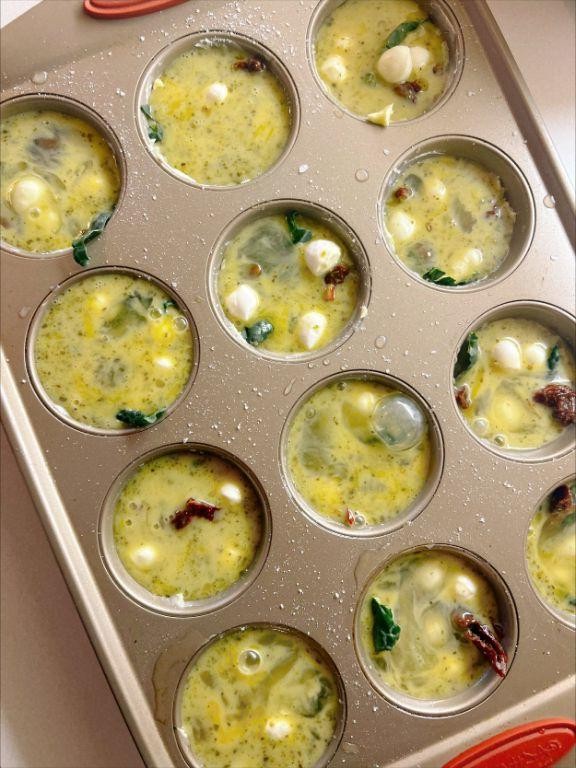
Perhaps there’s something quietly comforting about a recipe that feels both familiar and new, like rediscovering an old friend in a fresh light. These Tupperware-style egg muffins are just that—a simple, make-ahead breakfast that fits neatly into the rhythm of busy mornings, offering warmth and nourishment with minimal fuss. They remind me of those quiet moments in the kitchen before the day begins, where a little preparation can bring so much ease.
Serving: 12 | Pre Time: 15 minutes | Cooking Time: 25 minutes
Ingredients
For the egg base:
– 8 large eggs
– 1/2 cup whole milk
– 1/2 teaspoon salt
– 1/4 teaspoon black pepper
For the filling:
– 1 cup shredded cheddar cheese
– 1/2 cup diced bell peppers
– 1/4 cup chopped green onions
– 1/2 cup cooked and crumbled breakfast sausage
Instructions
1. Preheat your oven to 350°F and lightly grease a 12-cup muffin tin with non-stick cooking spray.
2. In a large mixing bowl, crack 8 large eggs and whisk them vigorously until the yolks and whites are fully combined, about 30 seconds.
3. Add 1/2 cup whole milk, 1/2 teaspoon salt, and 1/4 teaspoon black pepper to the eggs, and whisk again until the mixture is smooth and uniform in color.
4. Evenly distribute 1/2 cup diced bell peppers, 1/4 cup chopped green onions, and 1/2 cup cooked and crumbled breakfast sausage among the 12 muffin cups.
5. Pour the egg mixture over the fillings in each muffin cup, filling them about 3/4 full to allow for rising during baking.
6. Sprinkle 1 cup shredded cheddar cheese evenly over the top of each filled muffin cup.
7. Place the muffin tin in the preheated oven and bake at 350°F for 20-25 minutes, or until the egg muffins are set in the center and the tops are lightly golden brown.
8. Remove the muffin tin from the oven and let the egg muffins cool in the tin for 5 minutes to firm up before gently loosening them with a butter knife.
9. Transfer the egg muffins to a wire rack to cool completely, about 10 minutes, then store them in an airtight container in the refrigerator for up to 4 days.
Fluffy and tender, these egg muffins have a soft, almost custard-like texture that pairs beautifully with the savory crunch of peppers and the richness of cheese. Serve them warm with a dollop of salsa or avocado slices for a bright contrast, or pack them cold for a satisfying grab-and-go snack that feels like a little hug from your kitchen.
Meal-prep turkey wraps in Tupperware
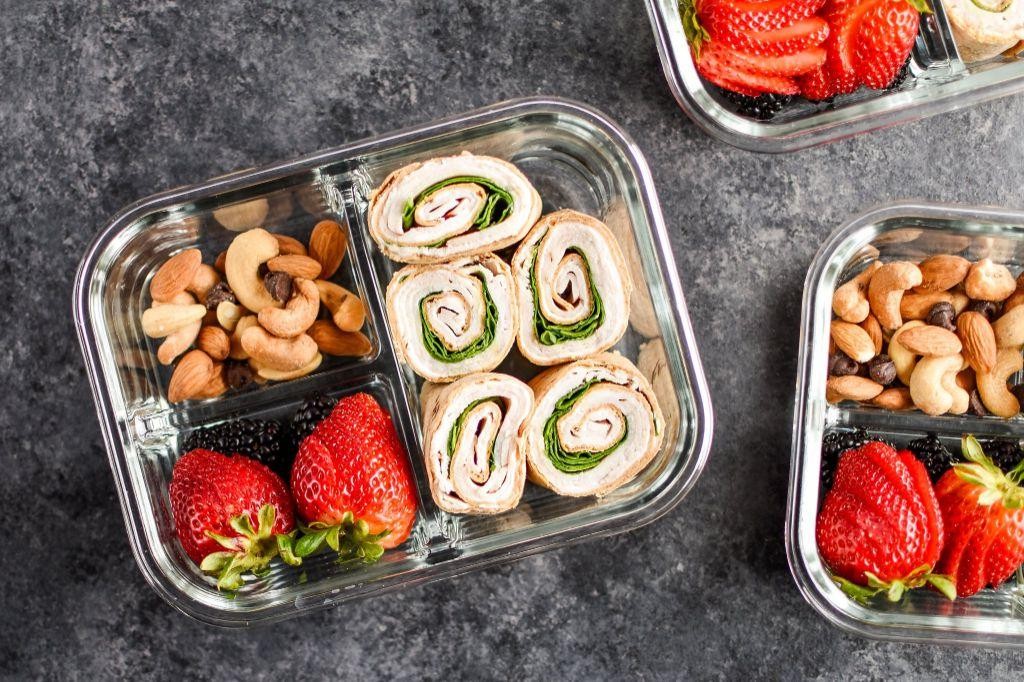
Yesterday, as the afternoon light faded into evening, I found myself standing in the quiet kitchen, thinking about the week ahead and the simple, comforting ritual of preparing food that will carry me through it. There’s a gentle satisfaction in assembling these wraps, a quiet promise of nourishment tucked neatly away. It’s a small act of care for the future self who will be grateful for the ready-made meal.
Serving: 4 | Pre Time: 15 minutes | Cooking Time: 0 minutes
Ingredients
For the filling
– 1 lb cooked turkey breast, shredded
– 1/2 cup plain Greek yogurt
– 1/4 cup mayonnaise
– 1 tbsp Dijon mustard
– 1/2 tsp garlic powder
– 1/4 tsp black pepper
– 1/4 tsp salt
For assembly
– 4 large flour tortillas (10-inch diameter)
– 2 cups romaine lettuce, shredded
– 1 large tomato, diced
– 1/2 cup shredded cheddar cheese
Instructions
1. Place the shredded turkey breast in a large mixing bowl.
2. Add the Greek yogurt, mayonnaise, Dijon mustard, garlic powder, black pepper, and salt to the bowl with the turkey.
3. Use a rubber spatula to fold all ingredients together until the turkey is evenly coated with the creamy mixture. Tip: Folding gently prevents the turkey from becoming mushy and helps maintain a pleasant texture.
4. Lay one flour tortilla flat on a clean work surface.
5. Spoon one-quarter of the turkey mixture onto the center of the tortilla, spreading it into an even horizontal line.
6. Top the turkey mixture with 1/2 cup of shredded romaine lettuce.
7. Sprinkle 1/4 of the diced tomato evenly over the lettuce.
8. Sprinkle 2 tablespoons of shredded cheddar cheese over the tomato. Tip: Keeping the fillings in a tight, central line makes rolling the wrap much easier and prevents tearing.
9. Fold the bottom edge of the tortilla up over the fillings, then fold in the left and right sides.
10. Roll the wrap tightly away from you to form a secure cylinder. Tip: For the neatest presentation and to prevent leaks, wrap each finished cylinder snugly in plastic wrap before placing it in your container.
11. Repeat steps 4 through 10 with the remaining three tortillas and fillings.
12. Place each finished wrap into an airtight container or Tupperware.
Because the turkey is already cooked, these wraps are wonderfully cool and refreshing, with the creamy dressing clinging to every shred of meat. The crisp lettuce and juicy tomato provide a bright contrast, while the soft tortilla holds everything together in a perfectly portable package. Try serving them alongside a handful of salty potato chips or with a small cup of fruit salad for a complete, effortless lunch.
Tupperware-friendly lentil soup
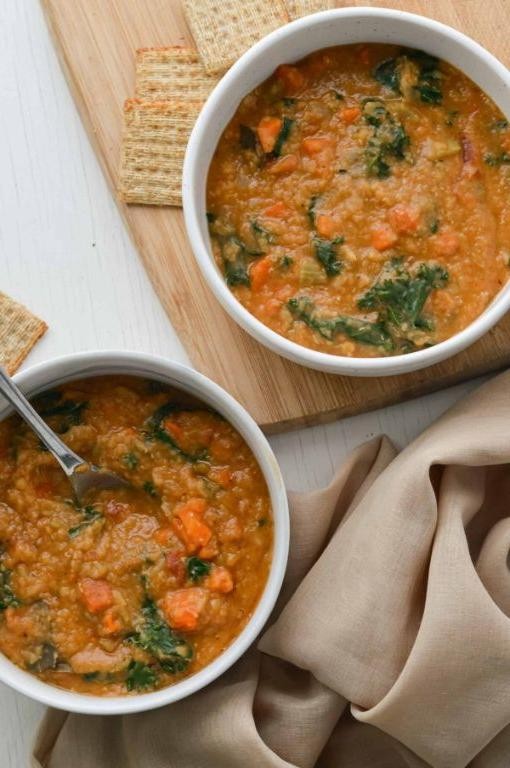
Wandering through the quiet kitchen as evening settles, I find myself drawn to the simple comfort of a pot simmering on the stove, its earthy aroma promising warmth that will linger through the week. This lentil soup is a gentle companion, made for tucking into containers and finding solace in later, when time feels short and the world outside is cold.
Serving: 6 | Pre Time: 15 minutes | Cooking Time: 45 minutes
Ingredients
For the Base
– 2 tablespoons olive oil
– 1 large yellow onion, diced
– 3 cloves garlic, minced
– 2 large carrots, peeled and diced
– 2 celery stalks, diced
For the Soup
– 1 cup brown lentils, rinsed
– 6 cups vegetable broth
– 1 (14.5-ounce) can diced tomatoes
– 1 teaspoon dried thyme
– 1 bay leaf
– 1 teaspoon salt
– 1/2 teaspoon black pepper
For Finishing
– 2 tablespoons fresh lemon juice
– 1/4 cup chopped fresh parsley
Instructions
1. Heat the olive oil in a large pot over medium heat until it shimmers, about 1 minute.
2. Add the diced onion and cook, stirring occasionally, until translucent and soft, about 5 minutes.
3. Stir in the minced garlic and cook for 1 minute, just until fragrant to avoid burning.
4. Add the diced carrots and celery, cooking for 5 minutes until they begin to soften.
5. Pour in the rinsed lentils, vegetable broth, diced tomatoes with their juices, dried thyme, bay leaf, salt, and black pepper.
6. Bring the mixture to a boil over high heat, then reduce to a low simmer.
7. Cover the pot and simmer for 35 minutes, stirring once halfway through, until the lentils are tender but not mushy.
8. Remove the pot from heat and discard the bay leaf.
9. Stir in the fresh lemon juice and chopped parsley until evenly distributed.
Ladling this soup reveals a hearty, brothy texture where the lentils hold their shape, offering a subtle earthiness brightened by lemon. It deepens in flavor overnight, making it ideal for packing with a slice of crusty bread or swirling with a spoonful of yogurt for a creamy contrast.
Portable hummus and veggie sticks in Tupperware
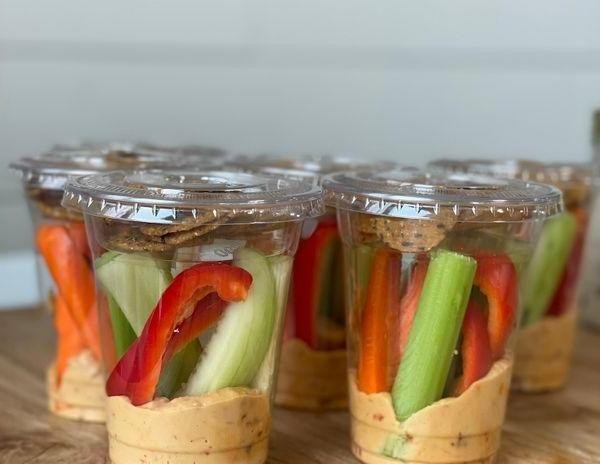
Maybe it’s the quiet hum of the refrigerator at this hour, or the simple act of washing vegetables under cool water, but preparing this portable lunch feels less like a chore and more like a small, grounding ritual. There’s a gentle satisfaction in knowing exactly what you’ll eat later, each component chosen and placed with care into its own little container. It’s a quiet promise to your future self, tucked away until needed.
Serving: 1 | Pre Time: 15 minutes | Cooking Time: 0 minutes
Ingredients
For the hummus:
– 1 (15-ounce) can chickpeas, drained and rinsed
– 1/4 cup tahini
– 3 tablespoons fresh lemon juice
– 1 small garlic clove, minced
– 2 tablespoons extra-virgin olive oil
– 1/4 teaspoon ground cumin
– 1/4 teaspoon fine sea salt
– 2 to 3 tablespoons ice water
For the veggie sticks:
– 1 medium carrot, peeled
– 1 medium cucumber
– 1 bell pepper (any color), stem and seeds removed
Instructions
1. Place the drained chickpeas, tahini, lemon juice, minced garlic, olive oil, cumin, and salt into the bowl of a food processor.
2. Secure the lid on the food processor and process the mixture on high speed for 60 seconds, stopping once to scrape down the sides with a rubber spatula to ensure everything is incorporated evenly.
3. With the processor running on low speed, slowly drizzle in 2 tablespoons of ice water through the feed tube and process for 30 seconds until the mixture is very smooth. Tip: Using ice water helps create an exceptionally creamy texture.
4. Check the hummus consistency; if it seems too thick, add the remaining 1 tablespoon of ice water and process for another 15 seconds.
5. Transfer the finished hummus into a small, airtight container, smoothing the top with the back of a spoon.
6. Using a sharp chef’s knife, cut the peeled carrot and cucumber into sticks roughly 3 inches long and 1/2 inch thick.
7. Cut the bell pepper into strips of similar size, about 3 inches long and 3/4 inch wide. Tip: Cutting vegetables to a uniform size ensures they will be easy to dip and pleasant to eat.
8. Arrange the carrot, cucumber, and bell pepper sticks neatly in a separate compartment of your container or in their own small container. Tip: Placing a paper towel at the bottom of the veggie container can help absorb excess moisture and keep everything crisp.
9. Seal both containers tightly and refrigerate until ready to pack, for up to 24 hours.
Overtly creamy and flecked with specks of chickpea skin, the hummus carries the bright tang of lemon and the earthy warmth of cumin. The vegetable sticks provide a satisfying, fresh crunch that contrasts beautifully with the smooth dip. For a different twist, try swapping the carrot sticks for crisp jicama or radish slices, or sprinkle the hummus with a pinch of smoked paprika just before serving.
Tupperware-style tuna salad
Just now, as the evening light fades on this quiet Christmas Eve, I find myself drawn to the kitchen, to the simple comfort of a recipe that feels like a gentle exhale. It’s a dish born from practicality and quiet moments, a familiar friend waiting in the fridge.
Serving: 4 | Pre Time: 15 minutes | Cooking Time: 0 minutes
Ingredients
For the base:
– 2 (5-ounce) cans solid white albacore tuna in water, drained
– 2 large hard-boiled eggs, peeled and chopped
– 1/4 cup finely diced celery
– 2 tablespoons finely diced red onion
For the dressing:
– 1/3 cup mayonnaise
– 1 tablespoon Dijon mustard
– 1 tablespoon fresh lemon juice
– 1/4 teaspoon kosher salt
– 1/8 teaspoon freshly ground black pepper
Instructions
1. Place the drained tuna into a medium mixing bowl and flake it thoroughly with a fork until no large chunks remain.
2. Add the chopped hard-boiled eggs, diced celery, and diced red onion to the bowl with the tuna.
3. In a separate small bowl, combine the mayonnaise, Dijon mustard, fresh lemon juice, kosher salt, and black pepper. Whisk these ingredients together for about 30 seconds until completely smooth and emulsified.
4. Pour the prepared dressing over the tuna and vegetable mixture in the medium bowl.
5. Using a rubber spatula, gently fold all the ingredients together. Continue folding for 1-2 minutes until every component is evenly coated with the dressing, being careful not to over-mix and break down the tuna too much.
6. Taste the salad and, if desired, adjust the seasoning with an additional small pinch of salt.
7. For the best flavor, cover the bowl tightly with plastic wrap and refrigerate the tuna salad for at least 30 minutes to allow the flavors to meld.
8. After chilling, give the salad one final gentle stir before serving.
The texture is wonderfully creamy yet retains little pops of crunch from the celery, while the flavor is bright from the lemon and deeply savory. Try it scooped onto buttery crackers for a quick snack, or piled into an avocado half for a lush, no-bread lunch.
Meal-prep black bean burrito bowls in Tupperware
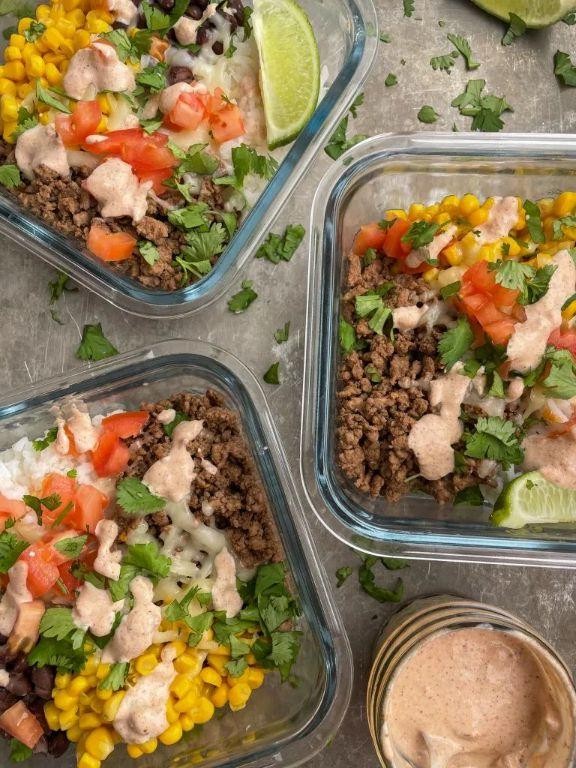
Holding this warm Tupperware in my hands, I’m reminded how these simple black bean burrito bowls turn a hectic week into something gently nourishing. They’re a quiet promise to my future self, a little assembly of comfort waiting in the fridge.
Serving: 4 | Pre Time: 15 minutes | Cooking Time: 25 minutes
Ingredients
For the Rice & Beans:
– 1 cup long-grain white rice
– 2 cups water
– 1 tablespoon olive oil
– 1 small yellow onion, diced
– 2 cloves garlic, minced
– 1 (15-ounce) can black beans, drained and rinsed
– 1 teaspoon ground cumin
– 1/2 teaspoon chili powder
For the Roasted Vegetables:
– 1 large bell pepper, sliced
– 1 cup corn kernels (fresh or frozen)
– 1 tablespoon olive oil
– 1/4 teaspoon salt
For Assembly:
– 1 cup shredded Monterey Jack cheese
– 1/2 cup salsa
– 1/4 cup sour cream
– 1/4 cup fresh cilantro, chopped
Instructions
1. Preheat your oven to 425°F (218°C).
2. Rinse 1 cup of long-grain white rice under cold water until the water runs clear.
3. In a medium saucepan, combine the rinsed rice and 2 cups of water. Bring to a boil over high heat.
4. Once boiling, reduce the heat to low, cover the saucepan, and simmer for 18 minutes. Tip: Avoid lifting the lid during cooking to ensure perfectly fluffy rice.
5. Remove the saucepan from the heat and let the rice sit, covered, for 5 minutes. Then, fluff it with a fork.
6. While the rice cooks, toss 1 large sliced bell pepper and 1 cup of corn kernels with 1 tablespoon of olive oil and 1/4 teaspoon of salt on a baking sheet.
7. Spread the vegetables in a single layer and roast them in the preheated oven for 20 minutes, or until the pepper edges are lightly charred.
8. Heat 1 tablespoon of olive oil in a skillet over medium heat. Add 1 diced small yellow onion and cook for 5 minutes, until translucent.
9. Add 2 minced garlic cloves to the skillet and cook for 1 minute, until fragrant.
10. Stir in 1 drained and rinsed 15-ounce can of black beans, 1 teaspoon of ground cumin, and 1/2 teaspoon of chili powder. Cook for 3 minutes, until heated through. Tip: Gently mash a few beans with the back of your spoon to help thicken the mixture.
11. Assemble the bowls in four Tupperware containers. Divide the cooked rice evenly among them.
12. Top each portion of rice with the black bean mixture and the roasted vegetables.
13. Add 1/4 cup of shredded Monterey Jack cheese, 2 tablespoons of salsa, 1 tablespoon of sour cream, and 1 tablespoon of chopped fresh cilantro to each bowl. Tip: For the best texture, add the sour cream and salsa just before eating if you’re meal-prepping for more than two days.
14. Seal the containers and refrigerate for up to 4 days.
Just a few days later, the flavors have mingled into something wonderfully cohesive—the creamy beans against the bright, charred vegetables, all held together by the fluffy rice. I love taking a container straight to the park, letting the cool cheese and warm ingredients create their own quiet contrast in the sun.
Tupperware-friendly chia pudding
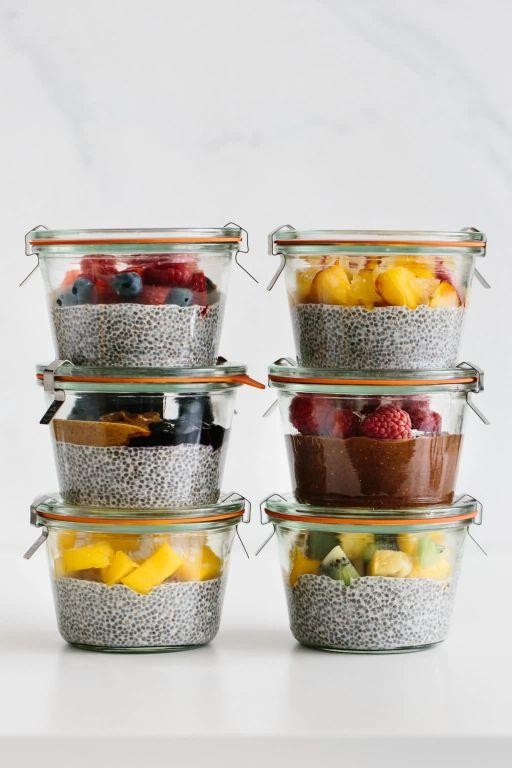
Wandering through the quiet kitchen this evening, I find myself craving something simple yet nourishing—a gentle treat that can be tucked away for tomorrow’s busy moments. This chia pudding is just that: a soft, forgiving recipe that comes together with little effort, ready to wait patiently in the fridge until you need it. It’s a small act of care for future-you, wrapped up in a humble Tupperware container.
Serving: 2 | Pre Time: 5 minutes | Cooking Time: 0 minutes
Ingredients
For the pudding base:
– 1/2 cup chia seeds
– 1 1/2 cups unsweetened almond milk
– 2 tbsp pure maple syrup
– 1 tsp pure vanilla extract
For serving (optional):
– 1/4 cup fresh berries (such as raspberries or blueberries)
– 2 tbsp sliced almonds
Instructions
1. In a medium mixing bowl, combine 1/2 cup chia seeds and 1 1/2 cups unsweetened almond milk.
2. Add 2 tbsp pure maple syrup and 1 tsp pure vanilla extract to the bowl.
3. Whisk the mixture vigorously for 30 seconds to prevent clumping, ensuring all ingredients are fully incorporated.
4. Let the mixture sit undisturbed for 5 minutes to allow the chia seeds to begin absorbing the liquid.
5. Whisk the pudding again for 15 seconds to break up any seeds that have stuck together.
6. Cover the bowl tightly with plastic wrap or a lid, pressing it directly onto the surface of the pudding to prevent a skin from forming.
7. Refrigerate the pudding for at least 4 hours, or ideally overnight, until it thickens to a spoonable, gel-like consistency.
8. Divide the chilled pudding evenly between two serving containers or Tupperware jars.
9. Top each serving with 2 tbsp of fresh berries and 1 tbsp of sliced almonds, if desired.
You’ll notice the pudding sets into a soft, tapioca-like texture with a subtle nutty sweetness from the maple. Try layering it in a glass with granola for a parfait, or stir in a spoonful of cocoa powder before chilling for a chocolatey twist—it’s wonderfully adaptable to whatever your day brings.
Portable caprese salad in Tupperware
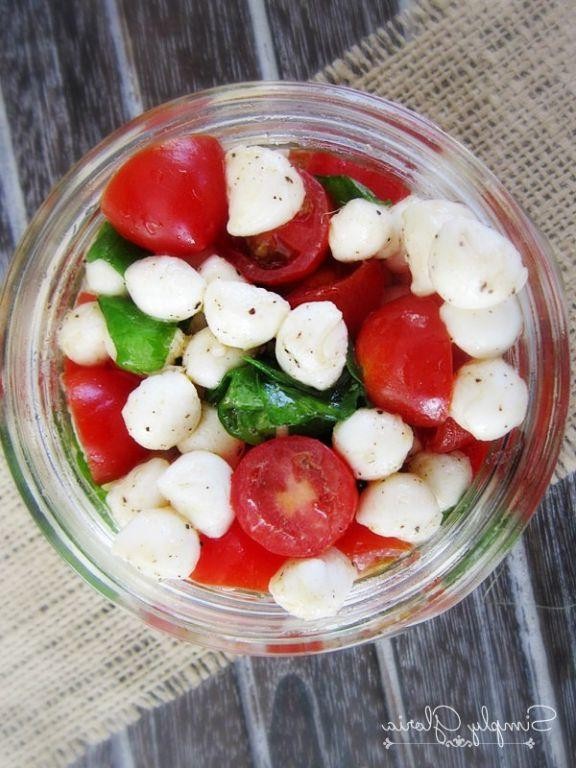
Now, as the evening settles in on this quiet December day, I find myself thinking about those simple meals that travel with us—the ones we pack with care, hoping they’ll hold a bit of comfort wherever we go. This portable caprese salad is just that: a layered, no-fuss assembly of fresh ingredients meant to be tucked into a container and enjoyed later, wherever you might be.
Serving: 2 | Pre Time: 15 minutes | Cooking Time: 0 minutes
Ingredients
For the salad base:
– 2 cups cherry tomatoes, halved
– 8 ounces fresh mozzarella cheese, cut into 1/2-inch cubes
– 1/4 cup fresh basil leaves, torn
For the dressing:
– 2 tablespoons extra-virgin olive oil
– 1 tablespoon balsamic vinegar
– 1/4 teaspoon salt
– 1/8 teaspoon black pepper
Instructions
1. Place the halved cherry tomatoes in a medium mixing bowl.
2. Add the cubed fresh mozzarella cheese to the bowl with the tomatoes.
3. In a small separate bowl, whisk together the extra-virgin olive oil and balsamic vinegar until fully combined.
4. Sprinkle the salt and black pepper into the dressing mixture and whisk again to incorporate evenly.
5. Pour the dressing over the tomatoes and mozzarella in the mixing bowl.
6. Using a gentle folding motion with a spatula, toss the ingredients until everything is lightly coated with the dressing.
7. Fold in the torn fresh basil leaves, being careful not to crush them, to distribute them throughout the salad.
8. Divide the salad evenly between two airtight containers, such as Tupperware, packing it gently to avoid compressing the ingredients.
9. Seal the containers tightly and refrigerate them for at least 30 minutes before serving to allow the flavors to meld.
Vivid and refreshing, this salad offers a juicy burst from the tomatoes against the creamy, mild mozzarella, all brightened by the basil and tangy dressing. For a creative twist, try layering it in a jar with the dressing at the bottom to keep the basil vibrant until you’re ready to eat.
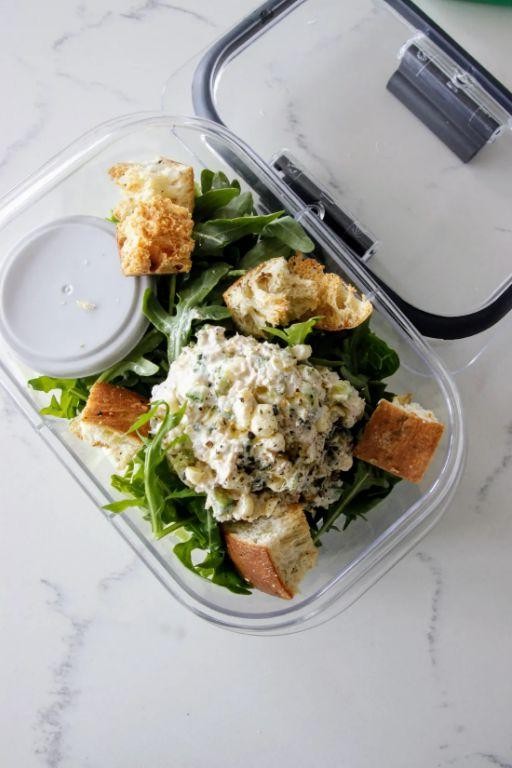
Tupperware-style chicken Caesar salad

Venturing into the quiet corners of my kitchen, I find comfort in the familiar rhythm of assembling a meal meant to last, a salad that holds its own through the week. It’s a gentle, practical ritual, this making of a Tupperware-style chicken Caesar salad, where crispness is preserved and flavors are allowed to meld softly over time.
Serving: 4 | Pre Time: 20 minutes | Cooking Time: 15 minutes
Ingredients
For the chicken:
– 1 lb boneless, skinless chicken breasts
– 2 tbsp olive oil
– 1/2 tsp kosher salt
– 1/4 tsp black pepper
For the salad base:
– 1 large head romaine lettuce, chopped into bite-sized pieces
– 1/2 cup grated Parmesan cheese
– 1 cup croutons
For the dressing:
– 1/2 cup mayonnaise
– 2 tbsp fresh lemon juice
– 2 cloves garlic, minced
– 2 anchovy fillets, minced (optional for a traditional flavor)
– 1/4 cup grated Parmesan cheese
– 1/4 tsp black pepper
Instructions
1. Preheat a skillet over medium-high heat and add 2 tbsp olive oil, heating until it shimmers lightly, about 2 minutes.
2. Season 1 lb chicken breasts evenly with 1/2 tsp kosher salt and 1/4 tsp black pepper on both sides.
3. Place the chicken in the skillet and cook for 6-7 minutes per side, until the internal temperature reaches 165°F and the exterior is golden brown.
4. Transfer the chicken to a cutting board, let it rest for 5 minutes to retain juices, then slice it into thin strips.
5. In a small bowl, whisk together 1/2 cup mayonnaise, 2 tbsp lemon juice, 2 minced garlic cloves, 2 minced anchovy fillets (if using), 1/4 cup grated Parmesan, and 1/4 tsp black pepper until smooth.
6. Tip: For a creamier dressing, let it sit for 10 minutes to allow the flavors to blend.
7. In a large mixing bowl, combine the chopped romaine lettuce, sliced chicken, and 1/2 cup grated Parmesan.
8. Pour the dressing over the salad and toss gently until everything is evenly coated.
9. Tip: Add the dressing just before serving to keep the lettuce crisp if not storing immediately.
10. Divide the salad among four airtight containers, topping each with 1/4 cup croutons to maintain crunch.
11. Tip: Layer the croutons on top to prevent them from becoming soggy during storage.
12. Seal the containers and refrigerate for up to 3 days.
After a day in the fridge, the lettuce softens slightly while the chicken absorbs the garlicky, tangy dressing, creating a harmonious blend that’s both refreshing and satisfying. Serve it straight from the container for a quick lunch, or plate it with extra Parmesan shavings and a squeeze of lemon to brighten the flavors on a busy afternoon.
Meal-prep roasted vegetables in Tupperware
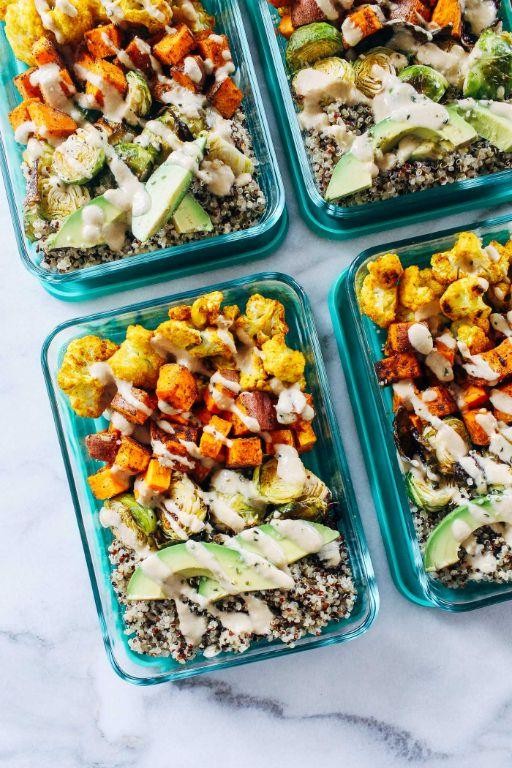
Gently, as the week unfolds with its predictable rhythms, I find myself returning to this simple ritual—a quiet hour in the kitchen transforming humble roots and bulbs into a week’s worth of golden, caramelized promise, all tucked neatly into waiting containers.
Serving: 4 | Prep Time: 15 minutes | Cooking Time: 35 minutes
Ingredients
For the vegetables:
– 1 large sweet potato, peeled and cut into 1-inch cubes
– 2 medium carrots, peeled and cut into 1/2-inch rounds
– 1 small head of broccoli, cut into florets (about 3 cups)
– 1 red bell pepper, seeded and cut into 1-inch strips
– 1 yellow onion, peeled and cut into 1-inch wedges
For the seasoning:
– 3 tablespoons olive oil
– 1 teaspoon garlic powder
– 1 teaspoon dried rosemary
– 1/2 teaspoon kosher salt
– 1/4 teaspoon black pepper
Instructions
1. Preheat your oven to 425°F (218°C) and line a large, rimmed baking sheet with parchment paper.
2. Place the prepared sweet potato cubes, carrot rounds, broccoli florets, bell pepper strips, and onion wedges into a large mixing bowl.
3. In a small bowl, whisk together the 3 tablespoons of olive oil, 1 teaspoon of garlic powder, 1 teaspoon of dried rosemary, 1/2 teaspoon of kosher salt, and 1/4 teaspoon of black pepper until fully combined.
4. Pour the seasoned oil mixture over the vegetables in the large bowl.
5. Using your hands or a large spoon, toss the vegetables thoroughly until every piece is lightly and evenly coated with the oil and seasoning.
6. Spread the coated vegetables in a single, even layer on the prepared baking sheet, ensuring they are not crowded to allow for proper roasting and browning.
7. Place the baking sheet in the preheated oven and roast for 20 minutes.
8. After 20 minutes, carefully remove the baking sheet from the oven. Using a spatula, flip and stir the vegetables to promote even cooking and browning on all sides.
9. Return the baking sheet to the oven and continue roasting for another 12 to 15 minutes, or until the vegetables are tender when pierced with a fork and have developed deep, caramelized edges and spots.
10. Remove the baking sheet from the oven and let the roasted vegetables cool completely on the sheet for about 15 to 20 minutes to prevent steaming in the storage container.
11. Once completely cool, transfer the roasted vegetables into an airtight container or divide them among meal-prep containers.
Even now, as I close the lid, the memory of their scent—earthy sweetness from the carrots and potatoes mingling with the savory, herbal notes of rosemary—lingers. The texture is a perfect contrast: tender interiors giving way to slightly crisp, caramelized edges that hold their shape beautifully in a grain bowl or as a vibrant side, reheated gently until just warm.
Tupperware-friendly peanut butter energy bites
Perhaps it’s the quiet hum of the refrigerator at this late hour, or the gentle glow from the streetlamp outside the kitchen window, but there’s something deeply comforting about making a batch of these simple, sustaining bites. They require no oven, just a bowl and a bit of patience, transforming pantry staples into little parcels of energy that feel like a quiet promise to your future self.
Serving: 12 bites | Prep Time: 15 minutes | Cooking Time: 0 minutes
Ingredients
For the base mixture:
- 1 cup old-fashioned rolled oats
- 1/2 cup creamy peanut butter
- 1/3 cup honey
- 1 teaspoon pure vanilla extract
- 1/4 teaspoon fine sea salt
For mixing in:
- 1/4 cup ground flaxseed
- 1/4 cup mini chocolate chips
Instructions
- Measure 1 cup of old-fashioned rolled oats and pour them into a large mixing bowl.
- Add 1/2 cup of creamy peanut butter, 1/3 cup of honey, 1 teaspoon of pure vanilla extract, and 1/4 teaspoon of fine sea salt to the bowl with the oats.
- Use a sturdy spatula or a wooden spoon to stir the mixture vigorously for about 2 minutes, until all the ingredients are completely combined and a thick, cohesive dough forms. Tip: If the mixture seems too dry and crumbly, add another tablespoon of honey and stir again until it holds together.
- Add 1/4 cup of ground flaxseed and 1/4 cup of mini chocolate chips to the dough.
- Fold the flaxseed and chocolate chips into the dough until they are evenly distributed throughout.
- Cover the bowl with plastic wrap and place it in the refrigerator for 30 minutes to allow the dough to firm up, which will make rolling much easier.
- Remove the bowl from the refrigerator. Using a tablespoon or a small cookie scoop, portion the dough.
- Roll each portion between your palms for about 10 seconds to form a smooth, round ball approximately 1 inch in diameter. Tip: Lightly dampening your hands with water can prevent the sticky dough from clinging to your fingers.
- Place the formed energy bites on a plate or a small baking sheet lined with parchment paper.
- Once all bites are rolled, transfer the plate or baking sheet to the refrigerator for a final 1 hour to set completely. Tip: For longer storage, place the chilled bites in a single layer in an airtight container, separating layers with parchment paper to prevent sticking.
Each bite offers a wonderfully chewy texture from the oats, giving way to the rich, salty-sweet depth of peanut butter and the subtle crunch of flaxseed. Enjoy them straight from the fridge for a firm, cool treat, or let one sit on your desk for a few minutes to soften slightly, releasing the aroma of honey and vanilla. They’re perfect tucked into a lunchbox or savored with a cup of tea during a quiet afternoon pause.
Summary
A fantastic collection of 18 simple, make-ahead meals that turn your Tupperware into a week of delicious, stress-free lunches! We hope you find some new favorites to try. Don’t forget to leave a comment telling us which recipe you loved most and share this roundup on Pinterest to help other busy home cooks.


