Vividly, I can still picture my grandmother’s sun-drenched kitchen on Saturday mornings, the air thick with the promise of pancakes and the gentle hum of her old blender. She’d always whip up a special, creamy drink for us kids—a secret potion, she’d call it—to give us energy for the day’s adventures. That memory, warm and sweet as the vanilla she used, is the soul of this recipe, a simple shake transformed into a hug in a glass.
Why This Recipe Works
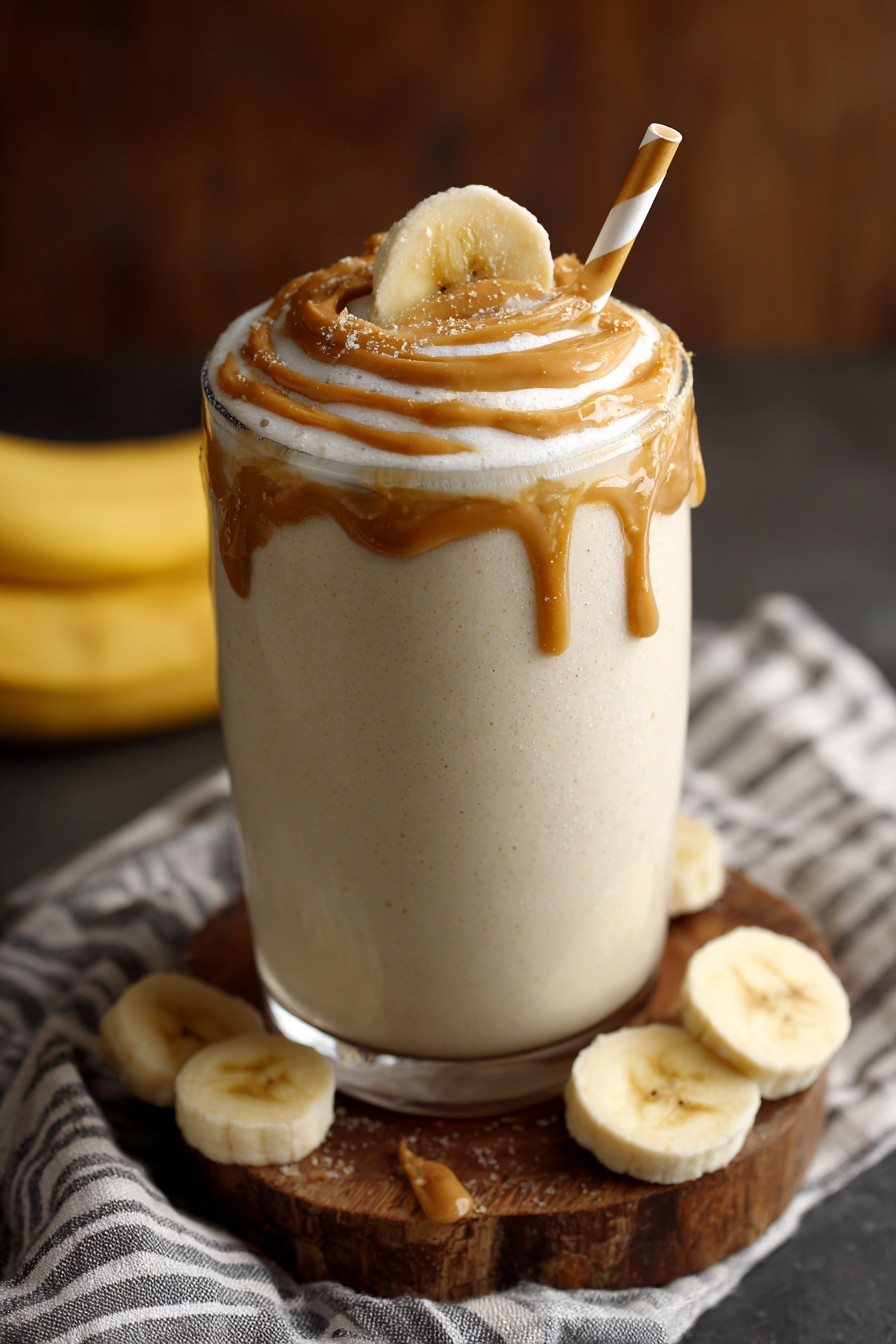
- Silky Texture: The combination of frozen banana and creamy almond milk creates a luxuriously smooth, milkshake-like consistency that feels indulgent, not chalky.
- Perfectly Balanced Sweetness: Ripe banana and a touch of pure maple syrup provide natural, nuanced sweetness that complements the vanilla without overwhelming it, just like Grandma used to balance flavors.
- Family-Friendly Nutrition: It packs a wholesome protein punch and healthy fats to keep everyone satisfied, making it a trustworthy snack you can feel good about serving.
- Effortless Customization: This shake is a beautiful blank canvas, easily adapted with different fruits, milks, or mix-ins to suit any picky eater or dietary need at your table.
Ingredients
- 1 cup unsweetened almond milk (or your family’s preferred milk)
- 1 large ripe banana, previously peeled, sliced, and frozen solid
- 1 scoop (about 30g) high-quality vanilla protein powder
- 1 tablespoon pure maple syrup (or honey)
- 1/2 teaspoon pure vanilla extract
- 1 tablespoon creamy almond butter (or peanut butter)
- A generous handful of ice cubes (about 1/2 cup)
- A tiny pinch of salt
Equipment Needed
- A high-speed blender
- Measuring cups and spoons
- A tall glass for serving
- A reusable straw (optional, but fun for the kids)
Instructions
Step 1: Gather Your Memories and Ingredients
Before you even touch the blender, take a moment. Pour that cup of almond milk into your measuring cup and let its gentle, nutty aroma remind you of simpler times. Slice that ripe banana if you haven’t already—its flecks of brown are like little specks of caramel, promising natural sweetness. Measure out your scoop of vanilla protein powder; think of it as the modern magic dust that gives this family treat its staying power. Get your maple syrup, vanilla extract, and that jar of almond butter ready on the counter, just like setting the table for a cherished guest. This act of preparation isn’t just about cooking; it’s a quiet ritual, connecting you to all the hands that have lovingly prepared food in your family’s history. Tip: For the creamiest result, ensure your banana is fully frozen solid—this is the secret to a shake that rivals any ice cream parlor treat without the guilt.
Step 2: The Heart of the Blend
Now, pour that cup of almond milk into the blender pitcher first. Listen to its soft splash—it’s the foundation. Next, carefully add your frozen banana slices. They might clatter a bit, but that’s okay. Follow with the scoop of vanilla protein powder, the tablespoon of maple syrup (its rich scent is pure autumn nostalgia), the half teaspoon of pure vanilla extract, and that generous tablespoon of creamy almond butter. Don’t forget the tiny pinch of salt; it’s the quiet hero that makes all the other flavors sing in harmony, just a whisper to elevate the whole composition. Finally, add that generous handful of ice cubes—about half a cup. They’ll ensure everything stays frosty and refreshing. Securely fasten the lid on your blender. This moment, with all the potential resting in that pitcher, always filled me with a childlike anticipation.
Step 3: Blending to Velvety Perfection
Place the blender on its base and start on the lowest setting. Let it run for about 10 seconds to begin breaking down the larger chunks. Then, gradually increase the speed to high. Let the machine work its magic for a full 45 to 60 seconds. You’re listening for a specific sound: the harsh, chunky noise should transform into a smooth, consistent whirl. Peek through the lid if you must. You’re looking for a completely homogeneous, thick, and creamy liquid with no visible bits of banana or powder. If it seems too thick and is struggling to blend, pause, and add another tablespoon or two of almond milk down the center opening of the lid with the blender off. Then, blend again for another 15-20 seconds until perfectly smooth. The goal is a texture so luxurious it coats the back of a spoon.
Step 4: The First Taste Test
Once the roar of the blender settles into silence, carefully remove the pitcher. Give it a gentle shake. The shake should move as one thick, unified body. Pour a tiny spoonful into a clean spoon. Taste it. This is the most important step, the one my grandma always did with a thoughtful look. Is it sweet enough for your family’s palate? The banana and maple syrup provide a base, but if you desire a touch more sweetness, add another teaspoon of maple syrup now and blend for just 5 more seconds. Is the vanilla flavor pronounced and warm? If not, another drop or two of pure extract can work wonders. This personal adjustment makes the recipe yours. Tip: For an extra-frosty, diner-style shake, you can blend in 3-4 additional ice cubes after tasting until fully incorporated.
Step 5: Serving with Love
Take your favorite tall glass—maybe one that holds memories of summer lemonade or holiday eggnog. Pour the shake from the pitcher in a steady, creamy stream, filling the glass nearly to the brim. If you’re feeling fancy, a quick dollop of whipped cream on top never hurt anybody and always brings a smile. Add a reusable straw if you like. Then, serve it immediately. The chill, the creamy texture, the comforting vanilla scent—it’s best enjoyed right away, shared with someone you love. Watch as they take that first sip, the cold glass in their hand, and see if it doesn’t transport them, too, to a place of simple, homemade joy. Tip: To keep it cold longer without excessive dilution, you can chill the serving glass in the freezer for 10 minutes before pouring.
Tips and Tricks
For a protein powder that blends seamlessly without grittiness, look for a “milkshake” or “casein” blend, as they tend to be creamier than pure whey isolates. If your family avoids nuts, sunflower seed butter is a fantastic, equally creamy substitute for almond butter, and oat milk makes a wonderfully rich and neutral dairy-free base. To save precious morning minutes, prep “smoothie packs” by slicing and freezing bananas in advance and storing them with pre-measured protein powder in portioned bags. If your shake separates after sitting, a quick 10-second re-blend will restore its perfect texture. And remember, the riper the banana, the sweeter and more potent the banana flavor will be—use one with plenty of brown spots for the best results.
Recipe Variations
- Chocolate-Dipped Strawberry: Add 1/2 cup of frozen strawberries and 1 tablespoon of unsweetened cocoa powder to the base recipe. It tastes like a nostalgic treat from the county fair.
- Cozy Cinnamon Spice: Stir in 1/2 teaspoon of ground cinnamon and a dash of nutmeg with the other ingredients. It transforms the shake into a liquid version of your favorite snickerdoodle cookie, perfect for crisp fall mornings.
- Tropical Escape: Replace the frozen banana with 1 cup of frozen mango chunks and add 2 tablespoons of canned coconut milk (full-fat for extra creaminess). Close your eyes, and you’re on a beach vacation.
- Peanut Butter Cup: Swap the almond butter for two tablespoons of peanut butter and add one tablespoon of cocoa powder. It’s a decadent, protein-packed homage to the classic candy bar we all loved as kids.
- Berry Blast: Use 1/2 cup of frozen mixed berries (blueberries, raspberries, blackberries) instead of the banana. The result is a vibrant, tangy, and antioxidant-rich shake that’s as pretty as it is delicious.
Frequently Asked Questions
Q: Can I make this shake without a banana?
A: Absolutely. The banana primarily provides creaminess and sweetness. For a similar texture, you can use 1/2 cup of frozen cauliflower rice (it’s flavorless!) or 1/4 of an avocado. You may need to increase the maple syrup slightly to compensate for the lost sweetness.
Q: My protein powder makes the shake too thick. What can I do?
A: Different powders have different absorbencies. Simply add more liquid, one tablespoon at a time, and blend between each addition until you reach your desired consistency. Remember, you can always add more liquid, but you can’t take it away!
Q: How far in advance can I make this?
A: For the absolute best texture and taste, enjoy it immediately. However, you can store it in a sealed jar or shaker in the refrigerator for up to 4 hours. Give it a vigorous shake or a quick re-blend before drinking, as some separation is natural.
Q: Is this suitable for a post-workout drink?
A: Yes, it’s an excellent choice. The protein aids muscle recovery, the banana offers potassium to replenish electrolytes, and the healthy fats from the nut butter help with sustained energy release, making it a perfectly balanced option.
Q: Can I use a different milk?
A: Of course! This recipe is a family heirloom meant to be adapted. Dairy milk, oat milk, soy milk, or cashew milk all work beautifully. Each will impart a slightly different flavor profile, so choose your family’s favorite.
Summary
More than just a drink, this vanilla protein shake is a vessel for warmth and memory. With its creamy texture, perfectly balanced sweetness, and adaptable nature, it turns everyday nutrition into a moment of comforting, family-centric joy.
Grandma's Vanilla Protein Shake
1
servings5
minutesIngredients
Instructions
- 1 Add all ingredients to a high-speed blender in the order listed: almond milk, frozen banana, protein powder, maple syrup, vanilla extract, almond butter, ice cubes, and salt.
- 2 Secure the lid and start blending on low speed for 10 seconds.
- 3 Gradually increase to high speed and blend for 45-60 seconds, until completely smooth and creamy. If too thick, add more milk 1 tbsp at a time.
- 4 Stop the blender, taste, and adjust sweetness with more maple syrup if desired. Blend for 5 more seconds if needed.
- 5 Pour immediately into a chilled glass and serve.